
• Skip to main content
  • Skip to primary sidebar
  • Skip to footer

Delicious Table ® logo

menu icon
go to homepage
  • ALL RECIPES
  • HALLOWEEN PARTY FOOD
  • FALL RECIPES
  • WELCOME TO DT!
    • Facebook
    • Instagram
    • Pinterest
    • YouTube
  • subscribe
    search icon
    Homepage link
    • ALL RECIPES
    • HALLOWEEN PARTY FOOD
    • FALL RECIPES
    • WELCOME TO DT!
    • Facebook
    • Instagram
    • Pinterest
    • YouTube
  • ×
    Home » Recipes

    Latest Recipes

    Grilled Corn On The Cob

    [heart_this] · Jul 9, 2026 · 3 Comments

    Ears of grilled corn on a white platter seasoned with melted butter on top.

    Grilled Corn on the Cob is the easiest summer side dish. Learn how to grill corn with or without the husks, in foil or directly on the grill, plus 14 delicious seasoning ideas.

    It cooks in just 10 minutes and is perfect for BBQs, cookouts, with burgers, steaks, and summer dinners...

    Grilled corn on the cob gains incredibly rich flavor and smoky sweetness!

    There are many creative flavor ideas to try: use seasoning blends or homemade compound butter. And you can grill with or without the corn husks.

    Grilled corn on the cob coated with melted butter and seasoning.

    How to Grill Corn on the Cob

    Serve it with steaks, burgers, or hot dogs. With endless flavor options, this is great BBQ cookout party food.

    Summertime is fun and always very busy. With so many different ways to cook sweet corn, the choices are to boil, steam, bake, or grill it. In my opinion, grilling is the best. It is a fast side with delicious flavor.

    This is one of my go-to sides for an outdoor grill party out by the pool, with very little prep and one of my favorite summer recipes...

    Grilled corn on the cob in pieces of foil in a woven basket.

    Grilled Corn Ingredients

    • fresh corn (white sweet corn is the best!)
    • butter
    • sea salt
    • black pepper
    • various seasoning blends, BBQ rub, or compound butters
    Ingredients labled on a marble counter to make grilled corn cobs.

    How To Clean Corn & Remove Corn Husks

    Keep the corn chilled in the fridge. Pull the corn husks back, peel the silks off, and discard them. Rinse with clear running water, and remove all the silk strands.

    If you prefer cooking corn with the husks on, carefully pull the husks back, and remove all the silks. Soaking the corn with husks on in cool water prevents them from burning on the grill. Tie them back with soaked kitchen string or a piece of husk and skip wrapping them in foil.

    Next, rub a stick of butter over the corn kernels, and hold it by the paper wrapper around the butter. Sprinkle with seasoning like lemon pepper, BBQ Rub, and salt and pepper on each corn ear. Check out the notes section for lots of other flavor ideas!

    Place each corn cob on a piece of foil and wrap it around.

    Showing how to take clean corn cobs, rub butter and different seasoning mixes on them to grill for a summer side dish.
    Cleaned cobs of corn with seasoning in small bowls and a cube of butter to make grilled corn.

    Corn Husks On

    Tie husks back, and grill.

    Ears of corn with the husk tied back on a grill.

    Husks Off Foil Wrap

    Remove husks, silks, and foil wrap.

    Ears of corn in foil on a grill with seasoning on corn.

    Grilling The Corn!

    PRO TIP: Grilling corn in foil has two major advantages. It adds flavor and seasoning like butter, without it burning. And second, no husks to tie back and watch on the grill, they do tend to singe on a grill!

    First, heat the grill to medium-high.

    Next, place ears of corn wrapped in foil on the hot grill grates, and turn every 3-4 minutes on all sides for 10 minutes. Keep the grill lid closed in between turnings. For a smoky flavor, pull the foil off using tongs. Grill it slightly on the grill grates for a couple of minutes!

    Serve hot with more butter if desired. Store leftovers in an airtight container. Or cut off the corn kernels and make a corn salad the next day!

    Ears of corn with the green husks pulled back and tied.

    14+ Ways To Flavor Corn On The Cob

    These are some of the top ways to season your corn. Try them and come up with your own amazing flavor additions and the best corn on the cob seasoning recipe...

    • Sea Salt & Fresh Cracked Pepper
    • Lemon Pepper
    • BBQ Rub
    • Lawry's Seasoning Salt (an original Southern California seasoning!)
    • Parmesan Cheese
    • Smoked Sea Salt
    • Herbs de Provence
    • House Seasoning
    • Cajun Seasoning
    • Herb Butter
    • Lemon Dill Butter
    • Garlic Powder or Chili Powder 
    • Paprika
    • Sun Dried Tomato Butter
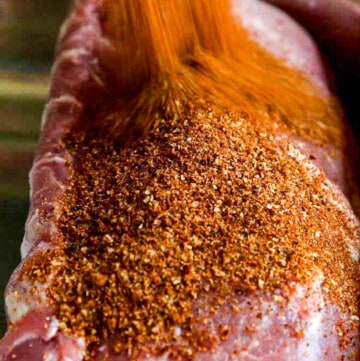
    • A large pork loin roast with a lot of dry rub seasoning pouring over the top.
      The Best BBQ Dry Rub
    • A wood platter with 5 seasoning jars open filled with flavored finishing salts.
      Flavored Finishing Salts
    • A small glass mason jar filled with Cajun seasoning with a label and it in a wooden bowl.
      Cajun Seasoning Recipe
    • Homemade herb butter wrapped in parchment paper on a cutting board with fresh herbs.
      How To Make Herb Butter
    • A glass bowl filled with compound butter made with herbs and sun dried tomatoes, and them scattered on the cutting board.
      Sun Dried Tomato Butter
    • Small brown round cutting board with slices of lemon dill butter garnished with fresh lemon and dill.
      Lemon-Dill Butter

    What goes with grilled corn?

    Serve with some tri-tip steaks and a salad with Green Goddess Dressing, and dinner is done. More classic ideas for hot grilled corn are Fried Chicken, Hot Dogs, or Hamburgers. Take a look at my 42 Amazing Burger Sides!

    Seasoned butter grilled corn on a white platter.

    Top Grilled Corn Tips:

    • You can make these a day ahead for BBQ parties and cookouts, then just toss them on the grill!
    • Eat right off the grill with no husks.
    • The aluminum foil keeps the corn warm! And you can keep it wrapped and warm in the oven or in an insulated cooler!
    • Endless options to season the corn the way you love it. Create your own grilled corn on the cob seasoning.
    • Quick easy prep. Easier clean up, just toss the foil.
    • No boiling pots of water, or any other work to do. And it keeps your kitchen cool.
    • The melted butter and seasoning are all right in the packet, great for parties.
    Fresh corn cobs with the husks pulled back laying in a rectangle basket.

    Grilled Corn FAQs

    how long to grill corn on the cob

    Place the wrapped corn on the grill grates and turn every 3-4 minutes for 10 minutes total. Check the corn by piercing a kernel to see if it's soft. Then keep warm on the upper rack until ready to serve.

    What kind of corn works best for grilling?

    Any sweet corn will work, try for a tender white sweet corn sold in local grocery stores. Look for green husks and fresh silks and open them up a bit and be sure they are nice ears.

    How do you pick the best sweet corn?

    Look for bright green ears of corn with fresh husks and silks. Pull back the husks and silks a bit to check that it is fresh and well-grown. Pass on corn with dry husks or ones with yellow-brown color.

    Should you soak corn before grilling?

    Only if you are grilling with the husks on. First pull off the silks and then retie the corn with string. Soak for 5 minutes to prevent grill flare-ups and the husk burning.

    A white oval platter with grilled corn and melted butter on top.

    More Vegetable Sides

    These are the best Fried Green Tomatoes, and one of the most famous Southern recipes of all time. Each slice has a crunchy crust to dip into a creamy Remoulade, buttermilk Ranch Dressing, or comeback sauce.

    Make-Ahead Mashed Potatoes are creamy smooth, buttery, fluffy, and melt in your mouth. There are five reheating methods here plus tips on how to keep them warm for dinner.

    Fresh Cole Slaw with no mayo comes together in minutes Vegetable Roasting is easy to get on the dinner table. with this mix of veggies all on one sheet pan.

    Mexican Street Corn will delight people at your next cookout or BBQ party. Crispy Smashed Potatoes served with melted Herb Butter (made from garden fresh herbs), are one of the most heavenly potato recipes with golden edges. These are pure comfort food joy and a beautiful side dish.

    • A white long plate with a stack of fried green tomatoes with remoulade and buttermilk ranch dressing.
      Fried Green Tomatoes
    • A white oval dish filled with golden brown roasted baby potato halves with a silver serving spoon.
      Roasted Potatoes
    • A clear glass bowl filled with tri color cole slaw and wooden tongs stuck in the slaw.
      Coleslaw Recipe (No Mayo)
    • A white casserole dish filled with mashed potatoes and squares of melted butter on top.
      Make-Ahead Mashed Potatoes
    • A square white dish filled with colorful roasted vegetables and topped with squares of butter garnished with herbs.
      Vegetable Roasting
    • A sheet pan of smashed potatoes with fresh herbs baked with crispy golden brown edges.
      Crispy Smashed Potatoes

    Did you love this recipe? We would love to hear from you! If you make this recipe and love it, give it a 5-star rating ⭐⭐⭐⭐⭐ with a comment. THANK YOU!! Follow Delicious Table with my free newsletter and share this recipe with your friends on Facebook, Pinterest, and Instagram.

    Ears of grilled corn on a white platter seasoned with melted butter on top.
    Print

    Grilled Corn On The Cob Recipe + 14 Flavors!

    Grilled corn on the cob gains incredibly rich flavor and smoky sweetness! Grab some fresh corn at the Farmer's market or store. It cooks in just 10 minutes and can be put together ahead of dinner or a cookout party. There are 14 creative flavor ideas to try, use seasoning blends or homemade compound butter. And you can grill with or without the corn husks. An easy summer side to make ahead or assemble at the last minute. And after all, everyone loves hot buttered corn.
    Course Side Dish
    Cuisine American
    Keyword corn husks, corn on the cob, grilled corn, grilled corn on the cob, grilling corn, how to grill corn
    Prep Time 15 minutes minutes
    Cook Time 10 minutes minutes
    Total Time 25 minutes minutes
    Servings 6
    Calories 218kcal
    Author Lisa Hatfield

    Ingredients

    • 6 ears fresh corn white sweet corn
    • 1 /4 stick salted butter
    • 1 teaspoon sea salt
    • 1 teaspoon cracked black pepper
    • 1 tablespoon various seasonings, spices ,BBQ rub, or compound butters

    Instructions

    Clean The Corn

    • Keep the corn chilled in the fridge until ready to cook. Pull the corn husks back, peel the silks off, and discard them. Wash under clear running water and keep removing all the remaining silks until you are left with clean ears.
    • If you prefer cooking corn with the husks on, carefully pull the husks back, and remove all the silks. Soaking the corn with husks in cool water prevents them from burning on the grill. You tie them back with soaked kitchen string or a piece of husk and skip wrapping them in foil.
    • Next, rub a stick of butter over the corn kernels, and hold it by the paper wrapper around the butter. Sprinkle with seasoning like lemon pepper, BBQ Rub and salt and pepper on each corn ear. Check out the notes section for lots of other flavor ideas!
    • Place each corn cob on a piece of foil and wrap it around.

    Grilling Corn

    • Heat the grill to medium-high.
    • Places ears of corn wrapped in foil on the hot grill grates, and turn every 3-4 minutes on all sides for 10 minutes. Keep the grill lid closed in between turnings. If you want a more smoky flavor, pull the foil off using tongs, and let it char on the grill grates for the last couple minutes.
    • Serve hot with more butter if desired. Store leftovers in an airtight container. You can also cut off the kernels and make a corn salad the next day!

    Notes

    Why This Recipe Works

    • You can make these a day ahead for BBQ parties and cookouts.
    • Eat right off the grill without husks.
    • Rub olive oil on the in place of butter, then season.
    • It will stay hot for a while in the foil.
    • Endless options to season the corn the way YOU LOVE IT!
    • Quick easy prep. Easier cleanup!
    • No boiling pots of water, or any other work to do.
    • The melted butter and seasoning are all right in the packet! You can of course add more butter.

    14+ Ways To Flavor Corn On The Cob

    • Sea Salt & Fresh Cracked Pepper
    • Lemon Pepper
    • BBQ Rub
    • Lawry's Seasoning Salt (an original Southern California seasoning!)
    • Parmesan Cheese
    • Smoked Sea Salt
    • Herbs de Provence
    • House Seasoning
    • Cajun Seasoning
    • Herb Butter
    • Lemon Dill Butter
    • Garlic Powder or Chili Powder 
    • Paprika
    • Sun Dried Tomato Butter

    Nutrition

    Calories: 218kcal | Carbohydrates: 18g | Protein: 3g | Fat: 17g | Saturated Fat: 10g | Cholesterol: 40mg | Sodium: 536mg | Potassium: 256mg | Fiber: 2g | Sugar: 6g | Vitamin A: 656IU | Vitamin C: 6mg | Calcium: 17mg | Iron: 1mg

    Fried Green Tomatoes

    [heart_this] · Jul 7, 2026 · 3 Comments

    A white long plate with a stack of fried green tomatoes with remoulade and buttermilk ranch dressing.

    These are the best Fried Green Tomatoes, and one of the most famous Southern recipes of all time. Each slice has a crunchy crust to dip into a creamy remoulade, buttermilk ranch dressing, or comeback sauce.

    Use up an abundance of green tomatoes from your own garden, farmers' markets, and now it's easy to buy unripe ones in the grocery stores. There are a few secrets to frying them perfectly golden crisp, and the three dipping sauces take these right over the top...

    A white long plate with a stack of fried green tomatoes with remoulade and buttermilk ranch dressing.

    The first time I ever heard about fried tomatoes, was in the Whistle Stop Cafe in the now-famous novel Fried Green Tomatoes at the Whistle Stop Cafe published in 1987 by Fannie Flagg and starring Evelyn Couch and Jessica Tandy where this classic Southern dish became the talk of the town!

    It is a wonderful movie, and it made me fall in love with this green tomato recipe!

    Why This Recipe Works

    • Use up green tomatoes so they don't go to waste in your kitchen.
    • The crunchy and crisp coating on these tomatoes is just right. The combination of cornmeal and Panko bread crumbs adds a nice thick coating with crunchy edges.
    • The trick is in the oil temperature to get a crunchy coating, get your oil temperature to 350 degrees for the best results, otherwise, your tomatoes will fry soggy. I recommend peanut oil, as it has a high smoke point and is flavorless.
    • The method of triple dipping and post-frying rest also helps get and keep that gorgeous golden exterior crust. I'll give you all the tips and tricks to get them right in the recipe below.
    • This is a cost-effective recipe, especially if you grow tomatoes in your garden, or a friend gives them to you! I grew the little ones, and also got a couple from my grocery store.
    • All I can say, is these are even better dipped or drizzled. Try a little hot sauce you love, like Tabasco, or sauces like my recipes for remoulade or buttermilk ranch dressing.
    • Enjoy your fried green tomatoes as a lunch, or as a great side dish side for family dinner. I have heard people even love to eat them for breakfast!
    A blue and white plate with fried green tomato cut open and ready to eat.

    How To Make Fried Green Tomatoes

    • 3 firm unripened green tomatoes
    • 2 tablespoons sea salt

    dry dip mix

    • 1 cup all purpose flour
    • 1 tablespoon Cajun seasoning

    wet dip mix

    • ½ cup buttermilk (or regular milk)
    • 1 egg

    crispy coating mix

    • ⅓ cup cornmeal
    • ½ cup panko bread crumbs
    • ¼ cup peanut oil (or canola oil)
    A white marble counter with ingredients including green tomatoes and bread crumbs to make fried green tomatoes.

    Prep The Tomatoes

    1. Wash, and remove the tomato stems using a melon baller or small knife.
    2. Slice tomatoes, unpeeled into ½ inch thick slices. Lay on a tray, and season tomato slices on both sides with sea salt. Let tomato slices stand for 5 minutes. This adds flavor and removes some of their liquid. Dab with paper towels to remove extra moisture.

    Dredge Tomatoes

    1. While the salted tomato slices are resting at room temperature, set out three shallow bowls (or a shallow dishes) with coating ingredients to dip the tomato slices: 1rst dip bowl place flour and Cajun seasoning 2nd dip bowl buttermilk and egg mixture whisked together well 3rd dip bowl breadcrumbs and cornmeal mixture, stir to combine.
    2. Dredge tomato slices into first 1) flour cajun seasoning mixture, then second the 2) egg and buttermilk mixture, then finally the third bowl of 3) breadcrumb cornmeal batter. Set on a platter or plate to rest.

    Deep Frying The Tomatoes

    1. In a large cast-iron skillet, frying pan, or deep fryer, heat the peanut oil (or a flavor neutral one like canola oil) on medium-high heat to 350-375 degrees. The OIL MUST BE HOT OR IT MAKES THEM SOGGY, make sure there is enough oil in the pan, about 1 " deep. During the frying process, use a candy thermometer or stick the end of a wood spoon and if it bubbles, the temperature is high enough.
    2. Place a wire rack over a sheet pan. Fry just a few of the coated tomato slices at a time, for about 2-3 minutes on each side or until golden brown. Work safely and carefully to turn over the tomatoes in the large skillet using tongs and a spatula. Let the oil come back up to temp between batches. Once the tomatoes turn golden brown in the frying pan, use tongs and carefully place in a single layer on the wire rack to keep them crisp.
    3. Sprinkle with a flake salt like Maldon sea salt. Serve warm with hot sauce like Tabasco, a creamy sauce like remoulade, buttermilk dressing, or comeback sauce. Best to eat while they are hot!

    What To Serve With Fried Green Tomatoes

    • Remoulade Sauce
    • Buttermilk Ranch Dressing
    • Comeback Sauce
    • Maldon salt for finishing
    • Chives finely diced
    A graphic with 3 prep bowls for dipping fried green tomatoes before frying.
    A collage of 9 photos showing how to make fried green tomatoes and the dipping stations before deep frying.

    Fried Green Tomato Top Tips

    • Tomatoes: You want green unripe tomatoes (firm tomatoes), that are not ripe. Red tomatoes are ripe and don't hold up well to the frying due to the moisture inside them. Buy beautiful firm unripe heirloom tomatoes in your local grocery produce section. I found that I could fry both small and large tomatoes, but the big slices are easier to get the coating to stick and prettier in my opinion than the small ones, but both are delicious!
    • Sea salt: When you salt the green tomato slices, it is doing two things. One it pulls extra moisture from the tomato prior to frying, and it also flavors the tomatoes. Sprinkled one teaspoon salt like a flaked Maldon finishing salt over the fried tomatoes, it adds an amazing pop to the flavors!
    • All Purpose Flour: AP flour is fine, the flour mixture helps to coat and bind the other coatings and seasoning onto the tomato slices.
    • Cajun seasoning: You can buy or make your own Cajun seasoning. Take a look at my recipe for Cajun seasoning, it is a great way to use up your spices.
    • Buttermilk: I use buttermilk (and also use this when making fried chicken) but you can substitute milk.
    • Egg: The egg acts as a binder for the wet dip.
    • Yellow Cornmeal: Adds a smoother coating texture, you can swap in white cornmeal. Yellow cornmeal is made from well, yellow corn and it contains beta carotene (also known as vitamin A), which is where it gets its color. It tastes stronger, a little richer, and, well, cornier than white cornmeal. White cornmeal, as you can guess, is made from white corn and its flavor's a little more delicate.
    • Panko Dry Bread Crumbs: Add a crunchy exterior coating to the fried tomatoes. I love to mix the Panko breadcrumbs and cornmeal for the best-fried food results.
    • Peanut Oil: I think peanut oil is the best to fry in, it really does the job and gets a crisp golden coating. Peanut oil has a high smoke point which is what you want when heat oil. That's what gives you a golden crunch plus has a neutral flavor, which is important. You can use vegetable oil, canola, or sunflower oil as well.
    • Dipping Sauces: For a delicious sauce, serve either remoulade or buttermilk ranch dressing drizzled or in little small bowls to enjoy your crispy tomatoes.
    • Garnish: Drizzle sauces and sprinkle with chives or green onions.
    • Make Ahead: Can I make fried green tomatoes ahead of time and reheat them without losing the crispy coating? Well, yes, but only fry them partway, cool on a wire rack side by side unstacked (and refrigerate), lightly covered, and then crisp them back up before eating. Use them within 24 hours.
    • Reheating: First, take out of the fridge for 30 minutes. The best way to reheat is to refry right before serving, crisps up the golden coating. You can also use an oven or air fryer or oven at 375-400 degrees for about 5-8 minutes. Don't microwave them as the coating will become soggy.

    Fried Green Tomatoes Dipping Sauce Recipes

    Here are three easy dipping sauces classic for Southern foods that have simple ingredients all the grocery stores will carry.

    Comeback Sauce

    Comeback sauce is a popular sweet Southern-style sauce and dip that is close to a Louisiana remoulade. It originated in a Greek restaurant in Mississippi and is a creamy light pink savory dip with a tangy flavor. Popular as a delicious dip in Southern cooking for french fries, onion rings, fish tacos, and chicken tenders. You will also see it as a salad dressing, and seafood restaurants often serve it for fried and fresh shrimp, crab, and fried fish.

    Keep stored in the refrigerator for about 1 week.

    • ¾ cup mayonnaise
    • ¼ cup ketchup
    • ¼ cup chili sauce (such as Heinz®)
    • 1 tablespoon fresh lemon juice
    • 1 teaspoon Worcestershire sauce 
    • ½ teaspoon dry mustard powder (such as Colman's®)
    • ½ teaspoon onion powder
    • ½ teaspoon hot pepper sauce (such as Tabasco®)
    • ¼ teaspoon garlic powder
    • ¼ teaspoon paprika
    1. Combine mayonnaise, ketchup, chili sauce, lemon juice, Worcestershire sauce, dry mustard, onion powder, hot sauce, garlic powder, and paprika in a small bowl; whisk until well combined.
    2. Refrigerate for at least 2 hours to allow the flavors to meld, though overnight is even better.

    Remoulade Sauce

    Remoulade sauce is a popular condiment to drizzle on seafood, cold meats, baked fish, fried green tomatoes, or use as a sandwich spread. Use as a dip for hot french fries or bites of scrumptious crab cakes...

    A cold smooth sauce made with a mayonnaise base, garlic, onions, mustard, parsley, other fresh herbs, and seasonings. Variations of remoulade are found all over the world, from France to Louisiana, USA. Paprika, anchovies, capers, and horseradish are some of the many ingredient variations added to flavor this popular condiment.

    Remoulade
    Remoulade sauce is a popular condiment or dipping sauce, usually paired with seafood, cold meats, and fried foods. Drizzle on baked fish, fried green tomatoes, or as a sandwich spread. Use it as a dip for chicken wings, hot french fries or bites of scrumptious crab cakes.
    GET THE RECIPE PIN IT
    A vintage spoon scooping up remoulade sauce to use on a recipe.
    Fried green tomatoes with remoulade sauce drizzled on top.

    Buttermilk Ranch Dressing

    A classic dipping sauce for Fried Green Tomatoes is Ranch Dressing, it is SO easy and ready in minutes when you make it at home.

    Homemade Buttermilk Ranch Dressing Recipe
    Buttermilk Ranch Dressing from scratch uses real fresh ingredients, and it tastes so much better than bottled products. Get the secret mixing tip with 20+ creative ways to use it in recipes all week long.
    GET THE RECIPE PIN IT
    A large Mason jar filled with ranch dressing made at home with a small serving bowl and spoon.

    Use this famous Cajun spice on chicken, shrimp steaks, fries, or classics like jambalaya, and gumbo! It's the seasoning you want to make the best coating for fried green tomatoes...

    Cajun Seasoning
    Make homemade Cajun seasoning with common spices. Use Cajun spice on chicken, shrimp steaks, fries, or classics like jambalaya, fried green tomatoes, and gumbo!
    GET THE RECIPE PIN IT
    A small glass mason jar filled with Cajun seasoning with a label and it in a wooden bowl.

    Fried Green Tomatoes FAQ

    How to keep fried green tomatoes crisp and not soggy?


    The crunchy and crisp coating is achieved with a combination of cornmeal and Panko bread crumbs it adds a nice thick coating with crunchy edges.

    The trick is in the oil temperature, get and keep your oil temperature to 350 degrees for the best results. Use a thermometer to check it, otherwise, your tomatoes will fry soggy. Peanut oil is a great choice, as it has a high smoke point and is flavorless.

    The method of triple dipping and resting post fry on a wire rack without overlapping keeps that gorgeous golden exterior crust from getting soggy.

    What other Southern cooking dishes go with fried green tomatoes?


    Macaroni and cheese, fried chicken, shrimp and cheese grits, BBQ chicken, cornbread, biscuits and gravy, pork chops, corn on the cob, chicken fried steak, gumbo, chicken and dumplings, or jambalaya.

    What to serve with fried green tomatoes?

    Serve a classic remoulade sauce, Tabasco hot sauce, Comeback sauce, and/or buttermilk ranch dressing. You can garnish with flake sea salt and some finely snipped chives.

    What Are Fried Green Tomatoes?


    Fried green tomatoes are a Southern United States side dish usually made with firm unripe green tomatoes and coated typically in a cornmeal coating with seasonings and deep fried. They are usually served for lunch or a dinner side dish.

    Fried green tomatoes on a white plate golden brown and drizzled with remoulade and ranch dressing.

    More Tomato Recipes

    You can make Sun-Dried Tomatoes at home in the oven or by using a food dehydrator. I am sharing all my cooking tips, plus 20+ dinner inspiration recipe ideas, and creative ways to enjoy your homemade dried tomatoes.

    Tomato Soup with Basil Dumplings can be rich and chunky or creamy smooth and is loaded with a veggie rainbow for a main meal or hearty lunch. What makes this hearty soup recipe so good, are the fluffy basil dumplings!

    Sun-Dried Tomato Butter is amazing on hot pasta, roasted vegetables, sizzling grilled steak, or oven warmed baguettes and dinner rolls.

    Bloody Marys with a homemade mix of fire-grilled green chiles (jalapeno, Anaheim, or Hatch Chiles) fresh garden tomatoes, onions, horseradish, and spices.

    • A small clear jar filled with sun dried tomatoes on a table with scattered dried tomatoes all around the table.
      How To Make Sun Dried Tomatoes
    • A bowl of tomato soup and cup of soup in a white cup garnished with fresh basil.
      Tomato Soup With Basil Dumplings
    • A glass bowl filled with compound butter made with herbs and sun dried tomatoes, and them scattered on the cutting board.
      Sun Dried Tomato Butter
    • A pitcher of bloody marys with two drinks garnished with olives, pepperoncinis, and beef sticks.
      Spicy Bloody Marys

    Did you love this recipe? We would love to hear from you! If you make this recipe and love it, give it a 5-star rating ⭐⭐⭐⭐⭐ with a comment. THANK YOU!! Follow Delicious Table with my free newsletter and share this recipe with your friends on Facebook, Pinterest, and Instagram.

    A white long plate with a stack of fried green tomatoes with remoulade and buttermilk ranch dressing.
    Print

    Fried Green Tomatoes With 3 Dipping Sauce Recipes

    These are the best Fried Green Tomatoes, and one of the most famous Southern recipes of all time. Each slice has a crunchy crust to dip into a creamy remoulade, buttermilk ranch dressing, or comeback sauce. There are a few secrets to frying them perfectly golden crisp, and the three dipping sauces take these right over the top.
    Course Appetizers, Dips, & Snacks
    Cuisine American
    Keyword best fried green tomatoes, cajun seasoning, fried green tomatoes, tomato recipes
    Prep Time 15 minutes minutes
    Cook Time 5 minutes minutes
    Total Time 20 minutes minutes
    Servings 8
    Calories 218kcal
    Author Lisa Hatfield

    Equipment

    • Large Cast Iron Skillet
    • Melon Baller
    • Large Stainless Spatula
    • OXO Good Grips 12" Tongs

    Ingredients

    green tomatoes

    • 3 firm green tomatoes
    • 2 tablespoons sea salt

    dry dip mix

    • 1 cup AP flour
    • 1 tablespoon Cajun seasoning

    wet dip mix

    • ½ cup buttermilk or milk
    • 1 egg

    crispy coating mix

    • ⅓ cup cornmeal
    • ½ cup panko bread crumbs
    • ¼ cup peanut oil

    optional dips and garnish

    • remolaude sauce
    • buttermilk ranch dressing
    • 1 teaspoon Maldon salt for finishing
    • chives finely diced

    Instructions

    Prep The Green Tomatoes

    • Wash, and remove the tomato stems using a melon baller or small knife.
    • Slice tomatoes, unpeeled into ½ inch thick slices. Lay on a tray, and season tomato slices on both sides with sea salt. Let tomato slices stand for 5 minutes. This adds flavor and removes some of their liquid. Dab with paper towels to remove extra moisture.

    Dredge Tomatoes

    • While the salted tomato slices are resting at room temperature, set out three shallow bowls (or a shallow dishes) with coating ingredients to dip the tomato slices: 1rst dip bowl place flour and Cajun seasoning 2nd dip bowl buttermilk and egg mixture whisked together well 3rd dip bowl breadcrumbs and cornmeal mixture, stir to combine.
    • Dredge tomato slices into first 1) flour cajun seasoning mixture, then second the 2) egg and buttermilk mixture, then finally the third bowl of 3) breadcrumb cornmeal batter. Set on a platter or plate to rest.

    Deep Frying The Tomatoes

    • In a large cast iron skillet, frying pan, or deep fryer, heat the peanut oil (or a flavor neutral one like canola oil) on medium-high heat to 350-375 degrees. The OIL MUST BE HOT OR IT MAKES THEM SOGGY, make sure there is enough oil in the pan, about 1 " deep. During the frying process, use a candy thermometer or stick the end of a wood spoon and if it bubbles, the temperature is high enough.
    • Place a wire rack over a sheet pan. Fry just a few of the coated tomato slices at a time, for about 2-3 minutes on each side or until golden brown. Work safely and carefully to turn over the tomatoes in the large skillet using tongs and a spatula. Let the oil come back up to temp between batches. Once the tomatoes turn golden brown in the frying pan, use tongs and carefully place in a single layer on the wire rack to keep them crisp.
    • Sprinkle with sea salt or a flake salt like Maldon. Serve warm with hot sauce like Tabasco, a creamy sauce like remoulade, buttermilk dressing, or comeback sauce. Best to eat while they are hot!

    Video

    Notes

    Use up green tomatoes so they don't go to waste in your kitchen.
    The crunchy and crisp coating on these tomatoes is just right. The combination of cornmeal and Panko bread crumbs adds a nice thick coating with crunchy edges.
    The trick is in the oil temperature, get your oil temperature to 350 degrees for the best results, otherwise, your tomatoes will fry soggy. I recommend peanut oil, as it has a high smoke point and is flavorless.
    The method of triple dipping and post-frying rest also helps get and keep that gorgeous golden exterior crust. I'll give you all the tips and tricks to get them right in the recipe below.
    This is a cost-effective recipe, especially if you have green tomatoes from your garden, or a friend gives them to you! I grew the little ones, and also got a couple from my grocery store.
    All I can say, is these are even better dipped or drizzled. Try a hot sauce you love like Tabasco or sauces like remoulade or buttermilk ranch dressing.
    Enjoy your fried green tomatoes as a lunch, or side dish at family dinner. I have heard people even love to eat them for breakfast!
    • Tomatoes: You want firm (not ripe) green tomatoes. I found that I could fry both small and large tomatoes, but the big slices are easier to get the coating to stick and prettier in my opinion than the small ones, but both are delicious!
    • Sea salt: When you salt the green tomato slices, it is doing two things. One it pulls extra moisture from the tomato prior to frying, and it also flavors the tomatoes.
    • Flour: AP flour is fine, it helps to coat and bind the other coatings and seasoning onto the tomato slices.
    • Cajun seasoning: You can buy or make your own Cajun seasoning. Take a look at my recipe for Cajun seasoning, it is a great way to use up your spices.
    • Buttermilk: I use buttermilk (and also use this when making fried chicken) but you can substitute milk.
    • Egg: The egg acts as a binder for the wet dip.
    • Cornmeal: Add a smoother coating texture to the fried green tomatoes.
    • Panko dry bread crumbs: Add a crunchy exterior coating to the fried green tomatoes. I love to mix Panko and cornmeal for the best-fried food results.
    • Peanut oil: I think peanut oil is the best to fry in, it really does the job and gets a crisp golden coating. Peanut oil has a high smoke point, and a neutral flavor, which is important. You can use vegetable oil, canola, or sunflower oil as well.
    • Dipping sauces: You can serve either remoulade or buttermilk ranch dressing drizzled or in little bowls to enjoy your fried green tomatoes.
    • Garnish Drizzle sauces and sprinkle with chives.

    Nutrition

    Calories: 218kcal | Carbohydrates: 25g | Protein: 5g | Fat: 11g | Saturated Fat: 3g | Polyunsaturated Fat: 3g | Monounsaturated Fat: 4g | Trans Fat: 1g | Cholesterol: 22mg | Sodium: 2016mg | Potassium: 223mg | Fiber: 3g | Sugar: 3g | Vitamin A: 870IU | Vitamin C: 6mg | Calcium: 78mg | Iron: 2mg

    Oven Baked Hash Browns

    [heart_this] · Jul 6, 2026 · 94 Comments

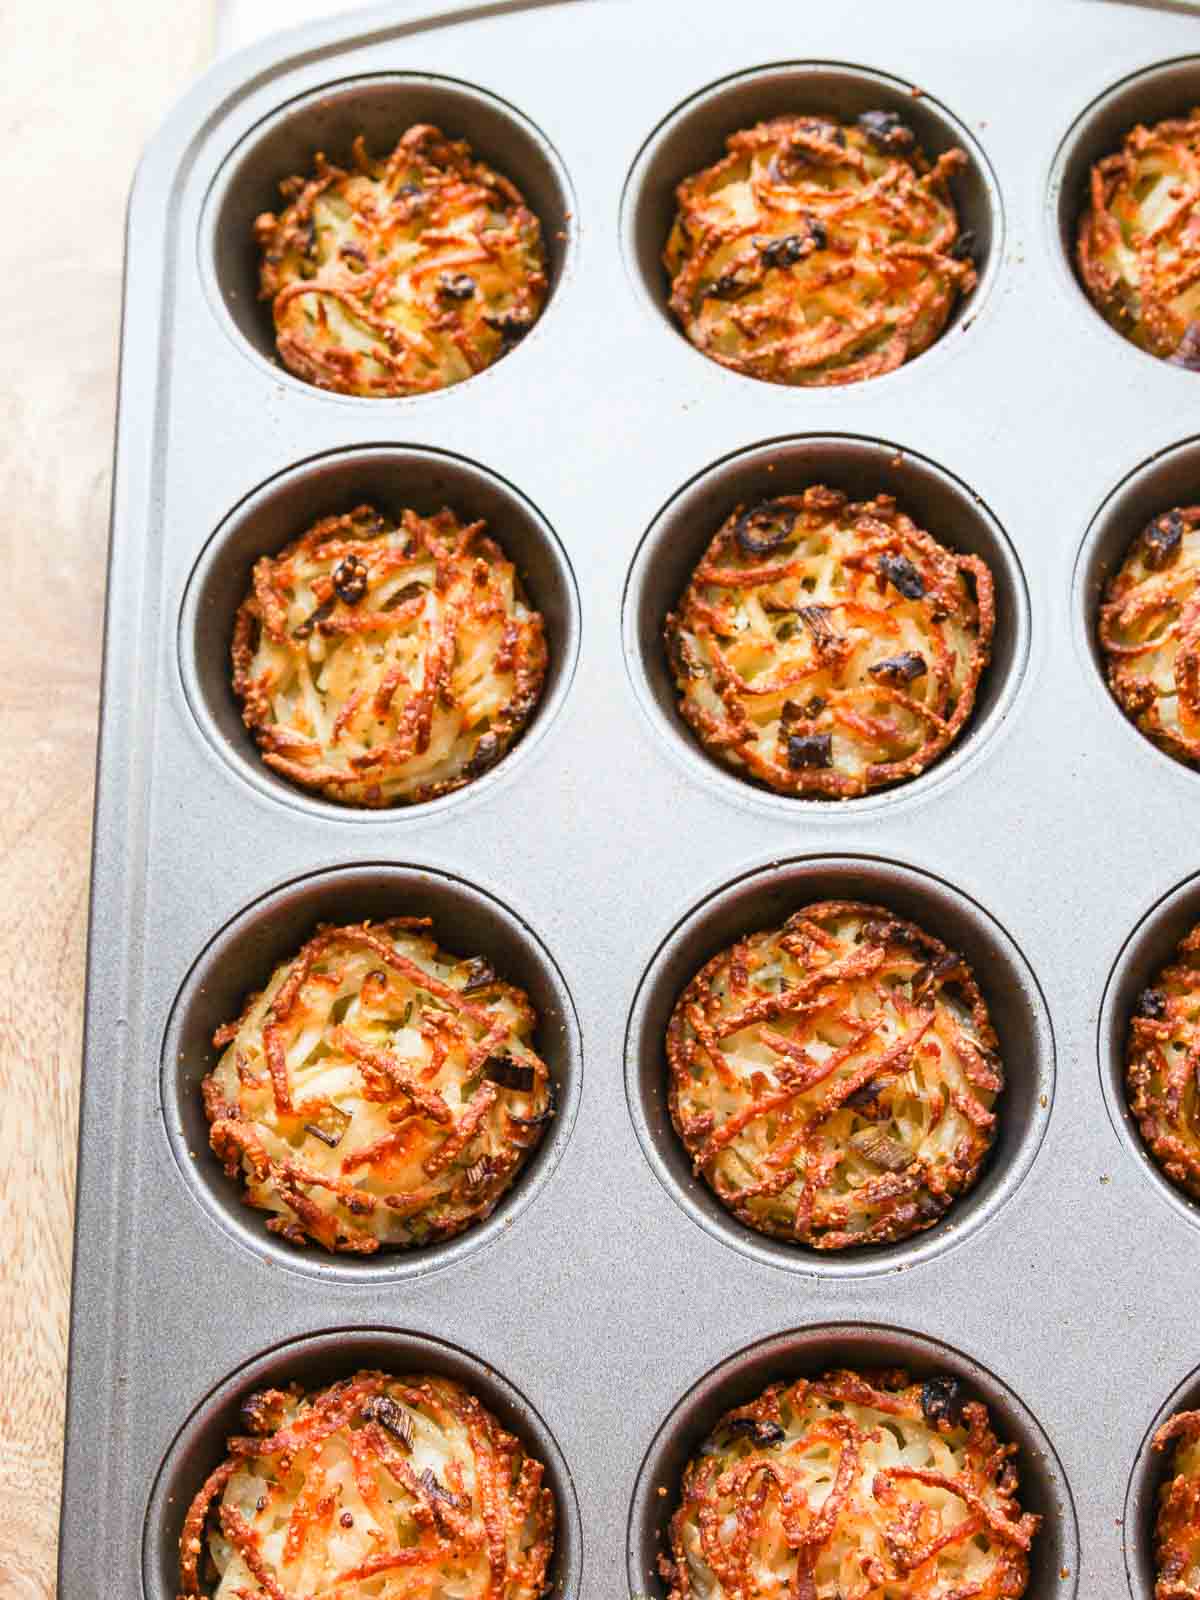
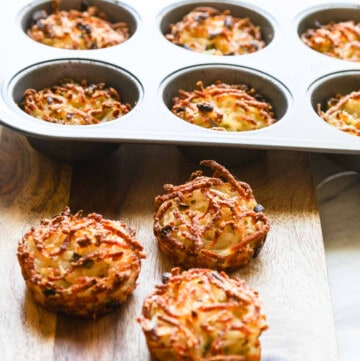
    Three golden crispy edged hash browns baked in a muffin tin on cutting board.

    Crispy Oven Hash Browns are baked in muffin tins using frozen or real potatoes. This is the easy way to make perfect hash browns without spending time at the stove.

    Skip the traditional cooking method of frying in a large skillet altogether. Both sides and the bottom have a crispy exterior. And no messy stovetop to clean.

    One of my most popular brunch recipes, crispy hash browns are the perfect side dish for breakfast, brunch, or lazy holiday weekends.

    A great recipe that will quickly become a family favorite. Golden brown edges and soft centers are what we crave. Serve hot out of the oven with eggs, pancakes, breakfast sausage, and crispy bacon for an amazing breakfast...

    Three oven baked hash browns golden brown and crisp ready to eat.

    Readers Want To Know:

    • What is the best way to get crisp, golden hash browns in the oven without deep frying them in oil and making a mess all over the kitchen.
    • Why do most recipes create soggy oil soaked potatoes, or they burn and cook unevenly?
    • Get all the details about baking temperature, timing, seasoning, ingredient swaps, and reheating.
    • Find more well-tested party food and brunch recipes loved by readers for over a decade: Pancake Muffin Bites, Breakfast Egg Muffins, or Brie and Bacon Quiche!
    • Plus, there are recommendations for serving options and storage so your leftover or party prepped hash browns stay fresh and delicious.

    Why This Recipe Works: Oven Baked vs. Stovetop Hash Browns

    • Making hash browns for breakfast can take a lot of time. These bake in the oven, you can do other things...these save you time.
    • These are much easier than making them on the stovetop with all that oil and extra calories.
    • No messy oil splatters on your stove!
    • Use real potatoes or grab a family-sized bag of pre shredded potatoes and the rest of the ingredients for this simple recipe.
    • Hash browns in oven is fast and easy.
    • Homemade hash browns have simple ingredients you can keep on hand.
    • Being able to MAKE THEM AHEAD...is a BIG help for parties and entertaining.
    • You can prep the night before a bridal shower party or special occasion like Mother's Day and you are ready to go in the morning.
    • You will LOVE the fast clean up in the muffin tins. Spray them well, and clean up is a breeze. 
    • Something so fun about individual servings for breakfast and brunch, to fill your plate and go back for 2nd's (or 3rds). And little kids will love holding them.
    • The oven does all the work for you, and creates spontaneous golden crispy edges!
    Looking down on wood cutting board with three hash browns that were baked to golden brown in muffin tin.

    How To Make Hash Browns

    • 20-ounce bag frozen hash brown potatoes (or real potatoes)
    • 1 cup sliced green onions (optional)
    • ½ cup Kraft grated parmesan cheese or real grated parmesan cheese
    • 1 teaspoon sea salt
    • ½ teaspoon cracked pepper
    • 2 tablespoons olive oil (or swap vegetable oil)
    1. Defrost the potatoes overnight in the fridge. This is a key step! If you forget, simply place the frozen bag of shredded potatoes into a bowl of cold water.
    2. Spray your non-stick muffin tins with coconut oil non-stick spray.
    3. Press potatoes really dry, this helps them crisp and avoids soggy hash browns. You can use a salad spinner to dry them, clean kitchen dish towels, paper towels, or a piece of cheese cloth. Squeeze to remove all the excess liquid. Dry them really well so you don't see much moisture. Again, the key to this recipe is you don't want much liquid in them.
    4. Once defrosted and dry, transfer the potatoes into a large bowl, and add green onions, parmesan cheese, sea salt, cracked pepper, and olive oil. Stir until well combined.
    5. Scoop into well-sprayed muffin tin, distribute all the potato mixture in each muffin cup in an even layer, and press down just a little bit, this helps them form their shape and bake.
    6. Bake 45 minutes at 400 degrees until crispy.

    What Types Of Potatoes Can I Use For Hash Browns?

    Shredded Potatoes - You can use fresh white potatoes or frozen hash brown potatoes available in any of your local grocery stores. You really want starchy fresh potatoes, varieties like Russet or Idaho.

    The Simply Potatoes Shredded Hash Browns (brand) are dry out of the package saving a step. You will find these in the egg section of your store, and they are unfrozen. This recipe is not sponsored by Simply Potatoes, I just really like their products. Ore-Ida Shredded Hash Brown Potatoes are another popular brand of breakfast potatoes.

    PRO TIP: When baking hash browns from frozen shredded potatoes, you need all the ice and water removed so they crisp up when baking.

    Green Onions - These are optional, you can leave the green onions out and swap in onion powder if you like. The onions will darken due to the oven heat. They taste great but don't look so pretty. You could also add ½ teaspoon garlic powder to boost flavor.

    Parmesan Cheese - A great addition, but you could substitute grated Romano or any cheese you like. Readers have left comments they love cheddar cheese and other cheese blends.

    Sea Salt & Black Pepper - Simple seasoning for any good recipe.

    Olive Oil - Crisps the potato edges; you can swap in vegetable oil.

    How To Store and Reheat Frozen Baked Hash Browns

    These make great on-the-go breakfast items for busy mornings and can be served with dinner too. How good would these be with grilled steaks? Put leftover hash browns into a freezer-safe container.

    1. Store leftovers in the fridge in a sealed container.
    2. Bring them to room temperature if possible.

    Reheating Air Fryer Hash Browns

    Reheat your hash brown breakfast potatoes in your air fryer. To get them hot and crispy just preheat your air fryer to 370 degrees. Add the potatoes to the air fryer basket, and reheat for 3-5 minutes or until heated through.

    To reheat in the oven, preheat the oven to 375 place them on a parchment-lined baking sheet and bake for 10 mintues.

    Close up of shredded potato mixture to bake hash browns in a muffin tin.

    How To Make Hash Browns Ahead

    The easiest way is to prep ahead. With minimal effort, you can serve homemade hash browns on the day of your party or Christmas morning.

    Step 1: Fill the muffin tin to the top with the hash brown potato mixture, press with a spoon spatula to level the night before, and cover with plastic wrap. Keep in the fridge overnight.

    Step 2: When you are ready to bake, remove the plastic wrap, pop in the oven to bake and bake 45-60 minutes at 400 degrees until crispy brown.

    Gorgeous golden baked hash browns in a muffin tin for breakfast.

    Reader Comments

    This easy side dish got so popular on social media the first time I shared this blog post. It quickly became a reader favorite, and so many of you left a five star rating and rave reviews. thank you! I hope it will become one of your favorite side dishes for breakfast.

    "Made these for Mother’s Day brunch. I loved how easy they were to prepare, and loved that I was able to assemble them the night before. So simple and so delicious!!!"

    "New fav for everyone! They came out nice and crunchy on the outside and perfect on the inside. I added extra parmesan cheese and scallions with shredded mozzarella on top. Froze the leftovers. Will be making again!"

    "Delicious and easy. Nice as a side dish with steak and topped with sour cream."

    "We loved these! Used canola oil spray, tipped muffin pan over to release & no problem!"

    "Turned out great, used olive oil spritzer in the muffin tin before packing in the potato mixture, really yummy!"

    "Thank you I never can make hash browns that are worth eating. You made this lady of seventy-two very happy.. this recipe is easy to follow..you can use your imagination adding ingredients.. and it always is a success.. thank you, Lisa..."

    Hash Brown FAQ

    How To Get Crispy Hash Browns?

    1. Peel and shred the potatoes using a food processor or box grater.
    2. Place into cool water right away as you grate them, so they don't turn brown.
    3. Soak the shredded potatoes for at least 15 minutes, or overnight is even better. The water pulls out the extra potato starch from the potatoes to help you get those crisp brown sides.
    edges you are craving!
    4. Dry the potatoes in either a salad spinner or in a bowl with clean towels or paper towels. Removing the moisture helps to crisp the potatoes as they bake.


    What Potatoes Can I Use For Hash Browns?


    1. You can use fresh potatoes or frozen hash browns from the grocery store. The Simply Potatoes Shredded Hash Browns (brand) are dry out of the package saving a step. Frozen pre-shredded potatoes need all the water removed so they crisp when baking.

    2. Or use a starchy potato variety like Russet Potatoes. You can use regular grated potatoes, again, just be sure to grate, soak in water well and dry them very well to ensure they crisp.

    How To Use Russet Potatoes To Get Crispy Hash Browns


    1. Peel each larger size raw potato (Yukon), then shred using a food processor or the large side of a box grater.
    2. Place into a bowl filled with a large amount of water right away as you grate them, so they don't turn brown.
    3. Soak the shredded potatoes in cool water for at least 15 minutes, or overnight is even better. The water pulls out the excess starch from the starchy potatoes and helps you get those crispy edges you are craving!
    4. Dry the potatoes in either a salad spinner or in a bowl with clean towels or paper towels. Removing the excess water and moisture helps to crisp the potatoes.

    What can I serve with Hash Browns?

    More Potato Recipes

    Make-Ahead Mashed Potatoes are creamy smooth, buttery, fluffy, and melt in your mouth. I am sharing several ways to reheat and keep them warm for dinner or the holidays like Thanksgiving. I am sharing all my secrets and tips including how to use a potato ricer for buttery smooth potatoes.

    For the ultimate in comfort food dinner side dish, bake up a sheet pan of Smashed Potatoes. These get crispy edges and have soft centers.

    You will fall in love with these cheesy potatoes, which is really a cheesy hash brown casserole. Cheesy Potato Casserole, aka Funeral Potatoes

    Tater Tot Casserole an easy breakfast recipe that takes 15 minutes to prep and bakes up to brown bubbly goodness in just 50 minutes.

    • A white casserole dish filled with mashed potatoes and squares of melted butter on top.
      Make-Ahead Mashed Potatoes
    • A sheet pan of smashed potatoes with fresh herbs baked with crispy golden brown edges.
      Crispy Smashed Potatoes
    • Lifting a scoop of sweet potato casserole out of a white casserole dish with large serving spoon.
      Sweet Potato Casserole (Ruth's Chris Recipe)
    • A vintage silver serving spoon taking out a piece of tater tot casserole just baked.
      Tater Tot Breakfast Casserole

    Did you love this recipe? We would love to hear from you! If you make this recipe and love it, give it a 5-star rating ⭐⭐⭐⭐⭐ with a comment. THANK YOU!! Follow Delicious Table with my free newsletter and share this recipe with your friends on Facebook, Pinterest, and Instagram.

    Three golden crispy edged hash browns baked in a muffin tin on cutting board.
    Print

    Baked Hash Brown Recipe

    Crispy Oven Hash Browns are baked in muffin tins using frozen or real potatoes. This is the easy way to make perfect hash browns without spending time at the stove.
    Skip the traditional cooking method of frying in a large skillet altogether. Both sides and the bottom of each one have a crispy exterior. And no messy stovetop to clean.
    Course Breakfast & Brunch
    Cuisine American
    Keyword baked hash browns recipe, frozen shredded hash browns recipe, hash brown recipe, hash browns, how to make hash browns, oven baked hash browns
    Prep Time 15 minutes minutes
    Cook Time 1 hour hour
    Total Time 1 hour hour 15 minutes minutes
    Servings 12
    Calories 80kcal
    Author Lisa Hatfield

    Equipment

    • Muffin Pan
    • Spoon Spatula
    • Coconut Oil Nonstick Spray

    Ingredients

    • 20 ounce bag hash brown potatoes
    • 1 cup sliced green onions (optional)
    • ½ cup Kraft grated parmesan cheese or real grated parmesan cheese
    • 1 teaspoon kosher sea salt
    • ½ teaspoon cracked sepepper
    • 2 tablespoons olive oil
    US Customary - Metric

    Instructions

    • Defrost the potatoes overnight in the fridge. This is a key step! If you forget, simply place the frozen bag of shredded potatoes into a bowl of cold water.
    • Spray your non-stick muffin tins with coconut oil non-stick spray.
    • Press potatoes really dry, this helps them crisp and avoids soggy hash browns. You can use a salad spinner to dry them, clean kitchen dish towels, paper towels, or a piece of cheese cloth. Squeeze to remove all the excess liquid. Dry them really well so you don't see much moisture. Again, the key to this recipe is you don't want much liquid in them.
    • Once defrosted and dry, transfer the potatoes into a large bowl, and add green onions, parmesan cheese, sea salt, cracked pepper, and olive oil. Stir until well combined.
    • Scoop into well-sprayed muffin tin, and distribute the potato mixture in each in an even layer. Press down just a little bit, this helps them form their shape and bake.
    • Bake 45 minutes at 400 degrees until crispy.
    • Store leftovers (if any!) in the fridge and reheat in the microwave. These make a great on the go breakfast for school or work and can be served with dinner too!

    Video

    Notes

    How To Make Hash Browns Ahead

    The easiest way is to prep ahead. With minimal effort, you can serve homemade hash browns on the day of your party or Christmas morning.
    Step 1: Fill the muffin tin to the top with the hash brown potato mixture, press with a spoon spatula to level the night before, and cover with plastic wrap. Keep in the fridge overnight.
    Step 2: When you are ready to bake, remove the plastic wrap, pop in the oven to bake and bake 45-60 minutes at 400 degrees until crispy brown.

    How To Store and Reheat

    Store leftovers in the fridge in a sealed container and reheat in the microwave. These make great on-the-go breakfast items for busy mornings and can be served with dinner too. How good would these be with grilled steaks? Put leftover hash browns into a freezer-safe container.
    Bring them to room temperature and reheat them in the microwave or in the oven on a baking sheet lined with parchment paper.

    Air Fryer Hash Browns

    Reheat your hash brown breakfast potatoes in your air fryer. To get them hot and crispy just preheat your air fryer to 370 degrees. Add the potatoes to the air fryer basket, and reheat for 3-5 minutes or until heated through.

    What Types Of Potatoes Can I Use For Hash Browns?

    Shredded Potatoes - You can use fresh white potatoes or frozen hash brown potatoes available in any of your local grocery stores. You really want starchy fresh potatoes, varieties like Russet or Idaho.
    The Simply Potatoes Shredded Hash Browns (brand) are dry out of the package saving a step. You will find these in the egg section of your store, and they are unfrozen. This recipe is not sponsored by Simply Potatoes, I just really like their products. Ore-Ida Shredded Hash Brown Potatoes are another popular brand of breakfast potatoes.
    PRO TIP: Frozen shredded potatoes need all the ice and water removed so they crisp up when baking.
    Green Onions - These are optional, you can leave the green onions out and swap in onion powder if you like. The onions will darken due to the oven heat. They taste great but don't look so pretty. You could also add ½ teaspoon garlic powder to boost flavor.
    Parmesan Cheese - A great addition, but you could substitute grated Romano or any cheese you like. Readers have left comments they love cheddar cheese and other cheese blends.
    Sea Salt & Black Pepper - Simple seasoning for any good recipe.
    Olive Oil - Crisps the potato edges, you can swap in vegetable oil.

    How To Use Russet Potatoes To Get Crispy Hash Browns

    1. Peel each larger size raw potato (Yukon), then shred using a food processor or the large side of a box grater.
    2. Place into a bowl filled with a large amount of water right away as you grate them, so they don't turn brown.
    3. Soak the shredded potatoes in cool water for at least 15 minutes, or overnight is even better. The water pulls out the excess starch from the starchy potatoes and helps you get those crispy edges you are craving!
    4. Dry the potatoes in either a salad spinner or in a bowl with clean towels or paper towels. Removing the excess water and moisture helps to crisp the potatoes.

    Nutrition

    Calories: 80kcal | Carbohydrates: 9g | Protein: 2g | Fat: 3g | Saturated Fat: 1g | Cholesterol: 3mg | Sodium: 269mg | Potassium: 162mg | Vitamin A: 120IU | Vitamin C: 5.4mg | Calcium: 57mg | Iron: 0.6mg

    Apple Cider Sangria

    [heart_this] · Nov 18, 2025 · Leave a Comment

    Apple cider Fall sangria in glasses next to a real pumpkin with fruit and garnished with cinnamon sticks.

    Last Updated October 16th, 2026 at 03:59 pm by Lisa

    Apple Cider Sangria is a boozy Fall punch with Autumn flavors like crisp apple cider, sweet oranges, and Fall spices like cinnamon and pumpkin pie spice.

    Serve it in one of these creative ways for game day or Thanksgiving. Try a beverage container, large pitcher, punch bowl, or pour from a real pumpkin with a tap dispenser. Happy Fall Ya'll...

    YOU WILL LOVE THIS FALL SANGRIA RECIPE

    • Simple ingredients: Easy-to-find ingredients at local stores!
    • A taste of Fall in every sip!
    • Sangrias are so easy to put together in minutes and are great on Game Days.
    • For the holiday season, stir in some fresh cranberries or pomegranate seeds for a Girls Gathering!
    • Crowd pleaser: Easy party punch for Halloween and Thanksgiving holiday parties.

    Be sure to check out our other delicious Cocktails & Drink Recipes for all the other holidays. And be sure to check out my White Wine Sangria for July 4th and Summertime!

    SANGRIA INGREDIENTS

    To make this sangria recipe for Fall, here is what you need:

    • Honey - use a local honey or a good brand you prefer
    • Pumpkin Pie Spice - mix up a batch or buy some.
    • Vanilla Extract - make it homemade or a good store-bought brand.
    • Frozen Can of Orange Juice - or squeeze or 2 cups fresh!
    • Apple Cider - you will need 8 cups of apple cider. If you buy fresh apple cider be sure to chill it. Bottled from the store has a long shelf life and can remain unrefridgerated as it has been pasteurized.
    • Wine Choice: red wine apple cider sangria - a red wine gives a gorgeous color. For a white sangria recipe use: pinot grigio, a dry white wine, or sauvignon blanc), or sparkling wine - (prosecco or champagne) adds bubbles and fizz!
    • Triple Sec - an easy-to-find orange liqueur
    • Brandy - any good brand, or try Apple Brandy.
    • Cinnamon Sugar Rim: ground cinnamon and granulated sugar
    • Fall Sangria with Apple Dider Garnish Ideas: cinnamon sticks, small red apple slices (I used Honeycrisp apple slices), cloves, star anise, and blood orange ring slices.

    MAKING FALL SANGRIA WITH APPLE CIDER

    1. Choose Serving Container for your easy apple cider sangria - This beverage tap dispenser is perfect for pumpkins to serve any party punch. Or use a glass drink dispenser, large pitcher, or a punchbowl.
    2. Defrost the OJ can on the counter.
    3. Slice the apple and oranges - Place in the bottom of your container. pour in wine, apple cider, Triple Sec and Brandy.
    4. Add Yummy Fall Flavors - Mix the orange juice concentrate (or fresh squeezed), honey, pumpkin pie spice, and vanilla extract. Pour that mixture into the serving container. I also added a large metal tea strainer filled with star anise, cloves, and allspice. This is optional but so good!
    5. If possible, let it sit overnight in the fridge in an airtight container. It helps infuse the fruit for better flavor!
    Glass mugs filled with apple cider sangria recipe garnished with cinnamon sticks.

    CREATIVE SERVING TIPS IDEAS:

    • serve in a real pumpkin with a keg tap dispenser!
    • or in a glass beverage drink dispenser with fake ice to prevent clogs
    • use a punch bowl and ladle
    • pour into a cocktail glasses or Mason mugs from a large pitcher

    More Fall Cocktail Recipes

    Fireball Whisky Cocktails are an easy cocktail recipe with orange, cinnamon, cloves, apple cider, and cinnamon-flavored whiskey. 

    Fireball Punch "big batch cocktails" are made with orange juice, apple cider, and Fireball whisky that tastes like cinnamon red hot candies. It's just the right sweetness and tastes like Fall with crisp apples, fresh oranges, and spicy cinnamon.

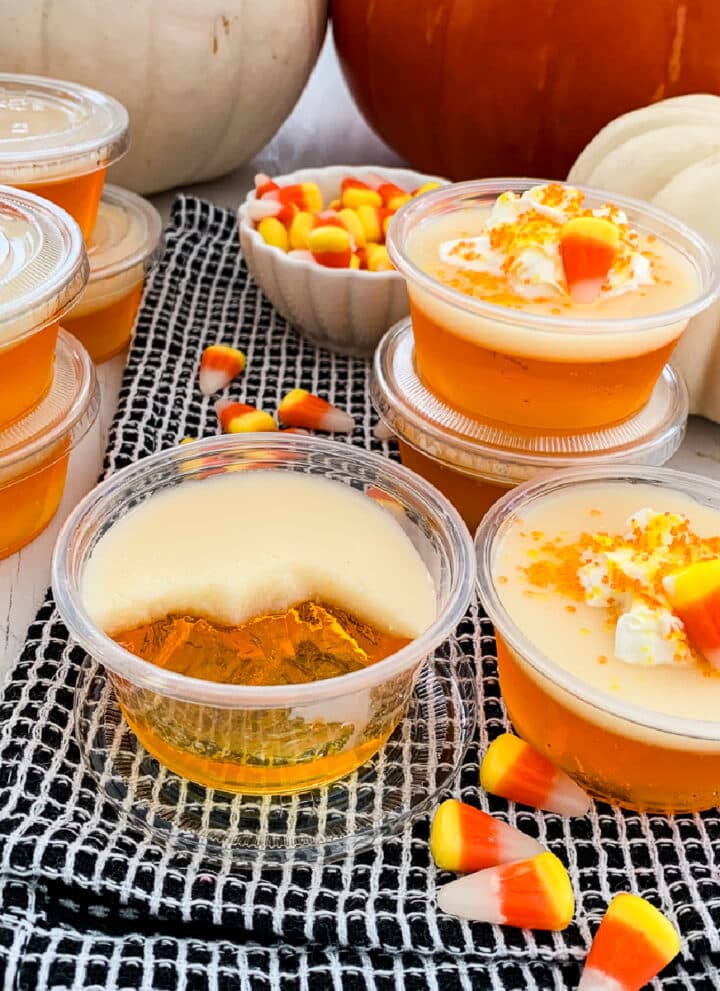
    Candy Corn Jello shots have 3 colors in these boozy adult shooters, just like the famous seasonal Fall candy! Batches of Jell-O shots are a popular college party classic. But who doesn't love a layered shot that actually tastes great for a bit of mischief-making?

    A taste of Fall in every sip, these Autumn Aperol Spritz cocktails have cider, Aperol, and fresh citrus juice topped with prosecco or Champagne bubbles. These refreshing drinks are great for brunch, happy hours, Friendsgiving, and Thanksgiving.

    • Fireball Whisky Cocktails with cinnamon sticks wrapped in orange peel for garnish.
      Fireball Whisky Cocktails
    • A large glass punch bowl filled with Fall and Thanksgiving punch with apples and oranges floating on top.
      Fireball Punch
    • Close up of a candy corn Jello shot that is half sipped and others in plastic cups at a party with candy corn in the background.
      Candy Corn Jello Shots
    • Three glasses of Aperol Spritz on a table with appetizers at a Fall party.
      Autumn Aperol Spritz

    Did you love this recipe? We would love to hear from you! If you make this recipe and love it, give it a 5-star rating ⭐⭐⭐⭐⭐ with a comment. THANK YOU!! Follow Delicious Table with my free newsletter and share this recipe with your friends on Facebook, Pinterest, and Instagram.

    Apple cider Fall sangria in glasses next to a real pumpkin with fruit and garnished with cinnamon sticks.
    Print

    Apple Cider Sangria Recipe

    Apple Cider Sangria is a boozy Fall punch with Autumn flavors like crisp apple cider, sweet oranges, and Fall spices like cinnamon and pumpkin pie spice. Serve it in one of these creative ways for game day or Thanksgiving. Try a beverage container, large pitcher, punch bowl, or pour from a real pumpkin with a tap dispenser. Happy Fall Ya'll...
    Course Drinks & Cocktails
    Cuisine Alcohol Drinks, American, Cocktails
    Keyword apple cider sangria, Fall sangria, sangria recipe
    Prep Time 15 minutes minutes
    Cook Time 0 minutes minutes
    Total Time 15 minutes minutes
    Servings 12
    Calories 226kcal
    Author Lisa Hatfield

    Equipment

    • Beverage Tap Dispenser Kit (Pumpkins or Watermelons)
    • Glass Beverage Drink Dispenser
    • Glass Punch Bowl
    • Plastic Punch Ladle
    • Acrylic "Fake" Ice Cubes keep keg taps/beverage dispensers from clogging

    Ingredients

    • 1 whole Navel orange or blood orange slices thin halves
    • 2 whole Honeycrisp apple slices thin halves
    • 25 ounces 1 bottle of red wine white wine or sparkling wine
    • ¼ cup triple sec
    • ¼ cup brandy or apple brandy
    • 64 ounces apple cider Honeycrisp apple cider
    • 12 ounces frozen can orange juice or 3 cups fresh squeezed OJ
    • ¼ cup honey
    • 1 teaspoon pumpkin pie spice
    • 3 tablespoons vanilla extract
    • garnish: cinnamon sticks or small red apples, cloves, star anise, allspice, orange ring slices, or fresh cranberries or sliced granny smith apple

    cinnamon sugar rim for glasses

    • 2 tablespoons cinnamon
    • ½ cup granulated sugar

    Instructions

    Mix The Sangria

    • Leave the frozen orange juice out for 30 minutes to make it easier to pour out. (Optional: squeeze your own orange juice; you will need about 3 cups fresh.)
      Next, slice the apples and oranges into thin, half-round slices. Place the sliced fruit on the bottom of a large serving container.
      Pour the red (or white wine) over the fruit. Next, pour in the apple cider. (I used a Honey Crisp apple cider). Then add the Triple Sec and Brandy.
    • In a small pitcher, mix the orange juice concentrate (or fresh squeezed), honey, pumpkin pie spice, and vanilla extract. Pour that mixture into the container.
      I also added a large metal tea ball filled with star anise, cloves, and allspice. This is optional but so good!
      If possible, let the sangria sit overnight in the fridge in an airtight container. It helps infuse the fruit into the sangria for better flavor!

    Choose How To Serve The Sangria

    • Decide if you are making this for a large pumpkin keg, beverage drink dispenser, a punch bowl, or a large pitcher.
    • Cinnamon Sugar Sparkle Garnish: Mix 2 tablespoons cinnamon with ½ cup granulated sugar in a bowl. Cut an orange in half, run the orange onto the rim of the glass, and dip each glass into the cinnamon sugar.
    • Garnish with cinnamon sticks and ice.
      Optional: top off with sparkling water, or 7-Up or Sprite.
    • Pumpkin Keg: Choose a nice big round pumpkin. Give it a good clean. Slice off the top with a sharp serrated knife. Scoop out the pumpkin seeds and pulp with a large scoop or spoon. Keep the pumpkin top. Insert the tap into the carved empty pumpkin according to the directions on the box.
    • PRO TIPS: Beverage Drink Dispenser: Check if it fits in your fridge first, and let the ingredients sit overnight for amazing flavor. Add some plastic fake ice down by the tap of either the pumpkin keg tap or the beverage dispenser nozzle to prevent clogs while pouring!

    Nutrition

    Calories: 226kcal | Carbohydrates: 39g | Protein: 0.5g | Fat: 0.3g | Saturated Fat: 0.1g | Polyunsaturated Fat: 0.1g | Monounsaturated Fat: 0.02g | Sodium: 10mg | Potassium: 302mg | Fiber: 1g | Sugar: 33g | Vitamin A: 64IU | Vitamin C: 16mg | Calcium: 35mg | Iron: 1mg

    Homemade Dog Food Recipes (30+ Ideas!)

    [heart_this] · May 15, 2024 ·

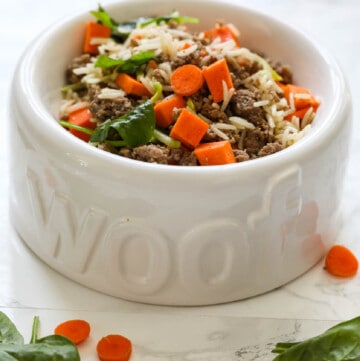
    A white ceramic dog dish that says woof filled with homemade dog food.

    Last Updated October 7th, 2026 at 06:39 pm by Lisa

    Homemade dog food recipes are fresh, nutritious, and can be custom-made! Skip expensive store-bought commercial pet food. Let's create one of the best home cooked dog food recipes perfect for your furry friend with these 30+ ideas. And watch them lick the bowl clean...

    A white ceramic dog bowl that says Woof on the front filled with homemade dog food.

    Why Make Your Own Dog Food?

    Both of my Shih Tzus, Lucky and Sassy suffered from allergies to chicken from dry commercial dog food, expensive fancy wet food, and treats.

    I began to think, is it worth it to make your own dog food and treats? So I set out to make the best homemade dog food and quality shih tzu food for them.

    Let's discuss ingredients and recipes for homemade dog food vet approved that will possibly help picky or senior dogs that won't eat with sensitive stomachs and or skin allergies!

    You Will Love Home-Cooked Dog Meals!

    Are there any benefits to feeding your dog homemade pet food? And why should I feed my dog homemade food?

    • Homemade Cooked Dog Food vs Store Bought: There are advantages as you control the ingredients for allergies which can cause issues for your pet. Avoid unwanted preservatives, fillers, and shelf stabilizers in yucky canned adult dog food. And also by making homemade puppy food, you start them off right!
    • Protein Choices: Always use cooked raw meat like ground beef, ground turkey, or ground chicken in food for dogs homemade. It is going to taste better than dog foods that sit in a bag or on the shelf. NOTE: You need at least 1 gram of protein per pound weight of your dog. First, try using different proteins! Ground beef dog food recipes were the answer for my dog and approved by my vet.
    • Best Senior Dog Food: Senior dogs lose their appetite and need soft food in small pieces as sometimes they don't have all their teeth to chew. Another great reason to try recipes for home cooked dog food!
    • Economical: You can use up ingredients you have on hand from your freezer and not throw them in the trash. So is it cheaper to feed your dog homemade food? The answer it may be depending on the quantities you make and the ingredients you use. Homemade dog food recipes for small dogs are usually quite cost effective vs. expensive delivery or chilled fresh pet products.

    Oh and since then, I've also created a recipe for her very own super clean Dog Biscuits with her name, on them-so cute so check those out!

    A white and tan dog laying on a grey floor with a white ceramic bowl that says "woof" filled with a homemade dog food recipe.

    How To Make Homemade Food For Dogs

    Your dog will absolutely love this easy homemade dog food recipe.

    As pet owners, we want the best for our dogs, and yes it takes a couple of hours of home cooking to make their food every couple of months. But it is worth it in my opinion. The quality of our dog's life is worth it. I also think I saved a small fortune at the vets' office!

    You can create your own custom version or try this one to start. And will find it is almost the same price as dry food for small dogs!

    Ingredients

    • 3 pounds ground beef (7 cups cooked crumbled ground beef)
    • 2 cups uncooked white or brown rice
    • 1 teaspoon of sea salt (skip if using bouillon)
    • 1 tablespoon butter
    • 28 ounces beef stock (optional) + ½ cup water 28 oz = 3.5 cups, add ½ cup water for the proper ratio to make rice
    • 1 ½ cups fresh broccoli (shredded, cut finely or in a 12 oz frozen bag)
    • 2 cups fresh carrots (shredded, cut into small coins - 2 large carrots)
    • 2 cups sweet potatoes (small cubes or shredded - 1 large sweet potato)
    • 2 cups fresh spinach
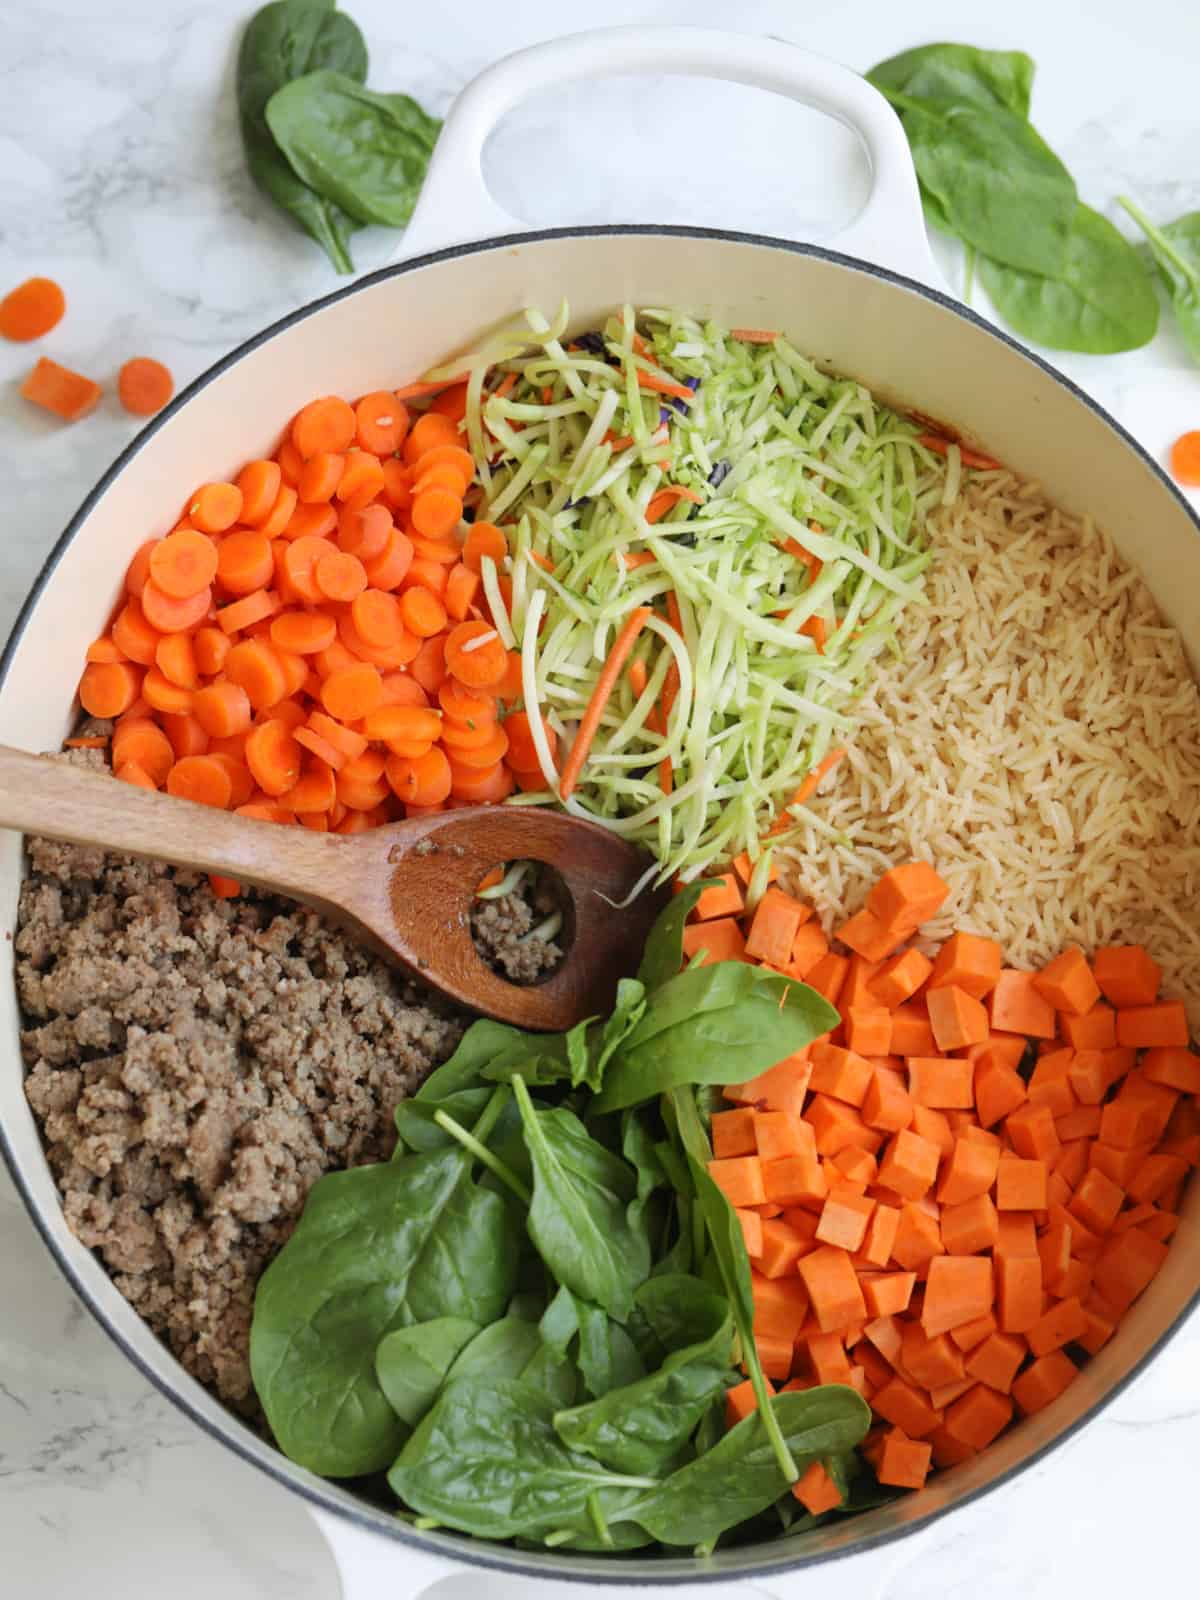
    A large white cast iron cooking pot filled with cooked rice and ground beef, fresh spinach, cut carrots, sweet potato and zucchini with a wooden spoon showing how to make dog food.

    Step 1: Make Flavored Rice

    Use a ratio of 1 cup rice to 2 cups water with beef bouillon or beef stock, you can scale up or down check your rice package instructions. Feel free to swap in beef, chicken, or vegetable broth for better flavor. I also LOVE Better Than Beef Buillon or a box of beef stock to flavor the rice. Both options are totally Sassy approved.

    Bring the stock/water to a boil, add rice and salt (skip salt if using bullion). And if you want to add a pat of butter, it makes rice taste even better. Cover the pot and simmer for 18 minutes on low and don't remove the lid. Brown rice takes 30 minutes. Check the rice, and if done turn off the heat, replace the lid, and let it rest for several minutes in the steamy pan. Use a fork to fluff it up!

    Step 2: Cook Meat Protein and Veggies

    Brown and crumble 3 lbs of ground beef in a large skillet. Place in a large bowl with the fat drippings. Dogs need some fat. You can also use ground turkey or other protein suggestions.

    PRO TIP: Chop, shred, or process all the veggies. My dog is a small dog and prefers the veggies finely shredded in a food processor. You can also use a knife or a box grater to chop it even finer.

    In a large pot (cast-iron pan or skillet), briefly saute carrots, broccoli, and sweet potato until just soft for a few minutes on medium heat.

    A large white cast iron cooking pot filled with a mix of homemade foods for dogs.

    After cooking, place the dog food mix into the largest bowl you have. Add the cooked ground beef, warm rice, warm sauteed veggies, and fresh spinach. Mix well with a large spatula.

    After some trial and error, I learned Sassy's favorite recipes for home cooked dog food have finely minced ground beef (and sometimes ground turkey) with a wide variety of fine grated vegetables, and beef broth to cook the rice!

    Loading food for dogs homemade into a funnel packing a zip top bag with a wooden spoon to freeze for later.

    Step 3: Mix and Portion Homemade Cooked Dog Food

    When making home cooked food for dogs, how much do you feed them?

    I have a small dog, so using this recipe I calculated the calories she needs per day. You will need to research this number. Measure a few days supply based on your dog's caloric needs. Then, portion it into a 5-day supply for your dog so it is food-safe after it defrosts in the fridge.

    The best way to store fresh pet food for your doggie is to freeze it using use freezer bags!

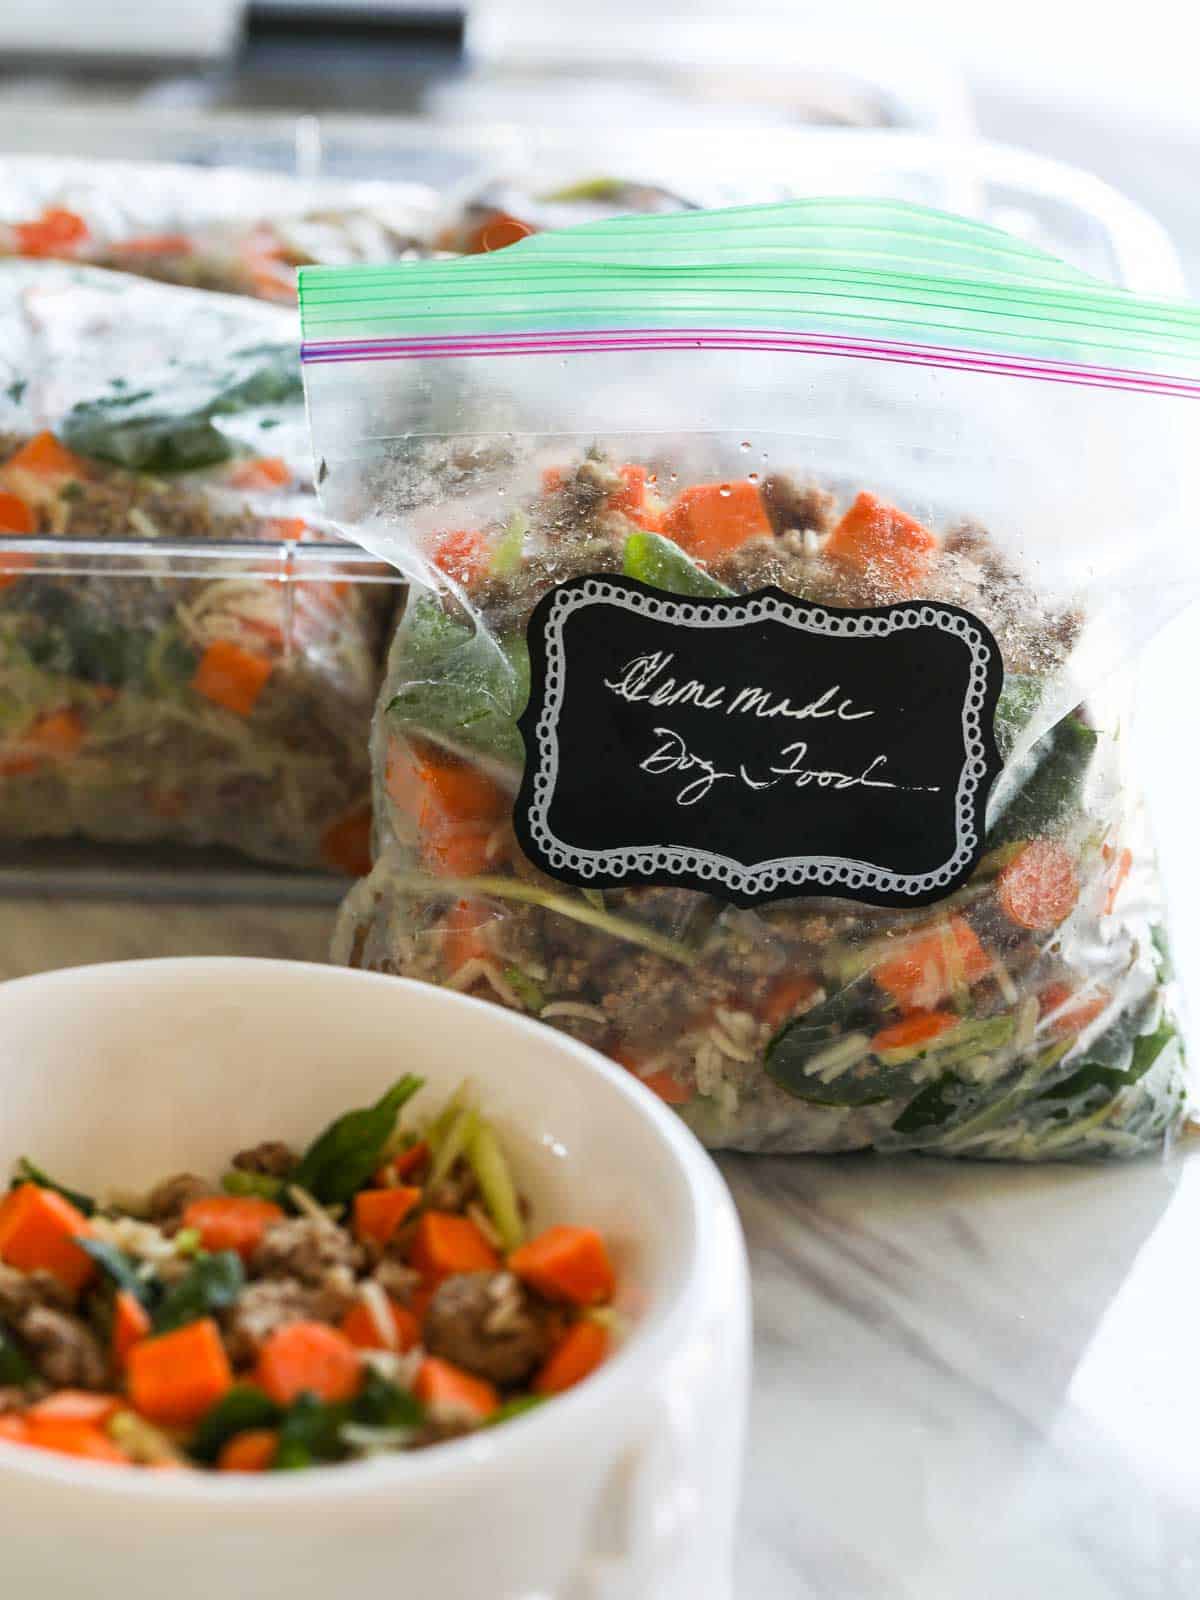
    Photos showing home made dog food portioned into clear plastic zip top bags and freezer containers filled with a black chalk lable that says homemade dog food.
    Extra large ceramic bowl filled with homemade food for dogs with ground beef, rice, and chopped vegetables packed into zip lock bags.

    Step 4: Can Fresh Dog Food Be Frozen?

    Yes! Simply pull out a freezer bag of new food and let it defrost in the fridge every 5 days. I give her ⅕ of the baggie daily in correct calorie portions per the weight of my dog.

    The bags compress flat in the freezer or you can place them in an airtight container. Store in an airtight container or larger zip-top bag in the freezer.

    Freezer bags filled with frozen homemade dog food stacked inside a freezer with a lable that says Sassys Food.

    Cost Effective: Is making your own dog food cheaper than buying it?     

    So, will it be cheaper to buy dog food or make your own? What is the Cost of Homemade vs. Store-Bought food? The ingredients and portions will make a difference. Here is the math I came up with.

    $20 of ingredients made 40 individual 1 cup homemade servings or about $.50/serving. Store-bought dry food is about $.41 per serving. So yes, homemade is a tiny bit more expensive, but the fresh nutrition and ingredients I believe are good for your dog, after all, dogs ate human leftovers and scraps way before dog food was manufactured!

    This serving size is for my 11-pound dog, she is small. So you would need to calculate the number of daily calories your dog needs.

    You will need to do some research on how many calories your dog needs per day based on your dog's activity level and your dog's weight. There are so many factors to consider that will vary due to the breed, size, age, and activity of your pet. My dog needs about 400 calories a day and is a small dog weighing just 11 pounds.

    PRO TIP: You can use this handy homemade dog food calculator to check the nutrition of the dog food you create here at BalanceIt. Puppies, adult dogs, and especially senior dogs have different needs.

    Do Vets Approve Homemade Dog Food For Nutritional Needs?

    So, do vets recommend homemade dog food? Well, mine does. And always asks what I feed her and says she looks great at 13! Making dog food at home has been very good for Sassy.

    There needs to be a proper balance of protein, carbohydrates, fiber, and fat. Supplementing a dogs' food with liquid vitamins or fish oil is also a good idea.

    To conclude, be sure to talk with your vet. Use good ingredients and quality proteins that are safe for them to consume.

    You may need a referral to a veterinary nutritionist if your dog has unique conditions or seek out a vet that focuses on canine nutrition. They might have specific vet approved homemade dog food recipes for your pets unique situation.

    1. Main Protein (use high quality meat, seafood, dairy or eggs)
    2. Fat (from animal or organ meat, fish, fish oil)
    3. Carbohydrates (grains, legumes, or vegetables)
    4. Vitamins & Minerals like calcium 
    5. Essential fatty acids (egg yolks or oatmeal)

    DISCLAIMER: Seek the advice of a good vet, I am a food blogger and not able to provide any medical advice or comment on your dog's needs or situation. This recipe is not meant to be all your dog consumes in their daily diet. You have to choose what are the pros and cons of making your own dog food!

    Deciding To Make DIY Dog Food Recipe

    Dog owners can be concerned about feeding their dogs human food and scraps. I had a long chat with Sassy's vet at her annual check-up. The truth is , each dog is totally unique. Some have food sensitivities, easily get upset tummies and some have digestive issues, so regular commercial food might be best for those dogs. Other dogs can eat most anything without a problem.

    Care In Trying New Dog Recipes

    The best advice is to slowly introduce new foods to our dogs. Food changes can cause issues to their digestive tract. What works for one won't work for another. Fresh dog food recipes have ingredients your dog might be trying for the first time so go slow, with small portions. Sassy could not handle chicken stock cooked into the rice, due to her allergies. So I use beef stock when I cook the rice, and she loves it.  

    A clear quart size sip top bag filled with dinner for dogs labeled homemade dog food.

    Cost Effective Optional Additions

    Sprinkle some dry dog food or beans like drained canned black beans or garbanzo beans into the homemade food to stretch out a homemade dog food batch. Use high-quality commercial pet food and check the label carefully for any ingredients to avoid food allergies and reactions.

    Use Up Extra Freezer Meat or Leftovers

    Food safe meat in the freezer is great option. Never feed your dog spoiled or rotten food! And it's fine to use up extra steak meat or pork on hand in meals for dogs. As a result, nothing will go to waste. Never feed bones or super fatty meats.

    The feet of a white dog near a bowl of colorful homemade dog food in a white bowl.

    Try Different Veggies

    It's a good idea to use different veggies and vary them in each batch. If some are about to go bad or I have extra and want to use them up quickly and find this is a perfect use!

    How To Get A Dog To Eat Their Food

    Try different textures of veggies and see what your dog likes!

    What I learned, is to finely grate the veggies. A food processor works great, then chop them more with a butchers knife, Sassy ate it all! She wasn't a fan of the cubed shapes and large spinach leaves.

    The tiny pieces of chopped vegetables did the trick to get her to eat it all. I think she loves the brown rice mixed in with the beef stock the most.

    A large cream mixing bowl filled with home cooked food for dogs, and portioning it in into zip top bags.

    Feeding Senior Dogs & Picky Dogs

    If your dog is picky or or older and has a hard time chewing, use finely chopped dog food. Run the vegetables through a food processor and or finely chop them on a cutting board. A hand held boxed grater will work. But takes more time. I use the shredder blade on my processor and buzz everything through.

    For convenience, try riced frozen vegetables! I have used packages of frozen riced cauliflower, sweet potato, and broccoli. The downside is, they are a little more expensive. And alternatively, are great for senior dogs that can't chew well, are picky or won't eat larger pieces of dog food.

    A white bowl with the word woof on it filled with dog food made at home.

    Ingredients For Home Cooked Dog Food Recipes

    What are the best ingredients for homemade dog food? The first step is to choose a quality protein. It's a good idea to mix a couple of proteins like ground beef and ground turkey as an example. Plan on 1 gram of protein per pound of your dog. Example: An 11-pound dog needs 11 grams of protein a day minimum. One cup of the recipe below has 18 grams of protein.

    First Choice, What Meat & Plant Proteins Can I Use?

    • Ground Beef
    • Ground Chicken (my dog is allergic, many dogs are)
    • Ground Turkey
    • Ground Lamb
    • Fish
    • Eggs
    • Beef Liver (organ meats)
    • Duck
    • Ground Bison
    • Venison
    • Cooked Lentils
    • Cooked Rice
    • Canned Garbanzo Beans
    • Canned Black Beans
    An extra large mixing bowl filled with one of the best recipes for home cooked dog food recipes.

    Next, What Vegetables Can Dogs Eat?

    Are you wondering what veggies can dogs eat safely? Let's answer that question. Again, I am a food blogger over here and not a veterinary medicine professional or nutritionist. For thousands of years, dogs have survived off the scraps of human food. What are the best ingredients to put in homemade dog food? Here are the ones I use often, and I mix it up differently in every batch!

    Please be sure to do your own research on what is best for your dog's diet! Be sure to see my infographic down by the recipe card for more tips and ideas on ingredients.

    • butternut squash
    • Brussels sprouts 
    • fennel
    • peas
    • zucchini
    • carrots
    • sweet potato
    • fresh spinach
    • cooked potato (in moderation)
    • pumpkin
    • celery
    • broccoli (chopped)
    • frozen peas
    • bell peppers
    • green beans
    • kale

    What Not To Put In Dog Food?

    • Onions (never feed)
    • Mushroom (never feed)
    • Tomatoes (never feed)
    • Garlic (never feed)
    • Raw Meat (always cook it!)

    So what is your dog's favorite recipes for home cooked dog food? Please leave a ⭐️⭐️⭐️⭐️⭐️ comment down by the recipe card with your Doggies favorite flavor combination!

    Sassy girl, is happy. Okay, she didn't like the spinach and pulled it out! But loves the rice and beef. The trick I learned was to chop it finer than seen here and she gobbled it all...

    Four photos of a white and tan female Shih Tzu dog eating some of the best food for dogs including ground beef, rice, and vegetables.

    FAQ: What Veggies Can My Dog Eat?

    Are bell peppers okay to feed to dogs?

    Yes. Bell peppers are loaded with essential vitamins, nutrients, and antioxidants and are beneficial. Rich in vitamins A, E, B6, and lutein and are great sources of vitamin C and beta-carotene. Red bell peppers actually start out green and mature to red. Packing in high nutrition because they've been on the vine longest.

    Can dogs eat potatoes?

    Yes. Cooked potatoes in moderation are fine. Boil, steamed, or baked without seasoning are fine. They contain a number of nutrients. These include vitamins A, B6, and C, and minerals like magnesium, iron, calcium, and potassium.
    Raw potatoes should never be fed to your dog. Raw potatoes contain solanine. A compound that can be toxic to dogs.

    Is it okay to feed my dog broccoli?

    Yes. Broccoli is best served as an occasional treat. It is high in fiber and vitamin C and low in fat. Broccoli florets contain isothiocyanates, which can cause mild-to-potentially severe gastric irritation in some dogs. Additionally, large broccoli stalks can cause choking. So be sure to chop them up the broccoli for your pet!

    Homemade Dog Food Infographic

    An infographic of how to make dog food at home with lists of ingredients and options in making your own recipe at home and pictures of dogs.

    Homemade Biscuit Dog Recipes

    These Dog Biscuits are one of my other go-to homemade dog food recipes. Super fun to make, and you can even personalize them for your pup. Again, I use a lot of fresh veggies, peanut butter, pumpkin, and more in them, and Sassy just LOVES these! And I share how to order the super cute biscuit cutter in the recipe post 🐶🐾

    Homemade Dog Treats
    Your doggy will love these homemade dog treats (dog biscuit recipe) packed with nutritious pumpkin, peanut butter, spinach, zucchini, carrots, and oats.
    GET THE RECIPE PIN IT
    A wooden bowl with homemade dog treats and the name of the dog Sassy stamped in each of them in a pile.

    Did you love this recipe? We would love to hear from you! If you make this recipe and love it, give it a 5-star rating ⭐⭐⭐⭐⭐ with a comment. THANK YOU!! Follow Delicious Table with my free newsletter and share this recipe with your friends on Facebook, Pinterest, and Instagram.

    A white ceramic dog dish that says woof filled with homemade dog food.
    Print

    Homemade Dog Food Recipes (30+ Ideas!)

    Easy homemade dog food recipes are fresh, nutritious, and can be custom-made! Skip expensive store-bought commercial pet food. And watch your furry friend lick the bowl clean. Now let's create one of the best home cooked dog food recipes with these 30+ ingredient ideas.
    Course Main Course
    Cuisine American
    Keyword dog food recipes, food for dogs homemade, homemade dog food, homemade dog food recipes, Homemade Dog Food Recipes Vet Approved, homemade food for dogs
    Prep Time 1 hour hour
    Cook Time 30 minutes minutes
    Total Time 1 hour hour 30 minutes minutes
    Servings 16 1 cup dog servings
    Calories 338kcal
    Author Lisa Hatfield

    Ingredients

    • 3 pounds ground beef 7 cups cooked crumbled ground beef
    • 2 cups brown rice or swap white rice
    • 1 teaspoon sea salt
    • 1 tablespoon butter
    • 28 ounces beef stock (optional) + ½ cup water 28 oz = 3.5 cups, add ½ cup water for proper ratio to make rice
    • 1 ½ cups fresh broccoli, shred or cut finely or a 12 oz frozen bag
    • 2 cups fresh carrots, shred or cut into small coins 2 large carrots
    • 2 cups sweet potato, small cubes or shred 1 large sweet potato
    • 2 cups fresh spinach

    Instructions

    Make Rice

    • Rinse the rice in a fine mesh strainer for about 30 seconds under cold water. It removes starches that makes rice sticky.
      Use a ratio of 1 cup rice to 2 cups water, which you can scale up or down. (check your rice package instructions.) Feel free to swap in beef, chicken, or vegetable broth for better flavor. You can also use a good buillon to water for extra flavor.
      Bring the broth stock/water to a boil, add rice and salt (skip salt if using buillon). And if you want to add a tab of butter, too, go for it — your rice will taste 10x better. Cover the pot and simmer for 18 minutes on low and don't remove the lid! Brown rice takes 30 minutes.
      Check the rice, and if done turn off the heat, replace the lid, and let it rest for several minutes in the steamy saucepan. Use a fork to fluff it up!
    • Chop, shread, or process in a food processor all the veggies. My dog is a small dog and prefers the veggies finely shredded in a food processor.

    Make Ground Beef and Veggies

    • Brown and crumble 3 lbs of ground beef in a large skillet. Place in a large bowl.
    • In a large cast iron pan or skillet, briefly saute carrots, broccoli, and sweet potato until just soft for a few minutes on medium.

    Mix Dog Food

    • Into the large bowl with ground beef, add warm rice, warm sauted veggies, and fresh spinach. Mix well with a large spatula.
    • Portion 4-5 cups of Homemade Dog Food per zip lock back, and store in an airtight container or larger zip top bag in the freezer. Pull our one small bag per week, and reheat a serving for your dog in the microwave for 30 seconds. I sometimes sprinkle some dry dog food into the homemade food to stretch out my homemade dog food batch.

    Video

    Notes

    What Other Meat & Plant Proteins Can I Use?
    Ground Beef, Ground Chicken (my dog is allergic, many dogs are), Ground Turkey, Ground Lamb, Fish, Eggs, Beef Liver (organ meats), Duck, Ground Bison, Venison, Cooked Lentils, Cooked Rice, Canned Garbanzo Beans, and Canned Black Beans.
    What Other Vegetables Can I use?
    butternut squash, Brussels sprouts, fennel, peas, zucchini, carrots, sweet potato, fresh spinach, cooked potato (in moderation), pumpkin, celery, broccoli (chopped), frozen peas, bell peppers, green beans, or kale. 

    Nutrition

    Serving: 1cup | Calories: 338kcal | Carbohydrates: 25g | Protein: 18g | Fat: 18g | Saturated Fat: 7g | Cholesterol: 62mg | Sodium: 334mg | Potassium: 503mg | Fiber: 2g | Sugar: 2g | Vitamin A: 5458IU | Vitamin C: 10mg | Calcium: 44mg | Iron: 2mg

    Cajun Sausage Potato Soup

    [heart_this] · Apr 23, 2024 · 1 Comment

    A wooden board with two bowls of sausage potato soup with spoons and pieces of bread.

    Last Updated April 26th, 2024 at 11:15 am by Lisa

    Sausage potato soup is what you want on cold nights to warm your bellies! Every spoonful is comforting and zesty. This spicy, cozy dinner has hearty chunks of vegetables and slices of andouille sausage. And takes just 20 minutes of prep time. Simmer this easy soup in a slow cooker or a pot on the stove and serve with crusty bread...

    A wooden cutting board with two white bowls of homemad sausage potato soup with soup spoons, a blue napkin, and pieces of bread.

    Why You'll Love This Soup Recipe

    • Uses simple kitchen pantry ingredients!
    • Make it in 2 hours on high or simmer on low for 4 hours.
    • Freeze extra portions for fast weeknight meals.
    • Quick 20 minute prep, and one of the easiest potato soup recipes!

    Be sure to check out our other delicious Soup, Stew, and Chili Recipes for more dinner ideas!

    Close up of two white bowls of spicy sausage potato soup with pieces of bread broken inside the soup on a cutting board with a napkin.

    Sausage Potato Soup Recipe

    Ingredients

    • 2 tablespoon butter
    • 2 cups yellow onion (medium size) finely dice
    • 1 tablespoon Cajun seasoning...homemade is best!
    • 1 lb Cajun style sausages like andouille or Louisiana Brand from Costco
    • 1 cup celery diced small
    • 2 cups sliced carrots diced small
    • 1 cup bell pepper diced red or green peppers
    • 3 cups gold potatoes 1 pound 5-6 small dice
    • ½ pint heavy cream
    • 32 ounces of Chicken Stock
    Ingredients on a marble table to make a Cajun sausage potato soup in a crock pot.
    Two white bowls filled with spicy sausage and potato soup with spoons and blue napkins on a cutting board.

    Easy Sausage Potato Soup Ingredient Notes:

    Sausages: You can use any andouille sausage, these are a Cajun style and are smoked with spicy heat. You can also use Italian sausage, chicken, pork sausage, or turkey sausage for less spice.

    Chicken Stock: Homemade bone broth Chicken Stock is the best, and you can also use chicken broth from grocery stores.

    Potatoes: I used small Yukon gold potatoes, they hold up well to soups in low simmers and crockpots and stay in small pieces. If you use russet potatoes, they are high-starch potatoes. In soups, russets become soft and make a creamier soup if you prefer.

    Heavy Cream: You can swap in whole milk for this creamy sausage potato soup, or leave the dairy out. But I recommend it, as it gives that extra creaminess and color.

    Spicy Heat: If you want less spicy soup, skip the Cajun Seasoning and use a regular sausage. Or add a few red pepper flakes for a lower heat and maybe some crushed garlic.

    Cajun Seasoning: Homemade is awesome! It is worth your time. Mix up a batch to use in your cooking. Most ingredients you most likely have on hand like garlic powder, salt, onion powder, cayenne, paprika, and more! Try your new Cajun spice mix in my Fried Green Tomatoes, so good!

    A wooden bowl with mixed Cajun seasoning mixed and copper measuring spoons nearby on a white marble countertop.

    Instructions How To Make It

    A small vintage glass Ball jar with Cajun seasoning inside and a brown paper label with Cajun seasoning on it, tied with string to the jar.
    1. Homemade cajun seasoning is worth your time when made with good fresh spices. I highly recommend it! Try my Cajun Seasoning Recipe. So good!
    A stainless steel slow cooker crock pot with ingredients to make soup.

    2. First, finely mince the onions. Then slice the carrots, and dice the celery, bell pepper, and potatoes into small ½" pieces. PRO TIP: Same-size vegetable pieces will all cook at the same time.

    Chopped potato, green bell pepper, sliced andouille sausage in a slow cooker to make soup.
    Thin slices of Cajun andouille sausage in a white bowl to use in a recipe for soup.

    3. Slice the sausage into thin slices. Note: you can use crumbled sausage for this recipe, but sliced andouille sausages are best for a great spicy kick because they are smoked and have a unique Cajun flavor!

    Chopped onions with butter and seasoning in a slow cooker with a saute function.

    4. In a skillet or slow cooker with sauté function, saute 2 tablespoons butter, 2 cups finely minced onion, and 1 tablespoon cajun seasoning. This brings out a deep flavor! Optional: You can skip the saute step and add the same ingredients to your slow cooker.

    Pouring chicken stock into a slow cooker with chopped vegetables and sausage for a soup recipe.

    5. Next, add the sliced hot link sausages, diced celery, diced carrot, diced bell pepper, and diced potatoes.

    6. Pour 1 quart (32 ounces) of chicken stock over the top and stir. Turn the slow cooker on high for two hours or cook on a low simmer for 4 hours. Don't let the soup boil. The potatoes and carrots should be fork-tender.

    Slow cooker with ingredients inside and heavy cream on top to make soup with a wooden spoon.

    7. Right before serving, pour ½ pint of heavy cream and stir. Serve warm in bowls with bread sticks or crackers.

    Looking down into a crock pot of creamy sausage and potato soup.

    Storage Tips

    Store leftovers in the fridge in an airtight container. You can freeze the soup in freezer containers or freezer bags, and reheating is easy. Simply defrost in the fridge, pour into a saucepan, and reheat over low heat.

    Two bowls of spicy Cajun sausage potato soup with bread in the bowls.
    What is andouille sausage?

    Andouille is a large Cajun sausage. The flavor is smoky with a spicy kick. It is a blend of chopped pork butt aka pork shoulder, onions, and a Cajun seasoning spice mix.

    More Easy Soup Recipes

    • Creamy Chicken Gnocchi Soup
    • Best Homemade Chicken Noodle Soup  
    • Cheese Soup
    • Tomato Soup with Basil Dumplings 
    • Jalapeno Popper Soup
    • A white bowl full of Chicken Gnocchi Soup with a silver spoon and bread nearby.
      Chicken Gnocchi Soup
    • A blue bowl filled with homemade chicken noodle soup.
      Chicken Noodle Soup
    • White bowl filled with cheese soup and a homemade crouton on top.
      Cheese Soup
    • A bowl of tomato soup and cup of soup in a white cup garnished with fresh basil.
      Tomato Soup With Basil Dumplings
    • Two bowls of creamy jalapeno popper soup in white handled soup bowls garnished with thin sliced jalapenos and cheese.
      Jalapeno Popper Soup

    Did you love this recipe? We would love to hear from you! If you make this recipe and love it, give it a 5-star rating ⭐⭐⭐⭐⭐ with a comment. THANK YOU!! Follow Delicious Table with my free newsletter and share this recipe with your friends on Facebook, Pinterest, and Instagram.

    A wooden board with two bowls of sausage potato soup with spoons and pieces of bread.
    Print

    Cajun Sausage and Potato Soup

    Sausage potato soup is what you want on cold nights to warm your bellies. A spicy, cozy soup filled with vegetables and slices of andouille sausage. Every spoonful is comforting and zesty. Make this easy soup in a slow cooker or a pot on the stove.
    Course Dinner & Main Dishes
    Cuisine Cajun
    Keyword chicken gnocchi soup recipe, Crockpot soup recipe, easy recipe, easy soup recipe, sausage and potato soup, Slow cooker soup
    Prep Time 20 minutes minutes
    Cook Time 2 hours hours
    Total Time 2 hours hours 20 minutes minutes
    Servings 6
    Calories 607kcal
    Author Lisa Hatfield

    Ingredients

    • 2 tablespoon butter
    • 2 cups yellow onion (1 medium size) finely dice
    • 1 tablespoon Cajun seasoning homemade is best!
    • 1 lb Andouille Sausages
    • 1 cup celery diced small
    • 2 cups sliced carrots diced small
    • 1 cup bell pepper diced red or green peppers
    • 3 cups gold potatoes 1 pound 5-6 small. dice small
    • ½ pint heavy cream 1 quart
    • 32 ounces Chicken Stock 1 quart

    Instructions

    • Homemade cajun seasoning is worth your time when made with good fresh spices. I highly recommend it! Try my Cajun Seasoning recipe. So good.
    • First, finely mince the onions. Then slice the carrots, and dice the celery, bell pepper, and potatoes into small ½" pieces. Same size pieces will all cook at the same time.
    • Slice the sausage into thin slices. Note: you can use crumbled sausage for this recipe, but sliced andouille sausages are best for great flavor because they are smoked and have a unique Cajun flavor!
    • In a skillet (or slow cooker with sauté function), saute 2 tablespoons butter, 2 cups finely minced onion, and 1 tablespoon cajun seasoning.
      Sauté the butter, onions, and cajun seasoning to bring out deep flavor from the caramelization of the onions, browning the butter (even more flavor), and toasting the spices. This is ideal to take the flavor to the next level!
      Optional: You can skip the saute step and add the same ingredients to your slow cooker and cook.
    • Next, add the sliced hot link sausages, diced celery, diced carrot, diced bell pepper, and diced potatoes.
    • Pour 1 quart (32 ounces) of chicken stock over the top and stir. Turn the slow cooker on high for two hours or cook on a low simmer for 4 hours. Don't let the soup boil. The potatoes and carrots should be fork-tender.
    • Right before serving, pour ½ pint of heavy cream and stir. Serve warm in bowls with bread sticks or crackers.

    Video

    Notes

    Cajun Seasoning: Homemade is awesome! It is worth your time. Mix up a batch to use in your cooking. Most ingredients you most likely have on hand like garlic powder, salt, onion powder, cayenne, paprika, and more!

    Nutrition

    Calories: 607kcal | Carbohydrates: 39g | Protein: 23g | Fat: 41g | Saturated Fat: 19g | Polyunsaturated Fat: 5g | Monounsaturated Fat: 14g | Trans Fat: 0.3g | Cholesterol: 124mg | Sodium: 930mg | Potassium: 1256mg | Fiber: 6g | Sugar: 11g | Vitamin A: 8047IU | Vitamin C: 61mg | Calcium: 90mg | Iron: 3mg

    Green Goddess Dressing Recipe

    [heart_this] · Apr 16, 2024 · 14 Comments

    A small glass bowl with green goddess dressing and white plates of mixed salad greens on a table.

    Last Updated May 15th, 2024 at 11:28 am by Lisa

    Green Goddess Dressing bursts with fresh herbs and delightful flavor! Today, I am sharing my Mom's original Green Goddess recipe exactly the way she made it back in the day. It was wildly popular in Southern California in the 1970s, and still is to this day...

    Two white plates with salad green tossed in green goddess dressing and  silver forks.
    Making a green goddess dressing for salad in the blender.

    Reader Review

    ⭐️⭐️⭐️⭐️⭐️ "This recipe is more authentic to the actual 1970 California style Green Goddess dressing my mother used to make, with some variation, but still far more similar to the original than you'll see in so many "modern" day green goddess dressings which substitute yogurt for mayo, add avocado, and practically no vinegar. The amount of vinegar is key to creating this original flavor and is missing from so many new modern recipes."

    For years, this recipe from my Mom rested in my family collection of California Food Recipes with many others. I finally pulled it out, and made it. Wow! Memories flooded back of weeknight dinners at home with my family around the table in the 1970s and '80s.  Oh my gosh, I burst into tears when I licked the spoon and got a taste!

    Growing up, I remember a mayo jar tucked neatly on the glass shelf of our fridge, with this gorgeous green dressing inside.

    A bunch of green onions and a recipe card for green goddess salad dressing handwritten.

    Green Goddess Dressing Recipe

    I cherish this recipe card in my Mothers handwriting. It was one of her all-time favorite salad dressing recipes. Be sure to check out all our Salad Recipes on Delicious Table!

    Green Goddess Dressing Ingredients

    So what is in Green Goddess Dressing? Well, the original recipe has very simple ingredients.

    • 1 cup mayonnaise
    • ½ cup sour cream
    • ⅓ cup finely minced flat-leaf parsley
    • 3 tablespoons finely chopped fresh chives and or green onions
    • 3 tablespoons anchovy paste (or swap 3 anchovy fillets)
    • 3 tablespoons tarragon wine vinegar (see recipe notes to make it at home or for swaps)
    • 1 tablespoon fresh lemon juice
    • 1 clove garlic crushed
    • pinch kosher sea salt
    • pinch black pepper
    1. In a blender or food processor, add mayonnaise, sour cream, finely minced parsley, green onions (and or chives), anchovy paste, tarragon vinegar (or white wine vinegar), lemon juice, crushed garlic, kosher sea salt, and black pepper.
    2. Blend on high speed until smooth about 30 seconds until it reaches a creamy texture. then chill until ready to use in a covered bowl or jar with a lid.
    A white table with ingredients to make green goddess dressing all labeled.
    Making green goddess dressing in a blender with all the ingredients.

    Recipe Notes, Swaps, and Variations

    Most modern recipes call for avocado. The original recipe has been turned into a vegan green goddess dressing. But that's not the way it was made in Southern California even though we are known worldwide for our avocados!

    In my humble opinion, this is the original recipe from back in the day and is the best Green Goddess Dressing recipe.

    Those variations are all up to you, but hey this is so good, why change a California classic?

    Vinegars: White wine vinegar is the best tarragon vinegar substitute, Champagne vinegar, apple cider vinegar, or rice vinegar may be used but it won't be the same taste.

    Best Substitutes For Tarragon Vinegar: In the last year, I could not find tarragon vinegar at my grocery store. You can make tarragon vinegar at home. Mix 1 cup white wine vinegar and put 1 teaspoon dried tarragon in a tea strainer or a tablespoon of fresh tarragon leaves. Let it steep at room temperature for a few days, and it flavors the vinegar to use in recipes. You can also place fresh tarragon in white wine vinegar, and it will flavor the vinegar!

    Flavor Variations: As recipes do, they all evolve over time. There are so many green goddess versions with mint, cilantro, cloves garlic, basil, dill, ripe avocado, cashews, lime juice, and just a few teaspoons of anchovy paste.

    Anchovy Paste: Substitute canned anchovies with 2-3 whole anchovies for 3 tablespoons of anchovy paste. Also, you can reduce the amount of anchovy paste if you prefer as it is a strong flavor.

    A clear glass bowl with a spoon dipping into Green Goddess dressing.

    Green Goddess Salad Dressing Recipes became very popular in the 70s and most people might think it was named for its green-tinted color, but there is a great deal of history with this recipe.

    It has come in and out of popularity over the decades, both as a homemade salad dressing and sold bottled in grocery stores since the 1920s.

    Modern versions often include ingredients like Greek yogurt in place of mayonnaise, avocado, egg yolks, Dijon mustard, and tarragon leaves. Recipes do change with time, but the original is so good.

    History

    Food historians give credit to Executive Chef Philip Roemer of the Palace Hotel in San Francisco California, who invented Green Goddess Salad Dressing in 1923 to honor actor George Arliss, who was staying in the hotel while he starred in a play called “The Green Goddess.”

    It is widely believed, that Chef Roemer’s Green Goddess salad dressing was created after sauce verte au pain by a French Chef to Louis XIII. Today, Sauce Verte has a mayonnaise base, with herbs like tarragon, parsley, and sage.

    Small white plate with silver fork and greens tossed in green goddess salad dressing.

    Mom's Original 1970s Recipe For Green Goddess Dressing

    I will never be sure how my Mom got this recipe in the 1970s, but it was very popular among her friends. Many of those Ladies were home economists. Mom was an amazing home cook and taught cooking classes as a high school teacher in Southern California.

    Our home life was filled with delicious homemade meals, entertaining guests was a weekly event and part of our family life. We were either preparing for dinner parties or cleaning up from one!

    Mom had many family friends who were cookbook authors, cooking instructors, appliance demonstration experts, and food stylists. From an early age, food, cooking, and entertaining were a big part of my life.

    How Can I Use It?

    There are so many ways to use this classic California recipe for salad dressing. Try your recipe for Green Goddess Salad Dressing on a relish tray as a veggie dip, for a fried shrimp sauce, or toss it into hot pasta.

    • Drizzle it as a Green Goddess Sauce onto grilled, fried, or roasted shrimp!
    • Serve with steamed artichokes.
    • Use as a Green Goddess Salad dip.
    • Serve as a sauce with oysters.
    • Use as a roasted vegetable sauce topping.
    • Dollup on grilled or baked chicken.
    • Drizzle on a Chilled Iceberg lettuce salad
    • Serve veggies with this flavorful dip on a crudité platter with carrots, radishes, cherry tomatoes, broccoli...
    A purple cabbage filled with dip and a lady dipping a small orange carrot into it.
    How do you store this Original Green Goddess Dressing Recipe?

    This dressing can be made ahead for the week, chilled in the fridge, and drizzled over salads greens during your busy weeknights or your next dinner party. Or use it up as a dip with cut-up vegetables.
    -Keep in a small Mason jar in the fridge for up to a week.
    -Serve as a dip, or toss with salad greens for a dressing - makes 2 cups.

    How to serve Green Goddess Salad Dressing?

    Over a simple green salad is the best, use fresh spinach, herbs, mixed salad greens or a wedge. Just pour, and toss.

    Is Green Goddess Dressing Keto?

    Yes! This dressing is great for those of you following low-carb Keto diets.

    Clear glass bowl with glass spoon and a pile of green onions and parsley.

    More Salad Dressing Recipes

    The best Ranch Dressing because it uses real fresh ingredients. It is easy, made in minutes, and you pop the buttermilk dressing right in the fridge to enjoy all week.

    "Make and Shake" this Meyer Lemon Vinaigrette in a Mason jar in just minutes. Store in the fridge for up to two weeks. Better than any bottled dressing.

    Parmesan Lemon Vinaigrette is made in a mason jar, this homemade salad dressing recipe is made in minutes with real lemon and parmesan cheese.

    With just 5 simple ingredients, this Blue Cheese Dressing is an easy recipe made in minutes. It also works great as a dip for buffalo wings or a chip dip.

    • A large Mason jar filled with ranch dressing made at home with a small serving bowl and spoon.
      Homemade Buttermilk Ranch Dressing
    • A vintage silver spoon resting on an open jar of vinaigrette.
      Meyer Lemon Citrus Vinaigrette
    • A mason jar with lemon vinaigrette inside on a messy cutting board.
      Parmesan Lemon Vinaigrette
    • A ceramic plate with sliced apples, chicken on lettuce with homemade blue cheese dressing.
      Blue Cheese Dressing

    Did you love this recipe? We would love to hear from you! If you make this recipe and love it, give it a 5-star rating ⭐⭐⭐⭐⭐ with a comment. THANK YOU!! Follow Delicious Table with my free newsletter and share this recipe with your friends on Facebook, Pinterest, and Instagram.

    A small glass bowl with green goddess dressing and white plates of mixed salad greens on a table.
    Print

    Green Goddess Dressing: Original California Recipe Without Avocado

    Green Goddess Dressing bursts with fresh herb flavor. This original Green Goddess Dressing recipe became a wildly popular Southern California recipe in the 1970s. Serve as a salad dressing, a cold dip with vegetables, with grilled shrimp, or toss into hot pasta.
    Course Dinner & Main Dishes, lunch, Salads & Dressing
    Cuisine American
    Keyword green goddess dressing, green goddess dressing recipe, green goddess recipe, green goddess salad, green goddess salad dressing, green goddess sauce
    Prep Time 10 minutes minutes
    Total Time 10 minutes minutes
    Servings 32 2-tbsp servings (2 cups)
    Calories 58kcal
    Author Lisa Hatfield

    Ingredients

    Green Goddess Dressing Ingredients

    • 1 cup mayonnaise
    • ½ cup sour cream
    • ⅓ cup finely minced parsley
    • 3 tablespoons finely chopped chives and or green onions
    • 3 tablespoons anchovy paste (or swap 3 anchovy filets)
    • 3 tablespoons tarragon wine vinegar (see recipe notes to make it at home)
    • 1 tablespoon fresh lemon juice
    • 1 clove garlic crushed
    • pinch kosher sea salt
    • pinch black pepper
    US Customary - Metric

    Instructions

    • In a blender, add mayo, sour cream, minced parsley, green onions (or chives), anchovy paste, tarragon vinegar, lemon juice, crushed garlic, sea salt, and pepper.
    • Keep in a small Mason jar in the fridge for up to a week.
    • Serve as a cold dip, or toss with salad greens for a dressing - makes 2 cups.

    Video

    Notes

    Storage

    This dressing can be made ahead for the week, chilled in the fridge, and drizzled over salads greens during your busy weeknights or your next dinner party. Or use it up as a dip with cut-up vegetables!

    • Keep in a small Mason jar in the fridge for up to a week.
    • Serve as a dip, or toss with salad greens for a dressing - makes 2 cups.

    Nutrition

    Calories: 58kcal | Carbohydrates: 0g | Protein: 0g | Fat: 6g | Saturated Fat: 1g | Cholesterol: 6mg | Sodium: 102mg | Potassium: 18mg | Fiber: 0g | Sugar: 0g | Vitamin A: 90IU | Vitamin C: 1.2mg | Calcium: 9mg | Iron: 0.1mg

    Easy Taco Salad

    [heart_this] · Jan 10, 2024 · 2 Comments

    A white plate full of taco salad topped with taco meat, grated cheese, Fritos, sour cream, black olives and tomatoes.

    Last Updated July 9th, 2026 at 11:24 am by Lisa

    Whip up this easy Taco Salad recipe loaded with all the best Mexican food toppings, two recipes for dressings, and all kinds of topping ideas. Plus get my secret ingredients for the most flavorful taco meat!

    And the best part of Mexican taco salad is of course the Fritos or Doritos. Serve as a lunch, taco night family dinner with these taco bar ideas, or on taco Tuesday! And pile on your favorite ingredients...

    This classic taco salad reminds me of summertime at the beach or lounging poolside with family and friends.

    My Mom made this recipe every summer, it was our favorite as kids. And of course, she taught me how to make a taco salad her way!

    So what goes into a taco salad?

    The Best Taco Salad Recipe

    This simple recipe hits the spot on so many levels, the fresh toppings like tomato, olives, onions, and bell pepper mixed with salty chips and seasoned ground beef are scrumptious together.

    Add toppings you and your family love, like creamy avocado and sour cream. There are 35+ topping ideas are listed below. For a twist, make a Dorito taco salad recipe with crushed chips on top. Or make it the way we always did with crunchy Fritos.

    Taco Salad Ingredients

    The ingredients for taco salad are straightforward, but like tacos, many people have their favorite toppings. Here are the basic ingredients of taco salad, and then make it just the way you want!

    Taco Meat

    • 1.5 lb ground beef 80/20
    • 1 cup fire-roasted salsa
    • ¼ cup Lawry's taco seasoning

    Salad Toppings

    • 1 head romaine lettuce sliced thin
    • ½ head iceberg lettuce sliced thin
    • 1 cup black beans drained and rinsed
    • 2 cups mini heirloom tomatoes sliced in half
    • 1 avocado diced
    • ½ cup sour cream
    • 1 cup red and yellow bell pepper square dice
    • ½ cup pickled jalapenos
    • ½ cup sliced black olives
    • ½ cup green onions sliced thin
    • 2 cups Fritos (or Doritos)
    • 1 cup Colby or cheddar cheese shredded
    • Ground Beef – The taco seasoning and salsa make the BEST spicy ground beef! I like to use 80% Angus beef, you can drain the fat if you wish. 70% lean ground beef will work fine as well. You can also use lean ground turkey in this recipe or cooked diced chicken.
    • Fire Roasted Salsa – One of my favorite ways to make ground beef taste amazing. Any salsa works, but fire-roasted packs a lot more flavor. Another option is to make your own homemade salsa.
    • Taco Seasoning: An easy fast way to spice up your meat, has classic Mexican spices like cumin, chili powder, and oregano plus many others. I love and highly recommend Lawry's Taco Seasoning! It is a Southern California company based in Los Angeles. Or use a homemade taco seasoning recipe.
    • Lettuce: Romaine lettuce and iceberg lettuce work so well together, and I like using up lettuce this way. Fresh spinach or mixed greens would work fine for a lighter salad.
    • Salad Chips: Okay, in my humble opinion taco FRITO salad is the best. But hey you can use white or blue tortilla chips, nacho cheese Doritos, or thin tortilla strips. Most people crush the chips so you can eat the taco salad with Doritos on a fork.
    • Tomatoes: The little cherry tomatoes or grape tomatoes are great, I like the mini little yellow and red ones, but you can dice large juicy tomatoes too.
    • Avocado: Need I say more? I love avocados, they add pretty color and creaminess that make the salad interesting. Be sure to squeeze on lime juice to keep them fresh and bright green.
    • Sour Cream: Adds that cool and creamy, balance to the spicy fire-roasted salsa and jalapenos.
    • Cheeses: I used Colby and cheddar cheese. A mixed Mexican cheese blend is great, mozzarella or even pepper jack are all delicious.
    • Black Beans: Hearty black beans add protein and texture.
    • Green Onions: Thinly sliced, and add a nice bite, you could also use pickled red onions or sweet onions like Vidalias diced finely.
    • Pickled Jalapeno Peppers: I like to chop them finely, but the whole is fine. They add a "spicy jalapeno twang". You could slice or dice fresh jalapenos too, just taste them before adding them as some are too hot out of the jar.
    • Black Olives: A classic in my family, my Mom always added these!
    • Bell Pepper: Red and yellow peppers are so beautiful on top, and add more crunch.
    • Taco Salad Dressings: Popular dressings are the famous taco salad Catalina dressing or Taco Salad Dressing. Read on for how to make either or both of these!

    Recipe Instructions For Taco Salad Meat Mixture

    Use a heavy (cast iron) large skillet over medium heat.

    The secret to this delicious meat filling is to add lots of flavors. Browned ground beef just doesn't have all the flavor.

    You can drain grease from the browned ground beef if you wish.

    Once the ground beef is browned over medium-high heat and no longer pink, add the salsa and a little packet of taco seasoning. Stir with a wooden spoon to mix and combine well.

    And if you have leftovers, use up in ground beef tacos!

    Assemble The Salad

    1. Place the thinly sliced romaine and iceberg bed of lettuce on a plate, top with taco meat, black beans, tomatoes, avocado, sour cream, bell pepper, pickled jalapenos, green onions, black olives, Fritos, and grated cheese.
    2. Another option is to place all the ingredients in a large salad bowl, give it a good toss, and let people add their own dressing they like.
    3. For dinner time or at parties, it is nice to serve this buffet style. Place all the ingredients in separate bowls, and let people build their own. The whole family will be happy too!

    Taco Salad Dressing

    You can add a dressing if you like, this recipe tastes amazing without dressing, but many people love these taco salad dressing recipes.

    • Catalina Dressing: To make Catalina Dressing, whisk 1⁄2 cup ketchup, ½ cup sugar, ½ cup red wine vinegar, ½ cup grated onion, 1 teaspoon paprika, 1 teaspoon Worcestershire sauce,½ cup vegetable oil, ½ teaspoon sea salt, ¼ teaspoon pepper.
    • Taco Salad Dressing: Mix 1 cup of Ranch Dressing, ½ cup salsa, and 1 tablespoon of taco seasoning to make homemade taco dressing.

    Taco Salad Bowls

    So many people love taco bowls! I can remember when this first became popular at restaurants. Whether you buy taco salad shells at the store or use your favorite taco bowl recipe.

    For a great presentation, a taco salad in shells is a nice presentation and would be fun for a party like a bridal shower or family cookout!

    More Topping Ideas

    There are so many different ingredients in a taco salad. To make a healthy taco salad, skip the Fritos and Dorito chips, go light on higher-calorie toppings like cheese and sour cream, and you can swap in ground turkey or ground chicken for ground beef.

    Many of these ideas can also make a healthy taco salad recipe. Try some of these fun additions with links to my other recipes on Delicious Table!

    • avocado salsa
    • cilantro
    • grilled sweet corn kernels
    • red onion or pickled red onions
    • baked strips of flour tortillas
    • ground turkey, ground chicken, cubed chicken
    • grilled tri-tip or carne asada
    • guacamole
    • hot sauce
    • cucumber
    • your favorite salsa or homemade salsa!
    • crushed Doritos (small pieces)
    • crunchy tortilla strips
    • fried corn tortillas
    • pinto beans or kidney beans
    • homemade pico de gallo
    • refried beans
    • rice
    • crispy tortilla bowl
    • sour cream
    • radish slices
    • baked taco salad shell bowls
    • Catalina dressing
    • taco salad dressing

    Taco Salad FAQ

    What's Good To Serve With Taco Salad?

    Try guacamole, chips, and salsa. Or drizzle on some green taco sauce or salad dressing like Catalina.

    Drinks like CoronaRita Margaritas, Micheladas, or my easy Margaritas will be the perfect sipper.

    Another idea is to serve Mexican street corn (elotes), you can even cut the corn off and put it right on top!

    A hot bean and cheese dip would go great, and a 7 Layer Dip, or dessert Churros would be amazing sides.

    Fritos on top of taco salad with sour cream, avocado, tomatoes, and olives.

    More Salad Recipes

    Cobb Salad is a classic loaded with delicious toppings like tomato, chicken, crumbled bacon, avocado, and chopped eggs. Made famous in Hollywood at the Original Brown Derby restaurant, this flavorful dish is served with a Special French Dressing.

    Seven-Layer Salad also known as an overnight or "7 Layer Salad", is a festive and a perfect party food recipe that serves large groups for picnics, potlucks, and cookouts, or as a BBQ side.

    Make an easy Roast Chicken Apple Salad topped with Blue Cheese Dressing that you "Make and shake" in a Mason jar, plus learn how to oven-roast chicken breasts.

    When it's hot or you are serving grilled food, try this icy cool Wedge Salad with Pistachio-Avocado Dressing. It is an easy recipe and refreshing cookout side with hot grilled steaks, chicken, or shish kabobs. It works great for lunch with hot soup or a sandwich.

    • A white square plate filled with colorful Cobb Salad made with chicken, eggs, avocados, tomatoes, and bacon.
      Cobb Salad
    • A glass trifle dish filled with 7 Layer Salad full of colorful ingredients.
      7 Layer Salad
    • A ceramic plate with sliced apples, chicken on lettuce with homemade blue cheese dressing.
      Blue Cheese Dressing
    • Wedge salad with avocado dressing drizzled on top with pistachios on a black slate board.
      Iceberg Wedge Salad

    Did you love this recipe? We would love to hear from you! If you make this recipe and love it, give it a 5-star rating ⭐⭐⭐⭐⭐ with a comment. THANK YOU!! Follow Delicious Table with my free newsletter and share this recipe with your friends on Facebook, Pinterest, and Instagram.

    A white plate full of taco salad topped with taco meat, grated cheese, Fritos, sour cream, black olives and tomatoes.
    Print

    Easy Taco Salad ~ 35+ Topping Ideas

    Taco Salad with 35+ topping ideas plus a delicious taco meat recipe. Works as lunch, family dinner, or party food for a large gathering.
    Course Main Course
    Cuisine Mexican
    Keyword classic taco salad, easy taco salad recipe, taco meat, taco salad, taco salad recipe
    Prep Time 20 minutes minutes
    Cook Time 15 minutes minutes
    Total Time 35 minutes minutes
    Servings 6
    Calories 795kcal
    Author Lisa Hatfield

    Equipment

    • Large Cast Iron Skillet
    • Epicurean Non-Slip Cutting Board
    • Chef Knife
    • Rubbermaid Leak-Proof Food Storage Containers

    Ingredients

    Taco Meat

    • 1.5 lb ground beef 80/20
    • 1 cup fire-roasted salsa
    • ¼ cup packet Lawry's Taco Seasoning Mix

    Salad

    • 1 head romaine lettuce sliced thin
    • ½ head iceberg lettuce sliced thin
    • 1 cup black beans drained and rinsed
    • 2 cups mini heirloom tomatoes sliced in half
    • 1 avocado diced
    • ½ cup sour cream
    • 1 cup red and yellow bell pepper square dice
    • ½ cup pickled jalapenos
    • ½ cup sliced black olives
    • ½ cup green onions sliced thin
    • 2 cups Fritos
    • 1 cup colby or cheddar cheese shredded

    Instructions

    Taco Meat

    • In a large heavy (cast iron) skillet over medium heat add the ground beef, salsa, and taco seasoning.
    • Brown the ground beef, and stir to mix well. You can drain the juicy beef if you wish.

    Assemble The Salad

    • Place the thinly sliced romaine and iceberg bed of lettuce on a plate, top with taco meat, black beans, tomatoes, avocado, sour cream, bell pepper, pickled jalapenos, green onions, black olives, Fritos, and grated cheese.
    • If you would like dressing, try either Catalina Dressing; 1⁄2 cup ketchup, ½ cup sugar, ½ cup red wine vinegar, ½ cup grated onion, 1 teaspoon paprika, ½ teaspoon Worcestershire sauce, 1 cup salad vegetable oil, ½ teaspoon sea salt, ¼ teaspoon pepper.
      OR this Taco Salad Dressing; mix 1 cup ranch dressing, ½ salsa, and 1 tablespoon taco seasoning mix.
    • Store the leftover meat in an airtight container, and each topping in a separate container in the refrigerator. You can enjoy ground beef taco salad for several days or make tacos!

    Video

    Notes

    dressing (optional)

    You can add a dressing if you like, this recipe tastes amazing without one. If you would like dressing, try either these!
    • Try either Catalina Dressing, 1⁄2 cup ketchup, ½ cup sugar, ½ cup red wine vinegar, ½ cup grated onion, 1 teaspoon paprika, 1 teaspoon Worcestershire sauce, ½ cup salad vegetable oil, ½ teaspoon sea salt, ¼ teaspoon pepper.
    • Taco Salad Dressing; Mix 1 cup Ranch Dressing, ½ cup salsa, and 1 tablespoon seasoning to make homemade taco salad dressing.

    More Taco Salad Toppings

    • avocado salsa taco sauce
    • grilled sweet corn kernels
    • red onion or pickled red onions
    • baked strips of flour tortillas
    • ground turkey or ground chicken
    • grilled tri-tip or carne asada
    • guacamole
    • hot sauce
    • cucumber
    • your favorite salsa or homemade salsa!
    • cooked diced chicken
    • crushed Doritos (small pieces)
    • crunchy tortilla strips
    • fried corn tortillas
    • pinto beans or kidney beans
    • homemade pico de gallo
    • refried beans
    • rice
    • crispy tortilla bowl
    • sour cream
    • radish slices
    • baked taco shell bowls
    • Catalina dressing
    • taco salad dressing

    Ingredient Notes

      • Ground Beef – The taco seasoning and salsa make the BEST spicy ground beef! I like to use 80% Angus beef, you can drain the fat if you wish. 70% lean ground beef will work fine as well. You can also use lean ground turkey in this recipe or cooked diced chicken.
      • Fire Roasted Salsa – One of my favorite ways to make ground beef taste amazing. Any salsa works, but fire-roasted packs a lot more flavor. Another option is to make your own homemade salsa.
      • Taco Seasoning: An easy fast way to spice up your meat, has classic Mexican spices like cumin, chili powder, and oregano plus many others. I love and highly recommend Lawry's Taco Seasoning! It is a Southern California company based in Los Angeles. Or use a homemade taco seasoning recipe.
      • Lettuce: Romaine lettuce and iceberg lettuce work so well together, and I like using up lettuce this way. Fresh spinach or mixed greens would work fine for a lighter salad.
      • Salad Chips: Okay, in my humble opinion taco FRITO salad is the best. But hey you can use white or blue tortilla chips, nacho cheese Doritos, or thin tortilla strips. Most people crush the chips so you can eat the taco salad with Doritos on a fork.
      • Tomatoes: The little cherry tomatoes or grape tomatoes are great, I like the mini little yellow and red ones, but you can dice large juicy tomatoes too.
      • Avocado: Need I say more? I love avocados, they add pretty color and creaminess that make the salad interesting. Be sure to squeeze on lime juice to keep them fresh and bright green.
      • Sour Cream: Adds that cool and creamy, balance to the spicy fire-roasted salsa and jalapenos.
      • Cheeses: I used Colby and cheddar cheese. A mixed Mexican cheese blend is great, mozzarella or even pepper jack are all delicious.
      • Black Beans: Hearty black beans add protein and texture.
      • Green Onions: Thinly sliced, and add a nice bite, you could also use pickled red onions or sweet onions like Vidalias diced finely.
      • Pickled Jalapeno Peppers: I like to chop them finely, but the whole is fine. They add a "spicy jalapeno twang". You could slice or dice fresh jalapenos too, just taste them before adding them as some are too hot out of the jar.
      • Black Olives: A classic in my family, my Mom always added these!
      • Bell Pepper: Red and yellow peppers are so beautiful on top, and add more crunch.
    •  

    Nutrition

    Serving: 6g | Calories: 795kcal | Carbohydrates: 46g | Protein: 37g | Fat: 53g | Saturated Fat: 21g | Cholesterol: 130mg | Sodium: 1606mg | Potassium: 1312mg | Fiber: 13g | Sugar: 10g | Vitamin A: 12266IU | Vitamin C: 54mg | Calcium: 441mg | Iron: 6mg

    Caramel Apple Crisp

    [heart_this] · Nov 15, 2023 · 5 Comments

    A round white dish of fresh baked caramel apple crisp with a large serving spoon for a Fall dessert.

    Caramel Apple Crisp is an easy Fall dessert that tastes just like caramel apples! It is made with just 7 ingredients, and has a golden brown crisp topping and crust, sweet apples, and melted gooey caramel candy.

    When the leaves are falling and things slow down. It's the time of year to make cozy dinners, sip hot cider drinks, and go apple picking with the whole family. Be sure to serve this apple dessert with a big scoop of vanilla ice cream...

    Caramel Apple Crisp Recipe

    For an easy, fast dessert this is the best apple crisp and great for all cooks at all levels! And the melted caramel twist adds that extra chewy sweetness. It's the best way to use up a few leftover apples before they are too ripe.

    What is nice about this baked dessert is that it can be made ahead, is really good with several types of classic apple varieties. And the best part is you can put it together in 15 minutes with a 45-minute bake time. So in about an hour, you have the ultimate Fall dessert...

    Caramel Apple Crisp Dessert Ingredients

    • Honeycrisp apples
    • candy caramels (unwrap each caramel, and cut in four pieces)
    • oats
    • all-purpose flour
    • brown sugar (light or dark)
    • cinnamon
    • butter 
    • vanilla ice cream optional

    Baking Instructions

    Prepare The Caramels & Apples

    1. Preheat oven to 375 degrees.

    2. Next, unwrap the caramels, and cut each one into 4 small pieces. Set aside. Reserve ¼ cup of cut caramel pieces for the top of the crisp.

    Cutting caramel candy into smaller pieces to make a caramel apple crisp.

    3. Wash the apples. I really like Honeycrisp for this recipe. They have the right texture and sweetness. Next, I like to remove the seeds/core using a handled corer slicer or a good serrated knife.

    Cut into ½" small pieces. Set aside in a medium bowl.

    4. Squeeze on some lemon juice if you are not baking right away to keep them from browning.

    Assemble The Crisp

    5. Soften 2 cubes (1 cup) of butter in the microwave for 1 minute on low heat.

    6. In a large bowl, mix the butter with dry ingredients. Add melted butter, cinnamon, oats, flour, and brown sugar. Combine mixture until crumbly using a spatula or a pastry blender until all the ingredients are well incorporated.

    7. Spray a large 9 x 13 glass baking dish, 9 x 13-inch pan, or large cast iron skillet with non-stick spray.

    8. Sprinkle 3 cups of the crumbled oat mixture into the bottom of the dish evenly, pressing with a measuring cup.

    9. Next, layer ½ apples, and ½ caramel pieces, and sprinkle 2 more cups of the crumbled crisp mixture on top.

    PRO TIP: You can prep this easy apple crisp ahead by a few hours or even overnight-just coat your apple pieces with lemon juice. Cover with plastic wrap to chill in the fridge. Bring to room temperature for 1 hour, remove the wrap, and then bake!

    10. Repeat the last layer with the other ½ apples and sprinkle the remaining crumble mixture on top and decorate with the rest of the caramel pieces on top of the apples.

    Baking The Dessert

    11. Bake in the oven at 375 degrees for 45 minutes.

    Serve with a big scoop of vanilla ice cream or homemade whipped cream.

    Leftovers can be stored in an airtight container, and reheated in the microwave, oven, or air fryer.

    Close up of a caramel apple crisp baked in a dish.

    Variations

    Lots of Caramel Sauce: There are a lot of recipes out there where you put dollops of gooey caramel sauce (or salted caramel sauce) on top. Heck, you can even make your own homemade caramel sauce and then give your crisp a caramel drizzle instead of using unwrapped caramel candies. Either works, but I love the little bits of chewy caramel in every bite!

    Other Fruit Crisp Flavors:  For a little different option of baked fruit dessert, try a peach crisp + candied ginger, or strawberries and rhubarb + a honey drizzle, or mixed berries + a buttery crumble topping!

    What are the best apples for apple crisp?

    One of the best things to do in the Fall is head out to your local apple orchard. Pick your own crisp kind of apple you love, and sip cider afterward... it's heaven!

    A graphic showing two kinds of apples, Granny Smith and Honeycrisp in wood bowls.

    Other good choices at your grocery store for the apple mixture for this recipe are both tart and sweet apples like Honeycrisp, Braeburn, Granny Smith Apples (green apples), Golden Delicious, Pink Lady, and Jonathan/Jonagold. These are all good firm varieties that will give you the best results and are great options.

    Avoid baking with Red Delicious, Fuji, or Gala apples, they just don't hold up to the heat of cooking and baking.

    A honeycrisp apple in a ratan basket up close, with bright pink and yellow colors.
    What is the difference between a caramel apple crisp and a caramel apple crumble?

    It all comes down to the crust and topping. A crumble does not use oatmeal in the crust or topping!

    What is the difference between caramel sauce and butterscotch?

    Caramel Sauce is made with granulated white sugar + butter + heavy cream + sea salt
    Butterscotch is made with brown sugar + melted butter
    Dulce de leche is made with regular milk + granulated white sugar + baking soda

    More Baking Apple Recipes

    These are some of my favorite recipes for a delicious dessert to serve for a family dinner, a special occasion, or the holidays.

    My family heirloom recipe for Apple Crumble Pie made with homemade Pie Filling, a "foolproof" crust, and a crumble topping makes this one scrumptious recipe. Some people also call this a Dutch or French Apple Pie, and it is one of America's favorite desserts.

    An easy Apple Pie Filling using crisp fresh apples and warm spices that can be made ahead and is freezer-friendly. A Classic apple pie recipe is one of the most popular American recipes of all time. And there is nothing better in the Fall season, than baking your favorite dessert like a warm pie or apple turnovers with flaky crusts in the oven!

    Bake a delicious traditional Apple Crisp with a sweet crust, caramelized filling apple mixture, and a streusel crumb topping. Top with vanilla ice cream and an extra drizzle of caramel sauce. Serve this easy dessert after a nice family dinner, and it is fancy enough for the holidays or other special occasions!

    • A white pie dish with a slice of apple crumble pie, also known as a dutch apple pie with a crumbled topping and green apples in the background in a wood bowl.
      Dutch Apple Pie
    • A large jar filled with apple pie filling with a lid and bow.
      Apple Pie Recipe Filling
    • Apple Crisp in a red bowl with a silver spoon, ice cream, and drizzled with caramel sauce.
      Apple Crisp

    More Apple Appetizer Recipes

    Salted Caramel Apple Dip has crisp green apples, salted caramel sauce, and crushed Health bars. A beloved recipe and pot-luck party hit for Thanksgiving, Halloween, and all through Autumn. As people dig in for another bite, they will ask you for this recipe...I promise.

    If you like caramel apples, then you will love these Caramel Apple Brie Appetizers, a scrumptious combination of creamy brie, the crunch of macadamia nuts, and tart-sweet dried cranberries. It is addictive...

    • Slices of green Granny Smith apples around a white dish with a sweet dessert dip inside a low small white dish with a ruffled edge, and a piece of apple sticking into the dip.
      Caramel Apple Dip
    • A white platter filled with apple brie skewers for Thanksgiving appetizers.
      Caramel Apple Brie Appetizers

    Did you love this recipe? We would love to hear from you! If you make this recipe and love it, give it a 5-star rating ⭐⭐⭐⭐⭐ with a comment. THANK YOU!! Follow Delicious Table with my free newsletter and share this recipe with your friends on Facebook, Pinterest, and Instagram.

    A round white dish of fresh baked caramel apple crisp with a large serving spoon for a Fall dessert.
    Print

    Easy Caramel Apple Crisp Recipe

    Easy fall dessert and made with 7 ingredients, Baked Caramel Apple Crisp Dessert tastes like caramel apples! Serve warm with scoops of vanilla ice cream.
    Course Desserts & Sweets
    Cuisine American
    Keyword caramel apple crisp, caramel apple crisp dessert, caramel apple dessert, easy caramel apple crisp, Fall Dessert, Thanksgiving dessert
    Prep Time 15 minutes minutes
    Cook Time 45 minutes minutes
    Total Time 1 hour hour
    Servings 12
    Calories 536kcal
    Author Lisa Hatfield

    Equipment

    • Apple Corer Slicer
    • Small Serrated Knife
    • Epicurean Non-Slip Cutting Board

    Ingredients

    • 8 cups Honeycrisp apples 5 large or 6-7 small
    • 11 ounces caramels unwrap each caramel, cut into four pieces or buy Caramel bits
    • 3 cups rolled oats
    • 2 cups all-purpose flour
    • 1 ½ cups brown sugar
    • 1 teaspoon cinnamon
    • 1 cup butter 2 sticks, melted
    • vanilla ice cream optional
    US Customary - Metric

    Instructions

    • Preheat oven to 375 degrees.
    • Unwrap caramels, and cut each one into 4 small pieces. Set aside.
    • Wash apples, and remove seeds/core using an apple corer slicer or knife. Cut into ½" small pieces, place into a bowl, and squeeze some lemon juice on the pieces if you are not baking right away to keep them from browning. Set aside.
    • Soften 2 cubes (1 cup) of butter in the microwave for 1 minute on low heat.
    • In a large bowl, mix the dry ingredients. Combine melted butter, cinnamon, oats, flour, and brown sugar. Combine mixture until crumbly using a spatula or a pastry blender until all the ingredients are well incorporated.
    • Spray a large 9 x 13 glass baking dish, pan or large deep cast iron skillet with non-stick spray.
    • Sprinkle 3 cups of the crumble mixture into the bottom of the dish evenly. Press the crust flat with a measuring cup to the edges.
    • Next, layer ½ apples, and ½ cut pieces of caramels, and sprinkle 3 more cups of the crumbled crisp mixture on top.
    • Repeat the last layer with the other ½ apples, sprinkle the remaining crumble mixture on top. Decorate with the rest of the caramel pieces on top of the apples.
    • Bake 375 degrees for 45 minutes.
    • Serve with a big scoop of vanilla ice cream or whipped cream.

    Video

    Notes

    What are the best apples for apple crisp?

    Other good choices at your grocery store for the apple mixture for this recipe are both tart apples and sweet apples like Honeycrisp, Braeburn, Granny Smith apples, Golden Delicious, Pink Lady, and Jonathan/Jonagold . These are all good firm varieties that will give you the best results and are great options.
    Avoid baking with Red Delicious, Fuji, or Gala apples, they just don't hold up to the heat of cooking and baking.


    Nutrition

    Calories: 536kcal | Carbohydrates: 88g | Protein: 6g | Fat: 19g | Saturated Fat: 11g | Polyunsaturated Fat: 2g | Monounsaturated Fat: 5g | Trans Fat: 1g | Cholesterol: 42mg | Sodium: 195mg | Potassium: 282mg | Fiber: 5g | Sugar: 53g | Vitamin A: 529IU | Vitamin C: 4mg | Calcium: 84mg | Iron: 2mg

    50 Thanksgiving Dinner Recipes

    [heart_this] · Nov 6, 2023 · Leave a Comment

    Thanksgiving dinner recipes on a table like a carved roast turkey on a platter, mashed potatoes, cranberry sauce, gravy, stuffing, and sweet potato casserole.

    Last Updated January 4th, 2026 at 09:29 am by Lisa

    Look over 50 Thanksgiving dinner recipes with make ahead tips for everything from roast turkey and side dishes to appetizers and desserts!

    Many of these delicious easy recipes can be made in advance. There are Thanksgiving appetizers, traditional main course holiday dinner ideas, classic side dishes, non-traditional options other than turkey, and Southern comfort foods.

    Also, print off your free Thanksgiving planner to create your menu and plans. It's loaded with ideas and helpful tips to host the best Thanksgiving gathering holiday feast with all the best dishes.

    You will find all the classic Thanksgiving recipes like turkey, stuffing or dressing, mashed potatoes, sweet potato casserole, gravy, salads, bread, and so much more. One of the best parts of the holidays besides the turkey, are leftovers, and relaxing. Happy Thanksgiving...

    A Thanksgiving table of dishes including sliced roast turkey

    Table of Contents

    • Thanksgiving Dinner Menu Ideas
    • Easy Thanksgiving Menu
      • Roast Turkey, Gravy Recipe, And Stuffing!
      • Classic Thanksgiving Dinner Sides
    • 50+ Thanksgiving Dinner Recipes
      • Thanksgiving Turkey Recipes
      • Make Ahead Traditional Thanksgiving Dinner Sides
      • Thanksgiving Main Dishes (Non Traditional)
      • Easy Thanksgiving Sides: Vegetables And Holiday Salads
      • Thanksgiving Appetizers
      • Thanksgiving Desserts
      • Fall Cocktails And Holiday Drink Recipes
    • Thanksgiving Leftover Recipe Ideas
    • For A Southern Thanksgiving Dinner
    • Thanksgiving Dinner Planning Tips
      • 1. Invite Family And Guests
      • 2. Menu Creation
      • 3. Thanksgiving Make Ahead Dishes
      • 4. Cooking Schedule
      • 5. Serving Thanksgiving Dinner
      • Download A Free Thanksgiving Dinner Planner!
    • Make Ahead: Thanksgiving Dinner Plan
      • 3 Days Before Thanksgiving
      • Two Days Before Thanksgiving
      • One Day Before Thanksgiving
      • Thanksgiving Day Cooking
    • More Party Food Thanksgiving Recipes
    • More Holiday Party Food

    PRO TIP: Balance your menu with delicious Thanksgiving recipes that are both savory and sweet, light and rich. And consider your guests' food allergies and preferences!

    Thanksgiving Dinner Menu Ideas

    Without a doubt, the star of the show is your Thanksgiving turkey recipe! Here are some of the best ways to cook turkey.

    For many years, I wrestled a whole turkey into a wet brine solution a day ahead of Thanksgiving. It was too much work! And the clean up was always a pain to keep things food safe with raw turkey juices everywhere.

    Today, I go with easier methods to prepare Thanksgiving turkeys, and always prepare sides ahead of time.

    Easy Thanksgiving Menu

    Whether it's a plan for a few people or a large group, this classic Thanksgiving menu has all the best of Thanksgiving, most recipes can be made ahead or have fast preparation times.

    That way you will have enough time to chat with family and guests, to relax and enjoy yourself.

    Roast Turkey, Gravy Recipe, And Stuffing!

    Juicy Herb Butter Turkey Breast Recipe • Easy Recipe • 15 Minute Prep • Great For Leftovers. Way easier than cooking and carving a whole turkey. And so moist and flavorful, and the pan dripping makes the best gravy! 🎥 Be sure to watch the Boneless Sliced Turkey video!

    Turkey Gravy • Delicious Flavor • Step-by-Step Guide • 7 Easy Steps • NO LUMPY Gravy! Really good Turkey pan drippings make the most incredible homemade gravy. 🎥 Be sure to watch the Turkey Gravy video!

    Make Ahead • Easy • Favorite Stuffing Recipes! 🎥 Be sure to watch to Dressing Stuffing Recipe video! A great time saver during the holidays, mix this Sausage Stuffing ahead. Freeze, defrost, fill a baking dish, and bake! The top bakes golden brown with crispy bread crumbs and cubes of French bread on this hearty stuffing. The first day of this dressing is fabulous, but oh that second day is unreal!! 

    What is stuffing vs. dressing?

    Although it's the same ingredients, stuffing is cooked inside a turkey. It soaks up turkey juices and is difficult to cook to a food safe temperature and not dry out the turkey meat. A dressing is baked in a casserole dish and gets a golden crunchy top!

    • Roast Turkey (Dry Brine Recipe)
    • A dark golden roast turkey with a white gravy boat pouring turkey gravy on top.
      Turkey Gravy
    • Top down view of a roasted turkey breast sliced thick and garnished with fresh herbs.
      Turkey Breast Recipe
    • A white casserole dish filled with Sausage Stuffing baked to a golden brown.
      Sausage Stuffing Dressing

    Classic Thanksgiving Dinner Sides

    Make Ahead + 5 Ways To Reheat Them! • Step-by-Step Guide • Smooth & Creamy Make-Ahead Mashed Potatoes are creamy smooth, buttery, fluffy, and melt in your mouth. There are five reheating methods to serve them warm. 🎥 Be sure to watch to Mashed Potato Recipe video!

    For a tropical twist on Cranberry Sauce, this recipe has fresh pineapple and oranges adding a balanced sweetness and much less sugar than traditional recipes.

    Very Easy • No Cooking • Make Ahead • Light & Refreshing! Cranberry Relish has a light fresh taste, sweet and tart, and pairs especially well with turkey.  This recipe has less sugar than a traditional cranberry sauce. 🎥 Be sure to watch to Cranberry Relish Recipe video!

    Super Easy • Hack For Homemade Yeast Rolls • Make Ahead • Light & Fluffy! Easy Soft (Storebought) Dinner Rolls using store-bought frozen dough! Rise them in the fridge overnight then bake fresh the next day. Top with different grated cheeses, seasonings, and fresh herbs.

    • A white casserole dish filled with mashed potatoes and squares of melted butter on top.
      Make-Ahead Mashed Potatoes
    • A crystal bowl filled with cranberry sauce with pineapple and cranberries in the background.
      Pineapple-Orange Cranberry Sauce
    • A gorgeous red and orange cranberry relish in a clear crystal bowl with a spoon.
      Cranberry Relish
    • A close up of baked Frozen Dinner Rolls topped with cheeses, herbs, and seasonings.
      Dinner Rolls

    50+ Thanksgiving Dinner Recipes

    Thanksgiving Turkey Recipes

    PRO TIP: Did you know, you can cook your turkey the day before Thanksgiving? To reheat sliced turkey, simply pour some chicken stock over it, cover with foil in a roasting pan, and rewarm it in the oven. And of course, it is really nice to not have to carve a big turkey bird with guests waiting, trust me!

    Depending on how much turkey you want, here are some great options.

    1. Roast Turkey Dry Brine • Easy Recipe • Flavorful Dry Brine Rub • Prep Ahead Friendly A roast turkey rubbed with seasonings and fresh spices for maximum flavor and crispy skin. 🎥 Be sure to watch the Roasted Turkey Recipe video!

    2. Turkey Gravy • Delicious Flavor • Step-by-Step Guide • 7 Easy Steps • NO LUMPY Gravy! Really good Turkey pan drippings make the most incredible homemade gravy. 🎥 Be sure to watch the Turkey Gravy video!

    3. Boneless Herb Butter Turkey Breast Recipe • Easy Recipe • Juicy With Herb Butter • Prep Ahead Friendly • Great For Sliced Turkey Leftovers. Roast a boneless turkey breast! Way easier than cooking and carving a whole turkey. And so moist and flavorful, and the pan dripping make the best gravy! 🎥 Be sure to watch the Boneless Sliced Turkey video!

    4. A Spatchcock Turkey • Works With Any Regular Turkey • Step-by-Step Guide • Turkey Perfection! Also called a butterflied bird, roasts about 30 minutes faster than most recipes, has golden crispy skin, and juicy meat, and carves like a dream! 🎥 Be sure to watch to Spatchcock Recipe video!

    Roast Turkey (Dry Brine Recipe)

    A Turkey Dry Brine adds bold flavor to your whole bird, and is so easy to put together for your Thanksgiving menu with a good spice blend right from your kitchen! Skip the store-bought mixes, also try this on a boneless turkey breast for leftovers. With simple ingredients, you can mix a big batch of this spice rub to make a beautiful roast turkey anytime during the holiday season.

    ROAST TURKEY DRY BRINE RECIPE
    A dark golden roast turkey with a white gravy boat pouring turkey gravy on top.

    Turkey Gravy

    Make a perfect turkey gravy in just 10 minutes with this step-by-step guide and four simple ingredients. The rich pan drippings from your Thanksgiving turkey add an incredible depth of flavor and is a simple process. Learn my Chef's secret for velvety smooth results and no lumpy gravy!

    TURKEY GRAVY
    Top down view of a roasted turkey breast sliced thick and garnished with fresh herbs.

    Turkey Breast Recipe

    Turkey breast recipe using boneless turkey breast plus a gravy recipe from pan drippings. Easier to roast and carve for Thanksgiving turkey.

    TURKEY BREAST RECIPE
    A collage of spatchcock turkey sliced on a platter, with one in a roasting pan, and on a table with side dishes.

    Spatchcock Turkey

    A Spatchcock Turkey is also called a butterflied bird, roasts about 30 minutes faster than most recipes, has golden crispy skin, and juicy meat, and carves like a dream! Serve roast turkey for your Christmas, holiday, or Thanksgiving dinner feast with lots of sides and desserts for a holiday to remember. This Spatchcock method works with any regular turkey, follow this step-by-step guide to turkey perfection.

    HOW TO SPATCHCOCK A TURKEY

    Make Ahead Traditional Thanksgiving Dinner Sides

    Every year, these are the traditional Thanksgiving menu items I look forward to and have made many so many times for the big day and Friendsgiving.

    Mashed Potatoes & Thanksgiving Stuffing

    1. Make Ahead + 5 Ways To Reheat Them! • Step-by-Step Guide • Smooth & Creamy Make-Ahead Mashed Potatoes are buttery, fluffy, and melt in your mouth. There are five reheating methods to serve them warm. 🎥 Watch the Mashed Potato Recipe video!

    2.  Make Ahead • Easy • Favorite Stuffing Recipes A great time saver during the holidays, mix this Sausage Stuffing ahead. Freeze, defrost, fill a baking dish, and bake! The top bakes golden brown with crispy bread crumbs and cubes of French bread on this hearty stuffing. 🎥 Watch the Dressing Stuffing Recipe video!

    Cranberry Sauce & Relish

    3.  Make Ahead • Easy • Lower Sugar For a tropical twist on Cranberry Sauce, this recipe has fresh pineapple and oranges adding a balanced sweetness and much less sugar than traditional recipes. 🎥 Watch the Cranberry Sauce video!

    4. So Easy • No Cook Recipe • Make Ahead • Light & Refreshing! Cranberry Relish, and delight your friends and family. It has a light fresh taste, a little bit of a crunch, and less sugar than a traditional cranberry sauce. 🎥 Watch the Cranberry Relish Recipe video!

    Sweet Potato Recipes

    5. Easy Recipe • Delicious Thanksgiving Side • Make Ahead • Light & Fluffy! Sweet Potato Casserole, this signature side is the original recipe from the famous Ruth's Chris Steak House. The combination of the pecan crumble and fluffiness of the sweet potato mixture takes this classic holiday side way over the top. 🎥 Watch the Sweet Potato Casserole video!

    6. Easy • Classic Side • Make Ahead The best Sweet Potato Casserole with crunchy pecans, coconut, and toasted marshmallows. It comes together in just about 30 minutes, making it an ideal last-minute side dish. Everything melts together, this is one of those guilty pleasure dishes people love.

    A white casserole dish filled with mashed potatoes and squares of melted butter on top.

    Make-Ahead Mashed Potatoes

    Make-Ahead Mashed Potatoes are creamy smooth, buttery, fluffy, and melt in your mouth. There are five reheating methods here plus tips on how to keep them warm for dinner, or holiday meals like Thanksgiving. We all want that creamy classic buttery warm goodness. And this recipe will help you master this popular side dish!

    MAKE-AHEAD MASHED POTATOES
    A white casserole dish filled with Sausage Stuffing baked to a golden brown.

    Sausage Stuffing Dressing

    Bake a big dish of Sausage Stuffing, this classic holiday side dish is loaded so much flavor. Choose to make it with a spicier or a mild sweet Italian sausage. It also has boxed cornbread stuffing, crunchy celery, soft French bread, sweet dried cherries, and tart dried cranberries all mixed into one heavenly dressing recipe. Deep rich flavor comes from the scrumptious crumbled sausage, it might just become your new stuffing recipe this holiday season. The texture is incredible, there is something different in each bite of this easy side dish. Soft, crunchy, crispy, and chewy all in one happy stuffing.

    SAUSAGE STUFFING DRESSING
    A crystal bowl filled with cranberry sauce with pineapple and cranberries in the background.

    Pineapple-Orange Cranberry Sauce

    Pineapple-Orange Cranberry Sauce has 4 ingredients, and has a wonderfully balanced sweetness with oranges and pineapple, plus 10 ways to use leftover sauce during the holidays! This easy holiday recipe always gets glowing comments at the Christmas holiday table and as one of the most classic Thanksgiving side dishes! And the fresh orange and pineapple fruit add a wonderful island vibe to this gorgeous cranberry sauce recipe.

    PINEAPPLE-ORANGE CRANBERRY SAUCE
    A gorgeous red and orange cranberry relish in a clear crystal bowl with a spoon.

    Cranberry Relish

    The holiday season is filled with big meals and rich heavy food. Let your palate take a welcomed break with a few bites of relish using fresh cranberries! Pair with your Thanksgiving turkey, stuffing, mashed potatoes, and gravy. Make a cranberry orange relish, and delight your friends and family. It has a light fresh taste, a little bit of a crunch, and less sugar than a traditional cranberry sauce. It will be the perfect side dish for Thanksgiving dinner or a Christmas feast.

    CRANBERRY RELISH
    Lifting a scoop of sweet potato casserole out of a white casserole dish with large serving spoon.

    Sweet Potato Casserole (Ruth's Chris Recipe)

    For all you avid fans of the Sweet Potato Casserole at the famous Ruth's Chris Steak House, this is their original recipe and signature side dish. The combination of the fluffiness of the sweet potato mixture topped with a pecan crumble takes this classic holiday side way over the top with a modern twist. It is so scrumptious, the whole family will want seconds and a copy of this delicious copycat recipe.

    RUTH'S CHRIS WHIPPED SWEET POTATO CASSEROLE
    A silver server scooping up sweet potato casserole with golden toasted marshmallows on top out of a white casserole dish.

    Sweet Potato Casserole With Marshmallows

    The BEST Sweet Potato Casserole with marshmallows, with crunchy pecans, toasted coconut. A winning Thanksgiving side or Holiday dish to serve.

    SWEET POTATO CASSEROLE WITH MARSHMALLOWS

    Thanksgiving Main Dishes (Non Traditional)

    Beef Roast • Serves 10 People • 45 Minutes Cook Time • Make an elegant Beef Roast (aka Roast Beef) from tenderloin or New York steak. Wonderful to serve for dinner parties, special occasions, or the holidays with a rich red wine sauce.  

    Double Smoked Ham With Orange Honey Glaze Works With Any Regular Turkey • Step-by-Step Guide • Just Like Honey Baked Hams! Make a twice smoked spiral cut ham just like a smokehouse pit boss. This holiday meal classic has an amazing smoky flavor with an apple cider orange honey glaze!

    Kahlua Pineapple Ham • Easy • Make Great Ham Leftovers • Grilled & Saves Oven Space! Brushed with a heavenly glaze on both the ham and wedges of pineapple. As it bakes, you get gorgeous fruity, candy, caramelized edges.

    Lobster Ravioli with Lemon Butter Sauce • No Boiling Pot of Water! • Baked Ravioli • uses a baked ravioli technique you can make in just over an hour or prep ahead for dinner parties, holidays, and romantic nights.

    Cherry Balsamic Pork Roast • Easy 10-Minute Prep • Makes Great Leftovers • Perfect for family dinner, entertaining, or the holidays. An easy 10-minute prep pork loin recipe that serves a crowd.

    Thick sliced roast beef on a cutting board with pan juices and ingredients in the background.

    Beef Roast

    Serve this Beef Roast Recipe with a wine marinade as an elegant dinner or for the holidays. Slice leftovers for roast beef sandwiches.   

    ELEGANT BEEF ROAST
    A double smoked ham on a outdoor smoker ready to eat.

    Double Smoked Ham With Orange Honey Glaze

    Twice smoked spiral cut ham made just like a famous smokehouse. This double smoked ham has an amazing orange honey glaze with apple cider!

    DOUBLE SMOKED HAM
    A sliver carving fork and knife next to a pork loin roast and topped with cherries.

    Cherry Balsamic Pork Loin

    Easy 10-minute prep, festive Cherry Balsamic Pork Loin serves a large crowd and is perfect for family dinner, entertaining, special occasions, or the holidays! One of the best ways to entertain for a large dinner party is to serve an elegant beautiful pork loin roast with a few simple ingredients.

    CHERRY BALSAMIC PORK LOIN
    A white plate filled with heart shaped lobster ravioli garnished with parsley.

    Lobster Ravioli

    Lobster Ravioli with a Lemon Butter Sauce uses a baked ravioli technique you can prep ahead for dinner parties, holidays, and romantic nights. This recipe can be made ahead with wonton wrappers and baked instead of boiling the ravioli. It is a perfect recipe for the holidays or special dinners like Valentine's Day.

    LOBSTER RAVIOLI
    A spiral baked ham on white platter with wedges of pineapple and sliced oranges.

    Kahlua Pineapple Glazed Ham

    Kahlua Pineapple Glazed Ham elevates party food for holidays and special celebrations. A tropical spin on a classic spiral ham dinner!

    KAHLUA PINEAPPLE GLAZED HAM

    Easy Thanksgiving Sides: Vegetables And Holiday Salads

    A close up of baked Frozen Dinner Rolls topped with cheeses, herbs, and seasonings.

    Dinner Rolls

    Dinner Rolls aka Bread Rolls, are beautiful and easy to make. Brush store-bought frozen rolls with melted butter, and add toppings you love. Grab a bag of frozen dough, and try different grated cheeses, seasonings, and fresh herbs. This hack for homemade yeast rolls gives you perfect golden brown tops with soft fluffy interiors.

    EASY DINNER ROLLS (STOREBOUGHT DOUGH)
    A cornbread muffin in an orange muffin tin paper with a piece out of it and crumbs on the table.

    Cheddar Cheese Jalapeño Cornbread

    Bake these Cheddar Cheese Jalapeño Cornbread Muffins made with just 3 ingredients and are super soft and cheesy. Serve hot with a big slather of honey butter for a dinner like bowls of chili, pork chops, fried chicken or BBQ ribs.

    CORNBREAD MUFFINS
    A loaf of sliced bread filled with a cheesy mixture to make a pull apart crack bread recipe.

    Green Chile Cheese Pull Apart Bread

    Pull Apart Bread is famously also known as "Crack Bread" for a reason, people can't stop eating it! A simple loaf of bakery bread is magically transformed into cheesy goodness with creamy garlic and green chile flavors. It can be a hot appetizer or a dinner side dish. Melty gooey cheese recipe mixture is tucked into the nooks and crannies, then baked to golden deliciousness. You will love the cheese pulls as you grab a piece of this decadent garlicky bread.

    CHILE CHEESE PULL APART BREAD
    A square white dish filled with colorful roasted vegetables and topped with squares of butter garnished with herbs.

    Vegetable Roasting

    Make perfectly Roasted Vegetables with these cooking tips and techniques for root vegetables, butternut squash, Brussels sprouts and more. Plus get vegetable roasting times and ideas to use all your favorite seasonal veggies.

    MIXED ROASTED VEGETABLES
    Homemade herb butter wrapped in parchment paper on a cutting board with fresh herbs.

    How To Make Herb Butter

    Herb Butter is fantastic melted on roasted vegetables, hot pasta, sizzling grilled steaks, warm baguettes, spread on tea sandwiches, or dinner rolls. Flavored butter is an easy condiment to create in your kitchen and will keep for weeks. And when dinner is ready, have it ready to slather on hot food and bread.

    HOW TO MAKE HERB BUTTER
    Ears of grilled corn on a white platter seasoned with melted butter on top.

    Grilled Corn On The Cob

    Grilled corn on the cob gains incredibly rich flavor and smoky sweetness! Grab some fresh corn at the Farmer's market or store. It cooks in just 10 minutes and can be put together ahead of dinner or a cookout party. There are 14 creative flavor ideas to try, use seasoning blends or homemade compound butter. And you can grill with or without the corn husks. An easy summer side to make ahead or assemble at the last minute. And after all, everyone loves hot buttered corn.

    GRILLED CORN ON THE COB
    A large spoon holding a scoop of hot potato casserole serving it for dinner.

    Cheesy Potato Casserole

    Cheesy Potato Casserole is wildly popular and also known as Funeral Potatoes. This famous American side dish is loved by people across the country for family gatherings, church potlucks, and holiday dinners. This recipe gives you my top scratch secrets to make it amazing, plus make-ahead shortcuts. One thing is for sure. You will fall in love with these cheesy potatoes. They are rich, creamy, light, and fluffy with a golden crispy scrumptious topping.

    CHEESY POTATO CASSEROLE
    A sheet pan of smashed potatoes with fresh herbs baked with crispy golden brown edges.

    Crispy Smashed Potatoes

    Crispy Smashed Potatoes served with melted herb butter are one of the most heavenly potato recipes. These are pure comfort food and a beautiful side dish for family dinners, romantic date nights, holidays, or dinner parties. Soft fluffy centers are surrounded by a golden-brown crust on each and every one. And those crunchy edges are simply addictive.

    CRISPY SMASHED POTATOES
    A white oval dish filled with golden brown roasted baby potato halves with a silver serving spoon.

    Roasted Potatoes

    Is there anything better than oven Roasted Potatoes with golden crisp sides and pillowy soft, fork-tender centers? Their flavor goes so well with main dishes from sizzling steaks to roast chicken, and are a classic side dish around the world. Hands down, this is the easiest way to make the best roasted potatoes every single time for dinner, any night of the week!

    ROSEMARY POTATOES
    A turquoise salad bowl filled with broccoli salad with colorful grapes and pistachios.

    Broccoli Salad

    A Broccoli Salad with vibrant colors of crisp green apples, crunchy broccoli, and sweet grapes. Topped with a creamy orange tangy dressing and salty pistachios mixed into this summer salad. A classic broccoli salad typically has lots of mayonnaise. This no-mayo broccoli salad that swaps in Greek yogurt for the mayo cutting fat and calories.

    BROCCOLI SALAD
    A salad shaped like a Christmas tree with red bell pepper garland, white apple stars and ornaments of nuts and fruit.

    Christmas Tree Salad

    Holiday Christmas Tree Salad with a Cranberry Vinaigrette will be the talk of your Christmas party. Shape this salad and decorate it like a Christmas tree with garland, ornaments, and snow!

    HOLIDAY TREE SALAD
    Two plates of Christmas salad with forks topped with fruit and nuts.

    Christmas Holiday Salad

    Present a gorgeous, festive, red and green Christmas Holiday Salad with an easy pomegranate vinaigrette dressing topped with sparkling pomegranate seeds, D'Anjou pears for the little trees, spicy candied pecans, ruby red dried cranberries, and juicy raspberries. Now, this salad says Happy Holidays...

    CHRISTMAS HOLIDAY SALAD
    Cabbage steaks on a white rectangle platter garnished with parmesan cheese and toasted pine nuts.

    Roasted Cabbage Steaks

    Oven roasted cabbage steaks have crispy edges and golden brown centers. Sprinkle with parmesan cheese and toasted pine nuts for a savory finish. This an easy recipe that uses up a whole head of cabbage in a fresh, delicious, new way. And tons of topping options are in the recipe card below. This great side dish pairs well with family dinners like corned beef, chicken, steak, and fish. A delicious way to turn a humble green vegetable into something sublime.

    ROASTED CABBAGE STEAKS

    Thanksgiving Appetizers

    A rustic table with small bowls filled with toppings for a fall appetizer crostini bar.

    Fall Crostini Bar

    Learn how to set up a crostini bar with topper ideas to entertain for Fall, Friendsgiving, or Thanksgiving. Elegant no-fuss Fall party food to serve at your gathering. Take a crostini toast, spread either the whipped goat cheese or feta, and add toppings you love.

    FALL CROSTINI BAR
    A slice of rustic tree wood with Thanksgiving deviled eggs garnished with fresh herbs.

    Thanksgiving Appetizer Deviled Eggs

    Thanksgiving Deviled Eggs are an easy appetizer party food idea. Gorgeous Fall color, garnished with sage and thyme to celebrate the season.

    THANKSGIVING DEVILED EGGS
    A bountiful Thanksgiving charcuterie cheeseboard fill with colorful meats, cheeses nuts and more for Thanksgiving.

    Thanksgiving Charcuterie Board

    Create a gorgeous easy Thanksgiving charcuterie board filled with your favorite sliced meats, an assortment of cheeses, crackers, fruit, nuts, and a few and sugary treats. A Fall cheeseboard is so easy to put together for Thanksgiving, Friendsgiving or Fall gatherings. Make for an after-school snack board for kids, or to host a happy hour for friends with simple appetizers and drinks.

    THANKSGIVING CHARCUTERIE BOARD
    A large glass jar filled with a Fall Snack Mix with candy corn and M&Ms with a small bowl of it nearby.

    Fall Snack Mix

    This Fall Snack Mix will disappear at your Fall, Halloween Party, or at your Thanksgiving feast. Just 4 ingredients are amazing together. Kids and adults love these treats.

    FALL SNACK MIX
    A pumpkin shaped cheese ball on a platter with pita chips and crackers.

    Everything Bagel Pumpkin Cheese Ball

    Serve a pumpkin-shaped Everything Bagel Cheese Ball Fall appetizer for your next party, it's always a hit! Easy to make-ahead in 15 minutes, chill, and take to a party. This cheeseball makes a wonderful Thanksgiving appetizer and has simple ingredients like cream cheese and seasonings!

    EVERYTHING BAGEL CHEESEBALL
    White platter with Christmas Deviled Eggs garnished with rosemary and pomegranate seeds.

    Christmas Deviled Eggs

    Serve Christmas Deviled Eggs as festive appetizers with bubbly Champagne or drinks at your holiday party. Whip these together in a matter of minutes for a perfect holiday appetizer or a first course. Sprinkle a few sparkling ruby red pomegranate seeds that look like holly berries, with sprigs of rosemary, and celebrate the holiday season with creamy deviled eggs.

    HOLIDAY DEVILED EGGS
    A collection of Thanksgiving appetizers with recipe ideas, and party decorating tips for a Fall party.

    36 Thanksgiving Appetizers

    These are 37 of the best Thanksgiving Day appetizers for savory snacks, easy appetizers, and a bounty of party ideas for your celebration. Whether you bake up some warm canapes, make easy no cook appetizers like a dip, or create a beautiful holiday charcuterie board, there are dozens of delicious recipes here to put out before your Thanksgiving feast.

    THANKSGIVING APPETIZERS COLLECTION
    A white bowl with candied pecans and a few on the table with jars filled with them nearby.

    Candied Pecans

    Candied Pecans with pumpkin pie spice flavors are crunchy and sweet with cinnamon-sugar, and a kick of heat. Use as a holiday or Fall appetizer on a grazing table, or charcuterie cheeseboard, or pack up as a homemade holiday food gift. These easy candy pecans are egg-free, gluten-free, and great for snacks. Wrap in pretty decorated mason jars, and add gift tags. Someone will be delighted.

    CANDIED PECANS
    A white platter filled with brie and bacon palmier appetizers golden brown and ready to eat.

    Brie and Bacon Palmiers

    Brie and Bacon Palmiers baked in 15 minutes with 3 ingredients. You will need store-bought puff pastry, crisp crumbled bacon, and some brie. An easy last-minute appetizer packed with bacony goodness, golden puff pastry, and that classic brie taste...

    BRIE AND BACON PALMIERS

    Thanksgiving Desserts

    Fill your dessert table with the best seasonal delights! Of course, pumpkin pie and pecan pie are classic, here are some more of my favorite desserts to serve...

    A white pie dish with a slice of apple crumble pie, also known as a dutch apple pie with a crumbled topping and green apples in the background in a wood bowl.

    Dutch Apple Pie

    Dutch Apple Pies are also known as Apple Crumble Pies baked with a homemade filling, a foolproof flaky crust, and a crumble topping. This type of apple streusel pie is also called a French Apple Pie recipe. The apple filling and crumbly streusel topping are out of this world.

    CRUMBLE PIE (DUTCH APPLE PIE)
    A large jar filled with apple pie filling with a lid and bow.

    Apple Pie Recipe Filling

    An easy Apple Pie Filling using crisp fresh apples and warm spices that can be made ahead and is freezer-friendly. And to prevent soggy bottom crusts, you need a really good filling to bake up the best apple desserts. Get all the secrets to a thicker pie filling with the best apple flavor in every bite.

    APPLE PIE FILLING
    A baked loaf of pumpkin bread sliced thick with a silver knife.s

    Pumpkin Bread

    A rich delicious Pumpkin Bread scratch recipe with warm Fall spices, fresh orange juice, and loaded with milk chocolate chips. This quick bread recipe comes together in minutes, with just a spatula and a bowl! Bake this as a classic pumpkin bread recipe or add nuts like pecans or walnuts and bake.

    PUMPKIN BREAD
    Apple Crisp in a red bowl with a silver spoon, ice cream, and drizzled with caramel sauce.

    Apple Crisp

    Bake a delicious Apple Crisp with a sweet crust, caramelized apple filling, and a streusel crumb topping. Serve this easy dessert anytime for dinner or the holidays. The hot crumble topping gets a little crispy topping in the oven, with a melting scoop of ice cream, and caramel sauce drizzled all over, what a delicious dessert.

    CLASSIC APPLE CRISP
    Slices of green Granny Smith apples around a white dish with a sweet dessert dip inside a low small white dish with a ruffled edge, and a piece of apple sticking into the dip.

    Caramel Apple Dip

    Make a Caramel Apple Dip with crisp green apples, salted caramel sauce, and crushed Health bars. A beloved recipe for potlucks, holiday parties, Thanksgiving, Halloween, and all through the Autumn apple season.

    CARAMEL APPLE DIP
    Nut Goodie Bar Candy in mini white paper cups.

    Nut Goodie Bar Candy

    Nut Goodie Bar Candy is an addictively sweet chocolate peanut butter candy bar famous in Midwest USA. An easy no-bake candy served right from the freezer.

    NUT GOODIE BAR CANDY

    Fall Cocktails And Holiday Drink Recipes

    Three glasses of Aperol Spritz on a table with appetizers at a Fall party.

    Autumn Aperol Spritz

    A taste of Fall in every sip, these Aperol Spritz cocktails have cider, Aperol, and fresh citrus juice topped with prosecco or Champagne bubbles. These refreshing drinks are great for brunch, happy hours, Friendsgiving, and Thanksgiving.

    AUTUMN APEROL SPRITZ
    A large glass punch bowl filled with Fall and Thanksgiving punch with apples and oranges floating on top.

    Fireball Punch

    Fireball Thanksgiving Punch with orange, apple cider, and Fireball whisky. Serve Fall "big batch cocktails" for Friendsgiving & Thanksgiving.

    FIREBALL PUNCH
    A glass mug filled with Pumpkin Spice Latte with whip cream and sprinkles.

    Pumpkin Spice Latte

    Whip up a Pumpkin Spice Latte made with real fresh ingredients, and cozy Fall spices. Top your PSL with decadent toppings like whip cream and Fall sprinkles. You can swap in the plant-based milk you love, and add some good strong hot coffee or a shot of espresso.

    PUMPKIN LATTE
    A New Years Eve party with champagne cocktails made with Goldschlager gold liquor.

    Champagne Cocktails

    Chic Champagne Cocktails glitter with real gold and bubbles of fine Champagne or prosecco for New Year's Eve or holiday celebrations like a Christmas party! Everyone wants bubbly drink recipes that sparkle for the festive season. Ring in the new year and toast to all the luck in the world with an elegant cocktail in hand.

    GOLD CHAMPAGNE COCKTAILS
    A Halloween party with candy corn martinis and a small black dish of candy corn nearby.

    Candy Corn Martinis

    A Candy Corn Martini is the perfect Halloween drink for parties, with simple ingredients that are easy to find. Have lots of fun chilling out with these, oh and homemade candy corn vodka is super easy to make. Fascinate your friends with these bright orange festive cocktails. And Happy Halloween season.

    CANDY CORN MARTINIS
    Fireball Whisky Cocktails with cinnamon sticks wrapped in orange peel for garnish.

    Fireball Whisky Cocktails

    "Red Hot" Fireball Whisky Cocktails made with orange, cinnamon, cloves, and apple cider. Serve fireball drinks for Fall parties, brunch, and Thanksgiving Day!

    FIREBALL COCKTAILS

    Thanksgiving Leftover Recipe Ideas

    These leftover recipes are both great ways to use up all your Thanksgiving mains and side dishes. And both can be frozen and baked off for dinner in the oven or your air fryer...

    A baked white dish of turkey leftover shepherd's pie.

    Leftover Turkey Recipe: Shepherd's Pie

    After the holidays, try this leftover turkey recipe for shepherd's pie. Use turkey leftovers, stuffing, mashed potatoes, gravy, and more from Thanksgiving dinner or Christmas.
    Years and years ago, I had so many leftovers. I asked my Dad, "What am I going to do with all this food?" And he wisely said, "Well why don't you make a turkey shepherd's pie?"
    At first, it sounded weird, but then I thought hey that is a good idea. So I made one. Dad, this recipe is all yours, I give you full credit.
    As a matter of fact, it is a yearly tradition and a great freezer meal. Bake it up all golden and bubbly on a cold evening. This is fast comfort food to love...

    LEFTOVER TURKEY SHEPHERD'S PIE RECIPE
    Golden brown baked empanadas decorated with pie crust leaves on a Fall tray.

    Empanadas ~ Turkey Leftover Recipe

    Empanadas made with Thanksgiving leftovers: Use Thanksgiving leftover turkey, ham, mashed potatoes or stuffing, gravy etc baked into homemade or store-bought pie crust. Freeze empanadas for easy weeknight meals!

    TURKEY LEFTOVERS: EMPANADAS!

    For A Southern Thanksgiving Dinner

    For some true Southern hospitality, try new Thanksgiving recipe ideas that are traditionally made and served in the Southern part of the United States, as part of your Thanksgiving spread this year!

    The best way to plan a Thanksgiving meal with classic Southern sides for our favorite holiday is to add one or two new delicious soul food recipes.

    By no means is this a complete list of Southern food. So many family recipes and original dishes are a part of Southern Thanksgiving tables. A good Southern meal will have great food and a wide variety of flavors from sweet to savory. But they all have that good down-home feel that you always remember when you ate that dish! I can still remember the first time my Mom made Oyster casserole at Thanksgiving!! As a kid, I'm not sure I was a fan. LOL

    What other dishes are on a Southern Thanksgiving menu?


    According to Southern Living, Southern Thanksgiving staple dishes include: Fried Turkey, Spoonbread, Dressing, Yeast Rolls, Corn Pudding, Grandma's Gravy, Oyster Casserole (Oyster Dressing), Sweet Potato Pie, Sweet Potato Casserole, Deviled Eggs, Cranberry Sauce, and Green Bean Casserole.

    More Southern-Style Holiday Meal ideas include;
    Desserts: Pumpkin Pie Bars, Carrot Cake, Pecan Pie Bars, and Banana Pudding (Trifle), and Red Velvet Cake.
    Sides: Fruit Salad, Ambrosia Salad, Mac & Cheese, Butter Beans, Roasted Sweet Potatoes, Cast-iron Skillet Cornbread, Au Gratin Potatoes, Roasted Southern Candied Yams, Flaky Biscuits, and Sweet Tea of course!

    And a Soul Food Thanksgiving menu will possibly include dishes like baked Mac & Cheese (the perfect side dish), Collard Greens, Buttermilk Biscuits, and Peach Cobbler.

    Thanksgiving Dinner Planning Tips

    A good plan is so worth the time! After all, besides fabulous food, you want to enjoy your guests at the table and be relaxed on the big day!

    1. Invite Family And Guests

    First, make a guest list of friends and family: For years I have been teased about making too much food! A couple of thoughts. One, people do eat more on the holidays, and second you can send people home with leftovers and freeze some for later. I like to keep a stack of takeaway containers for people to enjoy some leftovers the next day at home.

    2. Menu Creation

    Second, create your menu of dishes: Take into consideration who is bringing what dishes, food allergies, and traditional dishes with the family favorites you wouldn't dream of not having on the Thanksgiving table!

    For years, I have some store-bought items like frozen dinner rolls topped with fresh herbs or bakery desserts with some extra whipped cream on top! It really helps take off the pressure of having everything homemade from scratch.

    I also avoid choosing dishes or fussy appetizers that require too many individual servings if I have a big crowd.

    3. Thanksgiving Make Ahead Dishes

    Next, list what dishes can be made 1-3 days ahead and depending on your oven space, the cooking time for each recipe. Dinner rolls are best baked fresh, but mashed potatoes can be easily made a couple of days ahead and reheated!

    Write down a menu plan to cook for the week ~ use my free handy planner linked below!

    PRO TURKEY TIP: You can cook your turkey on Thanksgiving day or the day before! To reheat sliced turkey, simply pour some chicken stock over it, cover with foil in a roasting pan, and rewarm it in the oven. And of course, it is really nice to not have to carve a big turkey bird with guests waiting, trust me!

    4. Cooking Schedule

    Create a Cooking Schedule: Every year I do this! I am chatty and like to have fun, so it keeps me on task, (so I don't burn anything!), and that way I don't forget my timing and get distracted during the party. List the temperatures and cooking times next to each dish on a list for that morning and then what to heat just before serving.

    One thing I do every year is think about what will fit in my oven, and I write down my timing. Example: If I am cooking a turkey, I note the the time and when I can fit more dishes in while carving the bird.

    Set an alarm to remind you to start the dishes, it really helps when you have a house full of people!

    5. Serving Thanksgiving Dinner

    Be sure to plan out where to serve food and how to reheat and keep it warm.

    Serving buffet style is so easy and everyone loves to go for seconds and look over all the dishes. I highly recommend these electronic warming trays! They are great for parties during the holidays.

    Download A Free Thanksgiving Dinner Planner!

    Get a little help on how to plan your Thanksgiving menu. Be sure to browse my entire Thanksgiving Recipe Index to build your recipe plan! A little planning goes a long way, put down all your ideas and things that inspire you in this planner. After all, you want to spend less time in the kitchen and more time having fun!

    There are spots for everything from deciding on your Thanksgiving menus to a guest list, shopping items, ideas for Thanksgiving decorations, how to put a festive twist on the menu, and more. Happy Thanksgiving!

    Download your FREE copy of this 20-page planner and get those party plans started today…

    CLICK FOR A FREE THANKSGIVING PLANNER!
    A white casserole dish filled with freshly baked Sausage Stuffing for Thanksgiving.

    Make Ahead: Thanksgiving Dinner Plan

    3 Days Before Thanksgiving

    • Start defrosting your frozen turkey on Monday if cooking on Thursday 3 days ahead. Defrost the frozen turkey on a sheet pan in the refrigerator to catch drips!
    • Finish up shopping, pull out dishes, serving platters, and cutlery. Do all your grocery shopping, organize, and check you have all your ingredients.
    • Set up the table linens and chairs, place plates, napkins, glassware, flatware, and name cards, and a place for centerpieces.

    Make my Cranberry Sauce or Cranberry Relish - chill in fridge for 2 days, pull out on Thanksgiving and serve at room temperature.

    Make a Cranberry Vinaigrette Salad Dressing ahead of time for your salad.

    Two Days Before Thanksgiving

    • Make pie dough, Homemade Stock, prep dips, appetizers, and desserts. Set the table with plates, glasses, and cutlery.
    • I make Thanksgiving Centerpieces and keep them in the fridge the night before.

    For example, my Make Ahead Mashed Potatoes can be made up to 2 days ahead, and reheated and kept warm in 5 different ways!

    Bake a Pumpkin Bread then wrap well in plastic wrap, refrigerate, then serve at room temperature.

    Cheesy Potato Casserole is great to make ahead and reheats well in a dish in the oven and is even better baked fresh from the oven on the big day!

    One Day Before Thanksgiving

    • Some things like fresh salads, can have all the ingredients prepared in airtight containers. Make the salad dressing ahead, then assemble just before eating!
    • Prepare all the dishes ahead that you can and wrap them well covered in plastic in the fridge; Mashed Potatoes and Sweet Potato Casserole etc.

    Bake Corn Bread Muffins a couple of days ahead, and reheat them wrapped in foil in the oven.

    Storebought Baked Dinner Rolls - Assemble the rolls in your baking dish, the night before, cover them with plastic wrap, and raise the dough overnight in the fridge. Top with melted butter and different toppings, and bake fresh the day of just before serving.

    Thanksgiving Day Cooking

    Thursday morning, you can relax because most dishes are prepped and ready!

    • Get the turkey started in the oven, and follow your cooking time plan!
    • Make the Turkey Gravy. You can also make gravy ahead with boxed rotisserie chicken drippings!
    • Bake or Reheat your side dishes.
    • Assemble Cold Salads - Prepare most of the salad ingredients (not the lettuce) separately the day before, including the dressing.
    • Bake the dinner rolls fresh the day of just before serving and serve with soft butter or my Herb Butter!
    A Thanksgiving dinner table filled with a carved turkey on a platter, sweet potato casserole dish, mashed potatoes, cranberry sauce, gravy, and sausage dressing.

    Did you love this recipe? We would love to hear from you! If you make this recipe and love it, give it a 5-star rating ⭐⭐⭐⭐⭐ with a comment. THANK YOU!! Follow Delicious Table with my free newsletter and share this recipe with your friends on Facebook, Pinterest, and Instagram.

    More Party Food Thanksgiving Recipes

    People can help themselves to any of these impressive appetizer spreads that look so stunning for the cozy Fall and Winter holidays like Christmas and Thanksgiving.

    Whether you are a fan of the NFL or College Football, cheer on your favorite team with a winning game plan of good food and munchies with over 75 Game Day Recipes in this collection.

    Create a stunning Thanksgiving Charcuterie Board filled with your favorite little bites. Add sliced meats, different types of cheeses, crackers, fruit, and nuts. Besides savory items, add some festive and sugary holiday treats for hungry guests.

    These are the best Thanksgiving Appetizers for savory snacks, easy appetizers, and a bounty of party ideas for your celebration.  Of course, nothing is easier than a Fall Crostini Bar! It's for appetizers with an easy setup and assembly. There are recipes for a whipped goat cheese crostini topping and tons of ideas for toppings! 🥖🍷🧀

    • A football shaped cheese ball coated with crumbled bacon, green onions, and cheddar cheese and white cheese to look like laces on the football surrounded by crackers on a platter.
      75+ Football Food Recipes
    • A bountiful Thanksgiving charcuterie cheeseboard fill with colorful meats, cheeses nuts and more for Thanksgiving.
      Thanksgiving Charcuterie Board
    • A collection of Thanksgiving appetizers with recipe ideas, and party decorating tips for a Fall party.
      36 Thanksgiving Appetizers
    • A rustic table with small bowls filled with toppings for a fall appetizer crostini bar.
      Fall Crostini Bar

    More Holiday Party Food

    Which of these 40 Best Puff Pastry Recipes will you choose? This collection of impressive appetizers and delicious desserts is wrapped with irresistible layers of golden flaky puff pastry. And these freshly baked recipes are from some of the best food bloggers in the country.

    Take a look at 75 Cookout Recipes, plus tips and hacks for your outdoor BBQ party. This complete guide has all the best recipes for backyard cookouts including grilled classics, gorgeous entertaining options, fun drinks, cool desserts, make-ahead salads, easy potluck sides, and more for your outdoor parties!

    Over 80+ Easter Dinner ideas are included in this recipe collection. All the traditional Easter Dinner classics like glazed ham, rack of lamb, roasted or mashed potatoes, and scrumptious desserts like an adorable bunny cake.

    Celebrate with over 50+ high school and college Graduation Party Food Ideas. Throw an awesome 2023 grad party full of delicious food and drinks! Toss those graduation caps, and mark the occasion with friends and family. You did it, cherish every moment of all that hard work. Cheers, and enjoy your grad party as high school and college graduates.

    • A number of puff pastry appetizers, dinner ideas, and desserts in a collection.
      40 Puff Pastry Appetizer Recipes
    • A square collage of colorful grilled food, side dishes, desserts, and drink recipes to serve at an outdoor bbq cookout.
      75+ Cookout Recipes & BBQ Party Ideas
    • An Easter Dinner Ideas collage of recipes for dinner, desserts, and appetizers.
      80+ Easter Dinner Ideas
    • A grad party with red, white, and black food themed items on a table like a cake and snacks.
      50+ Graduation Party Food Ideas

    Pizza Strata Breakfast Casserole

    [heart_this] · Oct 22, 2023 · 4 Comments

    Lifting out a piece of breakfast casserole from a white baking dish with a serving utensil from the strata.

    Last Updated July 6th, 2026 at 01:19 pm by Lisa

    Everyone will rave about this golden-baked breakfast casserole with the flavors of pizza! This strata has layers of melted cheese, crumbled brown breakfast sausage, red pizza sauce, and savory pepperoni. A great recipe for family breakfast, brunch parties, game day gatherings, or busy holidays like Christmas morning.

    Put this egg bake together the day before in a baking dish, and pop into the fridge. Then this overnight breakfast casserole is ready to bake with zero prep, for a spectacular strata breakfast. People will delight in the pizza taste in every yummy bite...

    Breakfast Casserole Recipe (Strata)

    The whole idea of this hearty breakfast casserole is to create similar flavors that you love on your pizza. Everyone LOVES this casserole! I first made it for a family many years ago, it just sounded so good and was different than my regular breakfast egg casserole I made many times.

    Why You Will Love This Breakfast Casserole

    The thing I love the most about this easy breakfast casserole recipe is:

    • The fast prep time.
    • It can be made ahead.
    • Is a perfect potluck dish.
    • Everyone loves it for a brunch party.
    • No prepping on the day you bake it.
    • Feeds a crowd, and is absolutely delicious!

    Egg Bake Ingredients

    Bobili Pizza Crust (or white bread slices)
    butter
    yellow onions
    ground pepper
    Italian seasoning
    sea salt (kosher salt)
    mild and or hot bulk pork sausage
    fresh mushrooms and or bell peppers (optional of course!)
    mixed shredded cheeses
    mini Pepperoni
    pizza sauce
    large eggs or EggBeaters
    milk

    Cheeses: Try a mixture of grated cheeses in your egg bake casserole like white cheddar cheese mozzarella cheese, asiago, parmesan, provolone, or fontina.

    Breakfast Pizza Casserole Instructions

    1. Spray or grease a large 9 x 13 casserole dish with nonstick spray. Preheat oven to 375.

    2. Cut Boboli (or bread slices) into 1” pieces.

    3. Chop 2 cups yellow onions. Heat a large skillet or heavy pan on medium-high heat, add butter, onions, sea salt, pepper, and Italian Seasoning. Cook on medium heat for 4-5 minutes, until just browning.

    Add bulk sausage (not in casings), and use a wooden spoon to stir and crumble the sausage into smaller pieces. Once the sausage is crumbled and cooked, add mushrooms for 3-4 minutes, stir and mix to combine, and turn off the heat.

    4. Bottom Layer: Place ⅓ pizza crust (or bread), ⅓ sausage/onion/mushroom mixture, ⅓ pepperoni, and ⅓ grated cheese.
    5. Middle Layer: Add ⅓ pizza crust (or bread), ⅓ sausage/onion/mushroom mixture, ⅓ pepperoni, and ⅓ grated cheese.
    6. Top Layer: Add the last ⅓ pizza crust (or bread), the rest of the ⅓ sausage/onion/mushroom mixture and drippings, and the rest of the ⅓ of mixed grated cheese.

    7. Crack 8 eggs into a large bowl, and add the milk. Use a whisk to combine well. Pour the milk and egg mixture evenly over the casserole dish.

    8. Drop 8-10 spoonful dollops of pizza sauce (I use Trader Joe's) all over on top. Sprinkle the rest of the mini pepperoni on top.

    9. Bake 375 for 45 minutes till golden brown and bubbly! Let rest for about 5 minutes, and slice to serve.

    Keep breakfast strata leftovers in the refrigerator in an airtight container, and reheat in the microwave for about 3 minutes.

    Strata Make Ahead Breakfast Casserole FAQ

    Make-Ahead Tips: Assemble the night before covered in clear plastic wrap or aluminum foil. Remove the wrap and bake in the morning for your party.

    What else is a breakfast casserole called?

    A Strata. These bread-layered casseroles have eggs, milk, cheeses, and puffs up when baking. And are American cuisine. It is commonly served for brunch or on holiday mornings. And may sometimes include other additions such as breakfast sausage or vegetables like mushrooms or bell pepper. Some people also call these a bread pudding or savory bread puddings.

    Breakfast Pizza Casserole Strata Variations

    Just like you order a custom pizza, add in ingredients you love! Try different meats, veggies, and cheeses...

    • Toss in some diced Smoked Ham or Canadian bacon!
    • Add in some sliced or diced Roast Turkey
    • Just like on a pizza, add some fresh sliced tomatoes, Sun Dried Tomatoes, or some roasted crushed garlic cloves!
    • You can swap in bread cubes from a loaf of bread.

    PRO TIP: Believe it or not, I have used leftover pizza from the night before in this breakfast casserole and it's delicious! Just cut up the sliced into small 1" pieces and bake with the other ingredients.

    Here I am on a girl's getaway weekend in the mountains with the casserole hot out of the oven...Make this recipe and comment below!

    A lady in a kitchen holding a breakfast casserole with oven mitts smiling and about to serve brunch.

    More Brunch and Breakfast Recipes

    What else goes with a baked breakfast casserole for a brunch party? Well for starters, have a nice fruit salad, hot coffee, juice, and mimosas or bloody marys. Have some good hot Sauce or Salsa for people to spice up their slice of breakfast casserole. And here are some other ideas!

    A popular Christmas breakfast idea everyone loves a top reader favorite...Baked Parmesan Hash Browns. They are baked in a muffin tin with golden crisp edges and no stovetop mess.

    When hosting a brunch party, some of my go-to make-ahead brunch recipes are Mini Brie and Bacon Quiche made in a muffin tin, easy and so good fresh from the oven.

    Tater Tot Breakfast Casserole is an easy recipe loaded with taters with 15 minutes of prep time and bakes to golden hot in just 45 minutes. Put this tater tots dish together a day ahead for relaxed weekends, special occasions, or the holidays.

    Hand-dip Pancake Muffins into warm syrup for a fast breakfast recipe or brunch party idea. The fun part is to top them with blueberries, raspberries, mini chocolate chips, and more. Take your Sunday brunch and football game day parties to the next level with a big batch of your own homemade Spicy Bloody Mary Mix, and set up the ultimate Bloody Mary bar.

    Bake a batch of Raspberry Scones studded with sweet berries, and white chocolate chips, and drizzled with vanilla icing, for light, soft fluffy results.

    • Three golden crispy edged hash browns baked in a muffin tin on cutting board.
      Oven Baked Hash Browns
    • A vintage wire rack with four baked brie and bacon mini quiche.
      Brie and Bacon Mini Quiche
    • Baked pancake muffins in a tin topped with blueberries, mini chocolate chips, and raspberries.
      Pancake Muffins
    • A pitcher of bloody marys with two drinks garnished with olives, pepperoncinis, and beef sticks.
      Spicy Bloody Marys
    • A vintage silver serving spoon taking out a piece of tater tot casserole just baked.
      Tater Tot Breakfast Casserole
    • Small white cake plate with homemade raspberry scones studded with white chocolate chips and sweet red raspberries.
      Raspberry Scones

    More Light Breakfast Recipes

    Need something light and healthy for breakfast or a light selection to go with your hearty brunch? Whip up one of these healthy recipes: Avocado Toast, or try one of these 5 Breakfast Egg Muffins Recipes for you to try, and it's so simple to make individual muffins for everyone in your family for weekday breakfast.

    Homemade Granola made with fresh quality ingredients is the perfect breakfast cereal and is great in yogurt parfait bowls, granola bars, cookies, and more. Mix up a big batch (keep some in the freezer!) of this healthy granola recipe loaded with natural sweeteners, lots of texture, and a super great crunch.

    Pink Grapefruit Detox Smoothies are great to start the day and are loaded with fresh spinach and fruit. These go great with beautiful Breakfast Yogurt Parfaits or a classic Boiled Egg.

    • A close up photo of a slice of avocado toast topped with small heirloom tomatoes and microgreens.
      Avocado Toast
    • Small round breakfast egg muffins stacked on a white cake plate for a brunch or breakfast filled with different flavors.
      Breakfast Egg Muffins
    • A handmade ceramic bowl filled with yogurt and topped with granola, raspberries, and black berries.
      Homemade Granola
    • Two glasses of a green smoothie recipe garnished with grapefruit slices and straws.
      Green Smoothie Recipe
    • Four small yogurt parfaits made with yogurt, granola and berries.
      Yogurt Parfaits
    • 6 perfectly hard boiled eggs with a cracked half of an egg shelf on top.
      Steamed Hard Boiled Eggs

    Did you love this recipe? We would love to hear from you! If you make this recipe and love it, give it a 5-star rating ⭐⭐⭐⭐⭐ with a comment. THANK YOU!! Follow Delicious Table with my free newsletter and share this recipe with your friends on Facebook, Pinterest, and Instagram.

    Lifting out a piece of breakfast casserole from a white baking dish with a serving utensil from the strata.
    Print

    Breakfast Casserole Recipe

    Everyone will rave about this golden-baked breakfast casserole with the flavors of pizza! This strata has layers of melted cheese, crumbled brown breakfast sausage, red pizza sauce, and savory pepperoni. A great recipe for family breakfast, brunch parties, game day gatherings, or busy holidays like Christmas morning. Put this egg bake together the day before and bake with zero prep, for a spectacular strata breakfast. People will delight in the pizza taste in every yummy bite!
    Course Breakfast & Brunch
    Cuisine American
    Keyword breakfast casserole, breakfast egg casserole, brunch casserole, egg bake, egg bake casserole, strata
    Prep Time 20 minutes minutes
    Cook Time 45 minutes minutes
    Total Time 1 hour hour 5 minutes minutes
    Servings 12
    Calories 472kcal
    Author Lisa Hatfield

    Equipment

    • Large Casserole Dish
    • Wire Whisk
    • Chef Knife

    Ingredients

    • 1-14 ounce Bobili Pizza Crust 6 slices white bread
    • 3 tablespoons butter
    • 2 cups chopped yellow onions 1 large onion
    • ½ teaspoon ground pepper
    • 1 teaspoon Italian Seasoning
    • 1 teaspoon sea salt
    • 2 pounds mild and or hot ground sausage ground sausage, not in casings
    • 8 ounces fresh mushrooms and or bell peppers optional
    • 2 cups mixed grated cheese white cheddar, mozzarella, asiago, parmesan, provolone, or fontina
    • 5 ounces mini Pepperoni
    • 1 cup pizza sauce
    • 8 large eggs or EggBeaters 2 cups
    • 1 cup milk

    Instructions

    • Spray large 9 x 13 casserole dish with nonstick spray. Preheat oven to 375.
    • Cut Boboli (pizza, or bread slices) into 1” pieces. Chop 2 cups yellow onions. Slice the mushrooms into ½ pieces.
    • Heat a large skillet or heavy pan on medium high heat. Add 3 tablespoons butter, chopped onions, sea salt, pepper, and Italian Seasoning. Cook on medium heat for 4-5 minutes, until just browning. Adding the seasonings in early releases those great flavors!
      Next, add 2 pounds of sausage, and use a wooden spoon to stir and crumble the sausage into smaller pieces. Once the sausage is crumbled and cooked, add the mushrooms for 3-4 minutes, stir and mix to combine, and turn off the heat.
    • Bottom Layer: Place ⅓ pizza crust (or bread pieces), ⅓ sausage/onion/mushroom mixture, ⅓ pepperoni, and ⅓ mixed shredded cheese.
    • Middle Layer: Add ⅓ pizza crust (or bread pieces), ⅓ sausage/onion/mushroom mixture, ⅓ pepperoni, and ⅓ mixed shredded cheese.
    • Top Layer: Add the last ⅓ pizza crust (or bread pieces), the rest of the ⅓ sausage/onion/mushroom mixture and drippings, and the rest of the ⅓ of mixed grated cheese.
    • Crack 8 eggs into a mixing bowl, and add the milk. Use a whisk to combine well. Pour the milk and egg mixture evenly all over the casserole dish.
    • Drop 8-10 spoonful dollops of pizza sauce (I use Trader Joes) all over on top. Sprinkle the rest of the cheese and mini pepperoni on top.
    • Bake 375 for 45 minutes till golden brown and bubbly!
    • Make-Ahead tips: Assemble night before covered in clear wrap. Bring to room temperature for 20 minutes. Remove wrap, and bake in the morning for your party.

    Video

    Notes

    Mushrooms & Bell Peppers

    If these are not your thing, leave them out. 

    Bobili Pizza Crust OR Bread

    In the past, I have made egg casseroles with so many kinds of things. Leftover pizza cut up is incredible, and you can use French bread cut into cubes. 

    Breakfast Pizza Casserole Strata Variations

    Just like you order a custom pizza, add in ingredients you love! Try different meats, veggies, and cheeses...
    • Toss in some diced Smoked Ham or Canadian bacon!
    • Add in some sliced or diced Roast Turkey
    • Just like on a pizza, add some fresh sliced tomatoes, Sun Dried Tomatoes, or some roasted crushed garlic cloves!
    • You can swap in bread cubes from a loaf of bread.

    Nutrition

    Calories: 472kcal | Carbohydrates: 7g | Protein: 24g | Fat: 38g | Saturated Fat: 16g | Polyunsaturated Fat: 4g | Monounsaturated Fat: 15g | Trans Fat: 0.5g | Cholesterol: 204mg | Sodium: 1168mg | Potassium: 469mg | Fiber: 1g | Sugar: 3g | Vitamin A: 616IU | Vitamin C: 4mg | Calcium: 199mg | Iron: 2mg

    Candy Corn Jello Shots

    [heart_this] · Oct 19, 2023 · 1 Comment

    Close up of a candy corn Jello shot that is half sipped and others in plastic cups at a party with candy corn in the background.

    Candy corn jello shots have 3 colors in these boozy adult shooters, just like the famous seasonal Fall candy!

    Batches of jello shots are known as a college party classic. But who doesn't love a layered shot that actually tastes great for a bit of mischief-making?

    Decorate with whipped cream and candy corn pieces for your Fall gathering or Halloween party. Cheers...

    Candy Corn Halloween Jello Shots Recipe

    Any true party will have a signature cocktail or shot for guests. A top tip is to be sure to serve them in the right plastic shot glasses! This is a simple recipe but needs some time to let the layers of the shots firm up. So plan ahead.

    Jello Shot Ingredients

    Yellow - Layer 1

    • 3 ounces yellow gelatin box of Jello lemon Jello (yellow Jello)
    • ¾ cup boiling water
    • 1 cup vodka
    • 3 whole ice cubes

    Orange - Layer 2

    • 3 ounces orange gelatin box of Jello orange Jello
    • ¾ cup boiling water
    • 1 cup vodka
    • 3 whole ice cubes

    White - Layer 3

    • ¾ cup boiling water
    • 1-ounce gelatin packet packets of unflavored gelatin come in 1-oz portions
    • 3.3 ounces white chocolate Jello pudding with white gelatin layer
    • 1 cup vodka
    • 3 whole ice cubes
    • optional garnishes: whipped cream, candy corn, and sprinkles

    Instructions

    1. First, make space in your fridge for a tray or sheet pan. Set up twelve 3 oz plastic cups (shot cups) on the tray. You will pour the mixture into 3 separate layers. Yellow first, then orange, topped with white. PLAN FOR THIS: Chilling for at least 4 hours in between each layer until set! Cover with the plastic lids, and keep chilled overnight in the fridge. Don't freeze. Let's make candy corn jello shots!
    2. Set up a heatproof small bowl or mixing cup to mix the jello layers.
    3. NOTE: Jello packet instructions have you add cold water, you will be swapping in alcohol like vodka for that step, so disregard the package directions!

    First, Make The Bottom Yellow Layer

    1. Boil 3 cups water in a small saucepan. Pour ¾ cup hot water into a heatproof measuring cup for your first layer.
    2. Stir in the 3 oz yellow gelatin lemon Jello packet into the ¾ boiling cup of water, and whisk with a spoon. Then add 1 cup vodka and 3 ice cubes. The ice helps chill the layer faster. The ice will melt fast, and when it does you are ready to pour. Pour the first yellow layer into each of the plastic cups. Fill the bottom ⅓ of the shot cup with the yellow mixture. Chill in the refrigerator for 4 hours until set, before you make the next orange layer.

    Second, Make The Middle Orange Layer

    1. Reheat the boiling water. Pour ¾ cup hot water into a heatproof measuring cup for your second orange layer.
    2. Stir in the 3 oz orange gelatin Jello packet into the ¾ boiling cup of water, and whisk with a spoon. Then add 1 cup vodka and 3 ice cubes. The ice helps chill the layer faster. The ice will melt fast, and when it does you are ready to pour. Pour the second orange layer into each of the plastic cups on top of the yellow layer. Fill another ⅓ of the shot cup with the orange mixture. Chill in the refrigerator for 4 hours until set, before you make the last white top layer.

    Finally, Make The Top White Layer

    1. Note: The order is important for this layer! To ¾ boiling cup of water add 1 oz of gelatin, and whisk well. The gelatin helps set the white chocolate pudding mix.
    2. Next, add 3.3 oz white chocolate Jello pudding mix, 1 cup vodka, and 3 ice cubes. The ice helps chill the layer faster. The ice will melt fast, and when it does you are ready to pour.
    3. Pour the last top white layer one each of the plastic cups. Fill the top ⅓ of the shot cup with the white mixture leaving a bit of room at the top.
    4. Carefully snap the lids on the shots. Refrigerate for at least 4 hours, and preferably overnight. Wait until the jello shot is firm and doesn't stick to your finger.

    Set Up Fridge Time & Garnishes

    1. When set, garnish with a dollop of whipped cream, candy corn, or sprinkles right before serving!
    2. SERVING NOTES: If kept at room temperature, they slowly soften and become melted in the cups. Jello Shots can last for seven to 10 days in a covered container in the refrigerator. For serving you can squirt some whipped cream, add sprinkles, or some candy corn on top of the white layer!

    What kind of alcohol can be used for Halloween Jello Shots?

    Different alcohols will change the flavor a bit so choose what you and your guest prefer.

    • plain vodka
    • coconut rum
    • tequila
    • cake vodka
    • whipped cream vodka
    • vanilla vodka
    A candy corn Jello shot cup that is empty with just a bit of yellow Jello and other cups full some garnished with whipped cream and candy corn.

    Best Halloween Jello Shots Small Plastic Containers

    PRO TIP: Once your Jello shots are solid, with the lid on the top of the cup, you can turn them over to break the seal so they slide right out into your mouth!

    Squeezable: Soft sided small plastic jello cups help release the shot and have a good time!

    Portion Control: The ideal size for boozy Jello shots are to use small containers, like 3 oz small plastic cups. Buy your set of disposable cups online or at the grocery store in the Jello aisle.

    Easy Stacking: There are lots of small containers and paper cups on the market like condiment cups like you get at takeout for salad dressings. Another option for Halloween Jello shots are these EZ-squeeze cups with a unique shape. What you want in your shot glass cups:

    • Disposable
    • Ones With Lids
    • 2-3 oz Small Containers
    • Stackable

    Avoid paper cups or stiff sided ones as it's hard to get the shots to release unless you run a butter knife around the edge, and no one has time for that!

    The white layer is actually a jello pudding layer with gelatin added to help it set. As an alternative, you can create a white layer by mixing sweetened condensed milk with gelatin and water.

    More Boozy Adult Party Shots

    Christmas Shots will be the talk of your holiday party! 🎄🎅🏻Hang a batch of shots as ornaments on a little tree filled with bright colorful boozy sippers. Serve them in classic shot glasses with festive rim garnishes, or mix them into Christmas cocktails! These fun drinks sparkle and glitter in the joy of the season.

    Let the shenanigans begin at your St. Patrick's Day party, and slurp some Green Jello Shots and Jell-O Jigglers! ☘️☘️☘️ Emerald green jelly shots are a fun way to celebrate as the bagpipes play. These are so easy to make ahead for parties and will take you back to your college days. Top each one with a lucky clover, to bring good fortune and a wee bit of mischief...

    • A jolly Santa Claus on top of a green Christmas tree with colorful ornaments.
      Christmas Shots
    • A white rectangle platter with green jello shots and jigglers shaped like shamrocks.
      Green Jello Shots & Jigglers

    Free Halloween Planner!

    Download your FREE copy of this Halloween planner to get your party plans started today…

    CLICK FOR A FREE HALLOWEEN PLANNER! 🎃👻🍭
    A two page Halloween planner to plan the best food and decorations for a Halloween party.
    Looking down on a table with a half sipped candy corn Jello shot and others nearby at a party.

    More Halloween Cocktails & Fall Drinks

    Boo! Take a peek through 200+ of the Best Halloween Recipes from inspiring Food Blogger friends! Whether you are having a spectacular Halloween bash costume party on Halloween night October 31st or cooking up spooktacular recipes for a creepy food dinner for the family.

    A taste of Fall in every sip, these Aperol Spritz Cocktails have cider, Aperol, and fresh citrus juice topped with prosecco or Champagne bubbles. These refreshing drinks are great for brunch, happy hours, Friendsgiving, and Thanksgiving.

    A Candy Corn Martini is the ultimate Halloween drink for parties. Chill out with these, oh and homemade candy corn vodka is super easy to make!

    Mix up a batch of these Witches Brew cocktails with a vibrant emerald green color. And these aren't made with green food coloring! Add some bones and magical edible pearl dust also called drink glitter with bubbly mixers to enchant your party guests!

    Fireball Whisky Cocktails are made with orange, cinnamon, cloves, apple cider, and cinnamon flavored whiskey. Serve these fireball whisky drinks for game days, the holiday season, brunch, Fall parties, and Thanksgiving Day.

    • Three glasses of Aperol Spritz on a table with appetizers at a Fall party.
      Autumn Aperol Spritz
    • A Halloween party with candy corn martinis and a small black dish of candy corn nearby.
      Candy Corn Martinis
    • A Halloween party with two green cocktails using Midori and garnished the Witches brew midori sours are garnished with white plastic bones for Halloween cocktails.
      Witches Brew Midori Sour
    • Fireball Whisky Cocktails with cinnamon sticks wrapped in orange peel for garnish.
      Fireball Whisky Cocktails

    More Halloween Drinks

    Hosting a Halloween party? Get over a dozen ideas to serve bubbly, creepy, Halloween Punch for kids. Serve in a cauldron for a spooky look as your punch bowl. And get all the dry ice tips for your party!

    Halloween Aperol Cocktails are just about the easiest drink for your party. A Black Halloween Martinis is the perfect frightening Halloween drink for parties. Make these dark mysterious black cocktails for your friends.

    Fireball Punch "big batch cocktails" are made with orange juice, apple cider, and Fireball whisky that tastes like cinnamon red hot candies. Besides, could it just be the prettiest bowl of Thanksgiving punch? Hey, and why not serve it for a Halloween party with spooky appetizers.

    • A black cauldron with wooden ladle and pouring red punch into the bowl with dry ice smoke for Halloween Punch.
      Halloween Party Punch
    • A large cocktail glass with black sugar rim, ice, Aperol Cocktails, and eyeballs for Halloween.
      Halloween Aperol Cocktails
    • Two Halloween black drinks make with black vodka garnished with 3 red maraschino cherries and a black spider.
      Halloween Black Widow Martinis
    • A large glass punch bowl filled with Fall and Thanksgiving punch with apples and oranges floating on top.
      Fireball Punch

    Did you love this recipe? We would love to hear from you! If you make this recipe and love it, give it a 5-star rating ⭐⭐⭐⭐⭐ with a comment. THANK YOU!! Follow Delicious Table with my free newsletter and share this recipe with your friends on Facebook, Pinterest, and Instagram.

    Close up of a candy corn Jello shot that is half sipped and others in plastic cups at a party with candy corn in the background.
    Print

    Candy Corn Jello Shots

    Candy corn jello shots have 3 colors in these boozy adult shooters, just like the famous seasonal Fall candy! Batches of jello shots are known as a college party classic. But who doesn't love a layered shot that actually tastes great for a bit of mischief-making? Decorate with whipped cream and candy corn pieces for your Fall gathering or Halloween party. Cheers...
    Course Drinks & Cocktails
    Cuisine American
    Keyword candy corn jello shots, green jello shots, Halloween jello shots, Halloween shots, layered Jello shots
    Prep Time 15 minutes minutes
    Cook Time 5 minutes minutes
    Chilling Time 8 hours hours
    Total Time 20 minutes minutes
    Servings 12
    Calories 227kcal
    Author Lisa Hatfield

    Equipment

    • Jello Shot Plastic Cups 3 oz Jello shot cups

    Ingredients

    Yellow - Layer 1

    • 3 ounces yellow gelatin box of Jello lemon Jello (yellow Jello)
    • ¾ cup boiling water
    • 1 cup vodka
    • 3 whole ice cubes

    Orange - Layer 2

    • 3 ounces orange gelatin box of Jello orange Jello
    • ¾ cup boiling water
    • 1 cup vodka
    • 3 whole ice cubes

    White - Layer 3

    • ¾ cup boiling water
    • 1 ounce gelatin packet packets of unflavored gelatin come in 1 oz portions
    • 3.3 ounces white chocolate Jello pudding white gelatin layer
    • 1 cup vodka
    • 3 whole ice cubes
    • optional garnishes: whipped cream, candy corn, and sprinkles

    Instructions

    • First, make space in your fridge for a tray or sheet pan. Set up twelve 3 oz plastic cups (shot cups) on the tray. You will pour the mixture into 3 separate layers. Yellow first, then orange, topped with white. PLAN FOR THIS: Chilling for at least 4 hours in between each layer until set! Cover with the plastic lids, and keep chilled overnight in the fridge. Don't freeze. Let's make candy corn jello shots!
    • Set up a heatproof small bowl or mixing cup to mix the jello layers.
    • NOTE: Jello packet instructions have you add cold water, you will be swapping in alcohol like vodka for that step, so disregard the package directions!

    First, Make The Bottom Yellow Layer

    • Boil 3 cups water in a small saucepan. Pour ¾ cup hot water into a heatproof measuring cup for your first layer.
    • Stir in the 3 oz yellow gelatin lemon Jello packet into the ¾ boiling cup of water, and whisk with a spoon. Then add 1 cup vodka and 3 ice cubes. The ice helps chill the layer faster. The ice will melt fast, and when it does you are ready to pour.
      Pour the first yellow layer into each of the plastic cups. Fill the bottom ⅓ of the shot cup with the yellow mixture.
      Chill in the refrigerator for 4 hours until set, before you make the next orange layer.

    Second, Make The Middle Orange Layer

    • Reheat the boiling water. Pour ¾ cup hot water into a heatproof measuring cup for your second orange layer.
    • Stir in the 3 oz orange gelatin Jello packet into the ¾ boiling cup of water, and whisk with a spoon. Then add 1 cup vodka and 3 ice cubes. The ice helps chill the layer faster. The ice will melt fast, and when it does you are ready to pour.
      Pour the second orange layer into each of the plastic cups on top of the yellow layer. Fill another ⅓ of the shot cup with the orange mixture.
      Chill in the refrigerator for 4 hours until set, before you make the last white top layer.

    Finally, Make The Top White Layer

    • Note: The order is important for this layer! To ¾ boiling cup of water add 1 oz of gelatin, and whisk well. The gelatin helps set the white chocolate pudding mix.
    • Next, add 3.3 oz white chocolate Jello pudding mix, 1 cup vodka and 3 ice cubes. The ice helps chill the layer faster. The ice will melt fast, and when it does you are ready to pour.
    • Pour the last top white layer one each of the plastic cups. Fill the top ⅓ of the shot cup with the white mixture leaving a bit of room at the top.
    • Carefully snap the lids on the shots. Refrigerate for at least 4 hours, and preferably overnight. Wait until the jello shot is firm and doesn't stick to your finger.

    Set Up Fridge Time & Garnishes

    • When set, garnish with a dollop of whipped cream, candy corn or sprinkles right before serving!
    • SERVING NOTES: If kept at room temperature, they slowly soften and become melted in the cups. Jello Shots can last for seven to 10 days in a covered container in the refrigerator.
      For serving you can squirt some whipped cream, add sprinkles or some candy corn on top of the white layer!

    Video

    Notes

    What kind of jello shot cups and glasses are best?

    Try a small 3 oz plastic container with a lid. This way you can easily stack and take them to a party. I found these little plastic cups in the grocery store aisle right by the standard packages of jello powder.

    What is the ratio of Jello, Gelatin, and Alcohol?

    Gelatin "Jello" is typically sold in either a 6-ounce box or a 3-ounce box. 
    The strongest you can make jello shots (that will set) is a 3 to 1 ratio of 80-proof alcohol like vodka to water, and it takes overnight to set up.

    How many shots per person?

    When throwing a party, you'll probably want to prepare 1-2 for each guest.

    Nutrition

    Calories: 227kcal | Carbohydrates: 19g | Protein: 3g | Fat: 0.03g | Saturated Fat: 0.01g | Polyunsaturated Fat: 0.01g | Monounsaturated Fat: 0.004g | Sodium: 119mg | Potassium: 3mg | Fiber: 0.04g | Sugar: 18g | Calcium: 3mg | Iron: 0.1mg

    Pulled Pork Sliders

    [heart_this] · Oct 15, 2023 · 2 Comments

    Three pulled pork sandwiches on Hawaiian buns with pickles, cheese and ham on a cutting board.

    Savory Pulled Pork Sliders are an easy dinner or party food idea ready in under 30 minutes and use homemade or store-bought shredded pork! This Cuban sandwich version has melted Swiss cheese, juicy pork, Black Forest ham, and tangy dill pickles.

    The slider sandwiches are brushed with a delicious butter sauce and get gorgeous golden brown tops. Bake them for entertaining on game days, during the holidays, as a fast dinner, or chilling on weekends watching movies...

    Pulled Pork Slider Recipe

    Inspired by the famous Cuban Sandwich, I set out to turn simple shredded pork sliders into a melty ham and cheese sandwich pulled pork style!

    These easy pork sliders are loaded with Dijon butter on sweet Hawaiian bread rolls. I mean what could be better? Here is why you will love this recipe.

    • Flavor Packed: Every bite is drool-worthy and so full of flavor!
    • Super Easy Quick Recipe: This tasty slider recipe is so quick to make, even at the last minute. It's ready in less than 30 minutes as a great snack, game day appetizer, or weekday dinner.
    • Make Ahead Friendly: Prep these ahead and keep them chilling in the fridge. Then pop into the oven and bake.
    • Perfect for Leftovers: Whether you have store-bought, or homemade cooked shredded pulled pork, a great way to use up those leftovers!
    • A Party Food Favorite: These yummy warm sandwiches are always a crowd-pleaser. Perfect to have ready in a dish in the fridge for any party, take to a potluck, or family game nights.

    Ingredients

    • Hawaiian sweet bread rolls
    • Black Forest (sliced ham sliced 3x3 square)
    • Pulled Pork
    • Swiss cheese (cut into small 3x3 squares)
    • Dill Pickles (sliced thin)
    • Butter
    • Dijon mustard

    Slider Recipe Instructions

    Buy or make pulled pork in the oven, with a slow cooker or instapot.

    Try my wildly popular and very tender Slow Cooker Pulled Pork or take a look at this recipe to use Pork Loin for Shredded Pork: Oven Roasted Low and Slow, no smoker required! The recipe will give you 2 pounds of shredded pork. And surprisingly not made with pork butt or pork shoulder.

    1: Preheat oven to 350. Spray a roasting pan or small dish with non-stick spray.

    2: In a small saucepan, melt a cube of butter and Dijon mustard. Keep warm on low.

    3: Cut rolls in half, layer ham, a slice of cheese, Pickles and shred the Pork with two forks, then lay pieces in the sandwich.

    4: Put tops on sliders, and brush the top with melted butter/Dijon sauce.

    5: Place them in the oven, then bake for 15 minutes. Bake until the tops are golden brown and the cheese melts.

    To reheat leftovers, keep them in the baking dish covered with aluminum foil, bring to room temperature for 45 minutes then bake at 350 for 15 minutes covered.

    Other Toppings For Pork Sandwiches

    • Pulled Pork Buns: Hawaiian sweet bread rolls are great. But there are so many options and flavors of small slider buns nowadays in stores. And any buns will get golden brown with the butter mustard Dijon sauce on top.
    • For BBQ sliders, add some good barbecue sauce!
    • For a Hawaiian pulled pork sliders recipe, add some pineapple rings, and be sure to use sweet Hawaiian rolls.

    FUN FACT: the Cuban Sandwich actually originated in Miami, Florida and not Cuba! They serve these famous sandwiches to happy tourists. I found them on many menus in Cuba during my January 2016 trip. But they are actually not a traditional Cuban dish. Read about my Cuban adventure, and learn how to make Cuban Mojitos or Cuba Libres. So refreshing on hot days!

    What To Serve With Sliders

    Everyone loves them for dinner and as party food. Here are some great sides to serve your dinner, cookout, or party! And if you love sliders, try my Cheeseburger Sandwich Sliders, they are great for summer cookouts.

    • Coleslaw
    • Cowboy Baked Beans
    • Macaroni Salad
    • Loaded Potato Salad
    • 7 Layer Salad
    • Potato Chips
    • Onion Rings
    • French Fries
    • Easy Pasta Salad
    • Mac n' Cheese
    • BBQ Potato Salad
    • Mexican Grilled Corn
    • Grilled Corn
    Why are small sandwiches called sliders?


    Ever wondered where the term "slider" came from? It is believed to have originated from White Castle's "slyder" term they put a trademark on and used between 1985 and 2009. "Slider" describes small steam-grilled sandwiches. But today, it describes any small burger or small hot sandwich.

    More Pork Recipes

    Cherry Balsamic Pork Roast is perfect for family dinner, entertaining, or the holidays. An easy 10-minute prep pork loin recipe that serves a crowd.

    Perfectly moist yet slightly caramelized edges, a super savory Oven Shredded Pork with pork loin. Slow Cooker Pork has pork loin and goes perfectly with crunchy coleslaw, pickle chips, and tangy BBQ sauce.

    You'll also want to keep this easy recipe on hand. And make my Tater Tot Nachos (Totchos) with Pork and Tomatillo Sauce. It's also a perfect party or Game Day recipe!

    • A sliver carving fork and knife next to a pork loin roast and topped with cherries.
      Cherry Balsamic Pork Loin
    • A white casserole dish with oven roasted pulled pork shredded and ready to eat in tacos or a recipe for dinner.
      Oven Roasted Pulled Pork
    • Red white check paper lined basked holding a pulled pork sandwich topped with coleslaw.
      Slow Cooker Pulled Pork
    • A close up of a oval cast iron pan with tater tots, pulled pork, cut avocado, and drizzled with white sauce.
      Tachos Tater Tot Nachos

    Did you love this recipe? We would love to hear from you! If you make this recipe and love it, give it a 5-star rating ⭐⭐⭐⭐⭐ with a comment. THANK YOU!! Follow Delicious Table with my free newsletter and share this recipe with your friends on Facebook, Pinterest, and Instagram.

    Three pulled pork sandwiches on Hawaiian buns with pickles, cheese and ham on a cutting board.
    Print

    Pulled Pork Slider Recipe

    Savory Pulled Pork Sliders are an easy dinner or party food idea ready in under 30 minutes. This Cuban sandwich version has melted Swiss cheese, shredded pork (make or buy), Black Forest ham, and pickles! The slider sandwiches are brushed with a delicious butter sauce and get gorgeous golden brown tops. Bake them for entertaining on game days, during the holidays, as a fast dinner, or chilling on weekends watching movies.
    Course Appetizer, Dinner & Main Dishes
    Cuisine American
    Keyword pork sliders, pulled pork sandwiches, pulled pork slider, pulled pork sliders, shredded pork sandwiches, slider recipe, slider sandwich, warm sandwiches
    Prep Time 10 minutes minutes
    Cook Time 15 minutes minutes
    Total Time 25 minutes minutes
    Servings 14
    Calories 368kcal
    Author Lisa Hatfield

    Equipment

    • Roasting Pan
    • Mini Basting Brush

    Ingredients

    • 14 Hawaiian sweet bread rolls
    • ¼ lb Black Forest sliced ham sliced 3x3 square
    • 2 lb pulled pork
    • 1 package sliced Swiss cheese cut into small 3x3 squares
    • dill pickles sliced thin
    • ½ cup butter 1 stick
    • 3 tablespoons Dijon mustard
    US Customary - Metric

    Instructions

    • Buy or make pulled pork in the oven, with a slow cooker or instapot.
    • Preheat oven to 350. Spray a roasting pan or small dish with non-stick spray.
    • In a small saucepan, melt a cube (½ cup) of butter and Dijon mustard. Keep warm on low.
    • Cut rolls in half, layer ham, a slice of cheese, Pickles, and shred the Pork with two forks, then lay pieces in the sandwich.
    • Put the tops on sliders, brush tops with melted butter and Dijon sauce.
    • Bake for 15 minutes, until the tops are golden brown and the cheese is melted.

    Notes

    Sliders are great for family dinners! And everyone loves them as party food. Here are some great sides to serve your dinner, cookout, or party. And if you love sliders, try my Cheeseburger Sandwich Sliders, they are great for summer cookouts.
    • Coleslaw
    • Cowboy Baked Beans
    • Macaroni Salad
    • Loaded Potato Salad
    • 7 Layer Salad
    • Potato Chips
    • Onion Rings
    • French Fries
    • Easy Pasta Salad
    • Mac n' Cheese
    • BBQ Potato Salad
    • Mexican Grilled Corn
    • Grilled Corn

    Nutrition

    Calories: 368kcal | Carbohydrates: 19g | Protein: 32g | Fat: 18g | Saturated Fat: 9g | Cholesterol: 96mg | Sodium: 1305mg | Potassium: 451mg | Fiber: 1g | Sugar: 5g | Vitamin A: 500IU | Vitamin C: 0.9mg | Calcium: 312mg | Iron: 1.2mg

    Chile Cheese Pull Apart Bread

    [heart_this] · Oct 10, 2023 · 2 Comments

    A loaf of sliced bread filled with a cheesy mixture to make a pull apart crack bread recipe.

    Last Updated November 17th, 2025 at 02:18 pm by Lisa

    Chile Cheese Pull Apart Bread is also famously called "Crack Bread" because people can't stop eating it! A simple loaf of storebought bakery bread is magically transformed into cheesy goodness with garlic butter and green chiles. It can be a hot appetizer or a dinner side dish.

    Melty gooey cheese is tucked into the nooks and crannies wrapped in a golden brown crust. You will love the cheese pulls as you grab a piece of this decadent garlicky bread...

    Pull Apart Bread Recipe

    This cheesy garlic bread is also great during football season game day parties, family gatherings, and even the holidays.

    Just a few simple ingredients make this incredible chile cheesy pull-apart garlic bread. My Mom always made green chile cheese bread in the oven toasted on French bread halves under the broiler, so I took her basic recipe and created one of the best bread recipes in a pull-apart cheese bread style...

    Cheesy Bread Ingredients

    • 1 whole crusty loaf of bread sourdough bread or French bread
    • 3 cups shredded Monterey Jack cheese or mozzarella cheese
    • 2 four oz cans canned mild green chiles (1 cup)
    • ¼ cup mayonnaise
    • ½ cup salted butter
    • 1 teaspoon minced garlic 1 whole clove finely minced
    • 1 tablespoon dried parsley
    • ½ teaspoon sea salt

    Chile Cheesy Pull Apart Bread Instructions

    1. Using a small serrated knife, cut the bread loaf into diamond shapes in a diagonal grid pattern. Make 1" cuts, and be careful to not cut down all the way through the bottom of the loaf.

    2. In a small bowl, mix the grated shredded 3 cups of Jack cheese, 8 ounces of canned green chiles (1 cup), and ½ cup of mayonnaise. Hand-grated cheese gives you better cheese pulls!

    3. In a medium saucepan on medium heat, melt ½ cup butter (one stick), add 1 teaspoon finely minced garlic, 1 tablespoon dried parsley (you can also use fresh parsley), and ½ teaspoon sea salt. Stir until just combined, then turn off the heat. Pour the garlic butter into a measuring cup with a spout.

    4. Now it's time to fill the pull apart cheese bread. Using a teaspoon and your fingers, pull each of the sections open, and pour in the garlic butter inside. Use a pastry brush, and dab leftover butter all over the top of the bread.

    Next, fill in the chile cheese mixture. The best thing to use is a teaspoon. push plenty of cheese mixture down inside each crack. Some of the cheese will pop out of the crevices and that is great, it will melt beautifully and make nice cheesy edges on your pull apart garlic bread!

    5. Preheat the oven to 350 degrees. Wrap the stuffed bread in aluminum foil and bake on a baking sheet pan for 20 minutes, then unwrap and finish 5-10 more minutes until the cheese is melty and the bread is golden brown.

    6. Serve it hot on a breadboard with a small knife and lots of napkins!

    Cheesy Pull-Apart Bread Top Tips

    Best Types of Cheese To Use

    The best cheese tip is to grate your own cheese. It melts so much better! Pregrated has an additive that doesn't get the gooey cheese all melty. Good choices are Monterey Jack, sharp cheddar cheese, or pepper jack cheese for your cheesy garlic pull-apart bread.

    Best Bread To Use

    Buy or make a homemade bread loaf. Look for a good quality baked loaf (not bread dough), a dense loaf like a Sourdough (best choice), or rustic Italian, or French Boulle. The bread needs to be strong to hold all these ingredients, so avoid soft bread.

    Make Ahead Tips

    One of the best parts of this recipe is you can make it before you need it. Mix softened butter with the garlic, salt, and dried parsley instead of melted butter. Spread the butter with a small spatula, and push the grated chile cheese mixture in all the cracks. Wrap with plastic wrap, then a piece of foil, and refrigerate. Bake within a day. Remove the plastic wrap, rewrap with foil, bring to room temperature, and bake.

    Flavor Variations

    For a cheesy ranch pull-apart bread, swap in good Ranch Dressing in place of the mayonnaise!

    Another idea is to add a marinara sauce for dipping the cheesy warm bread.

    Leave out the green chiles, and swap in green onions or a tablespoon of finely minced jalapeno peppers are a great choice but they can be hot so taste a piece first.

    You can try other fresh herbs in place of the parsley, like sage, rosemary, or thyme. If you don't have minced garlic, use garlic powder. And in a pinch use some parmesan cheese in place of grated cheese, it will be delicious.

    A lady pulling a piece of cheesy pull apart bread from a loaf of crack bread.
    How do you reheat cheese garlic bread?

    Wrap the bread in a piece of foil, and warm it up in a hot oven at 350 degrees for 10-15 minutes. You can also warm up bread in an air fryer at 350 degrees for 5 minutes, check at the 3-minute mark if the cheese is melting.

    More Party Food Appetizer Recipes

    People can help themselves to any of these impressive appetizer spreads that look so stunning for the cozy Fall and Winter holidays like Christmas and Thanksgiving.

    Whether you are a fan of the NFL or College Football, cheer on your favorite team with a winning game plan of good food and munchies with over 75 Game Day Recipes in this collection.

    Create a stunning Thanksgiving Charcuterie Board filled with your favorite little bites. Add sliced meats, different types of cheeses, crackers, fruit, and nuts. Then add festive and sugary holiday treats for hungry guests on turkey day or anytime during the holiday season.

    These are the best Thanksgiving Appetizers for savory snacks, easy appetizers, and a bounty of party ideas for your celebration.  Nothing is easier than a Fall Crostini Bar for appetizers with an easy setup and assembly. There are recipes for a whipped goat cheese crostini topping and tons of ideas for toppings! 🥖🍷🧀

    • A football shaped cheese ball coated with crumbled bacon, green onions, and cheddar cheese and white cheese to look like laces on the football surrounded by crackers on a platter.
      75+ Football Food Recipes
    • A bountiful Thanksgiving charcuterie cheeseboard fill with colorful meats, cheeses nuts and more for Thanksgiving.
      Thanksgiving Charcuterie Board
    • A collection of Thanksgiving appetizers with recipe ideas, and party decorating tips for a Fall party.
      36 Thanksgiving Appetizers
    • A rustic table with small bowls filled with toppings for a fall appetizer crostini bar.
      Fall Crostini Bar

    More Appetizer Party Food

    Which of these 40 Best Puff Pastry Appetizer Recipes will you choose? This collection of impressive appetizers and delicious desserts is wrapped with irresistible layers of golden flaky puff pastry. And these freshly baked recipes are from some of the best food bloggers in the country.

    Today I am sharing all the secrets in this ultimate guide to Chicken Wings, the famous bar snack, and big game day food! A perfect chicken wing appetizer is totally possible that tastes deep-fried, but is oven baked.

    Take a look at 75 Great Cookout Recipes, plus tips and hacks for your outdoor BBQ party. This complete guide has all the best recipes for backyard cookouts including grilled classics, gorgeous entertaining options, fun drinks, cool desserts, make-ahead salads, the perfect appetizer, easy potluck sides, and more for your outdoor parties!

    Elegant, dainty, crustless Tea Sandwiches are quintessential pinkies-up party food for a beautiful light lunch garden party, a bridal shower, or a Mother’s Day brunch. Today, we will cover everything from bread choices to filling options, the best ways to make tea sandwiches ahead, and how to create incredible savory flavors.

    • A number of puff pastry appetizers, dinner ideas, and desserts in a collection.
      40 Puff Pastry Appetizer Recipes
    • A white platter filled with crispy chicken wings and one dipping into buffalo sauce.
      Crispy Chicken Wings
    • A square collage of colorful grilled food, side dishes, desserts, and drink recipes to serve at an outdoor bbq cookout.
      75+ Cookout Recipes & BBQ Party Ideas
    • Tea sandwiches stacked on a 3 tiered glass tray at a tea party with assorted fillings and flavors.
      Tea Sandwiches

    Did you love this recipe? We would love to hear from you! If you make this recipe and love it, give it a 5-star rating ⭐⭐⭐⭐⭐ with a comment. THANK YOU!! Follow Delicious Table with my free newsletter and share this recipe with your friends on Facebook, Pinterest, and Instagram.

    A loaf of sliced bread filled with a cheesy mixture to make a pull apart crack bread recipe.
    Print

    Green Chile Cheese Pull Apart Bread Recipe (Crack Bread)

    Pull Apart Bread is famously also known as "Crack Bread" for a reason, people can't stop eating it! A simple loaf of bakery bread is magically transformed into cheesy goodness with creamy garlic and green chile flavors. It can be a hot appetizer or a dinner side dish. Melty gooey cheese is tucked into the nooks and crannies, then baked to golden deliciousness. You will love the cheese pulls as you grab a piece of this decadent garlicky bread.
    Course Appetizers, Dips, & Snacks, Side Dishes & Vegetables
    Cuisine American
    Keyword cheese crack bread, cheese pull apart bread, pull apart bread
    Prep Time 15 minutes minutes
    Cook Time 30 minutes minutes
    Total Time 45 minutes minutes
    Servings 12
    Calories 173kcal
    Author Lisa Hatfield

    Equipment

    • Small Serrated Knife
    • Large Metal Sheet Pan
    • Mini Basting Brush

    Ingredients

    • 1 whole crusty loaf of bread sourdough bread or French bread
    • 3 cups shredded Montery Jack cheese or mozzarella cheese
    • 2 four oz cans canned mild green chiles 1 cup
    • ½ cup mayonaise
    • ½ cup salted butter
    • 1 teaspoon minced garlic 1 whole clove finely minced
    • 1 tablespoon dried parsley
    • ½ teaspoon sea salt

    Instructions

    • Using a small serrated knife, cut the bread loaf into diamond shapes in a diagonal grid pattern. Make 1" cuts, and be careful to not cut down all the way through the bottom of the loaf.
    • In a small bowl, mix the grated shredded 2 cups Jack cheese, 4 ounces green chile, and ¼ cup of mayonnaise. Hand grated cheese give you better cheese pulls!
    • In a medium sauce pan on medium heat, melt ½ cup butter (one stick), add finely minced garlic, dried parsley (you can also use fresh parsley), and sea salt. Stir until just combined, then turn off heat. Pour the garlic butter into a measuring cup with a spout.
    • Now its time to fill the pull apart cheese bread. Using a teaspoon and your fingers, pull apart each of the sections and pour in the garlic butter inside. Use a pastry brush, and dab leftover butter all over the top of the bread.
      Next, spoon in the chile cheese mixture. Using a spoon, push plenty of cheese mixture down inside each crack. Some of the cheese will pop out of the crevices and that is great, it will melt beautifully and make nice cheesy edges!
    • Preheat the oven to 350 degrees. Wrap the bread in foil and bake on a baking sheet pan for 20 minutes, then unwrap and finish 5-10 more minutes until the cheese in melty and bread is golden brown.
    • Serve it hot on a bread board!

    Notes

    Best Cheese To Use: I recommend grating your own cheese so it melts better! Pregrated has an additive that doesn't get all melty and gooey. Good choices are Monterey Jack, Cheddar cheese, or Pepperjack cheese. 
    Best Bread To Use: Buy a good quality baked loaf (not bread dough), a dense loaf like a Sourdough (best choice) or rustic Italian, or French Boulle. The bread needs to be strong to hold all these ingredients.
    Make Ahead Tips: Mix softened butter with the garlic, salt, and dried parsley instead of melted butter. Spread the butter with a small spatula, and push the grated chile cheese mixture in all the cracks. Wrap with plastic wrap, then a piece of foil and refrigerate. Remove the plastic wrap, rewrap with foil, and bake.
    Variations: For a cheesy ranch pull-apart bread, swap in good Ranch Dressing in place of the mayonnaise! Add a marinara sauce for dipping the cheesy warm bread into. Leave out the green chiles, and swap in green onions or a tablespoon of finely minced jalapeno peppers are a great choice but they can be hot so taste a piece first. You can try other fresh herbs in place of the parsley, like sage, rosemary, or thyme. If you don't have minced garlic, use garlic powder. And in a pinch use some parmesan cheese in place of grated cheese, it will be delicious.
    How do you reheat cheese garlic bread?
    Wrap the bread in a piece of foil, and warm it up in a hot oven at 350 degrees for 10-15 minutes. You can also warm up bread in an air fryer at 350 degrees for 5 minutes, check at the 3-minute mark if the cheese is melting.

    Nutrition

    Serving: 12g | Calories: 173kcal | Carbohydrates: 1g | Protein: 5g | Fat: 17g | Saturated Fat: 9g | Polyunsaturated Fat: 3g | Monounsaturated Fat: 4g | Trans Fat: 0.3g | Cholesterol: 39mg | Sodium: 339mg | Potassium: 35mg | Fiber: 0.2g | Sugar: 0.1g | Vitamin A: 399IU | Vitamin C: 4mg | Calcium: 149mg | Iron: 0.3mg

    Turkey Gravy

    [heart_this] · Oct 10, 2023 · 1 Comment

    A dark golden roast turkey with a white gravy boat pouring turkey gravy on top.

    Last Updated January 4th, 2024 at 11:09 pm by Lisa

    Make a perfect turkey gravy in just 10 minutes with this step-by-step guide and four simple ingredients.

    The rich pan drippings from your Thanksgiving turkey add an incredible depth of flavor and is a simple process. Learn my Chef's secret for velvety smooth results and no lumpy gravy...

    Table of Contents

    • Turkey Gravy Recipe
    • Turkey Gravy Ingredients
    • The Best Turkey Gravy Instructions
      • 1. Start With Good Turkey Pan Drippings
      • 2. Make Flour-Butter Thickener (Beurre Manié)
      • 3. Now It's Time To Cook Your Perfect Gravy
      • 4. And Now Thicken The Gravy
      • 5. Whisk And Simmer For 5 Minutes
      • 6. Let's Finish Thickening
      • 7. Serving Hot Gravy
    • More Thanksgiving Side Dishes
    • More Thanksgiving Dinner Turkey Recipes

    Turkey Gravy Recipe

    Of all the Thanksgiving recipes, making a delicious gravy can make people a little bit uneasy in the kitchen. Today, we will cover how to make the best homemade turkey gravy! And the easiest way to ensure there are no lumps.

    Get my cooking techniques for a silky smooth rich gravy that I learned in professional cooking school. The cooking technique came from my French Chef instructor, and it works every single time flawlessly.

    There is a full video in the recipe card below. So go see how I make it with all the stages of cooking a delicious turkey gravy! And you can scale this recipe up and down for your holiday feast right in the recipe as well. Let's make gravy...

    Turkey Gravy Ingredients

    • soft butter 
    • all purpose flour
    • turkey pan drippings (try my Roast Turkey recipe!)
    • Chicken Stock (Bone Broth) chicken broth, turkey broth, or turkey stock

    Make My Homemade Chicken Stock! The flavor of the gravy is deeply enhanced by both the turkey juices and the addition of good chicken stock. Making turkey gravy from stock is the way to go. I have made my own stocks for decades, a skill passed from my Grandmother on down through to my Mom and I carry on the tradition. I use storebought if I don't have any in my freezer.

    Have you ever wondered how to make your own stocks at home? Learn how to make Chicken Stock, also known as bone broth. This is a step-by-step guide with cooking tips plus how to freeze it with 15 delicious new recipe ideas. Save money and have some ready to elevate dinner, soups, sauces, and stews.

    Chicken Stock (Bone Broth) Plus Freezer Tips and 15+ Recipe Uses!
    Make Chicken Stock aka Bone Broth at home to create other tasty recipes with chicken stock, plus cooking tips and 15+ delicious recipe ideas!
    GET THE RECIPE PIN IT
    3 small Mason jars filled with chicken stock and black heart shaped labels.

    The Best Turkey Gravy Instructions

    1. Start With Good Turkey Pan Drippings

    Save those golden drippings from your juicy roast turkey, and whisk together a fantastic brown gravy for your Thanksgiving table. However you season your bird, will enhance the gravy flavor. Fresh herbs like parsley, fresh thyme, sage, and rosemary or a Turkey Dry Brine Rub spice mix, salt, and black pepper all add extra flavor to the gravy!

    1. As the turkey starts to cook, the best way to get enough pan drippings is to pour a 32 ounce box of chicken stock into the bottom of the roasting pan. It adds moisture while the bird roasts and creates several cups of drippings you need for good gravy. Use a turkey baster with those pan juices to keep your meat moist, and to help it get golden brown.
    2. As the pan juices evaporate, add another 32 ounce box of chicken stock to keep liquid in the pan high enough to keep the brown bits at the bottom of the roasting pan from burning and to create pan drippings.
    3. Optional Steps: Once you remove the turkey drippings from the pan, you can drain off the layer of fat using a fat separator. A fat separator is basically a large measuring cup with a special spout that helps the fat rise to the top so it can be poured off. I don't typically do this step, but you can if you wish. I think the fat adds delicious flavor! Another option is to strain the drippings with a fine-mesh sieve. I typically don't do this unless there are a lot of pieces of herbs like rosemary or larger turkey bits in the gravy. These are both a matter of personal preference!

    2. Make Flour-Butter Thickener (Beurre Manié)

    On a small plate or in a small bowl, press ¼ cup softened butter with ¼ cup flour with a fork until well incorporated into a paste.

    The French chefs call this mixture a Beurre Manié, and it is great to thicken soups, stews, and sauces like gravy!

    PRO TIP: For the best gravy, some people like a thick gravy, and others like a thin gravy. The consistency is up to you! To thicken gravy, cook it longer and don't add any extra chicken stock. For thinner gravy simply add more chicken stock and don't add as much flour-butter thickener.

    3. Now It's Time To Cook Your Perfect Gravy

    Pour one cup of turkey drippings into the pan, then one cup of chicken stock, equal portions are what you want. You can use all pan dripping if you prefer, add stock to increase the gravy amount as you desire.

    4. And Now Thicken The Gravy

    Now whisk 1-2 tablespoons of the flour-butter (Beurre Manié) mixture into the pan over medium heat. Stir with a whisk or wooden spoon constantly until well incorporated. Simmer, don't boil on a medium low heat.

    5. Whisk And Simmer For 5 Minutes

    It will begin to thicken at about 5 minutes, the gravy will get silky and glossy. The key is to not walk away, keep adding more chicken stock and butter/flour mixture. And keep stirring on a low heat with a whisk for 5 more minutes. If it boils turn your heat down to medium-low heat. You want a nice gentle simmer.

    PRO TIP: For the best results, taste your gravy as you go. Resist the urge to add additional salt, there is usually enough salt and seasonings on the roasting turkey, in the stock, and butter.

    6. Let's Finish Thickening

    It takes about 10 minutes total time to finish cooking gravy, and it will thicken even more when you take it off the heat!

    7. Serving Hot Gravy

    Serve hot in a gravy boat with sliced turkey, dressing, mashed potatoes, and other Thanksgiving or holiday side dishes.

    Leftover turkey gravy should be stored in an airtight container chilled in the refrigerator. Be sure to not keep leftover gravy at room temperature for more than 2 hours, and get it chilled for fridge storage safely. Eat within 3-4 days.

    How do you thicken gravy?

    Beurre Manié is French for “kneaded butter”. It is made by mixing equal parts of softened butter and flour. This paste is used to thicken sauces, soups, and stews.

    How is a roux and beurre manié different?

    Both use the same ratio of 1 part flour to 1 part butter. And each one is used to thicken sauces like gravy, soups, and stews. The main difference is roux is cooked first in a pan, using melted butter and flour, whisking over lower heat which turns it a darker color. A beurre manié is made by mashing uncooked soft butter with flour into a paste on a plate or in a bowl with a fork and then adding the mixture to the recipe during the cooking process.

    A Thanksgiving table complete with mashed potatoes, cranberry sauce, gravy and other side dishes.

    More Thanksgiving Side Dishes

    Make one of these delicious Thanksgiving Appetizers! There are over 36 recipes to choose from in this collection of the best holiday party food ideas.

    For more sides, you can't beat classics like Southern Sweet Potato Casserole or Coconut-Pecan Sweet Potatoes.

    Make perfectly Roasted Vegetables with these cooking tips and techniques. Plus get roasting times and ideas to use seasonal veggies.

    Make these Make-Ahead Mashed Potatoes with 5 Ways to Reheat them for your holiday party, one of America's favorite holiday side dishes!

    Sausage Stuffing Dressing is a classic holiday side dish loaded with so much flavor! Choose to make it with a spicier or a mild sweet Italian sausage. It also has boxed cornbread, crunchy celery, soft French bread, sweet dried cherries, and tart dried cranberries. They are all mixed into one heavenly dressing recipe.

    This tropical Pineapple Orange Cranberry Sauce is a great addition to take or serve at your holiday feast.

    Party Dinner Rolls topped with cheese and herbs. So pretty, and people go crazy for them.

    • A collection of Thanksgiving appetizers with recipe ideas, and party decorating tips for a Fall party.
      36 Thanksgiving Appetizers
    • Lifting a scoop of sweet potato casserole out of a white casserole dish with large serving spoon.
      Sweet Potato Casserole (Ruth's Chris Recipe)
    • A square white dish filled with colorful roasted vegetables and topped with squares of butter garnished with herbs.
      Vegetable Roasting
    • A white casserole dish filled with mashed potatoes and squares of melted butter on top.
      Make-Ahead Mashed Potatoes
    • A white casserole dish filled with Sausage Stuffing baked to a golden brown.
      Sausage Stuffing Dressing
    • A crystal bowl filled with cranberry sauce with pineapple and cranberries in the background.
      Pineapple-Orange Cranberry Sauce
    • A close up of baked Frozen Dinner Rolls topped with cheeses, herbs, and seasonings.
      Dinner Rolls
    • A silver server scooping up sweet potato casserole with golden toasted marshmallows on top out of a white casserole dish.
      Sweet Potato Casserole With Marshmallows

    More Thanksgiving Dinner Turkey Recipes

    This complete guide and step-by-step recipe for Spatchcock Turkey. It gives every bit of the surface a chance to turn and even golden brown all over. Large meat cuts like legs and the breast all cooks at different times. Light meat or white meat, cooks faster than thigh meat or dark meat. This cooking method is an effective technique. It roasts the entire bird at the same time and doesn't over cook any one part.

    Cooking a Turkey Breast is easy using a boneless breast is so easy. And you will love the flavorful gravy made from the pan drippings! This is a great recipe to serve a small number of people. And you will have easy turkey leftovers the next day!

    Wondering what to do with Thanksgiving leftovers? Make Thanksgiving Empanadas Hand Pies. Bake a Leftover Casserole that is just like a Shephard's Pie and the best recipe for leftovers.

    A Roast Turkey with Dry Brine adds bold flavor to your whole Thanksgiving bird! This is so easy to put together with a good spice blend right from your kitchen pantry. Skip those store-bought mixes and mix up the best seasoning at home!

    • A collage of spatchcock turkey sliced on a platter, with one in a roasting pan, and on a table with side dishes.
      Spatchcock Turkey
    • Roast Turkey (Dry Brine Recipe)
    • Top down view of a roasted turkey breast sliced thick and garnished with fresh herbs.
      Turkey Breast Recipe
    • Golden brown baked empanadas decorated with pie crust leaves on a Fall tray.
      Empanadas ~ Turkey Leftover Recipe
    • A white dish filled with golden bubbly turkey shepherd's pie baked and ready to eat.
      Leftover Turkey Shepherd's Pie

    Did you love this recipe? We would love to hear from you! If you make this recipe and love it, give it a 5-star rating ⭐⭐⭐⭐⭐ with a comment. THANK YOU!! Follow Delicious Table with my free newsletter and share this recipe with your friends on Facebook, Pinterest, and Instagram.

    A dark golden roast turkey with a white gravy boat pouring turkey gravy on top.
    Print

    Turkey Gravy Recipe

    Make a perfect turkey gravy in just 10 minutes with this step-by-step guide and four simple ingredients. The rich pan drippings from your Thanksgiving turkey add an incredible depth of flavor and is a simple process. Learn my Chef's secret for velvety smooth results and no lumpy gravy!
    Course Thanksgiving
    Cuisine Side Dish
    Keyword gravy, gravy recipe, homemade gravy, no lumpy gravy, turkey gravy, turkey gravy recipe
    Prep Time 5 minutes minutes
    Cook Time 10 minutes minutes
    Total Time 15 minutes minutes
    Servings 12
    Calories 58kcal
    Author Lisa Hatfield

    Equipment

    • Turkey Baster
    • Wire Whisk
    • OXO Fat Separator

    Ingredients

    • ¼ cup soft butter room temperature
    • ¼ cup all purpose flour
    • 1 cup turkey pan drippings
    • 1 cup chicken stock (bone broth) chicken broth, turkey broth, or turkey stock

    Instructions

    Turkey Pan Drippings

    • As the turkey starts to cook, the best way to get enough pan drippings is to pour a 32 ounce box of chicken stock into the bottom of the roasting pan. It adds moisture while the bird roasts and creates several cups of drippings you need for good gravy. Use a turkey baster with those pan juices to keep your meat moist, and to help it get golden brown.
    • As the pan juices evaporate, add another 32 ounce box of chicken stock to keep liquid in the pan high enough to keep the brown bits at the bottom of the roasting pan from burning and to create pan drippings.
    • Optional: Once you remove the turkey drippings from the pan, you can drain off the layer of fat using a fat separator. A fat separator is basically a large measuring cup with a special spout that helps the fat rise to the top so it can be poured off. I don't typically do this step, but you can if you wish. I think the fat adds delicious flavor!
      Another option is to strain the drippings with a fine-mesh strainer. I typically don't do this unless there are a lot of pieces of herbs like rosemary or larger turkey bits in the gravy. This is a matter of personal preference.

    Make The Gravy Flour-Butter Thickener (Beurre Manié)

    • On a small plate or in a small bowl, press ¼ cup butter with ¼ cup flour with a fork until well incorporated into a paste. The French chefs call this mixture a Beurre Manié, and it is great to thicken soups, stews, and sauces like gravy!

    Cook The Gravy

    • Pour one cup of turkey drippings into the pan, then one cup of chicken stock, equal portions are what you want. You can use all pan dripping if you prefer.
    • Now whisk 1-2 tablespoons of the flour-butter (Beurre Manié) mixture into the pan over medium heat. Stir with a whisk or wooden spoon constantly until well incorporated. Simmer, don't boil on a medium low heat.
    • It will begin to thicken at about 5 minutes, the gravy will get silky and glossy. The key is to not walk away, keep adding more chicken stock and butter/flour mixture. And keep stirring on a low heat with a whisk for 5 more minutes. If it boils turn your heat down to medium-low heat. You want a nice gentle simmer.
    • It takes about 10 minutes to finish cooking, and it will thicken even more when you take it off the heat.
    • Serve hot in a gravy boat with sliced turkey, dressing, mashed potatoes and other Thanksgiving or holiday side dishes.
    • Leftover turkey gravy should be stored in an airtight container chilled in the refrigerator. Be sure to not keep leftover gravy at room temperature for more than 2 hours, and get it chilled for fridge storage safely. Eat within 3-4 days.

    Video

    Notes

    Good Turkey Pan Drippings

    Save those golden drippings from your juicy roast turkey, and whisk together a fantastic brown gravy for your Thanksgiving table. However you season your bird, will enhance the gravy flavor. Fresh herbs like parsley, fresh thyme, sage, and rosemary or a Turkey Dry Brine Rub spice mix, salt, and black pepper all add extra flavor to the gravy!

    Homemade Chicken Stock

    Make My Homemade Chicken Stock! The flavor of the gravy is deeply enhanced by both the turkey juices and the addition of good chicken stock. Making turkey gravy from stock is the way to go. Learn how to make Chicken Stock, also known as bone broth. This is a step-by-step guide with cooking tips plus how to freeze it with 15 delicious new recipe ideas. Save money and have some ready to elevate dinner, soups, sauces, and stews.

    How To Make Thick or Thin Gravy 

    For the best gravy, some people like a thick gravy, and others like a thin gravy. The consistency is up to you! To thicken gravy, cook it longer and don't add any extra chicken stock. For thinner gravy simply add more chicken stock and don't add as much flour-butter thickener.
    PRO TIP: For the best results, taste your gravy as you go. Resist the urge to add additional salt, there is usually enough salt and seasonings on the roasting turkey, in the stock, and butter.

    Nutrition

    Calories: 58kcal | Carbohydrates: 3g | Protein: 1g | Fat: 4g | Saturated Fat: 3g | Polyunsaturated Fat: 0.2g | Monounsaturated Fat: 1g | Trans Fat: 0.2g | Cholesterol: 11mg | Sodium: 87mg | Potassium: 46mg | Fiber: 0.1g | Sugar: 1g | Vitamin A: 119IU | Vitamin C: 0.1mg | Calcium: 3mg | Iron: 0.2mg

    Cheesy Potato Casserole

    [heart_this] · Oct 8, 2023 · 2 Comments

    A large spoon holding a scoop of hot potato casserole serving it for dinner.

    Last Updated April 16th, 2024 at 12:11 pm by Lisa

    Cheesy Potato Casserole is wildly popular and also known as Funeral Potatoes. This famous American side dish is loved by people across the country for family gatherings, church potlucks, and holiday dinners.

    This recipe gives you my best scratch secrets to make it amazing, plus make-ahead shortcuts. One thing is for sure. You will fall in love with these cheesy potatoes. They are rich, creamy, light, and fluffy with a golden crispy scrumptious topping...

    A large spoon holding a scoop of hot potato casserole serving it for dinner.

    Funeral Potatoes / Cheesy Potato Casserole Recipe

    Most of us have either had or made a funeral potatoes recipe at some point in our lives. I grew up with this particular recipe that was shared with my parents. It became our family favorite for Christmas, Thanksgiving, and Easter feasts.

    Potato casseroles tend to have lots of variations, so try out some new ideas in the printable recipe card below. You can make this as a hash brown casserole or take the time to go totally scratch! I promise you it is worth the effort of a bit more total time in the kitchen, making this incredible side dish.

    PRO TIP: Over the decades I have made this recipe, hand-grated cheese is so much better! Grate a good sharp cheddar. You will taste the difference. And hand grating cooked potatoes results in a fluffy light texture, and totally worth your time!

    A large spoon scooping into a potato casserole dish for a holiday dinner.

    Cheesy Potato Casserole Ingredients

    • medium Russet potatoes or buy 2 bags of shredded hash browns
    • melted butter
    • cream of celery soup (canned or homemade)
    • sharp cheddar cheese (hand grated melts better than pre-shredded!)
    • green onion chopped
    • sour cream
    • potato chips
    • Nonstick coconut oil spray

    PRO TIP: Use two 20 oz bags of frozen hash browns in place of 6 cups of cooked shredded potatoes for a shortcut. Real potatoes add a fluffier texture, but take a little more prep time.

    Ingredients to make Funeral potatoes aka cheesy potato casserole.

    Casserole Instructions

    1. Peel the potatoes and cook until tender, coarsely grate. Add them to a large bowl as you go. You can use pre-shredded hash browns, but I recommend you shred your own potatoes. It makes the casserole so fluffy and light!
    2. Grate the cheddar cheese. Grated cheddar cheese melts so much better than pre-grated cheese. There are stabilizers in the bag to keep it from sticking, so it's worth a few extra minutes to grate it for this recipe.
    Grating cooked potatoes on a hand box grater to make a potato casserole.

    3. On the stove in a saucepan, melt the stick of butter (½ cup). Add the 2 cups cheddar cheese and 10.5 ounces of cream of celery soup. Stir over medium heat until just combined. Turn off the heat. Let it cool down.

    4. Once cool, mix in the 16 ounces of sour cream and chopped green onions.

    5. Spray a 9 x 13 casserole dish with coconut oil spray. This really helps with easy clean up and serving.

    6. Layer ½ the potatoes and ½ the cheese sauce. Layer the other ½ of the grated potatoes and the other half of the cheese sauce.

    7. Add the potato chips into a zip-top bag, and seal the bag removing the air. Roll a rolling pin back and forth until you have finely crushed chips. Note: many people use cornflakes and love them on top, your choice!

    8. Sprinkle the crushed chips all over the top of the potato casserole.

    A white casserole dish with funeral potatoes and a crushed potato chip topping.

    9. Bake in the oven for 45 minutes at 450 degrees. Serve it hot! Try using a warming tray for this holiday party side dish classic.

    Baked potato casserole also called funeral potatoes golden brown and baked in a white casserole dish.
    Scooping out a serving of potato casserole from a white baking dish.

    Top Potato Casserole Recipe Tips And Ingredient Variations

    Potatoes: If buying shredded potatoes at the store, be sure to get shredded hashbrowns, not diced hash browns! If you buy frozen hash browns, thaw them overnight in the fridge.

    Cheese: Quality ingredients make a difference in your cooking. Use a good sharp cheddar cheese that you hand grate. It will taste better and melts into a smooth and creamy sauce mixture! This is worth the extra cooking time in this recipe.

    Canned Soup Options: Many versions of this recipe exist, and in place of cream of celery, swap in either cream of mushroom soup or storebought or homemade cream of chicken soup.

    Toppings: For many years I have used crushed potato chips. Many people love a cornflake topping, panko bread crumbs, or Ritz crackers. One thing I like about potato chips, is you crush them up and that's it!

    For any of these other toppings, I recommend melting a couple of tablespoons of butter in a medium skillet and browning the cracker, bread crumbs, or crushed corn flakes if you choose one of those toppings.

    Green Onions: If you prefer to leave out the onions, add a teaspoon of onion powder, garlic powder, and a dash of black pepper. The green onions add a wonderful depth of flavor but not everyone is a fan.

    Other Additions: Some people love to add Diced Smoked Ham leftover from the holidays! And how about this idea, my friend Michelle lays raw chicken breasts on top and bake the potato casserole. Add crumbled bacon or bacon bits with green onions like a loaded baked potato!

    Or people add a little can of diced green chiles, and shredded chicken, with crumbled tortilla chips for a Mexican flair!

    Funeral Potatoes Reheat & Leftover Instructions

    Cover any leftovers tightly with plastic wrap or aluminum foil. You can reheat them in the microwave uncovered, but the chips don't crisp up. I prefer to bring leftovers to room temperature for about an hour, then reheat the cheesy potatoes in the oven covered with foil at 350 for 20 minutes or for 8 minutes at 375 in my Air Fryer!

    Freezing: You can freeze the unbaked mixture or the leftovers! I like to put them in portions in zip-lock bags, push the air out, and pop them into the freezer. Then defrost overnight in the refrigerator, put into a dish covered with foil, and bake at 350 for 20 minutes!

    Make Ahead Tips

    For holidays and family gatherings, this recipe is great to make ahead. You can follow the recipe and layer it in your baking dish. Then crush your topping and add it right before baking!

    What are funeral potatoes?

    Funeral potatoes got their name as they became a popular crowd-pleasing hot side dish potato casserole served after funerals for luncheons and dinner at churches.

    A rectangle white casserole dish with cheesy potato casserole being scooped out with a big serving spoon.

    More Potato Recipes

    Smashed Potatoes served with melted herb butter are one of the most heavenly potato recipes. These crispy potatoes are a perfect side dish for a family dinner, romantic date nights, holidays, or a dinner party.

    Bake your Hash Browns in muffin tins and skip the frying on your stovetop altogether. And no messy stovetop to clean! This simple recipe is so popular for holidays or any special occasion.

    Make-Ahead Mashed Potatoes are creamy smooth, buttery, fluffy, and melt in your mouth. There are five reheating methods here plus tips on how to keep them warm for dinner, or holiday meals like Thanksgiving when you have several things cooking in the oven.

    Tater Tot Casserole is an easy breakfast recipe that takes 15 minutes to prep and bakes golden brown in just 50 minutes.

    • A sheet pan of smashed potatoes with fresh herbs baked with crispy golden brown edges.
      Crispy Smashed Potatoes
    • Three golden crispy edged hash browns baked in a muffin tin on cutting board.
      Oven Baked Hash Browns
    • A white casserole dish filled with mashed potatoes and squares of melted butter on top.
      Make-Ahead Mashed Potatoes
    • A vintage silver serving spoon taking out a piece of tater tot casserole just baked.
      Tater Tot Breakfast Casserole

    Did you love this recipe? We would love to hear from you! If you make this recipe and love it, give it a 5-star rating ⭐⭐⭐⭐⭐ with a comment. THANK YOU!! Follow Delicious Table with my free newsletter and share this recipe with your friends on Facebook, Pinterest, and Instagram.

    A large spoon holding a scoop of hot potato casserole serving it for dinner.
    Print

    Cheesy Potato Casserole (Funeral Potatoes) Recipe

    Cheesy Potato Casserole is wildly popular and also known as Funeral Potatoes. This famous American side dish is loved by people across the country for family gatherings, church potlucks, and holiday dinners. This recipe gives you my top scratch secrets to make it amazing, plus make-ahead shortcuts. One thing is for sure. You will fall in love with these cheesy potatoes. They are rich, creamy, light, and fluffy with a golden crispy scrumptious topping.
    Course Side Dishes & Vegetables
    Cuisine American
    Keyword cheesy potato casserole, cheesy potatoes, funeral potatoes, potato casserole, potato casserole recipe
    Prep Time 45 minutes minutes
    Cook Time 45 minutes minutes
    Total Time 1 hour hour 30 minutes minutes
    Servings 12
    Calories 427kcal
    Author Lisa Hatfield

    Equipment

    • Spoon Spatula
    • Box Grater
    • Large Casserole Dish
    • Electric Warming Tray

    Ingredients

    • 6-7 medium Russet potatoes or buy 2 - 1 pound 4 oz bag shredded hash browns
    • ½ stick butter melted
    • 10.5 ounces can cream of celery soup
    • 2 cups grated cheddar cheese grated melts better than pre-shredded
    • ⅓ cup green onion chopped
    • 16 ounces sour cream 1 pint
    • 11 ounces Lays potato chips
    • Non stick coconut oil spray

    Instructions

    • Peel the potatoes and cook until tender, coarsely grate. Add the potatoes into a large bowl as you go. You can use pre-shredded hash browns, but I recommend you shred your own potatoes. It makes the casserole so fluffy and light!
    • Grate the cheddar cheese. Grated cheddar cheese melts so much better than pre-grated cheeses. There are stablizers in the bag to keep it from sticking, and so its work a few minutes to grate it for this recipe.
    • On the stove in a sauce pan, melt the stick of butter (½ cup). Add the 2 cups cheddar cheese, and 10.5 ounces of cream of celery soup. Stir over medium heat until just combined. Turn off the heat. Let it cool down.
    • Once cool, mix in the 16 ounces of sour cream and chopped green onions.
    • Spray a 9 x 13 casserole dish with coconut oil spray. This really helps with easy clean up and serving.
    • Layer ½ the potatoes and ½ the cheese sauce. Layer the other ½ of grated potatoes and the other half of the cheese sauce.
    • Add the potato chips into a zip-top bag, and seal the bag removing the air. Roll a rolling pin back and forth until you have fine crushed chips. Note: many people use corn flakes and love them on top, your choice!
    • Sprinkle the crushed chips all over the top of the potato casserole.
    • Bake 45 minutes at 450 degrees. Serve it hot! Try using a warming tray for this holiday party side dish classic.

    Video

    Notes

    PRO TIP for Potatoes: Use two 20 oz bags of frozen hash browns in place of 6 cups of cooked shredded potatoes for a shortcut. Real potatoes add a fluffier texture, but take a little more prep time.
    3 medium sized Russet potatoes or eight to ten small white rose potatoes will typically weigh one pound. A pound of potatoes will be about 3-½ cups chopped or 2 to 3 cups mashed, this varied due to the sizes of potatoes. 
    PRO TIP for Cheese: Over the decades I have made this recipe, hand-grated cheese is so much better! Grate a good sharp cheddar. You will taste the difference. And hand grating cooked potatoes results in a fluffy light texture, and totally worth your time!

    Top Potato Casserole Recipe Tips And Ingredient Variations

    Potatoes: If buying shredded potatoes at the store, be sure to get shredded hashbrowns, not diced hash browns! If you buy frozen hash browns, thaw them overnight in the fridge.
    Cheese: Quality ingredients make a difference in your cooking. Use a good sharp cheddar cheese that you hand grate. It will taste better and melts into a smooth and creamy sauce mixture! This is worth the extra cooking time in this recipe.
    Canned Soup Options: Many versions of this recipe exist, and in place of cream of celery, swap in either cream of mushroom soup or storebought or homemade cream of chicken soup.
    Toppings: For many years I have used crushed potato chips. Many people love a cornflake topping, panko bread crumbs, or Ritz crackers. One thing I like about potato chips, is you crush them up and that's it!
    For any of these other toppings, I recommend melting a couple of tablespoons of butter in a medium skillet and browning the cracker, bread crumbs, or crushed corn flakes if you choose one of those toppings.
    Green Onions: If you prefer to leave out the onions, add a teaspoon of onion powder, garlic powder, and a dash of black pepper. The green onions add a wonderful depth of flavor but not everyone is a fan.
    Other Additions: Some people love to add Diced Smoked Ham leftover from the holidays! And how about this idea, my friend Michelle lays raw chicken breasts on top and bake the potato casserole. Add crumbled bacon or bacon bits with green onions like a loaded baked potato!
    Or people add a little can of diced green chiles, and shredded chicken, with crumbled tortilla chips for a Mexican flair!

    Funeral Potatoes Reheat & Leftover Instructions

    Cover any leftovers tightly with plastic wrap or aluminum foil. You can reheat them in the microwave uncovered, but the chips don't crisp up. I prefer to bring leftovers to room temperature for about an hour, then reheat the cheesy potatoes in the oven covered with foil at 350 for 20 minutes or for 8 minutes at 375 in my Air Fryer!
    Freezing: You can freeze the unbaked mixture or the leftovers! I like to put them in portions in zip-lock bags, push the air out, and pop them into the freezer. Then defrost overnight in the refrigerator, put into a dish covered with foil, and bake at 350 for 20 minutes!

    Make Ahead Tips

    For holidays and family gatherings, this recipe is great to make ahead. You can follow the recipe and layer it in your baking dish. Then crush your topping and add it right before baking!

    Nutrition

    Serving: 12g | Calories: 427kcal | Carbohydrates: 37g | Protein: 10g | Fat: 28g | Saturated Fat: 11g | Polyunsaturated Fat: 3g | Monounsaturated Fat: 9g | Trans Fat: 0.2g | Cholesterol: 54mg | Sodium: 436mg | Potassium: 851mg | Fiber: 2g | Sugar: 3g | Vitamin A: 641IU | Vitamin C: 13mg | Calcium: 202mg | Iron: 1mg

    Halloween Pizza

    [heart_this] · Oct 7, 2023 · 2 Comments

    Six baked Halloween pizzas on a baking rack decorated to look like ghosts, pumpkins, dracula, frankenstein, and monsters.

    Halloween pizzas are great to bake for family dinner, a Halloween party, movie nights, or right before trick or treating!

    Decorate with one of these six fun Halloween-themed ideas, or create your own. Make a Jack-O-Lantern pizza, Dracula, Frankenstein, Monster, Mummy, or Ghost. During the month of October, throw an epic pizza night. The kids will definitely want to help make dinner this Halloween season...

    Six baked Halloween pizzas on a board decorated to look like ghosts, pumpkins, dracula, frankenstein, and monsters.

    Halloween Pizza Recipe

    With just a few simple ingredients, you can bake up little mini Halloween pizzas faster than calling Papa Johns or Chuck E. Cheese for pizza delivery! These might become a Halloween tradition in your home each year...

    Pita Pizza Ingredients

    • pita breads (flatbread or premade pizza crust)
    • pizza sauce (homemade, canned, or marinara sauce)
    • grated cheese (white or cheddar cheese)
    • black olives (or green olives)
    • pepperoni slices large or mini
    • cooked crumbled sausage
    • string cheese
    • real cheese slices (white-ghosts, orange pumpkins)
    • candy eyes
    • optional: mushrooms or red or green bell pepper
    Ingredients to bake Halloween pita pizzas on a baking rack decorated to look like ghosts, pumpkins, dracula, frankenstein, and monsters.

    Easy Pita Pizza Baking Instructions

    1. Heat oven to 400 degrees. Start preparing all your toppings.
    2. Place an oven safe baking rack on a large baking sheet pan, and each pita bread on the rack. Toast the pitas in the oven for 7 minutes until they are just firm and golden brown. This is the easier way to get them slightly crisp before putting your favorite toppings on.
    3. If you make your pizza sauce at home, mix a small 6 oz can of roasted garlic tomato paste with an 8-ounce can of tomato sauce, and a teaspoon of Italian seasoning.
    4. Spread a thin layer of sauce on each pita bread using a small brush or the back of a spoon, and decorate for Halloween.
    5. Place decorated Halloween Pita Pizzas on the oven rack over a large sheet pan, and bake for 7 minutes at 400 degrees Fahrenheit until the cheese melts. After baking add some candy eyes, and serve warm!

    Halloween Pizza Ideas: Toppings & Decorating Ideas

    Mummy Pizza: Add some grated white cheese, then lay strips of cheese (string cheese) in a crisscross pattern, and add two black olive slices for eyes. Add candy eyes inside black olive eyes after it bakes.

    Friendly Ghost Pizza: For a simple cheese pizza, add some grated cheese, then use ghost-shaped cookie cutters and cut a ghost shape out of a slice of mozzarella cheese, provolone, or Swiss. Add a small circle of black olive for the mouth, and add candy eyes after it bakes.

    Pumpkin Jack-o’-Lantern Pizza: Add some orange shredded cheese then cut round pepperoni slices with scissors into triangles for eyes and nose, then cut them into smaller triangles for teeth on your pepperoni pizza.

    Dracula: Add some shredded white cheese, chopped black olives for hair, green olives with pimentos for eyes, and slice a piece of curved red bell pepper for a mouth and tiny triangles for fangs.

    Frankenstein: Sprinkle grated white cheese, and for a fun pizza add crumbled cooked sausage for hair, mini pepperoni for eyes, green olive on the neck for his bolts, a black olive nose, and red bell pepper pieces for his stitched mouth.

    Monster: Sprinkle on grated cheese, big pepperoni for eyes, then two mushroom caps with small pepperoni on top, a black olive nose, then red bell pepper strips for eyebrows, and small triangle pieces for his teeth.

    6 different Halloween pizzas baked on a board decorated like jack o lantern, Dracula, mummy, ghost, Frankenstein, and a monster.

    Top Halloween Pizza Decorating Tips

    PRO TIP: The candy eyeballs melt in the oven heat, so place them on right after baking!

    Pizza Crust: You can make or purchase your own homemade pizza dough and bake it in a pizza pan or pizza stone with toppings. There are lots of pre-made crust products at the store ready to go, and even thin crust pizza products.

    The pita bread makes it so fast and easy, saving time and getting to the good part which is decorating the pizzas. I got pita bread from my Trader Joe's store, but they sell them at most markets now.

    Cutting Toppings: I found it is easiest to use clean kitchen shears to cut the pepperoni like for the pumpkin-shaped pizza . Moms can help kids do this or give them a clean small pair of scissors to use!

    Spider Pizza Web: First, build a spider web with string cheese. Then for black olive spiders, make the bodies with whole black olives. Add some spider legs with 8 strips of black olives.

    Six Halloween pizzas on a baking rack decorated to look like ghosts, pumpkins, dracula, frankenstein, and monsters.
    What is pita bread?

    The English word pita, comes from the Greeks. Pita bread is a round flat bread or leavened bread made with flour, water, yeast, and salt.

    The dough is rolled flat, and baked in a hot oven. It originates from the Middle East and is found all through the eastern Mediterranean and in wheat-eating areas of Europe, Asia, and Africa. 

    Free Halloween Planner!

    Download your FREE copy of this Halloween planner to get your party plans started today…

    CLICK FOR A FREE HALLOWEEN PLANNER! 🎃👻🍭
    A two page Halloween planner to plan the best food and decorations for a Halloween party.

    More Halloween Recipes

    200+ of the best Halloween Recipes from inspiring Food Blogger friends! Whether you are having a spectacular Halloween bash costume party on Halloween night October 31st.  Cook up spooktacular delicious savory recipes for a creepy food dinner for the family. Halloween Sandwiches are a fun way to impress guests, and the perfect party food for a crowd. Serve a big sub sandwich with spooky decorations like cheese teeth and edible eyeballs.

    Candy Corn Martinis are the perfect Halloween drink for parties. You will have lots of fun chilling out with these, oh and homemade candy corn vodka is super easy to make!

    Over a dozen of the best Halloween Punch Ideas here from making different colors, sherbet punches, creative garnishes, and ice rings. Learn how to use dry ice safely for punch. Everyone loves easy party food! These savory salty-sweet Easy Halloween Snacks are loved by kids and adults. Build a fun snack board tray with your favorite chips, crackers, sweet treats, and spooky candy eyes!

    Create a spooktacular Halloween Charcuterie Board filled with your favorite sliced meats, and an assortment of cheeses. Add crackers, fruit, nuts, and a few spooky and sugary Halloween treats.

    Bake a spooky Halloween Cake with orange and chocolate marbled cake inside. And a cemetery all the Halloween cake decorations are made in chocolate! A Black Vodka Martini is the perfect frightening Halloween drink and fun twist for parties. Make these dark mysterious black cocktails for your friends!

    • Dozens of pictures of 200 Halloween recipes including adult drinks, appetizers, treats, snacks, desserts for kids and families all with a Halloween theme.
      200+ Best Halloween Recipes
    • A giant sub sandwich that looks like a Monster with giant edible radish eyes and small black olive eyes.
      Halloween Sandwich Ideas
    • A Halloween party with candy corn martinis and a small black dish of candy corn nearby.
      Candy Corn Martinis
    • A black cauldron with wooden ladle and pouring red punch into the bowl with dry ice smoke for Halloween Punch.
      Halloween Party Punch
    • A full platter of Halloween salty snacks and candy decorated with candy eyeballs for an easy last minute Halloween Party Idea.
      Easy Halloween Snacks
    • A large Halloween Charcuterie cheeseboard loaded with stacks of crackers, cut and sliced meats, nuts, and Halloween candy for a Halloween party.
      Halloween Charcuterie Board
    • A chocolate Halloween Cake with gate, fence, tree and tombstones.
      Halloween Cake
    • Two Halloween black drinks make with black vodka garnished with 3 red maraschino cherries and a black spider.
      Halloween Black Widow Martinis

    Did you love this recipe? We would love to hear from you! If you make this recipe and love it, give it a 5-star rating ⭐⭐⭐⭐⭐ with a comment. THANK YOU!! Follow Delicious Table with my free newsletter and share this recipe with your friends on Facebook, Pinterest, and Instagram.

    Six baked Halloween pizzas on a baking rack decorated to look like ghosts, pumpkins, dracula, frankenstein, and monsters.
    Print

    Halloween Pizzas

    Halloween pizzas are great to bake for family dinner, a Halloween party, movie nights, or right before trick or treating! Decorate with one of these six fun Halloween-themed ideas, or create your own. Make a Jack-O-Lantern pizza, Dracula, Frankenstein, Monster, Mummy, or Ghost.
    Course Dinner & Main Dishes
    Cuisine American
    Keyword Halloween Appetizer, Halloween dinner, Halloween pita pizza, Halloween pizza, pita pizza
    Prep Time 15 minutes minutes
    Cook Time 7 minutes minutes
    Total Time 22 minutes minutes
    Servings 6
    Calories 265kcal
    Author Lisa Hatfield

    Equipment

    • Candy Eyeballs
    • Pizza Wheel
    • Global Kitchen Scissors
    • Mini Basting Brush
    • Large Metal Sheet Pan
    • Wire Baking Rack
    • Halloween Cookie Cutters

    Ingredients

    • 6 pita bread
    • ½ cup pizza sauce homemade or canned
    • 1 cup grated cheese white or cheddar cheeses
    • ¼ cup whole black olives and or green olives
    • ¼ cup pepperoni slices large or mini
    • 4 whole string cheese
    • 4-6 whole sliced cheese white-ghosts orange-pumpkins
    • 6-12 whole candy eyes
    • optional: mushrooms or bell pepper

    Instructions

    Toast Pita Bread

    • Preheat the oven to 400 degrees. Start preparing all your toppings.
    • Place an oven safe baking rack on a large sheet pan, and each pita bread on the rack. Toast the pitas in the oven for 7 minutes until they are just firm. This gets them slightly crisp before putting toppings on.
    • If you make your pizza sauce at home, mix a small 6 oz can of roasted garlic tomato paste with an 8-ounce can of tomato sauce, and a teaspoon of Italian seasoning.
    • Spread a thin layer of sauce on each pita bread using a small brush or back of a spoon, and decorate for Halloween!

    Halloween Pizza Topping Ideas

    • Mummy Pizza: Add some grated white cheese, then lay strips of cheese (string cheese) in a crisscross pattern, and add two black olive slices for eyes. Add candy eyes inside black olive eyes after it bakes.
      Friendly Ghost Pizza: For a simple cheese pizza, add some grated cheese, then use ghost-shaped cookie cutters and cut a ghost shape out of a slice of mozzarella cheese, provolone, or Swiss. Add a small circle of black olive for the mouth, and add candy eyes after it bakes.
      Pumpkin Jack-o’-Lantern Pizza: Add some orange shredded cheese then cut round pepperoni slices with scissors into triangles for eyes and nose, then cut them into smaller triangles for teeth on your pepperoni pizza.
      Dracula: Add some shredded white cheese, chopped black olives for hair, green olives with pimentos for eyes, and slice a piece of curved red bell pepper for a mouth and tiny triangles for fangs.
      Frankenstein: Sprinkle grated white cheese, and for a fun pizza add crumbled cooked sausage for hair, mini pepperoni for eyes, green olive on the neck for his bolts, a black olive nose, and red bell pepper pieces for his stitched mouth.
      Monster: Sprinkle on grated cheese, big pepperoni for eyes, then two mushroom caps with small pepperoni on top, a black olive nose, then red bell pepper strips for eyebrows, and small triangle pieces for his teeth.
      NOTE: The candy eyeballs melt in the oven heat, so place them on right after baking!
    • Place decorated Halloween Pita Pizzas on the oven rack over a large sheet pan, and bake for 7 minutes at 400 degrees. After baking and add some candy eyes, and serve warm!

    Video

    Notes

    pita bread

    Purchase a good thin pita bread, and pre-toast the bread in a 400 degree oven for 5-7 minutes or so, this creates a nice crisp crust on your pita pizzas!
    Don't bake directly on a baking sheet, use a wire rack to get the oven heat all around the pizza. 
    If you don't have a wire baking rack then pre-toast the pita bread on the oven racks and bake the pizzas there as well. Place some foil on the rack below to catch any drips!
     

    Nutrition

    Serving: 1g | Calories: 265kcal | Carbohydrates: 33g | Protein: 11g | Fat: 11g | Saturated Fat: 5g | Polyunsaturated Fat: 1g | Monounsaturated Fat: 3g | Trans Fat: 0.1g | Cholesterol: 24mg | Sodium: 628mg | Potassium: 187mg | Fiber: 4g | Sugar: 2g | Vitamin A: 305IU | Vitamin C: 1mg | Calcium: 154mg | Iron: 2mg

    Pumpkin Pie Spice

    [heart_this] · Oct 6, 2023 · 1 Comment

    A small glass spice jar filled with pumpkin pie spice made at home.

    For Fall baking, mix up your own Pumpkin Pie Spice aka pumpkin spice! A famous American seasoning blend that is so easy to make at home.

    You can use whole spices, and grind them at home or use preground spices. And we will cover 20 great recipe ideas to use it for all things pumpkin! When the leaves are falling, things slow down. It's time to sip hot drinks, go apple picking, and make pumpkin everything...

    Homemade Pumpkin Spice Recipe

    First, did you know that pumpkin spice does not actually contain pumpkin?

    My first tip is to use fresh, quality pantry spices. It will taste so much better for our favorite homemade recipes throughout the pumpkin season. This spice blend has a place in our hearts and a spot in our spice cabinet for Fall recipes!

    It is the perfect blend of cinnamon, ginger, allspice, nutmeg, and cloves. And creates a classic spice for our favorite pumpkin recipes like desserts, and flavoring for pumpkin pie. By the way, occasionally, mace is also part of the mix.

    Seasoning Mix Simple Ingredients

    • ground cinnamon
    • ground ginger
    • ground nutmeg
    • ground allspice
    • ground cloves

    PRO TIP: Did you know that apple pie spice is also a good substitute for this recipe? It swaps in ground cardamon for the ground gloves, and is also a great mixed spice to keep on hand for baking!

    Instructions

    1. Add all the spices to a bowl, and mix well using a small whisk or small spoon.
    2. Use a small funnel to fill the jars and store them in an airtight glass spice jar in a dry place.
    3. Try grinding some of your own whole spices to make it taste even better! You can make fresh ground spices from whole cloves, whole allspice, whole nutmeg, and whole cinnamon sticks. Use a clean coffee grinder or a nutmeg grinder, specifically made for larger nutmeg nuts.
    4. After mixing up homemade spices, store them in mini-ball jars! They are tiny versions of the classic pint or quart jars. Or clean an old spice jar and fill it with spice mixture using a small funnel to fill the jar.
    5. Be sure the lid is airtight, and use within 3-4 months for peak flavor. Get all kinds of ways to use this mix in the printable recipe card below at the bottom of the post.

    You can buy whole or ground spices from the grocery store. And look for a section in the store for bulk seasoning, there are great values there! Just be sure to have a way to grind them at home.

    It is so fun to make smaller batches of your own blend at home for simple spices. Skip the spice aisle, and for savory dishes, try my easy recipes for Cajun seasoning, 5 Finishing Salt flavors, and the best BBQ Rub.

    Grinding Whole Spices

    Ground whole spices have more flavor intensity. Be sure to use fresh spices, not ones that have been around for a while! If you are a big fan of cloves, put those pantry staples to good use, and grind them into powder for this recipe!

    PRO TIP: You can take any whole spices in your pantry and grind them in a coffee grinder for homemade spice blends. Simply wipe out after and grinding individual spices. Nutmeg is easy to grind with a Microplane or in a good nutmeg grinder.

    Substitutes & Variations

    Cinnamon is the leading ingredient in Pumpkin Pie Spice, and most important.

    This will come close to the taste, won't be exact but will still be delicious.

    PRO TIP: If you are low or don't have cinnamon the easiest way is for each tablespoon of cinnamon add at least 1-2 teaspoons of what you have on hand of ground spices like ginger, nutmeg, allspice, or cloves.

    How To Store Spices

    You can use mini Ball spice jars, small versions of classic jars. Or a clean old spice container with a small funnel to fill the whole jar.

    Be sure the lid is airtight, store at room temperature in a dark place, and use within 3-4 months for peak flavor.

    A mini ball jar with funnel to fill with pumpkin pie spice.

    How Did Pumpkin Spice Get So Popular?

    The global popularity of pumpkin spice all started with the "Starbucks PSL" in the Fall of 2003. Do you remember that? It became one of people's Autumn season favorite things. Try my home version that has easy ingredients. And it tastes like a coffee house Pumpkin Latte! Stay home and relax.

    What Recipes Use Pumpkin Pie Spice?

    • Add into soft butter for pumpkin butter on pancakes.
    • Use it to make hot drinks like a Pumpkin Latte!
    • Whip into heavy whipped cream, dollop on Apple Pie, Apple Crisp, pecan, or easy pumpkin pie.
    • Sprinkle on Candied Pecans, try my recipe!
    • Mix into pancake or waffle batter.
    • Add some into your coffee grounds before brewing your morning coffee.
    • Add to cookie dough to make pumpkin sugar cookies.
    • Bake pumpkin bars with a warm spice flavor.
    • Mix in pumpkin chocolate chip cookies.
    • Stir into an icebox pumpkin dessert.
    • Bake into muffins.
    • Sprinkle on top of a breakfast Yogurt Parfait.
    • Add to healthy Pumpkin Bread or quick bread.
    • Add a spoonful to hot cocoa.
    • Stir into soft vanilla ice cream.
    • Sprinkle on hot oatmeal for breakfast.
    • Flavor homemade Granola.
    2 pumpkin latte coffee drinks on a table with mini pumpkins.

    Global Spice Trade

    Pumpkin spice has early origins from the 16th-century Dutch spice trade. It is also similar to the British mixed spice. It has traveled around the globe and is used in many dishes, most sweet but some savory.

    From secret islands, baked into Dutch shortbread, to British mixed spice, and to the New World, it has traveled around the globe in various forms for centuries.

    All these different mixed spices come from different parts of the world and create the blend we love today.

    Pumpkin Pie Spice FAQ

    What does pumpkin spice have in it?

    Well, did you know that ironically, it does not include pumpkin as an ingredient? It is made of just 5 spices. For centuries, it has been the delicious spice mix typically used in pumpkin pie recipes, but also in other desserts and drinks.

    What is the spice trade history of pumpkin spice?

    The history of pumpkin spice dates back to the Dutch East India Company and the global spice trade. The Dutch took control of the Spice Islands in the early 17th century, closely guarding their secret island locations. The Dutch East India Company had access to the spices that inspired the Dutch to create blends such as speculaaskruiden. It is similar but includes cardamom and usually white pepper.

    What country does pumpkin pie spice come from?

    In the United States, in 1934, the McCormick Spice Co. introduced "pumpkin pie spice" to Americans. And promoted an easy pumpkin pie recipe with the spice mix and newly canned commercial pumpkin puree!

    Bright orange colorful orange, white, and pink pumpkins piled into a big pile.

    More Delicious Pumpkin Recipes & DIY Ideas

    These Pumpkin Lattes have fresh ingredients, warm spices (this Pumpkin Pie Spice mix), and strong hot coffee. Create a coffee house in your own kitchen.

    Save the seeds from Jack-o-lantern pumpkin carving this time of year! Roasted Pumpkin Seeds are great to top soups and sprinkle on salads. And they are a perfect low-carb keto snack idea.

    A rich delicious Pumpkin Bread scratch recipe with warm Fall spices, fresh orange juice, and loaded with milk chocolate chips. This quick bread recipe comes together in minutes, with just a spatula and a bowl. And it will also make pumpkin chocolate chip muffins!

    • A glass mug filled with Pumpkin Spice Latte with whip cream and sprinkles.
      Pumpkin Spice Latte
    • A ceramic dish full of golden brown roast pumpkin seeds.
      Roasted Pumpkin Seeds
    • A baked loaf of pumpkin bread sliced thick with a silver knife.s
      Pumpkin Bread

    Thanksgiving Table Pumpkin Centerpieces are gorgeous on your table using bright fall-colored squash, pumpkins, flowers, and greenery.

    Serve a "pumpkin-shaped" Everything Bagel Cheese Ball appetizer for your next Fall party, it's always a hit! Easy to make ahead in 15 minutes, chill, and take to a gathering. And how cute is it with a real stem?

    Succulent Pumpkins are an easy Fall or Thanksgiving Centerpiece idea. These will last up to 2 months and are gorgeous for Autumn decorating.

    • A collage of 9 different succulent pumpkins in different colors and top with succulents.
      Succulent Pumpkins
    • A pumpkin shaped cheese ball on a platter with pita chips and crackers.
      Everything Bagel Pumpkin Cheese Ball
    • An orange table runner with handmade orange pumpkins filled with fresh Fall flowers and greenery for Thanksgiving centerpieces.
      Thanksgiving Centerpieces

    Did you love this recipe? We would love to hear from you! If you make this recipe and love it, give it a 5-star rating ⭐⭐⭐⭐⭐ with a comment. THANK YOU!! Follow Delicious Table with my free newsletter and share this recipe with your friends on Facebook, Pinterest, and Instagram.

    A small glass spice jar filled with pumpkin pie spice made at home.
    Print

    Pumpkin Pie Spice Recipe (Pumpkin Spice)

    Mix up your own Pumpkin Pie Spice aka pumpkin spice seasoning blend for this famous American spice mix. Use fresh, quality pantry spices, it tastes so much better homemade for our favorite recipes throughout the pumpkin season.
    Course Seasoning
    Cuisine Seasoning
    Keyword how to make pumpkin spice, mixed seasoning, pumpkin pie spice, pumpkin pie spice recipe, pumpkin spice recipe, seasoning blend, spice mixture
    Prep Time 10 minutes minutes
    Cook Time 0 minutes minutes
    Total Time 10 minutes minutes
    Servings 36
    Calories 110kcal
    Author Lisa Hatfield

    Equipment

    • Mini Ball Spice Jars
    • Nutmeg Grinder
    • 3 Sizes Stainless Steel Funnels

    Ingredients

    • 3 tablespoons ground cinnamon
    • 2 teaspoons ground ginger
    • 2 teaspoons ground nutmeg
    • 1 ½ teaspoons ground allspice
    • 1 ½ teaspoons ground cloves

    Instructions

    • Add all the spices to a bowl, and mix well using a small whisk or small spoon.
    • Use a small funnel to fill the jars and store in an airtight glass spice jar in a dry place.
    • Try grinding some of your own whole spices to make it taste even better! You can make fresh ground spices from whole cloves, whole allspice, whole nutmeg and whole cinnamon sticks. Use a clean coffee grinder or a nutmeg grinder.
    • Store your spice mixture in mini Ball jars! They are tiny versions of the classic pint or quart jars. Or clean an old spice jar and fill it with spice mixture using a small funnel to fill the jar.
    • Be sure the lid is airtight, and use within 3-4 months for peak flavor.

    Video

    Notes

    Spices

    Fresh ground whole spices have more flavor intensity. Be sure to use fresh spices, not ones that have been around for a while! If you are a big fan of cloves, use ones in your pantry and grind them into powder for this recipe.

    Grinding Spices

    You can take any whole spices in your pantry and grind them in a coffee grinder for homemade seasoning blends. Simply wipe out after and grinding each individual spice. 
    Nutmeg is easy to grind with a Microplane or a good nutmeg grinder.

    Ways To Enjoy Pumpkin Pie Spice

    • Mix into soft butter for pumpkin butter on pancakes.
    • Make a Pumpkin Latte, add to the hot milk.
    • Mix into heavy whipped cream, dollop on apple, pecan, or pumpkin pie.
    • Sprinkle on Candied Pecans.
    • Stir into pancake or waffle batter.
    • Combine coffee grounds and pumpkin pie spice before brewing your morning coffee.
    • Add to cookie dough for a warm spice flavor.
    • Bake into banana muffins.
    • Add a spoonful to hot cocoa. 
    • Sprinkle on top of a breakfast Yogurt Parfait.
    • Add to Pumpkin Bread.
    • Stir into soft vanilla ice cream.
    • Sprinkle on hot oatmeal for breakfast.
    • Flavor homemade Granola.

    Nutrition

    Calories: 110kcal | Carbohydrates: 28g | Protein: 2g | Fat: 3g | Saturated Fat: 1g | Polyunsaturated Fat: 1g | Monounsaturated Fat: 1g | Trans Fat: 1g | Sodium: 15mg | Potassium: 232mg | Fiber: 16g | Sugar: 2g | Vitamin A: 97IU | Vitamin C: 2mg | Calcium: 291mg | Iron: 3mg

    Honey Mustard Pretzel Chicken

    [heart_this] · Sep 26, 2023 · 3 Comments

    A piece of chicken coated in a pretzel crust and and salad on the plate for a honey mustard chicken recipe.

    Honey Mustard Pretzel Chicken can be on the table for your family in under an hour. With just four simple store-bought ingredients, and 10-minutes, this chicken dinner together is one easy recipe!

    This is a great last-minute dinner for busy weeknights. Stock the ingredients or grab them on your way home from the store. The whole family can help make this easy kid-friendly pretzel chicken recipe. Of course, their favorite part might just be crushing the pretzels!

    Honey and mustard are a heavenly combination with the crunch of salty baked pretzel pieces. Serve a simple green salad on the side, then drizzle on some more sauce...

    This is one of the new recipes I originally shared on CocoandAsh.com, so you might see it there as well.

    A family hit, this easy chicken recipe is a whole new level of yum, even for picky eaters. Oh, and did I mention it makes great leftovers?

    Let's Make Pretzel Honey Mustard Pretzel Chicken

    With the best flavors of both sweet and salty, this easy chicken dinner a has a homemade honey mustard sauce sure to become a go-to recipe for your family...

    • Dijon mustard
    • honey
    • boneless skinless chicken breast halves
    • pretzels
    1. Pre-heat oven to 375 degrees.
    2. Line a large baking sheet or spray a wide shallow baking dish.
    3. Mix Dijon mustard and honey in a small bowl and whisk together. Divide the honey mustard sauce in half, and keep one half aside to serve as a dipping sauce for dinner.
    4. Place pretzels in a zip-lock bag, close the bag, and crush pretzels into smaller pieces with a rolling pin or by hand. Pour pretzel crumbs onto a shallow dish or plate.
    5. On a cutting board, slice larger chicken meat pieces into smaller portions of chicken cutlets for kids. And you can even use chicken tenders, or cut each chicken piece into chicken nuggets!
    6. Using tongs, dip each of the skinless breasts or small pieces into the honey mustard, then dip in the crushed pretzel pieces. Discard any excess honey mustard used to coat the meat, don't use this for dipping sauce. Use the reserved portion.
    7. Lay coated chicken pieces with pretzel crust on a parchment paper lined baking sheet in a single layer or in a wide shallow baking dish.
    8. Bake 45 minutes at 374 degrees Fahrenheit, until the internal temperature reaches 165 degrees on a meat thermometer.
    9. Serve with honey-mustard extra sauce.

    Spicy Chicken Variation: For a spicier version, use a hot honey mustard to coat the chicken and for the dipping sauce!

    What sides go with Pretzel Chicken?

    • Wedge Salad
    • Cauliflower Rice
    • Roasted Vegetables
    • Green Beans
    • Simple Green Salad or Wedge Salad
    • Roasted Baby Potatoes
    • Make Ahead Mashed Potatoes
    • Egg Noodles
    • Coleslaw
    • Easy Pasta Salad
    • Cheddar Cheese Jalapeno Cornbread
    • Dinner Rolls
    • Smashed Potatoes
    • Grilled Corn On The Cob

    More Chicken Recipes

    Gorgonzola Leek Stuffed Chicken is my go-to chicken dish recipe for make-ahead entertaining. Sheet Pan Chicken with croutons and small potatoes takes 20 minutes to prep and this entire sheet pan dinner bakes in 50 minutes.

    Hawaiian Huli Huli Chicken takes you right to the islands, be sure to serve in beautiful pineapple bowls. Chicken Gnocchi Soup is so easy to put together and a hearty dinner recipe. Loaded with creamy shredded meat, vegetables and gnocchi which are soft puffy "Italian dumplings".

    • Cooked Gorgonzola Stuffed Chicken in pan sauce garnished with fresh thyme.
      Stuffed Chicken Breasts
    • A white platter filled with sheet pan chicken dinner including lemons, potatoes, and croutons.
      Sheet Pan Chicken
    • Two pineapple halves carved out filled with coconut rice, grilled pineapple and huli huli chicken.
      Huli Huli Chicken
    • A white bowl full of Chicken Gnocchi Soup with a silver spoon and bread nearby.
      Chicken Gnocchi Soup

    Learn how to make Chicken Stock (aka bone broth) step by step with cooking tips on how to store and freeze broth plus 15 delicious recipe ideas to use this versatile freezer pantry staple. And look at my Diced Chicken For Recipes post about all the ways to use it creatively in recipes.

    Homemade Chicken Noodle Soup is true comfort food in a bowl. Roasted chicken and a squeeze of lemon add amazing flavor. Simple homemade best chicken soup ever.

    Easy Buffalo Chicken Tortilla Scoops has classic flavors of buffalo wing sauce, blue cheese, and crisp celery. Made in 20 minutes, made with 6 ingredients! Easy Chicken Enchiladas are full of fire-roasted salsa flavor and loaded with cheese. The slow cooker filling is easy and freezer-friendly.

    • 3 small Mason jars filled with chicken stock and black heart shaped labels.
      Chicken Stock (Bone Broth)
    • A blue bowl filled with homemade chicken noodle soup.
      Chicken Noodle Soup
    • Loaded plate of hot appetizers of Buffalo Chicken on tortilla chips ready for game day food
      Buffalo Chicken Appetizer
    • A white casserole dish with chicken enchilada casserole topped with black olives and lots of melted cheese.
      Chicken Enchilada Casserole

    Did you love this recipe? We would love to hear from you! If you make this recipe and love it, give it a 5-star rating ⭐⭐⭐⭐⭐ with a comment. THANK YOU!! Follow Delicious Table with my free newsletter and share this recipe with your friends on Facebook, Pinterest, and Instagram.

    A piece of chicken coated in a pretzel crust and and salad on the plate for a honey mustard chicken recipe.
    Print

    Honey Mustard Pretzel Chicken Recipe

    Easy Honey Mustard Pretzel Chicken can be on the table for your family in under an hour with four simple store-bought ingredients and 10-minutes to put this dinner together. This is a great last-minute dinner for busy weeknights. The whole family can help make this easy kid-friendly recipe.
    Course Dinner & Main Dishes
    Cuisine American
    Keyword 4 ingredient dinner, chicken dinner, easy dinner recipe, honey mustard pretzel chicken, pretzel chicken dinner, pretzel chicken recipe
    Prep Time 10 minutes minutes
    Cook Time 45 minutes minutes
    Total Time 55 minutes minutes
    Servings 6
    Calories 329kcal
    Author Lisa Hatfield

    Equipment

    • Large Metal Sheet Pan
    • Parchment Paper Sheets

    Ingredients

    • ½ cup Dijon mustard
    • ½ cup honey
    • 6 boneless skinless chicken breasts
    • 2 cups pretzels crushed

    Instructions

    • Pre-heat oven to 375 degrees.
    • Line a large baking sheet or spray a wide shallow baking dish.
    • Mix Dijon mustard and honey in a small bowl and whisk together. Divide the honey mustard sauce in half, and keep one half aside to serve as a dipping sauce for dinner.
    • Place pretzels in a zip-lock bag, close the bag, and crush pretzels into smaller pieces with a rolling pin or by hand. Pour pretzel crumbs onto a shallow dish or plate.
    • On a cutting board, slice larger chicken meat pieces into smaller portions of chicken cutlets for kids. And you can even use chicken tenders, or cut each chicken piece into chicken nuggets!
    • Using tongs, dip each of the skinless breasts or small pieces into the honey mustard, then dip in the crushed pretzel pieces. Discard any excess honey mustard used to coat the meat, don't use this for dipping sauce. Use the reserved portion.
    • Lay coated chicken pieces with pretzel crust on a parchment paper lined baking sheet in a single layer or in a wide shallow baking dish.
    • Bake 45 minutes at 374 degrees Fahrenheit, until the internal temperature reaches 165 degrees on a meat thermometer.
    • Serve with honey-mustard extra sauce.

    Notes

    dipping sauce

    Be sure to divide the sauce into two separate portions.
    -One to coat the chicken then discard that bowl of sauce as it is not food safe as a dipping sauce. 
    -Use the reserved sauce for dipping and to drizzle as a sauce. 
    Spicy Chicken Variation: For a spicier version, use a hot honey mustard to coat the chicken and for the dipping sauce!

    Side Dish Ideas

      • Wedge Salad
      • Cauliflower Rice
      • Roasted Vegetables
      • Green Beans
      • Simple Green Salad or Wedge Salad
      • Roasted Baby Potatoes
      • Make Ahead Mashed Potatoes
      • Egg Noodles
      • Coleslaw
      • Easy Pasta Salad
      • Cheddar Cheese Jalapeno Cornbread
      • Dinner Rolls
      • Smashed Potatoes
      • Grilled Corn On The Cob

    Nutrition

    Calories: 329kcal | Carbohydrates: 45g | Protein: 27g | Fat: 4g | Cholesterol: 72mg | Sodium: 705mg | Potassium: 497mg | Fiber: 1g | Sugar: 24g | Vitamin A: 50IU | Vitamin C: 1.8mg | Calcium: 24mg | Iron: 2.2mg

    Roasted Pumpkin Seeds

    [heart_this] · Sep 25, 2023 · 6 Comments

    A ceramic dish full of golden brown roast pumpkin seeds.

    Last Updated November 4th, 2023 at 12:31 pm by Lisa

    Save the seeds from Jack-o-lantern pumpkin carving! Roasted Pumpkin Seeds are great to top soups and sprinkle on salads. And they are a perfect low-carb keto snack idea.

    Roasting pumpkin seeds with buttery crunchy goodness is a simple recipe to make every Fall, and quite a fun tradition...

    Bright orange colorful orange, white, and pink pumpkins piled into a big pile.

    How To Make Roasted Pumpkin Seeds

    During pumpking season, this is a great use to bake a delicious snack with this pumpkin seed recipe...

    • 2 cups clean pumpkin seeds (you can also use squash seeds too!)
    • 2 teaspoons garlic powder
    • ¼ teaspoon cayenne
    • 2 teaspoons Worcestershire sauce
    • ½ teaspoon black cracked pepper
    • 1 teaspoon of sea salt
    • 3 tablespoons melted butter

    PRO TIP: You can use seeds from winter squash like acorn squash, delicata, sweet dumpling squash, and buttercup squash, they work great for this crunchy snack!

    A pile of Fall squash and pumpkins in orange, green and white colors.

    How To Roast Pumpkin Seeds

    Carve open the top of your pumpkin (or squash, they work great!) using a sharp knife. Using a strong metal spoon or ice cream scoop clean out the insides of pumpkin guts into a bowl. Discard the stringy flesh pieces. Remove the seeds into a colander or large bowl. 

    Under running cold water, rinse the pumpkin seeds in the colander. Clean until most of the slimy pumpkin flesh and pulp is washed off. Pick out any larger pieces of pulp and discard those.

    Turn the clean seeds out onto a clean kitchen towel. This is the best way to remove excess water and pat dry pumpkin seeds. You don't have to totally have dry seeds, just remove as much water as possible so they roast really well.

    PRO TIP: Give them a good shake in the colander after I've rinsed them and pat them partially dry with paper towels. The heat of the oven dries any moisture left on them.

    Preheat oven to 375 degrees. Place clean seeds in a large bowl and add garlic powder, cayenne, Worcestershire sauce, black pepper, sea salt, and melted butter. Toss seeds and coat them well.

    Mix well to coat all the seeds and pour in a single layer on a parchment paper lined rimmed baking sheet, cookie sheet, or roasting pan.

    Roast 375 for 15 minutes, check them, stir and turn them over, roast 5-10 minutes more if needed to get an even golden brown color.

    Type Of Pumpkin Seed & Squash

    There are a lot of pumpkins and squash varieties in the world. Over the decades, I have roasted smaller seeds, large seeds, and used everything from carving pumpkins to squash! See my Pumpkin & Squash Centerpiece post, for a great way to create a beautful Thanksgiving table. This is an annual tradition in my home.

    People ask what is the best pumpkin for the best seeds? The answer is any large pumpkin, squash, small sugar pumpkin, or pie pumpkins will work. Using pie pumpkins are a great to get both raw pumpkin seeds for roasting and making homemade pumpkin puree and use up the rest of the pumpkin.

    A pile of different shaped and colored pumpkins and a sign listing the prices.

    How To Store Baked Pumpkin Seeds?

    Refrigerator: They will last for up to 30 days if stored in an airtight container in the refrigerator.

    Freezer: You can freeze them in containers or zip-top bags, and they last up to 6 months. Take them out, defrost and enjoy. You can also freeze clean seeds for roasting later.

    A ceramic bowl showing how roast pumpkin seeds look after taking them out of the oven.

    Why You'll Love Roasted Pumpkin Seeds

    • No more wasted seeds in the trash, this is a great way to transform them into a healthy snack with wonderful nutty flavor!
    • Cooking pumpkin seeds from your Halloween pumpkin lanterns is a gluten-free great snack.
    • And you can freeze the seeds in a zip lock bag until you're ready to roast them.
    • The flavor and texture are magical. They are worth the effort because something happens to the seeds while roasting in the spices and butter. Yes, butter. They come out golden brown and have a nice crunch.
    • They are low in carbs. With only 2g carbs per serving, they are perfect for low carb diets and keto diets.
    • Seeds are full of nutrients. See the recipe below for more detailed information.

    Pumpkin Seed FAQ

    Can you freeze fresh pumpkin seeds?

    Yes. Simply place them in an airtight freezer container or zip-top bag and store them in the freezer for up to six months. When you are ready to roast them, defrost first and remove the moisture with paper towels before using them in your recipe.

    Can you freeze roasted pumpkin seeds?

    Yes. Simply place your roasted seeds in an airtight freezer container or zip-top bag and store them in the freezer for up to six months.

    A farm stand with orange pumpkins on a table and benches all lined up during Fall.

    Ways To Eat Roasted Seeds From Jack O’lanterns

    • As a tasty Snack or Appetizer
    • Sprinkle on hot butternut squash soup or Cheese Soup
    • Serve on a Fall Charcuterie or Cheese Board
    • Mix into a healthy trail mix or Homemade Granola
    • Toss into a beautiful salad topped with shaved parmesan cheese and my delicious Lemon Vinaigrette!

    Are They Healthy?

    You bet! Here are some of the health benefits...

    • They are low in carbs, making them ideal for low carb diets and keto diets.
    • They are high in vitamins and minerals like zinc, magnesium, manganese.
    • They are high in antioxidants.
    • 131 calories in ¼ cup roasted whole pumpkin seed.
    • They are high in fiber, which is great for digestive health.
    • They contain plenty of tryptophan, the amino acid also found in turkey that is known as the "sleep hormone." If you need to get a good night's rest on Thanksgiving, a serving of turkey and an evening snack of seeds should do the trick!

    More Pumpkin Recipes & Fall DIY Ideas

    A Pumpkin Spice Latte made with fresh ingredients, warm spices, and strong hot coffee. Create a coffee house in your own kitchen.

    A rich delicious Pumpkin Bread scratch recipe with warm Fall spices, fresh orange juice, and loaded with milk chocolate chips. This quick bread recipe comes together in minutes, with just a spatula and a bowl. And it will also make pumpkin chocolate chip muffins!

    Pumpkin Pie Spice is a popular spice blend in so many Fall and Thanksgiving recipes. From lattes to apple pies. And has warm notes of cinnamon, ginger, allspice, nutmeg, and cloves.

    • A glass mug filled with Pumpkin Spice Latte with whip cream and sprinkles.
      Pumpkin Spice Latte
    • A baked loaf of pumpkin bread sliced thick with a silver knife.s
      Pumpkin Bread
    • A small glass spice jar filled with pumpkin pie spice made at home.
      Pumpkin Pie Spice

    Thanksgiving Table Pumpkin Centerpieces are gorgeous on your table using bright fall-colored squash, pumpkins, flowers, and greenery.

    Serve a "pumpkin-shaped" Everything Bagel Cheese Ball appetizer for your next Fall party, it's always a hit! Easy to make ahead in 15 minutes, chill, and take to a gathering. And how cute is it with a real stem?

    Succulent Pumpkins are an easy Fall or Thanksgiving Centerpiece idea. These will last up to 2 months and are gorgeous for Autumn decorating.

    • A collage of 9 different succulent pumpkins in different colors and top with succulents.
      Succulent Pumpkins
    • A pumpkin shaped cheese ball on a platter with pita chips and crackers.
      Everything Bagel Pumpkin Cheese Ball
    • An orange table runner with handmade orange pumpkins filled with fresh Fall flowers and greenery for Thanksgiving centerpieces.
      Thanksgiving Centerpieces

    Did you love this recipe? We would love to hear from you! If you make this recipe and love it, give it a 5-star rating ⭐⭐⭐⭐⭐ with a comment. THANK YOU!! Follow Delicious Table with my free newsletter and share this recipe with your friends on Facebook, Pinterest, and Instagram.

    A ceramic dish full of golden brown roast pumpkin seeds.
    Print

    Roasted Pumpkin Seeds Recipe ~ Low Carb Keto Snack Idea

    Save the seeds from Jack-o-lantern pumpkin carving! Roasted Pumpkin Seeds are great to top soups and sprinkle on salads. And they are a perfect low-carb keto snack idea. Roasting pumpkin seeds with buttery crunchy goodness is a simple recipe to make every Fall, and quite a fun tradition.
    Course Appetizers, Dips, & Snacks
    Cuisine American
    Keyword keto snack, low carb snack, pumpkin seed recipe, roast pumpkin seeds, roasted pumpkin seeds, roasting pumpkin seed
    Prep Time 10 minutes minutes
    Cook Time 20 minutes minutes
    Total Time 30 minutes minutes
    Servings 8
    Calories 131kcal
    Author Lisa Hatfield

    Equipment

    • Large Metal Sheet Pan
    • Parchment Paper Sheets

    Ingredients

    • 2 cups clean pumpkin seeds
    • 2 teaspoons garlic powder
    • ¼ teaspoon cayenne
    • 2 teaspoons Worcestershire sauce
    • ½ teaspoon black cracked pepper
    • 1 teaspoon sea salt
    • 3 tablespoons melted butter
    US Customary - Metric

    Instructions

    • Carve open the top of your pumpkin (or squash, they work great!) using a sharp knife. Using a strong metal spoon or ice cream scoop clean out the insides of pumpkin guts into a bowl. Discard the stringy flesh pieces. Remove the seeds into a colander or large bowl. 
    • Rinse the seeds under running cold water in the colander. Clean until most of the slimy pumpkin flesh and pulp is washed off. Pick out any larger pieces of pulp and discard those. Turn the clean seeds out onto a clean kitchen towel. This is the best way to remove excess water and pat dry pumpkin seeds.
    • Preheat oven to 375 degrees. Place clean seeds in a large bowl and add garlic powder, cayenne, Worcestershire sauce, black pepper, sea salt, and melted butter. Toss seeds and coat them well.
    • Mix well to coat all the seeds and pour in a single layer on a parchment paper lined rimmed baking sheet, cookie sheet, or roasting pan.
    • Roast 375 for 15 minutes, check them, stir and turn them over, roast 5-10 minutes more if needed to get an even golden brown color.
    • Store in an airtight container in the fridge and enjoy!

    Video

    Notes

    serving portion

    One serving portion is ¼ cup. This recipe makes 8 servings. 

    freezing

    Save clean washed seeds in the freezer from your Halloween carvings. Just place them in zip-top bags until you are ready to roast them.

    squash and pumpkins

    You can use seeds from winter squash like acorn squash, sweet dumpling squash, and buttercup squash, that's what I used!

    roasted seed uses

    Baked pumpkin seeds make a great snack or appetizer, and they are also are great on hot soup, on salads, or in a trail mix. 
    • As a snack or appetizer
    • Sprinkle on hot butternut squash soup
    • Mix into a healthy trail mix
    • Toss into a beautiful salad with a lemon vinaigrette.

    dry seeds before roasting?

    I do give them a good shake in the colander after I've rinsed them and pat them partially dry with paper towels.

    Nutrition

    Serving: 8g | Calories: 131kcal | Carbohydrates: 3g | Protein: 5g | Fat: 12g | Saturated Fat: 4g | Cholesterol: 11mg | Sodium: 344mg | Potassium: 150mg | Fiber: 1g | Sugar: 1g | Vitamin A: 157IU | Vitamin C: 1mg | Calcium: 10mg | Iron: 2mg

    Fall Crostini Bar

    [heart_this] · Sep 24, 2023 · 4 Comments

    A rustic table with small bowls filled with toppings for a fall appetizer crostini bar.

    Last Updated January 4th, 2024 at 11:09 pm by Lisa

    Learn how to set up a Crostini Bar for Fall with all the toppings, plus get beautiful design inspiration for arranging an easy and relaxed party for Fall gatherings, Friendsgiving, or a way to serve Thanksgiving appetizers.

    The whole idea here is for people to enjoy different combinations and share which one they love at your party. And the best part? All of this can be made ahead, so you can enjoy every minute of your gathering.

    Have guests take a crostini toast bread or two, spread whipped goat cheese or whipped feta cheese, add toppings, and enjoy every scrumptious bite...

    A rustic table with small bowls filled with toppings for a fall appetizer crostini bar.

    What Is Crostini?

    Crostini means little toasts in Italian. They are small pieces of toasted or fried bread usually brused withe olive oil then served with a topping afor an appetizer or canapé.

    You can make your own crostini toasts. Cut small round bread slices from a baguette, and toast them in the oven with a drizzle of olive oil until golden brown and crisp. Then add savory and sweet toppings like meats, seafood, spreads, cheeses, fruit, and nuts.

    Crostini Table of Contents

    • What Is Crostini?
    • Fall Crostini Recipes
      • How To Make Crostini Bread Toasts
      • Blue Cheese, Pear, & Honey Drizzle Crostini
      • Pumpkin Butter & Candied Pecan Crostini
      • Cranberry & Brie Crostini
      • Brie & Fig Jam Crostini
      • How To Make Whipped Goat Cheese
      • How To Make Whipped Feta
    • Other Crostini Flavors & Toppers
    • Fall Party Planning Tips
    • Party Design & Styling Ideas
    • Crostini Party Drinks & Cocktails
    • Crostini FAQ
    • More Fall Easy Make Ahead Appetizers
    • More Thanksgiving Appetizers

    Fall Crostini Recipes

    Take a crostini toast, spread either the whipped goat cheese or feta, and add toppings you love.

    Some classic Fall crostini toppings to try; pumpkin butter, brie, honey, blue cheese, cranberries, blue cheese, fig jam, spicy Candied Pecans, and sliced pears. Create your own combinations or try the ones I came up with here. This is all about easy, gorgeous entertaining...

    A rustic table with crostini and toppings labled for an outdoor Fall party.

    How To Make Crostini Bread Toasts

    • 1 large French baguette
    • ½ cup extra virgin olive oil

    There are two ways to do this, stovetop and oven.

    1. Slice the baguette into ½" slices, and arrange the slices in a single layer on a baking sheet.
    2. Drizzle slices with olive oil and bake for 8-10 minutes until golden brown. Alternatively, you can toast in a skillet or cast iron grill pan over medium heat.

    Blue Cheese, Pear, & Honey Drizzle Crostini

    ½ cup crumbled blue cheese + ¼ cup honey

    Pumpkin Butter & Candied Pecan Crostini

    ¼ jar pumpkin butter + ½ cup Candied Pecans chopped

    Cranberry & Brie Crostini

    4 ounces brie + ½ cup dried cranberries

    Brie & Fig Jam Crostini

    4 ounces brie + ¼ jar fig jam

    A vintage wooden board with eight small pieces of toast (or crostini) topped with fall things like pear, fig jam, brie, and pumpkin butter.

    How To Make Whipped Goat Cheese

    Whipped Feta Cheese or the Whipped Goat Cheese mixture is so easy to make and is packed full of flavor. These spreads are great alone on baguette slices or even crackers as a snack.

    • 11 ounces goat cheese
    • 2 tablespoons cream cheese room temperature
    • 1 teaspoon garlic powder
    • ½ teaspoon red pepper flakes
    • 1 whole lemon zested
    • ½ teaspoon Kosher sea salt
    • ¼ teaspoon cracked black pepper
    • 1 tablespoon optional garnish: fresh sage, fresh thyme, rosemary chopped
    1. Combine the goat cheese, cream cheese, garlic, red pepper flakes, lemon zest, and thyme leaves in a food processor or with a stand or handheld mixer.
    2. Whip for 60-90 seconds until smooth. Store refrigerated for up to a week.
    Whipped Goat Cheese with Herbs
    Pear + Blue Cheese + Honey with Whipped Feta Crostini

    How To Make Whipped Feta

    • 11 ounces feta block
    • 3 tablespoons cream cheese at room temperature
    • ½ teaspoon garlic powder
    • ¼ cup extra virgin olive oil
    • ½ lemon zest and juice
    • ¼ teaspoon cracked black pepper
    • 1 tablespoon optional garnish: finely chopped fresh sage, thyme, or rosemary.
    1. Bring feta block and cream cheese to room temperature for about 30 minutes.
    2. Combine the feta block and cream cheese to the food processor and combine, next add the garlic powder, extra virgin olive oil, lemon zest and juice, and black pepper.
    3. Whip for 60-90 seconds until smooth. Store refrigerated for up to a week.

    Other Crostini Flavors & Toppers

    There are endless options you can choose for a crostini bar. I purchased a few of these items at Trader Joe's like the pumpkin butter and fig jam and everything else at my local grocery store!

    You can write out the flavor combinations on small paper cards or on a menu-style chalkboard, or let guests design their own flavor combinations.

    • Cheeses: Maytag bleu, Manchego, or Parmesano Reggiano
    • Soft Cheeses: goat cheese, mini burrata, Boursin, Brie, Camembert
    • Spreads: basil pesto, hummus, Olive Tapenade, marinated artichokes
    • Sweet: Cranberry Sauce, cherry jam, marmalade, or honey
    • Nuts: toasted Pumpkin Seeds, pistachios, walnuts, or pine nuts
    • Fruit: apples, Pomegranate Seeds, pears, apricots, figs, or melon
    • Meats: sliced prosciutto, pancetta, salami, or Cubes of Chicken, crumbled bacon
    • Seafood: lump crabmeat, Shrimp (no-tails), smoked salmon
    • Drizzles: aged balsamic vinegar or lemon/orange flavored olive oils
    • Veggies: sliced mini heirloom tomatoes or Pickled Vegetables
    • Herbs: basil leaves, chopped thyme, rosemary, and sage
    • Finishing Salts: sprinkle a tiny bit of Sriracha, Pinto Noir, or Mustard Salt on top of your creation!

    And for a Spring party like Mother's Day, an engagement Bridal Shower Party, or Easter Sunday top your Spring Crostini Appetizers with garden herbs and edible flowers...

    How To Make Spring Crostini Appetizers
    Spring garden crostini with edible flowers and herbs is a spectacular easy appetizer, perfect for a tea, garden party, wedding shower, or Mother's Day.
    GET THE RECIPE PIN IT
    A white platter with crostini recipe topped with edible flowers and herbs.

    Fall Party Planning Tips

    Muted colors are one look, or go with traditional Autumn colors like orange, brown, cream, tan, and black. Another option is to borrow a few things from friends or neighbors like tables, chairs, or linens.

    These are the things you might need for your party:

    • Tables and chairs
    • Linens & Napkins
    • Cutting Boards
    • Rustic Crates
    • Wood Boxes
    • Vases with dried florals
    • Baskets
    • Fresh Fall flowers
    • Pumpkins
    • Metal containers
    • Antique silverware
    • Small ceramic bowls
    • Long-serving boards
    • Chalkboard
    • Plates and glasses

    PRO TIP: To create this rustic Fall look, try different textures, heights, vintage, and heirloom family items. Use the things you have, look high and low in your home, you will be surprised how many items are perfect for this kind of party.

    Every beautiful thing you see in this post was designed by my darling friend Lidy from French Garden House at her spectacular home. By the way, Lidy's home and garden are featured in many magazines including This Old House and French Country Style. Take a peek at her online store, it is full of stunning treasures and fascinating French country antiques, you will fall in love.

    "I personally select every antique from my favorite brocantes in Europe and the US. I support artisan created products and family workshops for gift and jewelry pieces I know you will love. I'm hopeful that you will find something that makes your heart beat faster, that brings beauty to your every day, or stirs a memory of a time or person you love."

    Lidy Baars ~ French Garden House

    She styled this exquisite Fall look from her collection of French antiques and uses her "design superpowers" to make things look so interesting and stunning. We LOVE working together, and giggle the whole time as she styles and I fuss over the food. Then we shoot our photographs together. Isn't it wonderful? Oh then of course we EAT!

    Serve toppings in small bowls with spoons and spreading knives. Place a stack of plates, with napkins in between the plates. This is a great tip from Lidy...

    Looking down on a table filled with toppings and crostini toasts at a party.

    Party Design & Styling Ideas

    Get creative with setting up the table you are serving from. Pick a place with shade and consider the weather. Of course, you can set your table up inside if the weather isn't cooperating.

    Use what you have to create displays and different heights and to keep people moving around trying different crostini bar combinations. 

    Try to set up a scene with levels, and place things up high, low, and spilling out of baskets.

    Use fresh pumpkins, flowers, succulents, herbs, and Fall decor pieces you love. For more inspiration, take a look at my DIY tutorials on Succulent Pumpkins and Pumpkin Flower Arrangements.

    The succulent pumpkins are SO easy and will last all through Fall. Everyone loves them, and you can give them to guests as they head home!

    Crostini Party Drinks & Cocktails

    Have a drink station nearby. Try my Fireball Cocktails or Autumn Aperol Spritz both are great for any Fall party. You can also serve iced tea or a festive Fireball Punch or Christmas Punch.

    • Fireball Whisky Cocktails with cinnamon sticks wrapped in orange peel for garnish.
      Fireball Whisky Cocktails
    • Three glasses of Aperol Spritz on a table with appetizers at a Fall party.
      Autumn Aperol Spritz
    • A large glass punch bowl filled with Fall and Thanksgiving punch with apples and oranges floating on top.
      Fireball Punch
    • A big glass beverage container filled with holiday Christmas Punch.
      Christmas Punch

    Crostini FAQ

    How To Make Crostini Bread?

    Preheat the oven to 375 degrees.
    Slice the baguette into ½" slices, and arrange slices in a single layer on a baking sheet.
    Drizzle slices with olive oil and bake for 8-10 minutes until golden brown.

    How To Keep Crostini Fresh?

    You can make crostini toasts ahead of time. Bake them, and then cool completely to room temperature, this helps release moisture. Then store in an airtight container or ziptop bag for up to two days.

    You can reheat the crostini toasts if they soften too much in humid conditions in the oven for two minutes at 350 degrees.

    More Fall Easy Make Ahead Appetizers

    Cheese Truffles are loaded with delicious flavors and toppings. Serve with crackers or pretzels for an easy appetizer and fun party food!

    Boursin Cheese whips together in just minutes for an easy appetizer. One of the best ways to eat it is simply with toasted warm bread or crackers.

    Dip into a Bacon Ranch Cheese Ball with crackers or pretzels, and enjoy every bite of this easy delicious appetizer. It is made with simple ingredients and quick prep time. Roll it in crispy bacon crumbles or assorted mixed cheeses.

    Pull Apart Bread is famously also known as "Crack Bread" for a reason, people can't stop eating it! A simple loaf of bakery bread is magically transformed into cheesy goodness with creamy garlic and green chile flavors. It can be a hot appetizer or a dinner side dish.

    Melty gooey cheese is tucked into the nooks and crannies, then baked to golden deliciousness. You will love the cheese pulls as you grab a piece of this decadent garlicky bread.

    Serve a "pumpkin-shaped" Everything Bagel Cheese Ball appetizer for your next Fall party, it's always a hit! Easy to make ahead in 15 minutes, chill, and take to a gathering.

    Jalapeno Popper Dip is always a hit! Make this melty hot appetizer for parties with simple pantry ingredients and scoop up with large corn chips.

    This Fall Snack Mix will disappear at your Fall, Halloween Party, or at your Thanksgiving feast. Just 4 ingredients are simply amazing together. Kids and adults love these treats.

    Everyone loves easy party food! These savory salty-sweet Easy Halloween snacks are loved by kids and adults. Build a fun snack board tray with your favorite chips, crackers, sweet treats, and spooky candy eyes!

    • A white platter filled with cheese truffles (mini cheese balls) with crackers and pretzels at a party.
      Cheese Truffles (Mini Cheese Balls)
    • A loaf of sliced bread filled with a cheesy mixture to make a pull apart crack bread recipe.
      Chile Cheese Pull Apart Bread
    • A wooden cutting board with small baguettes sliced open with a white bowl of whipped creamed cheese spread on a slice.
      Boursin Cheese
    • A round bacon cheese ball topped with bacon, cheddar cheese, and surrounded by crackers and pita chips for an easy appetizer.
      Bacon-Ranch Cheese Ball
    • A pumpkin shaped cheese ball on a platter with pita chips and crackers.
      Everything Bagel Pumpkin Cheese Ball
    • A white oval casserole dish with a hot dip being scooped out with a large corn chip.
      Jalapeno Popper Dip
    • A large glass jar filled with a Fall Snack Mix with candy corn and M&Ms with a small bowl of it nearby.
      Fall Snack Mix
    • A full platter of Halloween salty snacks and candy decorated with candy eyeballs for an easy last minute Halloween Party Idea.
      Easy Halloween Snacks

    More Thanksgiving Appetizers

    These are the best Thanksgiving Day Appetizers for savory snacks, easy appetizers, and a bounty of party ideas for your celebration. Whether you bake up some warm canapes, make easy no cook appetizers like a dip, or create a beautiful holiday charcuterie board. There are dozens of delicious recipes here to put out before your Thanksgiving feast.

    A Fall and Thanksgiving Cheeseboard is so easy to put together and a delicious way to make easy Thanksgiving appetizers. These also work for a Friendsgiving gathering, as an after-school snack board for kids, or to host a happy hour for friends with simple appetizers and drinks...

    Dozens of impressive appetizers and delicious desserts are included in this 40 Puff Pastry Appetizer Collection. Each recipe is wrapped with irresistible layers of golden flaky puff pastry. Keep a few of these easy recipes for special occasions during the holidays and celebrations of life!

    Make a Caramel Apple Dip with crisp green apples, salted caramel sauce, and crushed Health bars. A beloved recipe for potlucks, holiday parties, Thanksgiving, Halloween, and all through the Autumn apple season.

    • A collection of Thanksgiving appetizers with recipe ideas, and party decorating tips for a Fall party.
      36 Thanksgiving Appetizers
    • A bountiful Thanksgiving charcuterie cheeseboard fill with colorful meats, cheeses nuts and more for Thanksgiving.
      Thanksgiving Charcuterie Board
    • A number of puff pastry appetizers, dinner ideas, and desserts in a collection.
      40 Puff Pastry Appetizer Recipes
    • Slices of green Granny Smith apples around a white dish with a sweet dessert dip inside a low small white dish with a ruffled edge, and a piece of apple sticking into the dip.
      Caramel Apple Dip

    Did you love this recipe? We would love to hear from you! If you make this recipe and love it, give it a 5-star rating ⭐⭐⭐⭐⭐ with a comment. THANK YOU!! Follow Delicious Table with my free newsletter and share this recipe with your friends on Facebook, Pinterest, and Instagram.

    A rustic table with small bowls filled with toppings for a fall appetizer crostini bar.
    Print

    Fall Crostini Bar

    Learn how to set up a crostini bar with topper ideas to entertain for Fall, Friendsgiving, or Thanksgiving. Elegant no-fuss Fall party food to serve at your gathering. Take a crostini toast, spread either the whipped goat cheese or feta, and add toppings you love.
    Course Appetizers, Dips, & Snacks
    Cuisine American
    Keyword crostini, crostini recipe, crostini toppers, fall appetizers, thanksgiving appetizers
    Prep Time 30 minutes minutes
    Cook Time 10 minutes minutes
    Total Time 40 minutes minutes
    Servings 12
    Calories 680kcal
    Author Lisa Hatfield

    Equipment

    • Large Metal Sheet Pan
    • Small Serrated Knife
    • Epicurean Non-Slip Cutting Board

    Ingredients

    Crostini Bread

    • 1 large French baguette
    • ½ cup extra virgin olive oil

    Blue Cheese, Pear, & Honey Drizzle Crostini Topper

    • ½ cup crumbled blue cheese
    • ¼ cup honey

    Pumpkin Butter & Candied Pecan Crostini Topper

    • ¼ jar pumpkin butter
    • ½ cup candied pecans chopped

    Cranberry & Brie Crostini Topper

    • 4 ounces brie
    • ½ cup dried cranberries

    Brie & Fig Jam Crostini Topper

    • 4 ounces brie
    • ¼ jar fig jam

    Whipped Goat Cheese

    • 11 ounces goat cheese
    • 2 tablespoons cream cheese room temperature
    • 1 teaspoon garlic powder
    • ½ teaspoon red pepper flakes
    • 1 whole lemon zested
    • ½ teaspoon Kosher sea salt
    • ¼ teaspoon cracked black pepper
    • 1 tablespoon optional garnish: fresh sage, thyme, rosemar chopped

    Whipped Feta

    • 11 ounces feta block
    • 3 tablespoons cream cheese room temperature
    • ½ teaspoon garlic powder
    • ¼ cup extra virgin olive oil
    • ½ lemon zest and juice
    • ¼ teaspoon cracked black pepper
    • 1 tablespoon optional garnish: fresh sage, thyme, rosemary chopped

    Instructions

    Make Crostini Toasts

    • Preheat the oven to 375 degrees.
    • Slice the baguette into ½" slices, and arrange slices in a single layer on a baking sheet.
    • Drizzle slices with olive oil and bake for 8-10 minutes until golden brown.

    Make Whipped Goat Cheese

    • Combine the goat cheese, cream cheese, garlic, red peppperflakes, lemon zest, and thyme leaves in a food processor or with a stand or handheld mixer.
    • Whip for 60-90 seconds until smooth. Store refrigerated for up to a week.

    Make Whipped Feta

    • Bring feta block and cream cheese to room temperature for about 30 minutes.
    • Combine the feta block and cream cheese to the food processor and combine, next add the garlic powder, extra virgin olive oil, lemon zest and juice, and black pepper.
    • Whip for 60-90 seconds until smooth. Store refrigerated for up to a week.

    Video

    Notes

    More Topper Ideas:

    • cheeses: Maytag bleu, Manchego, or Parmesano Reggiano
    • soft cheeses: goat cheese, mini burrata, Boursin, Brie, Camembert
    • spreads: basil pesto, hummus, Olive Tapenade, marinated artichokes
    • sweet: Cranberry Sauce, cherry jam, marmalade, or honey
    • nuts: toasted Pumpkin Seeds, pistachios, walnuts, or pine nuts
    • fruit: apples, Pomegranate Seeds, pears, apricots, figs, or melon
    • meats: sliced prosciutto, pancetta, salami, or crumbled bacon
    • seafood: lump crabmeat, Shrimp (no-tails), smoked salmon
    • drizzles: aged balsamic vinegar or lemon/orange flavored olive oils
    • veggies: sliced mini heirloom tomatoes or Pickled Vegetables
    • herbs: basil leaves, chopped thyme, rosemary, and sage

    Serving Inspiration:

    • Chalkboard or food lables
    • Plates and glasses
    • Tables and chairs
    • Linens & Napkins
    • Cutting Boards
    • Rustic Crates
    • Wood Boxes
    • Vases with dried florals
    • Baskets
    • Fresh Fall flowers
    • Pumpkins
    • Metal containers
    • Antique silverware
    • Small ceramic bowls
    • Long-serving boards

    Nutrition

    Calories: 680kcal | Carbohydrates: 31g | Protein: 22g | Fat: 53g | Saturated Fat: 23g | Cholesterol: 97mg | Sodium: 1107mg | Potassium: 139mg | Fiber: 1g | Sugar: 24g | Vitamin A: 985IU | Vitamin C: 5mg | Calcium: 364mg | Iron: 2mg

    Pumpkin Spice Latte

    [heart_this] · Sep 22, 2023 · 4 Comments

    A glass mug filled with Pumpkin Spice Latte with whip cream and sprinkles.

    Last Updated October 16th, 2023 at 10:05 am by Lisa

    Whip up your own homemade version of a Pumpkin Spice Latte made with real fresh ingredients and cozy Fall spices. Top your PSL with decadent toppings like whipped cream and beautiful Fall sprinkles!

    You can swap in the plant-based milk you love, and add some good strong hot coffee or a shot of espresso.

    Create a coffee house in your own kitchen with all the real pumpkin flavor. Stay home, relax, and skip the long lines...

    A glass coffee cup filled with Pumpkin Spice Latte topped with sprinkles.

    Pumpkin Spice Latte Ingredients

    Do you remember when you first heard about the Starbucks pumpkin spice latte? It has almost been 20 years, wow!!! Now known as the "PSL" it is a delicious cup of coffee for Fall and seems to get us all in the mood for Autumn and is served in coffee shops all over the world. Let's make a coffee shop version. You will need these ingredients...

    • whole milk
    • pumpkin puree (canned)
    • sugar
    • Vanilla Extract
    • Cute Fall Sprinkles
    • Pumpkin Pie Spice
    • strong hot coffee

    Garnish Ideas: Whipped cream and cute Fall sprinkles, or a sprinkle of spices like:

    • sprinkle of cinnamon
    • shaved chocolate
    • seasonal sprinkles
    • tiny grate of nutmeg
    • candy corn
    A can of canned pumpkin next to a loaf of baked pumpkin bread and a small pumpkin.
    Two glass coffee mugs filled with pumpkin latte coffee drinks.

    Homemade Pumpkin Spice Latte Recipe

    This recipe will make 2 lattes. There is a step by step video in the printable recipe card below for you!

    On the stove-top in a small saucepan over medium heat, add milk, pumpkin puree, and sugar. Heat up, blend, and stir with a whisk until hot, but don't let it boil.

    Remove from heat, and whisk, use an immersion blender, or a milk frother to mix in the 1 tablespoon vanilla extract, 1 ½ teaspoon pumpkin pie spice, and ½ cup strong hot coffee.

    Pour milk mixture into glass mugs and top with whipped cream and pretty Fall sprinkles...

    Optional PSL Additions

    Cold Brew Coffee: You can also make this a cold brew drink and put it over lots of ice!

    Sweetener: To make it sweeter, add some natural flavors like maple syrup or honey. Add a few more grams of sugar, a drizzle of vanilla syrup, or a teaspoon Vanilla Extract.

    Dairy Options: For the cup milk, you can swap in dairy free almond milk, coconut milk, oat milk, skim milk, or a non-dairy milk like soy milk for whole milk if you are on a lower calorie diet.

    Extra Shots: Add in some more hot espresso shots if you prefer a stronger coffee from your espresso machine.

    Gluten-Free: This PSL is gluten free, as there aren't wheat products in the ingredients, yay!

    Pumpkin Puree: Read on to make your own at home, or buy it! By the way, pumpkin pie filling is a totally different product that you don't want for this recipe.

    Fall Spices: Sprinkle a tiny bit ground cinnamon or grate some ground nutmeg over the whipped cream!

    Pumpkin Spiced Latte FAQ

    Are canned pumpkin and pumpkin puree the same thing?


    When you go to the store, you will see canned pumpkin and pumpkin puree are the same thing! These terms can be confusing to consumers.
    Some cans will say solid-pack, and that is a puree that works for this recipe.
    I suggest you buy organic puree with no additives or anything extra. Puree is a different ingredient for recipes than pumpkin pie filling.

    Homemade Pumpkin Puree

    Cut open the pumpkin or squash into large pieces and either boil, roast, or steam it until cooked.
    Remove the skin, and mash or blend it into a puree in a bowl.
    Use homemade puree in recipes in place of canned.

    2 pumpkin latte coffee drinks on a table with mini pumpkins.
    Two mugs of Pumpkin Spice Latte with Fall sprinkles on top of whip cream.

    More Pumpkin Recipes

    Mix your own Pumpkin Pie Spice. You can certainly buy spice blends, but it is a great way to use pantry spices and tastes so much better homemade. It is popular in so many Fall and Thanksgiving recipes and has warm notes of cinnamon, ginger, allspice, nutmeg, and cloves. And fun to gift in a little mini jar!

    Once you make your own Roasted Seeds full of buttery crunchy goodness, you will make these every Fall.

    Pumpkin Bread baked with warm spices like cinnamon, fresh orange juice, and milk chocolate chips. Dense, moist, delicious, and so chocolaty...

    • A small glass spice jar filled with pumpkin pie spice made at home.
      Pumpkin Pie Spice
    • A ceramic dish full of golden brown roast pumpkin seeds.
      Roasted Pumpkin Seeds
    • A baked loaf of pumpkin bread sliced thick with a silver knife.s
      Pumpkin Bread

    More Hot Drinks

    Just like they serve in the pubs of Ireland, this is a classic Irish Coffee Recipe. It can be made with a kick of Jameson Irish whiskey and or Baileys Irish Cream. 

    Ring in the holiday season with cozy glasses of Mulled Wine infused with warm spices, brandy, red wine, apple cider, sliced fruit, and honey. This recipe is so popular, it was published in a magazine!

    • A glass mug with Irish Coffee on a vintage green table topped with green sprinkles and edible gold.
      Irish Coffee With Baileys or Whiskey
    • A lady holding a tray of mulled wine garnished with cinnamon sticks and orange peel.
      Festive Christmas Mulled Wine

    Did you love this recipe? We would love to hear from you! If you make this recipe and love it, give it a 5-star rating ⭐⭐⭐⭐⭐ with a comment. THANK YOU!! Follow Delicious Table with my free newsletter and share this recipe with your friends on Facebook, Pinterest, and Instagram.

    A glass mug filled with Pumpkin Spice Latte with whip cream and sprinkles.
    Print

    Pumpkin Spice Latte

    Whip up a Pumpkin Spice Latte made with real fresh ingredients, and cozy Fall spices. Top your PSL with decadent toppings like whip cream and Fall sprinkles. You can swap in the plant-based milk you love, and add some good strong hot coffee or a shot of espresso.
    Course Beverages
    Cuisine Breakfast or Snack
    Keyword PSL coffee drink, pumpkin latte, pumpkin spice latte, Starbucks pumpkin spice latte
    Prep Time 5 minutes minutes
    Cook Time 5 minutes minutes
    Total Time 10 minutes minutes
    Servings 2
    Calories 490kcal
    Author Lisa Hatfield

    Equipment

    • Glass Coffee Mugs
    • Coffee or Milk Frother
    • Immersion Blender

    Ingredients

    • 2 cups milk
    • 2 tablespoons pumpkin (canned puree)
    • 2 tablespoons sugar
    • 1 tablespoon vanilla extract
    • 2 tablespoons Fall sprinkles
    • ½ teaspoon pumpkin pie spice
    • ½ cup strong hot coffee

    Instructions

    • In a small saucepan over medium heat, add milk, pumpkin puree, and sugar.
    • Heat up and stir with a whisk until hot, but don't let it boil.
    • Remove from heat, and whisk, immersion blender, or a frother to mix in the vanilla, pumpkin pie spice, and coffee.
    • Pour into mugs, top with whip cream and pretty sprinkles.

    Video

    Notes

    Garnish

    • whipped cream
    • sprinkle of cinnamon
    • shaved chocolate
    • seasonal sprinkles
    • candy corn

    Buying Puree

    • When you go to buy puree, canned pumpkin and pumpkin puree are the same thing. These terms can be confusing to consumers!
    • Some cans will say solid-pack, and that is puree which works for this recipe. BTW pumpkin pie filling is a totally different product that you don't want for this recipe.
    • I suggest you buy organic puree, with no additives or anything extra.
     

    Nutrition

    Calories: 490kcal | Carbohydrates: 69g | Protein: 16g | Fat: 17g | Saturated Fat: 10g | Polyunsaturated Fat: 1g | Monounsaturated Fat: 4g | Cholesterol: 49mg | Sodium: 214mg | Potassium: 771mg | Fiber: 1g | Sugar: 68g | Vitamin A: 5462IU | Vitamin C: 1mg | Calcium: 569mg | Iron: 1mg

    Fall Snack Mix

    [heart_this] · Sep 20, 2023 · 1 Comment

    A large glass jar filled with a Fall Snack Mix with candy corn and M&Ms with a small bowl of it nearby.

    Last Updated October 16th, 2026 at 04:07 pm by Lisa

    This Fall Snack Mix will disappear at your Fall, Halloween Party, or at your Thanksgiving feast. Just 4 ingredients are simply amazing together. Kids and adults love these treats.

    It is almost impossible to stop eating this sweet and salty mix. And a big batch of this Fall treat will disappear before your eyes.

    You only need 4 ingredients. And the possibilities to add other things are endless. SOOOO GOOOOD to put out for a happy hour with drinks with friends and family. Nothing could be simpler, try not eating it all this Fall crack recipe...

    A large glass jar filled with a Fall Snack mix made from candy and nuts with a small white bowl next to it on a towel.

    Sweet And Salty Fall Snack Mix

    Hey, and no one will know if you throw it together at the very last minute, right? As a matter of fact, I placed a dish with this Fall Snack Mix out on the coffee table while I was making dinner for my brother's family and giggled as the whole bowl disappeared.

    Oh, and did you know that M&Ms come in white candy corn and Halloween flavors? Of course, any M&M variety will be just as good.

    Candy corn and peanuts? I know...but hang on... this easy snack mix is so good I could not stop eating it at my girlfriend's lake cabin. How can something so simple be so good? The crunch and salt of the peanuts, and the melty sweet chocolate are divine.

    And for a Chex mix recipe Fall version, just toss in any Chex cereal!

    Ingredients

    Brach's candy corn 

    M&Ms 

    Planters dry roasted peanuts 

    Brach's Autumn Mix candy

    Ingredients to make a Fall snack mix with bags of candy corn, M&Ms, peanuts, and mellowcreme autumn mix on a marble counter.

    Snack Mix Serving Instructions

    1. In a large bowl, toss the mixture of peanuts, M&Ms, Brach's Autumn Mix, and candy corn.
    2. Serve in a decorative tray or bowl. Store in a Tall Clamp Jar with a cute chalk label and pen. It also stores well in an airtight container in the refrigerator for up to 30 days.

    PRO TIP: This mix is so fun for Fall movie nights, Halloween Parties, Thanksgiving feasts, and with Cheese and Charcuterie boards in cute small bowls!

    Close up of a bowl with candy corn, Autumn mix candies, M&Ms, and peanuts in a white bowl.

    Additional Snack Mix Ingredients

    Try some of these other ideas to add into this sweet and salty Fall snack mix.

    • mini pretzels
    • rice Chex mix
    • bugles
    • Reese’s Pieces
    • peanut M&Ms
    • Cheez It crackers
    • Goldfish crackers
    • candy eyeballs
    • popcorn
    • caramel corn
    • corn chips
    • Roasted pumpkin seeds
    • cashews
    • pecans
    • chocolate chips
    • almonds
    • Cheerios
    • Fall Chex Mix: Toast Chex cereal for a Fall Chex mix with melted butter and Fall spices like Pumpkin Pie Spice to make a Pumpkin Pie Snack Mix!
    How long does Fall snack mix last?

    Put your leftover snack mix in a good clamp jar or airtight storage container and keep it fresh in your refrigerator for several weeks.

    A small white bowl with a colorful mix of Autumn snack mix nuts and candies for a party.

    More Fall Easy Make Ahead Appetizers

    Cheese Truffles are loaded with delicious flavors and toppings. Serve with crackers or pretzels for an easy appetizer and fun party food!

    Boursin Cheese whips together in just minutes for an easy appetizer. One of the best ways to eat it is simply with toasted warm bread or crackers.

    Dip into a Bacon Ranch Cheese Ball with crackers or pretzels, and enjoy every bite of this easy delicious appetizer. It is made with simple ingredients and quick prep time. Roll it in crispy bacon crumbles or assorted mixed cheeses.

    Candied Pecans with pumpkin pie spice flavors are crunchy and sweet with cinnamon-sugar glaze, and a kick of heat. Use as a holiday or Fall appetizer on a grazing table, or charcuterie cheeseboard.

    • A white platter filled with cheese truffles (mini cheese balls) with crackers and pretzels at a party.
      Cheese Truffles (Mini Cheese Balls)
    • A wooden cutting board with small baguettes sliced open with a white bowl of whipped creamed cheese spread on a slice.
      Boursin Cheese
    • A round bacon cheese ball topped with bacon, cheddar cheese, and surrounded by crackers and pita chips for an easy appetizer.
      Bacon-Ranch Cheese Ball
    • A white bowl with candied pecans and a few on the table with jars filled with them nearby.
      Candied Pecans

    Need a fast easy make ahead appetizer for Fall? Caramel Apple Brie Appetizers come together in minutes, and they are always wildly popular at Fall parties like Halloween and Thanksgiving.

    Everyone loves easy party food! These savory salty-sweet Easy Halloween snacks are loved by kids and adults. Build a fun snack board tray with your favorite chips, crackers, sweet treats, and spooky candy eyes!

    These are the best Thanksgiving Day Appetizers for savory snacks, easy appetizers, and a bounty of party ideas for your celebration. Whether you bake up some warm canapes, make easy no cook appetizers like a dip, or create a beautiful holiday charcuterie board. There are dozens of delicious recipes here to put out before your Thanksgiving feast.

    Make a Caramel Apple Dip with crisp green apples, salted caramel sauce, and crushed Health bars. A beloved recipe for potlucks, holiday parties, Thanksgiving, Halloween, and all through the Autumn apple season.

    • A white platter filled with apple brie skewers for Thanksgiving appetizers.
      Caramel Apple Brie Appetizers
    • A full platter of Halloween salty snacks and candy decorated with candy eyeballs for an easy last minute Halloween Party Idea.
      Easy Halloween Snacks
    • A collection of Thanksgiving appetizers with recipe ideas, and party decorating tips for a Fall party.
      36 Thanksgiving Appetizers
    • Slices of green Granny Smith apples around a white dish with a sweet dessert dip inside a low small white dish with a ruffled edge, and a piece of apple sticking into the dip.
      Caramel Apple Dip

    Did you love this recipe? We would love to hear from you! If you make this recipe and love it, give it a 5-star rating ⭐⭐⭐⭐⭐ with a comment. THANK YOU!! Follow Delicious Table with my free newsletter and share this recipe with your friends on Facebook, Pinterest, and Instagram.

    A large glass jar filled with a Fall Snack Mix with candy corn and M&Ms with a small bowl of it nearby.
    Print

    Fall Snack Mix

    This Fall Snack Mix will disappear at your Fall, Halloween Party, or at your Thanksgiving feast. Just 4 ingredients are amazing together. Kids and adults love these treats.
    Course Holiday
    Cuisine American
    Keyword Candy Corn, Fall Snack Mix, halloween snack mix
    Prep Time 3 minutes minutes
    Cook Time 0 minutes minutes
    Total Time 3 minutes minutes
    Servings 36
    Calories 239kcal
    Author Lisa Hatfield

    Equipment

    • Rubbermaid Leak-Proof Food Storage Containers
    • Tall Clamp Jar

    Ingredients

    • 22 ounce Brach's candy corn
    • 9.9 ounce bag M&Ms
    • 16 ounce jar Planters dry roasted peanuts
    • 22 ounce Brach's Autumn Mix candy
    US Customary - Metric

    Instructions

    • In a large bowl, mix salted peanuts, Candy Corn M&M's (or regular M&Ms), Brach's Autumn Mix and candy corn.
    • Serve in a decorative tray or bowl. Store in an airtight container with a cute label.

    Video

    Notes

    Storage

    Put your leftover snack mix in a good clamp jar or airtight storage container.

    Serve

    Put this snack mix out with fall drinks: Fireball Cocktails or Autumn Aperol Spritz

    Additional Snack Mix Ingredients

    Try some of these other ideas into your mix, some people even toast Chex cereal for a Fall Chex mix with melted butter and spices to make it even more amazing...
      • mini pretzels
      • rice Chex mix
      • bugles
      • Reese’s pieces
      • peanut M&Ms
      • Cheez it crackers
      • Goldfish crackers
      • candy eyeballs
      • popcorn
      • caramel corn
      • corn chips
      • Roasted pumpkin seeds
      • cashews
      • pecans
      • chocolate chips
      • almonds
      • Cheerios
     

    Nutrition

    Serving: 1g | Calories: 239kcal | Carbohydrates: 39g | Protein: 3g | Fat: 8g | Saturated Fat: 1g | Cholesterol: 1mg | Sodium: 183mg | Potassium: 82mg | Fiber: 1g | Sugar: 34g | Vitamin A: 15IU | Vitamin C: 0.1mg | Calcium: 16mg | Iron: 0.4mg

    12 Recipes For Hard Boiled Eggs

    [heart_this] · Sep 18, 2023 · 1 Comment

    12 creative ways to use hard boiled eggs in recipes showing deviled eggs for holidays, egg salad, ham salad, and potluck salads.

    Hard-boiled egg recipes that include the original Cobb Salad recipe, a potluck 7 Layer Salad, 2 flavors of Pickled Eggs including spicy and pub style, Macaroni Salad perfect for picnic potlucks and game days, Egg Salad Sandwiches, Ham Salad, and more.

    Once you try my super easy steam boiled method, you will get perfect eggs every single time that peel like a dream!

    This unique collection has creative ways to use leftover eggs plus holiday recipes. Put together these deviled egg recipe ideas on Halloween, Thanksgiving, Easter, or Christmas...

    There are so many ways to use a big batch of hard cooked eggs in recipes!

    Whether you have a large box of fresh or leftover dyed Easter eggs from the Easter Bunny. They won't go to waste with a list of good recipes.

    Boil the whole bunch to use in delicious ways all week saving time, it's quite economical and packs in protein. 🥚🐔🧺

    A white ceramic dish with a hard boiled egg sliced open on the dish.

    The Best Hard Boiled Eggs Recipe

    Over the years, I have settled on steaming as the best way to get egg boiling right. After testing a lot of different ways to hard cook them including:

    • pressure cooker
    • instant pot
    • boiling
    • steaming ✅
    • baking

    There are many people who swear by using older ones, fresh eggs, starting at a high heat in hot water, starting in cold water, using boiling water, adding salt, pricking the end of the egg with a pin, baking in the oven, using an instant pot, and so many more ways.

    [popout_newsletter]

    Why The Steam Method Works The Best!

    • With just a few simple steps, these gave the best results in terms of the color of the cooked egg yolks and they didn't get the dreaded green ring.
    • I tested both extra large eggs and regular white ones. This recipe works with all types of eggs. They all turned out great every single time when steamed.
    • The eggwhites were not rubbery.
    • And the creamy yolks were a gorgeous bright yellow.
    • Easy cleanup, pop the pan and steamer basket in the dishwasher!
    • Also, I love that you don't have to boil a huge pot of hot water, and found this to be an easy way to get through the cooking process with the best results as the low amount of water in the saucepan comes to a rapid boil very quickly.

    Basically, this recipe involves starting with cold eggs. Place and in a single layer into a steamer basket with an inch of water for perfect boiled eggs.

    And 12 minutes of cook time steaming them. Turn off the heat. Use a slotted spoon, and place them in a large bowl of ice water or ice bath to chill for 15 minutes, and add more ice if necessary.

    Then you simply roll each one on a cutting board or any flat, hard surface until the egg cracks, then to peel eggs, the shells will slip right off! Dip in a bowl of clean water to remove any pieces of shells. You will get perfectly smooth hard boil eggs to use in recipes!

    You can print off this recipe to use later, and there is a step by step video as well!

    Steamed Hard Boiled Eggs Recipe
    Steamed hard boiled eggs cook perfectly every time with no green ring. So easy to peel, the eggshells miraculously slip right off in minutes!
    GET THE RECIPE PIN IT
    6 perfectly hard boiled eggs with a cracked half of an egg shelf on top.
    Brown eggs with drops of moisture in a pot that were just cooked for hard boiled eggs.

    Recipes With Hard Boiled Eggs

    Boiled eggs are a versatile kitchen staple! Chop into Potato Salad or slice for a French niçoise salad made famous in the south of France in the city of Nice. Try them mixed into a shrimp or Healthy Tuna Salad with the crunch of diced celery, capers, and dressing sauces made with mayo or Greek yogurt.

    A hard boiled egg sliced open on a cutting board with egg shells nearby.

    Classic Egg Salad Sandwiches

    The best egg salad recipe starts with perfectly cooked eggs and fresh, quality, simple ingredients. Mix together into a rich creamy texture with fresh dill for a simple egg salad sandwich. You can make it a healthy egg salad with Greek yogurt too. And loaded onto any choice of bread like Rye or Pumpernickel sandwich bread with a pickle on top! Pack for your next picnic and it is also great on toast for breakfast!🥚🌿🥪

    Egg Salad Recipe
    The best egg salad recipe starts with perfectly cooked eggs and fresh, quality, simple ingredients. It's mixed together into a rich creamy texture and loaded onto Rye or Pumpernickel sandwich bread with a pickle on top! There are endless different ways to enjoy a traditional egg salad. It's a great way to use up leftover Easter eggs and works for family lunches, picnics, bridal, and baby showers, or afternoon tea in the best egg salad sandwich ever.
    GET THE RECIPE PIN IT
    An egg salad sandwich on brown bread stacked on a wood stand with a pickle on top.
    Egg salad on white sandwich bread cut in half on a wood stand.

    Spread your egg salad recipe with dill on white, rye, or pumpernickel bread. It is also great to add some more minced fresh dill, fresh red onion, or try my Pickled Red Onions! They are fantastic with egg salad...

    An egg salad sandwich on a wood stand cut in half with a pickle on top and bright pink pickled onions in the sandwich.

    7 Layer Salad

    ​Seven-Layer Salad also known as an overnight salad or "7 Layer Salad", is a colorful party food recipe that serves large groups, and everyone goes for seconds. It has layers of crisp lettuce, sliced eggs, crisp bacon, green onions, tomatoes, grated cheese, and fresh peas. And pour the dreamy dressing on top. Make a day ahead, and kept in the fridge overnight before your party! 🥗💚🍅🥚🥬

    7 Layer Salad
    7 Layer Salad (aka Overnight Salad) is one of the most popular potluck dishes for picnics, a BBQ side for cookouts, or a summer side dish.
    GET THE RECIPE PIN IT
    A glass trifle dish filled with 7 Layer Salad full of colorful ingredients.
    A large glass trifle bowl filled with a 7 Layer Salad with wood tong on the table and a red and white check cloth.

    Classic Cobb Salad

    There are so many egg dishes in the world, here is an all-time favorite, the Classic Original Cobb Salad. This great recipe is from the Original Brown Derby in Hollywood California and is one delicious recipe!

    It is served with a Special French Dressing aka Cobb Salad vinaigrette dressing and is loaded with delicious toppings like tomato, cubed chicken, crumbled bacon, avocado, cold chopped eggs, and fresh chives.

    A simple dish that was made late one night for a hungry customer has become an iconic American recipe. 🥚🥬🍅🍗🥓🥑🌿

    Cobb Salad Recipe
    The original Cobb Salad became famous in Los Angeles at the Brown Derby restaurant served with French Dressing loaded with chopped tomato, cubed chicken, crumbled bacon, diced avocado, chopped eggs, and topped with Roquefort cheese. Now you can make this famous iconic salad at home exactly how it was made back in the day in the golden age of Hollywood, California.
    GET THE RECIPE PIN IT
    A white square plate filled with colorful Cobb Salad made with chicken, eggs, avocados, tomatoes, and bacon.
    Edge of white square plate with Cobb Salad and the original recipe printed in LA Times.

    Afternoon Tea Sandwiches

    Choose from over two dozen creative small bites from classic cucumber tea sandwiches from Buckingham Palace fit for a Queen, egg salad sandwiches, easy ham salad, and so much more.
    There are many varieties of flavors and shapes of dainty finger sandwiches. Thinly sliced cold meats, vegetables, spreads, and finely chopped fillings of typically ham or chicken salad or cucumber with a cream cheese spread are very popular worldwide.☕️🌸🫖

    Tea Sandwich Recipes
    Elegant, dainty, crustless tea sandwiches are quintessential pinkies-up party food for a beautiful light lunch garden party, a bridal shower, or a Mother’s Day brunch. Today, we will cover everything from bread choices to filling options, the best ways to make tea sandwiches ahead, and how to create incredible savory flavors. Choose from over two dozen creative small bites from classic cucumber tea sandwiches from Buckingham Palace fit for a Queen, egg salad sandwiches, easy ham salad, and so much more.
    GET THE RECIPE PIN IT
    Tea sandwiches stacked on a 3 tiered glass tray at a tea party with assorted fillings and flavors.
    Side view of a triple glass tiered tray with stacks of tea sandwiches sliced in different shapes and colors of white and dark bread.

    Ham Salad Sandwiches

    Ham Salad is a tasty spread on crackers as an easy appetizer. But it's most famous for a ham salad sandwich recipe! Oh, and it's a fantastic way to use up all that leftover holiday ham.

    Pack up sandwiches in school or work lunch boxes, or take them on a picnic. Also, this classic ham salad recipe layers beautifully into little finger sandwiches for baby showers, bridal showers, and luncheons.

    Ham Salad Recipe
    Ham Salad is a tasty spread to go onto crackers for an easy appetizer. But it's most famous on sliced bread for a ham salad sandwich recipe! Oh, and it's a fantastic way to use up all that leftover holiday ham. Pack up sandwiches in school or work lunchboxes, or take them on a picnic. Also, this classic ham salad recipe layers beautifully into little finger sandwiches for baby showers, bridal showers, and luncheons.
    GET THE RECIPE PIN IT
    A ham salad sandwich sliced in half, stacked on a wood pedestal with crisp lettuce.
    Ham salad scooped on round seeded crackers garnished with chives for an easy snack.
    Ham salad on a sandwich sliced in half with an olive garnish.

    Easter Deviled Eggs

    Put out a plate of Easter Deviled Eggs that look like little spring baskets, they have fresh herbs and edible flower garnish plus tons of tips. A traditional deviled turned Eastery...🥚💐🐰🪴🧺

    Easter Deviled Eggs Recipe
    Easter deviled eggs are the perfect appetizer and Easter food idea. Decorated like little spring baskets complete with grass and flowers!
    GET THE RECIPE PIN IT
    Pretty Easter deviled eggs with green filling and decorated with fresh herbs and edible flowers.
    One of the best Easter Dinner Ideas a pastel blue plate loaded with deviled eggs for Easter decorated with edible flowers and herbs.

    Macaroni Salad

    A classic Macaroni Salad recipe loaded with chopped eggs, crunchy celery, Dill Pickles, and the secret ingredient pickle juice! A cherished old-fashioned family recipe and a real crowd-pleaser. The mustard, chopped pickles, and pickle juice make it super tangy and tasty. 🥚🥣🌿🍽

    Classic Macaroni Salad Recipe
    A classic macaroni salad recipe with chopped eggs, dill pickles, pickle juice, and crunchy celery. A cherished old fashioned family recipe!
    GET THE RECIPE PIN IT
    Looking down on a white plate filled with macaroni salad and a silver fork.
    White plate piled with homemade classic macaroni salad.

    Jalapeno Pickled Eggs

    Make a jar of these old-fashioned deli-style Jalapeno Pickled Eggs using jalapenos, garlic, and pickling spice. A healthy protein-packed snack or quick meal ready in 7 days right in your kitchen.

    These have a touch of heat. As a bonus, you get pickled garlic cloves and jalapenos out of the jar too! 🥚🌶🧄

    Pickled Eggs Recipe with Jalapenos
    Make these old-fashioned homemade deli-style Pickled Eggs recipe with jalapenos, garlic, and pickling spice. A low-carb keto protein-packed pickled egg recipe ready in 7 days.
    GET THE RECIPE PIN IT
    A large glass clamp jar filled with pickled eggs, fresh jalapeno slices, and spices.
    A clear jar filled with pickled eggs and one cut open.

    Chili Pepper Pickled Eggs

    These Yellow Pepper Pickled get their bright cheery color from yellow chili peppers, turmeric, and pickling spice. A fun easy recipe and a good idea for a healthy protein-packed snack ready in 7 days.

    This recipe is a take on the wildly popular ones served at Joe Jost's pub in Long Beach, California. People go there just for these and a cold mug of beer!🥚🌶🧄

    Tavern Bar Style Pickled Eggs Recipe
    Tavern Bar Style Pickled Eggs are a popular bar food served for hundreds of years to hungry patrons. These spicy eggs get their bright cheery yellow color from chili peppers, turmeric, and pickling spice. This fun easy pickled egg recipe can be a healthy snack, appetizer, or cold hor d'oeuvre.
    GET THE RECIPE PIN IT
    Crinkled parchment paper with a mug of beer, yellow pickled eggs, and pretzel sticks.
    A large 2 quart jar filled with yellow pickled eggs, spices, and yellow chilis with one scooped out with a wire spoon on a towel.

    Thanksgiving Deviled Eggs

    Thanksgiving Deviled Eggs are an easy appetizer party food idea. Gorgeous Fall color, garnished with sage and thyme to celebrate the season. And it's so fun to color the yolk mixture in a pretty color for Autumn.

    Serve them on a rustic board or tray, and watch them vanish. 🥚🍂🧡🪴

    Thanksgiving Deviled Eggs Recipe
    Thanksgiving Deviled Eggs are an easy appetizer party food idea. Gorgeous Fall color, garnished with sage and thyme to celebrate the season.
    GET THE RECIPE PIN IT
    A slice of rustic tree wood with Thanksgiving deviled eggs garnished with fresh herbs.
    A rustic piece of tree cut into a platter with Thanksgiving deviled eggs filled with rust colored filling and garnished with herbs.

    Christmas Holiday Deviled Eggs

    Serve Christmas Deviled Eggs with bubbly Champagne or drinks at your holiday party. These Christmas appetizers are gorgeous for the holidays.

    Sprinkle a few sparkling ruby red pomegranate seeds with sprigs of rosemary and celebrate the season. 🥚🎄🎅🏻❤️

    Christmas Deviled Eggs Recipe
    Serve Christmas Deviled Eggs as festive appetizers with bubbly Champagne or drinks at your holiday party. Whip these together in a matter of minutes for a perfect holiday appetizer or a first course. Sprinkle a few sparkling ruby red pomegranate seeds that look like holly berries, with sprigs of rosemary, and celebrate the holiday season with creamy deviled eggs.
    GET THE RECIPE PIN IT
    White platter with Christmas Deviled Eggs garnished with rosemary and pomegranate seeds.
    Glasses of champagne with Christmas Deviled Eggs topped with pomegranate seeds.

    Halloween Deviled Eggs

    Halloween Deviled Eggs are spooky party appetizers with dark black crackled egg shells filled with bright orange filling. Make these with food-safe dye, in orange, green, purple, or black colors.

    This classic simple appetizer is great to make ahead and have with Halloween cocktails. 🖤🎃

    Halloween Deviled Eggs Recipe
    Halloween Deviled Eggs are spooky party appetizers with dark black crackled egg shells filled with bright orange filling. Add some black sprinkles of sesame seeds and pair with some Halloween cocktails or drinks at your Halloween party.
    GET THE RECIPE PIN IT
    A black platter filled with Halloween deviled eggs sprinkled with black sesame seeds.
    A white ceramic plate with six Halloween deviled eggs on a black and white spider tablecloth at a Halloween party.

    Food Trends For Extra Hard-Boiled Eggs

    • Many people top Avocado Toast with fried or chopped boiled eggs piled on a slice of bread with avocado!
    • Portuguese pizza aka “Brazilian” pizza is a Portuguese-style pizza with toppings of Ham, calabresa sausage, bell peppers, sliced tomato, onion, black olives, and Sliced Eggs. Variations may also include green peas or corn. 
    • Mix up a quick Egg, Tomato, and Avocado Salad. In a bowl, add 2 diced leftover hard-boiled eggs, ½ cup cubed avocado, 1 small heirloom tomato or some Cherry Tomatoes. Then sprinkle with sea salt, black pepper, toss, and enjoy.
    What are the most popular boiled egg recipes?

    -classic nicoise salad
    -old fashioned chicken salad
    -egg salad breakfast toast
    -potato salad

    -breakfast soft boiled
    -scotch eggs

    -meal prep salad bar
    -egg salad sandwiches
    -avocado egg toast
    -ham salad
    -breakfast bowl
    -classic egg salad

    How long do hard boiled eggs last?


    Peeled hard boiled eggs should always be in the fridge and eaten within 7-10 max. Boiled in their shells will last 14 days.

    Did you love this recipe? We would love to hear from you! If you make this recipe and love it, give it a 5-star rating ⭐⭐⭐⭐⭐ with a comment. THANK YOU!! Follow Delicious Table with my free newsletter and share this recipe with your friends on Facebook, Pinterest, and Instagram.

    12 creative ways to use hard boiled eggs in recipes showing deviled eggs for holidays, egg salad, ham salad, and potluck salads.
    Print

    12 Recipes For Hard Boiled Eggs

    Hard-boiled egg recipes that include the original Cobb Salad recipe, a potluck 7 Layer Salad, 2 flavors of Pickled Eggs including spicy and pub style, Macaroni Salad perfect for picnic potlucks and game days, Egg Salad Sandwiches, Ham Salad, and more. Once you try my super easy steam boiled method, you will get perfect eggs every single time that peel like a dream! This unique collection has creative ways to use leftover eggs plus holiday recipes. Put together these deviled egg recipe ideas on Halloween, Thanksgiving, Easter, or Christmas.
    Course Breakfast & Brunch
    Cuisine Breakfast or Brunch
    Keyword easy peel eggs, steam boiled eggs
    Prep Time 3 minutes minutes
    Cook Time 12 minutes minutes
    Total Time 15 minutes minutes
    Servings 12
    Calories 755kcal
    Author Lisa Hatfield

    Equipment

    • Vegetable Steamer Basket
    • Cast Iron Dutch Oven

    Ingredients

    • 1 dozen organic eggs
    • water

    Instructions

    • In a medium large pot, add an inch of water to the bottom of the pan and bring to a rolling boil over high heat.
    • Place your steamer basket or steaming rack in and carefully place eggs onto the steamer basket with a slotted spoon in a single layer if possible. I found that if you load on alternating sides, it keeps it from tipping over into the boiling water.
    • Cover with a lid and steam for 12 minutes of steaming time.
    • Prepare a large bowl of ice water.
    • After 12 minutes of steaming, turn off the heat and place all them in the ice bath to chill for 15 minutes, add more ice if necessary.
    • Roll the egg on a cutting board or any hard surface, until it cracks, then slip the shells right off! Dip in a bowl of water to remove any pieces of shells. You will get perfectly smooth hard boiled eggs to use in recipes.

    Video

    Nutrition

    Calories: 755kcal | Carbohydrates: 4g | Protein: 67g | Fat: 50g | Saturated Fat: 17g | Polyunsaturated Fat: 10g | Monounsaturated Fat: 19g | Trans Fat: 1g | Cholesterol: 1964mg | Sodium: 750mg | Potassium: 729mg | Sugar: 2g | Vitamin A: 2851IU | Calcium: 296mg | Iron: 9mg

    Apple Crisp

    [heart_this] · Sep 12, 2023 · 3 Comments

    Apple Crisp in a red bowl with a silver spoon, ice cream, and drizzled with caramel sauce.

    Last Updated January 4th, 2024 at 11:23 pm by Lisa

    Bake a delicious Apple Crisp with a sweet crust, caramelized apple filling, and a streusel crumb topping. Serve this easy dessert after a nice family dinner, and it is fancy enough for the holidays or other special occasions!

    The hot crumble apple crisp topping gets golden brown in the oven. And is heavenly with a melting scoop of ice cream and caramel sauce drizzled all over. What a delicious apple dessert, full of tart apple flavor...

    Why This Is The Best Apple Crisp Recipe!

    • This easy recipe is made with simple ingredients, most of you might have these on hand right now to make a classic apple crisp!
    • Tastes amazing, and has a fast bake time of 45 minutes.
    • The crust texture, filling, and crumble topping are incredible.
    • Serve with coffee, it's divine.
    • A fast dessert for after dinner with ice cream and caramel sauce.
    • No pie crust to fuss over. It's definitely an easy apple crisp recipe. 
    • A homemade apple crisp can be ready in just over an hour!
    • It keeps well refrigerated for several days if it lasts that long!
    • Many other kinds of fruit crisp recipes can be made from this recipe. Try peaches, berries, or pears in place of the apples.
    • Feel free to make this even faster with cans of apple pie filling. You will need approximately 28-32 ounces of canned apple pie filling.

    Apple Crisp Recipe

    One of the best things during the Fall time of year is apple everything! This dessert recipe is wonderful for family dinners, Christmas holidays, in the Fall during the apple season, and Thanksgiving.

    It comes together faster than a cake or pie made from scratch and is so good with a cup of coffee. The full recipe and printable instructions are below in the recipe card.

    Crust and Streusel Topping Ingredients

    • all-purpose flour
    • old fashioned oats
    • sea salt
    • brown sugar
    • white sugar
    • butter

    Caramelized Apple Filling Ingredients

    • apples - Honeycrisp, Granny Smith apples, or Mac Intosh
    • granulated white sugar
    • corn starch
    • sea salt
    • butter soft
    • Vanilla Extract ~ make your own at home!
    • cinnamon
    • nutmeg
    • optional: scoop of ice cream or caramel topping
    Vanilla Extract Recipe
    Taste the difference in homemade frostings, vanilla bean ice cream, cookies, cakes, pies, and other desserts, and make your own vanilla extract! A good quality vanilla extract can be expensive due to the cost of growing the pods on tropical vanilla orchids. Not all extracts are alike. Create this easy recipe at home with concentrated fragrant vanilla flavor to use in baking or gift during the holidays.
    GET THE RECIPE PIN IT
    A glass flip top bottle filled with vanilla extract, and real vanilla bean pods on the table.

    Make the Crust and Streusel Topping

    Traditional or Old-Fashioned crisp streusel/crumble topping is typically a crumbled mixture of several ingredients. Sprinkled on top of the apples, and then baked until slightly crisp.

    1. Preheat oven to 350 degrees. Melt ¾ cup cold butter in the microwave.
    2. In a medium bowl, add 2 cups flour, ¾ cup old fashioned oats, ¼ teaspoon sea salt, ½ cup brown sugar, ½ cup white sugar, and ¾ cup melted butter. Mix well until combined with a spatula or pastry blender.
    3. Spray a 9 x 9 square baking dish with non-stick spray like coconut oil.
    4. Reserve 1 cup of mixture for the topping in a small bowl.
    5. Press the remaining crisp mixture into the dish using the bottom of a 1 cup measuring cup.

    Make The Apple Filling

    1. Wash apples in cold water, peel or you can leave the peels on if you prefer, I do! and slice the raw apples into ½" small pieces. Set into a large bowl.
    2. In that bowl, add ½ cup sugar, 2 tablespoons cornstarch, ¼ teaspoon salt, 1 tablespoon butter, 1 teaspoon vanilla extract, 1 teaspoon ground cinnamon, and ¼ teaspoon ground nutmeg.

    Cook the Apples and Baking

    1. Cook the apples on medium-low heat for 3-4 minutes. Stir constantly, they will thicken. Don't leave them alone or they can burn due to the sugar. The apples and ingredients will become "sticky" and look like a caramel sauce. Remove from heat.
    2. Let the apple mixture cool for about 10 minutes, then give them a good stir. Spread them evenly onto the packed crust. Sprinkle 1 cup of topping all over the top.
    3. Bake 350 degrees f for 45 minutes.
    4. Serve with a big scoop of vanilla ice cream and drizzle with caramel sauce.

    Apple Crisp FAQ

    What kind of apples for apple crisp?

    Honeycrisp apples are super huge, juicy, sweet, firm, and tart which makes them a top choice for a crisp.
    Granny Smith apples are great in crisps and pies. They have a slight tart flavor that balances perfectly with the sweet crumble topping, and hold up well during baking, and are a classic choice.
    These are classic apple varieties and top favorites. Some fall into the firm-tart category, and some the firm-sweet. You can even use a combination of the two listed below for apple crisp.
    Esopus Spitzenburg
    Northern Spy
    McIntosh
    Idared
    Pink Pearl
    Ginger Gold
    Golden Delicious
    Jazz
    Jonagold
    Pink Lady

    According to Food Network, there are some fresh apples to avoid in baking desserts. Gala apples, Fuji and Red Delicious are very common varieties, and are great to eat for snacks but don't hold up in the heat of the oven resulting in a watery-mushy pie, tart, or cake.

    A graphic showing two kinds of apples, Granny Smith and Honeycrisp in wood bowls.

    What is an apple cobbler vs. apple crisp?


    Fruit cobbler desserts are typically baked fruits with a biscuit dough topping, pie dough, or batter dropped in dollops on top in place of a full pie crust. With ripe fruit, you can create different flavors. Try a blackberry, blueberry, and peach cobbler and you don't need a pie crust in a cobbler. A crisp typically has a crumbled crust base and crumb topping.

    Cobblers are called that because they look like a cobblestone street or path as the batter or biscuit dough puffs up like a cobblestone street. These fruit desserts date back to the nineteenth century.

    More Apple Recipes

    These are some of my favorite recipes for a delicious dessert to serve for a family dinner, a special occasion, or the holidays.

    Caramel Apple Crisp is an easy Fall dessert that tastes just like caramel apples! It is made with just 7 ingredients, and has a golden brown crisp topping and crust, sweet apples, and melted gooey caramel candy.

    An Apple Crumble Pie made with homemade Pie Filling, "foolproof" crust, and a crumble topping make this one scrumptious recipe. Some people also call this a Dutch or French Apple Pie.

    An easy Apple Pie Filling using crisp fresh apples and warm spices that can be made ahead and is freezer-friendly. A Classic apple pie recipe is one of the most popular American recipes of all time. And there is nothing better in the Fall season, than baking your favorite dessert like warm apple pie or a soft apple pie filling baked in apple turnovers with flaky crusts in the oven!

    Salted Caramel Apple Dip has crisp green apples, salted caramel sauce, and crushed Health bars. A beloved recipe and pot-luck party hit for Thanksgiving, Halloween, and all through Autumn. As people dig in for another bite, they will ask you for this recipe...I promise.

    If you like caramel apples, then you will love these Caramel Apple Brie Appetizers, a scrumptious combination with creamy brie, the crunch of macadamia nuts, and tart-sweet dried cranberries. It is addictive...

    • A round white dish of fresh baked caramel apple crisp with a large serving spoon for a Fall dessert.
      Caramel Apple Crisp
    • A white pie dish with a slice of apple crumble pie, also known as a dutch apple pie with a crumbled topping and green apples in the background in a wood bowl.
      Dutch Apple Pie
    • A large jar filled with apple pie filling with a lid and bow.
      Apple Pie Recipe Filling
    • Slices of green Granny Smith apples around a white dish with a sweet dessert dip inside a low small white dish with a ruffled edge, and a piece of apple sticking into the dip.
      Caramel Apple Dip
    • A white platter filled with apple brie skewers for Thanksgiving appetizers.
      Caramel Apple Brie Appetizers

    Did you love this recipe? We would love to hear from you! If you make this recipe and love it, give it a 5-star rating ⭐⭐⭐⭐⭐ with a comment. THANK YOU!! Follow Delicious Table with my free newsletter and share this recipe with your friends on Facebook, Pinterest, and Instagram.

    Apple Crisp in a red bowl with a silver spoon, ice cream, and drizzled with caramel sauce.
    Print

    Apple Crisp Recipe

    Bake a delicious Apple Crisp with a sweet crust, caramelized apple filling, and a streusel crumb topping. Serve this easy dessert anytime for dinner or the holidays. The hot crumble topping gets a little crispy topping in the oven, with a melting scoop of ice cream, and caramel sauce drizzled all over, what a delicious dessert.
    Course Desserts & Sweets
    Cuisine American
    Keyword apple crisp, apple crisp recipe, apple recipe, easy apple crisp, Fall baking, Honeycrisp apple recipe, Thanksgiving dessert
    Prep Time 20 minutes minutes
    Cook Time 1 hour hour
    Total Time 1 hour hour 20 minutes minutes
    Servings 10
    Calories 399kcal
    Author Lisa Hatfield

    Equipment

    • Chef Knife
    • Epicurean Non-Slip Cutting Board
    • Red Baking Deep Dish Emile Henry

    Ingredients

    crust and streusel topping (reserve 1 cup to sprinkle on top)

    • 2 cups all-purpose flour
    • ¾ cup old fashioned oats
    • ¼ teaspoon sea salt
    • ½ cup brown sugar
    • ½ cup white sugar
    • ¾ cup butter melted

    caramelized apple filling

    • 4 cups apples sliced - Honeycrisp, Granny Smith or Mac Intosh
    • ½ cup sugar
    • 2 tablespoons corn starch
    • ¼ teaspoon sea salt
    • 1 tablespoon butter soft, salted or unsalted butter
    • 1 teaspoon vanilla extract
    • 1 teaspoon ground cinnamon
    • ¼ teaspoon ground nutmeg
    • vanilla ice cream or caramel topping optional
    US Customary - Metric

    Instructions

    crust and streusel topping

    • Preheat oven to 350 degrees. Melt ¾ cup cold butter in the microwave.
    • In a medium bowl, add 2 cups flour, ¾ cup old fashioned oats, ¼ teaspoon sea salt, ½ cup brown sugar, ½ cup white sugar, and ¾ cup melted butter. Mix well until combined with a spatula or pastry blender.
    • Spray a 9 x 9 square baking dish with non-stick spray like coconut oil.
    • Reserve 1 cup of mixture for the topping in a small bowl.
    • Press the remaining crisp mixture into the dish using the bottom of a 1 cup measuring cup.

    caramelized apples

    • Wash apples in cold water, peel or you can leave the peels on if you prefer, I do! and slice the raw apples into ½" small pieces. Set into a large bowl.
    • In that bowl, add ½ cup sugar, 2 tablespoons corn starch, ¼ teaspoon salt, 1 tablespoon butter, 1 teaspoon vanilla extract, 1 teaspoon ground cinnamon, and ¼ teaspoon ground nutmeg.
    • Cook the apples on medium-low heat for 3-4 minutes. Stir constantly, they will thicken. Don't leave them alone or they can burn due to the sugar. The apples and ingredients will become "sticky" and look like a caramel sauce. Remove from heat.
    • Let the apple mixture cool for about 10 minutes, then give them a good stir. Spread them evenly onto the packed crust. Sprinkle 1 cup of topping all over the top.
    • Bake 350 degrees for 45 minutes.
    • Serve with a big scoop of vanilla ice cream and drizzle with caramel sauce.

    Video

    Notes

    Baking Tips

    Spray your dish with a non-stick spray, it helps to serve your apple crisp easier and makes clean up so fast. 

    Apples

    You can use any apple for this recipe, my favorite is a Honeycrisp but Granny Smith apples and McIntosh work great.

    Storage

    After the apple crisp cools, if there is any leftover, cover with plastic wrap and keep chilled in the fridge. 

    Toppings

    Vanilla Ice cream is classic, sometimes I pre-scoop and refreeze on a parchment-lined sheet pan them for parties, it makes serving really easy. 
    Caramel Sauce drizzled over is so good too.
     

    More Apple Crisp Tips:

    • This easy recipe is made with simple ingredients, most of you might have these on hand right now!
    • Tastes amazing, and has a fast bake time of 45 minutes.
    • The crust, filling, and crumble topping are incredible.
    • Serve with coffee, it's divine.
    • A fast dessert for after dinner with ice cream and caramel sauce.
    • No pie crust to fuss over. It's ready in just over an hour.
    • It keeps well refrigerated for several days if it lasts that long!
    • Many other kinds of fruit crisp recipes can be made from this recipe, try peaches, berries, or pears in place of the apples.
    • Feel free to make this even faster with cans of apple pie filling. You will need approximately 28-32 ounces of canned apple pie filling.

    Nutrition

    Calories: 399kcal | Carbohydrates: 63g | Protein: 4g | Fat: 16g | Saturated Fat: 10g | Polyunsaturated Fat: 1g | Monounsaturated Fat: 4g | Trans Fat: 1g | Cholesterol: 40mg | Sodium: 253mg | Potassium: 123mg | Fiber: 3g | Sugar: 36g | Vitamin A: 488IU | Vitamin C: 2mg | Calcium: 26mg | Iron: 2mg

    Christmas Shots

    [heart_this] · Sep 10, 2023 · 3 Comments

    A jolly Santa Claus on top of a green Christmas tree with colorful ornaments.

    Last Updated April 29th, 2024 at 07:39 pm by Lisa

    Christmas shots will be the talk of your holiday party! Hang a batch of shots as ornaments on a little tree filled with bright colorful boozy sippers.

    Serve them in classic shot glasses with festive rim garnishes, or mix them into Christmas cocktails! These fun drinks sparkle and glitter in the joy of the season...

    Christmas Shot Recipes

    At Christmas gatherings and holiday parties, is there a better way to celebrate the holiday season? When I saw these Christmas Tree Fillable Ornaments I just had to try them for a party!

    Be sure to watch the video in the printable recipe card below...

    Christmas Ornament Shot Recipe Ingredients

    Each fillable ornament I ordered holds one ounce. Classic Christmas colors are so fun, they look like vintage lights. Create your own colors and holiday flavors!

    Icy Snowballs (White Shots)

    • ½ ounce Creme de Cacao
    • ½ ounce Peppermint Schnapps
    • ⅛ teaspoon White Edible Drink Glitter or Silver Pearl White Edible Drink Glitter

    Peppermint Bark (Green or Red Shot)

    • 1-ounce Peppermint Bark Cream Liqueur
    • ⅛ teaspoon Red or Green Edible Drink Glitter

    The Grinch (Green Shots)

    • ½ ounce Midori Melon Liqueur
    • ½ ounce Coconut Rum
    • ⅛ teaspoon Green Edible Drink Glitter

    Jolly Fireballs (Red Shots)

    • ½ ounce Fireball Whiskey
    • ⅛ teaspoon Red Edible Drink Glitter

    Equipment For Festive Shot Ideas

    • Fillable Christmas Booze Tree Ornaments
    • 3 Sizes Stainless Steel Funnels

    Instructions

    1. Take the top off the booze ball ornament, and the easy way to fill them is to put the ornament in a small shot glass to hold it up and use a small funnel while pouring.
    2. Add ⅛ teaspoon of the edible drink glitter to each shot.
    3. Use a little funnel, pour in 1 oz of alcohol up to the neck of the bottle and close with the screw top, and place an ornament hook onto the Christmas tree or stack them in a bowl for your party.
    4. Give it a good shake to mix the drink glitter, it does settle fairly quickly.

    Display On A Christmas Tree

    Use a small artificial Christmas tree weighted in a heavy clay pot to hold it steady. Add a string of little lights. Order the fillable ornament bulbs, and fill with shots. Hang on the tree using hooks. I added a Jolly Santa on top to oversee the party!

    Decorate Holiday Shot Glasses

    Everyone will remember the fun at your Christmas party with shooters! Decorate the rims of any 2 oz Glass Shot Glasses and make them extra festive with holiday spirit sprinkles! Here are some tips and ideas for your Christmas Day party. Decorate the rims of regular shot glasses with these ingredients.

    • Jet-Puffed Marshmallow Cream
    • Peppermint Crunch Sprinkles
    • Christmas Gingerbread Sprinkles
    • Red Edible Drink Glitter
    • Green Edible Drink Glitter
    • Silver Pearl White Edible Drink Glitter

    PRO TIP: Dip the rim of each shot glass into Jet-Puffed Marshmallow Cream, then either red sprinkles, green sprinkles, or crushed peppermint candy cane sprinkles.

    A jolly Santa Claus on top of a green Christmas tree with colorful ornaments.

    How To Serve Christmas Shots

    There are so many ways to mix and drink Santa shots. Drink them straight as shooters right out of 2 oz Glass Shot Glasses.

    Pour into a cup of hot coffee or hot cocoa, the peppermint and fireball ones are really good for coffee drinks.

    Mix into cocktails. Have some glasses, ice, and mixers like club soda, ginger ale, 7up, Sprite, cranberry juice, red or green Hawaiian punch, or Gatorade. Add ice, pour the shot into the glass, and mix the shots into cocktails. Let people mix up their own favorite drinks!

    Vodka Favorite Seasonal Shots Recipes: Try some fun flavored vodkas like Peppermint Vodka, Cranberry Vodka, Cherry Vodka, Pineapple Vodka, Caramel Vodka, or Apple Vodka. Clear vodka will work great with any colored edible glitter!

    More Tasty Christmas Themed Shot Ideas

    Celebrate on Christmas Eve with Christmas shooters! There are tons of different alcohol combinations and ways to use this holiday shots recipe. The only limit is your creativity with different colored shots for alcoholic drinks at parties.

    Peppermint Patty: Make your favorite hot cocoa or hot chocolate, to it add a shot of cream de cacao and peppermint schnapps. Decorate with a squirt of whipped cream topped with festive sprinkles!

    Santa Panties: You will need a tall shot glass for this one. Pour a layer of Grenadine (a bright red color bar syrup which is non alcoholic-see below to make it at home!). And then pour a layer of Peppermint Bark Cream Liqueur over the back of a small spoon to keep the layers separate!

    Homemade Grenadine: For 10 minutes in a medium saucepan, simmer on low heat: 1 cup pomegranate juice, 1 cup granulated sugar, and 1 squeeze of fresh orange juice.

    Butterscotch Schnapps: Can be filled into the ornaments straight, with a chocolate liqueur, or a coffee liqueur like Kahlua would be amazing!

    Apple Pie Shooters: In a cocktail shaker with ice, mix Bailey's Apple Pie with whiskey or a good bourbon. Or swap in Apple Schnapps and Bailey’s Irish cream. Top these holiday dessert-inspired shots with a squirt of whipped cream, and sprinkle like Pumpkin Pie Spice or cinnamon.

    More Christmas Cocktails & Drinks

    Ring in the holidays, and make Mulled Wine infused with warm winter spices, apple cider, lemon, orange, and apple slices. Through the years, this cherished holiday recipe has been at so many parties, and it is one of the best Christmas Punch recipes. Aperol Spritz Cocktails have apple cider, Aperol, prosecco, and blood oranges.

    Champagne Cocktails glitter with real gold and bubbles from champagne or prosecco. A festive chic holiday drink perfect for New Year's Eve or any time of year! For your guests who want to enjoy a Christmas drink or two but are following a low carb or keto diet, serve them Hibiscus Cocktails. They are low in sugar and SO good.
    Fireball Punch "big batch cocktails" are made with orange juice, apple cider, and Fireball whisky that tastes like cinnamon red hot candies.

    Candy Cane Martini (aka Peppermint Martinis) are festive Christmas cocktails made with peppermint vodka that you can make at home. You can make or buy vodka, and it makes an easy homemade, holiday, or Christmas gift. Cheers...

    • A lady holding a tray of mulled wine garnished with cinnamon sticks and orange peel.
      Festive Christmas Mulled Wine
    • A big glass beverage container filled with holiday Christmas Punch.
      Christmas Punch
    • Three glasses of Aperol Spritz on a table with appetizers at a Fall party.
      Autumn Aperol Spritz
    • A New Years Eve party with champagne cocktails made with Goldschlager gold liquor.
      Champagne Cocktails
    • A decorative etched cocktail glass with a red hibiscus keto cocktails garnished with an orange slice.
      Hibiscus Cocktails
    • A large glass punch bowl filled with Fall and Thanksgiving punch with apples and oranges floating on top.
      Fireball Punch
    • A silver tray with Candy Cane Martinis with crushed peppermint rim and candy cane garnish.
      Candy Cane Martinis

    Did you love this recipe? We would love to hear from you! If you make this recipe and love it, give it a 5-star rating ⭐⭐⭐⭐⭐ with a comment. THANK YOU!! Follow Delicious Table with my free newsletter and share this recipe with your friends on Facebook, Pinterest, and Instagram.

    A jolly Santa Claus on top of a green Christmas tree with colorful ornaments.
    Print

    Christmas Shots

    Christmas shots will be the talk of your holiday party! Hang a batch of shots as ornaments on a little tree filled with bright colorful boozy sippers. Or serve them in classic shot glasses with festive rim garnishes. These fun drinks sparkle and glitter in the joy of the season!
    Course Drinks & Cocktails
    Cuisine Alcohol Drinks, Cocktails, Shots
    Keyword alcohol shots, Christmas shots, Christmas Theme shot recipes, holiday shot recipes, shot recipes
    Prep Time 3 minutes minutes
    Cook Time 0 minutes minutes
    Total Time 3 minutes minutes
    Servings 4
    Calories 76kcal
    Author Lisa Hatfield

    Equipment

    • Christmas Tree Fillable Ornament Booze Ball Shots
    • 3 Sizes Stainless Steel Funnels
    • 2 oz Glass Shot Glasses
    • Peppermint Crunch Sprinkles
    • Christmas Sprinkles
    • Red Edible Drink Glitter
    • Green Edible Drink Glitter
    • Silver Pearl White Edible Drink Glitter

    Ingredients

    Icy Snowballs (White Shots)

    • ½ ounce Creme de Cacao
    • ½ ounce Peppermint Schnapps
    • ⅛ teaspoon White Edible Drink Glitter

    Peppermint Bark (Green or Red Shot)

    • 1 ounce Peppermint Bark Cream Liqueur
    • ⅛ teaspoon Red or Green Edible Drink Glitter

    The Grinch (Green Shots)

    • ½ ounce Midori Melon Liqueur
    • ½ ounce Coconut Rum
    • ⅛ teaspoon Green Edible Drink Glitter

    Jolly Fireballs (Red Shots)

    • ½ ounce Fireball Whiskey
    • ⅛ teaspoon Red Edible Drink Glitter

    Optional Shot Glass Garnishes

    • Jet Puffed Marshmallow Cream
    • Peppermint Crunch Sprinkles
    • Christmas Sprinkles

    Instructions

    • Take the top off the booze ball ornament, and the easy way to fill them is the put the ornament in a small shot glass to hold it up and use a funnel while pouring.
    • Add ⅛ teaspoon of the edible drink glitter to each shot. Use a little funnel, and pour in 1 oz of alcohol up to the neck of the bottle and close with the screw top and place an ornament hook onto the Christmas tree.
    • Give it a good shake to mix the drink glitter, it does settle fairly quickly.

    Ways To Enjoy Shots

    • Decorate the rim of each shot glass. Dip into Jet Puffed Marshmallow Cream, then either red sprinkles, green sprinkles, or crushed peppermint candy cane sprinkles.
    • Pour shots into shot glasses rimmed with festive sprinkles!
    • Pour the shot into the glass and drink or mix the shots into cocktails. Put out some glasses, ice, and mixers like gingerale, club soda, or 7up.
    • Pour into a cup of hot coffee or hot cocoa, the peppermint and fireball ones are really good for coffee drinks.

    Video

    Notes

    Shot  Color Tips

    Rum, Coconut Rum, or Vodka work great with red, green, or white drink glitter.  The Peppermint Bark Cream Liqueur (Pennsylvania Dutch Brand) works with red or green drink glitter but not white drink glitter, it is hard to see the sparkle.

    Edible Drink Glitter

    Only use safe edible drink glitter for your shots. There are many colors available online. You will need to shake the ornament shots, the edible drink glitter sinks to the bottom within a few minutes. 

    Nutrition

    Calories: 76kcal | Carbohydrates: 9g | Protein: 0.2g | Fat: 1g | Saturated Fat: 0.3g | Polyunsaturated Fat: 0.01g | Monounsaturated Fat: 0.03g | Cholesterol: 0.1mg | Sodium: 2mg | Potassium: 13mg | Fiber: 0.1g | Sugar: 7g | Vitamin A: 0.5IU | Calcium: 1mg | Iron: 0.1mg

    Roast Turkey (Dry Brine Recipe)

    [heart_this] · Sep 8, 2023 · 2 Comments

    Last Updated January 4th, 2024 at 11:09 pm by Lisa

    A Turkey Dry Brine adds bold flavor to your whole Thanksgiving bird, and is easy to put together with a good spice blend right from your kitchen pantry. Skip those store-bought mixes. A perfect turkey has a great flavor that starts with the best seasoning.

    With step-by-step instructions and simple ingredients, you can mix a big batch of this turkey rub recipe. Use it to make a beautiful dinner anytime during the holiday season with the juiciest slices and golden crispy skin...

    Table of Contents

    • Turkey Dry Brine Recipe
      • Make The Dry Brine Mixture
    • Roasting Pans
      • Apply The Rub
      • Adding Flavor & Moisture While Roasting
      • Roasting
      • Temperature Check
    • Turkey Seasoning Recipe: Flavor & Variation Ideas
      • How To Make a Wet Rub
      • Adding Even More Flavor
    • Safe Cooking Temperatures
    • More Turkey Dinner Holiday & Christmas Recipes
    • More Thanksgiving Side Dishes
    • More Thanksgiving Dinner Turkey Recipes

    Turkey Dry Brine Recipe

    All these Thanksgiving turkey spices are easily available at any grocery store. You can buy large spice jars online, I love to make a double batch and put this homemade turkey rub recipe in a small clamp spice jar. Be sure to print the recipe card below and save it for that special time of year during the holidays. Here is what you will need to prep for the perfect roast turkey, and be sure to watch the video in the recipe card below!

    • whole turkey (I roasted a 12 pound bird)
    • chicken stock - homemade or storebought
    • whole lemons and lemon zest
    • granulated garlic powder
    • granulated onion powder
    • brown sugar
    • sea salt (I use Morton kosher salt)
    • black pepper
    • dried parsley
    • dried thyme
    • crushed rosemary
    • paprika (not smoked or hot)
    • poultry seasoning

    PRO TIP: For maximum potential flavor in your roasted turkey, use good quality new seasonings and fresh spices. Go through your spice cupboard and replace anything expired or older than a year. Write with a black marker the date opened, which makes it easy to toss the ones that have lost the original herb's aromas and flavor.

    Make The Dry Brine Mixture

    To make this dry brine turkey recipe, first put all the spices and seasonings in a small bowl, and whisk to combine well. You can keep it in a large clamp spice jar or an airtight container if you make it ahead of time.

    Roasting Pans

    You will need a large shallow roasting pan with a rack. Remove the wrapper, and take out the neck and giblets. Place it on the wire roasting rack down on the bottom of the roasting pan.

    Apply The Rub

    Pat the surface of the bird dry with paper towels. This helps the turkey skin turn golden brown. You can preseason it, and keep it in the fridge overnight. This is a great way to prep ahead, and helps the skin get golden and crispy.

    Season the outside of the turkey and the breast of the turkey. Tuck wing tips under so they don't overroast.

    Adding Flavor & Moisture While Roasting

    Put lemons cut in half in the cavity, squeezing the lemon juice inside. You can also add fresh herbs. Place a fresh herb mixture with sprigs of rosemary, parsley, and sage leaves inside the bird. Or garlic cloves for additional flavor!

    Pour 4 cups of chicken stock into the bottom of the pan. This liquid helps keep the moisture high and the meat juicy. Plus it creates pan juices for gravy. In a pinch, you can use cold water, with some chicken bouillon.

    Roasting

    Preheat oven temperature to 400 degrees. Roast for 1 hour, check, and, if it is browning too fast tent it with a piece of aluminum foil. Pour 4 more cups of chicken stock into the pan, and baste using a bulb baster. Note: This initial higher temperature helps roast the meat faster and speeds up cooking time.

    Turn oven down to 375 degrees, and roast for another 90 minutes. Tent with foil if the skin is browning too fast. I recommend this at the 60 minute cooking time mark.

    How to get crispy skin on a turkey?

    The easy way is to place your turkey on a rack in a roasting pan. Next, dry the skin surface with paper towels. Then season with a good rub to make a flavorful bird. And chill in the refrigerator overnight. This helps to crisp up the skin while roasting in the oven.

    Temperature Check

    Use a good wireless meat thermometer with probes or instant-read thermometer. The wireless probe thermometers are great, with a Bluetooth one, you can monitor with your phone! You want the breast meat to be 165 degrees f temperature in the thickest part of the breast. Be careful to not have the thermometer tip touching the breast bone or that throws off the accuracy of the reading.

    Also, check the thickest part of the thigh, it needs to reach 175 degrees. Once it reaches a safe temperature, it rest for 10-15 minutes on a large cutting board. This makes the most juicy turkey, as the juices stay in the meat! Don’t cover it so the skin stays crisp. Carve with a sharp knife, and serve warm with side dishes or use in other recipes.

    Turkey Seasoning Recipe: Flavor & Variation Ideas

    Some people swear by their flavor injector (I just ordered one to make a new grilled turkey breast recipe for you all so stay tuned!), while others prefer a dry brine overnight like this one, a wet rub, or a wet brining solution.

    How To Make a Wet Rub

    You can take this dry rub recipe, and turn it into a wet rub by adding a tablespoon of olive oil or avocado oil until it turns into a paste-like consistency.

    You can also try my Cajun Seasoning to create one of the best cajun turkey rubs, and it has a bit of cayenne pepper so it is spicy!

    Adding Even More Flavor

    Put lemons cut in half in the cavity, squeezing the lemon juice inside for more flavor. Oranges would also work well, and be sure to squeeze the orange juice into the cavity for flavor and to keep it moist.

    You can also add fresh herbs! Place fresh rosemary sprigs, parsley and sage leaves inside the cavity to add lots of flavor. These really are the best herbs for turkeys, and garlic cloves are always good too!

    Safe Cooking Temperatures

    1. Use a good wireless meat thermometer with probes or instant-read meat thermometer, you want the internal temperature to be 165 degrees f in the thickest part of the breast and the thigh at 175 degrees f.
    2. Transfer to a carving board, and a general rule of thumb is to let it rest for 10-15 minutes to let the juices stay in the meat. But don’t cover it, so the skin stays crisp. Carve and serve warm or use in other recipes.

    More Turkey Dinner Holiday & Christmas Recipes

    And for leftover turkey, try either my Empanadas, hand pies filled with holiday leftovers, or my Turkey Shepherds Casserole!

    Here are some other great recipes for the holidays, Thanksgiving, or Christmas. Make these Make-Ahead Mashed Potatoes with 5 Ways to Reheat them for your holiday party. And one of them is in your slow cooker with cream and melted butter!

    Sausage Dressing is the BEST holiday side also known as sausage stuffing, it has the best rich flavors! You can use hot and/or mild Italian sausage, cornbread, crunchy celery, soft French bread, sweet dried cherries, and tart dried cranberries. This dish takes traditional stuffing to a whole new level!

    A festive, easy, Christmas Tree Salad with a Cranberry Vinaigrette (made in a Mason jar) will be the talk of your holiday party. Shape this salad like a Christmas tree and decorate it with "garland, ornaments, and snow".

    This Sweet Potato Casserole recipe is Ruth Chris's Thanksgiving side dish made with pecan crumble topping, vanilla extract, and a bit of maple syrup.

    • A white casserole dish filled with mashed potatoes and squares of melted butter on top.
      Make-Ahead Mashed Potatoes
    • A white casserole dish filled with Sausage Stuffing baked to a golden brown.
      Sausage Stuffing Dressing
    • A salad shaped like a Christmas tree with red bell pepper garland, white apple stars and ornaments of nuts and fruit.
      Christmas Tree Salad
    • Lifting a scoop of sweet potato casserole out of a white casserole dish with large serving spoon.
      Sweet Potato Casserole (Ruth's Chris Recipe)

    More Thanksgiving Side Dishes

    Make a Cranberry Orange Relish, and delight your friends and family. It has a light fresh taste, a little bit of a crunch, and less sugar than a traditional cranberry sauce. 

    Dinner Rolls is a pull-apart bread, people go crazy for these decorated with cheese and herbs are a party hit every time.

    For sweet potatoes, try either Coconut-Pecan Sweet Potatoes with little marshmallows or Sweet Potato Casserole with a crumble topping and 2 secret ingredients... SO good!

    This tropical Pineapple Orange Cranberry Sauce will be a great addition to take or serve at your holiday feast. It is made in a food processor in minutes, and so clean and refreshing with rich holiday dishes!

    • A gorgeous red and orange cranberry relish in a clear crystal bowl with a spoon.
      Cranberry Relish
    • A close up of baked Frozen Dinner Rolls topped with cheeses, herbs, and seasonings.
      Dinner Rolls
    • A silver server scooping up sweet potato casserole with golden toasted marshmallows on top out of a white casserole dish.
      Sweet Potato Casserole With Marshmallows
    • A crystal bowl filled with cranberry sauce with pineapple and cranberries in the background.
      Pineapple-Orange Cranberry Sauce

    More Thanksgiving Dinner Turkey Recipes

    With this complete guide and step-by-step recipe, a Spatchcock Turkey gives every bit of the surface a chance to turn and even golden brown all over. Turkey meat like turkey legs and the breast all cooks at different times. Light meat or white meat, cooks faster than thigh meat or dark meat. This cooking method is an effective technique to roast the entire bird so it is all done at the same time and doesn't over cook any one part.

    Cooking a Turkey Breast is easy using a boneless breast and you will love the flavorful Turkey Gravy made from the pan drippings!

    Turkey Gravy Recipe
    Make a perfect turkey gravy in just 10 minutes with this step-by-step guide and four simple ingredients. The rich pan drippings from your Thanksgiving turkey add an incredible depth of flavor and is a simple process. Learn my Chef's secret for velvety smooth results and no lumpy gravy!
    GET THE RECIPE PIN IT
    A dark golden roast turkey with a white gravy boat pouring turkey gravy on top.

    This is the best Thanksgiving turkey recipe to serve a small number of people or to have for leftovers the next day!

    Dotted with Herb Butter, this compound butter mixture keeps the meat tender and moist. Plus adds amazing flavor from the fresh herbs into the best turkey recipe and the gravy...

    Wondering what to do with Thanksgiving leftovers? Make Thanksgiving Empanadas (Hand Pies)or bake a Leftover Casserole that is just like a Shephard's Pie and the best recipe for leftovers.

    • A collage of spatchcock turkey sliced on a platter, with one in a roasting pan, and on a table with side dishes.
      Spatchcock Turkey
    • Top down view of a roasted turkey breast sliced thick and garnished with fresh herbs.
      Turkey Breast Recipe
    • Golden brown baked empanadas decorated with pie crust leaves on a Fall tray.
      Empanadas ~ Turkey Leftover Recipe
    • A white dish filled with golden bubbly turkey shepherd's pie baked and ready to eat.
      Leftover Turkey Shepherd's Pie

    Did you love this recipe? We would love to hear from you! If you make this recipe and love it, give it a 5-star rating ⭐⭐⭐⭐⭐ with a comment. THANK YOU!! Follow Delicious Table with my free newsletter and share this recipe with your friends on Facebook, Pinterest, and Instagram.

    Print

    Turkey Dry Brine Recipe

    A Turkey Dry Brine adds bold flavor to your whole bird, and is so easy to put together for your Thanksgiving menu with a good spice blend right from your kitchen! Skip the store-bought mixes, also try this on a boneless turkey breast for leftovers. With simple ingredients, you can mix a big batch of this spice rub to make a beautiful roast turkey anytime during the holiday season.
    Course Dinner & Main Dishes
    Cuisine American
    Keyword dry brine turkey, roast turkey, turkey dry brine, turkey dry rub, turkey seasoning rub
    Prep Time 30 minutes minutes
    Cook Time 2 hours hours 30 minutes minutes
    Total Time 3 hours hours
    Servings 8
    Calories 928kcal
    Author Lisa Hatfield

    Equipment

    • Spice Storage Jar
    • Digital Meat Thermometer
    • Wireless Bluetooth Oven/BBQ/Smoke Meat Thermometer (4 Probe)
    • Turkey Baster
    • Roasting Pan

    Ingredients

    • 2 whole zest of lemons
    • 1 tablespoon granulated garlic
    • 1 tablespoon granulated onion powder
    • 1 tablespoon brown sugar
    • 1 teaspoon sea salt
    • 1 teaspoon black pepper
    • 1 teaspoon dried parsley
    • 1 teaspoon dried thyme
    • 1 teaspoon crushed dried rosemary
    • 1 teaspoon paprika not smoked or hot
    • 1 teaspoon poultry seasoning
    • 12 pound turkey
    • 2 - 32 ounces chicken stock 8 cups homemade or storebought

    Instructions

    • Make the dry rub, put all the spices and seasonings in a small bowl, and whisk to combine well. You can keep it in a large clamp spice jar or an airtight container if you make it ahead of time.
    • Pat the entire whole bird dry with paper towels, this helps the skin turn brown. Season all sides and surface area of the skin with the seasoning. Tuck the wing tips under so they don't overcook.
    • Place turkey on the wire roasting rack on a large roasting pan, and pour 32 ounces (4 cups) chicken stock into the bottom of the pan. This helps keep the meat moist and creates pan juices for gravy. Put lemons cut in half in the cavity squeezing the lemon juice inside. You can also add fresh herbs. Place sprigs of rosemary, parsley and sage leaves inside add lots of flavor. Garlic cloves are always good too!
    • Preheat oven temperature to 400 degrees. Roast for 1 hour, check the turkey, if browning too fast tent with a piece of aluminum foil. Turn oven down to 375 degrees, and roast for another 90 minutes. Pour another 32 ounces of chicken stock (4 cups) if your liquid is low in the roasting pan. Tent with foil if the skin is browning too fast. I recommend this at the 60 minute cooking time mark.
    • Use a good quality meat thermometer or instant-read thermometer. There are also wireless probe thermometers available which are great. You want the breast meat to be 165 degrees f temperature in the thickest part. Be careful to not have the thermometer tip touching the breast bone or that throws off the accuracy of the reading. Also, check the thickest part of the turkey thighs, it needs to reach 175 degrees. Once it reaches a safe temperature, let it rest for 10-15 minutes on a large cutting board. This makes the meat juicy! Don’t cover it so the skin stays crisp. Carve with a sharp knife, and serve warm with side dishes or use in other recipes.

    Video

    Notes

     Seasoning Flavor Variations & Ideas

    How To Make A Wet Rub: You can take this dry rub, and turn it into a wet rub by adding a tablespoon of olive oil or avocado oil until it turns into a paste-like consistency.
    You can also try my Cajun Seasoning to create one of the best cajun turkey rubs, it has a bit of cayenne pepper so it is spicy if you like it hot!
    Adding Flavor: Put lemons cut in half in the cavity, squeezing the lemon juice inside for more flavor. You can also add fresh herbs! Place fresh rosemary sprigs, parsley and sage leaves inside adds great flavor. Garlic cloves are always good too.
    What Salt To Use: Kosher sea salt in your rub and not table salt! Table salt is much more dense and saltier due to the size of the salt granules.

    Nutrition

    Calories: 928kcal | Carbohydrates: 5g | Protein: 140g | Fat: 36g | Saturated Fat: 9g | Polyunsaturated Fat: 9g | Monounsaturated Fat: 12g | Trans Fat: 0.4g | Cholesterol: 464mg | Sodium: 1112mg | Potassium: 1490mg | Fiber: 1g | Sugar: 2g | Vitamin A: 543IU | Vitamin C: 1mg | Calcium: 87mg | Iron: 6mg

    Pickled Green Beans (Dilly Beans)

    [heart_this] · Sep 5, 2023 · 5 Comments

    A clear glass jar filled with pickled green beans on a cutting board.

    Last Updated September 6th, 2023 at 05:12 pm by Lisa

    Pickled Green Beans are sometimes called Dilly Beans. This is a quick pickle recipe, and requires no canning! Jazz up relish trays, and charcuterie boards, eat as a great snack, pop them into Bloody Marys, or toss green bean pickles chopped onto salads.

    This crisp crunchy dilly bean recipe will keep for up to 1 month chilled in the fridge if they last that long...

    PRO TIP: Refrigerator pickles are fast to make with this quick pickling recipe method. Since they are not processed in a canner, they must be stored in the fridge.

    Pickled Green Beans Recipe

    There is nothing easier than a no canning recipe! And pickled beans are an easy recipe to enjoy up your green bean harvest.

    These are simply fresh green beans pickled in a vinegar-based brine and seasoned with black or color peppercorns, either fresh dill or seeds, and other spices.

    Next time you are at farmers markets or grocery stores, pick up a bag of fresh whole beans to make homemade pickles. This is a wonderful way to preserve a bumper crop of green beans you grew in your garden. This recipe can be scaled down to make a small batch in a single jar.

    A green colander full of fresh green beans.

    Green Bean Pickle Ingredients

    • clean quart jar lid, ring (a short or tall jar works)
    • whole green beans or yellow wax beans
    • garlic cloves (1-2 cloves of garlic per jar)
    • chili peppers fresh or dry (1 per jar)
    • fresh dill (2-3 sprigs per jar)
    • mixed color or black peppercorns (1 teaspoon peppercorns/jar)
    • red chili flakes (¼ teaspoon/jar)
    • coriander seeds (½ teaspoon/jar)

    Pickling Liquid Brine Ingredients

    • distilled white vinegar
    • water
    • sea salt - kosher salt 

    PRO TIP: One pound of fresh green beans will fit in a Quart jar (4 cups). Cut the stem ends off with clean kitchen scissors, and you can cut the to fil in smaller jars.

    Let's Pickle Refrigerator Dilly Beans

    First, wash your Mason jars or canning jars with hot soapy water or in the dishwasher. You can use either quart or pint glass jars for spicy pickled green beans.

    Make The Pickling Liquid

    1. In a pot or large saucepan on the stove, combine vinegar, water, peppercorns, red pepper flakes, coriander, and salt.
    2. Turn the heat to medium-high and bring the hot vinegar mixture to a boil, dissolving the salt.
    A cutting board with a green colander filled with green beans and ingredients.

    Assemble The Jars

    1. In the bottom of the jar, place: garlic clove, hot chili pepper cut in half, and sprigs of dill.
    2. Trim ends of the beans with a clean pair of kitchen scissors. Pack the beans into the jars so they are standing on their ends. The best way to load the beans in the jars is to lay the glass jar on its side to fit them all inside. Depending on the size of your beans, you can make pints and cut the beans shorter to fit your pint jars.
    3. Cool the boiling brine to room temperature. Note: High heat hot liquid will cook the crisp pickled green beans so they won't be bright green and crunchy.
    4. Pour or ladle the room temperature mixture into the jars. Fill to within ½ inch of the top of the jar rims. Place lids and bands on jars. Place jars in the refrigerator and eat within a month!
    A cutting board with all the ingredients to make green bean pickles.

    How To Eat Pickled Green Beans

    Dilly Beans are also known as "Silly Beans" are back in high style thanks to their use in cocktails such as Caesars and Bloody Marys.

    A Caesar cocktail is consumed primarily in Canada. It has vodka, a Caesar mix, hot sauce, and Worcestershire sauce, served on ice with a salt-rimmed glass, and a garnish of celery and lime wedge. 

    You can also enjoy them as a snack, chopped in salads, and are a perfect addition to charcuterie boards and antipasto platters!

    Try these in a Bloody Mary, you will be very glad you did. This homemade Bloody Mary mix is so fresh and delicious! It has tons of fresh vegetables like peppers and fresh tomatoes...

    Spicy Bloody Mary Mix Recipe
    One sip of these Spicy Bloody Marys, and you will never want the bottled mix again! These have the right amount of heat, and bolder spices than boring tomato juice mixes. Fire-roasted grilled chilies, onions, and fresh ripe garden tomatoes create different flavors that are complex and extraordinary. Set up the ultimate bloody mary bar with classic garnishes and favorite toppings like crunchy celery, beef sticks, pepperoncini's, pickled green beans, stuffed olives, and dill pickle spears.
    GET THE RECIPE PIN IT
    A pitcher of bloody marys with two drinks garnished with olives, pepperoncinis, and beef sticks.
    A pitcher of bloody marys with garnish ideas labeled.
    A clear clamp jar filled with pickled green beans and ingredients on a cutting board.

    Swaps, Variations, and Best Flavor Additions

    Kinds of Vinegar: Apple cider vinegar, white wine vinegar, red wine vinegar, or rice vinegar will all work in this recipe.

    Spice Variations: Add in a teaspoon of dill seeds or mustard seed, all work. For some additional heat in this great recipe, add in a pinch of cayenne pepper or red pepper flakes.

    Bean Varieties: Use up your wax yellow beans or snap green bean bounty for pickling with some other basic ingredients.

    Peppers: Try to add different hot peppers depending on the heat level you prefer. Jalapenos, habaneros, and cayenne peppers all are great options.

    Garlic: You can add more cloves of garlic if you wish, either small cloves or even minced garlic is fine. Slice the cloves of garlic into smaller pieces to up the flavor of the brine.

    Salt: Table salt, pickling salt, and kosher sea salt can all be used in pickling. Table salt does work in a pinch. However iodized salt has iodine and tends to discolor the pickling liquid and jar contents.

    Herbs: Try fresh dill, dill seed, flower heads of dill plants, aka dill heads. All are usable for pickling, canning, and cooking dishes to add flavor.

    Quick Pickled Green Beans Top Tips

    • Crisp Beans: To keep your finished pickle crisp and crunchy, only add cooled pickling brine to your jars of beans. Or you will have a hard time keeping them bright green and crisp.
    • Flavors: Add additional flavors you prefer, more garlic, more chilis if you like spicy dilly beans.
    • Sweetness: Some people prefer sweet pickles. If you like them sweet, simply add some sugar to the hot brine while boiling it for a sweeter result.
    • Chilled: Always keep these chilled in the fridge, the beans below the liquid, and eat within a month.
    • Canning Note: This recipe is for quick refrigerator pickles only. To make shelf-stable pickles using a water bath canner or a pressure canner method, please consult a complete guide to canning like the Ball blue book for best results. It gives you all the recipes, and resources and is an excellent guide to processing your pickles in a boiling water bath and with canner processing times all with the safety guidelines.

    Green Bean Pickling FAQ

    What kind of green beans are best to pickle?

    Green beans, string beans, wax beans, and snap beans are all terms to describe pole or bush beans. These beans differ a bit in color and shape but work just fine in pickle recipes.
    Besides green, you will find light yellow and purple hues in the market, just know that purple beans lose their color when cooked.
    One bean to avoid for pickles is a French variety called Haricots verts, a small, thin variety. These don't hold up well to pickling.

    How long do pickled green beans last?

    So it is best to allow them to marinate in the fridge for 2 weeks and use them within a  month.  The vinegar combined with the cool fridge temperature aids in preserving them, but the lack of heat and true canning means they won’t keep for long periods of time.

    More Pickle Recipes

    Make Dill Pickles into spears, chips, and halves. Wait just one day to let the flavors develop in these cucumber pickles. Once you can't wait any longer, crack open a jar of classic cucumber pickles. And make a few extra jars of pickles for friends and neighbors!

    The pickling brine gives these Zucchini Pickles a zippy flavor and crisp texture, and what a great way to use up the summer squash that grows so fast in our gardens...

    Quick Pickled Red Onions keep in the fridge for 3-4 weeks. Try on hamburgers, a side dish salad, tacos, and pulled pork or grilled cheese sandwiches.

    These are the best Pickled Eggs with a touch of heat, and as a bonus, this is my favorite way to pickle garlic and jalapenos too!

    • Close up of zucchini pickles in a quart glass mason jar.
      Zucchini Pickles (Easy No Canning)
    • A person pulling a dill pickle chip out of a clear glass canning jar of homemade pickles.
      Refrigerator Dill Pickles
    • Mexican pickled red onions in a clamp jar and white bowl with chiles and limes on a colorful striped cloth.
      Mexican Pickled Red Onions
    • A large glass clamp jar filled with pickled eggs, fresh jalapeno slices, and spices.
      Jalapeno Pickled Eggs Recipe

    Did you love this recipe? We would love to hear from you! If you make this recipe and love it, give it a 5-star rating ⭐⭐⭐⭐⭐ with a comment. THANK YOU!! Follow Delicious Table with my free newsletter and share this recipe with your friends on Facebook, Pinterest, and Instagram.

    A clear glass jar filled with pickled green beans on a cutting board.
    Print

    Pickled Green Beans Recipe

    Pickled Green Beans also called Dilly Bean are a quick pickle recipe that requires no canning Jazz up relish trays, pop them into Bloody Marys, or toss pickled beans into salads! This crisp crunchy dilly bean recipe will keep for up to 1 month chilled in the fridge if they last that long.
    Course Side Dishes & Vegetables
    Cuisine American
    Keyword Dilly Beans, pickled beans, pickled green beans, pickled green beans recipe
    Prep Time 25 minutes minutes
    Total Time 25 minutes minutes
    Servings 8
    Calories 34kcal
    Author Lisa Hatfield

    Equipment

    • 1 4- 1 Quart Mason jars, lids, rings
    • Epicurean Non-Slip Cutting Board
    • Small Serrated Knife
    • Global Kitchen Scissors

    Ingredients

    Jar Ingredients

    • 1 pound whole green beans or yellow wax beans
    • 1-2 whole garlic cloves
    • 1 hot chili pepper jalapeno, serrano etc
    • 2-3 sprigs fresh dill
    • 2 teaspoons mixed color or black peppercorns ½ teaspoon peppercorns/jar
    • ½ teaspoon red pepper flakes ¼ teaspoon/jar
    • 2 teaspoons coriander seeds ½ teaspoon/jar

    Pickling Liquid

    • 2 cups white vinegar
    • 2 cups water
    • 2 tablespoons sea salt (kosher salt) or pickling canning salt
    US Customary - Metric

    Instructions

    • Wash your Mason jars or canning jars with hot soapy water or in the dishwasher. You can use either quart or pint glass jars.

    Make The Pickling Liquid

    • In a pot or large saucepan on the stove, combine vinegar, water, peppercorns, red pepper flakes, coriander, and salt.
    • Turn the heat to medium-high and bring the water vinegar mixture to a boil, dissolving the salt. Cool this mixture to room temperature.

    Fill The Jars

    • In the bottom of each quart jar, place: 1-2 garlic cloves, 1 hot chili pepper cut open, and 2 -3 sprigs of dill.
    • Trim ends of each green bean using a clean pair of kitchen scissors. Pack green beans into the jars so they are standing on their ends. The easy way to load the beans in the jars is to lay the glass jar on its side to fit them all inside. You can make pints and cut the beans shorter to fit your pint jars.
    • Cool the boiling brine to room temperature. Note: High heat hot liquid will cook the crisp pickled green beans so they won't be bright green and crunchy.
    • Pour or ladle the room temperature mixture into the jars. Fill to within ½ inch of the top of the jar rims. Place lids and bands on jars. Place jars in the refrigerator and eat within a month!

    Video

    Notes

    jars

    Use clean Mason jars and lids, I run my jars through the dishwasher to ensure they are clean.

    eat in a month

    So it is best to allow them to marinate in the fridge for 2 weeks and use them within a month and keep them submerged under the brine liquid. The vinegar combined with the cool fridge temperature aids in preserving them, but the lack of heat and true canning means they won’t keep for long periods of time.
    Use as a snack, in salads, with a sandwich, or in a Bloody Mary as a garnish.

    canning

    This recipe is for refrigerator quick pickles only. 
    Kinds of Vinegar: Apple cider vinegar, white wine vinegar, red wine vinegar, or rice vinegar will all work in this recipe.
    Spice Variations: Add in a teaspoon of dill seeds or mustard seed, all work. For some additional heat in this great recipe, add in a pinch of cayenne pepper or red pepper flakes.
    Bean Varieties: Use up your wax yellow beans or snap green bean bounty for pickling with some other basic ingredients.
    Peppers: Try to add different hot peppers depending on the heat level you prefer. Jalapenos, habaneros, and cayenne peppers all are great options.
    Garlic: You can add more cloves of garlic if you wish, either small cloves or even minced garlic is fine. Slice the cloves of garlic into smaller pieces to up the flavor of the brine.
    Salt: Table salt, pickling salt, and kosher sea salt can all be used in pickling. Table salt does work in a pinch. However iodized salt has iodine and tends to discolor the pickling liquid and jar contents.
    Herbs: Try fresh dill, dill seed, flower heads of dill plants, aka dill heads. All are usable for pickling, canning, and cooking dishes to add flavor.

    Nutrition

    Calories: 34kcal | Carbohydrates: 5g | Protein: 1g | Fat: 0.3g | Saturated Fat: 0.1g | Polyunsaturated Fat: 0.1g | Monounsaturated Fat: 0.1g | Sodium: 1754mg | Potassium: 150mg | Fiber: 2g | Sugar: 2g | Vitamin A: 457IU | Vitamin C: 9mg | Calcium: 37mg | Iron: 1mg

    Cherry Tomato Recipes

    [heart_this] · Sep 4, 2023 · Leave a Comment

    Ripe cherry tomatoes on a green stem just picked from a garden.

    Last Updated September 23rd, 2023 at 10:40 pm by Lisa

    Find dozens of inspiring cherry tomato recipes as you harvest your tomato plants and enjoy the colorful grocery store produce!

    From cool chilled cherry tomato salad, creamy pasta dishes, to a warm bowl of cozy tomato soup. There are easy breakfast egg muffins and delicious lunch box ideas like healthy tuna salad. Plus endless ways to cook and roast these garden gems with their sweet juices in tomato sauces, bloody marys, or preserve as oven sun dried tomatoes...

    Red and green tomatoes on the vine in a summer garden.
    Small round breakfast egg muffins stacked on a white cake plate for a brunch or breakfast filled with different flavors.

    Breakfast Egg Muffins

    Breakfast food can be so incredibly easy with Egg Muffins! They can be made just the way you want them in a muffin pan with cooked breakfast meats like smoked ham, bacon, or crumbled sausage. Or fill them with a diced confetti of vegetables like cherry tomatoes, and top them with different herbs and cheeses like mozzarella. There are five egg muffins recipes for you to try, and it's so simple to make individual muffins for everyone in your family for weekday breakfast.

    BREAKFAST EGG MUFFINS ~ 5 FLAVORS!
    A plate full of pizza salad topped with mini pepperoni, mushrooms, mozzarella balls, pepperoncinis, and black olives with a artistic black fork on the edge of the plate.

    Pizza Salad

    A colorful Pizza Salad loaded with popular favorite pizza toppings like mini pepperoni, black olives, mushrooms, tangy pepperoncinis, tiny ripe tomatoes, and little balls of mozzarella cheese. This Italian salad pizza inspired recipe is healthy, low carb, drizzled with a creamy sun-dried tomato dressing with all the flavors of pizza we crave.

    PIZZA SALAD
    A pitcher of bloody marys with two drinks garnished with olives, pepperoncinis, and beef sticks.

    Spicy Bloody Marys

    One sip of these Spicy Bloody Marys, and you will never want the bottled mix again! These have the right amount of heat, and bolder spices than boring tomato juice mixes. Fire-roasted grilled chilies, onions, and fresh ripe garden tomatoes create different flavors that are complex and extraordinary. Set up the ultimate bloody mary bar with classic garnishes and favorite toppings like crunchy celery, beef sticks, pepperoncini's, pickled green beans, stuffed olives, and dill pickle spears.

    SPICY BLOODY MARY COCKTAILS
    A small clear jar filled with sun dried tomatoes on a table with scattered dried tomatoes all around the table.

    How To Make Sun Dried Tomatoes

    Preserve your tomato bounty this Summer! And master how to make Sun Dried Tomatoes with any kind of tomato variety. You can do this in either your home oven or in an inexpensive food dehydrator! Then store in an airtight container. Sundried tomatoes are a tasty snack. And add a punch of flavor into cozy beef stews, Italian tuna salad wraps, cold pasta salads, creamy pasta dinners, and so many other recipes. There are 20+ ideas for you to try! The pop of color is so gorgeous, and nothing from a package or jar will taste as sweet and "tomatoey" as this garden candy!

    HOW TO MAKE SUN DRIED TOMATOES
    A white square plate filled with colorful Cobb Salad made with chicken, eggs, avocados, tomatoes, and bacon.

    Cobb Salad

    The original Cobb Salad became famous in Los Angeles at the Brown Derby restaurant served with French Dressing loaded with chopped tomato, cubed chicken, crumbled bacon, diced avocado, chopped eggs, and topped with Roquefort cheese. Now you can make this famous iconic salad at home exactly how it was made back in the day in the golden age of Hollywood, California.

    COBB SALAD RECIPE
    A glass trifle dish filled with 7 Layer Salad full of colorful ingredients.

    7 Layer Salad

    7 Layer Salad (aka Overnight Salad) is one of the most popular potluck dishes for picnics, a BBQ side for cookouts, or a summer side dish.

    7 LAYER SALAD RECIPE
    Small mini tacos topped with black olives, tomato, green onions, cheese and crema sauce.

    Mini Tacos

    Crunchy Mini Tacos are loaded with your favorite toppings! Tucked inside are layers of juicy taco meat, refried beans, cheeses, black olives, pickled jalapeños and more drizzled with a quick Mexican crema sauce. Serve these mini beef tacos as a delicious appetizer for a Cinco de Mayo party, family taco night dinner, birthday parties, or perfect party food for the big game.

    MINI TACO APPETIZER
    A close up photo of a slice of avocado toast topped with small heirloom tomatoes and microgreens.

    Avocado Toast

    Avocado Toast artisan bread, creamy avocado, sweet heirloom tomatoes, lemon extra virgin olive oil drizzle, sriracha salt, crushed hemp seeds, and microgreens. The best way to start your day with a healthy breakfast or a great snack option.

    AVOCADO TOAST
    Red and green Bell pepper halves filled and green tortilla wraps filled with no mayo Greek Yogurt Tuna Salad.

    Healthy Tuna Salad

    A healthier Tuna Salad loaded with crunchy celery, creamy avocado, basil, capers, kalamata olives, pepperoncini's, and sun-dried tomatoes. One of my favorite things about this recipe is it can be rolled up in a tortilla wrap, scooped in colorful bell pepper bowls, or put inside lettuce leaves for low carb lunches! The mayonnaise is swapped out for avocado and Greek yogurt which becomes a more creamy texture than just mayo. Each bite is full of crunchy little tasty pops of Italian flavors, and it is so fresh and clean.

    HEALTHY TUNA SALAD
    A bowl of tomato soup and cup of soup in a white cup garnished with fresh basil.

    Tomato Soup With Basil Dumplings

    Tomato Soup with Basil Dumplings can be rich and chunky or creamy smooth and is loaded with a veggie rainbow for a hearty lunch or dinner. What makes this hearty soup recipe so good, are the fluffy basil dumplings! Total comfort food in a bowl, as they soak up the hot creamy homemade tomato soup.

    TOMATO SOUP WITH BASIL DUMPLINGS
    A white plate full of taco salad topped with taco meat, grated cheese, Fritos, sour cream, black olives and tomatoes.

    Easy Taco Salad

    Taco Salad with 25+ topping ideas plus a delicious taco meat recipe. Works as lunch, family dinner, or party food for a large gathering.

    EASY TACO SALAD
    A glass bowl filled with compound butter made with herbs and sun dried tomatoes, and them scattered on the cutting board.

    Sun Dried Tomato Butter

    Sun Dried Tomato Butter is amazing on hot pasta, roasted vegetables, sizzling grilled steak, or oven warmed baguettes and dinner rolls.

    SUN DRIED TOMATO BUTTER

    More Cherry Tomatoes Recipes

    These are some more of my favorite ways to cook with different cherry tomatoes. I usually grow a couple varieties in my garden every summer, and love to add them into all kinds of dishes. With just a few simple ingredients, these might become your go to Summer faves...

    • Blend into Red Pepper Tomato Soup
    • Top on Chicken Parmesan
    • Make your own Sun Dried Tomato Butter
    • Mix into Chicken Piccata
    • Assemble a cool Cucumber Tomato Salad for potluck cookouts
    • Use as a topping on Pizzas
    • Chop and mix in an easy Pasta Salad
    • Mix into Breakfast Omelets or Breakfast Egg Muffins
    • Bake into Dinner Casseroles
    • Mix into Italian Tuna Salad
    • Blend into a Pasta Sauce like Alfredo, Marinara, or Bolognese
    • Mix into Tomato Pesto
    • Toss into Caprese Salads
    • Bake into a Hot Dish or Pasta Bake Casserole
    • Mix Marinated Mozzerlla Balls with sliced cherry tomato leftovers and load on Crostini!
    • Blend into Beef Stew
    • Saute into Gnocchi Soup with Bacon or Sliced Sausages

    Creamy Tomato Pasta Dinner: Simply boil and follow the package instructions of your favorite pasta. Cook the pasta recipe al dente, and reserve a half cup of pasta water.

    In a large skillet or pan, sauté crumbled Italian sausage over medium heat, stir in chopped onion, add some red pepper flakes, black pepper, oregano, thyme, and heavy cream. Now over medium-low heat, add in a half cup of pasta water, diced chopped cherry tomatoes, and toss with fresh spinach over low heat with the cooked pasta. Grate real parmesan cheese on top, and some fresh herbs like basil on top and dinner is on!

    Cherry Tomato Recipe FAQ

    What colors are cherry tomatoes?


    Cherry Tomatoes are most commonly red. Did you know there are yellow, green, and even black varieties on cherry tomato plants? Common names in the stores are grape tomatoes, Tiny Tim, Sweet Million, Bumble Bee, Sweetie, Supersweet 100, or Midnight Snack and Black Cherry.

    There are endless uses for cherry tomatoes, from pastas to salads, even snacks, soups, and stews!

    Can you roast cherry tomatoes?

    Yes! Place them in a casserole dish, and roast at 450 30-35 minutes sprinkled with kosher salt, black pepper, minced garlic cloves, olive oil, red pepper flakes, and fresh thyme. Mix into a cherry tomato sauce or mix into soups and marinara sauces.

    More Summer Recipe Collections

    Today's forecast calls for bridal showers! Honor the Bride-To-Be with this complete guide of over 50+ Bridal Shower Food Ideas to host an elegant party plus planning tips.

    Pick out your favorite Football Party Food! And be sure to serve some creative cocktails to sip or ice cold beers to drink.

    Which of these 40 Best Puff Pastry Recipes will you choose? Every impressive appetizer and delicious dessert in this collection is wrapped with irresistible golden flaky layers of freshly baked pastry and creative filling combinations.

    Take a peek at my other ultimate Cookout Menu chock full of everything you need to host a fantastic party including cookout food ideas. There are grilled meats, tips on juicy burgers, spiral grilled hot dogs, condiments, drinks, desserts, potluck salads, and more! Plus tons of creative ideas on how to host a fun party with everything you will need, and inspirational cookout ideas to plan your Summer BBQ party.

    100+ July 4th Recipes for your cookout menu including grilling, side dishes, and picnic food ideas with drinks, desserts, and more!

    Look through 42 of the Best Burger Sides! These will help you throw a legendary backyard cookout or July 4th BBQ with clever Summer party food ideas and pick the perfect side dish for hamburgers.

    • A pink and white cake with buttercream flowers on a cake plate with glasses of pink champagne at a bridal shower.
      50+ Bridal Shower Food Ideas
    • A football shaped cheese ball coated with crumbled bacon, green onions, and cheddar cheese and white cheese to look like laces on the football surrounded by crackers on a platter.
      75+ Football Food Recipes
    • A number of puff pastry appetizers, dinner ideas, and desserts in a collection.
      40 Puff Pastry Appetizer Recipes
    • A square collage of colorful grilled food, side dishes, desserts, and drink recipes to serve at an outdoor bbq cookout.
      75+ Cookout Recipes & BBQ Party Ideas
    • A graphic showing lots of food for July 4th including cheeseburgers, corn, and baked beans.
      100+ July 4th Recipes
    • A grilled burger loaded with toppings and served at a cookout in paper lined plastic baskets.
      42 Amazing Burger Sides For Cookouts

    Did you love this recipe? We would love to hear from you! If you make this recipe and love it, give it a 5-star rating ⭐⭐⭐⭐⭐ with a comment. THANK YOU!! Follow Delicious Table with my free newsletter and share this recipe with your friends on Facebook, Pinterest, and Instagram.

    Zucchini Pickles (Easy No Canning)

    [heart_this] · Aug 31, 2023 · 5 Comments

    Close up of zucchini pickles in a quart glass mason jar.

    Zucchini Pickles are ready in 30 minutes with no canning! Use any summer squash for these quick pickles that have a zippy flavor and a crisp crunch.

    What a great way to use up the abundance of zucchini squash that grows so fast in our gardens. Make some extra jars for friends and neighbors. Try them for snacks, in salads, or on sandwiches...

    How To Make Zucchini Pickles

    For these pickles, I used a common dark green zucchini (courgette) for this recipe. There are so many different varieties that will work like yellow zucchini, Costata Romanesco Zucchini, yellow squash, pattypan squash, or Cousa squash. Also, take a look at my recipe for healthy Zucchini Chips with a fresh clean dip! Another great way to use up all your Summer garden bounty.

    Two jars of pickles made from zucchini squash.

    Pickle Brine Ingredients

    • zucchini - 2 small zucchinis per quart jar (1 for pint jars)
    • distilled white vinegar
    • cold water
    • granulated sugar
    • kosher sea salt
    • yellow mustard seed 
    • dill seeds
    • ground turmeric

    PRO TIP: Turmeric spice will stain any white surface or your hands while you are cooking with it. Wipe up any drips quickly.

    Sterilize Quart Jars

    Each quart holds 32 ounces or 4 cups. Clean and sterilize your glass jars with hot soapy water or in the dishwasher.

    Prepare Zucchini Chips

    1. Rinse zucchini well in a large bowl with cool water and a splash of vinegar, then drain in a colander.
    2. Cut into ¼” slices using a mandoline, crinkle cut knife, or regular chef knife.

    PRO TIP: A small zucchini weighs approximately ¼-1/3 pounds. Two of these small zucchini squash will fill a quart jar, then cover it with pickling liquid.

    How To Make Crinkle Cut Slices

    Cut the zucchini summer squash into bread and butter pickle chips. The story goes that bread and butter pickles were named during the Great Depression era as people put sliced pickles in between buttered bread for an inexpensive meal.

    • Use a mandoline with a wavy blade or an inexpensive crinkle-cut knife to slice the zucchini (summer squash).
    • Or, keep it simple, and cut flat ¼" slices with a regular chef knife.

    All these zucchinis came from my neighbor's garden. She was so generous to share them, and immediately I thought quick pickles!! That same summer I took a pickle class workshop and learned some really great tips.

    Zucchini in a wood bowl with a mandoline slicing zucchini in a crinkle cut pattern.

    Pickling Liquid Instructions

    1. In a large stainless saucepan or large pot, combine vinegar, water, sugar, salt, mustard seeds, dill seeds, and turmeric. Bring to a quick boil over medium heat and dissolve sugar. Reduce to low, simmer for about 5 minutes for the spices to infuse.
    2. Set the pickling liquid aside until just warm to the touch. Note: If the brine is too hot, it will cook the zucchini and make the pickles soft instead of crisp.

    Jar Zucchini Pickles

    1. Load the cut zucchini slices into clean Mason jars.
    2. Pour the cooled pickling mixture into the jars, be sure to cover the sliced zucchini. Spoon some spices into the jar that settle in your pickling liquid. Place lids and rings. You will have some pickling liquid left over.
    3. Keep in the fridge for up to a month.

    Refrigerator Zucchini Pickles FAQ

    What are refrigerator pickles?

    Pickles are a type of fresh vegetable stored in the fridge in a brine solution, and not water-bath canned for long term shelf-storage.

    Are squash and zucchini the same?

    Who knew that all zucchini are actually squash? But, not all squash are zucchini!

    "Squash" refers to a plant species within the gourd family, which is further divided into winter squash and summer squash.

    How long do zucchini pickles last?

    Keep un-canned unprocessed zucchini pickles in the fridge for up to a month.

    Two Mason jars filled with zucchini pickles on a cutting board.

    More Refrigerator Pickle Recipes

    Turn garden cucumbers into Dill Pickle spears, chips, and halves. Wait just one day to let the flavors develop. Once you can't wait any longer, crack open a jar of these Refrigerator Pickles. They are so good with fresh dill sprigs, garlic cloves, and black peppercorns for some amazing flavor!

    Quick Mexican Pickled Red Onions keep in the fridge for 3-4 weeks. These taste so delicious on hamburgers, salads, tacos, and pulled pork or grilled cheese sandwiches.

    These "Dilly" Pickled Green Beans will jazz up any boring relish tray. Pop them into Bloody Marys, toss chopped into salads, or try them on sandwiches for their tang and crunch instead of pickle chips.

    Make a jar of these old-fashioned deli-style Pickled Eggs using jalapenos, garlic, and pickling spice. A healthy protein-packed snack ready in 7 days right in your kitchen.

    • A person pulling a dill pickle chip out of a clear glass canning jar of homemade pickles.
      Refrigerator Dill Pickles
    • Mexican pickled red onions in a clamp jar and white bowl with chiles and limes on a colorful striped cloth.
      Mexican Pickled Red Onions
    • A clear glass jar filled with pickled green beans on a cutting board.
      Pickled Green Beans (Dilly Beans)
    • A large glass clamp jar filled with pickled eggs, fresh jalapeno slices, and spices.
      Jalapeno Pickled Eggs Recipe

    Did you love this recipe? We would love to hear from you! If you make this recipe and love it, give it a 5-star rating ⭐⭐⭐⭐⭐ with a comment. THANK YOU!! Follow Delicious Table with my free newsletter and share this recipe with your friends on Facebook, Pinterest, and Instagram.

    Close up of zucchini pickles in a quart glass mason jar.
    Print

    Zucchini Pickles Recipe (No-Canning Refrigerator)

    Zucchini Pickles are ready in 30 minutes with no canning! Use any summer squash for these quick pickles that have zippy flavor and a crisp crunch.
    Course Sauces, Marinades, & Condiments
    Cuisine American
    Keyword quick pickles, refrigerator pickles, squash pickles, summer squash pickles, zucchini pickles
    Prep Time 30 minutes minutes
    Cook Time 5 minutes minutes
    Cool the pickle liquid 1 hour hour
    Total Time 35 minutes minutes
    Servings 32
    Calories 68kcal
    Author Lisa Hatfield

    Equipment

    • Crinkle-Cut Knife
    • Mandoline
    • 4- 1 Quart Mason jars, lids, rings

    Ingredients

    • 8 whole zucchini (small ¼-1/3 pound each) ¼” thick slices

    pickle brine

    • 5 cups distilled white vinegar
    • 5 cups water
    • 1 cup granulated sugar
    • 2 tablespoon kosher sea salt
    • 2 tablespoons mustard seed
    • 2 tablespoons dill seeds
    • 1 tablespoon ground turmeric

    Instructions

    clean quart jars

    • Clean your glass jars and lids in hot soapy water or the dishwasher. Note: Each quart holds 32 ounces or 4 cups. 2 small zucchinis per quart jar (1 for pint jars).

    prepare zucchini chips

    • Rinse zucchini well in a large bowl with cool water and a splash of vinegar, then drain in a colander.
    • Cut into ¼” thick slices using a mandoline, crinkle cut knife or regular chef knife.

    pickling liquid

    • In a large stainless saucepan, mix vinegar, water, sugar, salt, mustard seeds, dill seeds, and turmeric. Bring to a quick boil over medium heat and dissolve the sugar. Reduce to low heat and simmer for about 5 minutes for the spices to infuse.
    • Set the pickling liquid aside until just warm to the touch. Note: If the brine is too hot, it will cook the zucchini and make the pickles soft instead of crisp.

    jar zucchini pickles

    • Load the cut zucchini slices in clean Mason jars. 2 small zucchinis per quart jar (1 for pint jars).
    • Pour the cooled pickling mixture in the jars leaving an inch of headspace. Place lids and rings. You will have some pickling liquid leftover to discard.
    • Keep in the fridge for up to a month.

    Video

    Notes

    zucchini or summer squash notes

    2 small zucchinis per quart jar (1 for pint jars)
    These will also work in this recipe...
    • yellow zucchini
    • Costata Romanesco Zucchini
    • yellow squash
    • Cousa squash

    pickling brine

    If the brine is too hot, it will cook the zucchini and make the pickles soft instead of crisp.

    cut pickle slices

    • Use a mandoline with a wavy blade or an inexpensive crinkle-cut knife to get this cut.
    • Or, keep it simple, and cut ¼" slices with a regular chef knife.

    tumeric

    Turmeric spice will stain any white surface while you are cooking with it, and your hands so handle it with care and wipe up spills quickly. Once your zucchini pickles are ready to eat, the staining seems to diminish!

    Nutrition

    Calories: 68kcal | Carbohydrates: 14g | Protein: 1g | Fat: 1g | Saturated Fat: 1g | Polyunsaturated Fat: 1g | Monounsaturated Fat: 1g | Sodium: 876mg | Potassium: 108mg | Fiber: 1g | Sugar: 13g | Vitamin A: 70IU | Vitamin C: 6mg | Calcium: 18mg | Iron: 1mg

    Crispy Chicken Wings

    [heart_this] · Aug 14, 2023 · 4 Comments

    A white platter filled with crispy chicken wings and one dipping into buffalo sauce.

    Last Updated April 16th, 2024 at 12:10 pm by Lisa

    Today I am sharing all the secrets in this ultimate guide to chicken wings, the famous bar snack, and big game day food! A perfect chicken wing appetizer is totally possible that tastes deep-fried, but is oven baked.

    When it comes to party wings, we want tons of flavor. Tender juicy meat inside, and a crispy texture fried coating.

    Gather your party guests and throw a legendary football game party during the season. And host a spectacular Super Bowl event with delicious snack foods for the biggest game day of the year. Spicy chicken wings are an easy appetizer and winning party food. These are crispy perfection, and no deep frying...

    Table of Contents

    • Chicken Wings Recipe
      • Step 1: Prepare The Chicken Pieces
      • Step 2: First Bake!
      • Step 3: Make The Dry Rub Seasoning
      • Step 4: Second Bake With Seasoning
    • Wing Recipe Top Tips
      • How To Eat Wings
      • Buffalo Chicken Wings Recipe
      • How To Get Crispy Chicken Skin
      • Dry Wings Are Key!
      • Use A Sheet Pan Rack
      • Baking Powder Trick ~ The Secret Ingredient!
      • Oven Cooking
      • Chicken Wing Flavors
    • More Party Appetizers, Holiday, and Football Food

    Chicken Wings Recipe

    To make the best wings start with good fresh ingredients. Replace any older spices before you mix your dry spice rub. And if you buy a bag of frozen pieces, they will need to be fully defrosted for these crispy baked chicken wings. This recipe will work with boneless wings, but reduce the cooking time.

    Step 1: Prepare The Chicken Pieces

    • 4 lbs party chicken wings - approximately 24 cut drumettes and flats aka fresh chicken wings
    • 3 tablespoons baking powder aluminum free < this is key! (and not baking soda, not corn starch!)
    • 1 teaspoon kosher salt

    PRO TIP: You can buy whole chicken wings, and use a good sharp knife to cut into drumettes and flats, and remove the tips. Freeze the leftovers and wing tips to make homemade chicken stock, another one of my easy chicken recipes!

    If you buy a bag of frozen meat, it will need to be fully defrosted for this easy dry rub chicken wings recipe.

    Ideally, the day before dry the chicken pieces overnight. This step pulls the excess moisture and helps them crisp up better while cooking. The night before, lay a large piece of aluminum foil onto a rimmed baking sheet or large sheet pan (for easier cleanup) and then set a wire baking rack on top. This helps hot air circulate all around. Lay the uncooked raw chicken in a single layer, and place the sheet pan in the fridge uncovered overnight.

    If you don't have time to dry them overnight, simply dab off the moisture really well with paper towels.

    Put a shelf in the lower part of the oven and one in the top part of the oven. Preheat oven to 275 degrees f oven temperature.

    Next, place them in a large bowl or in a large zip lock freezer bag. Sprinkle on the baking powder and sea salt, and toss with tongs or shake the bag until you have coated them evenly. There will be some mix left over in the bottom of the bowl or bag, discard the remaining baking powder salt mixture.

    Step 2: First Bake!

    Lay them skin side up on a baking rack over a foil lined sheet pan baking and bake for 30 minutes on the lower shelf. This is an important step in the cooking process. it pulls the moisture from the skin, and helps get crispy oven chicken without frying!

    Step 3: Make The Dry Rub Seasoning

    While the wings are in their first bake, in a small bowl whisk the garlic powder, dried parsley, brown sugar, onion powder, paprika, black pepper, cayenne pepper, ground cumin, and chili powder.

    This homemade dry rub recipe is made in minutes and is the perfect combination of spices. It makes ½ cup of chicken wing dry rub seasoning, all the ingredients might be in your pantry right now and all of these dry rub ingredients can be found in any local grocery store.

    • garlic powder
    • dried parsley
    • brown sugar
    • onion powder
    • smoked or sweet paprika (not hot paprika)
    • black pepper
    • cayenne pepper
    • ground cumin
    • chili powder
    • cooking spray (coconut oil spray, vegetable oil spray, or olive oil spray)

    You can mix up this amazing crispy dry rub recipe or make your own. Then adjust the spicy flavors as you prefer like leaving out the cayenne pepper.

    Step 4: Second Bake With Seasoning

    Turn the oven up to 425 degrees high heat. Using tongs, add the chicken pieces to the bowl a few at a time, spray them very well with coconut spray, and sprinkle the dry rub well to coat them, add more pieces and sprinkle the seasoning, and repeat spraying until all are well coated. The coconut oil spray helps bind the dry rub to the skin, and helps crisp them in the oven!

    Using clean tongs, put the dry rub seasoned chicken back on the rack on the baking sheet lined with foil.

    Return the sheet pan to the oven and bake 30 more minutes at 425 degrees, rotate pan the half way through. They are done when they have dark golden brown and crispy skin, and an internal temperature reaches 165 degrees.

    Wing Recipe Top Tips

    So why does this recipe work and how do you make delicious chicken wings? The good news is, with simple ingredients and a couple steps, you will master the best way to make your favorite chicken wing recipes.

    True confession, for a long time. I have never really liked most chicken wings. It's a texture thing for me. So I set out to make my best dang version of this famous fried food that was easy, tasty, and crisp, and no frying!

    How To Eat Wings

    • Make or buy the favorite wing sauce of your choice. Simply whisk the ingredients over low heat in this recipe to create your own recipe. Toss warm sauce on cooked wings in a bowl.
    • Serve with celery sticks, carrot sticks, and other dipping sauces like Blue Cheese Dip or classic buffalo wings sauce!
    • To make a Buffalo Wing Sauce: In a small saucepan, mix Franks's buffalo sauce, butter, brown sugar, and sea salt for a wing sauce. You can dip or toss your in, so much fun!

    With just 5 simple ingredients, this Blue Cheese Dressing is an easy recipe made in minutes. It also works great as a dip for hot buffalo wings or a chip dip.

    Buttermilk Ranch Dressing from scratch uses real fresh ingredients, and it tastes so much better than bottled products. Get the secret mixing tip with 20+ creative ways to use it in recipes all week long. But the fun part is dipping crispy baked wings in it!

    Then drizzle, dip, and pour your own ranch dressing on everything in sight, like crispy wings!

    • A ceramic plate with sliced apples, chicken on lettuce with homemade blue cheese dressing.
      Blue Cheese Dressing
    • A large Mason jar filled with ranch dressing made at home with a small serving bowl and spoon.
      Homemade Buttermilk Ranch Dressing

    Buffalo Chicken Wings Recipe

    Classic Buffalo wing sauce is so easy to make, and one of my new favorites.

    The full recipe instructions for the classic buffalo sauce recipe are at the bottom of the post, in the printable recipe card.

    A crispy baked buffalo wings recipe is easy. Just make this recipe and toss them into their sauce. Eat right away while hot...

    • Frank's Red Hot Sauce
    • melted butter
    • brown sugar
    • sea salt (not table salt)

    In a small saucepan, mix Franks Buffalo sauce, butter, brown sugar, and sea salt for a quick homemade wing sauce.

    How To Get Crispy Chicken Skin

    There are lots of reasons soggy, flabby chicken skin happens. It can be a thick gloppy flour coating called for in most recipes. When the chicken pieces are not dried well first, or the fat isn't fully rendered out while oven roasting, frying, or baking.

    Dry Wings Are Key!

    First, it is a good idea to dab the chicken pieces off with a paper towel to remove excess moisture from the skin. Then lay the wings on a sheet pan over a baking rack in the refrigerator, and let them dry overnight. This really helps the skin crisp up and is one less thing to do the day of your party.

    Use A Sheet Pan Rack

    After seasoning, place the wings on a wire rack over a sheet pan so it can circulate all around them to dry faster while cooking. Aluminum foil (not parchment paper) helps catch the drips for faster cleanup from the chicken fat rendering off the chicken meat roasts.

    Baking Powder Trick ~ The Secret Ingredient!

    The winning technique 🏆 I learned from Americas Test Kitchen (ATK) Cooks Illustrated is to toss the wings in a mixture of non aluminum baking powder and sea salt to first coat the chicken lightly. As they explain, "It helps break down the proteins within the skin, as well as aids in browning." And it is true. So the next time you make wings, try this!

    Oven Cooking

    Wings are typically deep fried, shallow pan fried, oven baked, or roasted to get them cooked and crispy. This recipe oven bakes them at a lower oven temperature first, then half way through cranks up the heat to finish them off roasting with the coating of perfect seasoning. And one of my favorite things about this recipe is no dirty stovetop to clean and hot oil to deal with!

    Chicken Wing Flavors

    Make delicious wings for a snack or as one of your main courses. There are lots of ways to change up the flavors!

    Mix up a Cajun Dry Rub spice blend, and reduce the paprika so it doesn't burn in the heat of the oven.

    Mix your own best homemade spice blend, and leave out the sugar for a low carb keto version.

    After your wings are cooked, toss them in a well-seasoned sauce in a large bowl. Or dip them into your favorite flavorful dips, and gobble these right up with your favorite sauces!

    • buffalo wing sauce
    • cajun wing sauce
    • honey bbq sauce
    • spicy garlic ginger
    • parmesan wings (garlic parmesan)

    Air Frying Wings

    To make an air fryer chicken wings recipe, set the air frier at 425 degrees. Cook for 20-25 minutes using an oil-spray on the wings and the basket. Place them into the air fryer basket. Then turn them over halfway through using tongs and air fry until golden brown and crispy at 165 f internal temperature.

    Who invented wings?

    A popular classic American snack that was created in a bar in Buffalo New York in 1964. The Anchor Bar in Buffalo, New York, by co-owner Teressa Bellissimo is credited with creating this famous recipe. She cooked leftover wings in hot sauce as a late-night snack for her son and his friends

    More Party Appetizers, Holiday, and Football Food

    Gather your party guests and throw a legendary football party with spectacular, delicious Super Bowl foods for the biggest game of the year. And tailgate in style with all your fan favorites with these amazing Football Food Ideas!

    Take a look at 75 Great Cookout Recipes, plus tips and hacks for your outdoor BBQ party. This complete guide has all the best recipes for backyard cookouts including grilled classics, gorgeous entertaining options, fun drinks, cool desserts, make-ahead salads, the perfect appetizer, easy potluck sides, and more for your outdoor parties!

    Bake warm soft pretzels and scoop them into an easy beer cheese dip. Every bite has a chewy, golden crust with soft, fluffy centers. Homemade Pretzels are the perfect appetizer for relaxed weekends at home or big game-day football parties!

    These are the best Thanksgiving Day Appetizers for savory snacks, easy appetizers, and a bounty of party ideas for your celebration. Whether you bake up some warm canapes, make easy no-cook appetizers like a dip, or create a beautiful holiday Thanksgiving Charcuterie Board, there are dozens of ideas to find that great recipe for your Thanksgiving feast!

    • A football shaped cheese ball coated with crumbled bacon, green onions, and cheddar cheese and white cheese to look like laces on the football surrounded by crackers on a platter.
      75+ Football Food Recipes
    • A square collage of colorful grilled food, side dishes, desserts, and drink recipes to serve at an outdoor bbq cookout.
      75+ Cookout Recipes & BBQ Party Ideas
    • A wood platter loaded with soft pretzels shaped like footballs and beer cheese dip in a bowl nearby.
      Pretzels With Beer Cheese Dip
    • A collection of Thanksgiving appetizers with recipe ideas, and party decorating tips for a Fall party.
      36 Thanksgiving Appetizers
    A white platter filled with crispy chicken wings and one dipping into buffalo sauce.
    Print

    Crispy Chicken Wings Recipe

    All the secrets to make Crispy Chicken Wings, the ultimate bar snack and big game appetizer! When it comes to party wings, we want tons of flavor, tender juicy meat, a crispy coating, and a deep-fried texture without going through the trouble of frying. Perfectly cooked wings are totally possible with a super crisp exterior that looks and tastes deep-fried but is oven baked!
    Course Appetizers, Dips, & Snacks
    Cuisine American
    Keyword chicken wing dry rub, chicken wing recipe, chicken wings, dry rub for chicken wings, oven baked chicken wings
    Prep Time 15 minutes minutes
    Cook Time 1 hour hour
    Total Time 1 hour hour 15 minutes minutes
    Servings 8
    Calories 356kcal
    Author Lisa Hatfield

    Equipment

    • Large Metal Sheet Pan
    • Wire Baking Rack
    • OXO Good Grips 12" Tongs

    Ingredients

    • 4 lbs party chicken wings - whole wings or drumettes and flats fresh or fully defrosted
    • 3 tablespoons baking powder aluminum free, not baking soda
    • 1 teaspoon kosher salt

    Chicken Wing Dry Rub

    • 2 tablespoons garlic powder
    • 1 tablespoon dried parsley
    • 1 tablespoon brown sugar
    • 1 tablespoon onion powder
    • 1 tablespoon smoked or sweet paprika not hot paprika
    • 2 teaspoons black pepper
    • ½ teaspoon cayenne pepper
    • 2 teaspoon ground cumin
    • 2 teaspoon chili powder
    • coconut oil spray or a vegetable oil spray or olive oil spray

    Buffalo Wing Sauce

    • ½ cup Frank's Red Hot Sauce
    • 4 tablespoons melted butter
    • 1 tablespoon brown sugar
    • ¼ teaspoon sea salt not table salt

    Instructions

    • If you buy a bag of frozen wings they will need to be fully defrosted overnight.
    • Ideally, the day before dry the wings overnight. This step pulls the excess moisture and helps them crisp up better while cooking.
      The night before, lay a large piece of aluminum foil onto a rimmed baking sheet or large sheet pan (for easier cleanup) and then set a wire baking rack on top. This helps hot air circulate around them. Lay the uncooked raw chicken in a single layer, and place the sheet pan in the fridge uncovered overnight.
    • If you don't have time to dry the pieces overnight, simply dab off the moisture really well with paper towels really well.
    • Put a shelf in the lower part of the oven and one in the top part of the oven. Preheat oven to 275 degrees f.
    • Next, place wings in a large bowl or in a large zip lock freezer bag. Sprinkle on the baking powder and sea salt, and toss with tongs or shake the bag until you have coated the wings evenly. There will be some mix left over in the bottom of the bowl or bag, discard the remaining baking powder salt mixture.
    • Lay the chicken pieces skin side up on a baking rack over a foil lined sheet pan baking and bake for 30 minutes on the lower shelf. This is an important step in the cooking process, it pulls the moisture from the skin to helps the chicken get crisp without frying.
    • While the chicken is in their first bake, in a small bowl whisk the garlic powder, dried parsley, brown sugar, onion powder, paprika, black pepper, cayenne pepper, ground cumin, and chili powder.
    • Turn the oven heat up to 425 degrees. Using tongs, add wings to the bowl a few at a time, spray them very well with coconut spray, and sprinkle the dry rub well to coat all the wings, add more wings sprinkle the seasoning and repeat spraying until all the wings are well coated. The coconut oil spray helps bind the dry rub to the chicken, and helps crisp them in the oven!
    • Using clean tongs, put the dry rub seasoned wings back on the rack on the baking sheet lined with foil.
    • Return the sheet pan to the oven and bake 30 more minutes at 425 degrees, rotate pan the half way through. They are done when they have dark golden brown and crispy skin, and an internal temperature reaches 165 degrees.
    • Make the wing sauce of your choice if desired, simply whisk the ingredients over low heat in this recipe or create your own. Toss warm sauce on cooked wings in bowl and serve with celery sticks, carrots, and other dipping sauces.
    • Buffalo wing sauce: In a small saucepan, mix Franks buffalo sauce, butter, brown sugar, and sea salt for a wing sauce. You can dip or toss your wings in!

    Video

    Notes

    chicken wings

    For 4 pounds you need ½ cup of dry rub seasoning. Once you toss your wings in the seasoning you must discard any remaining dry rub, it is not safe to reuse. 
    Precut chicken wings and drumettes work best for this recipe.

    baking powder

    Buy a baking powder that is aluminum-free, this is the best baking powder to use as it is flavorless! The best-known brands are; McKenzie's, Rumford, Whole Foods 365, and Trader Joe's. Rumford is one of the oldest and most trusted.

    sheet pan with rack and foil

    The foil helps make for an easier clean up of the fat that drips - skip using parchment paper it isn't as good for this recipe to catch all the mess.

    soggy, flabby chicken skin

    There are lots of reasons it happens, it can be a thick gloppy flour coating called for in most recipes, the chicken pieces are not dried well first, or the fat isn't fully rendered out while oven roasting, frying or baking.

    dry wings

     First, it is good idea to dab the chicken pieces off with a paper towel to remove excess moisture from the skin. Then lay the wings on a sheet pan over a baking rack in the refrigerator, and let them dry overnight. This really helps the skin crisp up!

    sheet pan rack 

    After seasoning, place the wings on a rack over a sheet pan so it can circulate all around them to dry faster while cooking. Foil helps catch the drips for faster cleanup from the chicken fat rendering off the chicken meat roasts.

    Baking Powder Secret Weapon

     The winning technique 🏆 I learned from Americas Test Kitchen (ATK) Cooks Illustrated is to toss the wings in a mixture of non aluminum baking powder and sea salt to first coat the chicken lightly. As they explain, "it helps break down the proteins within the skin, as well as aids in browning." And it is true.

    oven cooking

    Wings are typically deep fried, shallow pan fried, oven baked, or roasted to get them cooked and crispy. This recipe oven bakes them at a lower oven temperature first, then half way through cranks up the heat to finish them off roasting with the coating of perfect seasoning.

    different seasonings

     You can mix up this amazing crispy dry rub recipe or make your own and adjust the spicy flavors as you prefer.

    Nutrition

    Serving: 8g | Calories: 356kcal | Carbohydrates: 9g | Protein: 23g | Fat: 26g | Saturated Fat: 9g | Polyunsaturated Fat: 5g | Monounsaturated Fat: 9g | Trans Fat: 0.5g | Cholesterol: 109mg | Sodium: 975mg | Potassium: 738mg | Fiber: 1g | Sugar: 3g | Vitamin A: 1000IU | Vitamin C: 2mg | Calcium: 233mg | Iron: 2mg

    Halloween Gingerbread House

    [heart_this] · Aug 13, 2023 · 1 Comment

    A Halloween gingerbread house decorated with royal icing and candy in orange, black, and white candy with a ghost opening the front door.

    Last Updated August 15th, 2023 at 01:20 am by Lisa

    Decorate a spooky cute Halloween Gingerbread House with an easy-to-find premade kit. Use all kinds of candies in different ways, add your own creative details, and try new design ideas with Halloween candy and royal icing.

    Haunted gingerbread houses are a whimsical table centerpiece for your Halloween party or to enjoy in your home all spooky season. After all, it is all about the candy...

    A Halloween gingerbread house all decorated with bright candy on a white plate at a Halloween party.

    Haunted Cookie House Decorating Kits

    Be sure to watch the video in the recipe card below for more ideas!

    Halloween haunted cookie house kits are available everywhere now, which include house pieces, royal icing, and some candy decorations. I found my Halloween Cookie Kit at TJ Max Homegoods, made by The Bakery Bling company and they are also available on Amazon.

    Most cookie kits come with royal icing, but just in case, I have recipes for you to make extra white, black, orange, etc. royal icing, which is a super fun way to create your own designs and details.

    PRO TIPS: Lay the gingerbread house pieces on parchment-lined trays or plates. Decorate the pieces of your house first using royal icing and sprinkles, and let them dry overnight. Assemble the next day, and add the final spooky details!

    Halloween Gingerbread House Table of Contents

    • Haunted Cookie House Decorating Kits
    • Decorating A Halloween Gingerbread House
    • Haunted Gingerbread House Decorating Ideas
      • Haunted Halloween Gingerbread House Base
      • Halloween "Christmas" Tree
      • Cobblestone Path and Porch
      • Criss Cross Roof
      • Roof Line
      • House Windows
      • Front Door Pumpkin Topiaries
      • Make Chocolate Tombstones
      • Pumpkin Patch
      • Window Shutters
    • Candy Shopping List & Decorating Ideas
    • More Things To Decorate Your House
    • Gingerbread House Tips, Lessons, & Fails
    • How To Make & Decorate With Royal Icing
    • Free Halloween Planner!
    • More Halloween Food Ideas
    • Halloween Drinks & Appetizers

    Decorating A Halloween Gingerbread House

    1. Unpack the pieces, and lay them out. Most kits will have a front, back, two side pieces, and 2 roof pieces. Take a look at them, any rough edges can be smoothed out with your fingertips, and check for cracks, those can be fixed with construction royal icing.
    2. Grab a piece of paper and take some notes on the designs you really want, and some things you want to try!
    3. Lay each of the pieces in order to decorate. My kit had two roof pieces with a diamond pattern embossed on them, so I piped black royal icing in those groves, then sprinkled yellow and orange jimmies. I did this over a piece of parchment paper to catch the extra sprinkles and reuse them.
    4. Knead the royal icing really well that should come in your kit, it works great at room temperature.
    5. Make some more of your own royal icing, which dries really hard for construction purposes. You can also add a color you like.
    6. If you are not going to eat the Halloween gingerbread house, use a glue gun to hold the pieces together. Once the pieces are decorated and dry, which takes about 8 hours, simply glue them together! That is what I did, and it was SO much easier, but with kids, they might want to eat it.
    7. You can buy some buttercream icing in a tube from the grocery store, but this would be for decorating accents, not to hold or glue the house together.

    Haunted Gingerbread House Decorating Ideas

    Haunted Halloween Gingerbread House Base

    I decided to put my house on a ceramic square plate. A piece of cardboard might work if it is sturdy enough. I glued my house onto the plate with hot glue, but I am not eating it plus I am on a diet!

    If kids will be eating it, try a strong paper plate or plastic plate, and use construction royal icing.

    Halloween "Christmas" Tree

    Decorate sugar ice cream cones for Halloween "Christmas" trees with pumpkin presents underneath. Black royal icing or black buttercream will work for this, simply pipe a thick line up and around in a spiral.

    Then push on large and small balls of candy or sprinkles. Some orange and black candy bats came in the kit, so I put them on as tree toppers and ornaments. Add more colorful Halloween sprinkles, in orange, purple, and green on the wet frosting, and let it dry before handling.

    Cobblestone Path and Porch

    To decorate the front and back cobblestone walkway, I love the round black licorice candies from See's candies in Southern California. They are online if you want to take a peek. These are called Black Licorice medallions in their shop. I sprinkled green sanding sugar sprinkled in between the licorice to look like grass. You can also cut pieces of cut black licorice and black icing to make a path.

    Criss Cross Roof

    Pipe black royal icing from a piping bag in a cross diamond pattern then sprinkle use tiny Jimmie sprinkles for a great effect! Sprinkle on a piece of parchment paper, then pour unused sprinkles back into the container.

    Or tile the roof with mini shredded wheat cereal pieces, graham cracker pieces, mini chocolate bars, or other candy like candy corn.

    Roof Line

    Trim licorice pieces to cover the gap in the roof line and base of the house. Use scissors to cut the black licorice pieces.

    House Windows

    For the house shutters, black licorice medallions were just right with black store-bought black buttercream frosting and little orange bat candies as accents. For the window boxes, I placed a piece of black licorice. Piped black icing on the window panes and sprinkled sparkling black sugar.

    These white bone gummies came in a box of candy I found at Homegoods TJ Maxx. They worked so well framing the windows and front door.

    Front Door Pumpkin Topiaries

    Use white frosting or royal icing, and stick a Brach's Mellocream pumpkin on top of an orange and white mint from See's candies. Then attach the candy eyes with white icing.

    Make Chocolate Tombstones

    Take a look at my Halloween Graveyard Cake for all kinds of decoration tips for making tombstones, fences, trees, gates, and more! Or my Halloween Cupcakes, which have little white chocolate bones and tons of other ideas you could put on your gingerbread house.

    Pumpkin Patch

    Surround your house with cookie dirt, made from crushed chocolate wafers or Oreo cookies.

    Make a pumpkin patch with crushed Oreos or graham crackers for the dirt, and Mellowcream pumpkin with green icing as the vines and stems. Make a candy corn fence with the white points sticking up.

    Window Shutters

    Put crooked pieces of Oreo cookies and cream candy bars on as the shutters, and pipe on thin black cobwebs!

    Two pieces of a Halloween gingerbread house decorated with candy laying on a white plate.

    Candy Shopping List & Decorating Ideas

    • Brach's Mellocream pumpkins
    • Red Vine black licorice
    • Brach's candy corn
    • See's black licorice medallions
    • Halloween assorted sprinkles (tree and front of house)
    • Sparkling black sugar (window frame accent)
    • Sparkling green sugar (grass)

    More Things To Decorate Your House

    • Halloween m&ms (orange, purple, green)
    • gumdrops
    • mini shredded wheat cereal
    • pretzels
    • NECCO wafers

    Gingerbread House Tips, Lessons, & Fails

    • Wet royal icing won't always hold a candy corn piece once the house is assembled. I learned this the hard way, they kept sliding and then falling off. The best thing is to let the icing dry a while then try to stick on heavier pieces of candy, in some cases, they are just too heavy to stick. You can add heavier pieces of candy while the pieces are flat, let them dry, then assemble them, this works really well!
    • Patience is the hardest part of making a gingerbread house. In all the years of making them, no two are ever the same. And one thing to remember is that it's your house! Make it the way you want to, and take your time. Don't be rushed. Make a good cup of coffee, relax, and create. Then let the pieces dry before assembling-that is my biggest tip.
    Close up of an orange square dish filled with candy corn that says candy corn on the front.

    How To Make & Decorate With Royal Icing

    Basic Decorating Royal Icing

    • 3 cups powdered sugar (confectioners sugar)
    • 2 large egg whites at room temperature
    • ½ teaspoon cream of tartar
    • optional black, orange, purple, or green food coloring

    Construction Royal Icing Using Meringue Powder

    • 2 cups powdered sugar
    • 2 tablespoons meringue powder
    • ¼ cup water (add more if needed)
    • optional black, orange, purple, or green food coloring

    Basic Decorating Royal Icing Instructions

    1. Mix ingredients well by hand or on medium speed for 5 minutes with a hand mixer. The icing is good for piping, and decorating but not as strong for construction.
    2. Store extra icing in a pastry bag or zip-top bag. Or covered in a bowl with plastic wrap. You can make a double batch of this recipe or add coloring like black, orange, purple, or green! This icing is great for piping and flooding, but too thin for "gluing" on candies and holding the house pieces together.

    Construction Royal Icing Using Meringue Powder Instructions

    1. In a medium mixing bowl, add the egg whites and whip until foamy. Add cream of tartar mix for about 30 more seconds. Add in powdered sugar gradually until completely mixed in, then you can turn the mixer to high speed. Whip about 3-5 minutes until it becomes thick and the royal icing will hold its shape.
    2. Then add food coloring if desired. Use this royal icing to hold pieces of your gingerbread house together.

    Free Halloween Planner!

    A little planning goes a long way, put down all your ideas and things that inspire you in this planner. There are spots for everything from your guest list, to shopping items, ideas for Halloween decorations, how to put a spooky twist on the menu, and more. Happy Halloween!

    Download your FREE copy of this planner and get those party plans started today…

    CLICK FOR A FREE HALLOWEEN PLANNER! 🎃👻🍭
    A two page Halloween planner to plan the best food and decorations for a Halloween party.

    More Halloween Food Ideas

    200+ of the best Halloween Recipes from inspiring Food Blogger friends! Whether you are having a spectacular costume party on October 31st or cooking up spooktacular delicious recipes for a creepy food dinner for the family.

    Halloween Deviled Eggs are spooky party appetizers with dark black crackled egg shells filled with bright orange filling. This classic simple appetizer is easy to make ahead and have with drinks. Create a spooktacular Halloween Charcuterie Board filled with your favorite sliced meats, an assortment of cheeses, crackers, fruit, nuts, and a few spooky and sugary treats. A spooky charcuterie board or cheese boards are they are known, are such an easy way to make party food!

    Bake a spooky Chocolate Graveyard Cake with orange and chocolate marbled cake inside, and a cemetery all made in chocolate!

    Build a fun and super easy Halloween snack board tray with your favorite chip, crackers, sweet treats, pretzels, popcorn, and spooky candy eyes! Mix up a batch of these emerald green Witches Brew Midori Sours. Add some spooky bones and magical edible drink glitter with bubbly mixers to enchant your guests!

    • Dozens of pictures of 200 Halloween recipes including adult drinks, appetizers, treats, snacks, desserts for kids and families all with a Halloween theme.
      200+ Best Halloween Recipes
    • A black platter filled with Halloween deviled eggs sprinkled with black sesame seeds.
      Halloween Deviled Eggs
    • A large Halloween Charcuterie cheeseboard loaded with stacks of crackers, cut and sliced meats, nuts, and Halloween candy for a Halloween party.
      Halloween Charcuterie Board
    • A chocolate Halloween Cake with gate, fence, tree and tombstones.
      Halloween Cake
    • A full platter of Halloween salty snacks and candy decorated with candy eyeballs for an easy last minute Halloween Party Idea.
      Easy Halloween Snacks
    • A Halloween party with two green cocktails using Midori and garnished the Witches brew midori sours are garnished with white plastic bones for Halloween cocktails.
      Witches Brew Midori Sour

    Halloween Drinks & Appetizers

    There are over a dozen of the Best Halloween Punch Ideas here from making different colors, sherbet punches, creative garnishes, ice rings, and even how to use dry ice for punch.

    Halloween Gingerbread Houses are a whimsical table centerpiece for your Halloween party or to enjoy in your home all spooky season. After all, it is all about the candy.

    Decorate your Halloween Candy Bark with lots of sweets, colorful sprinkles, and spooky eyes...👀🎃 You can use chocolate chips or white chocolate!

    Bake these Halloween Cupcakes topped with fluffy chocolate buttercream frosting that are not too scary and pretty darn cute...

    Candy Corn Martinis are perfect for parties, have lots of fun chilling out with these, oh and homemade candy corn vodka is super easy to make!

    Parties are all about serving haunted food and creepy drinks like mini Halloween Pizzas. Decorate with one of the six ideas here, choose a Jack-O-Lantern, Dracula, Frankenstein, Monster, Mummy, or Ghost! Halloween Sandwiches are the perfect party food for a crowd. Serve a big sub sandwich with spooky decorations like cheese teeth and edible eyeballs.

    • A black cauldron with wooden ladle and pouring red punch into the bowl with dry ice smoke for Halloween Punch.
      Halloween Party Punch
    • A Halloween gingerbread house decorated with royal icing and candy in orange, black, and white candy with a ghost opening the front door.
      Halloween Gingerbread House
    • A pile of Halloween bark on a dark black platter decorated with candy and sprinkles.
      Halloween Candy Bark
    • A Halloween party with candy corn martinis and a small black dish of candy corn nearby.
      Candy Corn Martinis
    • Six baked Halloween pizzas on a baking rack decorated to look like ghosts, pumpkins, dracula, frankenstein, and monsters.
      Halloween Pizza
    • A giant sub sandwich that looks like a Monster with giant edible radish eyes and small black olive eyes.
      Halloween Sandwich Ideas

    Did you love this recipe? We would love to hear from you! If you make this recipe and love it, give it a 5-star rating ⭐⭐⭐⭐⭐ with a comment. THANK YOU!! Follow Delicious Table with my free newsletter and share this recipe with your friends on Facebook, Pinterest, and Instagram.

    A Halloween gingerbread house decorated with royal icing and candy in orange, black, and white candy with a ghost opening the front door.
    Print

    Halloween Gingerbread House + Royal Icing Recipe

    Decorate a spooky cute Halloween Gingerbread House with an easy-to-find premade kit. Use all kinds of candies in different ways, add your own creative details, and try new design ideas with Halloween candy and royal icing.
    Course Dessert
    Cuisine American
    Keyword Halloween Cookie House, Halloween gingerbread house, Haunted Gingerbread House, How To Decorate Halloween Gingerbread Houses, Royal Icing
    Prep Time 2 hours hours
    Cook Time 0 minutes minutes
    drying time 8 hours hours
    Total Time 10 hours hours
    Servings 24
    Calories 100kcal
    Author Lisa Hatfield

    Equipment

    • Halloween Gingerbread House Kit by Bakery Bling
    • Halloween Sprinkles
    • Cake Piping Tips and Pastry Bags
    • Meringue Powder (Royal Icing)
    • Americolor Soft Gel Food Color - 6 Colors
    • See's Candies assorted Halloween candy

    Ingredients

    Basic Decorating Royal Icing

    • 3 cups powdered sugar confectioners sugar
    • 2 large egg whites room temperature
    • ½ teaspoon cream of tartar
    • optional black, orange, purple or green food coloring

    Construction Royal Icing Using Meringue Powder

    • 2 cups powdered sugar
    • 2 tablespoons meringue powder
    • ¼ cup water (add more if needed)
    • optional black, orange, purple or green food coloring

    Instructions

    Basic Decorating Royal Icing

    • Mix ingredients well by hand or on medium speed for 5 minutes with a hand mixer. The icing is good for piping, and decorating but not strong for constuction.
    • Store extra icing in a pastry bag or zip-top bag. Or covered in a bowl with plastic wrap. You can make a double batch of this recipe or add coloring like black, orange, purple or green! This icing is great for piping and flooding, but too thin for "gluing" on candies and holding the house pieces together.

    Construction Royal Icing Using Meringue Powder

    • In a medium mixing bowl, add the egg whites and whip until foamy. Add cream of tartar mix for about 30 more seconds. Add in powdered sugar gradually until completely mixed in, then you can turn the mixer to high speed. Whip for about 3-5 minutes until it becomes thick and the royal icing will hold its shape. Then add food coloring if desired.
      Use this to hold pieces of your gingerbread house together.

    Assembling Your Gingerbread House

    • Unpack the pieces, and lay them out. Most kits will have a front, back, two side pieces, and 2 roof pieces. Take a look at them, any rough edges can be smoothed out with your fingertips, and check for cracks, those can be fixed with construction royal icing.
    • Grab a piece of paper and take some notes on the designs you really want, and some things you want to try!
    • Lay each of the pieces in order that you are ready to decorate. My kit had two roof pieces with a diamond pattern embossed on them, so I piped black royal icing in those groves, then sprinkled yellow and orange jimmies. I did this over a piece of parchment paper to catch the extra sprinkles and reuse them.
    • Knead the royal icing really well that should come in your kit, it works great at room temperature. Make some more of your own royal icing, which dries really hard for construction purposes. You can also add a color you like.
    • If you are not going to eat the Halloween gingerbread house, use a glue gun to hold the pieces together.
    • Once the pieces are decorated and dry, which takes about 8 hours, simply glue them together! That is what I did, and it was SO much easier, but with kids, they might want to eat it.
    • You can buy some buttercream icing in a tube from the grocery store, but this would be for decorating accents, not to hold or glue the house together.

    Video

    Notes

    Haunted Gingerbread House Decorating Tips

    • Halloween "Christmas" Tree: Decorate sugar ice cream cones for Halloween "Christmas" trees with pumpkin presents underneath. Black royal icing or black buttercream will work for this, simply pipe a thick line up and around in a spiral. Then push on large and small balls of candy or sprinkles. Some orange and black candy bats came in the kit that I used as tree toppers and ornaments. Then add more colorful Halloween sprinkles, in orange, purple, and green into the wet frosting.
    • Cobblestone Path and Porch: To decorate the front and back cobblestone walkway, use round black licorice candies from See's candies in Southern California. They are online if you want to take a peek. These are called Black Licorice medallions in their shop. I sprinkled green sanding sugar sprinkled in between the licorice.
    • Criss Cross Roof: Pipe black royal icing from a piping bag in a cross diamond pattern then sprinkle use tiny Jimmie sprinkles for a great effect!
    • House Windows: For the house shutters, black licorice medallions were just right with black store-bought black buttercream frosting and little orange bat candies as accents. For the window boxes, I placed a piece of black licorice. Piped black icing on the window panes and sprinkled sparkling black sugar.
    • Front Door Pumpkin Topiaries: Use white frosting or royal icing, and stick a Mellocream pumpkin on top of an orange and white mint from See's candies. Then attach the candy eyes with white icing.
    • White Bone Gummy Candies: These came in a box of candy I found at Homegoods TJ Maxx. They worked so well framing the windows and front door.
    • Roof Line: Trim licorice pieces to cover the gap in the roof line and base of the house. Use scissors to cut the black licorice pieces.
    • Make "Cookie" Dirt: Surround your house with cookie dirt, made from crushed chocolate wafers or Oreo cookies.
    • Make Chocolate Tombstones: Take a look at my Halloween Graveyard Cake for all kinds of decoration tips for making tombstones, fences, trees, gates, and more! Or my Halloween Cupcakes, which have little white chocolate bones and tons of other ideas you could put on your gingerbread house.
    • Fence: Make a candy corn fence with the white points sticking up,
    • Pumpkin Patch: Make a pumpkin patch with crushed Oreos or graham crackers for the dirt, and Mellowcream pumpkin with green icing as the vines and stems.
    • Window Shutters: Put crooked pieces of Oreo cookies and cream candy bars on as the shutters, and pipe on thin black cobwebs!
    • House Pathway: Use cut pieces of cut black licorice and black icing to make a path.
    • Tile The Roof: Tile the roof with mini shredded wheat cereal pieces, graham cracker pieces, mini chocolate bars, or other candy like candy corn.
    • Haunted Halloween Gingerbread Base: I decided to put my house on a square plate. The cardboard might work if it is sturdy enough. I glued my house onto the plate with hot glue (but I am not eating it!) If kids will be eating it, try a strong paper plate or plastic plate, and use construction royal icing.

    Nutrition

    Serving: 24g | Calories: 100kcal | Carbohydrates: 25g | Protein: 1g | Fat: 0.005g | Sodium: 9mg | Potassium: 19mg | Sugar: 24g | Calcium: 1mg | Iron: 0.02mg

    30+ Cookout Side Dish Ideas

    [heart_this] · Aug 13, 2023 · 1 Comment

    A collage of many colorful side dishes to make during cookout season including potluck salads, baked beans, fruit salad, summer desserts and more.

    Last Updated November 16th, 2025 at 09:08 am by Lisa

    These are the best side dishes for a bbq to make during cookout season! This ultimate list has 30+ Cookout BBQ sides that will inspire you to create the yummiest food for family gatherings, summer picnics, backyard barbecues, or church potlucks.

    Bring the most delicious bbq sides and desserts for cookouts that will delight everyone for July 4th, Labor, or Memorial day BBQ parties, and take you right into Fall for tailgates and game days...

    A collage of many colorful side dishes to make during cookout season including potluck salads, baked beans, fruit salad, summer desserts and more.

    Side Dish Cookout Table of Contents

    • 30+ Cookout Side Dish Recipes
    • BBQ Potato Salad Recipe
    • Classic Cookout Side Dish Recipes
    • Summer Potluck Salad Side Dishes
    • Make Ahead Summer Potluck Ideas
    • Easy Salad Potluck Dishes
    • Party Food Sides
    • Clean, Cool, and Light Sides
    • Vegetable Sides and Coleslaws
    • Chip & Dip Easy Side Ideas
    • Summer Cookout Desserts
    • Cookout Foods FAQ
    • More Summer Party Food

    30+ Cookout Side Dish Recipes

    What to bring to a cookout that is easy and delicious? These are the party sides and grill side dishes that will make your dish the talk of the day!

    BBQ Potato Salad Recipe

    Classic potato salad is one of the most popular bbq side dish recipes, but how about one loaded with flavors like bbq sauce, bacon, and cheddar cheese? This one is super creamy with secret ingredients in place of the mayo.

    Every time you make this new twist on a classic mix-up a double batch. This is one of the easiest bbq side dish ideas, and it goes fast. Get the printable recipe card for BBQ Potato Salad at the end of this post! 🥔🥓🌿🧀

    Classic Cookout Side Dish Recipes

    These are warm side dishes and easy BBQ sides for a cookout to make at the last minute.

    This Mexican Street Corn Recipe (aka Elotes) has fresh corn grilled and brushed with a creamy cilantro sauce. Sprinkle with Cotija cheese and chile powder, and garnish with cilantro. Cut the kernels off and make an incredible Mexican street corn salad! 🌽🌿

    Cowboy Baked Beans have crispy applewood smoked bacon and hamburger cooked in a slow cooker or in the oven with a little brown sugar and other delicious ingredients. This perfect side dish recipe is one of the best party side dishes to make ahead for a large hungry crowd or for your next family dinner. 🤠🥫🥓

    Grilled Corn cooks fast, in 10 minutes for one of the easies bbq side ideas. Fresh sweet corn can be prepped the day before a cookout with endless flavor options for guests. You can also cut the corn kernels off and make a spicy corn salad! 🌽🔥

    • Several grilled elotes Mexican street corn on the cob sprinkled with Cotija cheese on a platter.
      Mexican Street Corn (Authentic Elotes)
    • A large white spoon scooping a serving of cowboy baked beans out of a casserole dish.
      Cowboy Beans
    • Ears of grilled corn on a white platter seasoned with melted butter on top.
      Grilled Corn On The Cob

    Summer Potluck Salad Side Dishes

    Creamy Bacon Potato Salad is one of the best BBQ side dishes. Loaded with crispy bacon and blue cheese. An awesome side for summer cookouts and potlucks. This is one of the best picnic food ideas because it has no eggs or mayo. 🥔🥓🍃

    Dig your fork into this icy cold Wedge Salad with a Pistachio-Avocado creamy dressing. The mild flavor of green salads compliments sizzling grilled steaks, chicken, or shish kabobs at cookouts or dinner parties. And you can make it heartier with chopped bacon, diced chicken, or hard-boiled eggs. 🥬🥑💚🍃🥣

    Broccoli Salad with crisp green apples, crunchy broccoli, and grapes creates one of the best summer salads ever. Toss in my favorite creamy sauce, made with just 3-ingredients! You can use regular oranges, small mandarin oranges, or pixie tangerines in the dressing. 🥦🍇🫐 This is great to make ahead too!

    • A small white bowl filled with bacon potato salad garnished with crispy bacon.
      Bacon Potato Salad
    • Wedge salad with avocado dressing drizzled on top with pistachios on a black slate board.
      Iceberg Wedge Salad
    • A turquoise salad bowl filled with broccoli salad with colorful grapes and pistachios.
      Broccoli Salad

    Make Ahead Summer Potluck Ideas

    We all want easy sides for a cookout, and this Pasta Salad with fresh herbs, bell pepper, and cheese is it! This delicious side dish is mayo-less and made with olive oil, vinegar, fresh basil, and red onion. Perfect to serve at outdoor picnics or cookouts, and its better if you make it ahead! 🧺🌿🥣

    One of the most popular classic cookout salads is an easy 7 Layer Salad Recipe! Put it together up to a day ahead, it has fresh tomatoes, boiled eggs, and veggies. Make it the night before. And have it ready to go to your party chilling in your fridge overnight complete with the dressing on top. 🥗🍅🥚

    The BEST creamy summer sides, this Macaroni Salad recipe has chopped eggs, creamy mayo, pickles, and PICKLE JUICE! A favorite old-fashioned beloved recipe that some people eat as their main course it's that good. I have made this one for many years, and its always one of the most popular side dishes for a party. 🥣💛🌿

    • A wooden bowl filled with pasta salad and wooden serving tongs.
      Easy Pasta Salad
    • A glass trifle dish filled with 7 Layer Salad full of colorful ingredients.
      7 Layer Salad
    • Looking down on a white plate filled with macaroni salad and a silver fork.
      Classic Macaroni Salad Recipe

    Easy Salad Potluck Dishes

    Whip up this easy Taco Salad recipe loaded with all the best Mexican food toppings like crunchy Fritos, grated cheese, creamy sour cream, and Catalina dressing. Plus get my two secret ingredients for the best taco meat! 🌮🥗

    A colorful Pizza Salad loaded with our favorite pizza toppings like mini pepperoni, black olives, mushrooms, tangy pepperoncinis, juicy cherry tomatoes, and little balls of buffalo mozzarella cheese. 🍕🥗

    The original Cobb Salad became famous in Los Angeles at the Brown Derby restaurant served with (red wine vinegar) vinaigrette French dressing loaded with chopped tomato, cubed chicken, crumbled bacon, diced avocado, chopped eggs, and topped with Roquefort cheese. 🍅🥓🥚🥗

    • A white plate full of taco salad topped with taco meat, grated cheese, Fritos, sour cream, black olives and tomatoes.
      Easy Taco Salad
    • A plate full of pizza salad topped with mini pepperoni, mushrooms, mozzarella balls, pepperoncinis, and black olives with a artistic black fork on the edge of the plate.
      Pizza Salad
    • A white square plate filled with colorful Cobb Salad made with chicken, eggs, avocados, tomatoes, and bacon.
      Cobb Salad

    Party Food Sides

    These are the best Fried Green Tomatoes, one of the most famous Southern recipes of all time, and a great way to use up green tomatoes. Each slice has a crunchy crust to dip into a creamy remoulade, buttermilk ranch dressing, or comeback sauce. 💚🍅

    Bake these Cheddar Cheese Jalapeño Corn Bread Muffins made with just 3 ingredients, and are super soft, fluffy, and cheesy. Serve hot with a big slather of honey butter for dinners like bowls of chili, pork chops, fried chicken, or BBQ ribs. 🌽🍞

    Frozen Dinner Rolls (aka Bread Rolls) are beautiful and easy to make. Brush store-bought frozen rolls with melted butter, and add toppings you love. Try parmesan cheese, seasonings, and fresh herbs. Then bake to a golden brown. 🍞🌿🧀

    • A white long plate with a stack of fried green tomatoes with remoulade and buttermilk ranch dressing.
      Fried Green Tomatoes
    • A cornbread muffin in an orange muffin tin paper with a piece out of it and crumbs on the table.
      Cheddar Cheese Jalapeño Cornbread
    • A close up of baked Frozen Dinner Rolls topped with cheeses, herbs, and seasonings.
      Dinner Rolls

    Clean, Cool, and Light Sides

    Watermelon Salad is easy to make and served from a watermelon bowl. And one of the best Summer side dishes for potlucks, BBQ cookouts, picnics, at the beach, or by the pool. 🍉🌿 So refreshing!

    A healthier Tuna Salad loaded with crunchy celery, creamy avocado, basil, capers, kalamata olives, pepperoncini's, and sun-dried tomatoes. Roll it up in a tortilla wrap or scoop in colorful red or green pepper bowls. Or put it inside lettuce leaves for low carb lunches! 🐟🫑🍅🫒

    Chilled Cucumber Soup (aka White Gazpacho) is a refreshing Summer recipe with yogurt, grapes, green apples, topped with almonds and crab. This cold soup recipe includes lots of other garnish topping ideas for you too! 🥒🍇🥣

    • Looking down into a scooped out watermelon filled with rounded watermelon balls garnished with mint and feta cheese.
      Watermelon Salad
    • Red and green Bell pepper halves filled and green tortilla wraps filled with no mayo Greek Yogurt Tuna Salad.
      Healthy Tuna Salad
    • Chilled cucumber soup topped with crab meat and grape garnish served in bowls over ice.
      Cucumber Gazpacho Soup

    Vegetable Sides and Coleslaws

    Mango Jicama Slaw has sweet juicy mangos, crunchy jicama, and crisp green cabbage. And the sweet tangy mango-lime vinaigrette is one clean slaw salad. It goes great on fish tacos or with grilled fish! 🥭🥗

    Coleslaw with an easy vinegar dressing, and no-mayo that you find in most classic creamy slaw recipes. It is great on pulled pork sandwiches, with grilled hamburgers, or BBQ chicken. This coleslaw recipe is so popular and a staple for bbq sides ideas. 🥬 🥕

    Vegetable Spring Rolls with a peanut ginger dip sauce for a healthy vegetarian or vegan lunch. These have a rainbow of gorgeous fresh veggies and are crunchy light and fresh! 💜🍃🌈🥑🥕🌱

    • Pouring dressing on a full plate of mango slaw with a gold fork on edge of ceramic plate.
      Mango Jicama Slaw
    • A clear glass bowl filled with tri color cole slaw and wooden tongs stuck in the slaw.
      Coleslaw Recipe (No Mayo)
    • A vegetable spring roll or rice paper roll cut in half showing the bright veggies inside with a ginger dipping sauce in a small bowl.
      Vegetable Spring Rolls

    Chip & Dip Easy Side Ideas

    Grab a bag of chips or some veggie crudites, and dip away! Crudités with Green Goddess Dip is an easy appetizer. 🥒🥕🫑🥦 Cut the fresh produce into sticks. And serve veggie cups with a purple cabbage "bowl" for a unique relish tray at your party.

    Onion Dip aka California Dip or Sour Cream Dip wins for easy sides for cookout parties. With only 2 ingredients! Made in minutes, serve with potato chips and assorted cut veggies. French onion dip is an easy appetizer with caramelized onions and fresh simple ingredients.🧅🥣

    Authentic Guacamole has fresh lime juice, and grated onion - one of my top guac secrets. Grab a few room temp ripe tomatoes for the chopped tomato as they add great flavor, with dashes of hot sauce, and spices to add just a little heat. 🥑🧅🌶🍅

    Avocado Salsa (aka Taco Sauce) is great to drizzle on Mexican foods. Try on tacos, burritos, and taquitos or served with tortilla chips as a dip. 🥑🧅💚

    • A cutting board with crudites and dip with bright colored vegetables cut into strips and sticks.
      Crudités With Dip
    • A lady dipping a potato chip into onion dip.
      Sour Cream Onion Dip
    • A blue glass bowl filled with guacamole and a chip stuck inside with a bowl of tortilla chips.
      How To Make Guacamole
    • A wood bowl with green avocado salsa taco sauce and blue corn tortilla chips on the table.
      Avocado Salsa

    Summer Cookout Desserts

    Every good party needs dessert side dishes cookout style. These are fresh takes on what to make for sweet side dishes!

    Have you ever tried grilled desserts? Bake a Grill Baked Blueberry Pie Recipe outdoors on your gas or charcoal grill. It works just like an indoor oven and keeps your house cool on scorching hot days. Top with ice cream or cool whip for an amazing summer dessert! 🫐🥧🔥

    Peach Cheesecake Pie is a 30-minute no-bake easy recipe. It has a crisp graham cracker crust, sweet cream cheese filling, and juicy summer peaches. Just grab 5 simple ingredients at the store. 🍑🥧

    A real fresh Strawberry Cake and no artificial ingredients like food coloring or jello! This cake is made with sweet juicy summer strawberries and topped with amazing strawberry buttercream frosting. 🍓🍰

    Bake a patriotic American Flag Cake with red, white, and blue marbled cake inside and bakery-style frosting. 🎂🍰🇺🇸

    • A blueberry pie that is baked outdoors on a grill with a flag shaped pie crust.
      Blueberry Pie Baked Outdoors
    • A slice of peach pie on a white plate with a silver fork on a red white check tablecloth.
      Peach Cheesecake Pie (No-Bake)
    • A freshly baked and decorated strawberry cake with real strawberries as decorations.
      Fresh Strawberry Cake
    • An American flag cake decorated with blueberries, raspberries, and white frosting with a patriotic star towel.
      American Flag July 4th Cake

    Cookout Foods FAQ

    How do you keep cookout side dishes cold?


    Buy platters that stay chilled for up to two hours. They also can be heated in the winter for parties and holiday celebrations!

    Pack up leftovers for guests to take with them, and keep chilled until people head home.

    What are the best ways to keep food safe at cookouts?


    -If serving outside, plan out to keep food protected from flying insects with food tents. And chill salads especially if they have meat, eggs, or mayonnaise.
    -Keep dishes out of the direct sun if possible. 
    -For outdoor parties, make sure to get food back in the fridge after about an hour on hot days to keep it safe.

    BBQ Potato Salad

    More Summer Party Food

    Today's forecast calls for bridal showers! Honor the Bride-To-Be with this complete guide of over 50+ Bridal Shower Food Ideas to host an elegant party plus planning tips.

    Favorite Football Party Food recipes go down so well with creative cocktails to sip or ice cold beers to drink.

    Which of these 40 Best Puff Pastry Recipes will you choose? Every impressive appetizer and delicious dessert in this collection is wrapped with irresistible golden flaky layers of freshly baked pastry and creative filling combinations.

    Take a peek at my other ultimate Cookout Menu chock full of everything you need to host a fantastic party including cookout food ideas and all the best grill recipes. There are grilled meat recipes, tips on juicy burgers, spiral grilled hot dogs, condiments, drinks, desserts, potluck salads, and more! Plus tons of creative ideas on how to host a fun party with everything you will need, and inspirational cookout ideas to plan your Summer BBQ party.

    100+ July 4th Recipes for your cookout menu including grilling recipes, side dishes, and picnic food ideas with drinks, desserts, and more!

    Look through 42 of the Best Burger Sides! These recipes will help you throw a legendary backyard cookout or July 4th BBQ with clever Summer party food ideas and pick the perfect side dish for hamburgers.

    • A pink and white cake with buttercream flowers on a cake plate with glasses of pink champagne at a bridal shower.
      50+ Bridal Shower Food Ideas
    • A football shaped cheese ball coated with crumbled bacon, green onions, and cheddar cheese and white cheese to look like laces on the football surrounded by crackers on a platter.
      75+ Football Food Recipes
    • A number of puff pastry appetizers, dinner ideas, and desserts in a collection.
      40 Puff Pastry Appetizer Recipes
    • A square collage of colorful grilled food, side dishes, desserts, and drink recipes to serve at an outdoor bbq cookout.
      75+ Cookout Recipes & BBQ Party Ideas
    • A graphic showing lots of food for July 4th including cheeseburgers, corn, and baked beans.
      100+ July 4th Recipes
    • A grilled burger loaded with toppings and served at a cookout in paper lined plastic baskets.
      42 Amazing Burger Sides For Cookouts

    Did you love this recipe? We would love to hear from you! If you make this recipe and love it, give it a 5-star rating ⭐⭐⭐⭐⭐ with a comment. THANK YOU!! Follow Delicious Table with my free newsletter and share this recipe with your friends on Facebook, Pinterest, and Instagram.

    A collage of many colorful side dishes to make during cookout season including potluck salads, baked beans, fruit salad, summer desserts and more.
    Print

    30+ Cookout Sides - BBQ Potato Salad

    These are the best side dishes to make during cookout season! This ultimate list has 30+ Cookout Side Dish Recipes that will inspire you to create the yummiest food for family gatherings, summer picnics, outdoor cookouts, backyard barbecues, or church potlucks.
    Course Salads & Dressing
    Cuisine Salad
    Keyword barbeque potato salad, bbq potato salad, cookout potato salad, cookout side dishes
    Prep Time 10 minutes minutes
    Cook Time 20 minutes minutes
    Total Time 30 minutes minutes
    Servings 10
    Calories 336kcal
    Author Lisa Hatfield

    Ingredients

    • 4 pounds Russet potatoes (6-8 medium potatoes)
    • ½ cup BBQ sauce your favorite brand
    • ½ cup sour cream
    • ½ cup ranch dressing
    • 2 tablespoons Worcestershire sauce
    • 2 tablespoons red wine vinegar
    • ½ teaspoon black pepper
    • 1 teaspoon garlic powder
    • 1 teaspoon smoked paprika (not hot)
    • 4 whole green onions sliced thin
    • 1 cup crumbled bacon 10 strips bacon
    • 4 ribs celery diced
    • 1 cup grated cheddar cheese

    Instructions

    • Heat a large pot of water on the stove. Wash the potatoes, and cut into 1" pieces. Boil the potato about 20 minutes until fork tender. drain and place into a large bowl.
    • While the potatoes are boiling, mix the sauce. In a medium bowl, mix BBQ sauce, sour cream, ranch dressing, Worcestershire sauce, red wine vinegar, black pepper, garlic powder, and smoked paprika.
    • Toss the sauce in with the cooked potatoes, then add the chopped green onions, diced celery, crumbled bacon, and grated cheddar cheese.
    • Keep refrigerated, and tastes even better the next day!

    Video

    Notes

    how to keep cookout sides cold?

    Buy platters that stay chilled for up to two hours, they also can be heated in the winter for parties and holiday celebrations!
    Pack up leftovers for guests to take with them, and keep chilled until people head home.

    what are the best ways to keep food safe at cookouts?

    If serving outside, plan out to keep food protected from flying insects with food tents, and chill salads especially if they have meat, eggs, or mayonnaise.
    Keep dishes out of the direct sun if possible. 
    For outdoor parties, make sure to get food back in the fridge after about an hour on hot days to keep it safe.

    Nutrition

    Calories: 336kcal | Carbohydrates: 42g | Protein: 12g | Fat: 14g | Saturated Fat: 6g | Polyunsaturated Fat: 3g | Monounsaturated Fat: 2g | Cholesterol: 37mg | Sodium: 739mg | Potassium: 901mg | Fiber: 3g | Sugar: 7g | Vitamin A: 401IU | Vitamin C: 12mg | Calcium: 135mg | Iron: 2mg

    Italian Gremolata Condiment + 15 Uses!

    [heart_this] · Aug 8, 2023 · 2 Comments

    A blue vintage bowl filled with chopped Gremolata with a silver spoon.

    Gremolata is a savory, flavor-packed Italian condiment topping. Use this healthy garnish on grilled vegetables, pasta dishes, meat, chicken, fish, and salads, and is classic on osso buco!

    This gremolata recipe has buttery toasted pine nuts, tangy capers, sweet bell pepper, fresh basil, lemon zest, and parsley. Together they create a light, fresh, and clean taste to compliment so many dishes...

    Gremolata Recipe

    The main reasons to make gremolata are you can make this from ingredients you typically might have on hand, try different delightful combinations, and it adds incredible, healthy, deliciousness.

    Gremolata Topping Ingredients

    • flat-leaf parsley
    • bell pepper yellow, orange, or red
    • capers
    • fresh basil leaves
    • toasted pine nuts
    • pistachios
    • white wine vinegar (or swap in red wine vinegar)
    • lemon zest (or citrus zest from Meyer lemons, limes or oranges all work!)
    • pinch salt and black cracked pepper
    Fresh produce and ingredients on a kitchen counter to make a gremolata recipe.

    Making Gremolata

    1. On a cutting board: With a good chef’s knife, finely chop bell pepper, parsley, basil, pine nuts/pistachios, and chives. Add to a small bowl as you go. Add the white-white vinegar, sea salt, pepper, and the zest of a lemon using a grater. Mix well.
    2. Food Processor/Blender: Add all the ingredients to a food processor or blender to chop and mix all the ingredients - this produces a finer gremolata.
    3. You can make the gremolata a few hours ahead, cover with plastic wrap, and keep it chilled in the refrigerator until ready to use in an airtight container. You can also sprinkle on some good grated parmesan cheese using a Microplane grater.
    A clear glass bowl filled with chopped ingredients to make gremolata.

    Top Gremolata Tips

    You can prepare the Gremolata ahead by a few hours, just cover it and keep chilled.

    If you want a finer mix, use a food processor or blender like a Vitamix instead of a sharp knife. Chopping by hand works great and is what I did in the photos you see here in this post.

    Use a few ingredients you have on hand and try some new variations if you wish, like these...

    Gremolata Recipe Variations and Additions

    Gremolata usually includes a grated lemon peel, although the zest from other citrus fruits lime, orange, and grapefruit are also tasty. There are also other variations, such as leaving out the herbs or adding herbs like parsley, cilantro, mint, and sage.

    • garlic
    • grated fresh horseradish
    • minced shallot
    • Pecorino Romano cheese
    • anchovy
    • bacon
    • chives
    • orange or grapefruit zest
    • rosemary
    • walnuts, pecans, or cashews

    What Can I Use Gremolata On?

    In all honesty, I couldn't stop eating the gremolata with Grilled Asparagus I made. I skipped the rest of the dinner I had made, it was so delicious!

    • Spoon over Grilled Salmon
    • Top a grilled steak or Roasted Potatoes
    • It's a classic on Osso Bucco, with Grilled Lamb Chops, or veal shanks
    • Mix into Meatballs for more texture and a bright flavor
    • Add into Salads, drizzle with olive oil and lemon juice or vinegar
    • Use it in Pressed Italian Sandwiches for a picnic
    • Mix into fresh pasta dishes like Fettuccine Alfredo
    • Stir into Artichoke Risotto
    • Spoon over Roasted Vegetables, Asparagus, Brussel sprouts, or carrots
    • A wooden platter with cedar wrapped salmon, asparagus, and lemon butter.
      Cedar Grilled Salmon
    • A black cast iron pan with risotto made from arborio rice topped with artichokes and pine nuts.
      Parmesan Risotto
    • A white plate filled with cooked asparagus topped with gremolata garnished with lemon wedges.
      Stovetop Grilled Asparagus
    • A fork holding twirled fettuccine out of a large skillet.
      Healthy Alfredo Sauce

    Green Sauces & Toppings Around The World

    Cultures around the world have versions of green sauce or topping. In fact, the Romans had a green sauce for fowl dating back to the 5th century. Typically, these green sauces are cold uncooked herbed sauces made from chopped herbs and other ingredients.

    The French have sauce verte, in Mexico, they have many versions of Salsa Verde. The US Mexican salsa verde, though also called a "green sauce", is instead based on tomatillos and is commonly cooked; the New Mexico version uses a green chile base.

    The British use a mint sauce, in Argentina they are famous for the chimichurri sauce, and the Spanish salsa verde and Italian pesto sauce have been used for centuries. And in Peru, they make a Peruvian Green Sauce that is incredible called Aji Verde. I had it on roasted chicken, and it is sublime!

    Gremolata FAQ

    What is Gremolata?


    The Italian pronunciation [ɡremoˈlaːta] or Italian pronunciation [ɡremoˈlaːda] is a chopped herb condiment classically made of lemon zest, garlic, and parsley. It is traditionally a topping with the Milanese braised veal shank dish ossobuco alla milanese.

    What are the differences between Gremolata, Pesto, and Chimichurri Sauces?


    Chimichurri is lighter than Pesto and is more of a marinade sauce and has finely chopped parsley, minced garlic, olive oil, oregano, red pepper flakes, and white or red wine vinegar. In the red version, tomato, and red bell pepper are the ingredients.

    The original pesto alla Genovese, the quintessential Italian herb sauce pesto recipe. It has Genovese basil, coarse salt, garlic, Ligurian extra virgin olive oil (Taggiasco), European pine nuts (sometimes toasted), and a grated cheese like Parmigiano Reggiano or Grana Padano, and pecorino Sardo or pecorino romano.

    Gremolata is quite chunky and not a blended sauce. It is a chopped-herb condiment. It has grated lemon zest, finely chopped garlic, parsley, and other ingredients like capers, basil, parsley, and bell pepper. Typically the recipes don't call for olive oil.

    More Sauces & Condiment Recipes

    If you enjoy spicy foods, this Creamy Balsamic Horseradish Sauce is a great compliment to savory dishes like thick slices of Beef Roast, prime rib, Corned Beef, or to slather on beef tenderloin Roast Beef Sandwiches.

    Remoulade is a popular condiment and a classic dip for fried foods. Usually paired with seafood, cold meats, and fried foods like French fries and fried green tomatoes.

    Fresh Cocktail Sauce made in minutes for easy appetizers like Shrimp Cocktail. Dollop this on oysters, clams, crabs, and more.

    Make Burger Sauce at home, this recipe is very similar to the In-N-Out Spread from Southern California. Hamburgers go from boring to spectacular with all the toppings, and I have lots of ideas to make your BBQ cookout party amazing.

    • Looking down into a wooden bowl with creamy balsamic horseradish sauce swirled in the center, and a wooden spreader resting on the edge of the bowl with a rustic beige tablecloth underneath and on a woven rattan placemat.
      Creamy Balsamic Horseradish Sauce
    • A vintage spoon scooping up remoulade sauce to use on a recipe.
      Remoulade Sauce
    • Cocktail Sauce
    • A messy grilled burger topped with lettuce, tomato, cheese, pickles and burger sauce in a basket with a bottle of burger sauce.
      Burger Sauce

    Did you love this recipe? We would love to hear from you! If you make this recipe and love it, give it a 5-star rating ⭐⭐⭐⭐⭐ with a comment. THANK YOU!! Follow Delicious Table with my free newsletter and share this recipe with your friends on Facebook, Pinterest, and Instagram.

    A blue vintage bowl filled with chopped Gremolata with a silver spoon.
    Print

    Gremolata Recipe Plus 15+ Recipe Ideas

    Gremolata is a flavor-packed condiment topping from Italy for vegetables, pasta dishes, fish, meat, salads, and classically used on osso buco.
    Course Side Dishes & Vegetables
    Cuisine American, Italian
    Keyword condiment, gremolata, gremolata recipe
    Prep Time 20 minutes minutes
    Total Time 20 minutes minutes
    Servings 8
    Calories 87kcal
    Author Lisa Hatfield

    Equipment

    • Vitamix Blender
    • Epicurean Non-Slip Cutting Board
    • Chef Knife
    • Microplane Grater

    Ingredients

    • 1 bunch flat-leaf parsley
    • 1 bell pepper yellow, orange, or red
    • 2 tablespoons capers
    • ¼ cup fresh basil leaves
    • ½ cup toasted pine nuts
    • ¼ cup pistachios
    • 1 tablespoon white wine vinegar
    • 1 lemon zest
    • pinch salt and black cracked pepper
    US Customary - Metric

    Instructions

    • On a cutting board: With a good chef’s knife, finely chop bell pepper, parsley, basil, pine nuts/pistachios, and chives, add to a bowl as you go. Add the white-white vinegar, sea salt, pepper, and zest of a lemon. Mix well.
      OR USE
      Food Processor/Blender: Add all the ingredients to a food processor or blender to chop and mix all the ingredients - this produces a finer gremolata.
    • You can make the gremolata a few hours ahead, cover with plastic wrap, and keep it chilled in the refrigerator until ready to use in an airtight container. You can also sprinkle on some good grated parmesan cheese using a Microplane grater.
    • You can also sprinkle on some good grated parmesan cheese using a Microplane grater.

    Video

    Notes

    Top Gremolata Tips

    You can prepare the Gremolata ahead by a few hours, just cover it and keep chilled.

    If you want a finer mix, use a food processor or blender like a Vitamix instead of a sharp knife. Chopping by hand works great and is what I did in the photos you see here in this post.

    Use a few ingredients you have on hand and try some new variations if you wish.

    Variations and Additions

    • garlic
    • grated fresh horseradish
    • minced shallot
    • Pecorino Romano cheese
    • anchovy
    • bacon
    • chives
    • orange or grapefruit zest
    • rosemary
    • walnuts, pecans, or cashews

    More Gremolata Uses

    • Spoon over grilled salmon
    • Top a grilled steak
    • It's a classic on Osso Bucco
    • Mix into meatballs for more texture and a bright flavor
    • Add into salads, mix with olive oil and lemon juice or vinegar and top a salad!
    • Use it in a pressed sandwich for a picnic
    • Mix into fresh pasta dishes like fettuccine alfredo
    • Stir into risotto
    • Spoon over roasted vegetables, asparagus, Brussels sprouts, or carrots
     

    Nutrition

    Calories: 87kcal | Carbohydrates: 4g | Protein: 2g | Fat: 8g | Saturated Fat: 1g | Sodium: 60mg | Potassium: 165mg | Fiber: 1g | Sugar: 1g | Vitamin A: 1127IU | Vitamin C: 29mg | Calcium: 19mg | Iron: 1mg

    75+ Cookout Recipes & BBQ Party Ideas

    [heart_this] · Aug 4, 2023 · 5 Comments

    A square collage of colorful grilled food, side dishes, desserts, and drink recipes to serve at an outdoor bbq cookout.

    Last Updated November 16th, 2025 at 09:09 am by Lisa

    Take a look at 75 great cookout recipes, plus tips and hacks for your outdoor BBQ party. This complete guide has all the best recipes for backyard cookouts including grilled classics, gorgeous entertaining options, fun drinks, cool desserts, make-ahead salads, easy potluck sides, and more for your outdoor parties!

    Cooking outdoors is an American tradition in warmer weather, especially in Summertime. And one of the best parts of life is grilling and relaxing with good food, a cool drink, friends, and family...

    All the classic main dishes are here like Hamburgers with Burger Sauce and amazing seasoning, Hot Dogs with Relish, and fancier grill master recipes for grilled Lamb Chops, Shish Kabobs, and more.

    You will find crowd-favorite recipes and side dishes like Cowboy Baked Beans, a side of corn like this Grilled Corn on the Cob, 7 Layer Salad, Macaroni Salad, and Coleslaw. And cool Summer Salads galore including a cool, refreshing Watermelon Salad, Pasta Salad, and Loaded Potato Salad.

    So fire up the charcoal, gas grill, or smoker, and throw an absolutely spectacular party with these cookout recipes for a July 4th barbeque party, Memorial Day, or an end-of-Summer Labor Day pool party!

    Cookout Recipes & BBQ Party Ideas
    Table Of Contents

    • Main Course Summer Cookout Classics
      • Grilled Hamburgers
      • Grilled Hot Dogs
      • Gorgeous Grilled Recipes
      • Pork BBQ Recipes
      • Fancy Grilled Lamb
      • Summer Cocktails And Drinks
    • Condiments And Dipping Sauces
    • Seasoning Mixes And BBQ Rub
    • Pickles And Pickled Recipes
    • Party Food And Grilled Sides
    • Hot Appetizer Ideas
    • Potato Salads And Slaw Recipes
    • Summer Meal Salads
    • Refreshing Salads
    • Make Ahead Easy Cold Salads
    • All American And Patriotic Flag Desserts
    • Desserts With Seasonal Fruits
    • Frozen Desserts
    • Ice Cream Desserts
    • Backyard BBQ House Party
      • Cookout Party Checklist
      • Planning
      • Food Serving
      • Chill Foods
      • Decorate
    • Cookout FAQ
    • Cookout Food Safety
    • More Party Food Recipe Collections

    Main Course Summer Cookout Classics

    Grilled Hamburgers

    The easiest way to entertain is to serve Grilled Hamburgers and arrange a platter of well-Seasoned Burger Patties with all the yummy toppings. Everyone can have their burger just the way they like them, with melted cheese, Burger Sauce, pickles, lettuce, tomatoes, and butter-grilled buns. Grill the BEST burgers ever right at home, with delicious flavors and a true summer staple! 🍔🔥

    Try my oven Baked Hamburgers, which are small, great for kids, and are delish. 🍔🇺🇸 And take a look at 42 Hamburger Side Dish Ideas that go great with or on burgers! 🍔🍔🍔

    • A person holding a messy grilled burger topped with melted cheese, burger sauce, lettuce, tomato, and pickles.
      The Best Cheeseburger
    • Mini cheeseburgers with melted cheese, tomato, and lettuce with American flag toothpick decoration on top.
      Cheeseburger Sliders
    • A grilled burger loaded with toppings and served at a cookout in paper lined plastic baskets.
      42 Amazing Burger Sides For Cookouts
    • A messy grilled burger topped with lettuce, tomato, cheese, pickles and burger sauce in a basket with a bottle of burger sauce.
      Burger Sauce
    A person holding a messy grilled burger topped with melted cheese, burger sauce, lettuce, tomato, and pickles.
    A graphic showing how to butter and toast hamburger buns and grill the patties on a grill with American cheese.

    Grilled Hot Dogs

    Why make cut spirals into Hot Dogs? Well, they get nice nooks and crannies to hold more toppings. And they look fancy for your cookout!

    Make classic or Spiral Grilled Hot Dogs. Learn the secret to thick Hot Dog Chili to slather all over these dogs plus a recipe for a crunchy Relish. 🌭

    1. Push each hot dog on a metal skewer, and run a sharp knife at an angle scoring the hot dog into a spiral section all the way down each hot dog. 
    2. PRO TIP: Jumbo hot dogs work better but regular hot dogs are fine too.
    3. Grill dogs on an outdoor grill or in a cast iron grill pan until cooked. Load onto a hot dog bun with toppings, and serve in a food basket lined with paper.
    • A red plastic food basket lined with paper holding a loaded grilled hot dog.
      Spiral Grilled Hot Dogs
    • A game day food table with chili dogs loaded with relish, cheese, and onions.
      Hot Dog Chili
    • A small white bowl with homemade relish in to top hot dogs in paper lined baskets.
      Homemade Relish
    A white bowl filled with hot dog relish topping and red plastic baskets filled with grilled hot dogs.

    Gorgeous Grilled Recipes

    Huli Huli Chicken is wildly popular in Hawaii using a rotisserie turn method for each grilled chicken breast. Recreate the same huli marinade and infuse these char-grilled chicken breasts with deep tropical flavors!🍗🔥 Plus get my top tips to carve Pineapple Bowls. 🔪🍍

    Gorgeous Salmon Cedar Wraps with asparagus, and zucchini ribbons, and topped with melted Lemon-Dill Butter are the perfect party food idea. These are super easy to make ahead for entertaining or a healthy family dinner party! 🐟🍋

    Shish Kabobs (aka Shish Kebabs or Beef Kabobs) have a beef marinade made with pineapple and dark rum. Rum is optional. Prep skewers and have them ready to go when guests arrive, your cookout will be one to remember.

    • Two pineapple halves carved out filled with coconut rice, grilled pineapple and huli huli chicken.
      Huli Huli Chicken
    • A wooden platter with cedar wrapped salmon, asparagus, and lemon butter.
      Cedar Grilled Salmon
    • A wooden platter filled with Shish Kabob grilled skewers.
      Shish Kabobs

    Pork BBQ Recipes

    There are endless side dishes that will go well with ham and pulled pork. Here are a few classic favorites. Potato Salad, Macaroni Salad, Picnic Pasta Salad, Coleslaw, or Cowboy Baked Beans. Make a few of these recipes and you have a rocking backyard barbecue party!

    Oven Roasted Pulled Pork is moist and super savory! Season with a homemade rub and cook with these slow-roasting secrets.

    Slow Cooker Pulled Pork Sandwiches start with an easy crock pot version that is so juicy! Top each sandwich with coleslaw, pickle chips, and tangy barbeque sauce.

    Cuban Sliders are golden brown with a butter Dijon sauce and topped with melted Swiss cheese, shredded pork and ham, and pickles. Serve a tray of these slider sandwiches at your backyard bbq!

    Make a Twice Double Smoked Spiral Cut Ham just like a smokehouse pit boss. This classic ham has an amazing smoky flavor with an apple cider orange honey glaze! And there are so many ways to use the leftovers...

    • A white casserole dish with oven roasted pulled pork shredded and ready to eat in tacos or a recipe for dinner.
      Oven Roasted Pulled Pork
    • Red white check paper lined basked holding a pulled pork sandwich topped with coleslaw.
      Slow Cooker Pulled Pork
    • Three pulled pork sandwiches on Hawaiian buns with pickles, cheese and ham on a cutting board.
      Pulled Pork Sliders
    • A double smoked ham on a outdoor smoker ready to eat.
      Double Smoked Ham With Orange Honey Glaze

    Fancy Grilled Lamb

    An elegant easy entertaining grill recipe ready in 45 minutes, impress your family and guests with this Cabernet-Rosemary Grilled Rack of Lamb sliced into Lamb Chops served with refreshing Watermelon Skewers. 🐑 🍉

    Grilled Lamb Chops are rubbed and seasoned with mint salt and paired with sweet juicy Peaches for an easy side. Top with Parmesan Mint Pesto, for a gorgeous party food idea! 🍖🍑🌿

    Gyros with Tzatziki Sauce are great for summer cookout dinner. Wrap a pita around grilled lamb meatballs with chopped tomato, cucumber, and a little parsley. The grilled lamb kabobs are sublime with the cool veggies and sauce all tucked in a pita... 🥙

    • A beautiful grilled rack of lamb on a white platter with rosemary sprigs and watermelon skewers.
      Cabernet Rosemary Grilled Rack Of Lamb
    • A white platter filled with grilled lamb chops topped with mint pesto and grilled peaches.
      Grilled Lamb Chops
    • Greek gyros on parchment paper topped with lamb meatballs cucumber and tomatoes.
      Lamb Gyros With Greek Tzatziki Sauce

    Summer Cocktails And Drinks

    Citrus And Fruit Drink Ideas

    These St. Germain Cocktails are easy spritzers with Elderflower liqueur, Prosecco, hibiscus tea, and a splash of club soda over crushed ice. 🌸🍾

    Ice cold Blueberry Lemonade captures Summer in every sip. This tasty lemonade can be made in minutes with homemade blueberry syrup, fresh lemon juice, and sweet honey. 🫐🍋

    Limoncello aka Lemoncello is a delicious icy cold Italian lemon liqueur, perfect to serve on hot summer evenings. 🍋

    A Frozen Floral Ice Bucket is the perfect way to keep wines cool for Spring and Summer entertaining!  A stylish and pretty way to serve icy cold bottles of sparkling water, wine, or champagne outdoors. 🧊🌺🍾

    Strawberry Cocktails are wonderful for romantic date nights, or at a Summer barbecue, and are low carb, low sugar, and low-calorie. 🍓🍹

    One sip of these Spicy Bloody Marys, and you will never want the bottled mix again! These have the right amount of heat and bolder spices than boring tomato juice mixes.

    • Two glasses filled with St Germain cocktails garnished with tiny purple orchids and white jasmine flowers.
      St. Germain Cocktails
    • Mason jar handled glasses with blueberry lemonade garnished with blueberries, mint, and lemons halves.
      Blueberry Lemonade
    • Two small glasses of icy cold limoncello (lemoncello) ready to sip.
      Limoncello
    • The side of a frozen floral ice bucket with pink and purple flowers and a bottle of wine inside chilling.
      Party Ice Bucket
    • Close up view of strawberry cocktails with heart shaped garnish made from a strawberry on the rim.
      Strawberry Cocktails
    • A pitcher of bloody marys with two drinks garnished with olives, pepperoncinis, and beef sticks.
      Spicy Bloody Marys

    Made with sweet summer fruit and white wine, this White Wine Sangria has strawberries, raspberries, pineapple, and blueberries. Serve this light and refreshing drink all summer long. ☀️🍓🫐🍍

    Easy Margaritas made with 3 simple ingredients in a pitcher, you won't believe how good this margarita recipe tastes. 🍹🧊

    A festive, healthy, and refreshing Hibiscus Cocktail to enjoy with appetizers without the guilt from sugar, carbs, and calories...🌺🫖

    • Two tall glasses of white sangria loaded with blueberries, raspberries, strawberries, and apple star garnish.
      White Wine Sangria
    • Blue rimmed margarita glasses with margaritas in them on ice cubes with sliced lime garnish.
      Easy Limeade Margaritas
    • A decorative etched cocktail glass with a red hibiscus keto cocktails garnished with an orange slice.
      Hibiscus Cocktails

    Tropical Island Vacation Drinks

    Straight from my trip to Cuba, this Mojito is 100% an authentic Cuban Mojito! Learn the secret ingredient in these famous Cuban cocktails and what secrets make them totally authentic.🌿🏝

    Make these CoronaRita Margaritas at home! They have a mini “Coronita” turned upside down into a slushy margarita. 🍻🍹

    Cuba Libre is a famous Cuban cocktail similar to Rum and Coke. On my trip to Cuba, I learned how to make these famous Cuban drinks! 🥃🥤

    Micheladas are light, refreshing clamato juice (tomato juice) and Mexican beer cocktails. A popular drink in Mexico is often enjoyed on hot days or in the morning after a wild night out. ☀️🌶🍻🍅

    • Four Havana club glasses filled with mojitos garnished with mint.
      Authentic Mojito Recipe
    • A Cinco de Mayo party with frozen margaritas called Coronaritas, guacamole, and chips on a green table.
      CoronaRita Margaritas
    • Four tall Havana Club glasses with Cuba Libre cocktails garnished with lime on a wood tray.
      Cuba Libre Cocktails
    • A tall glass filled with michelada garnished with green chili and spice coated lime slice.
      Micheladas Mexican Beer Cocktails

    Condiments And Dipping Sauces

    Serve all kinds of condiments at your cookout like relish, burger sauce, and Refrigerator Dill Pickles. and take a look at my Grill and BBQ seasoning, goes great on grilled ribeye steaks and burgers.

    Make Burger Sauce at home, this recipe is very similar to the In-N-Out Spread from Southern California. 🍔🍟🥤

    Made in minutes, just pop the Buttermilk Ranch Dressing right in the fridge to enjoy all week. 🥗🥣

    Avocado Salsa (aka Taco Sauce) can be drizzled on Mexican food tacos, burritos, taquitos, or served with tortilla chips. 🥑

    • A person pulling a dill pickle chip out of a clear glass canning jar of homemade pickles.
      Refrigerator Dill Pickles
    • A messy grilled burger topped with lettuce, tomato, cheese, pickles and burger sauce in a basket with a bottle of burger sauce.
      Burger Sauce
    • A large Mason jar filled with ranch dressing made at home with a small serving bowl and spoon.
      Homemade Buttermilk Ranch Dressing
    • A wood bowl with green avocado salsa taco sauce and blue corn tortilla chips on the table.
      Avocado Salsa

    Creamy Balsamic Horseradish Sauce is one of the most amazing creamy sides on thick slices of Roast Beef for dinner, on prime rib, or to slather on Roast Beef Sandwiches. 🥣

    Remoulade Sauce is a popular condiment or dipping sauce. It is usually paired with seafood, cold meats, and fried foods like French fries and Fried Green Tomatoes. 👩‍🍳🥣

    Get one of these 25+ amazing New Mexico Hatch Chile Recipes with tons of tips on how to roast with a smoky flavor, prep, and freeze them at home. 🌶🔥🌶

    • Looking down into a wooden bowl with creamy balsamic horseradish sauce swirled in the center, and a wooden spreader resting on the edge of the bowl with a rustic beige tablecloth underneath and on a woven rattan placemat.
      Creamy Balsamic Horseradish Sauce
    • A vintage spoon scooping up remoulade sauce to use on a recipe.
      Remoulade Sauce
    • Showing how to remove seeds from roasted Hatch Chiles to use them in recipes.
      Hatch Chiles (80+ Recipes)

    Seasoning Mixes And BBQ Rub

    Burger Seasoning makes the juiciest flavor-filled Grilled Hamburgers. Mix up a batch of hamburger seasoning for your next cookout, grill, or BBQ party. 🍔

    Grill and BBQ Rub is an easy spice mix and seasoning to make at home. Use it as a rib rub, steak rub, dry rub for chicken, or dry rub for pork. 🧂

    Make homemade Cajun Seasoning with common easy-to-find spices. Use on chicken, shrimp, steaks, fries, or classics like jambalaya and gumbo.

    • The steps to season hamburgers, with them shaped on parchment paper as burgers before grilling.
      Grilled Hamburger Seasoning
    • A large pork loin roast with a lot of dry rub seasoning pouring over the top.
      The Best BBQ Dry Rub
    • A small glass mason jar filled with Cajun seasoning with a label and it in a wooden bowl.
      Cajun Seasoning Recipe

    Pickles And Pickled Recipes

    Refrigerator Jalapeno Dill Pickles with jalapeno zing, garlic, and fresh dill. They require no canning and make perfectly crisp and crunchy dill pickles. 🥒🔪🧄

    Mexican Pickled Red Onions are an easy recipe pickled in lime juice with no canning skills needed. Ready in 30 minutes to top hamburgers, hot dogs, salads, and pulled pork!

    Pickled Green Beans also called Dilly Beans, are a quick pickle recipe that requires no canning. Jazz up relish trays, pop them into Bloody Marys, or toss pickled beans into cool salads!

    • A person pulling a dill pickle chip out of a clear glass canning jar of homemade pickles.
      Refrigerator Dill Pickles
    • Mexican pickled red onions in a clamp jar and white bowl with chiles and limes on a colorful striped cloth.
      Mexican Pickled Red Onions
    • A clear glass jar filled with pickled green beans on a cutting board.
      Pickled Green Beans (Dilly Beans)

    Party Food And Grilled Sides

    Grilled Corn cooks for 10 minutes. Fresh corn can be prepped the day before a cookout with endless flavor options for guests. 🌽🔥 And any leftover corn makes a great corn salad.

    Cowboy Baked Beans have crispy applewood smoked bacon and browned hamburger cooked in a slow cooker or in the oven. An awesome party food recipe to make ahead for a large hungry crowd. 🤠🥫🥓

    This Mexican Street Corn Recipe (aka Elotes) has fresh summer corn grilled and brushed with a creamy cilantro sauce. Sprinkle with Cotija cheese and chile powder, and garnish with cilantro. 🌽🌿

    • Ears of grilled corn on a white platter seasoned with melted butter on top.
      Grilled Corn On The Cob
    • A large white spoon scooping a serving of cowboy baked beans out of a casserole dish.
      Cowboy Beans
    • Several grilled elotes Mexican street corn on the cob sprinkled with Cotija cheese on a platter.
      Mexican Street Corn (Authentic Elotes)

    Hot Appetizer Ideas

    When it comes to party Chicken Wings, we want tons of flavor, tender juicy meat, a crispy coating, and a deep-fried texture without going through the trouble of frying, and are one of the most popular appetizer ideas! Jalapeno Popper Dip is always a hit! Make this melty hot appetizer for parties with simple pantry ingredients and scoop up with large corn chips. It's a take on the famous grilled jalapeno poppers!

    These are the best Fried Green Tomatoes, and one of the most famous Southern recipes of all time. Each slice has a crunchy crust to dip into a creamy remoulade, buttermilk ranch dressing, or comeback sauce. There are a few secrets to frying them perfectly golden crisp, and the three dipping sauces take these right over the top!

    • A white platter filled with crispy chicken wings and one dipping into buffalo sauce.
      Crispy Chicken Wings
    • A white oval casserole dish with a hot dip being scooped out with a large corn chip.
      Jalapeno Popper Dip
    • A white long plate with a stack of fried green tomatoes with remoulade and buttermilk ranch dressing.
      Fried Green Tomatoes

    Potato Salads And Slaw Recipes

    Potato Salad is a classic BBQ side dish. Loaded with crispy bacon and blue cheese. An awesome side for summer cookouts and potlucks. This is a great picnic food idea because it has no eggs or mayo. 🌿🥓🥔

    Cole Slaw with thin ribbons of vegetables and an easy vinegar dressing and no-mayo, is great on pulled pork sandwiches, with grilled hamburgers, or BBQ chicken. This coleslaw recipe works as a summer side dish for picnics and cookouts. 🥬 🥕

    A BBQ Potato Salad recipe with yummy flavors from your favorite bbq sauce, crumbled bacon, buttermilk ranch, crunchy celery, and cheddar cheese. Made with secret ingredients in place of mayo, this super creamy potato salad is inspired by one of America's favorite recipes, a loaded baked potato!

    Mango Jicama Slaw has sweet juicy mangos, crunchy jicama, and crisp green cabbage. And a sweet tangy mango-lime vinaigrette is one clean salad! 🥭🥗

    • A small white bowl filled with bacon potato salad garnished with crispy bacon.
      Bacon Potato Salad
    • A clear glass bowl filled with tri color cole slaw and wooden tongs stuck in the slaw.
      Coleslaw Recipe (No Mayo)
    • A large white bowl of BBQ potato salad garnished with cheddar cheese, bacon, and green onions on a red and white check gingham cloth.
      BBQ Potato Salad
    • Pouring dressing on a full plate of mango slaw with a gold fork on edge of ceramic plate.
      Mango Jicama Slaw

    Summer Meal Salads

    Whip up this easy Taco Salad recipe loaded with all the best Mexican food toppings and Catalina dressing. Plus get my two secret ingredients for the best taco meat. Then load with toppings like cheddar cheese, black beans, and sour cream. 🌮🥗

    The original Cobb Salad became famous in Los Angeles at the Brown Derby restaurant served with red wine vinaigrette French dressing loaded with chopped tomato, cubed chicken, crumbled bacon, diced avocado, chopped eggs, and topped with Roquefort cheese. Now you can make this famous iconic salad at home exactly how it was made back in the day in the golden age of Hollywood, California. 🌟🎬🥗

    A colorful Pizza Salad loaded with our favorite pizza toppings like mini pepperoni, black olives, mushrooms, tangy pepperoncini, tiny ripe tomatoes, and little balls of buffalo mozzarella cheese. 🍕🥗

    • A white plate full of taco salad topped with taco meat, grated cheese, Fritos, sour cream, black olives and tomatoes.
      Easy Taco Salad
    • A white square plate filled with colorful Cobb Salad made with chicken, eggs, avocados, tomatoes, and bacon.
      Cobb Salad
    • A plate full of pizza salad topped with mini pepperoni, mushrooms, mozzarella balls, pepperoncinis, and black olives with a artistic black fork on the edge of the plate.
      Pizza Salad

    Refreshing Salads

    Watermelon Salad is one of the most refreshing salads! It is easy to make and served from a watermelon bowl. A great summer salad for potlucks, BBQ cookouts, picnics, at the beach, or by the pool. 🍉🌿

    Try this Frozen Wedge Salad with Pistachio-Avocado Dressing on a hot summer day. 🥬🥑💚

    Broccoli Salad with crisp green apples, crunchy broccoli, and grapes create this summer salad with a creamy 3-ingredient orange dressing. 🥦🍇

    • Looking down into a scooped out watermelon filled with rounded watermelon balls garnished with mint and feta cheese.
      Watermelon Salad
    • Wedge salad with avocado dressing drizzled on top with pistachios on a black slate board.
      Iceberg Wedge Salad
    • A turquoise salad bowl filled with broccoli salad with colorful grapes and pistachios.
      Broccoli Salad

    Make Ahead Easy Cold Salads

    The easiest way to enjoy a potluck is to put this 7 Layer Salad Recipe together up to a day ahead! Have it ready to go to your party chilling in your fridge overnight complete with the dressing on top. People love cold dishes on hot days! 🥗🍅🥚

    An easy, simple recipe, this Pasta Salad has fresh herbs, bell peppers, and cheese. This is a mayo-less salad, perfect to serve at outdoor picnics or cookouts. 🧺🌿🥣 And the best thing is you can make it a Caprese pasta salad by adding in ripe tomatoes and basil in place of the bell peppers!

    The BEST Macaroni Salad recipe with chopped eggs, pickles, and PICKLE JUICE! A favorite old-fashioned recipe, and is a meal by itself! 🥣💛🌿

    • A glass trifle dish filled with 7 Layer Salad full of colorful ingredients.
      7 Layer Salad
    • A wooden bowl filled with pasta salad and wooden serving tongs.
      Easy Pasta Salad
    • Looking down on a white plate filled with macaroni salad and a silver fork.
      Classic Macaroni Salad Recipe

    All American And Patriotic Flag Desserts

    Need Fourth of July potluck ideas? Any of these pies or cakes are next level, and will wow everyone at the party with their patriotic spirit...

    Bake a Blueberry Pie right on your grill, just like an oven! Serve this grilled dessert all summer with vanilla ice cream at cookouts and July 4th. 🫐🥧🔥

    Flag Cake has patriotic red, white, and blue marble cake. Frost the cake with "bakery-style" cake frosting. So fluffy and not too sweet. 🍰🇺🇸

    Flag Pie (aka sheet pan or slab pie) is a patriotic dessert that serves 20 people. Serve as a July 4th dessert or for summer cookouts and picnics. This patriotic red, white, and blue baked pie is filled with easy blueberry and strawberry pie filling recipes. This sheet pan pie looks hard, but it's EASY, really easy. 🇺🇸🥧

    These M&M Sugar Cookies are decorated with red, white, and blue M&Ms, icing stripes, and star sprinkles. Great for beach days, picnics, summer parties, and the 4th of July. ❤️🤍💙

    S'more Chocolate Chip Skillet Cookies also called pizookies are the ultimate cookie dessert. Loaded with pieces of milk chocolate bars, semi-sweet chocolate chips, mini peanut butter cups, graham cracker shards, and toasted marshmallows all melted together into a gooey cookie. 🍪

    • A blueberry pie that is baked outdoors on a grill with a flag shaped pie crust.
      Blueberry Pie Baked Outdoors
    • A graphic loaded with July 4th desserts with red white and blue cakes, pies, and treats.
      100 Patriotic 4th of July Desserts
    • An American flag cake decorated with blueberries, raspberries, and white frosting with a patriotic star towel.
      American Flag July 4th Cake
    • A sheet pan filled with a flag pie made with strawberries, blueberries, and pie crust.
      American Flag Pie
    • A white plate filled with July 4th red white and blue cookies with icing and star sprinkles.
      Patriotic July 4th M&M Cookies
    • A cast iron skillet filled with a smore chocolate chip cookie with a fork inside.
      S'more Pizookie Skillet Cookies

    Desserts With Seasonal Fruits

    Fruity desserts are the best part of Summer, and most of us crave all kinds of fresh fruit desserts, cakes, pies, and popsicles!

    A Strawberry Cake recipe has strawberries baked in the cake and strawberry preserves in the buttercream and is a deliciously natural dessert. 🍰🍓

    Easy No-Bake Peach Cheesecake has a crisp graham cracker crust. Top with sweet whipped cream cheese filling and juicy ripe peaches.🍑🥧

    Apple Crumble Pie with homemade apple pie filling. This has "foolproof" pie crust and a crumble topping. Some people also call this pie recipe Dutch Apple Pie, Apple Crumb Pie, and even French Apple Pie. 🍏🥧🍋

    Bake a delicious Apple Crisp with a sweet crust, caramelized apple filling, and a streusel crumb topping. Serve this easy dessert after a nice family dinner, and it is fancy enough for the holidays or other special occasions!

    • A freshly baked and decorated strawberry cake with real strawberries as decorations.
      Fresh Strawberry Cake
    • A slice of peach pie on a white plate with a silver fork on a red white check tablecloth.
      Peach Cheesecake Pie (No-Bake)
    • A white pie dish with a slice of apple crumble pie, also known as a dutch apple pie with a crumbled topping and green apples in the background in a wood bowl.
      Dutch Apple Pie
    • Apple Crisp in a red bowl with a silver spoon, ice cream, and drizzled with caramel sauce.
      Apple Crisp

    Frozen Desserts

    This summer dessert is dairy-free, vegan, has no refined sugar, and real fruit! Summer Fruit Sorbet or "Nice Cream" is made with raspberries, strawberries, pineapple, and bananas, and served in real lemon cups with absolutely zero guilt. 🍋🍓🍍🍌

    Dipped in chocolate and rolled in chopped nuts and dried fruit, these Chocolate Bananas (aka choco bananas) are frozen dessert treats for hot summer days. 🍫🍌🥜

    Fruit Popsicles are one of the simplest recipes made with coconut water, strawberries, raspberries, and blueberries are refreshing low-sugar treats for hot summer days. 🍓🫐🧊

    • Bright yellow lemons carved out and filled with raspberry strawberry lemon sorbet as a summer dessert.
      Raspberry Lemon Sorbet
    • A small aluminum sheet pan with brown paper and 5 frozen bananas chocolate dipped and coated in nuts and dried fruit.
      Frozen Chocolate Covered Bananas
    • A single coconut water popsicle with strawberries, blueberries, and raspberries.
      Homemade Fruit Popsicles

    Ice Cream Desserts

    Make an ice cream cake this summer. This Oreo Ice Cream Cake has an incredible red velvet cookie crust. Layers of ice cream, pound cake, caramel, chocolate sauce, whip cream, and fun sprinkles. 🇺🇸🍦🎂

    Taste just like CHERRY PIE 5 ingredients create your own Cherry Pie Ice Cream Sandwiches. An easy ice cream treat that screams summer. 🍒🍦

    • An ice cream cake with a slice removed and covered in colorful sprinkles.
      Ice Cream Cake
    • A white platter with cherry pie ice cream sandwiches.
      Cherry Pie Ice Cream Sandwiches
    A lady holding a hamburger loaded with burger toppings at a party by the pool.

    Backyard BBQ House Party

    Gather your family, neighbors, and best friends, toss the floats in the pool, and chill the drinks! Let the good times roll...

    A white inflateable swan floating in a pool filled with red and blue July 4th beach balls.

    Cookout Party Checklist

    Start planning your backyard party with these inspiring ideas, tips, and hacks to make your cookout spectacular. Here is a basic checklist of things to gather and the easy way to get your party plans going. Be sure to try some new recipes, and have guests bring their favorite potluck dishes...

    • Main Course Items like Hamburgers, Hot Dogs, & Pulled Pork
    • Side Hot Dishes like Baked Beans & Grilled Corn
    • Cold Salads, Fruit Salad, Pasta & Potato Salads
    • Desserts, Cocktails, and Drinks
    • Condiments: Mayo, Ketchup, Mustard, Relish, & BBQ Sauce
    • Serving Trays - regular or ones that stay chilled 
    • Pop-Up Food Tents/Covers (keep critters off your food!) 🐜🐜🐜
    • Small Bowls
    • Serving Spoons
    • Grilling Tongs
    • Napkins
    • Utensils
    • Plastic Baskets/Paper Liners or Paper Plates
    • Red Solo Cups
    • Cooler/Ice
    • Beer, Wine, Drinks/Cocktails
    • Bottled Water
    • Iced Tea, Lemonade, or Soda
    • Chips, Dips, Pretzels, Snacks
    • Cookout, BBQ, and Grill Items
    • Pressed Sandwiches
    • Cocktails and Drinks
    • Desserts
    • Bottle opener/Corkscrew
    • Chinese Take Out Containers
    An American flag pie made with a blueberry filling cooling on a counter outside with a insect cover.

    Planning

    Plan for your number of guests, space to walk around the table, chairs, and places to sit in the shade. Set up folding tables and chairs, and borrow them from friends and neighbors.

    Food Serving

    A great way to stretch your budget is to look high and low for serving pieces you have-trust me you have great things to use. Find trays, baskets, and bowls, or buy inexpensive ones. 

    • Serve out of the heat if possible or cover food, and try to keep any salads chilled in warm weather or meat items covered.
    • Buy plastic food baskets, and cut parchment paper or buy liners. These are a great addition of party gear for serving any grilled foods like hamburgers and hot dogs. And all you are tossing out is the thin paper in the trash!
    • Have containers to send your good food and leftovers home with guests, people love it! I use inexpensive Chinese paper takeout containers or grocery store brands.
    • Use what you have to create different heights on your table if possible and to keep people moving around trying different dishes. I sometimes use boxes under pretty linens and tablecloths to create high and low places on the serving table.
    A watermelon carved out full of watermelon balls and topped with mint and feta cheese.

    Chill Foods

    • Serve salads in large chilled bowls on ice packs with a pretty towel covering the ice packs. 
    • Buy cold platters that stay chilled for up to two hours, I have a couple and love them. Also, these can be heated in the winter for parties and holiday celebrations!

    Decorate

    • Use fresh flowers, a large beverage container, succulents, herbs, and Summer decor pieces you love. For simple pretty table decorations, place flowers tied with ribbon in small jars.
    • Plan for outdoor lighting at your barbecue party. It can be strings of lights, lanterns with candles, pool orb lights, safe candles, or a fire pit.
    • Make a DIY Wine Ice Bucket with flowers frozen inside the ice. It is gorgeous and chills bottles of wine or champagne.
    • Pick fun summery linens, red and white check gingham cloths, florals, or cute summer prints. Use baskets, bowls, and platters in bright summer colors, or use colorful paper goods.
    • Use American flags, linens, flowers, and patriotic decorations in your table settings design. Shop for inexpensive items in dollar stores for patriotic décor and bbq party ideas or borrow things from friends or family!
    A red white and blue old Sam hat blowing in the wind on 4th of July.

    Cookout FAQ

    What is a cookout?

    A party or gathering where a meal is cooked and eaten outdoors. Some people in the US will call this a BBQ, although that is not a correct culinary term. In North Carolina, BBQ is pork or the whole hog slow-cooked and smoked for many hours. A true BBQ is actually smoking or cooking meats for long periods of time outdoors, and is actually a cooking method!

    What food is served at a Cookout?

    Popular cookout items include hamburgers, hotdogs, pork chops, chicken, and steaks. It is very popular to have other side dishes like salads, snacks, drinks, cocktails, and desserts.

    What is a Cookout vs a BBQ?

    Cookouts are outdoor parties where food is cooked on open flames of gas or charcoal grills. BBQ is an outdoor cooking method using fire and smoke to cook food, mostly meat like steak, pork, and beef. The techniques vary from direct and indirect heat using wood or charcoal usually for several hours. BBQ is a slang term (it is really a cooking method of low and slow smoking of meats) but used in many parts of America to generally describe any kind of outdoor grilling.

    Cookout Food Safety

    • If serving outside, it's a good idea to plan how to keep food protected from flying insects with food tents, and chill salads. Keep dishes out of the direct sun if possible. 
    • For outdoor parties in the Summer heat, make sure to get food back in the fridge after about an hour to keep it safe.
    • Reheat leftover dishes later in the day if people get hungry, and don't leave them out in the heat.
    • Pack up leftovers for guests to take with them, and keep them cold and chilled until people head home.

    More Party Food Recipe Collections

    100+ July 4th Recipes for your cookout menu including grilling recipes, side dishes, and picnic food ideas with drinks, desserts, and more! These are classic for the 4th of July and are more than tradition, they make our celebrations into memories with friends and family. Many of these recipe ideas have patriotic red, white, and blue colors, and all are easy.

    Celebrate with over 50+ high school and college Graduation Party Food Ideas. Throw an awesome 2023 grad party full of delicious food and drinks!

    Look through 42 of the Best Burger Sides! These recipes will help you throw a legendary backyard cookout or July 4th BBQ with clever Summer party food ideas.

    These are the best side dishes to make during cookout season! This ultimate list has 30+ Cookout Side Dish Recipes that will inspire you to create the yummiest food for family gatherings, summer picnics, outdoor cookouts, backyard barbecues, or church potlucks.

    Did you love this recipe? We would love to hear from you! If you make this recipe and love it, give it a 5-star rating ⭐⭐⭐⭐⭐ with a comment. THANK YOU!! Follow Delicious Table with my free newsletter and share this recipe with your friends on Facebook, Pinterest, and Instagram.

    A small white bowl with homemade relish in to top hot dogs in paper lined baskets.
    Print

    75+ Cookout Recipes And Barbeque Party Ideas

    Take a look at 75 great cookout recipes, plus tips and hacks for your outdoor BBQ party. This complete guide has all the best recipes for backyard cookouts including grilled classics, gorgeous entertaining options, fun drinks, cool desserts, make-ahead salads, potluck sides, and more for your outdoor parties! Cooking outdoors is an American tradition in warmer weather in Summertime. And one of the best parts of life is grilling and relaxing with good food, a cool drink, friends, and family. Bonus Recipe: Mix up this fresh crunchy homemade relish recipe, to top grilled hot dogs or hamburgers. Serve this condiment at your next cookout or BBQ!
    Course Sauces, Marinades, & Condiments
    Cuisine American
    Keyword hot dog relish, relish, relish recipe
    Prep Time 10 minutes minutes
    Cook Time 0 minutes minutes
    Total Time 10 minutes minutes
    Servings 12
    Calories 9kcal
    Author Lisa Hatfield

    Equipment

    • Chef Knife
    • Epicurean Non-Slip Cutting Board
    • Cuisinart Food Processor

    Ingredients

    • 1 bell pepper chopped fine
    • 1-2 dill pickles chopped fine
    • 1 cup green cabbage finely shredded
    • ¼ cup chopped onion chopped fine
    • 1 tablespoon apple cider vinegar
    • 2 tablespoons yellow mustard
    • ½ teaspoon sea salt
    • ½ teaspoon ground pepper

    Instructions

    • Finely chop all the bell pepper, pickles, cabbage, and onion on a cutting board. Add to a medium size bowl. Stir in vinegar, mustard, salt, and pepper.
    • PRO TIP: For a finer texture, pulse all ingredients in a food processor until finely mixed.
    • Seal in a container and keep refrigerated for at least a day. Use within a week on hot dogs and hamburgers.

    Video

    Notes

    Cookout Party Checklist

    Start planning your backyard party with these inspiring ideas, tips, and hacks to make your cookout spectacular. Here is a basic checklist of things to gather and the easy way to get your party plans going. Be sure to try some new recipes, and have guests bring their favorite potluck dishes...
      • Main Course Items like Hamburgers, Hot Dogs, & Pulled Pork
      • Side Hot Dishes like Baked Beans & Grilled Corn
      • Cold Salads, Fruit Salad, Pasta & Potato Salads
      • Desserts, Cocktails, and Drinks
      • Condiments: Mayo, Ketchup, Mustard, Relish, & BBQ Sauce
      • Serving Trays - regular or ones that stay chilled 
      • Pop-Up Food Tents/Covers (keep critters off your food!) 🐜🐜🐜
      • Small Bowls
      • Serving Spoons
      • Grilling Tongs
      • Napkins
      • Utensils
      • Plastic Baskets/Paper Liners or Paper Plates
      • Red Solo Cups
      • Cooler/Ice
      • Beer, Wine, Drinks/Cocktails
      • Bottled Water
      • Iced Tea, Lemonade, or Soda
      • Chips, Dips, Pretzels, Snacks
      • Cookout, BBQ, and Grill Items
      • Pressed Sandwiches
      • Cocktails and Drinks
      • Desserts
      • Bottle opener/Corkscrew
      • Chinese Take Out Containers

    Nutrition

    Calories: 9kcal | Carbohydrates: 2g | Protein: 1g | Fat: 1g | Saturated Fat: 1g | Polyunsaturated Fat: 1g | Monounsaturated Fat: 1g | Sodium: 174mg | Potassium: 46mg | Fiber: 1g | Sugar: 1g | Vitamin A: 328IU | Vitamin C: 15mg | Calcium: 8mg | Iron: 1mg

    Limoncello

    [heart_this] · Jul 30, 2023 · 3 Comments

    Two small glasses of icy cold limoncello (lemoncello) ready to sip.

    Last Updated April 4th, 2024 at 08:58 am by Lisa

    Make your own Limoncello, (aka lemoncello) an icy cold lemon liqueur popular in Italy. You can serve this as an after-dinner apéritif drink, drizzle on good ice cream for dessert, sprinkle on fresh fruit, a refreshing limoncello spritz, or make a lemon cream sauce to go on lobster ravioli!

    Enjoy this lemony sipper year-round, it is great on hot summer nights or after rich holiday feasts. This limoncello recipe is an easy homemade gift for food lovers...

    How To Make Limoncello

    Homemade limoncello starts with good juicy lemons as the main ingredient. Lemons are ready to pick or buy yearound in most places in the United States now. In California, April-June our citrus trees are full of ripe fruit ready to pick and use in recipes...

    Equipment

    • 1 large glass 3-quart jar or pitcher or tall clamp style glass bottles for gift-giving
    • A good vegetable peeler

    Ingredients

    • lemons (organic preferred, Meyer or regular)
    • good vodka (high-quality like Grey Goose 80 or 100 proof)
    • water
    • granulated sugar (I used a good organic sugar)

    What Alcohol Content to Use?

    • A high-quality vodka (ideally 95-100 proof grain alcohol)  is the very best to use for making limoncello. Everclear works very well.
    • A 100 proof vodka will extract more improved lemon oil from the peels and make the taste smooth.
    • 80 proof vodka brands work just fine if that's what you use, and will be less expensive.

    Vodka prevents mold or bacteria from growing. Once strained, it can keep in the freezer for up to a year.

    Instructions

    Wash the lemons with a vegetable brush and hot water to remove any residue of pesticides or wax; pat the lemons dry.

    Add the vodka to your large jar or pitcher.

    Using a vegetable peeler, remove the peel from the lemons in long strips, use only the yellow outer part of the rind. The pith, or white part underneath the rind, has a bitter taste. Keep the lemons for another recipe.

    Place the lemon peels in the large jar or pitcher and put a lid on the jar, or cover with plastic wrap.

    Steep the lemon peels in the vodka for 10 days at room temperature. Some people steep for up to 40 days, this will produce a better flavor, but 10 days is fine!

    After 10 days, in a large saucepan, combine the water and sugar over medium heat and bring to a gentle boil (until the sugar dissolves), about 5 -7 minutes. Cool completely.

    Remove from heat and let the syrup cool before adding it to the Limoncello mixture of lemon peels and vodka. Now, pour the sugar syrup into the lemon/vodka mixture.

    Strain the limoncello through a mesh strainer, a coffee filter, or cheesecloth. Discard the peels. Transfer the limoncello to decorative clamp style bottles using a small funnel.

    Seal the bottles and refrigerate until cold, at least 4 hours and up to 1 month. Keep in the freezer, but be sure to keep the limoncello in the fridge and chill until ready to use.

    What Lemons Are Best?

    Regular Standard Lemons

    Standard lemons are just fine, though buying organic lemons is a good idea since non-organic lemons are usually coated with wax, you'll get better extraction from organic lemons.

    PRO TIP: The vodka alcohol will pull everything from those peels, including any pesticides or insecticides used on the lemons. So use organic and still wash them really well!

    A wooden bowl filled with lemons ready to use in recipes.

    Meyer Lemons

    If you have access to them, Meyer lemons make have an incredibly sweet flavor and make great limoncello.

    Bright yellow orange Meyer lemons in a rectangle basket with lemon leaves tucked in ready to use in recipes.
    Meyer Lemons from my garden!

    What is Limoncello?

    Limoncello is also called lemoncello and is traditionally made in Italy with Femminello St. Teresa lemons, also known as Sorrento or Sfusato lemons. It is the second most popular liqueur in Italy after Campari.

    Limoncello imparts a strong lemon flavor without the sourness or bitterness of pure lemon juice. Lemon peels or lemon zest with no white pith are infused in grappa or vodka. The lemon oil is released from the peels and zest into the alcohol.

    Next, the lemon liquid is mixed with simple syrup. Varying the sugar-to-water ratio and the temperature affects the clarity, viscosity, and flavor.

    California produces over 90% of the lemons in the United States. California lemons grow year-round and are a popular ingredient in cocktails, desserts, and main dishes. Most of the lemons available in the US are from California, you can use Meyer or any lemon commonly found in your grocery store. This is also a great way to use up lemons grown at home.

    Simple Syrup Tips

    You can play with the ratios of water to sugar, all the way up to 4 cups of water with 4 cups of sugar and anything in between.

    Start with a simple syrup made of 1 cup of sugar dissolved in 1 cup of water start here whether you used 100 proof or 80 proof vodka. Add this to the infused vodka, taste, and add more simple syrup to taste.

    PRO TIP: More water will dilute the alcohol base, making a less alcoholic, milder, and smoother-sipping liqueur. More sugar will make it sweeter.

    How To Drink Limoncello

    • Serve in refreshing cocktails on a hot summer day. 
    • Refreshing and light, it is wonderful as a palate cleanser or as an after-dinner drinks serve icy cold right out of the freezer in small glasses.
    • It is an incomparable digestive, and with sparkling or tonic water, it is a sweet, tasty refreshment.
    • Pair with some lovely cool appetizers like Marinated Mozzarella, Meyer Lemon Olive Tapenade, or a Charcuterie Board!

    Store and Serving Tips

    • Use a tall inexpensive clamp top glass bottle if giving as a gift, bottle, or jar with a secure lid to store in the freezer. I found some beautiful ones at Cost Plus World Market. 
    • Best kept in the freezer until ready to serve. Serve ice cold from the freezer is THE best!
    • Traditionally served chilled as an after-dinner digestivo, along the Amalfi Coast in Italy.
    • Serve in chilled small glasses.
    • Try it to makes various cocktails, pastries or ice cream recipes.

    Limoncello FAQ

    What Are The Best Lemons to Use For Limoncello?


    Standard lemons are just fine, though buying organic lemons is a good idea since non-organic lemons are usually coated with wax, you'll get better extraction from organic lemons.

    Plus, the alcohol will pull everything from those peels, including any pesticides or insecticides used on the lemons.

    If you have access to them, Meyer lemons make have an incredibly sweet flavor and make great limoncello.

    What Other Citrus Fruit Works In Limoncello?


    You can also try other citrus fruits like grapefruits, limes, oranges-(orangecello), blood oranges, and tangerines-(mandarincello).

    How Long to Infuse Limoncello?

    Infuse your lemon peels and vodka for at least 10 days or up to 40 days. Most of the lemon flavor is extracted in the first few days, but you'll also get a stronger, bolder flavor the longer you let it sit.

    How To Peel Lemons For Limoncello?

    It is easiest to remove the peels with a vegetable peeler, but you can also use a microplane or a zester.

    Just try to get the skin alone and as little pith as possible. With the leftover lemons, you can make a batch of lemonade.

    More Lemon Recipes

    A tropical version of traditional Lemon Bars, the toasted coconut shortbread cookie crust, and lemon-lime filling are simply out of this world. Homemade vinaigrette dressings are so worth the time.

    Try a Meyer Lemon or Parmesan Lemon salad dressing and use up those lemons! I think it's the Lemon Butter Cream Sauce, I mean who wouldn't love that? This recipe uses either fresh lemon juice or limoncello.

    Meyer Lemon Tapenade, Lemon Dill Butter, or Preserved Lemons all come together so fast and make great gourmet gifts for food lovers. Ice cold Blueberry Lemonade captures Summer in every sip. This tasty summer drink can be made in minutes with homemade blueberry syrup, fresh lemon juice, and sweet honey.

    • A white plate with large lemon bars cut into squares dusted with powder sugar.
      Coconut Lime Lemon Bars
    • A vintage silver spoon resting on an open jar of vinaigrette.
      Meyer Lemon Citrus Vinaigrette
    • A vintage French ceramic bowl filled with freshly made meyer lemon olive tapenade with a silver spoon and sliced baguette to eat as an appetizer.
      Meyer Lemon Olive Tapenade
    • A mason jar with lemon vinaigrette inside on a messy cutting board.
      Parmesan Lemon Vinaigrette
    • A large clamp jar of Preserved Lemons with a brown craft paper tag that says Preserved Lemons.
      Preserved Lemons
    • Small brown round cutting board with slices of lemon dill butter garnished with fresh lemon and dill.
      Lemon-Dill Butter
    • A white plate filled with heart shaped lobster ravioli garnished with parsley.
      Lobster Ravioli
    • Mason jar handled glasses with blueberry lemonade garnished with blueberries, mint, and lemons halves.
      Blueberry Lemonade

    Did you love this recipe? We would love to hear from you! If you make this recipe and love it, give it a 5-star rating ⭐⭐⭐⭐⭐ with a comment. THANK YOU!! Follow Delicious Table with my free newsletter and share this recipe with your friends on Facebook, Pinterest, and Instagram.

    Two small glasses of icy cold limoncello (lemoncello) ready to sip.
    Print

    How To Make Limoncello

    Make your own Limoncello, (aka lemoncello) an icy cold lemon liqueur popular in Italy. You can serve this as an after-dinner apéritif drink, drizzle on good ice cream for dessert, sprinkle on fresh fruit, mix a limoncello spritz cocktail, or make a lemon cream sauce to go on lobster ravioli! Enjoy this lemony sipper year-round, it is great on hot summer nights or after rich holiday feasts. This limoncello recipe is an easy homemade gift for food lovers!
    Course Drinks & Cocktails
    Cuisine Italian
    Keyword Homemade Limoncello, Italian lemoncello, lemoncello, Limoncello, limoncello recipe
    Prep Time 20 minutes minutes
    Cook Time 5 minutes minutes
    Total Time 25 minutes minutes
    Servings 53 1.5 ounce pours
    Calories 84kcal
    Author Lisa Hatfield

    Equipment

    • Vegetable Peeler
    • Tall Clamp Jar

    Ingredients

    • 10 lemons organic preferred, Regular or Meyer Lemons
    • 4 cups vodka high-quality like Grey Goose
    • 3 ½ cups water
    • 2 ½ cups granulated sugar

    Instructions

    prep lemon peels

    • Wash the lemons with a vegetable brush and hot water to remove any residue of pesticides or wax. Pat the lemons dry.
    • Using a vegetable peeler, remove the peel from the lemons in long strips, use only the yellow outer part of the rind. The pith, or white part underneath the rind, is too bitter. Keep the lemons for another recipe.

    make the limoncello

    • Add the vodka to your large jar or pitcher.
    • Place the lemon peels in the large jar or pitcher and put a lid on the jar, or cover with plastic wrap.
    • Steep the lemon peels in the vodka for 10 days at room temperature. 10 days will produce a better flavor, but 4 days is fine! (Some people leave them up to 40 days for incredible lemon flavor!)
    • After 10 days, in a large saucepan, combine the water and sugar over medium heat and bring to a gentle boil (until the sugar dissolves), about 5 -7 minutes. Cool completely.
    • Remove from heat and let the syrup cool before adding it to the Limoncello mixture of lemon peels and vodka. Pour the sugar syrup into the lemon/vodka mixture.
    • Strain the limoncello through a mesh strainer, a coffee filter, or cheesecloth. Discard the peels. Transfer to decorative clamp style bottles using a small funnel.
    • Seal the bottles and refrigerate until cold, at least 4 hours and up to 1 month. Can be kept in the freezer as well, but be sure to keep the limoncello in the fridge and chill until ready to use. 

    Notes

    Tips to Store and Serve Limoncello

    • Use a tall inexpensive clamp top bottle if given as a gift, bottle, or jar with a secure lid to store in the freezer. I found some beautiful ones at Cost Plus World Market. 
    • Limoncello is best kept in the freezer until ready to serve. Serve ice cold from the freezer is THE best!
    • Limoncello is traditionally served chilled as an after-dinner digestivo. Along the Amalfi Coast in Italy, it is usually served in small ceramic glasses that are also chilled. This tradition has been carried into other parts of Italy.
    • Limoncello is also used to make various cocktails, pastries, or ice cream.

    What Lemons to Use?

    Standard lemons are just fine, though I do recommend buying organic lemons. Since non-organic lemons are usually coated with wax, you'll get better extraction from organic lemons. Plus, alcohol will pull everything from those peels, including any pesticides or insecticides used on the lemons.
    If you have access to them, Meyer lemons (see pictured below) make have an incredible sweeter flavor. You can also try other citrus fruits like grapefruits, oranges, blood oranges, and tangerines.
    I've found it easiest to remove the peels with a vegetable peeler, but you can also use a microplane or a zester. Just try to get the skin alone and as little pith as possible. With the leftover lemons, you can make a batch of lemonade

    How Long to Infuse Limoncello?

    Infuse your lemon peels and vodka for at least 10 days or up to 40 days. Most of the lemon flavor is extracted in the first few days, but you'll also get a stronger, bolder flavor the longer you let it sit.

    What Alcohol Content to Use?

    A high-quality vodka (ideally 100 proof grain alcohol)  is the very best to use for making limoncello. A 100 proof vodka will extract more improved lemon oil from the peels and make the taste smooth. 80 proof vodka brands work just fine if that's what you use, and will be less expensive.
    Vodka prevents mold or bacteria from growing. Once strained, this liqueur can be kept in the freezer for up to a year.
    PRO TIP: More water will dilute the alcohol base, making a less alcoholic, milder, and smoother-sipping liqueur. More sugar will make it sweeter.

    Nutrition

    Calories: 84kcal | Carbohydrates: 11g | Protein: 0g | Fat: 0g | Saturated Fat: 0g | Cholesterol: 0mg | Sodium: 1mg | Potassium: 28mg | Fiber: 0g | Sugar: 9g | Vitamin A: 5IU | Vitamin C: 10.8mg | Calcium: 6mg | Iron: 0.1mg

    How To Make Sun Dried Tomatoes

    [heart_this] · Jul 30, 2023 · 2 Comments

    A small clear jar filled with sun dried tomatoes on a table with scattered dried tomatoes all around the table.

    Last Updated September 23rd, 2023 at 10:41 pm by Lisa

    Preserve your tomato bounty this Summer! And master how to make Sun Dried Tomatoes with any kind of tomato variety. You can do this in either your home oven or in an inexpensive food dehydrator!

    Sundried tomatoes are a tasty snack. And add a punch of flavor into cozy beef stews, Italian tuna salad wraps, cold pasta salads, creamy pasta dinners, and so many other recipes. There are 20+ ideas for you to try!

    The pop of color is so gorgeous, and nothing from a package or jar will taste as sweet and "tomatoey" as this garden candy...

    Sun Dried Tomato Recipe

    Basically, the whole secret of how to sun dry tomatoes comes down to two things.

    • ONE: Thin slices!
    • TWO: Enough dry time!

    Choose your method, either in your oven or using a dehydrator. Then start making sun dried tomatoes!

    • 2 pounds small mixed cherry tomatoes - and any thin-sliced variety works!
    • 1 teaspoon sea salt (kosher salt not table salt)
    • 1 tablespoon Italian seasoning optional
    • good olive oil is optional (if olive oil packing)

    Prep Instructions

    1. Wash tomatoes in cool water.
    2. Slice them into ¼" thick slices. Thin smaller pieces dry faster and all the way through. You can cut them round or into long ovals. The original moisture of your tomatoes will ultimately determine how long they need to go through the drying process.

    Oven Dehydrator Method

    1. Preheat to a low oven temperature of 225 degrees.
    2. Line large metal baking sheets with parchment paper. Don't place sliced tomatoes directly on the metal pan or use foil, or the acid of them will react with the metal, burn, and stick to the pan.
    3. Arrange cut side up on a parchment-lined baking sheet. Sprinkle very lightly with sea salt and or Italian seasoning. I highly recommend sprinkling sea salt and Italian seasoning on them, it makes them extra spectacular.
    4. At 2 hours rotate your pans in the oven, this helps distribute the heat evenly on the pans.
    5. Bake for at least 2 more hours, until they are "dry and leathery". My top sheet pan was done in 2:45 minutes but the bottom pan was 3 hours 15 minutes. The total amount of time you will dehydrate in your oven will vary based on your type of oven, the pan, and even the weather that day.

    Food Dehydrator Method

    1. Spread the thin cut slices on food dehydrator tray screens in a single layer. Set the temperature on your dehydrator at 135°F, place the tomatoes in the dehydrator, and allow 5-7 hours for the drying process.
    2. Check every few hours as they dehydrate, you are looking for them to become dry and leathery. I put the dehydrator running in a room in my home so the noise of the fan and warmth didn't bother me, as it runs for almost a whole day.
    3. Sprinkle very lightly with sea salt and or Italian seasoning. I highly recommend sprinkling sea salt and Italian seasoning on them, it makes them extra spectacular.
    4. Storage Tips: Keep them in a glass mason jar with a piece of cheesecloth and the ring lid on in a dry place. The shelf life can be as long as 12 months. The secret is to keep them in a dry cabinet, and not sealed in a jar or airtight container. They can mold! They need air circulation. You can also freeze them in zip-top bags in the freezer. Or store them in olive oil, read on for those instructions.

    What Are Sun-Dried Dehydrated Tomatoes?

    If you grow your own tomatoes, you know that they often are all ready around the same time! So this is one more way to preserve the pounds that ripen all at once.

    For centuries, preserving food is a way of life in order to eat during winter months when fresh produce won't grow. Once the moisture evaporates, it halts the deterioration process and locks in a state of preservation.

    By dehydrating tomatoes, these foods can be enjoyed year-round. And provide valuable nutrition in the winter when it is difficult or impossible to grow fresh produce. It is widely believed the Italians were the first to dry them on their ceramic rooftops in the summer sun!

    These would make a great gourmet food gift too if you pick up some colorful tomatoes at a farmer’s market. And put a little recipe tag on how to how to make sun dried tomato!

    3 Ways To Dehydrate

    1. Sun - people have preserved a homemade version of dried tomatoes in the sun for centuries
    2. Oven - home and commercial ovens
    3. Food Dehydrator - are inexpensive and available online

    PRO TIP: Use similar size tomatoes and slice them evenly thin so they are done at the same time.

    Watch ~ Our Video Tutorial

    Can You Dry Tomatoes With The Sun?

    Yes. In fact, people have dried tomatoes in the sun for centuries, but this process is not always practical for most of us. It can be done by placing thin slices on raised screens in the hot dry sun day after day.

    There are challenges with this method.

    • You need consistent hot dry days, and bring them in at night.
    • Humidity will affect this drying method and can make it impossible.
    • You would want to cover them with cheesecloth to deter flying critters as well!
    • It can take from a few days to a couple of weeks depending on where you live.

    So how about we skip that method and try a couple of easier ways to dry them in just hours?

    Oven-Dried Dehydrator Method

    Most of you might prefer this method of drying tomatoes in the oven. It is easy and even faster than using special equipment like a dehydrator.

    Food Dehydrators

    Drying tomatoes in the food dehydrator has the advantage of not heating the house as you can place your dehydrator out of the main living area like a garage. I really like this method, it is how I learned how to make sun-dried tomatoes originally.

    Dehydrators have a large fan that is quite loud, but the advantage is that it frees up your oven to use for other things.  But heat does come from a food dehydrator, it's like a giant hairdryer! The best dehydrators provide temperature control with a knob so you can set it and forget it for the dehydrating time you need for that particular food you are drying.

    There are several on the market to choose from, but you don't need an expensive food dehydrator, you can use your oven.

    But if you are in the market to purchase one of the best dehydrators, these are some brands you might see on the market. I use a relatively inexpensive Nesco dehydrator and it works great. So buy the best quality for your needs.

    • Corsi dehydrator
    • Excalibur dehydrator
    • Nesco dehydrator
    • Cuisinart food dehydrator
    • Magic Mill dehydrator

    PRO TIP: When you dehydrate tomatoes by any method, the liquid evaporates thus shrinking them much smaller. They will darken in color, have a chewy texture, are odd-shaped, and have an intense sweet flavor. You should not see any noticeable moisture on the tops of them, and they will be light and dry like a chip.

    Sun-Dried Tomatoes Recipe FAQ

    What do sun-dried tomatoes taste like?


    They lose most of their water but retain their sugar, sweetness, and nutrients and what you’re left with is the deliciously dried tomato flesh with an absolutely incredible and intense, concentrated tomato flavor. 

    Are sun-dried tomatoes good?

    From the 1980s to the early 1990s, Sun-Dried Tomatoes became a trendy ingredient in the United States.

    They were tossed into pasta dishes and salads, baked into casseroles, and starred in family chicken dinner recipes like Creamy Tuscan Chicken.

    How To Store Dried Tomatoes?

    Pantry

    Keep in a dark dry pantry in a small glass jar, and cover them with a piece of cloth like cheesecloth so they stay dry on the shelf. A sealed jar may lead to mold if any moisture is remaining.

    Freezer

    Put the dried tomatoes into small zip top bags and keep frozen until ready to use.

    Place sun-dried tomatoes in an ice cube tray, cover with good olive oil, and freeze in zip-top bags for fast cooking. Use them in sauces like bolognese, marinara, or marinades.

    Refrigerator ~ Olive Oil Packing

    In small glass jars, place sun-dried tomatoes and top with olive oil and garlic cloves, and chill in the fridge, bring to room temperature and use in recipes for salad dressings, sauces, marinades, meat dishes, and pasta salads within 2-3 weeks.

    Sun Dried Tomato Cooking Tips

    Since Sun Dried Tomatoes have a concentrated, intense sweet yet tart flavor, it is best to either chop them finely to put into pasta salads and dishes or rehydrate them and blend them into sauces in cooking.

    People love to snack on them, they are sooo tasty. They get a chewier texture and hydrating them before using them is a really important step in your cooking.

    PRO TIP: Dehydrated tomato flavor is quite concentrated and strong. Use them in recipes when you really want to add rich tomato flavor!

    How To Rehydrate Tomatoes?

    Rehydrating can be done with water, broth, or even wine. But which is best? Water does hydrate them but dilutes the tomato's flavor and wine overpowers the tomato's natural flavor.

    A vegetable broth or Chicken Stock adds savory flavor. Soak in warm broth or stock for 30 minutes until soft and pliable, drain. Save the stock liquid and add flavor to stocks and sauces, dry, and use in your cooking.

    Store-Bought (Dry-Packed) Sun-Dried Tomatoes

    • Less expensive than olive oil packed, sometimes ⅓ the price.
    • Dry-packed variety can have tougher skins and a chewier texture.
    • They are unseasoned without fresh herbs, so you can flavor recipes your way.
    • Some people try to approximate oil-packed tomatoes by soaking the dry-packed sun dried ones in olive oil. It helps, but they still have a tougher chewy texture and will still need to be diced.

    Store-Bought Oil Packed Sun-Dried Tomatoes

    The tomatoes left in the jar should be covered in oil and chilled in the fridge.

    • Oil packed Sun-Dried Tomatoes come in several ways, they may be julienned, finely chopped, or whole. Herbs and/or spices are often added to the oil like Italian Seasoning, sea salt, etc.
    • Use the oil from the jar to make salad dressings and to saute meats and vegetables. It is packed with tomatoey flavor.
    A wire spatula scooping up sun dried tomatoes that were oven baked on a sheet pan.

    What Kind of Tomato Should I Use? 

    Ideally, use small bright-colored tomato varieties straight from the grocery store or ones from your own garden. Any size of tomato will work, like bigger tomatoes, heirlooms, or small cherry varieties. The key is to slice them thin and all the same size.

    The best tomatoes to choose from are cherry tomatoes or small colorful heirloom varieties. They are easy to slice and dehydrate quickly due to their size vs. larger tomatoes that can hold a lot of water inside. They come in so many colors too!

    Bright red cherry tomatoes some with the stem on in a box outside by a garden.

    Roma, paste tomatoes, or plum varieties are another really good choice and are oval-shaped and smaller than larger tomato varieties. Another advantage is their lower water content, so they work dehydrate well.

    A table filled with roma tomatoes in a farmers market.

    Any of these will work really well...

    • Cherry Tomatoes
    • Roma Tomatoes (aka Plum tomatoes or paste tomatoes)
    • Yellow Pear
    • Red Torch
    • Patio Choice Yellow
    • Juliet
    • Grape Tomatoes
    • Valentine
    • San Marzano

    Sun-Dried Tomato Recipe Ideas

    For recipes that use your homemade sun dried tomatoes, try these...

    • Blend into Red Pepper Tomato Soup
    • Top on Chicken Parmesan
    • Sun Dried Tomato Butter
    • Mix into Chicken Piccata
    • Use as a topping on Pizza
    • Chop and mix in an easy Pasta Salad
    • Mix into Breakfast Omelets or Breakfast Egg Muffins
    • Bake into Dinner Casseroles
    • Mix into Italian Tuna Salad
    • Blend into Pasta Sauces, Alfredo, Marinara, or Bolognese
    • Sun-Dried Tomato Pesto
    • Bake into a Hot Dish or Pasta Bake Casserole
    • Rehydrate and blend into Beef Stew
    • Saute into Gnocchi Soup with Bacon or Sliced Sausages

    Sun Dried Tomato Pasta: Simply boil and follow the package instructions of your favorite pasta. Cook the pasta recipe al dente, and reserve a half cup of pasta water.

    In a skillet, sauté crumbled Italian sausage, with chopped onion, add some red pepper flakes, black pepper, oregano, thyme, and heavy cream. Now add in a half cup of pasta water, diced sun dried tomato, and toss with fresh spinach over low heat with the cooked pasta. Finish with grated parmesan cheese and basil ribbons. A sun-dried tomato pasta is so easy!

    More Tomato Recipe Ideas

    These are some of my favorite recipes to use up the bounty of summer when you have a lot of tomatoes ripen all at once!

    Fried Green Tomatoes can be a snack, lunch, or a side for family dinner. Dip in Remoulade sauce or buttermilk Ranch Dressing, and is a great way to use up green tomatoes from your Summer garden.

    Homemade salsa is an easy recipe with a fresh taste you will never get out of a jar.  The fire-grilled flavor from tomatoes, onions, and peppers with medium heat in this homemade Tomatillo Salsa will have people loving each and every bite scooped on a tortilla chip...

    Cobb Salad became famous in Hollywood, California at the Original Brown Derby restaurant. It has a Special French Dressing (Cobb salad dressing) and delicious toppings like tomato, chicken, crumbled bacon, avocado, and chopped eggs.

    Tuna Salad can become a sandwich wrap or in a low-carb style in a colorful bell pepper bowl. And this recipe has no mayo. Bursting with flavor from crunchy celery, avocado, fresh basil, capers, kalamata olives, and a great recipe for adding sun-dried tomatoes...

    • A white long plate with a stack of fried green tomatoes with remoulade and buttermilk ranch dressing.
      Fried Green Tomatoes
    • A wood bowl with a lady scooping out homemade salsa with a tortilla chip.
      Tomatillo Salsa
    • A white square plate filled with colorful Cobb Salad made with chicken, eggs, avocados, tomatoes, and bacon.
      Cobb Salad
    • A glass bowl filled with compound butter made with herbs and sun dried tomatoes, and them scattered on the cutting board.
      Sun Dried Tomato Butter
    • A bowl of tomato soup and cup of soup in a white cup garnished with fresh basil.
      Tomato Soup With Basil Dumplings
    • Red and green Bell pepper halves filled and green tortilla wraps filled with no mayo Greek Yogurt Tuna Salad.
      Healthy Tuna Salad

    Did you love this recipe? We would love to hear from you! If you make this recipe and love it, give it a 5-star rating ⭐⭐⭐⭐⭐ with a comment. THANK YOU!! Follow Delicious Table with my free newsletter and share this recipe with your friends on Facebook, Pinterest, and Instagram.

    A small clear jar filled with sun dried tomatoes on a table with scattered dried tomatoes all around the table.
    Print

    How To Make Sun Dried Tomatoes

    Preserve your tomato bounty this Summer! And master how to make Sun Dried Tomatoes with any kind of tomato variety. You can do this in either your home oven or in an inexpensive food dehydrator! Sundried tomatoes are a tasty snack. And add a punch of flavor into cozy beef stews, Italian tuna salad wraps, cold pasta salads, creamy pasta dinners, and so many other recipes. There are 20+ ideas for you to try! The pop of color is so gorgeous, and nothing from a package or jar will taste as sweet and "tomatoey" as this garden candy!
    Course Seasoning
    Cuisine Condiment
    Keyword dehydrated cherry tomatoes, dehydrated tomatoes, howt to make sundried tomatoes, sun dried tomato recipe, sun dried tomato recipes, sun-dried tomatoes
    Prep Time 20 minutes minutes
    Cook Time 4 hours hours
    Total Time 4 hours hours 20 minutes minutes
    Servings 24
    Calories 7kcal
    Author Lisa Hatfield

    Equipment

    • Food Dehydrator
    • Large Metal Sheet Pan
    • Parchment Paper Sheets
    • Small Serrated Knife

    Ingredients

    • 2 pounds small mixed cherry tomatoes or Roma tomatoes
    • 1 teaspoon sea salt
    • 1 tablespoon Italian seasoning optional
    • good olive oil optional (if olive oil packing)

    Instructions

    • Wash tomatoes in cool water.
    • Slice them into ¼" thick slices. Thin smaller pieces dry faster. You can cut them round or into long ovals. The original moisture of your cherry tomatoes will ultimately determine how long they need to go through the drying process.

    Oven Dehydrator Method

    • Preheat to a low oven temperature of 225 degrees.
    • Line large metal baking sheets with parchment paper. Don't place sliced tomatoes directly on the metal pan or use foil, or these will react with the acid, and will burn, and stick to the pan.
    • Arrange cut side up on a parchment lined baking sheet. Sprinkle very lightly with sea salt and or Italian seasoning. I highly recommend sprinkling sea salt and Italian seasoning on them, it makes them extra spectacular.
    • At 2 hours rotate your pans in the oven, this helps distribute the heat evenly on the pans of sun-dried tomatoes.
    • Bake for at least 2 more hours, until tomatoes are "dry and leathery". My top sheet pan was done in 2:45 minutes but the bottom pan was 3 hours 15 minutes. The total amount of time you will dehydrate in your oven will vary based on your type of oven, the pan, and even the weather that day.

    Food Dehydrator Method

    • Spread tomato slices on food dehydrator tray screens in a single layer. Set the temperature on your dehydrator at 135°F and allow 5-7 hours for the drying process.
    • Check every few hours as they dehydrate, you are looking for them to become dry and leathery. I put the dehydrater running in a room in my home that the noise of the fan and warmth didn't bother me, as it runs for almost a whole day.
    • Sprinkle very lightly with sea salt and or Italian seasoning. I highly recommend sprinkling sea salt and Italian seasoning on them, it makes them extra spectacular.
    • Storage Tips: Keep them in a glass mason jar with a piece of cheesecloth and the ring lid on in a dry place. I found the shelf life to be about 12 months, as long as they are kept in a dry cabinet, but not in a sealed jar. You can also freeze them in zip top bags in the freezer.

    Video

    Notes

    oven cooking time

    The oven dehydration method was about 3 hours in a gas oven. The top tray was done in 2 hours 45 minutes, and the bottom tray 3 hours 15 minutes. 

    food dehydrator time

    Food Dehydrators take almost double the time, mine was done at 6 hours at 135 degrees on the fruit and vegetable setting. 

    tomatoes

    Use small bright-colored tomato varieties like; cherry, yellow pear, red torch, patio choice yellow, Juliet, grape, and valentine.  Roma tomatoes also called as plum tomatoes work well too.

    refrigerator olive oil packing

    In small glass jars, place sun-dried tomatoes and top with olive oil and garlic cloves, and chill in the fridge, bring to room temperature and use in recipes for salad dressings, sauces, marinades, meat dishes, and pasta salads. You can add basil and rosemary for added flavor. Keep refrigerated and use within a month.

    pantry storage

    Keep in a dark dry pantry in a small glass jar, and cover with a piece of cloth like cheesecloth so they stay dry on the shelf. A sealed jar may lead to mold if any moisture is left in them. I found the shelf life to be about 12 months, as long as they are kept in a dry cabinet, but not in a sealed jar. 

    freezer storage

    Put the dried tomatoes into small zip top bags and keep frozen until ready to use for up to 6 months.
    Place sun-dried tomatoes in an ice cube tray, cover with good olive oil, and freeze in zip-top bags for fast cooking. Use them in sauces like bolognese, marinara, or marinades.

    Nutrition

    Calories: 7kcal | Carbohydrates: 2g | Protein: 1g | Fat: 1g | Saturated Fat: 1g | Polyunsaturated Fat: 1g | Monounsaturated Fat: 1g | Sodium: 99mg | Potassium: 92mg | Fiber: 1g | Sugar: 1g | Vitamin A: 318IU | Vitamin C: 5mg | Calcium: 7mg | Iron: 1mg

    How To Make Vanilla Extract

    [heart_this] · Jul 27, 2023 · 1 Comment

    A glass flip top bottle filled with vanilla extract, and real vanilla bean pods on the table.

    Last Updated April 26th, 2024 at 07:57 am by Lisa

    Taste the difference in homemade frostings, ice cream, cookies, cakes, pies, and other desserts, and make your own vanilla extract!

    Good quality extracts can be expensive due to the cost of growing the pods on tropical vanilla orchids. Not all extracts are alike. Create this easy recipe at home with concentrated fragrant flavor to use in baking or gift during the holidays...

    Homemade Vanilla Extract Recipe

    Once you mix up this real extract try this. Grab your storebought extract and pour some into a small glass and then pour some homemade.

    You will notice the scent will be a strong, fragrant, aroma in yours and typically weaker with commercial products from the grocery store. Now, here is what you will need to make-your-own batch of vanilla extract in your kitchen!

    Table of contents

    • Homemade Vanilla Extract Recipe
    • How To Make Homemade Vanilla Extract
      • Ingredients & Equipment
      • Best Vodka Type
      • Equipment: Glass Bottles, Jars & Funnel
      • What Vanilla Pods Are Best?
      • Whole Vanilla Beans
      • Packaged Beans
      • Single Fold Vanilla Extract
      • Double Fold Vanilla Extract
    • Flavors & Variations
    • Homemade Extracts Are Cost-Effective!
    • Best Extract Top Tips
    • Vanilla Bean FAQ
    • Holiday Baking Recipes
    • Holiday Food Gifts
    • More Vanilla Extract Baking Recipes

    How To Make Homemade Vanilla Extract

    Ingredients & Equipment

    12 whole vanilla bean pods

    8 ounces vodka

    Instructions

    1. Clean and sterilize your jars or bottles.
    2. Slice each of the 12 beans down the length but not all the way through using a sharp knife.
    3. Place the sliced beans into the clean bottle or jar, you can cut them in half with scissors if they don't fit.
    4. Cover the beans completely submerged with 8 ounces of 80 proof vodka. Shake daily the first week, then rest in a cool dark place at room temperature out of direct sunlight for at least 6 months. You can use it after 2 months, it just gets better with time!
    5. I like to use a small glass jar, like Mason jars or tall clamp-style glass bottles for a large batch. It's also fun to use labels and write the date with a Sharpie marker.
    6. An extract can remain indefinitely as long as you add new beans sliced open and more vodka as you use it in your baking.

    PRO TIP: I highly recommend using at least 12 beans per 8 oz of vodka or alcohol you choose! You will get a final product with the highest quality natural vanilla extract, in other words, the real thing.

    Best Vodka Type

    Extracts are most commonly made from vodka, which has 80 proof alcohol content. You can also make it using different liquors, how about a bourbon one or a spiced rum extract like I made? Wouldn't those be great in baking?

    100 proof vodka is too strong, and not good to use unless diluted with water. 80 proof vodka is what you want. To bake gluten-free, buy a certified gluten free alcohol or vodka. Don't use any brand of flavored vodka, they are loaded with artificial flavors and will overpower the natural ingredients of pure vanilla.

    Equipment: Glass Bottles, Jars & Funnel

    Tall glass 8-ounce bottles with a clamp work really well. You can also use a small jar with a tight-fitting lid. Bottles with a convenient swing top and tight seal are great for gifts and storage.

    A Small Funnel makes pouring into a bottle clean and neat, I use these in my kitchen all the time!

    What Vanilla Pods Are Best?

    Vanilla beans come from several parts of the world and are now the third most expensive spice in the world behind saffron and fennel pollen. (They were the second most expensive spice at one time!)

    Madagascar Vanilla Beans – very common in stores and online, rich and a creamy and rich flavor
    Mexican Vanilla Beans – grown in Mexico are dark, bold, almost smoky flavor
    Tahitian Bean Pods – easy to buy online, have a rich sweet floral flavor, sometimes grown in Papua New Guinea
    Tonga - earthier, sweet fig and raisin notes
    Indonesian - mild and balanced
    Indian - full flavored with chocolate notes

    Did you know that vanilla beans grow on orchids? Well, they do. In fact, vanilla orchids (Vanilla planifolia) are the only orchid that produces edible fruit!

    The drying process for the beans is 10 days in the sun and 2-3 months in the shade. After that, they are aged in maturation trunks for 12 months where they develop their deep flavor.

    Whole Vanilla Beans

    Buy the finest quality vanilla beans online or at a good price at warehouse stores like Costco. Online, I found 25 Grade B beans labeled Tahitian Vanilla Beans that weighed 2.2 ounces and measured 4-6" each. You might also see Mexican vanilla beans or packages labeled Madagascar vanilla beans online or in stores.

    Grade A vanilla beans are a higher grade, and will be longer, and a bit thicker, due to the moisture inside them, than grade B vanilla beans. The surface of grade a beans is slightly more oily, and shiny as well.

    Put your money towards the best beans you can buy, the flavor compounds are in the pods and seeds, so spend your money on quality.

    Packaged Beans

    My package of 25 beans weighed 2.2 ounces, but that weight can vary.

    I made a spiced rum extract, which I thought would be great in baked cookies or cakes, and the Tahitian one was a gift from my wonderful friend Jill who brought it back from the islands of Tahiti, she toured the orchid bean farms!

    What is interesting is that after several months, I could not see a difference in these extracts when poured into small dishes. The rum one of course smells more like rum!

    Single Fold Vanilla Extract

    A single-fold extract is lower in vanilla flavor and is made with a ratio of about 4 beans in 1 cup or 8 ounces of vodka. This is what most commercial store-bought version bottles are filled with.

    This bottle below is what that looks like shortly after making it, but it needs more beans to get a deeper flavor.

    With just 4 beans, it is not a very dark brown color and won't have the best flavor.

    A glass flip top bottle filled with vanilla extract, and real vanilla bean pods on the table.

    Double Fold Vanilla Extract

    As you can see, this is getting much dark in color! I added 12 beans in 8 ounces of vodka and let it age for about 2 months, and it will get better all year!

    A tall glass bottle filled with vanilla extract and you can see the vanilla beans inside on a table with copper measuring spoons.

    A double-fold is richer in flavor and is made with a ratio of 12 beans in 1 cup or 8 ounces of vodka.

    It gets very dark over time, and you can't see through the extract in the bottle like this...

    Aging Extract & Waiting Time

    The longer a homemade one ages, the better it tastes. You can use it after a couple of months, but it gets darker and gets better as it sits. If you are impatient and want to give it as a gift, you can add more beans, and speed up the flavor extraction process.

    This is what aged dark extract looks like after one year 6 months! It gets much darker...

    A dark bottle of vanilla extract made at home with a small jar of spiced rum extract on a kitchen counter.

    Want An Endless Supply?

    As you use your extract in recipes, simply add a little more vodka into the bottle, and remove the old beans once a year. Simply add new split beans and this will become an endless supply. Take a look at my video for more tips!

    At the first full year mark, pour the extract through a strainer into a bowl. Discard the old beans, and replace the new sliced open beans in your bottle. Add the aged extract back into the bottle and keep on using it! Add some more vodka as you use it throughout the year.

    Flavors & Variations

    Non Alcohol Extracts - Pure extracts are made from alcohol because it’s the easiest way to pull the flavor out of the key ingredient like spices and herbs. I’ve never made one with a nonalcoholic alternative, but there are some online recipes to try!

    Various Alcohols To Try: All of these will create different flavor profiles for your baking or cooking. The main rule of thumb for good flavor is to portion at least 1.5 vanilla bean pods in each of the ounces of alcohol you choose. Each of these will add a unique subtle flavor to your cooking and baking!

    • Bourbon
    • Dark Spiced Rum
    • Coconut Rum
    • Brandy
    • Everclear (dilute with distilled water to reduce proof to 80-100 range)

    Homemade Extracts Are Cost-Effective!

    A homemade bottle of extract is VERY cost effective, especially for serious home bakers!! Alright, so I read all over the internet that making your own extract saves money, but couldn't find the math so let's do it!!!

    I am not really a math fan, but here is what I came up with. Assuming you use good quality ingredients, and that is always the best idea, I used the good stuff here.

    Good vodka like Titos or Absolut is $30 a handle for a 1.75-liter bottle or $.49 per ounce as there are just shy of 60 ounces in a liter.

    A popular store brand of extract (I know you know which one) in the grocery stores runs about $4.79 for 1-ounce bottle.

    My beans were $19 for 25 and I used 12 of them, so about half the package, add in $10 for those. The 8 ounce glass flip-top bottle was around $10 dollars, but we get to reuse it, so not calculating that in the total cost.

    So for an 8 oz bottle, the vodka is $4.00 + the cost of beans approximately $10. So the cost of my bottle is $14.00. My recipe is only $1.65 per ounce vs $4.79 in the store for a homemade high-quality extract!

    PRO TIP: Bottom line, you save ⅔ of the cost to make your own at home, but it does make a large amount so you either bake a ton or can easily gift it to other bakers and home cooks!

    Best Extract Top Tips

    • Storage Tips: Once you make your extract, keep it at room temperature, out of direct sunlight in a cool dark spot, and give it a shake once per week.
    • Baking Tip: For recipes, measure the same amount of homemade as a store-bought brand.
    • Holiday Gifting: It is nice to remove the beans so the lucky person you gift it to isn’t responsible for refilling with more alcohol and the beans don’t go to waste. However, if it’s been less than 6 months, I recommend gifting with the beans in the bottle, with a little note explaining to keep them covered with vodka and remove beans at one year mark.
    • Sterilize Your Bottle Or Jar: Sterilizing the bottles is always a good idea! Use a container that can be run through the dishwasher or drop them in boiling water to sterilize them before using.
    • Shelf Life: Unused aged extracts (with the beans fully submerged) will last several years. Aged extract without beans has an endless shelf life. The beans will become a little slimy if they aren’t almost fully submerged.
    • Black Specks: Bean pods have tiny black seeds inside and those are where the flavor is held. You will see lots of little black seeds in the bottle and in your baked goods too.
    Baking during the Christmas season with a vanilla extract recipe made at home.

    Why Make DIY Extracts?

    • very cost-effective to make at home
    • no artificial ingredients or imitation artificial vanilla flavor
    • tastes much better
    • two ingredients
    • makes a great gift for cooks and bakers
    • you can adjust the strength of the flavor
    • create some unique flavor extracts

    Fun Fact: The FDA guidelines in the United States say that to be labeled pure vanilla extract, it needs to have 1 ounce in weight of beans (that is approximately 12 beans but it will vary) to 8 ounces of alcohol. That means this recipe is the real thing!

    Also, according to the United States FDA (Federal Drug Administration), Vanilla extract may contain one or more of the following optional ingredients: vegetable glycerin, propylene glycol, added sugar (including invert sugar), dextrose, corn syrup including dried corn syrup. I don't know about you, but I don't really know what that stuff is, and I sure don't want it in my recipes! : )

    A glass bottle with a label that says vanilla extract and you can see vanilla beans in the bottle.

    Vanilla Bean FAQ

    What other vanilla flavorings are available?


    Vanilla Essence: Also labeled artificial vanilla extract, is made with artificial ingredients and artificial flavors such as water, ethanol, propylene glycol, emulsifiers, and chemically produced flavors and colors.
    Vanillin: This is the naturally occurring chemical compound that we recognize as the primary aroma and taste of vanilla.
    Synthetic Vanillian: is a lab made extract synthesized version that is much less expensive than using real natural vanilla beans.
    Vanilla Powder: An alternative to extract when it comes to baking recipes that can't support any additional liquid, or using higher heat methods. sprinkle or mix into coffee, cookies, pancakes, or waffles. The purest form of vanilla powder comes from finely ground bean pods.
    Vanilla Sugar: Popular in France and Mexico. The bean pods are dried, finely ground, and sugar is added. Use this as a substitute for regular sugar in some recipes.
    Vanilla Bean Paste: A concentrate of vanilla bean paste is popular with Chefs and home bakers who love convenience vs. scraping whole beans for baking.

    What is Pure Extract vs. Imitation Vanilla Extract?

    Store-bought vanilla extracts are versions of imitation extracts. The have artificial and synthetic ingredients which cut back on the amount of real vanilla extract in each bottle.

    99% percent of the world's vanilla extract is fake imitation that's not a product of the orchid plant that grows the beans. Instead, it's flavor is primarily synthetic vanillin a lab-produced version of the same chemical compound that occurs in natural vanilla flavor from real bean pods.

    Holiday Baking Recipes

    Bake the world a better place during the holiday and all year round.

    The day after Thanksgiving baking season is on! Along with shopping, decorating!! Tis' the season to relax and slow down a bit. Take a day and bake sweet treats on those cool, rainy, snowy afternoons...and use your real extract!

    Looking down on a white platter piled with Chocolate Chip Peppermint Cookies.

    Santa's Christmas Cookies can be decorated with kids' wish lists. Place on a glass of cold milk, and Santa will Ho Ho Ho for these sugar cookies.

    Peppermint Chocolate Chip Cookies with flavors of the holidays, these have candy cane peppermint crunch, milk chocolate chips, and Andes creme de menthe chips. Shortbread Christmas Cookies have peppermint white chocolate and macadamia nuts, these say Mele Kalikimaka and Aloha with their tropical vibe.

    • A collage of Christmas cookies decorated for Santa including one with a kids wish list on a mug of milk.
      Santas Cookies
    • A white rectangle plate filled with chocolate chip peppermint cookies with a small Santa nearby.
      Chocolate Chip Christmas Cookies
    • A pile of pineapple shaped peppermint macadamia nut shortbread cookies.
      Christmas Shortbread Cookies
    A glass of cold milk with a Christmas cookie on top with child wish list on top.

    Holiday Food Gifts

    Give some homemade extract to the home baker in your family, in pretty glass bottles with a cute bow or with a mini Santa hat, and you can even tie a recipe card for your favorite cake, chocolate chip cookie, or baking recipe!

    I had just made these bottles last Christmas for home use and gifts. The extract is still very light as they hadn't had time to age, plus I didn't add enough beans to make it super dark and full flavor.

    Try yours in your holiday baking, here are some of my most popular recipes to bake up during the Christmas season.

    More Vanilla Extract Baking Recipes

    So many baking recipes use vanilla extract and some of my favorites are here for you! Birthday cakes, vanilla ice cream, vanilla syrup, vanilla sugar, savory dishes, pastry creams, fluffy buttercream frosting, crème brûlée, or a classic chocolate cake or white cake.

    Bake an Apple Crisp with a sweet crust, caramelized apples, and a streusel topping. Serve this apple dessert with ice cream and caramel sauce. A rich delicious Pumpkin Bread scratch recipe with warm Fall spices, fresh orange juice, and loaded with milk chocolate chips.  Bake a patriotic American Flag Cake with red, white, and blue marbled cake inside and bakery-style frosting. An adorable Bunny Cake that is an EASY dessert for Easter dinner.

    Learn step-by-step to make this "cut-up" Easter cake plus all the decorating tips. Bake a Christmas Cake loaded with your favorite holiday flavors of peppermint. This Christmassy bake is gorgeous for a fancy holiday dinner party and easy enough to make with kids for a merry, joyful, perfect dessert. Bake a patriotic American Flag Cake with red, white, and blue marbled cake inside and bakery-style frosting. Bake a spooky Halloween Cake with orange and chocolate marbled cake inside, and a cemetery all made in chocolate!

    • Apple Crisp in a red bowl with a silver spoon, ice cream, and drizzled with caramel sauce.
      Apple Crisp
    • A baked loaf of pumpkin bread sliced thick with a silver knife.s
      Pumpkin Bread
    • An adorable bunny cake on a hot pink background surrounded with jelly beans.
      Easter Bunny Cake
    • A gorgeous swirl bundt Christmas cake decorated with large piping of peppermint buttercream frosting and crushed and whole candy cane peppermints.
      Christmas Cake
    • An American flag cake decorated with blueberries, raspberries, and white frosting with a patriotic star towel.
      American Flag July 4th Cake
    • A chocolate Halloween Cake with gate, fence, tree and tombstones.
      Halloween Cake

    Did you love this recipe? We would love to hear from you! If you make this recipe and love it, give it a 5-star rating ⭐⭐⭐⭐⭐ with a comment. THANK YOU!! Follow Delicious Table with my free newsletter and share this recipe with your friends on Facebook, Pinterest, and Instagram.

    A glass flip top bottle filled with vanilla extract, and real vanilla bean pods on the table.
    Print

    Vanilla Extract Recipe

    Taste the difference in homemade frostings, vanilla bean ice cream, cookies, cakes, pies, and other desserts, and make your own vanilla extract! A good quality vanilla extract can be expensive due to the cost of growing the pods on tropical vanilla orchids. Not all extracts are alike. Create this easy recipe at home with concentrated fragrant vanilla flavor to use in baking or gift during the holidays.
    Course Seasoning
    Cuisine American
    Keyword homemade vanilla extract, pure vanilla extract, vanilla extract, vanilla extract recipe
    Prep Time 5 minutes minutes
    Total Time 6 minutes minutes
    Servings 48
    Calories 547kcal
    Author Lisa Hatfield

    Equipment

    • Tahitian Vanilla Beans
    • 3 Sizes Stainless Steel Funnels
    • Small Serrated Knife
    • Tall Glass Flip Top Bottle

    Ingredients

    • 12 whole vanilla bean pods
    • 8 ounces vodka

    Instructions

    • Clean and sterilize your jars or bottles.
    • Slice each of the 12 vanilla beans down the length but not all the way through using a sharp knife.
    • Place the sliced beans into the clean bottle or jar, you can cut them in half with scissors if they don't fit.
    • Cover the beans completely submerged with 8 ounces of 80 proof vodka. Shake daily the first week, then rest in a cool dark place at room temperature out of direct sunlight for at least 6 months. You can use it after 2 months, it just gets better with time!
    • I like to use a small glass jar, like Mason jars or tall clamp-style glass bottles for a large batch. Its also fun to use labels, and write the date with a sharpie marker.
    • Vanilla extract can remain indefinelty as long as you add new vanilla beans and more vodka as you use it in your baking.

    Video

    Notes

    Best Extract Top Tips

    • Storage Tips: Once you make your extract, keep it at room temperature, out of direct sunlight in a cool dark spot, and give it a shake once per week.
    • Baking Tip: For recipes, measure the same amount of homemade extract as a store-bought brand.
    • Holiday Gifting: It is nice to remove the beans so the lucky person you gift it to isn’t responsible for refilling with more alcohol and the beans need to stay submerged. However, if it’s been less than 6 months, I recommend gifting with the beans in the bottle, with a little note explaining to keep them covered with vodka and remove beans at one year mark!
    • Sterilize Your Bottle Or Jar: Sterilizing the bottles is always a good idea! Use a container that can be run through the dishwasher or drop them in boiling water to sterilize them before using.
    • Shelf Life: Unused aged extract (with the beans fully submerged) will last several years. Aged extract without beans has an endless shelf life. The beans will become a little slimy if they aren’t almost fully submerged.
    • Black Specks: Vanilla pods have tiny black seeds inside and those are where the flavor is held. You will see lots of little black seeds in the bottle and in your baked goods too.

    Want An Endless Supply?

    As you use your extract in recipes, simply add a little more vodka into the bottle, and remove the old beans once a year. Simply add new split bean pods and this will become an endless supply. Take a look at my video for more tips!
    At the first full year mark, pour the extract through a strainer into a bowl. Discard the old beans, and replace the new sliced open beans in your bottle. Add the aged extract back into the bottle and keep on using it! Add some more vodka as you use it throughout the year.

    Flavors & Variations

    Non Alcohol Extracts - Pure extracts are made from alcohol because it’s the easiest way to pull the flavor out of the key ingredient like spices and herbs. I’ve never made one with a nonalcoholic alternative, but there are some online recipes to try!
    Various Alcohols To Try: All of these will create different flavor profiles for your baking or cooking. The main rule of thumb for good flavor is to portion at least 1.5 vanilla bean pods in each of the ounces of alcohol you choose. Each of these will add a unique subtle flavor to your cooking and baking!
    • Bourbon
    • Dark Spiced Rum
    • Coconut Rum
    • Brandy
    • Everclear (dilute with distilled water to reduce proof to 80-100 range)

    Nutrition

    Calories: 547kcal | Carbohydrates: 3g | Fat: 2g | Sodium: 2mg | Potassium: 2mg | Iron: 0.02mg

    Marinated Mozzarella Balls

    [heart_this] · Jul 22, 2023 · 1 Comment

    Marinated mozzarella balls in a beige ceramic dish with appetizer toothpicks.

    Last Updated June 5th, 2025 at 08:17 pm by Lisa

    Everyone loves cheese appetizers, and there is nothing easier than Marinated Mozzarella Balls! You can toss these together quickly with a simple marinade, fresh herbs, and seasonings, to go on a gorgeous charcuterie board or antipasto platter for a large crowd. Add some crackers, crusty bread, and drinks to get the party going...

    How To Make Mozzarella Balls 

    Some people call these Mozzarella Pearls. I love to make these cheesy appetizers for parties, especially on cheese boards! Most recipes use an olive oil liquid mixture to marinade in a large Mason jar.

    This recipe is simple. Just good flavors and nothing extra to toss out. You can adjust the simple ingredients on your mozzarella cheese balls to the tastes you prefer. Here is a basic idea of what you need from the grocery store...

    • extra virgin olive oil
    • fresh garlic
    • fresh parsley
    • fresh basil leaves
    • fresh thyme
    • fresh rosemary
    • red pepper flakes
    • kosher salt
    • fresh mozzarella balls (aka Italian bocconcini, ciliegine mozzarella, or mozzarella pearls)
    • optional: basil leaves for garnish

    PRO TIP: The packages of Italian fresh mozzarella balls I found were 8 ounces each and approximately 24 balls per box. You will drain off the liquid that is inside the container.

    1. Mix together the olive oil, minced garlic, herbs, red pepper flakes, and sea salt in a large bowl.
    2. Drain the liquid off, add the mozzarella balls to the olive oil mixture, and stir to fully coat. Allow them to marinate for at least an hour or longer. The longer they marinate, the better the flavors become! You can make them ahead of your party too. These can remain at room temperature for about 4 hours.
    3. Store in the fridge in an airtight container or mason jars for up to five days. Use up leftovers on a salad or for snacks, or melt on homemade pizza!
    4. Serve with appetizer picks in a single layer on a platter or small bowls on cheese boards like this Thanksgiving Charcuterie Board...
    A bountiful Thanksgiving charcuterie cheeseboard fill with colorful meats, cheeses nuts and more for Thanksgiving.

    Variations & Recipes With Mozzarella Balls

    All these great appetizer variation ideas are in the printable recipe card below. These might quickly become your go-to appetizers and a favorite recipe for parties.

    Fresh & Dry Herbs

    • Fresh herbs are the best option both for taste, the best flavor, and the bright green pop of color they add against the cheese balls.
    • If you use dry herbs, use ⅓ of what you would for fresh for best results. Dry herbs are much more concentrated.
    • Try a tiny sprinkle of oregano, about a ¼ teaspoon of dried, but not too much as this is a strong herb.

    Great Additions & Flavors

    • Use a good quality extra virgin olive oil, but not one that is flavored like garlic, it becomes overwhelming with all the other ingredients.
    • Slice a few cherry tomatoes to add in, or some good kalamata olives!
    • For a topping, drizzle aged balsamic vinegar, balsamic glaze, or white balsamic vinegar when you serve baby mozzarella balls.
    • Another great addition is marinated red peppers, which are sometimes fire-roasted bell peppers, or try some roasted Hatch Chiles.
    • Add Sun-Dried Tomatoes, try my recipe it is so easy and a great way to use up Summer garden tomatoes!

    Salad Mozzarella Ball Recipes

    Layer an easy Caprese salad, with juicy ripe cherries tomatoes sliced in half, fresh basil leaves, and your Italian marinated mozzarella pearls.

    Toss onto great side salad recipes like a fresh Caprese salad with grape tomatoes, or boil a large pot of salted water, add your favorite pasta, and make a Caprese pasta salad.

    And try these in my Pizza Salad, so easy and so good! This Italian salad pizza inspired recipe is healthy, low carb, drizzled with a creamy sun-dried tomato dressing with all the flavors of pizza we crave.

    Colorful and loaded with popular favorite pizza toppings like mini pepperoni, black olives, mushrooms, tangy pepperoncini, tiny ripe tomatoes, and little balls of mozzarella cheese...

    Pizza Salad Recipe
    A colorful Pizza Salad loaded with popular favorite pizza toppings like mini pepperoni, black olives, mushrooms, tangy pepperoncinis, tiny ripe tomatoes, and little balls of mozzarella cheese. This Italian salad pizza inspired recipe is healthy, low carb, drizzled with a creamy sun-dried tomato dressing with all the flavors of pizza we crave.
    GET THE RECIPE PIN IT
    A plate full of pizza salad topped with mini pepperoni, mushrooms, mozzarella balls, pepperoncinis, and black olives with a artistic black fork on the edge of the plate.
    Can you freeze mozzarella balls?


    Yes! In fact, whether they are marinated or not, you can free the small mozzarella pearls. Freeze them right in the package from the store, or if they have been marinated, put them in a zip-top bag or airtight freezer container. Use within a couple of months.

    Can you fry mozzarella balls?

    Yes! Fried mozzarella bites are an easy recipe and the perfect party appetizers. And the melted creamy mozzarella goes so well dipped into marinara sauce. You coat the little mozzarella balls in a topping and fry in hot oil like vegetable oil or peanut oil. You can even string cheese or mozzarella sticks instead!

    More Appetizer Recipes

     Every one of these impressive golden brown Puff Pastry Appetizers and delicious desserts in this collection is wrapped with irresistible flaky layers of freshly baked pastry and creative filling combinations. Find the perfect appetizer with these delicious recipes for your party!

    Create a stunning Thanksgiving charcuterie board (seen above) filled with your favorite little bites of sliced meats, different types of cheeses, marinated mozzarella balls, crackers, fruit, nuts, and a few festive and sugary holiday treats.

    These are the best Thanksgiving Appetizers for savory snacks, easy simple appetizers, and a bounty of party ideas for your celebration.  Nothing is easier than a Crostini Bar for appetizers with an easy setup and assembly. Try this easy appetizer recipe for a whipped goat cheese crostini topping and tons of ideas for other things to put on top, for your party! 🥖🍷🧀

    Boursin Cheese whips together in just minutes for an easy appetizer on a cheeseboard. One of the best ways to eat it is simply with toasted warm bread or crackers.

    Create a spooktacular Halloween Charcuterie Board filled with your favorite sliced meats, an assortment of cheeses, crackers, fruit, nuts, and a few spooky and sugary Halloween treats.

    • A number of puff pastry appetizers, dinner ideas, and desserts in a collection.
      40 Puff Pastry Appetizer Recipes
    • A bountiful Thanksgiving charcuterie cheeseboard fill with colorful meats, cheeses nuts and more for Thanksgiving.
      Thanksgiving Charcuterie Board
    • A collection of Thanksgiving appetizers with recipe ideas, and party decorating tips for a Fall party.
      36 Thanksgiving Appetizers
    • A rustic table with small bowls filled with toppings for a fall appetizer crostini bar.
      Fall Crostini Bar
    • A wooden cutting board with small baguettes sliced open with a white bowl of whipped creamed cheese spread on a slice.
      Boursin Cheese
    • A large Halloween Charcuterie cheeseboard loaded with stacks of crackers, cut and sliced meats, nuts, and Halloween candy for a Halloween party.
      Halloween Charcuterie Board

    Did you love this recipe? We would love to hear from you! If you make this recipe and love it, give it a 5-star rating ⭐⭐⭐⭐⭐ with a comment. THANK YOU!! Follow Delicious Table with my free newsletter and share this recipe with your friends on Facebook, Pinterest, and Instagram.

    Marinated mozzarella balls in a beige ceramic dish with appetizer toothpicks.
    Print

    Marinated Mozzarella Balls Recipe

    Everyone loves cheese appetizers, and there is nothing easier than Marinated Mozzarella Balls on a gorgeous Charcuterie Board with some crackers, crusty bread, and drinks to get the party going.
    Course Appetizer
    Cuisine Italian
    Keyword marinated bocconcini, marinated mozzarella appetizer, marinated mozzarella balls, mariniated ciliegine, mozzarella pearls
    Prep Time 10 minutes minutes
    Total Time 10 minutes minutes
    Servings 16
    Calories 103kcal
    Author Lisa Hatfield

    Equipment

    • Glass Prep Bowls
    • Appetizer Picks

    Ingredients

    • ¼ cup extra virgin olive oil
    • 2 cloves garlic minced
    • 1 tablespoon aged balsamic vinegar or glaze
    • 1 tablespoon finely chopped fresh parsley 1 teaspoon dry
    • 1 tablespoon finely chopped fresh basil 1 teaspoon dry
    • ½ tablespoon finely chopped fresh rosemary
    • 1 tablespoon finely chopped fresh thyme 1 teaspoon dry
    • ¼ teaspoon dry oregano
    • ½ teaspoon red pepper flakes
    • ¼ teaspoon kosher sal
    • 16 ounces bocconcini or ciliegine mozzarella drained

    Instructions

    • Mix together the olive oil, minced garlic, herbs, red pepper flakes and sea salt in a glass bowl.
    • Drain the liquid off, add the mozzarella balls to the olive oil mixture, and stir to fully coat. Allow them to marinate for at least an hour or longer. The longer they marinate, the better the flavors become! You can make them ahead of your party too. These can remain at room temperature for about 4 hours.
    • Store in the fridge in an airtight container or mason jar for up to five days. Use up leftovers on a salad or for snacks, or melt on homemade pizza!
    • Serve with appetizer picks in a single layer on a platter or small bowls on cheese boards.

    Video

    Notes

    Mozzarella Cheese Balls

    The packages I found were 8 ounces each and approximately 24 balls per box. 

    Can you freeze mozzarella balls?

    Yes! In fact, whether they are marinated or not, you can free the small mozzarella pearls. Freeze them right in the package from the store, or if they have been marinated, put them in a zip-top bag or airtight freezer container. Use within a couple of months.

    Fresh & Dry Herbs

      • Fresh herbs are the best option both for taste, the best flavor, and the bright green pop of color they add against the cheese balls.
      • If you use dry herbs, use ⅓ of what you would for fresh for best results. Dry herbs are much more concentrated.
      • Try a tiny sprinkle of oregano, about a ¼ teaspoon of dried, but not too much as this is a strong herb.

    Great Additions & Flavors

      • Use a good quality extra virgin olive oil, but not one that is flavored like garlic, it becomes overwhelming with all the other ingredients.
      • Slice a few cherry tomatoes to add in, or some good kalamata olives!
      • For a topping, drizzle aged balsamic vinegar, balsamic glaze, or white balsamic vinegar when you serve baby mozzarella balls.
      • Another great addition is marinated red peppers, which are sometimes fire-roasted bell peppers, or try some roasted Hatch Chiles.
      • Add Sun-Dried Tomatoes, try my recipe it is so easy and a great way to use up Summer garden tomatoes!
     

    Nutrition

    Calories: 103kcal | Carbohydrates: 1g | Protein: 5g | Fat: 9g | Saturated Fat: 2g | Polyunsaturated Fat: 0.4g | Monounsaturated Fat: 2g | Cholesterol: 10mg | Sodium: 58mg | Potassium: 9mg | Fiber: 0.1g | Sugar: 0.2g | Vitamin A: 69IU | Vitamin C: 1mg | Calcium: 106mg | Iron: 0.2mg

    Seafood Sauce

    [heart_this] · Jul 18, 2023 · 1 Comment

    A white ceramic bowl filled with seafood sauce on a cutting board.

    A Seafood Sauce that is light and tangy from the fresh lemon, dill, and capers. Try this creamy condiment with fish and chips, calamari, baked or grilled fish, fried shrimp, crab cakes, and so much more!

    Fresh seafood will be the star of the show with this delightful dipping sauce made with simple ingredients. Skip the jarred stuff, and mix up this easy recipe in minutes. Dinner will feel like you are at a fancy seafood restaurant...

    Seafood Sauce Recipe

    This is a milder sauce, similar to a tartar sauce but skips the addition of pickles and relish. The lemon zest and juice add brightness that seafood lovers will adore. The fresh dill and capers pair so well with many kinds of seafood dish ideas like wild-caught fish, crab, octopus, and shrimp.

    The Ingredients

    • mayonnaise
    • lemon zest
    • fresh lemon juice
    • capers (immature flower buds Caper plant usually pickled)
    • fresh dill
    • garlic clove
    • extra-virgin olive oil
    • pinch salt and black pepper

    Instructions To Make It!

    Finely chop the fresh dill. I highly recommend fresh dill herbs, but dried will work, but not as pretty or have the flavor punch. Wash the lemon, then zest using a Microplane. Slice and squeeze in the lemon juice.

    In a small bowl, whisk the mayonnaise with lemon zest, lemon juice, capers, chopped fresh dill, salt, pepper, olive oil, and crushed garlic. Whisk until well combined, and keep chilled in a container or bowl until ready to use. That's it!

    What is Marie Rose Sauce?

    Fanny Cradock created this popular British condiment recipe as a seafood cocktail-type sauce in the 1960s. A simple version mixes Ketchup with mayonnaise. And other ingredients can be added like real crushed tomatoes, Worcestershire sauce, lemon juice, and black pepper.

    Ways To Use Seafood Sauces

    Cooked seafood and side dishes like grilled or steamed artichokes are outstanding with this homemade seafood sauce recipe. Add some lemon wedges and melted butter for crab legs and lobster. And use this homemade version as a seafood boil sauce to drizzle on everything from shrimp to corn!

    • Seafood Boil Recipes
    • Snow Crab Legs
    • Lobster Tails
    • Fish & Chips (French Fries in North America)
    • Crab Cakes
    • Popcorn Shrimp
    • Crawfish or Crab Boil
    A small silver spoon in a white bowl of seafood sauce garnished with lemon and dill.

    Sauce Variations

    There are endless optional ingredients to add great flavor and customize it to your taste. The best part is you can change up this recipe and create delicious sauces for all kinds of dishes like the holidays, or a special dinner.

    • Spicy Additions: Add in some drops of hot sauce like a Tabasco sauce, a tiny amount of cayenne pepper, a little bit of red pepper flakes, or chili powder for a spicy kick.
    • Seasoning Additions: Mix in a sprinkle of Lemon Pepper, Old Bay Seasoning, or Cajun Seasoning.
    • Delicious Mix Ins: Try some Worcestershire sauce, a Creamy Balsamic Horseradish Sauce, or Chili Sauce. You could even mix in some Cocktail Sauce!
    • More Savory Ideas: Add a splash of white wine or clam juice, use lime juice and zest in place of lemon, more crushed garlic cloves, garlic powder, onion powder, or your favorite seasoning mix. Or mix in a new fresh minced herbs like tarragon, parsley, or basil!
    A white bowl with dill caper aioli garnished with dill and a wood spoon to spread on a BLT Lobster Sandwich.

    More Seafood Recipes

    A BLT Lobster Sandwich Recipe with succulent lobster, thick crispy applewood smoked bacon, golden grilled sourdough bread, and slathered with an easy dill-caper aioli.

    Remoulade is a popular condiment or dipping sauce, usually paired with shrimp and crab seafood, cold meats, and fried foods.

    Lobster Ravioli with Lemon Butter uses a baked ravioli technique you can make in just over an hour or prep ahead for dinner parties, holidays, and romantic nights.

    The best homemade Cocktail Sauce Recipe is made in minutes for easy appetizers like cooked Shrimp. Dollop the best shrimp cocktail sauce on oysters, clams, crab, and more!

    Try one of the most healthy recipes for Shrimp Cocktail (prawn cocktail) is made by oven-roasting large jumbo shrimp, then dipping them in your own cocktail sauce!

    A fast oven-baked Shrimp Boil is an easy weeknight family dinner ready in 35 minutes. Loaded with andouille sausage, potatoes, corn, shrimp, and a garlic butter sauce! Get all the deep delicious taste of a low country boil. A new classic without the fuss of boiling water!

    • A sliced open BLT sandwich loaded with succulent lobster, bacon, lettuce and tomato stacked on a board.
      BLT Lobster Sandwich
    • A vintage spoon scooping up remoulade sauce to use on a recipe.
      Remoulade Sauce
    • Cocktail Sauce
    • A white plate filled with heart shaped lobster ravioli garnished with parsley.
      Lobster Ravioli
    • A clear glass plate with shrimp cocktail, cocktail sauce, and two glasses of champagne.
      Shrimp Cocktail
    • A white platter filled with corn, shrimp, sausage, and potatoes for dinner.
      Sheet Pan Shrimp Boil

    Did you love this recipe? We would love to hear from you! If you make this recipe and love it, give it a 5-star rating ⭐⭐⭐⭐⭐ with a comment. THANK YOU!! Follow Delicious Table with my free newsletter and share this recipe with your friends on Facebook, Pinterest, and Instagram.

    A white ceramic bowl filled with seafood sauce on a cutting board.
    Print

    Seafood Sauce Recipe

    This Seafood Sauce recipe is light and tangy with fresh lemon, dill, and capers. Try it with fish and chips, baked or grilled fish, fried shrimp, and crab cakes. Fresh seafood will be the star of the show with this delightful dipping sauce made with simple ingredients. Skip the jarred stuff, and mix up this easy recipe in minutes. Dinner will feel like you are at a fancy seafood restaurant!
    Course Sauces, Marinades, & Condiments
    Cuisine American
    Keyword fried fish sauce, sauce recipe, seafood condiment, seafood sauce
    Prep Time 5 minutes minutes
    Cook Time 0 minutes minutes
    Total Time 5 minutes minutes
    Servings 12
    Calories 85kcal
    Author Lisa Hatfield

    Equipment

    • Mini Spatula Set (Silicone)

    Ingredients

    • ½ cup mayonnaise
    • 1 teaspoon lemon zest
    • 1 tablespoon fresh lemon juice
    • 1 tablespoon chopped capers immature flower buds Caper plant usually pickled
    • 1 tablespoon finely diced fresh dill
    • 1 garlic clove finely minced
    • 2 tablespoons extra-virgin olive oil
    • pinch salt and freshly ground pepper

    Instructions

    • Finely chop the fresh dill. I highly recommend fresh dill herbs, but dried will work, but not as pretty or have the flavor punch. Wash the lemon, then zest using a Microplane. Slice and squeeze in the lemon juice.
    • In a small bowl, whisk the mayonnaise with lemon zest, lemon juice, capers, chopped fresh dill, salt, pepper, olive oil, and crushed garlic.
      Whisk until well combined, and keep chilled in an airtight container or bowl until ready to use. That's it!

    Video

    Notes

    Sauce Variations

    There are endless optional ingredients to add great flavor and customize it to your taste.
      • Spicy Additions: Add in some drops of hot sauce like a Tabasco, a tiny amount of cayenne pepper, a little bit of red pepper flakes, or chili powder for a spicy kick.
      • Seasoning Additions: Mix in a sprinkle of Lemon Pepper, Old Bay Seasoning, or Cajun Seasoning.
      • Delicious Mix Ins: Try some Worcestershire sauce, a Creamy Balsamic Horseradish Sauce, or Chili Sauce. You could even mix in some Cocktail Sauce!
      • More Savory Ideas: Add a splash of white wine or clam juice, use lime juice and zest in place of lemon, more crushed garlic cloves, garlic powder, onion powder, or your favorite seasoning mix.  Or mix in a new fresh minced herbs like tarragon, parsley, or basil!

    Nutrition

    Calories: 85kcal | Carbohydrates: 0.3g | Protein: 0.1g | Fat: 9g | Saturated Fat: 1g | Polyunsaturated Fat: 4g | Monounsaturated Fat: 3g | Trans Fat: 0.02g | Cholesterol: 4mg | Sodium: 78mg | Potassium: 5mg | Fiber: 0.05g | Sugar: 0.1g | Vitamin A: 10IU | Vitamin C: 1mg | Calcium: 2mg | Iron: 0.1mg

    • Page 1
    • Page 2
    • Page 3
    • Interim pages omitted …
    • Page 8
    • Go to Next Page »

    Primary Sidebar

    MEET LISA

    Hey Everyone! I've been cooking passionately for over 30 years with professional culinary training and thousands of recipes in my collection. Let's get cooking! ♥

    Find out more →

    FOLLOW US ON SOCIAL

    • Facebook
    • Instagram
    • LinkedIn
    • Pinterest
    • YouTube

    MOST POPULAR RECIPES

    • Three golden crispy edged hash browns baked in a muffin tin on cutting board.
      Oven Baked Hash Browns
    • A white ceramic dog dish that says woof filled with homemade dog food.
      Homemade Dog Food Recipes (30+ Ideas!)
    • A large spoon holding a scoop of hot potato casserole serving it for dinner.
      Cheesy Potato Casserole
    • Marinated mozzarella balls in a beige ceramic dish with appetizer toothpicks.
      Marinated Mozzarella Balls
    • A white casserole dish with oven roasted pulled pork shredded and ready to eat in tacos or a recipe for dinner.
      Oven Roasted Pulled Pork
    • A baked loaf of pumpkin bread sliced thick with a silver knife.s
      Pumpkin Bread

    ALL READER FAVES ►

    FALL RECIPES

    • A ceramic dish full of golden brown roast pumpkin seeds.
      Roasted Pumpkin Seeds
    • Dozens of pictures of 200 Halloween recipes including adult drinks, appetizers, treats, snacks, desserts for kids and families all with a Halloween theme.
      200+ Best Halloween Recipes
    • Apple Crisp in a red bowl with a silver spoon, ice cream, and drizzled with caramel sauce.
      Apple Crisp
    • Slices of green Granny Smith apples around a white dish with a sweet dessert dip inside a low small white dish with a ruffled edge, and a piece of apple sticking into the dip.
      Caramel Apple Dip
    • A large jar filled with apple pie filling with a lid and bow.
      Apple Pie Recipe Filling
    • A white pie dish with a slice of apple crumble pie, also known as a dutch apple pie with a crumbled topping and green apples in the background in a wood bowl.
      Dutch Apple Pie

    Footer

    Most Popular "Reader Favorite" Recipes

    Three golden crispy edged hash browns baked in a muffin tin on cutting board.

    Oven Baked Hash Browns

    A white ceramic dog dish that says woof filled with homemade dog food.

    Homemade Dog Food Recipes (30+ Ideas!)

    A large spoon holding a scoop of hot potato casserole serving it for dinner.

    Cheesy Potato Casserole

    Marinated mozzarella balls in a beige ceramic dish with appetizer toothpicks.

    Marinated Mozzarella Balls

    A white casserole dish with oven roasted pulled pork shredded and ready to eat in tacos or a recipe for dinner.

    Oven Roasted Pulled Pork

    A baked loaf of pumpkin bread sliced thick with a silver knife.s

    Pumpkin Bread

    A large glass clamp jar filled with pickled eggs, fresh jalapeno slices, and spices.

    Jalapeno Pickled Eggs Recipe

    A large pork loin roast with a lot of dry rub seasoning pouring over the top.

    The Best BBQ Dry Rub

    Mexican pickled red onions in a clamp jar and white bowl with chiles and limes on a colorful striped cloth.

    Mexican Pickled Red Onions

    A white plate filled with heart shaped lobster ravioli garnished with parsley.

    Lobster Ravioli

    A sliver carving fork and knife next to a pork loin roast and topped with cherries.

    Cherry Balsamic Pork Loin

    A Cinco de Mayo party with frozen margaritas called Coronaritas, guacamole, and chips on a green table.

    CoronaRita Margaritas

    A large white spoon scooping a serving of cowboy baked beans out of a casserole dish.

    Cowboy Beans

    More Delicious Recipes

    PLEASE FOLLOW US!

    • Amazon
    • Facebook
    • Instagram
    • LinkedIn
    • Pinterest
    • TikTok
    • Twitter
    • YouTube

    Footer

    DELICIOUS TABLE

    • MEET LISA
    • SEE MY WORK! PRESS & DIGITAL MEDIA PUBLICATIONS
    • PRIVACY POLICY
    • ACCESSIBILITY STATEMENT

    POPULAR LINKS

    • EMAIL SIGN-UP newsletters and updates
    • RECIPE INDEX
    • AMAZON STORE As an Amazon Associate, I earn from qualifying purchases.

    LET'S CONNECT

    • PINTEREST
    • FACEBOOK
    • INSTAGRAM
    • YOUTUBE
    • TIKTOK
    • LINKEDIN
    • X / TWITTER

    2026 COPYRIGHT © ♥︎ DELICIOUS TABLE ®️