
• Skip to main content
  • Skip to primary sidebar
  • Skip to footer

Delicious Table ® logo

menu icon
go to homepage
  • ALL RECIPES
  • HALLOWEEN PARTY FOOD
  • FALL RECIPES
  • WELCOME TO DT!
    • Facebook
    • Instagram
    • Pinterest
    • YouTube
  • subscribe
    search icon
    Homepage link
    • ALL RECIPES
    • HALLOWEEN PARTY FOOD
    • FALL RECIPES
    • WELCOME TO DT!
    • Facebook
    • Instagram
    • Pinterest
    • YouTube
  • ×
    Home » Recipes

    Latest Recipes

    Christmas Deviled Eggs

    [heart_this] · Dec 23, 2019 · 3 Comments

    White platter with Christmas Deviled Eggs garnished with rosemary and pomegranate seeds.

    Last Updated January 4th, 2026 at 09:33 am by Lisa

    Serve Christmas Deviled Eggs as festive appetizers with bubbly Champagne or drinks at your holiday party. Whip these together in a matter of minutes for a perfect holiday appetizer or a first course. These can be made ahead for happy hours and parties and served with other scrumptious finger foods and canapes.

    Sprinkle a few sparkling ruby red pomegranate seeds that look like holly berries, with sprigs of rosemary, and celebrate the holiday season with creamy deviled eggs...

    Christmas Deviled Eggs Recipe

    During the holidays, we all love easy recipes and festive holiday appetizers to wow our friends, serve to our family, or take to a party. These super creamy Christmas deviled eggs always get rave reviews!

    Deviled Eggs

    • whole eggs (large eggs)
    • mayonnaise
    • Dijon mustard (or swap in yellow mustard)
    • fresh lemon juice
    • creme fraiche (or sub soft cream cheese or sour cream)
    • finely chopped rosemary
    • sea salt
    • ground black pepper

    Garnish Decoration

    • pomegranate seeds
    • sprigs of fresh rosemary
    Steamed Hard Boiled Eggs Recipe
    Steamed hard boiled eggs cook perfectly every time with no green ring. So easy to peel, the eggshells miraculously slip right off in minutes!
    GET THE RECIPE PIN IT
    6 perfectly hard boiled eggs with a cracked half of an egg shelf on top.
    A white ceramic egg holder filled with freshly steamed hard boiled eggs.
    1. Make hard boiled eggs by boiling them on the stove, or in an Instant Pot, or try my easy steam method that works every time, and use good quality fresh eggs!
    2. Remove the eggs from the hot water, and immediately cover the eggs with cold water and ice.
    3. Peel the cooked, cool eggs, and slice them in half. Push on the back of the egg half and pop out the yellow yolks into a mixing bowl.
    4. First, mash yolks very well in the bowl presssing with a spatula to remove all the lumps from any of the remaining yolks. This helps to make them creamier and fluffy, and easy to pipe so they won't get stuck in the piping tip!
    5. Then, add mayonnaise, Dijon mustard, lemon juice, salt, pepper, finely chopped rosemary, creme Fraiche' or soft cream cheese. Whip until well combined for several minutes.
    6. Fill your ziptop or pastry bag with a large star piping tip and your filling to get those pretty swirls. Hold the pastry bag top, and guide with your other hand to pipe the filling into the eggshells. Pipe in a continuous spiral starting from the bottom to get that "swirl look". Wipe off any excess filling on your eggs or plate with a wet paper towel. Or spoon mixture into the boiled eggshells if you don't want to pipe the filling.
    7. Cut your tiny rosemary pieces and have your pomegranate seeds ready to go, then assemble in minutes right before your party on a beautiful white tray and garnish. Serve on a tray or deviled egg plate.

    PRO TIP: Instead of scooping out the yolk with a spoon (which can tear the egg white half) gently push from the back of the egg and pop the yolks out!

    A graphic showing boiled eggs and how to remove yolk from cooked eggs.

    Deviled Egg Make-Ahead Tips

    1. Boil the eggs, slice them in half, and keep them covered on a tray with plastic wrap up to a day ahead.
    2. Fit your ziptop bag with a large star piping tip and fill it with your Christmas deviled egg mixture filling and keep refrigerated.
    3. Right before serving time, swirl the filling into each eggshell and add your green and red garnish.
    Looking down on a white ceramic egg dish with hard boiled eggs and one sliced open to reveal the yolk

    Holiday Deviled Eggs Variations and Swaps

    Mustard Swaps: Dijon mustard is really good in deviled eggs, however, try regular yellow mustard or spicy brown mustard instead.

    Spices: You can add a sprinkle of garlic powder or some regular paprika (not hot or smoked).

    Garnish Ideas & Options: You could also garnish with sprigs of fresh dill, mint, chives, sage, or parsley. For the red, you can use whole cranberries, little circles of red pepper like a bell pepper, or even a dollop of caviar with some crème fraîche, sour cream, or Mexican crema.

    Holiday Christmas deviled eggs with two glasses of Champagne and a cork on a kitchen counter.

    How To Make Colored Eggs

    If you want to add even more of a festive touch to your holiday table, color each egg white half in different Christmas colors like red and green colors. You can then fill the red and green eggs with the filling recipe here.

    1. In 2 different small bowls, add about ½ cup water to each bowl with about 6 drops of food coloring or food dye, and 1 tablespoon of vinegar or white wine vinegar to each cup.
    2. Next, place the egg white half (with the yolks removed) into the red and green food coloring bowls and allow to sit until the desired color is reached. The longer the egg white is in the dye, the more vibrant the resulting color will be. Let them steep for about 15-20 minutes.
    3. If you want brighter colors, simply add some more green food coloring or a few drops of red food coloring to the bowls, stir and keep coloring the eggs longer.
    4. Remove the colored egg whites with a slotted spoon to dry on paper towels on a disposable paper plate. Then fill and garnish.

    How To Seed Pomegranates

    Serve your deviled eggs on a white platter garnished with fresh rosemary and pomegranate seeds. Get my tips and the secret to opening pomegranates with the Easiest Way To Seed A Pomegranate post.

    Pomegranates: Seed, Juice, and Recipe Ideas
    Get Pomegranate Seeds out the easy way. Learn the simple trick to open, seed, and juice pomegranate arils in step-by-step instructions.
    GET THE RECIPE PIN IT
    A white ceramic dish with pomegranate seeds ready to use in a recipe.
    History of Deviled Eggs?

    Deviled eggs date back to the Roman Empire, and got popular in the 1940s. Everyone loves them. Eggs are hard-boiled, the yolks are whipped with other tasty ingredients and piped back into the shells.

    What are classic deviled egg ingredients?

    Boiled Eggs
    mayonnaise
    mustard
    paprika
    (not hot paprika or smoked paprika)
    salt and pepper


    The egg yolks are whipped or mixed with mayonnaise (or sour creme, creme fraiche, or cream cheese), mustard (yellow or Dijon), paprika, a little salt, and pepper, they are replaced inside the egg white halves and are served cold.

    Lots of other flavorings can be added, and that is where deviled eggs are something truly spectacular.

    White long platter with gorgeous Christmas Deviled Eggs decorated with rosemary and pomegranate seeds.

    More Holiday Deviled Egg Recipes

    Oh and before I forget, I want to thank my friend Karen LoBue who asked at Easter if I had any deviled egg recipes on my site, and I said, "Ah no!" And I was sort of like why the heck don't I?!

    And today there are more egg recipes for you to enjoy, Easter Deviled Eggs, Halloween Deviled Eggs, and Autumn Deviled Eggs! There is also a great post on How To Steam Hard Boiled Eggs and a post all about Recipes To Make With Hard Boiled Eggs.

    So here you go, Karen, this one is for you! Yours were so delish at Easter, you inspired me to make more for the holidays! Thank you...

    12 Recipes For Hard Boiled Eggs
    Hard-boiled egg recipes that include the original Cobb Salad recipe, a potluck 7 Layer Salad, 2 flavors of Pickled Eggs including spicy and pub style, Macaroni Salad perfect for picnic potlucks and game days, Egg Salad Sandwiches, Ham Salad, and more. Once you try my super easy steam boiled method, you will get perfect eggs every single time that peel like a dream! This unique collection has creative ways to use leftover eggs plus holiday recipes. Put together these deviled egg recipe ideas on Halloween, Thanksgiving, Easter, or Christmas.
    GET THE RECIPE PIN IT
    12 creative ways to use hard boiled eggs in recipes showing deviled eggs for holidays, egg salad, ham salad, and potluck salads.

    With a gorgeous Fall color, Thanksgiving Appetizer Deviled Eggs are garnished with sage and thyme to celebrate the bounty of Autumn.

    Easter Deviled Eggs are decorated to look like little spring Easter baskets complete with grass and flowers and a light green avocado filling and are a great appetizer for brunch or Easter Dinner.

    Halloween Deviled Eggs are spooky party appetizers with dark black crackled egg shells filled with bright orange filling.

    • A slice of rustic tree wood with Thanksgiving deviled eggs garnished with fresh herbs.
      Thanksgiving Appetizer Deviled Eggs
    • Pretty Easter deviled eggs with green filling and decorated with fresh herbs and edible flowers.
      Easter Deviled Eggs
    • A black platter filled with Halloween deviled eggs sprinkled with black sesame seeds.
      Halloween Deviled Eggs
    A platter of holiday Christmas deviled eggs garnished with rosemary and pomegranate seeds.

    More Christmas Appetizers

    An easy appetizer and party food, Shrimp Cocktail is made by oven roasting large shrimp, then dipping them in a fresh homemade cocktail sauce!

    Sweet and Spicy Candied Pecans with pumpkin pie spice are crunchy sweet with a kick of heat. They make a wonderful holiday homemade food gift, wrap in mason jars with cute gift tags and a bow...

    Festive Holiday Cheeseballs You just can’t go wrong with cheese balls, and these look like ornaments for Christmas trees and come in four flavors!

    An easy last-minute appetizer packed with bacony goodness and that classic brie taste, bake a batch of Brie and Bacon Palmiers.

    • A clear glass plate with shrimp cocktail, cocktail sauce, and two glasses of champagne.
      Shrimp Cocktail
    • 4 cheese balls shaped round and topped with curly bows and ornament hooks to serve as Christmas appetizers.
      4 Cheese Ball Recipes
    • A white bowl with candied pecans and a few on the table with jars filled with them nearby.
      Candied Pecans
    • A white platter filled with brie and bacon palmier appetizers golden brown and ready to eat.
      Brie and Bacon Palmiers

    Did you love this recipe? We would love to hear from you! If you make this recipe and love it, give it a 5-star rating ⭐⭐⭐⭐⭐ with a comment. THANK YOU!! Follow Delicious Table with my free newsletter and share this recipe with your friends on Facebook, Pinterest, and Instagram.

    White platter with Christmas Deviled Eggs garnished with rosemary and pomegranate seeds.
    Print

    Christmas Deviled Eggs Recipe

    Serve Christmas Deviled Eggs as festive appetizers with bubbly Champagne or drinks at your holiday party. Whip these together in a matter of minutes for a perfect holiday appetizer or a first course. Sprinkle a few sparkling ruby red pomegranate seeds that look like holly berries, with sprigs of rosemary, and celebrate the holiday season with creamy deviled eggs.
    Course Appetizer
    Cuisine American
    Keyword christmas appetizer, Christmas deviled eggs, deviled eggs, easy appetizer, holiday appetizers, holiday deviled eggs
    Prep Time 30 minutes minutes
    Cook Time 20 minutes minutes
    Total Time 50 minutes minutes
    Servings 12
    Calories 61kcal
    Author Lisa Hatfield

    Equipment

    • Vegetable Steamer Basket
    • Deviled Egg Carrier
    • Deviled Egg Platter

    Ingredients

    deviled eggs

    • 6 boiled eggs
    • 2 tablespoons mayonnaise
    • 1 tablespoon Dijon mustard swap in yellow mustard or brown mustard
    • 1 tablespoon fresh lemon juice
    • 1 tablespoon creme fraiche or sub soft cream cheese or sour cream
    • 1 teaspoon fresh finely chopped rosemary
    • ½ teaspoon sea salt
    • ½ teaspoon ground pepper

    garnish decoration

    • ¼ cup pomegranate seeds garnish
    • sprigs fresh rosemary garnish

    Instructions

    • Make hard boiled eggs by boiling them on the stove in a large saucepan, or in an Instant Pot, or try my easy steam method in a large pot that works every time, and use good quality fresh eggs!
    • Transfer eggs from the hot water using a slotted spoon into a large bowl, and immediately cover the eggs with cold water and ice. Peel the cooked, cool eggs, and slice them in half.
      Push on the back of the egg half and pop out the yellow yolks into a mixing bowl. Instead of scooping out the whole yolks with a spoon (which can tear the egg white) gently push from the back of the egg and pop the yolks right out of the egg whites into a separate bowl.
      First, mash yolks very well in a bowl finely with a spatula to remove all the lumps from any of the remaining yolks. You can use a hand mixer or food processor too for a creamier and fluffy smoother consistency of the egg mixture filling. That is the secret to getting a gorgeous whipped yolk mixture that pipes like a dream.
    • Then, add mayonnaise, Dijon mustard, lemon juice, salt, pepper, finely chopped rosemary, creme Fraiche' or soft cream cheese. Whip until very well combined for several minutes. Next, load your filling into a large zip lock bag or pastry bag fitted with a large star tip and your filling to get those pretty swirls.
    • Hold the pastry bag top, and guide with your other hand to pipe the filling into the eggshells. Pipe in a continuous spiral starting from the bottom to get that "swirl look". Wipe off any excess filling on your eggs or plate with a wet paper towel. Or spoon mixture into the boiled eggshells if you don't want to fuss with piping.
    • Cut tiny rosemary pieces and have your pomegranate seeds ready to go, then assemble in minutes right before your party on a beautiful white tray and garnish. Serve on a tray or deviled egg plate.
    • Store in an air-tight container or hard boiled egg carrier for up to a whole day ahead.

    Video

    Notes

    Christmas Deviled Eggs Top Tips

    1. Instead of scooping out the yolk with a spoon (which can tear the egg) gently push from the back of the egg and pop the yolk out!
    2. Also, you can certainly mix the deviled egg filling with a spoon or whisk, but a handmixer gives you a creamy fluffy texture that pipes beautifully.
    3. Use a large gallon zip top bag and large star tip to pipe the filling into the egg white shells, it looks gorgeous and professional!
    4. Make-Ahead Tip: Boil the eggs, slice them in half, and keep them covered on a tray with plastic wrap. Fill your ziptop bag with a piping tip, and have your tiny rosemary pieces and pomegranate seeds ready to go, then assemble in minutes right before your party!

    Deviled Egg Make-Ahead Tips

    1. Boil the eggs, slice them in half, and keep them covered on a tray with plastic wrap up to a day ahead.
    2. Fit your ziptop bag with a large star piping tip and fill it with your Christmas deviled egg mixture filling and keep refrigerated.
    3. Right before serving time, swirl the filling into each eggshell and add your green and red garnish.

    Holiday Deviled Eggs Variations and Swaps

    Mustard Swaps: Dijon mustard is really good in deviled eggs, however, try regular yellow mustard or spicy brown mustard instead.
    Spices: You can add a sprinkle of garlic powder or some regular paprika (not hot or smoked).
    Garnish Ideas & Options: You could also garnish with sprigs of fresh dill, mint, chives, sage, or parsley. For the red, you can use whole cranberries, little circles of red pepper like a bell pepper, or even a dollop of caviar with some crème fraîche, sour cream, or Mexican crema.

    How To Make Colored Eggs

    If you want to add a festive touch to your holiday table, color each egg white half in different Christmas colors like red and green colors. You can then fill the red and green eggs with the filling recipe here.
    1. In 2 different small bowls, add about ½ cup water to each bowl with about 6 drops of food coloring or food dye, and 1 tablespoon of vinegar or white wine vinegar to each cup.
    2. Next, place the egg white half (with the yolks removed) into the red and green food coloring bowls and allow to sit until the desired color is reached. The longer the egg white is in the dye, the more vibrant the resulting color will be. Let them steep for about 15-20 minutes.
    3. If you want brighter colors, simply add some more green food coloring or a few drops of red food coloring to the bowls, stir and keep coloring the eggs longer.
    4. Remove the colored egg whites with a slotted spoon to dry on paper towels on a disposable paper plate. Then fill and garnish.

    Nutrition

    Calories: 61kcal | Carbohydrates: 1g | Protein: 3g | Fat: 5g | Saturated Fat: 1g | Cholesterol: 95mg | Sodium: 158mg | Potassium: 40mg | Fiber: 1g | Sugar: 1g | Vitamin A: 136IU | Vitamin C: 1mg | Calcium: 14mg | Iron: 1mg

    Sheet Pan Shrimp Boil

    [heart_this] · Sep 13, 2019 · 1 Comment

    A white platter filled with corn, shrimp, sausage, and potatoes for dinner.

    Last Updated April 25th, 2024 at 08:41 pm by Lisa

    A fast oven-baked Shrimp Boil is an easy weeknight family dinner ready in 35 minutes. Get all the deep delicious taste of this low country classic dish without the fuss .

    Traditionally, you boil the ingredients in one large pot. But that is a lot of time, prep, and can be messy for family dinner.

    By baking on a sheet pan, the deep, rich flavors of this dinner are amazing. The savory blend of spices mixed with garlic butter coats each and every bite...

    Looking overhead of a shrimp boil poured onto a platter including cooked shrimp, pieces of corn, sliced andouille sausage, and potatoes.

    Why You'll Love This Recipe

    • One pan and one small bowl to wash.
    • Protein and vegetables all cook at the same time.
    • Delicious, gotta love that seasoned garlic butter flavor.
    • No large pots of boiling water.
    • Fun. Easy. Tasty. Casual.
    • Perfect for Company.
    • Fast Cleanup.
    • Beautiful and Fresh.
    Cooked shrimp, potatoes, slices of andouille sausages and pieces of corn ready to eat for dinner.

    How To Bake Sheet Pan Shrimp Boil

    • 1 lb spicy andouille sausage fully cooked
    • 1 lb baby Dutch yellow potatoes
    • 1 lb shrimp uncooked, peeled, deveined, tails on
    • 3 ears sweet corn
    • 1 tablespoon Old Bay seasoning
    • 2 teaspoons crushed garlic
    • ¼ cup butter melted

    PRO TIP: Of course, you can always add more Old Bay seasoning and garlic (keep the butter at the same amount) depending on how spicy your family or company prefers.

    1. Preheat oven to 425 degrees. Spray a large sheet pan with coconut oil nonstick spray. 
    2. Wash baby potatoes well, cut each potato in half and place in microwave-safe bowl. Microwave the cut potatoes on high for 5 minutes. Once cooked, place cooked potatoes on the sheet pan. 
    3. Wash the corn and cut across each ear of corn into 6 pieces, place corn on the sheet pan. 
    4. Place the shrimp on the sheet pan, (be sure the shrimp are fully thaw if previously frozen). Slice the spicy andouille sausage into thin slices at a slight angle. 
    5. In a bowl, mix melted butter, Old Bay, and crushed garlic. Pour this mixture all over the shrimp, cut potatoes, andouille sausage slices, and cut corn pieces, toss well to combine and cover each piece. Spread into an even layer. 
    6. Place in oven and bake for 20 minutes at 425 degrees, or until shrimp in turns pink, potatoes are fork tender, and corn is tender. 
    A white platter filled with a shrimp boil recipe for dinner.

    Shrimp Boils FAQ

    Side Dishes To Serve With Shrimp Boil

    For large parties and gatherings, here are some classic side dishes that go well

    • Cocktail Sauce: Make up some fresh homemade cocktail sauce to dip the shrimp into.
    • Cornbread: Try my easy Cheesy Jalapeno Cornbread
    • Dinner Rolls: Serve up a tray of fresh Baked Rolls and slather with Herb Butter.
    • Coleslaw: This Coleslaw is so popular, and doesn't have mayo so it is safe to keep out on a hot day. It is so clean, crunchy, and fresh.
    • Broccoli Salad: A Broccoli Salad is so colorful and a nice option for a party.
    • Macaroni Salad: For a classic and all time favorite in my home, make a big batch of Macaroni Salad.
    A close up of cooked shrimp, pieces of corn, sausage, and small potatoes on a sheet pan to bake for dinner.

    More Sheet Pan Dinners

    Sheet Pan Chicken with croutons and baby potatoes takes 20 minutes to prep and this entire chicken sheet pan dinner bakes in 50 minutes!

    Lobster Ravioli with a Lemon Butter Sauce uses a baked ravioli technique you can prep ahead for dinner parties, holidays, and romantic nights. Make this ahead on a sheet pan with wonton wrappers and baked instead of boiling the ravioli. It is a perfect recipe for the holidays or special dinners like Valentine's Day.

    Easy sheet pan Baked Hamburgers have cheddar cheese inside and Burger Sauce on top. Oven-bake these for dinner or serve to a crowd. Perfect July 4th party food for summer cookouts!

    • A white platter filled with sheet pan chicken dinner including lemons, potatoes, and croutons.
      Sheet Pan Chicken
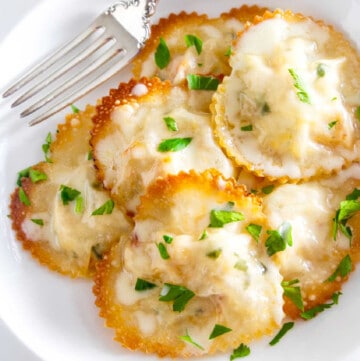
    • A white plate filled with heart shaped lobster ravioli garnished with parsley.
      Lobster Ravioli
    • Mini cheeseburgers with melted cheese, tomato, and lettuce with American flag toothpick decoration on top.
      Cheeseburger Sliders

    Did you love this recipe? We would love to hear from you! If you make this recipe and love it, give it a 5-star rating ⭐⭐⭐⭐⭐ with a comment. THANK YOU!! Follow Delicious Table with my free newsletter and share this recipe with your friends on Facebook, Pinterest, and Instagram.

    A white platter filled with corn, shrimp, sausage, and potatoes for dinner.
    Print

    Shrimp Boil ~ Sheet Pan Oven Baked

    Sheet Pan Shrimp Boil is a fast oven-baked weeknight family dinner ready in 35 minutes for an easy weeknight dinner with simple ingredients.
    Course Dinner & Main Dishes
    Cuisine American
    Keyword sheet pan dinner, shrimp boil, shrimp boil recipe
    Prep Time 10 minutes minutes
    Cook Time 25 minutes minutes
    Total Time 35 minutes minutes
    Servings 10
    Calories 268kcal
    Author Lisa Hatfield

    Equipment

    • Large Metal Sheet Pan
    • Coconut Oil Nonstick Spray

    Ingredients

    • 1 lb spicy andouille sausage fully cooked
    • 1 lb baby Dutch yellow potatoes
    • 1 lb shrimp uncooked, peeled, deveined, tails on
    • 3 ears sweet corn
    • 1 tablespoon Old Bay seasoning
    • 2 teaspoons crushed garlic
    • ¼ cup butter melted

    Instructions

    • Preheat oven to 425 degrees. Spray a large sheet pan with coconut oil nonstick spray. 
    • Wash baby potatoes well, cut each potato in half and place in microwave-safe bowl. Microwave the cut potatoes on high for 5 minutes. Once cooked, place cooked potatoes on the sheet pan. 
    • Wash the corn and cut across each ear of corn into 6 pieces, place corn on the sheet pan. 
    • Place the shrimp on the sheet pan, (be sure the shrimp are fully thawed if previously frozen). Slice the spicy andouille sausage into thin slices at a slight angle. 
    • In a bowl, mix melted butter, Old Bay, and crushed garlic. Pour this mixture all over the shrimp, cut potatoes, andouille sausage slices, and cut corn pieces, toss well to combine and cover each piece. Spread into an even layer. 
    • Place in oven and bake for 20 minutes at 425 degrees, or until shrimp in turns pink, potatoes are fork tender, and corn is tender. 

    Notes

    spicy

    Of course, you can always add more shrimp boil seasoning and garlic (keep the butter at the same amount) depending on how spicy your family likes dinner.

    Nutrition

    Calories: 268kcal | Carbohydrates: 6g | Protein: 19g | Fat: 18g | Saturated Fat: 7g | Cholesterol: 164mg | Sodium: 803mg | Potassium: 356mg | Fiber: 1g | Sugar: 0g | Vitamin A: 170IU | Vitamin C: 7.5mg | Calcium: 92mg | Iron: 3.2mg

    How To Cut Pineapple Bowls

    [heart_this] · May 30, 2019 · 3 Comments

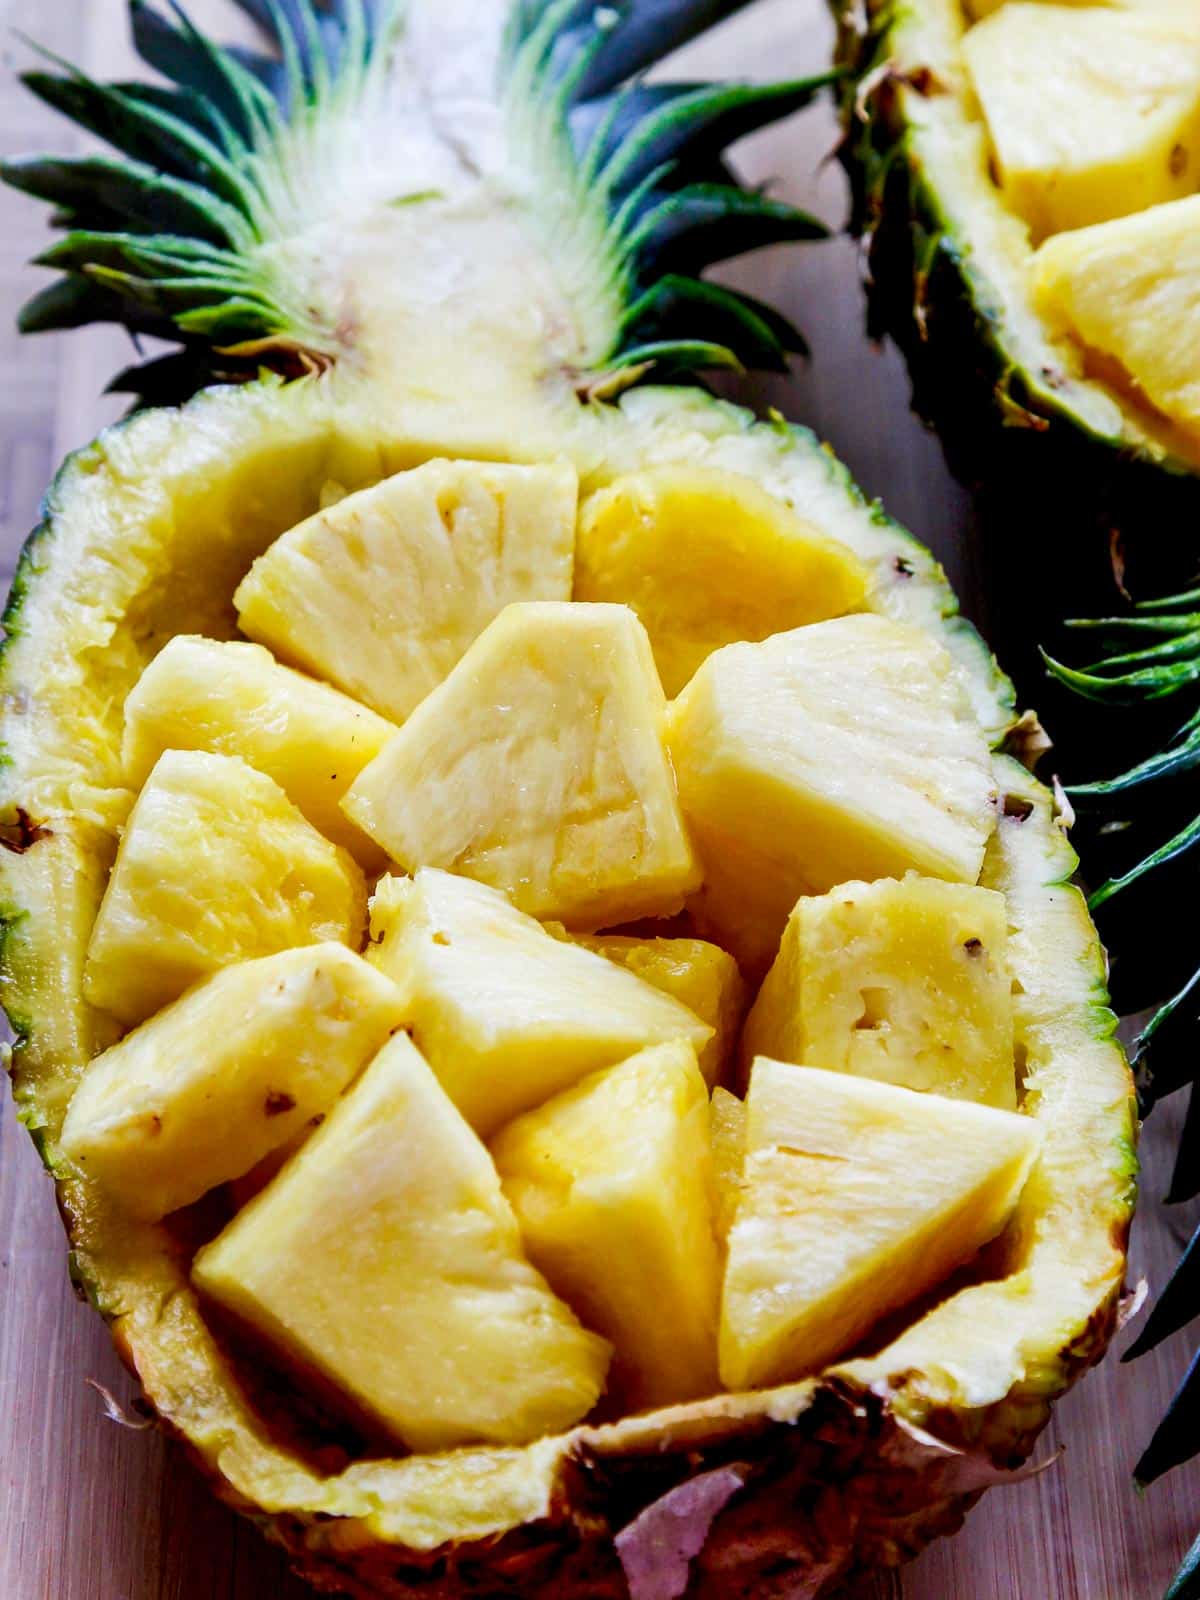
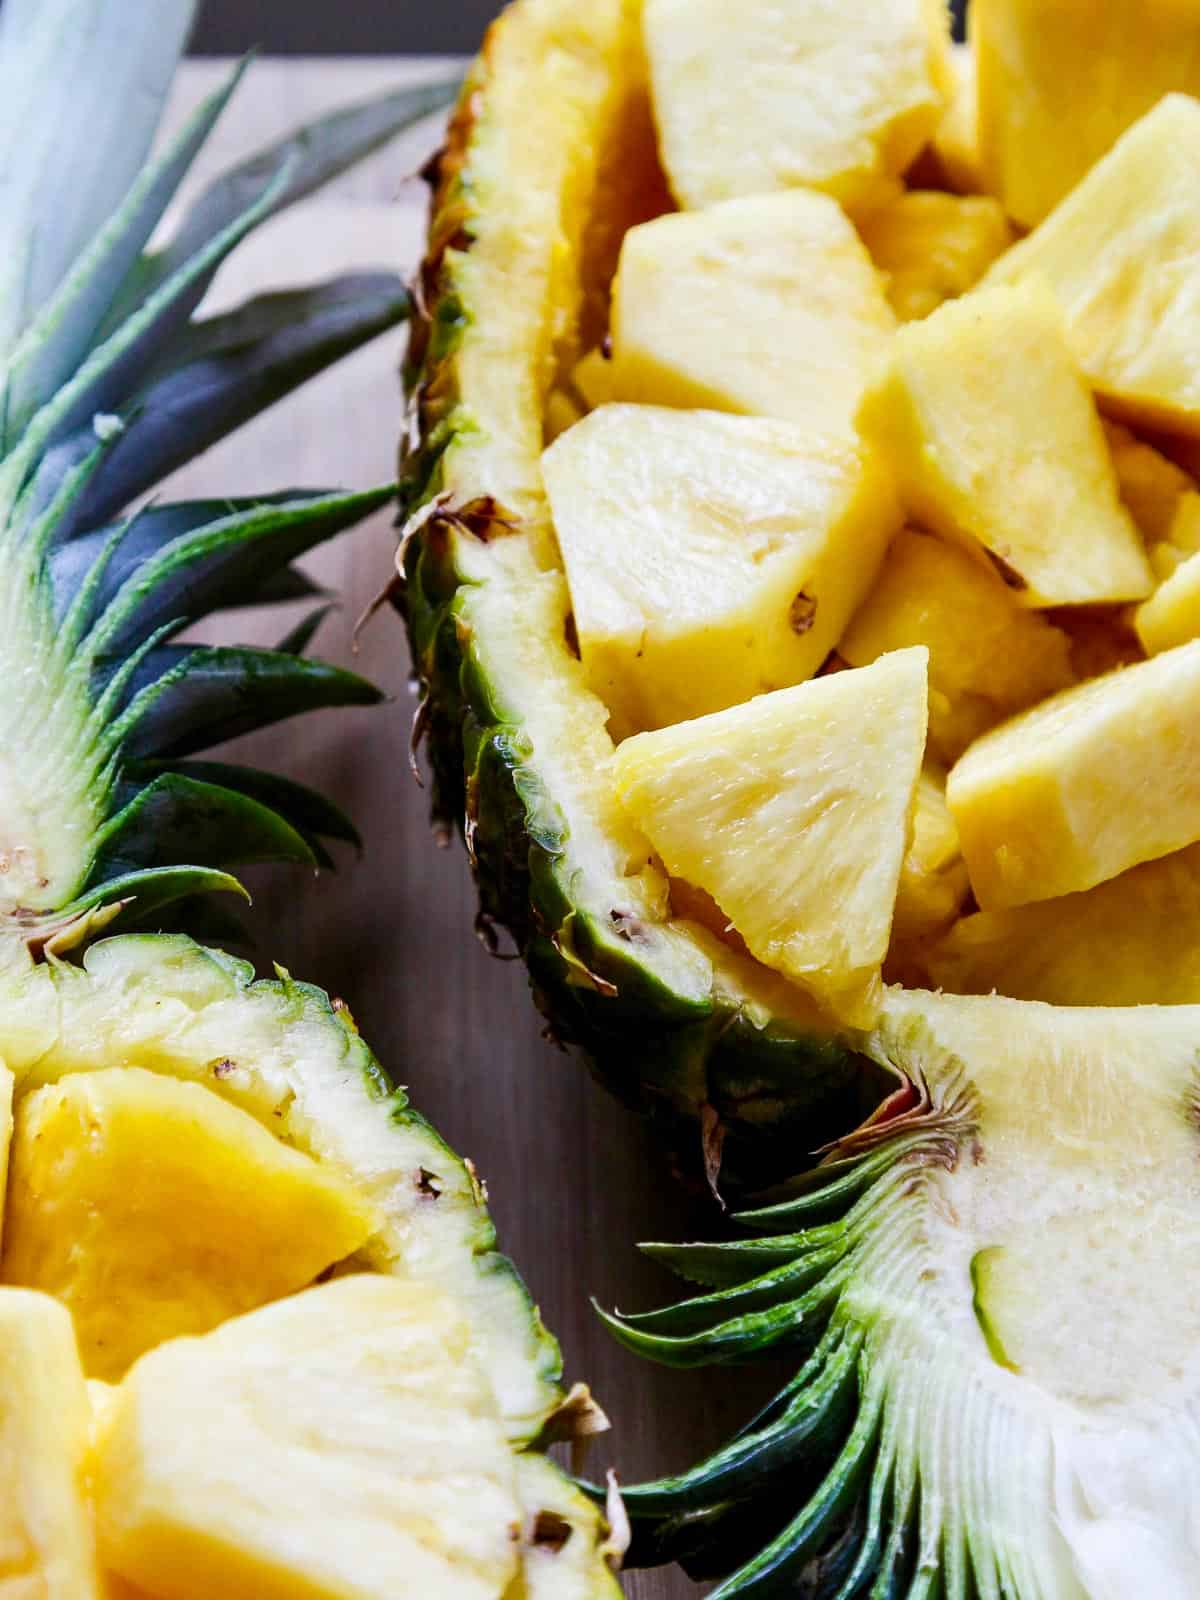
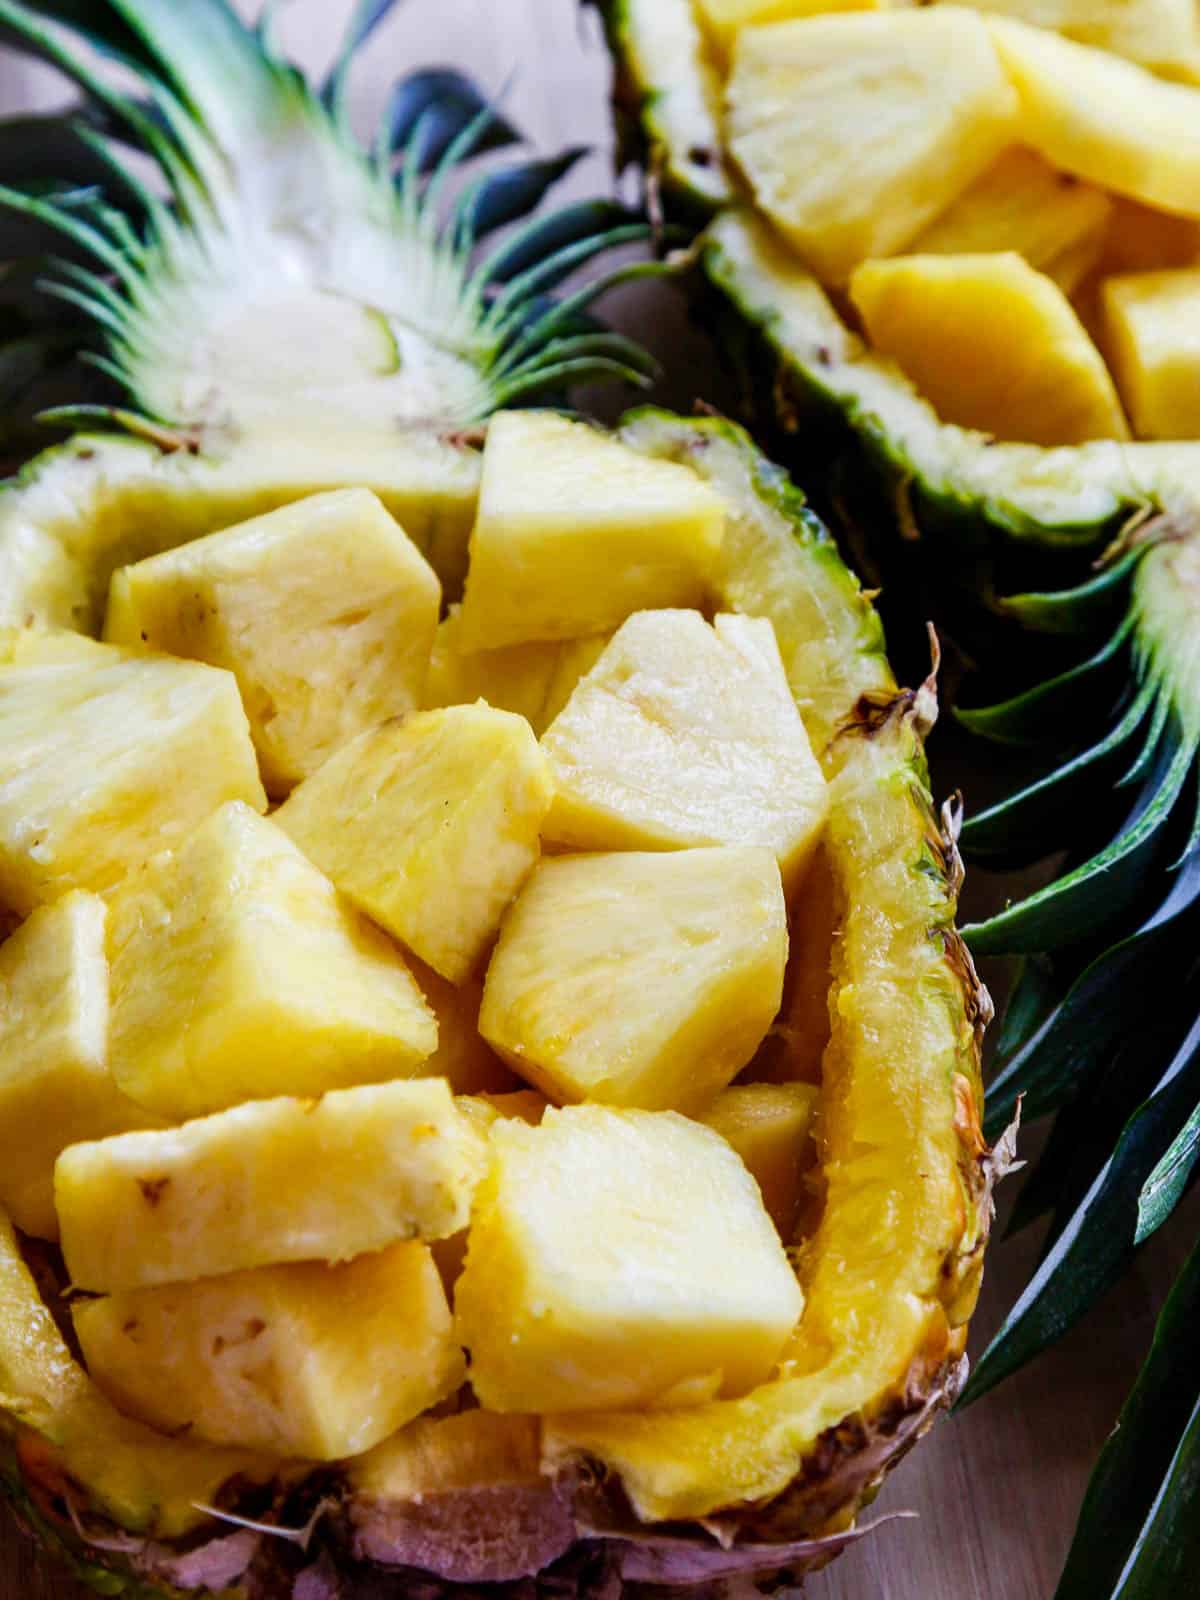
    A pineapple bowl filled with fresh cut chunks of pineapple ready to eat.

    Last Updated March 20th, 2022 at 02:05 pm by Lisa

    Learn how to cut pineapples and create Bowls or Boats as they are also known. This kitchen tip is a game-changer, just follow the steps and you might not ever buy it cut at the store ever again.

    There are so many recipes to try using this sweet tropical fruit. Make some pineapple fried rice, Shish Kabobs, or Huli Huli Chicken this summer. What a gorgeous way to serve fresh fruit for picnics, cookouts, or anytime...

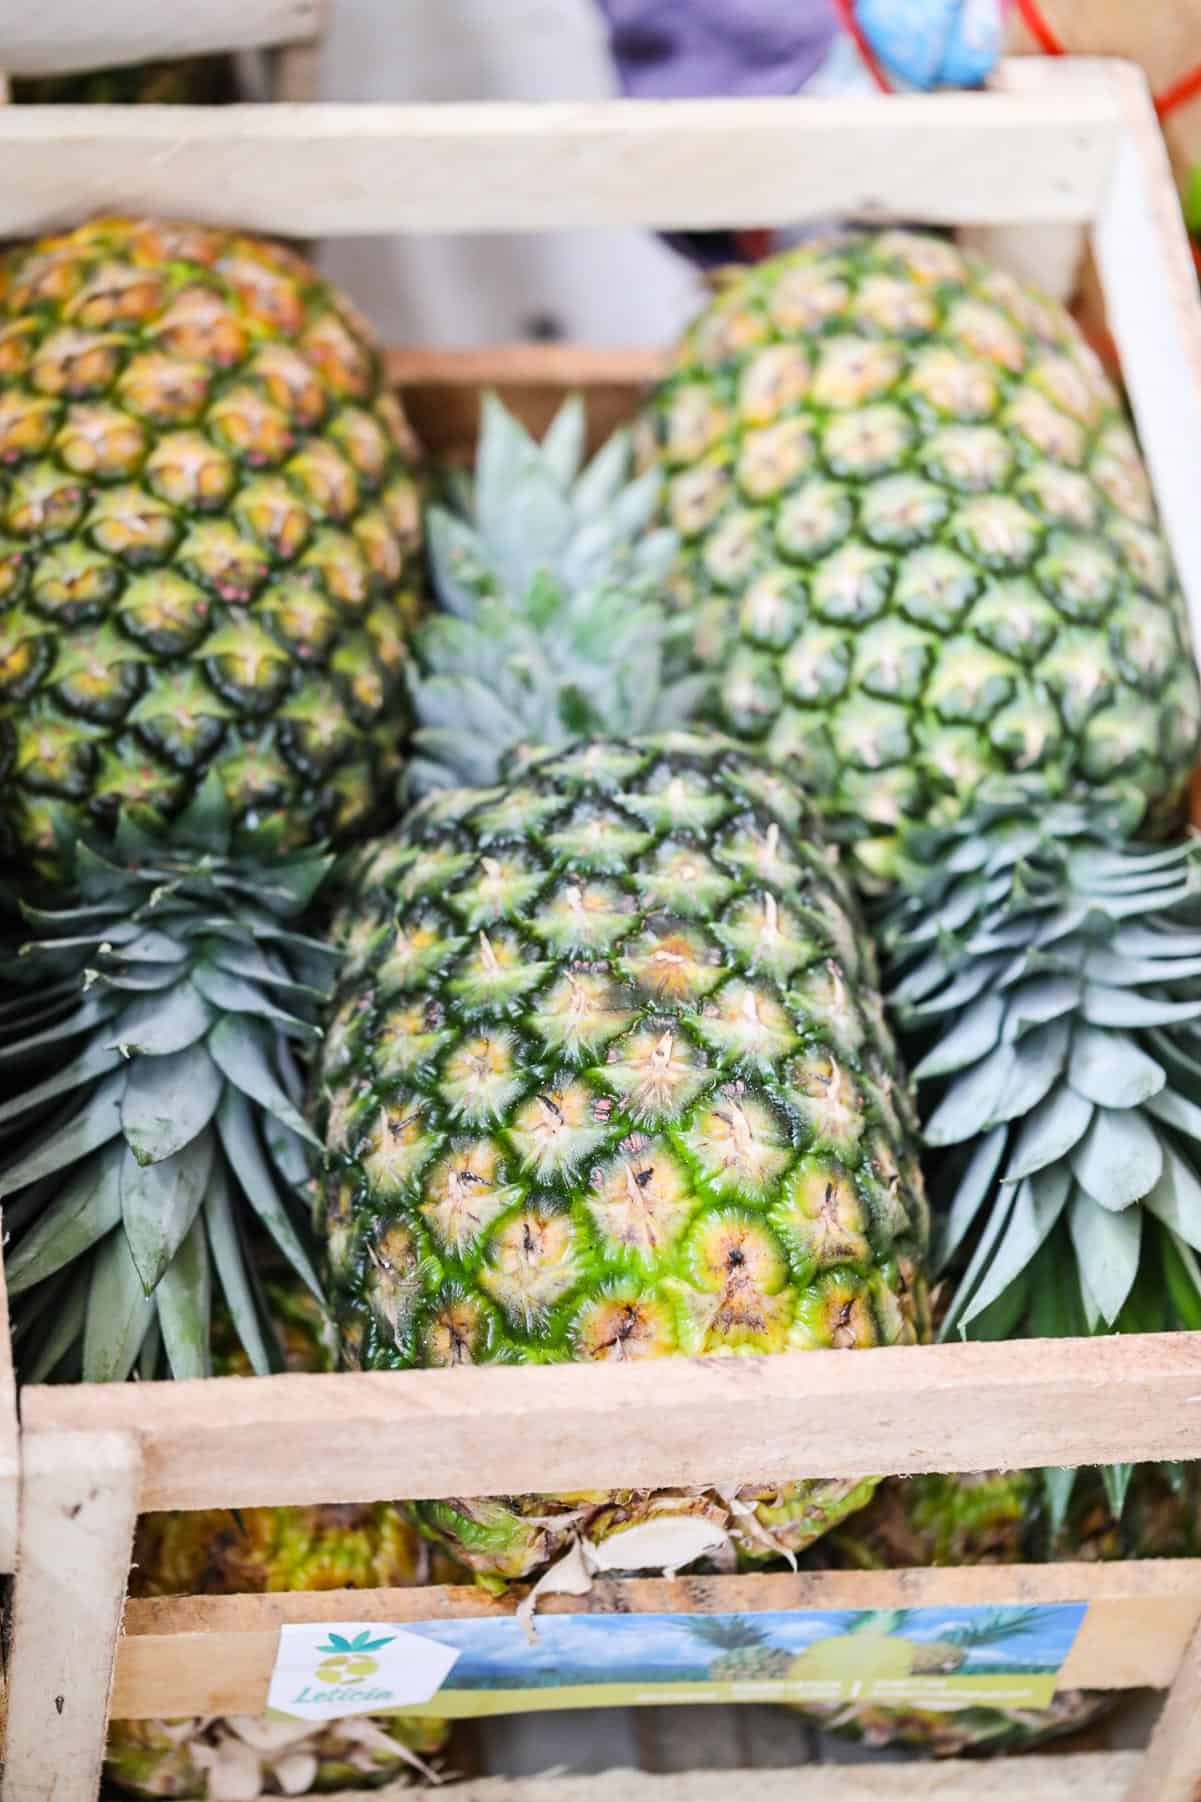
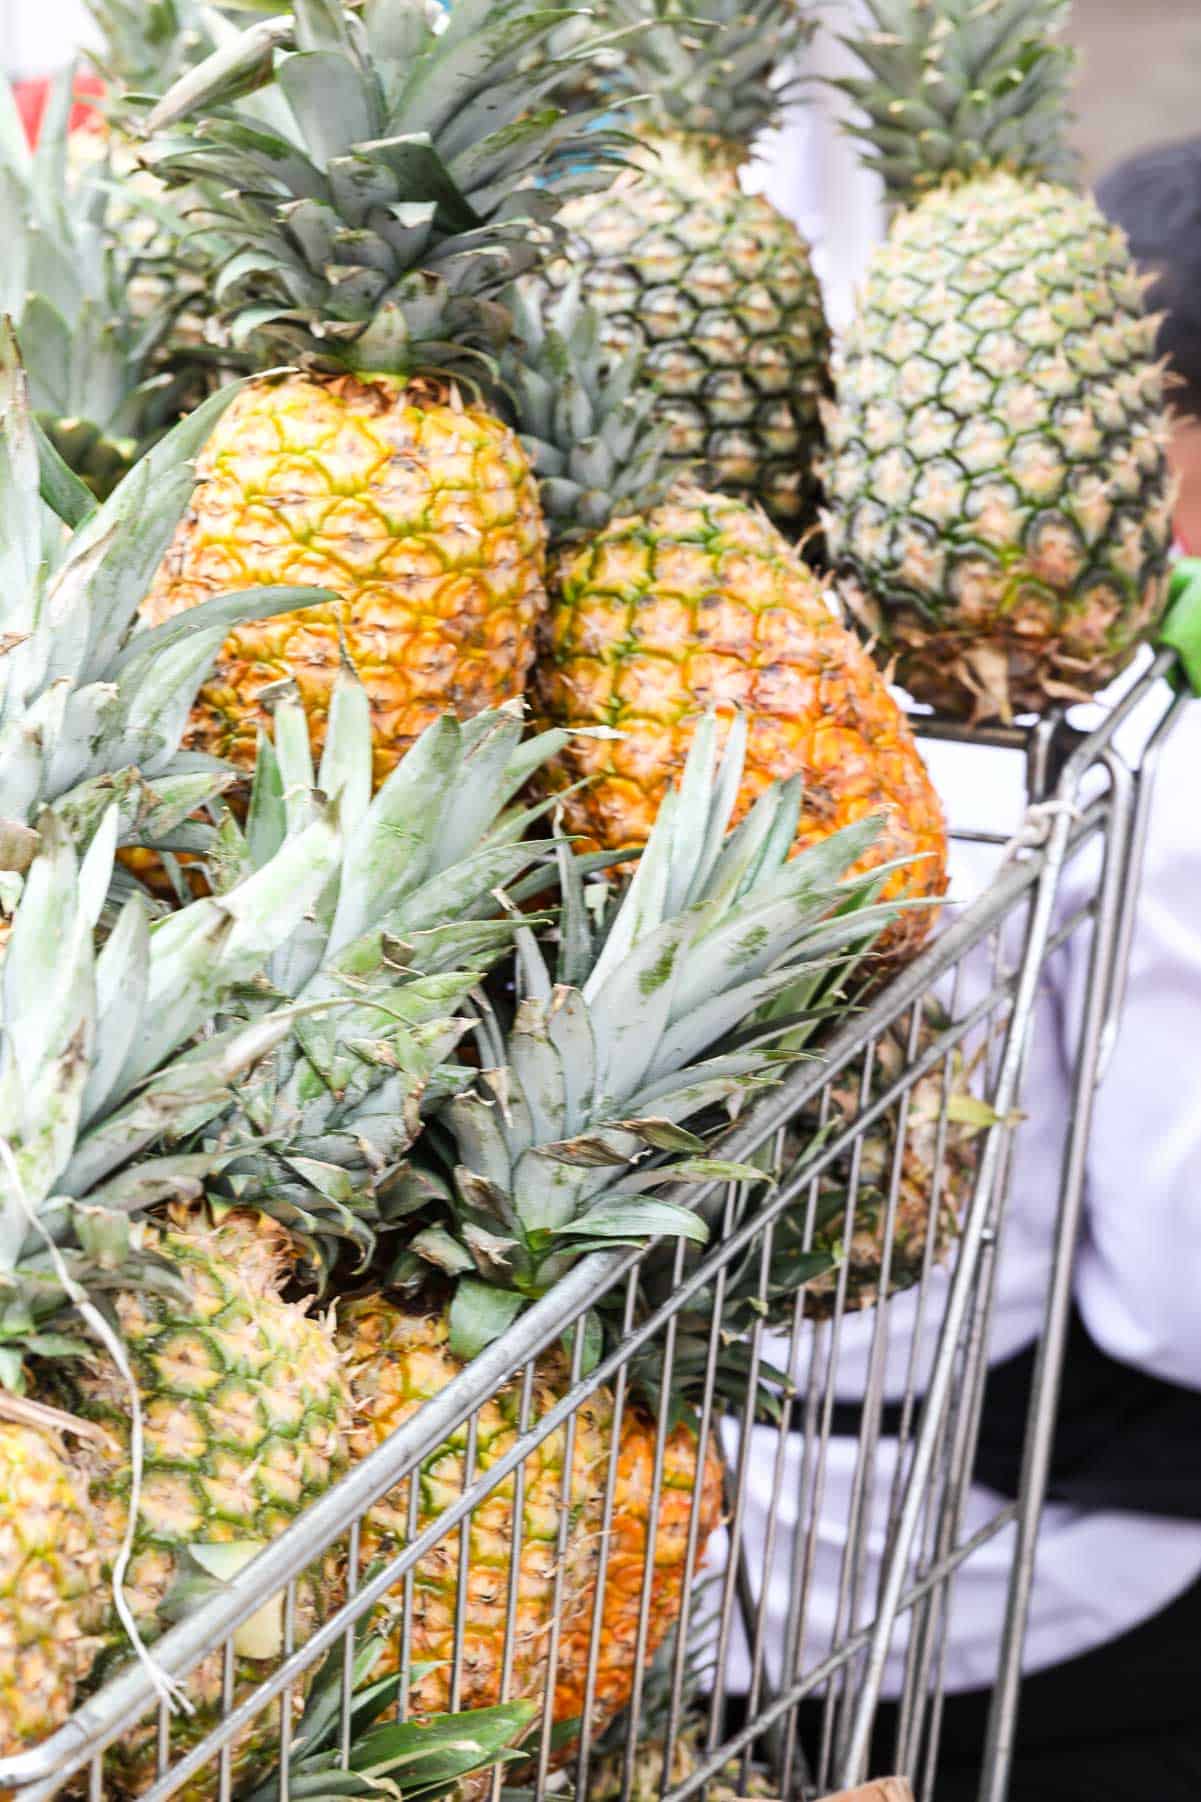
    Pineapples packed in a crate in a Lima Peru market 2018. Photo Credit ~ me!

    Top Pineapple Tips

    • Be sure the pineapple has a sweet smell towards the base.
    • Green color indicates that it might not be ripe and was picked too early.
    • Use the "Press Test."  A sweet (and ripe) pineapple will yield slightly to pressure.
    • Make sure to avoid overripe pineapples. They usually have reddish-brownish skins and dark dried leaves that crumble when you touch them and have a fermented smell. Pass on that one, it will taste-off, and be mushy and overripe inside.

    How To Make Pineapple Bowls

    Step-by-Step

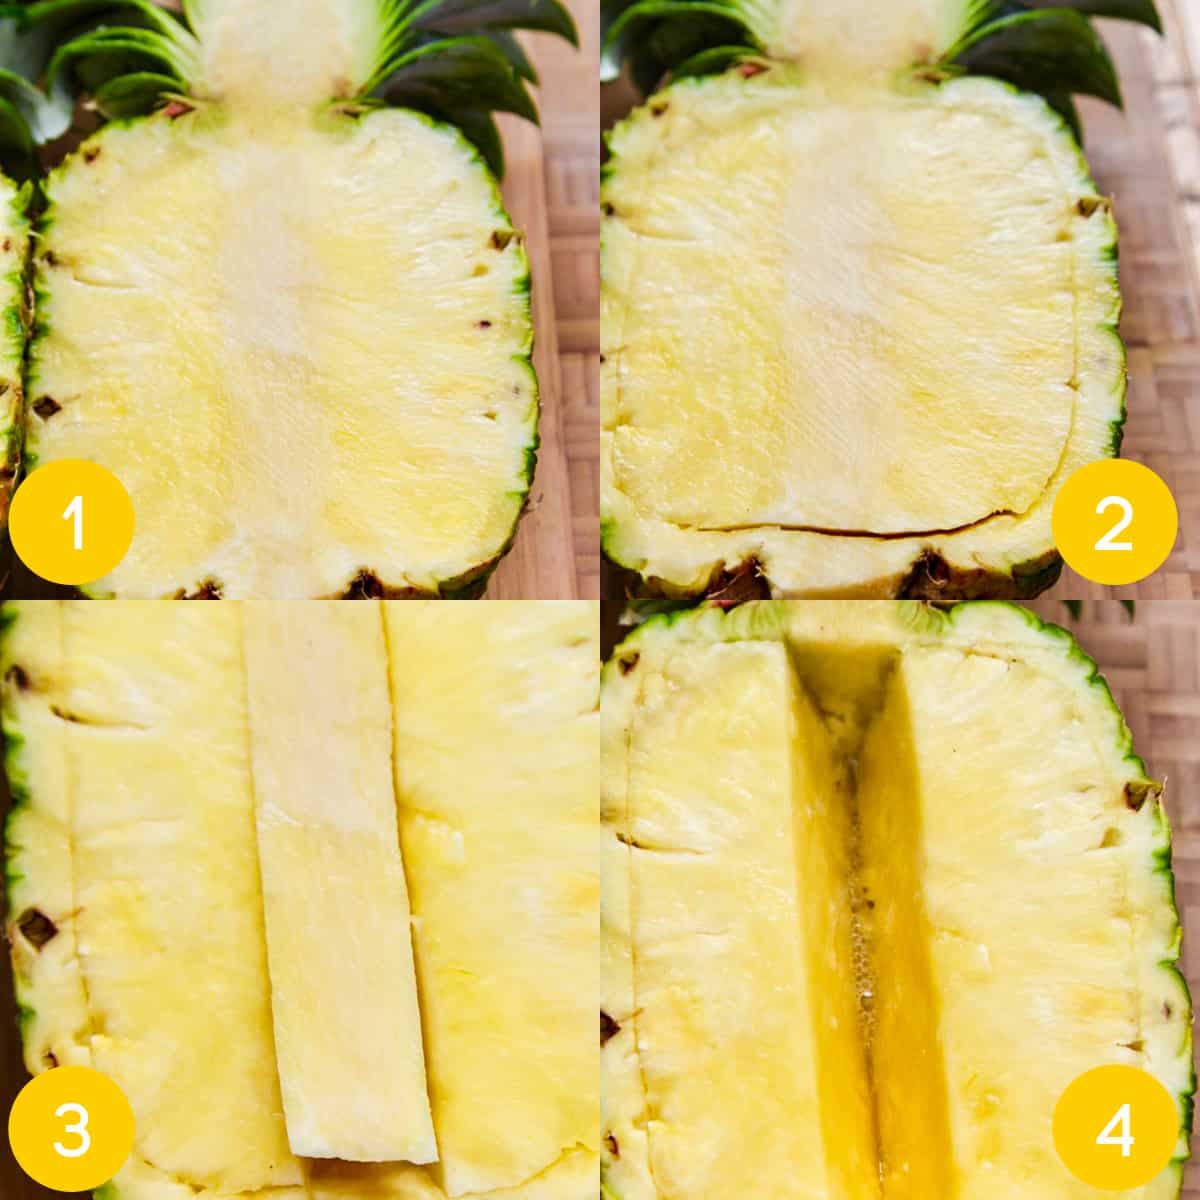
    1. Using a large knife cut the pineapple lengthwise and through the leaves into 2 halves.
    2. Next, use a small serrated paring knife, cut all the way around the edge leaving about ¾” of the outside edge.
    3. Cut the core out by cutting down both sides of the core at a slight angle inward in a "V" shape.
    4. Remove the core.

    5. Discard as it is tough and inedible.

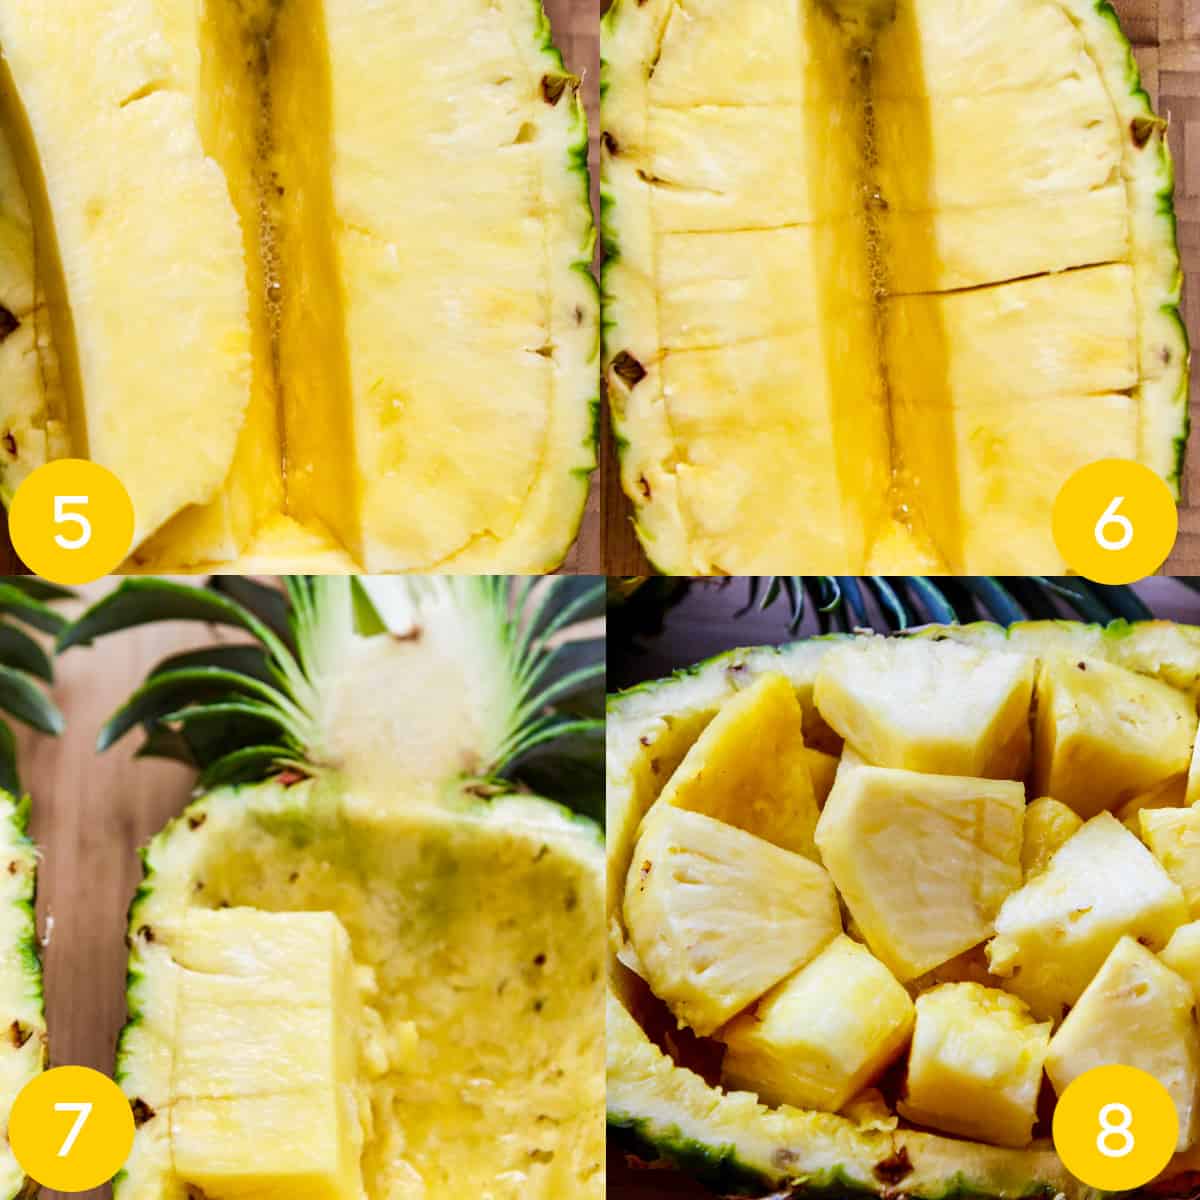
    6. Slice into chunks by making a grid pattern of about 1" pieces. Be careful not to cut through the outer skin.

    7. Use a large serving spoon, scoop out the pieces, save the juice ~ drink it or make a smoothie.

    8. Place the cut pieces back into the bowl.

    Pineapple FAQ

    How long does Pineapple last?


    You'll want to be sure you refrigerate it after you cut it up, and then it may last up to 7 days in a sealed container.

    How To Pick A Ripe Pineapple


    First, smell the bottom for sweetness.  This is the first tell-tale sign to determine how sweet and ripe your pineapple will be.  Sugar comes from the bottom of the fruit, where it migrates to the top as it ripens.  The bottom is where it should be most fragrant, so put your nose there not on the crown with all the leaves.
    If it smells sweet, like pineapple juice, it is ripe.  If you smell nothing, that means there is insufficient sugar and the fruit will not be sweet, and it has been harvested too early. 

    Pineapples ripen very little after they have been harvested. So you don't want to pick one that is underripe, hoping it will get ripened later. Unfortunately, it won't.

    What you want to look for is a yellow-golden color. 
    As the fruit starts to ripen in the field, it starts from the bottom, the higher the yellow rises toward the crown, the more sugar (and sweetness) it will have!
     
    Yellow on the bottom and green on the top will yield inconsistency in sweetness (i.e. some parts are sweet, other parts are not).  Ideally, you want the yellow color to rise all the way to the crown, which means the sugar is distributed evenly through the fruit.

    A steel grocery cart filled with fresh ripe whole pineapples in a market.
    Pineapples piled in a shopping cart in a Lima Peru market in 2018. Photo Credit ~ me!

    More Pineapple Recipes

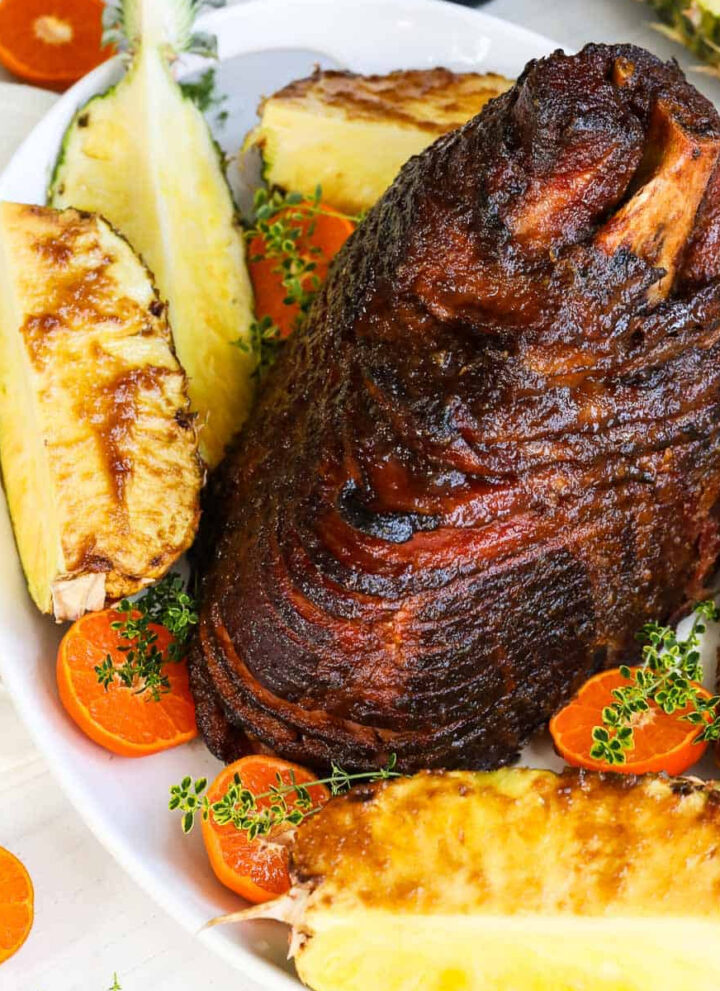
    This Kahlua Ham Recipe has pineapple juice, grated ginger, honey, vanilla, Kahlua, a sprinkle of cinnamon, and orange zest/juice.

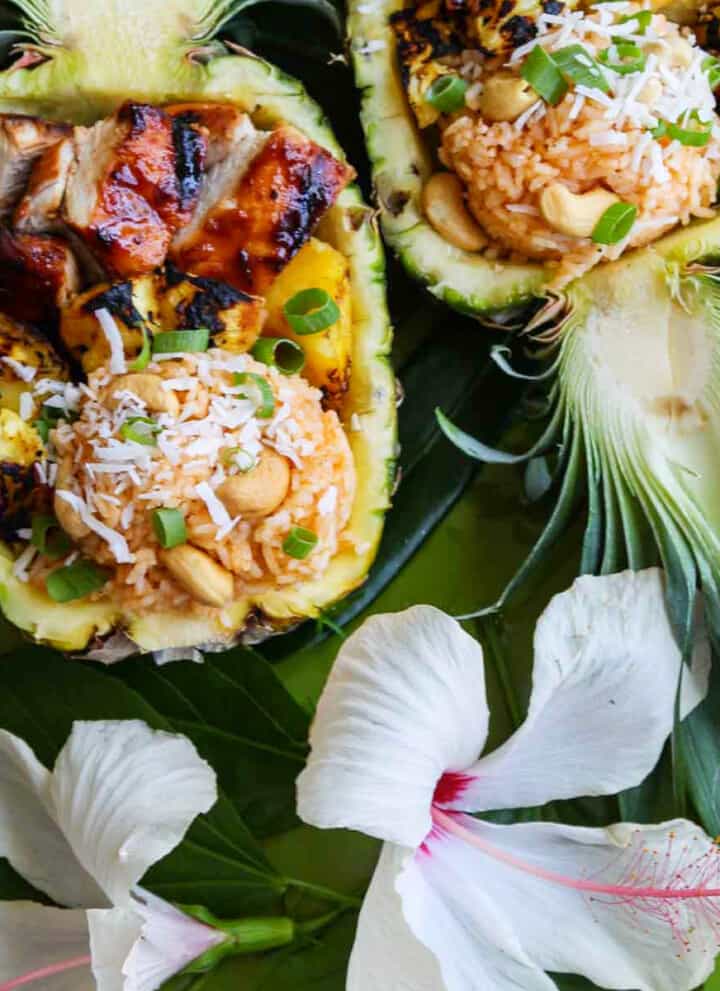
    For summer grilling, make Huli Huli Chicken and serve in Pineapple Bowls.

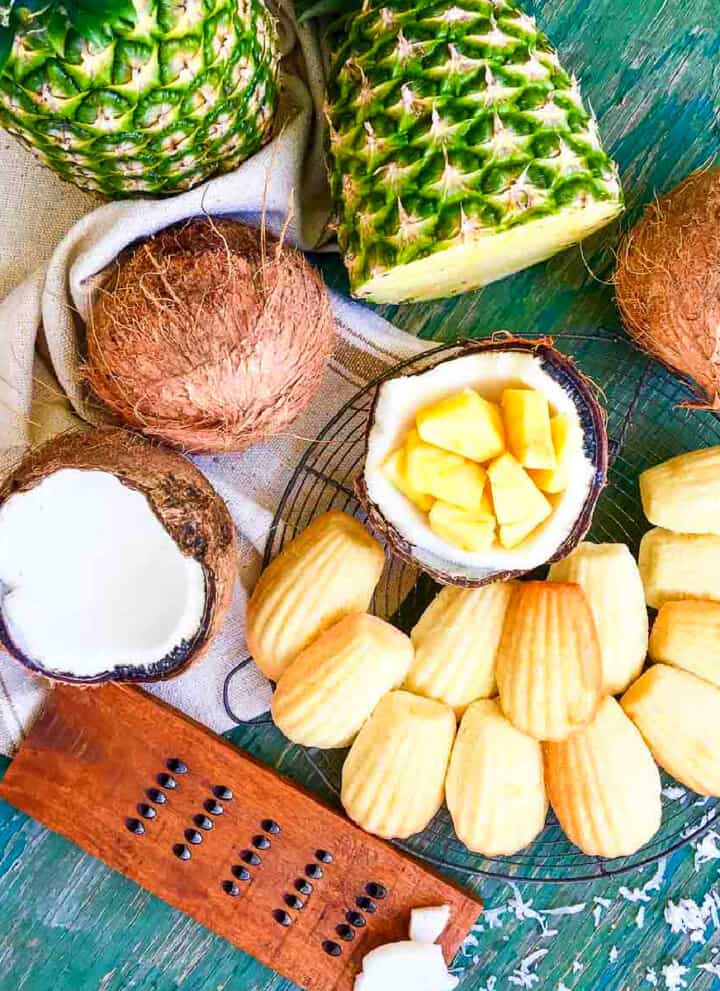
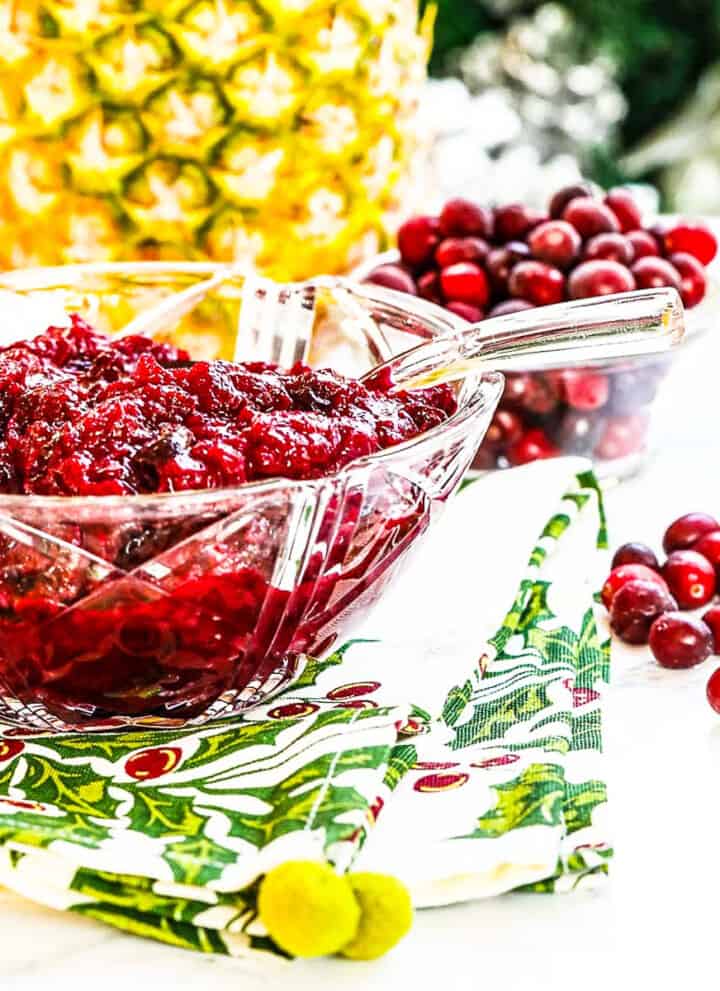
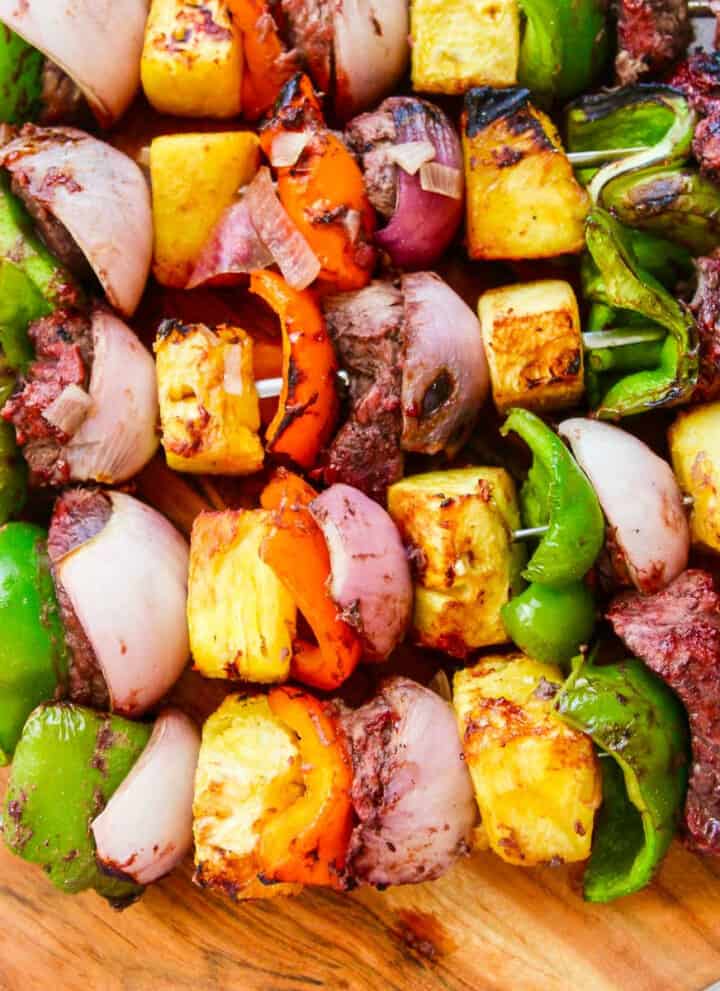
    Grill Shish Kabobs have a beef marinade made with pineapple and dark rum brushed on these bright colorful grilled skewers. Or whip up a summer dessert like Fruit Sorbet with no guilt or Pineapple-Coconut Madeleines are so great anytime as a treat. For Thanksgiving and Christmas holidays, shake things up and make a new Cranberry Sauce with orange and pineapple as the co-star ingredients.

    • A spiral baked ham on white platter with wedges of pineapple and sliced oranges.
      Kahlua Pineapple Glazed Ham
    • Overhead looking a madeleines cooled on a round baking rack with fresh pineapple and coconut fruit.
      Pineapple Coconut Madeleines
    • A crystal bowl filled with cranberry sauce with pineapple and cranberries in the background.
      Pineapple-Orange Cranberry Sauce
    • Two pineapple halves carved out filled with coconut rice, grilled pineapple and huli huli chicken.
      Huli Huli Chicken
    • A wooden platter filled with Shish Kabob grilled skewers.
      Shish Kabobs
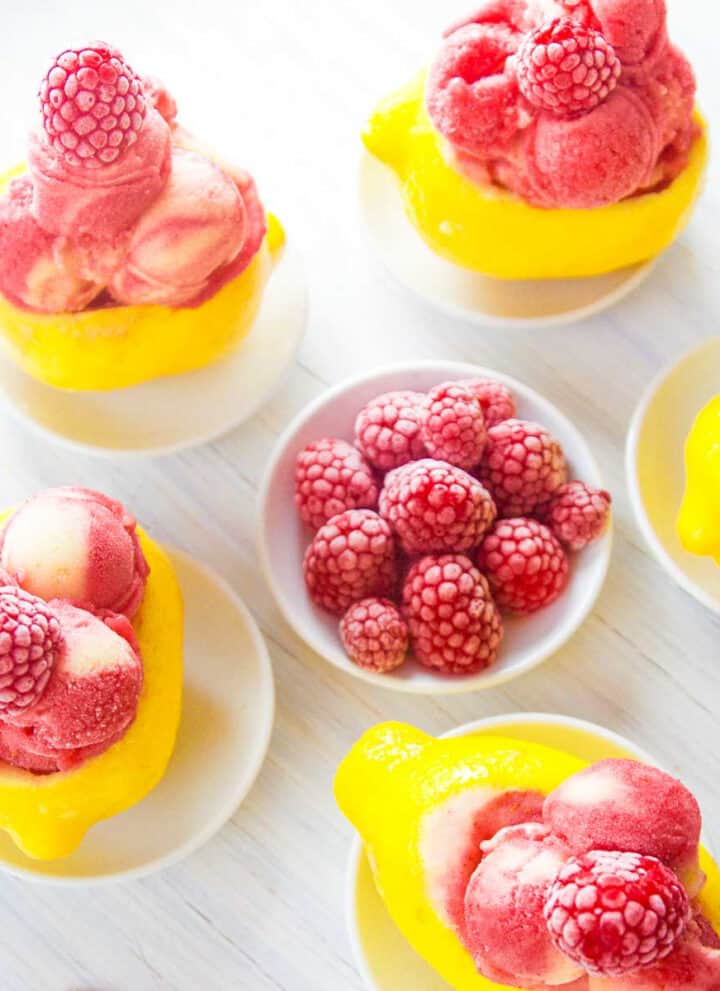
    • Bright yellow lemons carved out and filled with raspberry strawberry lemon sorbet as a summer dessert.
      Raspberry Lemon Sorbet

    Did you love this recipe? We would love to hear from you! If you make this recipe and love it, give it a 5-star rating ⭐⭐⭐⭐⭐ with a comment. THANK YOU!! Follow Delicious Table with my free newsletter and share this recipe with your friends on Facebook, Pinterest, and Instagram.

    A pineapple bowl filled with fresh cut chunks of pineapple ready to eat.
    Print

    How To Make Pineapple Bowls

    Learn how to cut pineapple bowls or boats the easy way plus how to use the chunks for recipes like shish kabobs, huli huli chicken or sorbet.
    Course Side Dishes & Vegetables
    Cuisine American
    Keyword how to cut a pineapple, how to pick a ripe pineapple, pineapple boat, pineapple bowl, ripe pineapple
    Prep Time 5 minutes minutes
    Total Time 5 minutes minutes
    Servings 4 pineapple bowls
    Calories 226kcal
    Author Lisa Hatfield
    Cost $5

    Equipment

    • Epicurean Non-Slip Cutting Board
    • Small Serrated Knife
    • Chef's Knife

    Ingredients

    Pineapple Bowls

    • 1 large fresh pineapple

    Instructions

    • Using a large knife cut the pineapple lengthwise and through the leaves into 2 halves.
    • Next, use a small serrated paring knife, cut all the way around the edge leaving about ¾” of the outside edge.
    • Cut the core out by cutting down both sides of the core at a slight angle inward in a "V" shape.
    • Now remove the core.
    • Discard as it is tough and inedible.
    • Slice into chunks by making a grid pattern of about 1" pieces. Be careful not to cut through the skin.
    • Use a large serving spoon, scoop out the pieces, save the juice ~ drink it or make a smoothie.
    • Place the cut pineapple back into the bowl.

    Notes

    Top Ripe Pineapple Tips

    • Be sure the pineapple has a sweet smell towards the base.
    • A green color indicates that it might not be ripe and was picked too early.
    • Use the "Press Test."  A sweet (and ripe) pineapple will yield slightly to pressure.
    • Make sure to avoid overripe pineapples. They usually have reddish-brownish skins and dark dried leaves that crumble when you touch them and have a fermented smell. Pass on that pineapple, it will taste-off, and be mushy and overripe inside.

    How To Store Pineapple Bowls

    Keep chilled in the fridge covered with plastic wrap. Serve within two days.

    Ripe Pineapple

    Wondering how to pick a juicy pineapple ready to use that day?
    First, smell the bottom for sweetness.  This is the first tell-tale sign to determine how sweet and ripe your pineapple will be.  Sugar comes from the bottom of the fruit, where it migrates to the top as it ripens.  The bottom is where it should be most fragrant, so put your nose there not on the crown.
    If it smells sweet, like pineapple juice, it is ripe.  If you smell nothing, that means there is insufficient sugar and the fruit will not be sweet, and it has been harvested too early. 
    Pineapples ripen very little after they have been harvested. So you don't want to pick one that is underripe, hoping it will get ripen later. Unfortunately, it won't.
    What you want to look for is a yellow-golden color. As the fruit starts to ripen in the field, it starts from the bottom, the higher the yellow rises toward the crown, the more sugar (and sweetness) it will have!  
    Yellow on the bottom and green on the top will yield inconsistency in sweetness (i.e. some parts are sweet, other parts are not).  Ideally, you want the yellow color to rise all the way to the crown, which means the sugar is distributed evenly through the fruit.

    Nutrition

    Calories: 226kcal | Carbohydrates: 59g | Protein: 2g | Fat: 0g | Saturated Fat: 0g | Cholesterol: 0mg | Sodium: 4mg | Potassium: 493mg | Fiber: 6g | Sugar: 44g | Vitamin A: 265IU | Vitamin C: 216.3mg | Calcium: 59mg | Iron: 1.3mg

    Avocado Toast

    [heart_this] · Mar 10, 2019 · 5 Comments

    A close up photo of a slice of avocado toast topped with small heirloom tomatoes and microgreens.

    Last Updated April 25th, 2024 at 11:22 am by Lisa

    Avocado Toast with artisan whole grain bread, creamy avocado, mini sweet heirloom tomatoes, a drizzle of lemon-infused olive oil, sriracha salt, crushed hemp heart seeds, and microgreens to make a healthy breakfast or snack.

    So many recipes are just smashing a ripe avocado on top of a piece of toast and seasoning it, perhaps with a bit of salt and pepper. How boring, this will change your breakfast game...

    Why You'll Love This Healthy Avocado Toast...

    • It's full of fresh full flavors, and gorgeous bright colors! Just looking at it makes me feel healthier, how about you?
    • It makes a great healthy breakfast or a wonderful snack. Hey, this could even work as a light dinner.
    • It starts the day, or the year, off to a beautiful fresh start! There is nothing but wholesome goodness here to begin your day.
    • It is FULL of valuable nutrients. For 295 calories, it packs 7 grams of protein, 9 grams of fiber, and only 3 grams of sugar! Plus vitamins A, C, Calcium, and Iron.

    Ingredients

    This recipe is so easy that you'll have a slice on your plate in less than 5 minutes. If you think you don't have the time for a healthy snack, lunch, or dinner, this recipe will prove you wrong!

    • 1 ripe avocado
    • 2 toasted bread slices (artisan whole grain bread)
    • mini heirloom tomatoes red & yellow sliced in half
    • lemon-infused extra virgin olive oil or extra virgin olive oil
    • sriracha salt (recipe below) or pink Himalayan salt
    • crushed hemp seeds or crushed chia seeds
    • microgreens

    How to Make Avocado Toast

    Step 1: Toast 2 pieces of artisan bread.

    Step 2: Cut avocado in half, remove pit and scoop out avocado on a plate. Use a fork, press avocado till smooth, and spread avocado on toast.

    Step 3: Slice heirloom tomatoes in half, place on top of the avocado.

    Step 4: Drizzle lemon-infused EVOO (extra virgin olive oil) over top.

    Step 5: Sprinkle with sriracha salt (or pink Himalayan salt) and crushed hemp seeds.

    Step 6: Place some microgreens on top, then enjoy. Yum!

    What is the Best Bread For Avocado Toast?


    The best bread should always be whole grain bread. You don't want to use white bread.

    Use hearty, wholesome, whole grain artisan bread. If you want, you could even go the extra step and make your own whole-grain artisan bread.

    Is Avocado Toast Good for Weight Loss?


    Avocado Toast won't magically make the pounds melt off without any extra effort, but it can be part of a well-balanced weight loss plan.

    The healthy fats in avocados make it a highly satisfying meal, so you'll stay full longer meaning you'll probably eat less overall.

    How to Make Homemade Sriracha Salt

    Speaking of making your own... I highly recommend making your own Sriracha Salt for this recipe. It's amazing and so much easier than you might think.

    All you need

    • ⅓ cup Sriracha sauce
    • ½ cup kosher sea salt

    To Make Sriracha Salt: mix the ingredients in a small bowl. Then spread on a dinner plate and microwave 1 minute at a time. Stir every 60 seconds with a fork, for 5 minutes total.

    Sriracha salt will be slightly damp and will continue to dry as it cooks. Let it cool and dry for several hours on the counter overnight.

    To Store: Store in small spice jars, or mason jars.

    Enjoy With: guacamole, roasted vegetables, french fries, grilled fish, or try fruit: mango, pineapple, watermelon.

    If you love this recipe, you'll definitely want to try my other Flavor Infused Finishing Salts recipes. I have one for Celery Salt, House Salt, Mustard Salt, and Pinot Noir Salt plus tons of ideas on how to use them in your cooking.

    5 Flavored Finishing Salt Recipes
    Make tasty homemade finishing salts in flavors like sriracha salt, celery salt, house salt, mustard salt, and even pinot noir salt! These DIY salts would make a great gift too - gifts for foodies and gifts for food lovers.
    GET THE RECIPE PIN IT
    A wood platter with 5 seasoning jars open filled with flavored finishing salts.

    More Avocado Recipes

    Here in Southern California where I live, many people have avocado trees in their backyard. I often have friends or family give me shopping bags at one time which is wonderful, so I use them in my cooking all the time. Here are some of my favorite ways to enjoy them...

    A neat organized pile of avocados in a market for sale.

    Avocado Salsa (aka Taco Sauce) is great to drizzle on Mexican foods like tacos, burritos, taquitos or served with tortilla chips as a dip. Wedge Salad with Pistachio-Avocado Dressing is super-chilled and a refreshing cookout side with hot grilled steaks, chicken, or shish kabobs.

    What are Totchos? Just nachos an American favorite appetizer we love and adore made with tater tots, now how good does that sound? 

    Authentic Guacamole has fresh lime juice, grated onion (one of my top secrets), chopped tomato, hot sauce, and spices. The classic simple ingredients make it a delicious party food appetizer or side with Mexican food on Game Days or Cinco de Mayo parties.

    • A wood bowl with green avocado salsa taco sauce and blue corn tortilla chips on the table.
      Avocado Salsa
    • Wedge salad with avocado dressing drizzled on top with pistachios on a black slate board.
      Iceberg Wedge Salad
    • A close up of a oval cast iron pan with tater tots, pulled pork, cut avocado, and drizzled with white sauce.
      Tachos Tater Tot Nachos
    • A blue glass bowl filled with guacamole and a chip stuck inside with a bowl of tortilla chips.
      How To Make Guacamole
    A close up photo of a slice of avocado toast topped with small heirloom tomatoes and microgreens.
    Print

    Avocado Toast

    Avocado Toast artisan bread, creamy avocado, sweet heirloom tomatoes, lemon olive oil drizzle, sriracha salt, crushed hemp seeds, and microgreens. The best way to start your day with a healthy breakfast or a great snack option.
    Course Appetizers, Dips, & Snacks, Breakfast & Brunch
    Cuisine American
    Keyword easy toast, healthy toast, vegetable toast
    Prep Time 3 minutes minutes
    Cook Time 1 minute minute
    Servings 2 toast
    Calories 295kcal
    Author Lisa Hatfield

    Ingredients

    • 1 ripe avocado
    • 2 slices artisan whole grain bread
    • mini heirloom tomatoes red & yellow sliced in half
    • lemon infused extra virgin olive oil or EVOO
    • sriracha salt or pink Himalayan salt
    • crushed hemp seeds or crushed chia seeds
    • micro greens
    US Customary - Metric

    Instructions

    • Toast 2 pieces of artisan bread
    • Cut avocado in half, remove pit, and scoop out avocado on a plate. Use a fork, press avocado till smooth, and spread avocado on toast.
    • Slice heirloom tomatoes in half, place on top of avocado.
    • Drizzle lemon infused EVOO over top.
    • Sprinkle with sriracha salt (or pink Himalayan salt) and crushed hemp seeds.
    • Place some micro greens on top.
    • Enjoy, yum!

    Nutrition

    Calories: 295kcal | Carbohydrates: 22g | Protein: 7g | Fat: 21g | Saturated Fat: 3g | Sodium: 703mg | Potassium: 702mg | Fiber: 9g | Sugar: 3g | Vitamin A: 660IU | Vitamin C: 18.5mg | Calcium: 48mg | Iron: 1.7mg

    OC FAIR 2017 | Judging Cakes and Cupcakes

    [heart_this] · Jul 22, 2017 · Leave a Comment

    OC FAIR 2017 | Judging Cakes and Cupcakes Lisa Torres - Delicious Table judging cakes and cupcakes

    Last Updated June 7th, 2023 at 01:43 pm by Lisa

    Delighted to Judge Cakes and Cupcakes at the 2017 OC Fair, what delicious fun. Creative cake pops, fruit flavor cupcakes, and specialty (gluten-free) cakes!

    OC FAIR 2017 | Judging Cakes and Cupcakes Lisa Torres - Delicious Table judging cakes and cupcakes

    All the entries are dropped off in the morning to Culinary Arts in the OC Promenade on the OC Fairgrounds...

    OC FAIR 2017 | Judging Cakes and Cupcakes Culinary Arts wall

    OC FAIR 2017 | Judging Cakes and Cupcakes Farm Fresh close

    Look at all the cakes and cupcakes ready for judging...lined up as far as the eye can see!

    The final tasting count: 18 cupcakes, 6 cake pops, 6 specialty cakes. Only one or two bites each, but that is
    OC FAIR 2017 | Judging Cakes and Cupcakes More Entries
    OC FAIR 2017 | Judging Cakes and Cupcakes More Entries

    Cake and Cupcake Judging:

    The final judging and tasting count: 18 cupcakes, 6 cake pops, 6 specialty cakes. Only one or two bites each, but that is some serious cake eating my friends...but hey I take my job seriously and completed the mission...

    OC FAIR 2017 | Judging Cakes and Cupcakes BAKE

    Cake and Cupcakes:

    OC FAIR 2017 | Judging Cakes and Cupcakes Farm Cake
    OC FAIR 2017 | Judging Cakes and Cupcakes Pig Cupcake
    OC FAIR 2017 | Judging Cakes and Cupcakes peanut butter cups cake
    OC FAIR 2017 | Judging Cakes and Cupcakes Pink Cupcakes
    OC FAIR 2017 | Judging Cakes and Cupcakes Opera Cake
    OC FAIR 2017 | Judging Cakes and Cupcakes Winning Trophy Cups plate of cupcakes
    OC FAIR 2017 | Judging Cakes and Cupcakes clown cake front
    OC FAIR 2017 | Judging Cakes and Cupcakes dark chocolate cake
    OC FAIR 2017 | Judging Cakes and Cupcakes classic chocolate cake
    OC FAIR 2017 | Judging Cakes and Cupcakes Gluten Free Carrot Cake
    OC FAIR 2017 | Judging Cakes and Cupcakes chocolate fancy
    OC FAIR 2017 | Judging Cakes and Cupcakes pineapple upside down cake
    OC FAIR 2017 | Judging Cakes and Cupcakes Apple Pie Cupcakes
    OC FAIR 2017 | Judging Cakes and Cupcakes Chick Cupcake
    OC FAIR 2017 | Judging Cakes and Cupcakes chocolate mocha cake
    OC FAIR 2017 | Judging Cakes and Cupcakes this is a cake
    OC FAIR 2017 | Judging Cakes and Cupcakes Lemon Meringue Pie
    OC FAIR 2017 | Judging Cakes and Cupcakes Chocolate Cake
    OC FAIR 2017 | Judging Cakes and Cupcakes chocolate cake pink box
    OC FAIR 2017 | Judging Cakes and Cupcakes blueberry lemon cupcakes
    OC FAIR 2017 | Judging Cakes and Cupcakes Clown Cake
    OC FAIR 2017 | Judging Cakes and Cupcakes Sheep Cupcake
    OC FAIR 2017 | Judging Cakes and Cupcakes Lisa Torres tasting

    Only one or two bites each, but that is a whole lotta sugar in 3 hours. Wait, did I just eat sweet treats for 3 straight hours?

    Or was it 4. Hmmm...Yes, it was four,  hello sugar coma!

    OC FAIR 2017 | Judging Cakes and Cupcakes Winning Trophy Cups plate of cupcakes
    OC FAIR 2017 | Judging Cakes and Cupcakes Lemon Meringue Pie
    OC FAIR 2017 | Judging Cakes and Cupcakes blueberry lemon cupcakes

    Judging with Chef  Stéphane Tréand, a true honor.

    OC FAIR 2017 | Judging Cakes and Cupcakes Lisa Torres - Delicious Table with Chef Stephane Treand 2

    ~ New at the OC Fair: The Pâtisserie by Chef Stéphane Tréand

    The Pâtisserie showcases the many talents of Chef Stéphane Tréand, World Champion Pastry Chef, Chocolatier, and MOF; come to the Pâtisserie, and learn about this prestigious title of Un de Meillleurs Ouvriers de France.

    Enjoy delicious baked goods, chocolate bonbons, gelato macaron sandwiches, chocolate orange tarts and other pâtisserie delights.

    Gorgeous macron tower display lovingly made by Chef  Stéphane Tréand and his wife.   Love the special farm animal macarons, all available to buy in OC Promenade.

    OC FAIR 2017 | Judging Cakes and Cupcakes Chef Treand Macron Tree

    Pamela Wnuck is the Culinary Supervisor,  and makes sure the Culinary Arts events are spectacular!

    Look what she cooked up for the OC Fair 2017...

    OC FAIR 2017 | Judging Cakes and Cupcakes Pamela with a OC Fair Macaron

    Pamela holding a macaron from world famous pastry legend, Chef  Stéphane Tréand founder of  The Pastry School in Costa Mesa, California.

    OC FAIR 2017 | Judging Cakes and Cupcakes Pamela and Chef Treand

    Culinary Arts is taking center stage at the 2017 OC Fair. The Main Stage is booked everyday throughout the fair and will be host to chefs, bakers, farmers, floral artists, food bloggers, mixologists, brewers, butchers and more.

    Learn from the best during demos and tasting sessions stocked with kitchen secrets, war stories and more – straight from the experts. The 30-minute culinary demonstrations are always new and exciting, educational and FREE. For the inside scoop on everything culinary, stop by the information desk.

    Fun culinary displays are all around the OC Promenade...Pamela and team, you did a beautiful job!

    OC FAIR 2017 | Judging Cakes and Cupcakes stove
    OC FAIR 2017 | Judging Cakes and Cupcakes THANK a farmer
    OC FAIR 2017 | Judging Cakes and Cupcakes rolling pins and vintage cooking
    OC FAIR 2017 | Judging Cakes and Cupcakes JD tractor
    OC FAIR 2017 | Judging Cakes and Cupcakes OC Fair tractor display
    OC FAIR 2017 | Judging Cakes and Cupcakes Kitchen Display
    OC FAIR 2017 | Judging Cakes and Cupcakes John Deere
    OC FAIR 2017 | Judging Cakes and Cupcakes Jam Jar
    OC FAIR 2017 | Judging Cakes and Cupcakes oranges
    OC FAIR 2017 | Judging Cakes and Cupcakes Culinary Arts Kitchen
    OC FAIR 2017 | Judging Cakes and Cupcakes car display
    OC FAIR 2017 | Judging Cakes and Cupcakes OC Fair in lights
    OC FAIR 2017 | Judging Cakes and Cupcakes Master Preserving
    OC FAIR 2017 | Judging Cakes and Cupcakes Culinary Arts display

    Winners....winners...winners!

    Who will win this year?

    OC FAIR 2017 | Judging Cakes and Cupcakes Preserving Awards

    After the judging wonderful sweet treats all afternoon, suddenly I was craving a salad. And lots of water. Imagine that?

    OC FAIR 2017 | Judging Cakes and Cupcakes Winning Trophy Cups plate of cupcakes
    OC FAIR 2017 | Judging Cakes and Cupcakes tasting

    Thanks again Pamela and Janet plus their fantastic team in Culinary Arts, for a wonderful time guest judging for the OC Fair.

    Next up, I will be judging the crazy and wonderful fair food in the Concessionaire's Cup on July 26th, 1-4 pm. Here is a taste  of: OC Fair 2017: Try these 17 insanely tasty fair foods

    All The Best Dishes,

    Lisa

    XO

    Flavored Finishing Salts

    [heart_this] · Mar 13, 2017 · 15 Comments

    A wood platter with 5 seasoning jars open filled with flavored finishing salts.

    Last Updated April 25th, 2024 at 02:02 pm by Lisa

    Flavored Finishing Sea Salt Recipes; Sriracha, Pinto Noir, Mustard, Celery, and House Seasoning. This Savvy Kitchen Tip includes step-by-step instructions, recipes, and ideas on how to use your finishing salts.

    They will take your cooking to a new level, and make a great homemade food gift. So easy, and so pretty...

    You'll Love To Make Flavored Finishing Salts

    These pretty little jars of homemade finishing salts are a fun project.

    • Try these flavors, or create new ones you're inspired to make.  
    • Be sure to make a few extra jars to share with friends and family to enjoy in their kitchens.
    • Salt improves the flavor of any dish and is a secret of all pro chefs.
    • Makes a great (inexpensive) gourmet food gift for the hostess or for holidays!
    What Are Finishing Salts?


    Finishing salts are coarse and bring out the flavors of the food after preparing or cooking the dish. Usually, you salt before or during cooking. Finishing salt like these flavored ones are sprinkled on the dish AFTER cooking and really add zip and zing to your cooking!

    How Can I Use These Finishing Salt Recipes?


    For each salt recipe below, take a look at dishes to enjoy with them and try to experiment with the combinations you create at home.

    I am currently in love with the sriracha salt, just amazing on avocado toast in the morning!

    How To Make Sriracha Salt

    Recipe:  In a small bowl, mix ⅓ cup Sriracha sauce + ½ cup kosher sea salt.

    Instructions:  Spread on a dinner plate and microwave 1 minute at a time. Stir every 60 seconds with a fork, for 5 minutes total.

    Sriracha salt will be slightly damp and will continue to dry as it cooks. Let it cool and dry for several hours on the counter overnight. Store in small spice jars, or mason jars.

    What Is Sriracha Salt Used With?

    Enjoy With: avocado toast, guacamole, roasted vegetables, french fries, grilled fish, or try fruit: mango, pineapple, watermelon.

    How To Make Mustard Salt

    Recipe: In a small bowl, mix ⅓ cup Dijon Mustard + ½ cup kosher sea salt.

    Instructions: Spread on a dinner plate and microwave 1 minute at a time. Stir every 60 seconds with a fork, for 5 minutes total.

    Mustard Salt will be slightly damp and will continue to dry as it cooks. Let it cool for several hours on the counter overnight. Store in small spice jars, or mason jars.

    What Is Mustard Salt Used With?

    Enjoy With: fish, roast beef, salad, grilled pork, and homemade pretzels.

    How To Make Pinot Noir Salt

    Recipe: In a small bowl, mix 7 tablespoons pinot noir + 1 cup kosher sea salt.

    Instructions: Spread on a dinner plate and microwave 1 minute at a time. Stir every 60 seconds with a fork, for 5 minutes total.

    Pinot Noir Salt will be slightly damp and will continue to dry as it cooks. Also,  let pinot noir salt air dry 2 more days on the counter. Store in small spice jars, or mason jars.

    What Is Pinot Noir Salt Used With?

    Enjoy With: braised beef, grilled steak, sprinkle on cheeses, pork loin, or pasta with marinara.

    How To Make Celery Salt

    Recipe: In a small bowl mix ½ cup celery leaves very finely chopped + 1 teaspoon celery seeds + ½ cup kosher sea salt.

    Instructions: Spread on a dinner plate and microwave 1 minute at a time. Stir every 60 seconds with a fork, for 5 minutes total.

    The color of the celery will fade over time.

    What Is Celery Salt Used With?

    Enjoy With: Salads, corn on the cob, the rim of a bloody mary glass, coleslaw, and tuna salad.

    How To Make House Seasoning

    Recipe: In a small bowl mix 2 cups kosher sea salt + ½ cup fresh cracked pepper (grind peppercorns in a coffee grinder) + ½ cup garlic powder.

    Instructions: Mix, no drying necessary.

    What Is House Seasoning Used With?

    Enjoy With:  All around seasoning ready to use on chicken before roasting, put on fish and grill, great on pork roasts, season BBQ ribs before grilling or smoking, or add amazing flavor, or try my Grilled Hamburger Seasoning!

    More Seasoning Recipes

    Mix your own Pumpkin Pie Spice. You can certainly buy it, but it is a great way to use pantry spices and tastes so much better homemade.

    Burger Seasoning makes the juiciest flavor-filled Grilled Hamburgers. Mix up a batch of hamburger seasoning for your next cookout, grill, or BBQ party.

    Grill and BBQ Rub is an easy spice mix and seasoning to make at home. Use as a rib rub, steak rub, dry rub for chicken, or dry rub for pork.

    Pickling Spice is easy to make and a great way to use up spices you have on hand. Add it to pickles, corn beef, stews, rice, or use in brine to flavor meat.

    Make your own Cajun Seasoning mix with a simple spice mix. Use on shrimp, oven fries, or in recipes for jambalaya, and classic gumbo.

    • A small glass spice jar filled with pumpkin pie spice made at home.
      Pumpkin Pie Spice
    • The steps to season hamburgers, with them shaped on parchment paper as burgers before grilling.
      Grilled Hamburger Seasoning
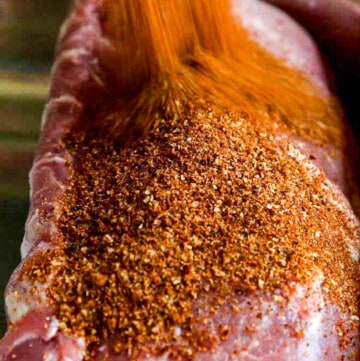
    • A large pork loin roast with a lot of dry rub seasoning pouring over the top.
      The Best BBQ Dry Rub
    • A recipe to make homemade pickling spice in a white bowl.
      Pickling Spice
    • A small glass mason jar filled with Cajun seasoning with a label and it in a wooden bowl.
      Cajun Seasoning Recipe
    A wood platter with 5 seasoning jars open filled with flavored finishing salts.
    Print

    5 Flavored Finishing Salt Recipes

    Make tasty homemade finishing salts in flavors like sriracha salt, celery salt, house salt, mustard salt, and even pinot noir salt! These DIY salts would make a great gift too - gifts for foodies and gifts for food lovers.
    Course Seasoning
    Cuisine American
    Keyword finishing salt, flavored salt, sriracha salt
    Prep Time 2 minutes minutes
    Cook Time 5 minutes minutes
    Total Time 7 minutes minutes
    Servings 50
    Calories 10kcal
    Author Lisa Hatfield

    Ingredients

    Sriracha Salt

    • ⅓ cup sriracha sauce
    • ½ cup kosher sea salt

    Mustard Salt

    • ⅓ cup Dijon Mustard
    • ½ cup kosher sea salt

    Pinot Noir Salt

    • 7 tablespoons pinot noir
    • 1 cup kosher sea salt

    Celery Salt

    • ½ cup celery leaves very finely chopped
    • 1 teaspoon celery seeds
    • ½ cup kosher sea salt

    House Seasoning

    • 2 cups kosher sea salt
    • ½ cup cracked pepper grind peppercorns in a coffee grinder
    • ½ cup garlic powder

    Instructions

    Sriracha Salt

    • Recipe:  In a small bowl, mix ⅓ cup Sriracha sauce + ½ cup kosher sea salt.
    • Spread sriracha salt mixture on a microwave-safe dinner plate, a paper plate works best, and spread evenly. Microwave 1 minute at a time, stirring every 60 seconds with a fork, for 5 minutes total. The salt mixture will continue to dry as it cooks. Stir and fluff with a fork. Let cool and dry for several hours on counter or overnight.
    • Try Sriracha Salt On: Avocado toast, guacamole, roasted vegetables, french fries, grilled fish, or try fruit: mango, pineapple, watermelon.

    Mustard Salt

    • Recipe: In a small bowl, mix ⅓ cup Dijon Mustard + ½ cup kosher sea salt.
    • Spread on a dinner plate and microwave 1 minute at a time. Stir every 60 seconds with a fork, for 5 minutes total.
      Mustard Salt will be slightly damp and will continue to dry as it cooks. Let it cool for several hours on the counter overnight. Store in small spice jars, or mason jar.
    • Try Mustard Salt On: Fish, roast beef, salad, grilled pork, homemade pretzels.

    Pinot Noir Salt

    • Recipe: In a small bowl, mix 7 tablespoons pinot noir + 1 cup kosher sea salt.
    • Spread on a dinner plate and microwave 1 minute at a time. Stir every 60 seconds with a fork, for 5 minutes total.
      Pinot Noir Salt will be slightly damp and will continue to dry as it cooks. Also,  let pinot noir salt air dry 2 more days on the counter. Store in small spice jars, or mason jar.
    • Try Pinot Noir Salt On: Braised beef, grilled steak, sprinkle on cheeses, pork loin, or pasta with marinara.

    Celery Salt

    • Recipe: In a small bowl mix ½ cup celery leaves very finely chopped + 1 teaspoon celery seeds + ½ cup kosher sea salt.
    • In a small bowl mix ½ cup celery leaves very finely chopped + 1 teaspoon celery seeds + ½ cup kosher sea salt.
      Spread on a dinner plate and microwave 1 minute at a time. Stir every 60 seconds with a fork, for 5 minutes total.
    • Try Celery Salt On: Salads, corn on the cob, the rim of a Bloody Mary glass, coleslaw, tuna salad.

    House Seasoning

    • Recipe: In a small bowl mix 2 cups kosher sea salt + ½ cup fresh cracked pepper (grind peppercorns in a coffee grinder) + ½ cup garlic powder. Store in an airtight container.
    • Try House Seasoning On:  All around seasoning ready to use on chicken before roasting, put on fish and grill, great on pork roasts, season BBQ ribs before grilling or smoking, season hamburger patties before grilling.

    Notes

    salt 

    For all four of these flavored salts, don’t use table salt. Use a flaky, coarse salt like Kosher Sea Salt (cheapest), Maldon, or Fleur de Sel. 
     

    Nutrition

    Calories: 10kcal | Carbohydrates: 2g | Protein: 0g | Fat: 0g | Saturated Fat: 0g | Cholesterol: 0mg | Sodium: 1174mg | Potassium: 4mg | Fiber: 0g | Sugar: 2g | Vitamin A: 5IU | Vitamin C: 1.2mg | Calcium: 1mg | Iron: 0mg

    Magnolia Market At The Silos | Chip + Joanna Gaines (HGTV Fixer Upper)

    [heart_this] · Nov 21, 2016 · 1 Comment

    Magnolia Market + Silo Baking Co. | Waco, Texas LIsa Torres - Delicious Table

    Last Updated May 26th, 2021 at 06:52 pm by Lisa

    Magnolia Market will sound familiar if you are a fan of Chip and Joanna Gaines on HGTV's hit show Fixer Upper. There are so many things to do at Magnolia Market: Shop and experience the Magnolia Market, play lawn games, grab a bite to eat from one of the many food trucks, and enjoy fresh-baked goods from Silos Bakery.

    While in Texas, I visited Magnolia Market and Silo Baking Co.  with a couple of Texas girlfriends. We took a drive from Dallas to Waco, Texas to see what was going on at Magnolia, to shop, and enjoy a culinary adventure. What a fun day of food and design, two of my favorite things!

    Magnolia Market At The Silos | Chip & Joanna Gaines ~ HGTV Fixer Upper Magnolia sign
    Magnolia Market At The Silos | Chip & Joanna Gaines ~ HGTV Fixer Upper friends

    LOCATION & HOURS
    601 Webster | Waco, Texas
    2 minutes from the highway
    MON - SAT
    9 AM - 6 PM
    Grounds Open Til 7
    Bakery open at 7:30AM
    Closed on Sunday

    Fun Facts about Magnolia Market and Chip & Joanna :

    The name "Magnolia" (Magnolia Homes, Magnolia Market, Magnolia Farm) goes back to their dating days. "When we were just dating, I would pick these blooms from Magnolia trees," Chip said.

    Fixer Upper is a home design show, however, Chip and Joanna are just adorable and so fun to watch as they take deplorable rundown houses and turn them into designer homes with that special "Magnolia" look and feel.

    At the center of this Magnolia TV and retail empire, Chip and Jo have placed a priority on faith and family. As quoted by Chip and Joanna, in a recent People magazine article. "Family is the most important thing in the world."  Don't you love to hear that family comes first?

    "If you've ever seen them, they are almost just bowl-like, and that whole thing just always inspired us. So when we had the opportunity and were trying to figure out what to name her little boutique, Magnolia Market just stood out to us. That stuck with us and here we are now in furniture and paint, and all the bits and pieces will have some magnolia statement to it."

    Magnolia Market has up to 35,000 visitors a week, and employs a staff of over 400!

    Silos Baking Co. was opened because Joanna loves to bake.

    The first Magnolia Market opened in 2003.

    Chip and Joanna have no formal construction or design experience.

    Even though Chip and Joanna are TV stars, they don't own a television. "Our first year of marriage, we had a fun couple that was our pre-marital counselors and they said, 'Hey, we want to challenge y'all for the first six months of marriage, don't do a TV,'" Joanna explained. "Then, six months later we looked at each other and said, 'How about another six months?' And it just became one of those things where, 12 years later, we still don't own one." (They do watch their own show with friends at their homes!)

    Chip and Joanna each shared their best design advice in Glamour magazine. "Be intentional with your space," Joanna says. "Don't be afraid to step on a limb and design your home the way you love it." Chip added: "Do what you love. Do what is important to you and your family. I just want to encourage people to just go for it and do what makes sense to you."

    Silos Baking Co Menu:

    The first thing to do after you take a photo with your friends...is go to Silos Baking Co. and grab a sweet treat or two!

    Because you will need your energy to shop in Magnolia Market!

    Magnolia Market At The Silos | Chip & Joanna Gaines ~ HGTV Fixer Upper Silo Menu

    SHIPLAP CUPCAKE | vanilla cake + vanilla buttercream

    Magnolia Market At The Silos | Chip & Joanna Gaines ~ HGTV Fixer Upper cupcake

    CLASSIC CINNAMON ROLL | sweet cinnamon pastry with a gooey center & "light" icing

    Magnolia Market At The Silos | Chip & Joanna Gaines ~ HGTV Fixer Upper Cinnamon Roll
    • Magnolia Market At The Silos | Chip & Joanna Gaines ~ HGTV Fixer Upper pins
    • Magnolia Market At The Silos | Chip & Joanna Gaines ~ HGTV Fixer Upper cupcake
    • Magnolia Market At The Silos | Chip & Joanna Gaines ~ HGTV Fixer Upper bottle
    • Magnolia Market At The Silos | Chip & Joanna Gaines ~ HGTV Fixer Upper cinnamon
    • Magnolia Market At The Silos | Chip & Joanna Gaines ~ HGTV Fixer Upper roll
    • Magnolia Market At The Silos | Chip & Joanna Gaines ~ HGTV Fixer Upper pecan
    • Magnolia Market At The Silos | Chip & Joanna Gaines ~ HGTV Fixer Upper hold
    • Magnolia Market At The Silos | Chip & Joanna Gaines ~ HGTV Fixer Upper bakery
    • Magnolia Market At The Silos | Chip & Joanna Gaines ~ HGTV Fixer Upper box

    This Cinnamon roll was absolutely perfect...super sweet, and yes, I did finish it!

    Magnolia Market At The Silos | Chip & Joanna Gaines ~ HGTV Fixer Upper roll
    Magnolia Market At The Silos | Chip & Joanna Gaines ~ HGTV Fixer Upper Silos
    Magnolia Market At The Silos | Chip & Joanna Gaines ~ HGTV Fixer Upper garden

    Magnolia Market  Shop:

    Magnolia will inspire your home design, and there are many unique pieces well priced. There are plenty of super friendly Magnolia staff members to assist you, and although the shop is bustling and quite busy, you can easily find the perfect home accents and check out quickly.

     Magnolia Market At The Silos | Chip & Joanna Gaines ~ HGTV Fixer Upper sign


    Magnolia Market At The Silos | Chip & Joanna Gaines ~ HGTV Fixer Upper shop
    Magnolia Market At The Silos | Chip & Joanna Gaines ~ HGTV Fixer Upper kids
    • Magnolia Market At The Silos | Chip & Joanna Gaines ~ HGTV Fixer Upper shelf
    • Magnolia Market At The Silos | Chip & Joanna Gaines ~ HGTV Fixer Upper Corin
    • Magnolia Market At The Silos | Chip & Joanna Gaines ~ HGTV Fixer Upper horse
    • Magnolia Market At The Silos | Chip & Joanna Gaines ~ HGTV Fixer Upper string
    • Magnolia Market At The Silos | Chip & Joanna Gaines ~ HGTV Fixer Upper disply
    • Magnolia Market At The Silos | Chip & Joanna Gaines ~ HGTV Fixer Upper brooms
    • Magnolia Market At The Silos | Chip & Joanna Gaines ~ HGTV Fixer Upper bowls
    • Magnolia Market At The Silos | Chip & Joanna Gaines ~ HGTV Fixer Upper miracles

    Magnolia Words of Inspiration:

    A home redesign could be in our future. I am a big fan of these words of wisdom, prints, and signs from Magnolia and think they make a space so personal and interesting.

    Magnolia Market At The Silos | Chip & Joanna Gaines ~ HGTV Fixer Upper inspire
    Magnolia Market At The Silos | Chip & Joanna Gaines ~ HGTV Fixer Upper signs
    Magnolia Market At The Silos | Chip & Joanna Gaines ~ HGTV Fixer Upper more signs
    Magnolia Market At The Silos | Chip & Joanna Gaines ~ HGTV Fixer Upper LOVE
    Magnolia Market At The Silos | Chip & Joanna Gaines ~ HGTV Fixer Upper inspire sign
    Magnolia Market At The Silos | Chip & Joanna Gaines ~ HGTV Fixer Upper inspire stack
    Magnolia Market At The Silos | Chip & Joanna Gaines ~ HGTV Fixer Upper Bread

    Chips "Man" Corner:

    Chips Corner is chock full of things for the guys. I picked up a couple of  treats for my special guy. If you watch the show, you will know what "Demo Day" is all about, that sign cracks me up!

    Magnolia Market At The Silos | Chip & Joanna Gaines ~ HGTV Fixer Upper Chips Corner
    Magnolia Market At The Silos | Chip & Joanna Gaines ~ HGTV Fixer Upper fans
    • Magnolia Market At The Silos | Chip & Joanna Gaines ~ HGTV Fixer Upper blades
    • Magnolia Market At The Silos | Chip & Joanna Gaines ~ HGTV Fixer Upper demo day
    • Magnolia Market At The Silos | Chip & Joanna Gaines ~ HGTV Fixer Upper pencils
    • Magnolia Market At The Silos | Chip & Joanna Gaines ~ HGTV Fixer Upper hats
    • Magnolia Market At The Silos | Chip & Joanna Gaines ~ HGTV Fixer Upper plates
    • Magnolia Market At The Silos | Chip & Joanna Gaines ~ HGTV Fixer Upper paint line
    • Magnolia Market At The Silos | Chip & Joanna Gaines ~ HGTV Fixer Upper leather
    • Magnolia Market At The Silos | Chip & Joanna Gaines ~ HGTV Fixer Upper magnolia
    Magnolia Market At The Silos | Chip & Joanna Gaines ~ HGTV Fixer Upper old books
    Magnolia Market At The Silos | Chip & Joanna Gaines ~ HGTV Fixer Upper home
    Magnolia Market At The Silos | Chip & Joanna Gaines ~ HGTV Fixer Upper string
    Magnolia Market At The Silos | Chip & Joanna Gaines ~ HGTV Fixer Upper leather
    Magnolia Market At The Silos | Chip & Joanna Gaines ~ HGTV Fixer Upper chest
    Magnolia Market At The Silos | Chip & Joanna Gaines ~ HGTV Fixer Upper framed
    Magnolia Market At The Silos | Chip & Joanna Gaines ~ HGTV Fixer Upper inspired
    Magnolia Market At The Silos | Chip & Joanna Gaines ~ HGTV Fixer Upper bowls stacked
    Magnolia Market At The Silos | Chip & Joanna Gaines ~ HGTV Fixer Upper barn fresh
    Magnolia Market At The Silos | Chip & Joanna Gaines ~ HGTV Fixer Upper cutting board
    Magnolia Market At The Silos | Chip & Joanna Gaines ~ HGTV Fixer Upper stack cutting boards
    Magnolia Market At The Silos | Chip & Joanna Gaines ~ HGTV Fixer Upper Magnolia cutting board
    Magnolia Market At The Silos | Chip & Joanna Gaines ~ HGTV Fixer Upper brooms
    Magnolia Market At The Silos | Chip & Joanna Gaines ~ HGTV Fixer Upper cotton

    Joanna's famous for her "old books" in her home designs, fun to see those.

    Magnolia at the Silos Garden:

    Spend the day relaxing in the garden, they have lot's of covered picnic tables and food trucks to grab a bite.

    Also, there is a large field for kids to run and play with all kinds of balls, hula-hoops, and games.. so everyone is happy!

    Magnolia Market At The Silos | Chip & Joanna Gaines ~ HGTV Fixer Upper grounds
    Magnolia Market At The Silos | Chip & Joanna Gaines ~ HGTV Fixer Upper picnic

    Everywhere you look, you can see Jonna's cute designer touches...

    Magnolia Market At The Silos | Chip & Joanna Gaines ~ HGTV Fixer Upper pumpkins
    Magnolia Market At The Silos | Chip & Joanna Gaines ~ HGTV Fixer Upper more pumpkins
    Magnolia Market At The Silos | Chip & Joanna Gaines ~ HGTV Fixer Upper Thankfulness
    Magnolia Market At The Silos | Chip & Joanna Gaines ~ HGTV Fixer Upper Magnolia sign rust
    Magnolia Market At The Silos | Chip & Joanna Gaines ~ HGTV Fixer Upper garden box
    Magnolia Market At The Silos | Chip & Joanna Gaines ~ HGTV Fixer Upper silo rust
    Magnolia Market At The Silos | Chip & Joanna Gaines ~ HGTV Fixer Upper flower box
    Magnolia Market At The Silos | Chip & Joanna Gaines ~ HGTV Fixer Upper purple flowers
    Magnolia Market At The Silos | Chip & Joanna Gaines ~ HGTV Fixer Upper trellis
    Magnolia Market At The Silos | Chip & Joanna Gaines ~ HGTV Fixer Upper Silos
    Magnolia Market At The Silos | Chip & Joanna Gaines ~ HGTV Fixer Upper golf cart
    Magnolia Market At The Silos | Chip & Joanna Gaines ~ HGTV Fixer Upper grounds
    Magnolia Market At The Silos | Chip & Joanna Gaines ~ HGTV Fixer Upper garden display

    Visiting Magnolia Market reminded me of our blessings in life.  I am overflowing with thankfulness this season and thankful for my family and friends. Although life isn't always easy or perfect, I do my best to thank God each day for what we have and our blessings.  I am also thankful for this website, my readers, and all the joy it brings to me and everyone who takes the time to follow along. For that I am humbly grateful, thankful, and honored.

    All the Best,

    Lisa

    XO

    Magnolia Market At The Silos | Chip & Joanna Gaines ~ HGTV Fixer Upper Lisa Hatfield Torres Delicious Table

    Tasty Food Photography Workshop: Pinch of Yum Studios

    [heart_this] · Sep 25, 2016 · 4 Comments

    Tasty Food Photography Workshop: Pinch of Yum Studios BEST

    Last Updated April 4th, 2024 at 02:17 pm by Lisa

    No recipe here today! But I do have some yummy food photos (which might make you hungry) with Lindsay, creator of Pinch of Yum. This workshop was offered several years ago and is no longer offered.

    However, you can still learn how to photograph food from Lindsay and Bjork over at Pinch of Yum! Their Food Photography Course* literally changed my life. And I highly recommend you start with great photos and start learning the blogging business!

    These are behind-the-scenes shots from the Tasty Food Photography Workshop with Lindsay, creator of Pinch of Yum. A gorgeous studio filled with light, props, and food..heaven! It was an awesome 2-day workshop.

    Tasty Food Photography Workshop: Pinch of Yum Studios chalkboard

    Ok, excuse me while I geek out. Like, a lot you guys. I don't really get star stuck, or even feel like I would recognize a celebrity if they were right in front of me. But in the food blogging world, Lindsay is a rock star.  She and her husband Bjork started Pinch of Yum together, as early food blog "pioneers". They now teach thousands of people how to build their blogs as a business.

    Tasty Food Photography Workshop: Pinch of Yum Studios class

    Lindsay, Bjork, and I share mutual home town acquaintances in Minneapolis. After hearing from our mutual friends, "Lisa, see what Lindsay is doing... you have to check out Pinch of Yum, Lisa, this food blog thing..Lisa, you should do that!".  At that time many years ago, I had not clue.  No clue what a food blog was, or about anything about social media. And never would believe someday I would build my very own website with my favorite recipes.  At that time, I couldn't turn on our huge scary DSLR camera, and take a simple family photo!  Hmmm things sure have changed!

    One night, after years of encouragement from our mutual sweetly-persistent friends, I did something incredible. I simply googled Pinch of Yum. And I thought, hmm I can actually do this blog thing... right? Little did I know how much I would fall in love with this creative world of food, writing, and photography. In 20 days, I self-built my website, staying up night after night. Once I posted my first recipe, I never looked back. I listened to countless training videos on Food Blogger Pro designed by Lindsay and Bjork, and that is why I feel like I know them so well! Never did I imagine, one day I would stand in the Pinch of Yum studio, with Linday....you guys! (that is seriously me..I might be blushing...) Okay I am.

    Tasty Food Photography Workshop: Pinch of Yum Studios LIsa Torres and Lindsay Ostrom

    Pinch of Yum Studio

    When you walk into the Pinch of Yum studio, you have to catch your breath. Because you just walked up three flights of stairs! Kidding, kinda... that part is true. AND it is so gorgeous! It literally does take your breath away. Light filled, racks and rows of props, backboards, a test kitchen all gorgeously designed..oh my, it is heavenly and beyond expectations.

    I know I took some snaps of the kitchen with the cool Smeg fridge and all, but in the end couldn't locate those photos. Even Sage their beloved dog has a cozy bed to take breaks after a hard day at work in the studio. The studio is nestled a super cool industrial area of Minneapolis, Minnesota, in one of the turn of the century brick buildings recently repurposed for businesses, offices, and studios.

    Here are a few things to know about Minneapolis. The people are so nice, they wave at you after they cut you off on the road! (That would never happen in LA/OC). The food scene is incredible and beyond amazing, so many great small chef-owned restaurants, and downtown is so hip, cool, and industrial. So go, just go! And if you message me, I will tell you about a secret speak easy to go check out.

    Tasty Food Photography Workshop: Pinch of Yum Studios sign
    Tasty Food Photography Workshop: Pinch of Yum Studios class names
    Tasty Food Photography Workshop: Pinch of Yum Studios menu
    Tasty Food Photography Workshop: Pinch of Yum Studios light fixture
    Tasty Food Photography Workshop: Pinch of Yum Studios MN
    Tasty Food Photography Workshop: Pinch of Yum Studios chat area
    Tasty Food Photography Workshop: Pinch of Yum Studios #
    Tasty Food Photography Workshop: Pinch of Yum Studios shelf
    Tasty Food Photography Workshop: Pinch of Yum Studios downlow

    Props and Styling Tools

    The Pinch of Yum studio is a food photographers dream. You will find a "treasure box" of  high quality beautiful props, photography backboards, and accessories to practice your food photography.  Each student photographs at their own window, and you can try different backboards, napkins, bowls, plates, and utensils for the perfect effect. There are stacks and stacks of gorgeous backboards, and many of them are from the great people at Erickson Wood Works.

    If you follow Pinch of Yum blog, you will recognize "the bowl " below. It is special, and I held that beauty for a second. It was made by Lindsay's father-in-law Larry Ostrom who sells his pottery online at Larry Ostrom Pottery. You guys, this place just rocks.

    Tasty Food Photography Workshop: Pinch of Yum Studios eat
    Tasty Food Photography Workshop: Pinch of Yum Studios prop bowls
    Tasty Food Photography Workshop: Pinch of Yum Studios rackfull
    Tasty Food Photography Workshop: Pinch of Yum Studios rack
    Tasty Food Photography Workshop: Pinch of Yum Studios the bowl
    Tasty Food Photography Workshop: Pinch of Yum Studios spoons
    Tasty Food Photography Workshop: Pinch of Yum Studios racks
    Tasty Food Photography Workshop: Pinch of Yum Studios boards
    Tasty Food Photography Workshop: Pinch of Yum Studios backboards

    Tasty Food Photography Workshop Key Takeaways

    1. Lighting is everything. E-V-E-R-Y-T-H-I-N-G. A window, preferably North facing with a sheer to soften the glare creates a glow, and a softness that is perfect for food.
    2. Fixed Prime lens (not the zoom lens I was using) will consistently take better shots. Plus I can set the aperture lower and control the shot better. First thing I did when I got home is ordered a 50mm 1.4 fixed prime lens. Thank you Amazon.
    3. First set aperture 2.2-4.0 Second set shutter speed 60-80 Third set ISO 100-1600
    4. Styling Tricks:  you can shoot great images on backboards that are not that large, the napkin/fabric makes a shot look amazing. Simple is powerful.
    5. Use Lightroom, and learn to leverage its features and editing efficiencies.
    6. Try to shoot tethered and on a tri-pod when it is darker. You instantly can see how your shots are coming out, and it saves time. Got a new tripod that will do an overhead shot, cool new things are in the works my friends.
    7. Video is not that hard, more on that later. Thanks Alana, you are awesome!
    Tasty Food Photography Workshop: Pinch of Yum Studios teaching
    Tasty Food Photography Workshop: Pinch of Yum Studios Lindsay
    Tasty Food Photography Workshop: Pinch of Yum Studios computer

    My Tasty Food Photography Workshop Practice Photos

    The Pinch of Yum team had plenty of food to practice with on a table you could practice with at any time. We styled our own dishes, as well as watched Lindsay work her magic on stacks of delicious pancakes, and smoothie bowls. Each of the 11 students had a table and a window with a sheer curtain and perfect lighting. This made the food glow, the colors pop,  and a slight sheen to the already gorgeous food. Lindsay also walked us through Lightroom and her key editing steps to bring out the best features of each photo. Lightroom, you and I will be spending a lot more time together in the future.

    One day it will be fun to look back, and see how my photography changes and grow. Hopefully it improves dramatically with my new skills from the workshop! Below, many photos might look so similar, but I was learning to control the camera in manual, and one setting makes a big difference!

    Pretty berries...love how the colors pop!

    Tasty Food Photography Workshop: Pinch of Yum Studios spoon full
    Tasty Food Photography Workshop: Pinch of Yum Studios
    Tasty Food Photography Workshop: Pinch of Yum Studios donuts
    Tasty Food Photography Workshop: Pinch of Yum Studios
    Tasty Food Photography Workshop: Pinch of Yum Studios
    Tasty Food Photography Workshop: Pinch of Yum Studios
    Tasty Food Photography Workshop: Pinch of Yum Studios gloss
    Tasty Food Photography Workshop: Pinch of Yum Studios smoothie
    Tasty Food Photography Workshop: Pinch of Yum Studios
    Tasty Food Photography Workshop: Pinch of Yum Studios berries
    Tasty Food Photography Workshop: Pinch of Yum Studios
    Tasty Food Photography Workshop: Pinch of Yum Studios close smoothies
    Tasty Food Photography Workshop: Pinch of Yum Studios spoon full
    Tasty Food Photography Workshop: Pinch of Yum Studios honey
    Tasty Food Photography Workshop: Pinch of Yum Studios BEST
    Tasty Food Photography Workshop: Pinch of Yum Studios
    Tasty Food Photography Workshop: Pinch of Yum Studios spoon rest
    Tasty Food Photography Workshop: Pinch of Yum Studios berry
    Tasty Food Photography Workshop: Pinch of Yum Studios spoon
    Tasty Food Photography Workshop: Pinch of Yum Studios
    Tasty Food Photography Workshop: Pinch of Yum Studios blue
    Tasty Food Photography Workshop: Pinch of Yum Studios super close
    Tasty Food Photography Workshop: Pinch of Yum Studios close
    Tasty Food Photography Workshop: Pinch of Yum Studios table
    Tasty Food Photography Workshop: Pinch of Yum Studios top
    Tasty Food Photography Workshop: Pinch of Yum Studios syrup
    Tasty Food Photography Workshop: Pinch of Yum Studios close stack
    Tasty Food Photography Workshop: Pinch of Yum Studios fork
    Tasty Food Photography Workshop: Pinch of Yum Studios pancakes

    My Favorite Food Photography Photos of the Workshop

    In this shot, I styled the bowl of muesli with the berries,  drizzled the honey pouring on the bowl, and shot in continuous shoot mode in manual mode. The type of camera, lens, and settings are noted below.

    Tasty Food Photography Workshop: Pinch of Yum Studios BEST
    ISO 640 80mm f/5.6 Canon EOS 60D Canon EF 24-105mmf/4L IS

    Love the gloss and shine on the berries and smoothie. Backlit, top down Instagram style photo. And yes, the smoothie was good, I ate every drop! BTW-Lindsay said, Pretty!"..made my trip worth it!

    Tasty Food Photography Workshop: Pinch of Yum Studios

    Lindsay styled this stack of pancakes. I love the syrup drops on the table, makes the shot in my opinion.

    Tasty Food Photography Workshop: Pinch of Yum Studios pancakes
    Tasty Food Photography Workshop: Pinch of Yum Studios super close

    Believe it or not, this was one of the first shots I took at the workshop of the donuts. Perfect lighting by a window and beautiful Erickson Background Surfaces. Oh and some beginners luck.

    Tasty Food Photography Workshop: Pinch of Yum Studios

    A yummy stack of pancakes dripping in chocolate sauce styled by my table mate Hannah. She did a terrific job so I snapped a quick photo. It is on the darker moody side...expermenting.

    Tasty Food Photography Workshop: Pinch of Yum Studios chocolate

    Ultimately, who knows where this Delicious Table food blog will go? For today, it is a fantastic way to express the creativity that has been locked inside of me for years.

    I love writing, recipe development, food styling, and learning to love food photography.  But by far, my favorite part of the industry are the people I have met, and the friendships I have made. Lindsay is one of those peeps. Bjork too, so super nice and down to earth, and they are helping a lot of people build beautiful successful food blogs everyday. Our class was terrific, and we are all staying in touch!

    So thank you, Lindsay and Bjork, and Sage (their dog), (although Sage we haven't met..yet) for sharing your talents, passion, and business skills within our awesome food blogging community.

    All the Best,

    Lisa

    XO

    Tasty Food Photography Workshop: Pinch of Yum Studios class funny

    And that is a wrap!

    Read about my Culinary Adventure to Chip and JoAnna's Magnolia Market!

    Magnolia Market + Silo Baking Co. | Waco, Texas LIsa Torres - Delicious Table

    Surfas Pro 2: 6-Week Professional Cooking Courses + Team Cooking Competition

    [heart_this] · Mar 29, 2016 · Leave a Comment

    Surfas Professional Cooking Series Two Chef

    Last Updated August 23rd, 2023 at 06:49 pm by Lisa

    Surfas 6-Week Professional Cooking Course (Level 2) + Team Cooking Competition is designed to take your skills to the next level! No matter where you are in the culinary world, I guarantee you will be learning new skills and techniques in what feels like a professional restaurant with a Chef to guide you through every step. Try out new ingredients, equipment, and master recipes you have always dreamed of making.

    My favorite class was Pasta, Ravioli, and Cheese. We learned how to make  the BEST lasagna I've ever tasted in my life. We made house-made fresh lasagna pasta, Bolognese sauce, and ricotta all from scratch. All I can say is, thank you Chef!  This recipe will be with me for life!

    Have you ever loved doing something with such enthusiasm that when you get around of your kinda people you just feel like it's one big happy family?

    That is how it is at Surfas...

    Surfas offers all kinds of cooking classes, and I plan on taking as many of possible in the future. But of course I started off at the Pro level, and why not? Since there was not real prerequisite I figured hey I can be there with all those "Pros".  Classes are open to any skill level and for those 18 or older, and classes are held in their beautiful Surfas’ state of the art Test Kitchen.

    Surfas 6-Week Professional Cooking Classes (Level 2) + Team Cooking Competition chef
    Lisa and Chef Dominique Fournier

    Surfas Culinary District

    The Surfas Costa Mesa Test Kitchen is outfitted with the latest state-of-the-art commercial kitchen equipment. The space may be used for chef demonstrations, cooking classes, book signings, and team building workshops. Additionally it is able to seat 110 comfortably with 110 chairs, five 6 foot tables, one 8 foot table, and four 6 foot culinary work stations available for use. The space is outfitted with a wireless microphone, TV monitor, and adjustable camera. Think of the Costa Mesa Test Kitchen for your next group party, meeting, or filming.

    Surfas 6-Week Professional Cooking Classes (Level 2) + Team Cooking Competition flambe

    About Chef Dominique Fournier

    Chef Dominique Fournier has extensive experience in the culinary world. French-born and trained, Fournier has been an Executive Chef for many notable 4 star restaurants from coast to coast including La Parisienne in California and Citronelle in Washington DC, as well as, restaurants in Paris and Corsica France. Chef Fournier enjoys combining traditional French cooking with modern flair. With 30+ years of experience, Chef is creative and methodical in his cooking and eager to share his experience to educate people about the art of food.

    Surfas 6-Week Professional Cooking Classes (Level 2) + Team Cooking Competition Chef DF

    Surfas Pro 2:  6-Week Hands-On Cooking Series and Competition Test Kitchen

    Join Surfas in welcoming back Chef Dominque Fournier to 2nd professional series, hands-on cooking class. Chef Fournier will guide you through both basic and advance recipes which are essential to a great cook. Through the 6 weeks students will learn knife skills, the basics of sauces and stocks, and how to garnish and finish each dish. You will also perfect your skills by fabricating a whole fish, creating puff pastry, and compete in a final cooking competition. Designed for all skill levels, this class is perfect for those who want to take their cooking skills to the next level. Pro 1 is not a prerequisite for this class.
    Now, let me make you hungry

    Surfas 6-Week Professional Cooking Classes (Level 2) + Team Cooking Competition lasagna
    Seriously Chef, this is the BEST lasagna of my life. House-made fresh lasagna pasta, we made the Bolognese sauce, and the ricotta. I can still taste this AMAZING lasagna...coming to my website soon!
    Surfas 6-Week Professional Cooking Classes (Level 2) + Team Cooking Competition pepper steak
    Steak Au Poivre (Pepper Steak) with Grilled Pineapple & Glaze, polenta cake, and match stick Pommes Frites.
    Surfas 6-Week Professional Cooking Classes (Level 2) + Team Cooking Competition moules
    Moules (mussels) marinière includes white wine, shallots, parsley and butter to cook the mussels. We then baked a puff pastry crust over the soup.
    Surfas 6-Week Professional Cooking Classes (Level 2) + Team Cooking Competition chicken a 'la orange

    Professional 2 Cooking Class Schedule:

    Week 1 – Stocks and Doughs
    Beef Stock
    Flat Bread Dough
    Puff Pastry Dough
    Flat Bread with Prosciutto, Artisanal Cheeses, and Lobster

    Week 2 – Sweet and Savory Pastries
    Puff Pastry
    Vol au Vent with Chicken and Mushrooms
    Mussel Soup in Puff Pastry
    Rustic Apple Tart
    Roasted Pear Tart

    Week 3 – Pasta, Ravioli, and Cheese
    Fresh Pasta Dough
    Homemade Ricotta
    Spinach Ravioli with Fresh Ricotta
    Fettuccine with Alfredo Sauce
    Lasagna with Bechamel Sauce
    Beurre Noisette

    Week 4 – Fabrication of Fish plus Cooking Techniques and Sauces
    Fish Fumet
    Sea Bass with Tomato Coulis
    Salmon with Leek Compote
    Beurre Rouge Sauce
    Sauce Normande

    Week 5 – Beef and Chicken with Sauces
    Chicken a l’Orange
    Peppered Steak with Pineapple Sauce
    Beef Stroganoff
    Bordelaise

    Week 6 – Friendly Cooking Competition
    Practice what you have learned! In this class students will be divided into teams and asked to create a full meal inspired by dishes previously learned. Our Chef Instructor will be assisting and giving advice. You will then have the opportunity to explain your dish and gather feedback. Chef Mina Sacramento of Shuck Oyster Bar will be judging. A team will be presented the winner.

    Surfas 6-Week Professional Cooking Classes (Level 2) + Team Cooking Competition judges

    Our Cooking Competition Team:

    Surfas 6-Week Professional Cooking Classes (Level 2) + Team Cooking Competition Competition
    Sandy, Lisa (me), and Amy...we were missing Kimberly! One person down, and we had to do all the dishes on competition night!
    Surfas 6-Week Professional Cooking Classes (Level 2) + Team Cooking Competition team 1
    Team 1: Matthew, Carol, Selina, and Theo
    Surfas 6-Week Professional Cooking Classes (Level 2) + Team Cooking Competition team2
    Suzy, Mary Jo, Laura, and Naomi! Thank you again Naomi for sharing your photographs of our culinary adventures.
    Surfas 6-Week Professional Cooking Classes (Level 2) + Team Cooking Competition Luz team
    Team 3: Judi, Luz, Andrea, Judy

    The judges tasting our dishes with their scoring sheets...

    Surfas 6-Week Professional Cooking Classes (Level 2) + Team Cooking Competition tasting

    About Your Judge:
    Chef Mina Sacramento has had many different careers from graphic design, to flight attendant, to Executive Chef. Her travels around the world have developed her palate and drawn her to the kitchen. Chef Mina trained in the Philippines and Spain. She has worked for the Montage Resort and Spa in Laguna Beach and Marche Moderne in Costa Mesa to name only a few. She currently runs the culinary program at Shuck Oyster Bar, named "Top 100 Restaurant in Orange County."

    Chef Mina with Chef Stacy looking on...what are they thinking as they taste our dishes?

    Surfas 6-Week Professional Cooking Classes (Level 2) + Team Cooking Competition Mina and Stacy

    Our Winning Menu...

    Two Main Dishes:

    Pineapple Orange Reduction and Saute Chicken in Puff Pastry Tower with Asparagus (made sauce and puff pastry)

    Surfas 6-Week Professional Cooking Classes + Team Cooking Competition chicken

    Linguine with Crispy Smoked Pepper Bacon Cream Sauce (made pasta by hand)

    Surfas 6-Week Professional Cooking Classes + Team Cooking Competition pasta

    Appetizer:

    Mediterranean Shrimp and Pesto flat bread (we made the flat bread, sauce, all components)

    Surfas 6-Week Professional Cooking Classes (Level 2) + Team Cooking Competition flatbread

    Competition Memories and Notes: We humbly won the competition, and honestly were a bit shocked. Our class was filled amazing home cooks, serious foodies, and one couple had taken over 30 cooking classes  at Surfas. Several other cooking class friends are culinary school graduates, from places like oh a....le cordon bleu. Our menu plan went well, our teamwork was tight even with one member short, and we kept a clean/neat station!

    And the Winning Team is...

    Surfas 6-Week Professional Cooking Classes (Level 2) + Team Cooking Competition win
    Team 4:  Amy, Sandy, and Lisa with our winning menu.

    Surfas Cooking Classes are hands-on...literally!

    Surfas 6-Week Professional Cooking Classes (Level 2) + Team Cooking Competition ravioli
    Making ravioli....

    Surfas 6-Week Professional Cooking Classes (Level 2) + Team Cooking Competition ravioli done

    Make New Cooking Friends!

    Cooking with new friends at Surfas is so much fun!  We all "get" each other's comments, and food centric lives.

    We had a great time in class, and many of us are still connected on Facebook to keep in touch!

    Surfas 6-Week Professional Cooking Classes (Level 2) + Team Cooking Competition Mike
    Surfas 6-Week Professional Cooking Classes (Level 2) + Team Cooking Competition Suzy
    Surfas 6-Week Professional Cooking Classes (Level 2) + Team Cooking Competition chef
    Surfas 6-Week Professional Cooking Classes (Level 2) + Team Cooking CompetitionLaura flambe
    Surfas 6-Week Professional Cooking Classes (Level 2) + Team Cooking Competition Theo
    Surfas 6-Week Professional Cooking Classes (Level 2) + Team Cooking Competition love
    Surfas 6-Week Professional Cooking Classes (Level 2) + Team Cooking Competition Suzy and Chef
    Suzy and Chef
    Surfas 6-Week Professional Cooking Classes (Level 2) + Team Cooking Competition Naomi
    A special thank you to Naomi, for photographing almost every picture in this post!
    Surfas 6-Week Professional Cooking Classes (Level 2) + Team Cooking Competition flambe table 4
    Flambe lessons..don't worry, we are professionals!
    Surfas 6-Week Professional Cooking Classes (Level 2) + Team Cooking Competition puff pastry
    Puff Pastry lessons....takes force to get that butter into the pastry!
    Surfas 6-Week Professional Cooking Classes (Level 2) + Team Cooking Competition Laura
    Surfas 6-Week Professional Cooking Classes (Level 2) + Team Cooking Competition flambe

    At Surfas Culinary District, they believe great cooking isn’t just about recipes; it’s about the techniques and essential ingredients. Come experience the difference. Please call 714-453-COOK(2665) with any questions.

    All the Best,

    Lisa

    XO

    Think I look happy and like this is fun?

    Surfas 6-Week Professional Cooking Classes (Level 2) + Team Cooking Competition Lisa
    Surfas Pro 2: 6-Week Professional Cooking Course + Team Cooking Competition funny

    Cheddar Cheese Jalapeño Cornbread

    [heart_this] · Nov 16, 2015 · 1 Comment

    A cornbread muffin in an orange muffin tin paper with a piece out of it and crumbs on the table.

    Last Updated July 23rd, 2023 at 01:15 pm by Lisa

    Bake these Cheddar Cheese Jalapeño Cornbread Muffins made with just 3 ingredients, and are super soft and cheesy. Serve hot with a big slather of honey butter for dinners like bowls of chili, pork chops, fried chicken, or BBQ ribs.

    Sure you can make Marie Callender's cornbread recipe from scratch, but this is a go-to easy way to get dinner on the table. It saves the steps of making your own cornbread mix.

    Your kitchen will fill with the baking aroma of this famous golden cornbread...

    Marie Callendar Corn Bread Recipe

    • 1 bag of Marie Callendar's Original Corn Bread Muffin Mix. This is definitely the best mix I've found, but if you can't find it for some reason, you can substitute another cornbread muffin mix brand.
    • 2 cups shredded cheddar cheese or cheese of your choice
    • 1 tablespoon La Victoria canned diced jalapeños

    PRO TIP: Taste the canned jalapenos to be sure they are not too hot, sometimes that happens. You can chop them super fine and just add less.

    Step 1: In a large bowl, mix the Marie Calendar's cornbread mix with 1 ½ cups of water, and stir in the 2 cups of grated cheese, and 1 tablespoon of finely chopped canned jalapeño. I like to use the La Victoria canned brand, but any other brand will work just fine. Stir until lumps disappear.

    Step 2: Using an ice cream scoop, scoop batter ⅔ of the way full into paper lined muffin tins.

    Step 3: Bake at 375 for 25 minutes until golden brown and a toothpick comes out clean.

    Honey Butter: Simply mix an equal portion of soft butter to honey and slather it on your hot cornbread.

    Lovin' These Jalapeño Cornbread Muffins

    • Fast Dinner Side: They will go well with just about any dinner and are especially delicious with a hot bowl of Turkey Chili, Fried Chicken, or BBQ Ribs.
    • Sweet Honey Butter: Good cornbread tastes great with regular butter or honey butter.
    • Easy To Make: Only 35 minutes to bake, and no electric mixer.
    • Any Pan Works: You can bake these in almost any pan like an 8-inch pan, a larger 13-inch brownie pan, a cast-iron skillet, or a glass baking dish. Or make them into muffins.
    • Three ingredients and three steps: Recipes don't get much easier.
    • Marie Callender's cornbread mix: It's definitely my go-to, and comes from the restaurant chain that is famous for its moist cornbread recipe. Keep this stocked in your pantry to bake up a batch in no time at all.

    Cornbread FAQ

    What goes with cornbread?


    Cornbread goes so many dishes, smear on some Honey Butter - simply mix equal portions of soft butter and honey. Put a on a plate with BBQ ribs, and Cowboy Baked Beans for a cookout. It is a perfect fast dinner side for Turkey Chili, Cheeseburger Meatloaf, Chicken Noodle Soup, or Grilled Steaks.

    Another classic combination is roasted or fried chicken, Mashed Potatoes, and Coleslaw. Or pair with Pulled Pork Sandwiches,
    pot roast, pork chops, or a Smoked Spiral Ham.

    How do you make your own cornbread mix?


    Mix these ingredients together in the quantity you desire.

    1 cup cornmeal
    1 cup flour
    1 tablespoon baking powder
    ½ teaspoon salt

    To make cornbread in a pan or muffins:

    Add 2 cups of this Homemade Cornbread Mix, 1 cup buttermilk, 1 egg, and 4 tablespoons melted butter. Optionally add ¼ cup of honey to make it sweet cornbread.

    More Side Dish Recipes

    Frozen Dinner Rolls (aka Bread Rolls) are an easy recipe to make. Brush store-bought frozen rolls with melted butter, and add toppings you love. Try different grated cheeses, seasonings, and fresh herbs.

    Make-Ahead Mashed Potatoes are a creamy smooth, buttery, fluffy, melt-in-your-mouth side dish. Plus get several ways to reheat and keep them warm for dinner. This is a great recipe for holidays like Thanksgiving and Christmas.

    These are the best Fried Green Tomatoes, one of the great recipes of the Southern United States. Each slice has a crunchy crust to dip into a creamy remoulade, buttermilk ranch dressing, or comeback sauce.

    Cowboy Baked Beans are loaded with browned hamburger meat and crispy applewood smoked bacon. The addition of ground beef makes these absolutely amazing and almost a meal itself.

    • A close up of baked Frozen Dinner Rolls topped with cheeses, herbs, and seasonings.
      Dinner Rolls
    • A white casserole dish filled with mashed potatoes and squares of melted butter on top.
      Make-Ahead Mashed Potatoes
    • A white long plate with a stack of fried green tomatoes with remoulade and buttermilk ranch dressing.
      Fried Green Tomatoes
    • A large white spoon scooping a serving of cowboy baked beans out of a casserole dish.
      Cowboy Beans

    Did you love this recipe? We would love to hear from you! If you make this recipe and love it, give it a 5-star rating ⭐⭐⭐⭐⭐ with a comment. THANK YOU!! Follow Delicious Table with my free newsletter and share this recipe with your friends on Facebook, Pinterest, and Instagram.

    A cornbread muffin in an orange muffin tin paper with a piece out of it and crumbs on the table.
    Print

    Cheddar Cheese Jalapeño Cornbread

    Bake these Cheddar Cheese Jalapeño Cornbread Muffins made with just 3 ingredients and are super soft and cheesy. Serve hot with a big slather of honey butter for a dinner like bowls of chili, pork chops, fried chicken or BBQ ribs.
    Course Appetizers, Dips, & Snacks, Side Dishes & Vegetables
    Cuisine American
    Keyword corn muffins, cornbread mix
    Prep Time 10 minutes minutes
    Cook Time 25 minutes minutes
    Total Time 35 minutes minutes
    Servings 12
    Calories 145kcal
    Author Lisa Hatfield

    Equipment

    • Muffin Pan
    • Spring Loaded Cookie Scoops (3 Sizes)

    Ingredients

    • 1 Bag Marie Callendar's Original Corn Bread Muffin Mix
    • 2 Cups shredded cheddar cheese or cheese of your choice
    • 1 Tablespoon La Victoria canned diced jalapeños
    US Customary - Metric

    Instructions

    • Put paper liners into your muffin tin. Preheat the oven to 375 degrees farenheit.
    • In a large bowl, mix the Marie Callendar's cornbread mix package with 1 ½ cups of water, stir in the 2 cups of grated cheese and 1 tablespoon of finely canned chopped jalapeño or candied jalapeno. Stir until lumps disappear.
    • It is hard to pour the cornbread batter neatly into a muffin tin from a mixing bowl. So try an ice cream scoop. Simply scoop the batter ⅔ way full into paper lined muffin tins.
    • Bake at 375 for 25 minutes until golden brown and a toothpick comes out clean from the middle of the cornbread muffin.
    • Serve with butter or honey butter.

    Notes

    Honey Butter

    So yummy, just mix equal portions of soft butter with honey.

    Fast Dinner Side

    They will go well with just about any dinner and especially delicious with hot bowl of Turkey Chili, Fried Chicken, or BBQ Ribs.

    Sweet Honey Butter

     Good cornbread tastes great with regular butter or honey butter.

    Easy To Make

     Only 35 minutes to bake, and no electric mixer.

    Any Pan Works

     You can bake these in almost any pan like an 8-inch pan, a larger 13-inch brownie pan, a cast-iron skillet, or a glass baking dish. Or make them into muffins.

    Marie Callender's Corn Bread Mix

     It's definitely my go-to and comes from the restaurant chain that is famous for its moist cornbread recipe. Keep this stocked in your pantry to bake up a batch in no time at all.

    Nutrition

    Calories: 145kcal | Carbohydrates: 11g | Protein: 5g | Fat: 8g | Saturated Fat: 4g | Cholesterol: 20mg | Sodium: 252mg | Potassium: 40mg | Fiber: 1g | Sugar: 3g | Vitamin A: 220IU | Vitamin C: 1.5mg | Calcium: 145mg | Iron: 0.5mg

    Surfas Pro 1: 6-Week Professional Cooking Course + Team Cooking Competition

    [heart_this] · Oct 21, 2015 · Leave a Comment

    Surfas Professional Cooking Series One Chef and I

    Last Updated May 20th, 2021 at 06:57 pm by Lisa

    Surfas Professional Cooking Classes - Series One at Surfas Culinary District will take your kitchen skills and cooking techniques to the next level.

    If you have ever dreamed of going to cooking school, this is a fantastic way to build the skill set without the time and financial commitments. Surfas is a professional restaurant supply store, a cooking school, and has a state of the art Test Kitchen in 3 locations.

    Surfas Professional Cooking Classes - Series One Chef and I

    Chef Dominique Fournier has extensive experience in the culinary world. French-born and trained, Chef Fournier worked in the best restaurants in Paris and Corsica, France. When we met, I asked him where he did his formal training, and looked at me like I was asking a stupid question and said, "I did my training for 40 years, that is the best school!" I agree, because watching Chef work in the kitchen and teach is something to experience. You can see the years in how he works and talks about cuisine.

    Executive Chef for many notable 4 star restaurants coast to coast including La Parisienne in California and Citronelle in Washington DC, Chef Fournier enjoys combining traditional French cooking with modern flair. With 40+ years of experience, Chef is creative and methodical in his cooking and eager to share his experience to educate people about the fine art of food.

    There are many things I learned from Chef, who I now consider a friend and my culinary mentor.

    Here are a few key take-aways I learned from Chef Fournier:

    Chef will ask, "Is it good?" to which the answer better be, "Yes Chef!" He taught us to believe in our food, and by working hard on the technical skills, seasoning, taste, and be sure it is right. Dishes also must be "sexy" aka beautiful.

    Chef will ask, "Did you taste your food?" and the best answer is always, "Yes, I tasted the dish Chef!" He taught us to season with salt, and wait as the flavors do change during the cooking process. Also, fresh high quality ingredients make a huge difference, but the key to cooking is taste, taste, taste as you go!

    Have fun in the kitchen but cooking is serious business. Take it seriously, but enjoy the success of cooking a delicious meal while having a good time. Be safe; hot pots, burning ovens, sharp knives, and  flames must be respected.

    Cooking can be hard work, but worth the effort. I will never forget him teaching us to pound butter into the puff pastry dough and the force that he pounded on that table!

    Sometimes, you must have a fearless attitude when cooking. Like the time he cut a whole salmon with ease in front of the class, like butter. This salmon was huge, and he took it apart so easily!

    People who are passionate about food like Chef Fournier love what they do but sometimes they yell at you, "What are you doing Lisa! That is not how I showed you Lisa! Lisa! that is not what you are to do do...Lisa, didn't you listen to me?" In the end, I learned to listen. Learn. Watch. And relax. Yes Chef!

    Chef, you taught us all so many things over the weeks we shared in your happy place, and where you love to yell, laugh, scream, and teach. I will always respect and admire your 40+ years of working in the finest kitchens of the world and appreciate that you taught us just a few of your techniques and favorite dishes.

    I will never cook at the same level again, you taught me many things and I thank you.

    Surfas Professional Cooking Classes - Series One Chef with dish

    Watching how he plates, you can tell the experience and comfort as he creates gorgeous dishes.

    Surfas Professional Cooking Classes - Series One Chef Hands

    Chef's knives are over 40 years old. The knives you see here have traveled to many kitchens.  One student attempted to use his knives. Not a good idea, as it did not go over well with Chef. Knives are personal to a Chef, and it is not polite to even ask to borrow for a minute. Know we know! This was a lesson to remember. He explained that several of the blades started out quite long, and are now quite short after years of sharpening. Years of toil and hard work have left their mark on his knife set.

    Surfas Professional Cooking Classes - Series One

    About Surfas Professional Cooking Series One:

    Classes are held in Surfas’ state of the art Test Kitchen. Cooking class will be a hands-on experience with a trained Chef Instructor.

    This course series was for those either quite comfortable in the kitchen, or moving into a professional cooking career. Anyone can take this series, there are no prerequisites. Surfas Culinary District offers many classes on different cuisines, techniques, and there are kids classes in the Summer. There is something for every cook at Surfas, and it is a great gift idea.  In addition, this is a professional restaurant supply store and the quality, variety,  and prices of their equipment are impressive! Give yourself extra time to shop and pick up a few more kitchen gadgets. Some people shop for shoes, I shop for kitchen gadgets!

    Designed for all skill levels, this class is perfect for those who want to take their cooking skills to the next level. Each student will be given a white chef jacket to wear.

    5 Week Hands-On Cooking Course and Competition
    Surfas Culinary District Test Kitchen

    Join Surfas in welcoming Chef Dominque Fournier to our popular professional series, hands-on cooking class. Chef Fournier will guide you through both basic and advance recipes which are essential to a great cook. Through the 5 weeks students will learn knife skills, the basics of sauces and soups, and how to garnish and finish each dish. You will also learn how to break down whole chicken and fish, create and use puff pastry for desserts, and compete in a final cooking competition.

    So now I thought we would just jump right into the fire so to speak.

    Flambe Lessons... don't worry, we are almost professionals! Chef taught us how to make pan sauces using flambe to cook off the alcohol from the cognac or wine. It was a fun night, the key was to pour the alcohol into the pan fast and all at once quickly.

    Surfas Professional Cooking Classes - Series One Flambe Lessons

    Mike is safe, although it looks as if his chef coat is on fire!

    Surfas Professional Cooking Cooking - Series One Flambe

    Our Cooking Team:

    The class is 16 people, and tables of  four people. My Table Team 4 members were Kimberly an amazingly talented home cook and knows every good restaurant in Southern California.  Naomi, a Cordon Blue Paris Graduate and The Pastry School Graduate yet retired. Robynne,  a talented and passionate home cook,  and Me! We cooked together for the 5 weeks of class.

    A special thank you to Naomi, who gave me permission to use many of her photographs for my blog post story. Thanks again Naomi!

    Surfas Professional Cooking Classes - Series One Table 4

    We use lots of fresh, delicious high quality ingredients...

    Surfas Professional Cooking Classes - Series One ingredients
    Surfas Professional Cooking Classes - Series One steak
    Surfas Professional Cooking Classes - Series One mushrooms
    Surfas Professional Cooking Classes - Series One iced shrimp
    Surfas Professional Cooking Classes - Series One ingredient

    Surfas Professional Cooking Classes - Series One Lessons:

    Week 1 - Knife Skills, Soups and Stocks
    Large, Medium, Small dice size cuts
    Brunoise, Batonnet, Tourne, and Julienne size cuts
    Tomato Soup
    Leek Potato Soup
    Mushroom Soup
    Carrot Soup
    Beef Stock
    Vegetable Stock

    Week 2 - Sauces, Plating, Garnish, and Appetizers
    Salade Frisee aux Lardons Oeuf Poche
    Shrimp au Jus
    Steak au Poivre with Purée Potato
    Asparagus with Hollandaise Sauce
    Rice Pilaf

    Week 3 - Fabrications, Sauté, Brazing
    Coq au Vin
    Sea Scallop Anisette
    Braised Chicken
    Sea Bass with Beurre Blanc

    Week 4 - Puff Pastry and Desserts
    Puff Pastry
    Genoise
    Chocolat Mousse
    Crème Anglaise
    Raspberry Coulis
    Palmiers

    Week 5 – Cooking Competition
    Practice what you have learned! In this class students will be divided into teams and asked to create a version of a dish previously learned. Our Chef Instructor will be assisting and giving advice. You will then have the opportunity to explain your dish and gather feedback. Anita Lau of Diary of a Mad Hungry Woman will be judging. A team will be presented the winner.

    Surfas Professional Cooking Classe - Series One mixer

    I love professional cooking at Surfas, it is very similar to cooking in a restaurant, and is a state of the art test kitchen with professional grade equipment.

    Surfas Professional Cooking Classes - Series One ingredient table
    Surfas Professional Cooking Classes - Series One oven
    Surfas Professional Cooking Classes - Series One kitchen

    Chef is happy today. He laughs a lot, and yells a lot. His passion for food and cooking is so fun!

    Surfas Professional Cooking Classes - Series One Chef laughing
    Surfas Professional Cooking Classes - Series One Kimberly
    Surfas Professional Cooking Classes - Series One stove
    Surfas Professional Cooking Classes - Series One having fun

    I LOVED this pro course series for many reasons. Chef led the class in a tough, fast, and furious pace similar to a professional cooking school level. In a way, this class series is like going to a mini version of culinary school. In fact, Chef teaches at professional cooking schools regularly.

    The melted chocolate is brushed on ring forms, sets,  and the form is peeled off leaving chocolate cups.

    Surfas Professional Cooking Classes -Series One chocolate cups
    Surfas Professional Cooking Classes - Series One strawberry dessert
    Surfas Professional Cooking Classes - Series One strawberry pastry

    Yes, we learned to filet a whole fish!!

    Surfas Professional Cooking Classes - Series One Laura

    Professional Cooking, isn't always glamorous. I did it, and it wasn't too hard with a couple of good techniques and my encouraging team mates!

    Surfas Professional Cooking Classes - Series One fish

    And made Sea Bass with Beurre Blanc...

    Surfas Professional Cooking Classes - Series One sea bass

    So pretty...Sea Scallop Anisette (this dish will be on my website in the Fall 2016)

    Surfas Professional Cooking Classes - Series One scallops

    And we learned how to make Puff Pastry from scratch. It takes a lot of muscle, pounding, and rolling!

    Surfas Professional Cooking Classes - Series One puff pastry

    Puff Pastry became Palmiers...I did an entire recipe post for French Valentine's Day Palmiers inspired from this class.

    Surfas Professional Cooking Classes - Series One palmers

    We learned lots of stock and soup recipes...

    Surfas Professional Cooking Classes - Series One soup

    Competition Night:

    I was SO nervous!  Our team had a basic strategy and menu, but still...oh the nerves!

    Chef with the Judging Score Sheet..

    Surfas Professional Cooking Classes - Series One Chef with judging criteria

    The Judging panel at our table..these are highly respected Chefs and food critics from Orange County.

    Surfas Professional Cooking Classes - Series One Judges


    Special thanks to Chef Dominique Fournier and Chef Judge Anita Lau of www.madhungrywoman.com who also judged on Hell's Kitchen cooking show for sharing your talents,  and your advice to us!!

    Surfas Professional Cooking Classes - Series One Anita Lau
    The Winning Menu we chose:

    appetizer course: potato leek soup with fried leeks and garlic croutons
    main course: seared sea bass with beurre blanc sauce, rice pilaf and asparagus                                   dessert course: chocolate mousse in chocolate cup on strawberry coulis sauce, chocolate pearls and palmier cookies

    October 13, 2015:  Kimberly, Robyn, and I won the 5-week pro-course final competition at Surfas tonight. We were judged by 5 local highly respected Orange County Chefs for 3 courses. Wow I still can't believe it!! ‪#‎ilovetocook‬ ‪#‎chefisproud‬ ‪#‎surfas‬ ‪#‎guessicancook‬

    Team 4, we were missing our talented Naomi on our competition night!

    Surfas Professional Cooking Classes -Series One Team 4 wins

    Happy Cook! It was so hot in the kitchen that our chocolate cup melted a bit, nothing a few chocolate pearls can't make pretty!

    Surfas Professional Cooking Classes - Series One Winning Menu

    At Surfas, they believe great cooking isn’t just about recipes; it’s about the techniques and essential ingredients. Come experience the difference. Please call 714-453-COOK(2665) with any questions.

    If you liked this post, read all about Surfas Pro 2: 6-Week Professional Cooking Course + Team Cooking Competition

    I am going to miss Surfas until the next cooking class...

    Surfas Professional Cooking Classes - Series One Me
    • « Go to Previous Page
    • Page 1
    • Interim pages omitted …
    • Page 6
    • Page 7
    • Page 8

    Primary Sidebar

    MEET LISA

    Hey Everyone! I've been cooking passionately for over 30 years with professional culinary training and thousands of recipes in my collection. Let's get cooking! ♥

    Find out more →

    FOLLOW US ON SOCIAL

    • Facebook
    • Instagram
    • LinkedIn
    • Pinterest
    • YouTube

    MOST POPULAR RECIPES

    • Three golden crispy edged hash browns baked in a muffin tin on cutting board.
      Oven Baked Hash Browns
    • A white ceramic dog dish that says woof filled with homemade dog food.
      Homemade Dog Food Recipes (30+ Ideas!)
    • A large spoon holding a scoop of hot potato casserole serving it for dinner.
      Cheesy Potato Casserole
    • Marinated mozzarella balls in a beige ceramic dish with appetizer toothpicks.
      Marinated Mozzarella Balls
    • A white casserole dish with oven roasted pulled pork shredded and ready to eat in tacos or a recipe for dinner.
      Oven Roasted Pulled Pork
    • A baked loaf of pumpkin bread sliced thick with a silver knife.s
      Pumpkin Bread

    ALL READER FAVES ►

    FALL RECIPES

    • A ceramic dish full of golden brown roast pumpkin seeds.
      Roasted Pumpkin Seeds
    • Dozens of pictures of 200 Halloween recipes including adult drinks, appetizers, treats, snacks, desserts for kids and families all with a Halloween theme.
      200+ Best Halloween Recipes
    • Apple Crisp in a red bowl with a silver spoon, ice cream, and drizzled with caramel sauce.
      Apple Crisp
    • Slices of green Granny Smith apples around a white dish with a sweet dessert dip inside a low small white dish with a ruffled edge, and a piece of apple sticking into the dip.
      Caramel Apple Dip
    • A large jar filled with apple pie filling with a lid and bow.
      Apple Pie Recipe Filling
    • A white pie dish with a slice of apple crumble pie, also known as a dutch apple pie with a crumbled topping and green apples in the background in a wood bowl.
      Dutch Apple Pie

    Footer

    Most Popular "Reader Favorite" Recipes

    Three golden crispy edged hash browns baked in a muffin tin on cutting board.

    Oven Baked Hash Browns

    A white ceramic dog dish that says woof filled with homemade dog food.

    Homemade Dog Food Recipes (30+ Ideas!)

    A large spoon holding a scoop of hot potato casserole serving it for dinner.

    Cheesy Potato Casserole

    Marinated mozzarella balls in a beige ceramic dish with appetizer toothpicks.

    Marinated Mozzarella Balls

    A white casserole dish with oven roasted pulled pork shredded and ready to eat in tacos or a recipe for dinner.

    Oven Roasted Pulled Pork

    A baked loaf of pumpkin bread sliced thick with a silver knife.s

    Pumpkin Bread

    A large glass clamp jar filled with pickled eggs, fresh jalapeno slices, and spices.

    Jalapeno Pickled Eggs Recipe

    A large pork loin roast with a lot of dry rub seasoning pouring over the top.

    The Best BBQ Dry Rub

    Mexican pickled red onions in a clamp jar and white bowl with chiles and limes on a colorful striped cloth.

    Mexican Pickled Red Onions

    A white plate filled with heart shaped lobster ravioli garnished with parsley.

    Lobster Ravioli

    A sliver carving fork and knife next to a pork loin roast and topped with cherries.

    Cherry Balsamic Pork Loin

    A Cinco de Mayo party with frozen margaritas called Coronaritas, guacamole, and chips on a green table.

    CoronaRita Margaritas

    A large white spoon scooping a serving of cowboy baked beans out of a casserole dish.

    Cowboy Beans

    More Delicious Recipes

    PLEASE FOLLOW US!

    • Amazon
    • Facebook
    • Instagram
    • LinkedIn
    • Pinterest
    • TikTok
    • Twitter
    • YouTube

    Footer

    DELICIOUS TABLE

    • MEET LISA
    • SEE MY WORK! PRESS & DIGITAL MEDIA PUBLICATIONS
    • PRIVACY POLICY
    • ACCESSIBILITY STATEMENT

    POPULAR LINKS

    • EMAIL SIGN-UP newsletters and updates
    • RECIPE INDEX
    • AMAZON STORE As an Amazon Associate, I earn from qualifying purchases.

    LET'S CONNECT

    • PINTEREST
    • FACEBOOK
    • INSTAGRAM
    • YOUTUBE
    • TIKTOK
    • LINKEDIN
    • X / TWITTER

    2026 COPYRIGHT © ♥︎ DELICIOUS TABLE ®️