
• Skip to main content
  • Skip to primary sidebar
  • Skip to footer

Delicious Table ® logo

menu icon
go to homepage
  • ALL RECIPES
  • HALLOWEEN PARTY FOOD
  • FALL RECIPES
  • WELCOME TO DT!
    • Facebook
    • Instagram
    • Pinterest
    • YouTube
  • subscribe
    search icon
    Homepage link
    • ALL RECIPES
    • HALLOWEEN PARTY FOOD
    • FALL RECIPES
    • WELCOME TO DT!
    • Facebook
    • Instagram
    • Pinterest
    • YouTube
  • ×
    Home » Recipes

    Latest Recipes

    Mango Jicama Slaw

    [heart_this] · Apr 22, 2022 · 6 Comments

    Pouring dressing on a full plate of mango slaw with a gold fork on edge of ceramic plate.

    Last Updated April 25th, 2024 at 10:51 am by Lisa

    Mango Slaw has green crunchy cabbage, crisp jicama, and a sweet tangy lime vinaigrette made with juicy sweet mangos. A perfect summer salad.

    Trader Joe's makes a cabbage mango slaw that is so good! After I finished that little box, I set out to create a big batch at home with healthy clean tropical flavors and fresh ingredients.

    Mangos always remind me of tropical islands, warm balmy beaches, and relaxing vacations.  Enjoy this clean side dish, guilt-free as a salad, and in so many more ways...

    Mango slaw piled on a plate with a glass jar of dressing and limes in the background.

    Mango Slaw Recipe

    This recipe starts with ripe juicy mangoes. To learn how to tell if mangos are ripe, and how to cube them, take a look at my post all about Mangos! Get all the tips to cut a mango into cubes or slices. 

    Lime Mango Vinaigrette Salad Dressing

    • 1 cup diced mango
    • 2 limes zest and fresh lime juice
    • ¼ cup orange juice
    • 2 tablespoons honey
    • 1 teaspoon grated ginger
    • ¼ cup extra virgin olive oil
    • 1 teaspoon of sea salt (kosher salt)
    • ¼ teaspoon chile powder
    • 2 tablespoons finely chopped fresh cilantro

    Mango Slaw Mix

    • 2 cups diced mangos
    • ½ green cabbage sliced thin about 6 cups (you can swap in napa cabbage or even purple cabbage)
    • ¼ jicama peeled and grated (about 3 cups)
    • chopped cilantro for garnish with an extra a squeeze of lime

    Lime-Mango Vinaigrette

    1. In a blender or food processor, mix until smooth: mango, lime, lime zest, orange juice, honey, ginger, olive oil, salt, pepper, and hot hatch chile powder (or substitute a tiny pinch of cayenne).
    2. Keep in a small mason jar in the fridge for up to a week.
    3. Chop 2 tablespoons of fresh cilantro, and stir into dressing. If you blend in the cilantro, it turns the dressing green, and it will not be orange!
    4. You will have about 1 cup of dressing from this recipe.

    Mango Jicama Slaw

    1. Peel and grate ¼ of jicama. Use a vegetable peeler to get the tough skin off. Then grate in a Cuisinart or a box grater.
    2. Use a mango cutter to open the fruit, and cut the mango into small diced cubes.
    3. Slice or grate ½ green cabbage. Shred in a Cuisinart or slice thinly with a knife.
    4. In a large bowl, toss green cabbage, jicama, and mango.
    5. Pour dressing, and garnish with chopped cilantro.

    Variations

    -You can add a little Greek yogurt into the dressing if you like it creamier.

    -Cabbages that will work; red cabbage/purple cabbage, or napa cabbage.

    -Add fresh herbs in place of cilantro like fresh mint, basil, or parsley.

    -Use any bag of pre shredded cabbage coleslaw mix or cabbage slaw from the store, then add in your jicama and mango.

    -Mangos are amazing, but you could swap in tropical fruits like pineapple or papaya, those would bring so much flavor.

    How To Cut A Mango

    You can cut a mango easily in two different ways:

    1. use a good sharp chef knife - can be a bit tricky, and you will lose more of the fruit as it is hard to get the knife in the right position to preserve the mango fruit.

    2. use a gadget called a mango splitter - has the advantage of safety. The sharp stainless steel blades slice cleanly through the mango and leave almost nothing behind on the large flat seed.

    Once you remove the mango fruit from the pit, you can then slice the mango into thin strips, cubes, or long pieces as you wish.

    Mango Tips: How To Tell If Ripe? And Easy Ways To Cut!
    Learn how to cut a mango into cubes or slices in easy ways. Lots of creative recipe ideas, and all kinds of tips to pick ripe mangos, or ripen them fast at home.
    GET THE RECIPE PIN IT
    A perfectly cut open mango with cubes cut into the fruit.
    What to serve with mango slaw?


    Enjoy mango slaw served with:
    - Serve as a cool side for grilled fish like halibut or salmon
    -Put out a bowl at your next cookout as a healthy option
    -Scoop on a plate with pineapple shrimp skewers or shish kabobs
    -Pile on a pulled pork sandwich
    -Load on grilled or fish tacos
    -Put on chicken tostadas, drizzle with salsa

    How do I ripen mangos?


    Since mangos are usually sold firm, leave them at room temperature for a few days on the kitchen counter to soften until yielding to gentle pressure.

    How long do mangos last in the fridge?


    Refrigerate once ripe for up to a week or more.

    More Summer Salads

    How fun is this refreshing Watermelon Salad? I have served this at parties out by the pool, and everyone loves to serve themselves from the carved-out watermelon bowl. Serve chilled on a hot day for a summer bbq, beach day, or pool party.

    One of my favorite family vegetarian recipes for a summer salad is this Broccoli Grape Salad My Aunt and Dad always made this, it's amazing with crisp green apples, crunchy broccoli, and tri-color sweet grapes. Create this fresh clean broccoli salad tossed in a light 3-ingredient creamy orange dressing. This healthy side salad is great to pack off to the beach or for picnics in the park as it holds really well.

    Cole Slaw with an easy vinegar dressing and no-mayo, is great on pulled pork sandwiches, with grilled hamburgers, or with BBQ chicken. This is one of the cleanest coleslaw recipes and works as a summer side dish for picnics and cookouts.

    If you have never tried a frozen salad, it is delightful on a sweltering hot summer day. Make a refreshing Frozen Wedge Salad...you will be amazed at how good it is with avocado dressing is a refreshing cookout side with hot grilled steaks, chicken, or shish kabobs.

    • Looking down into a scooped out watermelon filled with rounded watermelon balls garnished with mint and feta cheese.
      Watermelon Salad
    • A turquoise salad bowl filled with broccoli salad with colorful grapes and pistachios.
      Broccoli Salad
    • A clear glass bowl filled with tri color cole slaw and wooden tongs stuck in the slaw.
      Coleslaw Recipe (No Mayo)
    • Wedge salad with avocado dressing drizzled on top with pistachios on a black slate board.
      Iceberg Wedge Salad

    Did you love this recipe? We would love to hear from you! If you make this recipe and love it, give it a 5-star rating ⭐⭐⭐⭐⭐ with a comment. THANK YOU!! Follow Delicious Table with my free newsletter and share this recipe with your friends on Facebook, Pinterest, and Instagram.

    Pouring dressing on a full plate of mango slaw with a gold fork on edge of ceramic plate.
    Print

    Mango Slaw Recipe

    Mango Slaw has shredded green cabbage, crisp jicama, and a tangy lime vinaigrette made with juicy sweet mangos. A perfect summer salad.
    Course Side Dishes & Vegetables
    Cuisine American
    Keyword mango coleslaw, mango jicama slaw, mango salad, mango slaw recipe
    Prep Time 20 minutes minutes
    Total Time 20 minutes minutes
    Servings 8
    Calories 153kcal
    Author Lisa Hatfield

    Equipment

    • Vitamix Blender
    • Box Grater
    • Mango Splitter

    Ingredients

    Lime Mango Vinaigrette

    • 1 cup diced Mango
    • 2 limes zested and juiced
    • ¼ cup orange juice fresh
    • 2 tablespoons honey
    • 1 teaspoon grated ginger
    • ¼ cup olive oil
    • 1 teaspoon sea salt
    • ¼ teaspoon chile powder
    • 2 tablespoons finely chopped cilantro

    Mango Jicama Slaw

    • 2 cups mango diced
    • ½ green cabbage sliced thin about 6 cups
    • ¼ Jicama peeled and grated about 3 cups
    • chopped cilantro for garnish
    US Customary - Metric

    Instructions

    Lime-Mango Vinaigrette

    • In a blender or food processor, mix until smooth: mango, lime, lime zest, orange juice, honey, ginger, olive oil, salt, pepper, and hot hatch chile powder (or substitute a tiny pinch cayenne).
    • Keep in a small mason jar in the fridge for up to a week. You will have about 1 cup of dressing from this recipe.
    • Chop 2 tablespoons of fresh cilantro, stir into dressing. If you blend in the cilantro, it turns the dressing green, and it isn't orange!

    Mango Jicama Slaw

    • Peel and grate ¼ of jicama. Use a vegetable peeler to get the tough skin off. Then grate in a Cuisinart or a box grater.
    • Use a mango cutter to open the fruit, and dice mango into small diced cubes.
    • Slice ½ green cabbage thinly in a food processor or with a chefs knife.
    • In a large bowl, toss green cabbage, jicama, and mango.
    • Pour dressing, and garnish with chopped cilantro.

    Notes

    Mangos

    1 large Mango yields 2 cups diced mango.
    1 regular size mango yields about 1¼ cups diced.

    Dressing Storage

    The dressing will keep in the fridge for about a week, this recipe makes about 1 cup. Shake well before pouring.

    Variations

    -You can add a little Greek yogurt into the dressing if you like it creamier.
    -Cabbages that will work; red cabbage/purple cabbage, or napa cabbage.
    -Add fresh herbs in place of cilantro like fresh mint, basil, or parsley.
    -Use any bag of pre shredded cabbage coleslaw mix or cabbage slaw from the store, then add in your jicama and mango.
    -Mangos are amazing, but you could swap in tropical fruits like pineapple or papaya, those would bring so much flavor.

    Nutrition

    Calories: 153kcal | Carbohydrates: 23g | Protein: 1g | Fat: 7g | Saturated Fat: 1g | Sodium: 304mg | Potassium: 298mg | Fiber: 5g | Sugar: 16g | Vitamin A: 785IU | Vitamin C: 60.8mg | Calcium: 42mg | Iron: 0.8mg

    Mexican Pickled Red Onions

    [heart_this] · Apr 20, 2022 · 6 Comments

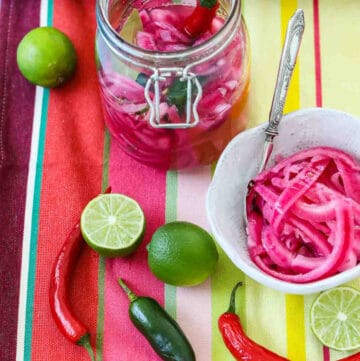
    Mexican pickled red onions in a clamp jar and white bowl with chiles and limes on a colorful striped cloth.

    Last Updated November 19th, 2025 at 12:39 pm by Lisa

    Mexican Pickled Red Onions are an easy recipe with no canning skills needed. Ready in 30 minutes to top hamburgers, salads, tacos, tostadas, and pulled pork.

    This tasty condiment for Mexican food is just like what they serve you in restaurants. Quick pickled onions keep in the fridge for 3-4 weeks to enjoy in all kinds of ways.

    The secret is lime juice, that is what makes these authentic. There is something about pickled things in a jar that always gets me, so gorgeous...

    While on vacation, we found a Mexican restaurant right on the beach just off the coast of the resort town of Mazatlán.

    Each heavenly bite of these fish tacos came filled with fresh toppings. They added the perfect condiments like cool slices of avocado, pickled carrots, and cabbage along with the pink onions.

    In Spanish, these are called cebollas encurtidas. They are found paired with all kinds of Mexican cuisine and are common in Central America as well.

    The perfectly fried fish tacos were rich yet clean. And so heavenly with an ice-cold Pacifico beer and ocean waves crashing on the beach. Oh, and all the toppings matched the hot pink top I wore that day, I swear it wasn't planned... 🌮😎

    How To Make Mexican Pickled Red Onions

    You will need a glass canning Mason jar or glass container. It is nice to use a clamp-style jar, but any clean glass jar works.

    • 1 small red onion (8 ounces) cut into ¼" half-moon slices
    • 3 limes (lemon juice works in a pinch)
    • ½ cup water
    • ½ cup white vinegar (rice vinegar, white wine vinegar, apple cider vinegar, or red wine vinegar)
    • 1 teaspoon of sea salt
    • ½ teaspoon dry Mexican oregano
    • 1-2 bay leaves
    • 2-3 jalapeño peppers, serrano chiles, or habanero
    1. Slice red onions into ¼" thin half-moon strips with a chef's knife. Juice all 3 limes.
    2. In a small pan, bring to a boil the water, white vinegar, sea salt, oregano, and bay leaves. Turn off the heat. Add the sliced onions and lime juice, and let cool.
    3. Once the onions cool down, add them into a jar or container with the pickle brine liquid. Add 1-2 chiles, you can slice them if you wish.
    4. Clamp the jar closed, or place the lid on and store them in the refrigerator for up to 4 weeks.
    5. You can use your onions after 30 minutes, but the flavor will be better after waiting overnight.

    sliced fresh onions: white onions or sweet yellow onions all will work.

    whole spices: mix it up and add some red pepper flakes, bay leaf, toasted cumin seeds, whole allspice berries, or black peppercorns.

    chiles: add whole or sliced chiles like serrano, jalapeno, or a habanero if you want your tangy condiment onions spicy.

    PRO TIP: Instead of just quick pickled red onions, add thinly sliced carrots, radishes, cabbage, or bell peppers to your jar!

    How To Eat Pickled Red Onions

    What makes this easy Mexican recipe work is the citrus juice. The acid in the limes and vinegar tames the strong flavors of the onions. You can slice thin or thicker slices of onion, and make a quick batch with this simple recipe right before dinner!

    This red onion recipe is the perfect condiment for so many recipes...try on:

    • chicken tacos
    • tostadas
    • try on grilled hamburgers
    • carne asada tacos
    • chop and mix into classic taco salad
    • awesome with pulled pork sandwiches
    • shrimp tacos
    • cochinita pibil (shredded Mexican pork)
    • fish tacos
    • tuck inside a French gourmet grill cheese sandwich
    • A stacked gourmet grilled cheese sandwich with cheese, tomato, red onions, and lettuce.
      French Gourmet Grilled Cheese
    • Red white check paper lined basked holding a pulled pork sandwich topped with coleslaw.
      Slow Cooker Pulled Pork
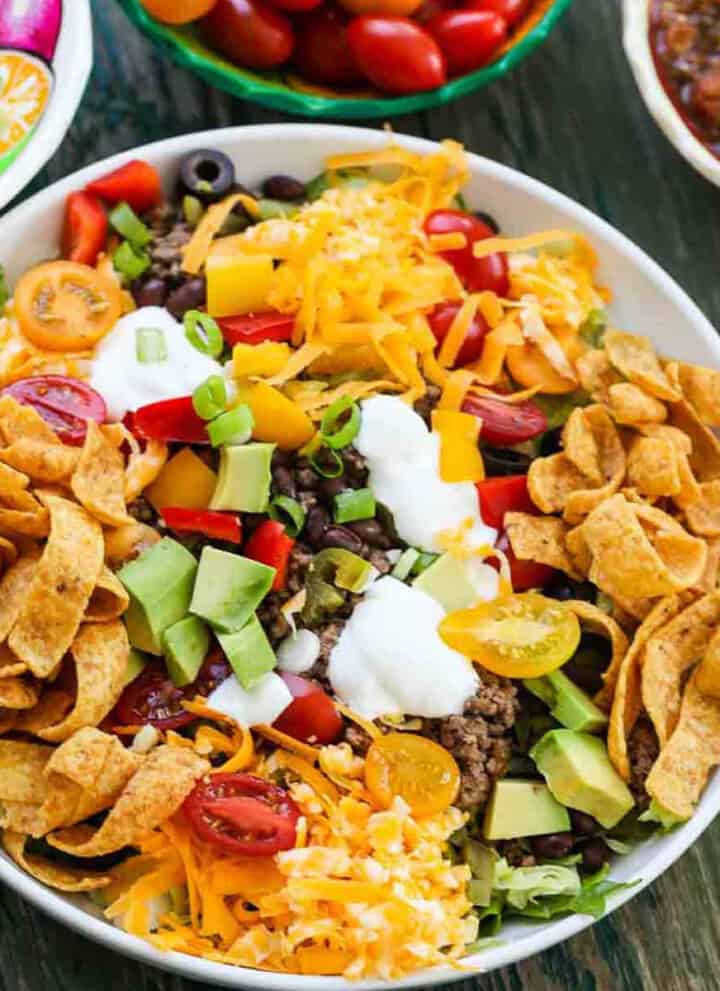
    • A white plate full of taco salad topped with taco meat, grated cheese, Fritos, sour cream, black olives and tomatoes.
      Easy Taco Salad

    Your pickled onions will look like this right after cooking...

    And the next day after they chill in the fridge, they turn a gorgeous hot pink...

    Pickled Onions FAQ

    What do pickled onions taste like?

    Oh, they are so good! Pickling the onions takes that harsh bitterness out of them, and makes them taste almost sweet. They are softer and not as crunchy and add a briney pickle flavor to tacos and salads.

    How long do red pickled onions last?

    Since you are pickling them, they are going to last over 30 days. Keep them chilled in the fridge ready to grab for recipes.

    More Quick Pickle Recipes

    Refrigerator Jalapeno Dill Pickles with jalapeno zing, garlic, and fresh dill require no canning and make perfectly crisp and crunchy dill pickles. Pickling cucumbers at home is easy, anyone can do it. I promise you will enjoy the process as it is quite relaxing.

    If you like refrigerator pickles, try these Refrigerator Pickled Green Beans, they are perfect for a Bloody Mary garnish or a healthy snack.

    The cold pickling brine gives these Zucchini Pickles a zippy flavor and crisp texture, and what a great way to use up the summer squash that grows so fast in our gardens. Pickling Spice can be made at home, you probably have all the ingredients in your pantry. Try either my Jalapeno Pickled Eggs or my Chili Pepper Pickled Eggs, so easy and a great protein snack.

    • A person pulling a dill pickle chip out of a clear glass canning jar of homemade pickles.
      Refrigerator Dill Pickles
    • A clear glass jar filled with pickled green beans on a cutting board.
      Pickled Green Beans (Dilly Beans)
    • Close up of zucchini pickles in a quart glass mason jar.
      Zucchini Pickles (Easy No Canning)
    • A large glass clamp jar filled with pickled eggs, fresh jalapeno slices, and spices.
      Jalapeno Pickled Eggs Recipe

    Did you love this recipe? We would love to hear from you! If you make this recipe and love it, give it a 5-star rating ⭐⭐⭐⭐⭐ with a comment. THANK YOU!! Follow Delicious Table with my free newsletter and share this recipe with your friends on Facebook, Pinterest, and Instagram.

    Mexican pickled red onions in a clamp jar and white bowl with chiles and limes on a colorful striped cloth.
    Print

    Mexican Pickled Red Onions Recipe

    Make Pickled Red Onions with no canning. These are an easy beginner pickle that takes 10 minutes to prepare and ready to eat in 30 minutes but taste even better after a couple of days. Great condiment for Mexican food like tacos, tostadas, or top salads, hamburgers, pulled pork or grilled cheese sandwiches.
    Course Side Dishes & Vegetables
    Cuisine American
    Keyword pickled onion recipe, pickled onions, pickled red onions
    Prep Time 10 minutes minutes
    Cook Time 5 minutes minutes
    Total Time 15 minutes minutes
    Servings 4 cups
    Calories 18kcal
    Author Lisa Hatfield

    Equipment

    • Epicurean Non-Slip Cutting Board
    • Chef Knife
    • Regular and Wide Mouth Mason Jar Plastic Lids
    • 4- 1 Quart Mason jars, lids, rings

    Ingredients

    • 1 small red onion 8 ounces, cut into ¼" half-moon slices
    • 3 whole limes juiced
    • ½ cup water
    • ½ cup white vinegar
    • 1 teaspoon sea salt
    • ½ teaspoon dried oregano
    • 2 bay leaves
    • 2 whole jalapenos serano chilies or habenero hot peppers
    US Customary - Metric

    Instructions

    • Slice red onions into ¼" thin half-moon strips with a chef's knife. Juice all 3 limes.
    • In a small pan, bring to a boil the water, white vinegar, sea salt, oregano and bay leaves. Turn off heat. Add the sliced onions and lime juice, and let cool.
    • Once the onions cool down, add into a jar or container with the pickle brine liquid. Add 1-2 chiles, you can slice them if you wish.
    • Clamp the jar closed, or place the lid on and store in the refrigerator for up to 4 weeks.
    • You can use your onions after 30 minutes, but the flavor will be better after waiting overnight.

    Video

    Notes

    Recipe Uses 

    Try on tacos, salads,  hamburgers, pulled pork sliders, and slow cooker pulled pork sandwiches.

    Storage

    Keep in an airtight glass jar in the refrigerator for up to 3-4 weeks.

    Red Onion Sizes

    A large red onion weighs approximately 14 oz, they will of course vary. 
    A small red onion weighs approximately 9 oz, they will of course vary. 

    Onions

    You can use any type of onion for this recipe such as white, yellow, or sweet Maui yellow onions. The color will be different based on the onion you use. 

    Vinegar

    You can use any type of vinegar for this recipe such as rice vinegar, white wine vinegar, or apple cider vinegar.

    Nutrition

    Calories: 18kcal | Carbohydrates: 3g | Protein: 1g | Fat: 1g | Saturated Fat: 1g | Polyunsaturated Fat: 1g | Monounsaturated Fat: 1g | Sodium: 585mg | Potassium: 46mg | Fiber: 1g | Sugar: 1g | Vitamin A: 14IU | Vitamin C: 3mg | Calcium: 14mg | Iron: 1mg

    Chocolate Easter Bunny Cupcakes

    [heart_this] · Apr 13, 2022 · 1 Comment

    A display of Easter cupcakes decorated with chocolate bunnies and green sprinkles.

    Last Updated April 25th, 2024 at 11:07 am by Lisa

    Chocolate Bunny Cupcakes are an easy Easter dessert. Top baked cupcakes with buttercream frosting, you can use chocolate buttercream or vanilla buttercream, sprinkles, and chocolate bunnies. Nothing could be easier, and it's all at the grocery store!

    You can either use store-bought ingredients like cake mix or bake homemade cupcakes, either way, is there anything cuter than those chocolate bunny ears...

    So Easy!

    1. Everything you need is at the store, simple ingredients-no fuss.
    2. Great for kids, even the little ones can help you bake/assemble them.
    3. These can be NO-BAKE: Assemble with premade unfrosted cupcakes and frosting at your local grocery store, just ask in the bakery!
    4. You can bake these in little cupcake flower pots that are meant for baking or use paper liners.

    How fun to put these Easter treats out for a buffet or have one at each place setting at the table for Easter Dinner.

    What You Need

    12 baked vanilla cupcakes

    1 cup salted butter (2 sticks, room temperature butter)

    ½ cup vegetable shortening

    5 cups powdered sugar (confectioners sugar)

    2 tablespoons hot water

    2 teaspoons vanilla extract

    ¼ teaspoon almond extract

    Decorations: Wilton terra cotta flower pot shaped Silicone baking cups-not sure these are still made, so you can use cute flower cupcake papers, green grass egg sprinkles, and small chocolate Easter bunnies (Hershey's)

    Instructions 

    1. Bake cupcake batter according to box directions or buy plain vanilla cupcakes from the store bakery.
    2. Make vanilla buttercream frosting.
    3. Use a small offset spatula, butter knife, or pipe on cupcakes using a pastry bag.
    4. Pour green "grass" sprinkles into a small dish, and dip and roll the top of the cupcake to coat with sprinkles.
    5. Push a milk chocolate bunny down into the cupcake and you are done!

    Chocolate Buttercream Or White Frosting

    You can use either of these frosting recipes for your cupcakes.

    • A red bowl with fluffy vanilla frosting ready to frost a cake.
      Fluffy Buttercream Frosting
    • A chocolate cupcake with swirled chocolate buttercream frosting and sprinkles on a small stand.
      Buttercream Chocolate Frosting
    How do you decorate cute Easter cupcakes?


    You can decorate with so many sweet treats and ingredients, here are some great ways to make adorable Easter cupcakes:

    -Color shredded coconut pink, blue, green, yellow, etc. for decorating. Put coconut in a small baggie with a drop or two of coloring and toss until coconut is colored.
    -Frost with green icing and top with a cluster of chocolate eggs
    -Add some buttercream and press a peanut butter egg on top
    -Make marshmallow bunny ears. Snip large marshmallows with kitchen scissors to look like bunny ears.
    -Decorate marshmallow bunny ears with pink sugar and small balls of marshmallow for the nose.
    -Use thin black licorice for whiskers and two mini white jelly beans for bunny teeth.
    -Order edible eyes to use on your cupcakes.
    -Color regular sugar by putting it in a zip-top bag with a drop or two of food coloring, close, and mix around until you get the color you want
    -Melt candy melts in different colors and pipe on decorations.
    -Use green buttercream frosting with Ateco's 259 Tip "grass tip" and create a grassy cupcake top then add jelly beans or eggs.
    -Shape mini birds nets from rice crispy treats, and nestle little chocolate eggs inside.

    More Easter Dessert Ideas

    What an adorable Easter bunny cake, it is made from two round cakes, vanilla frosting, and decorated with candy...

    Some of my favorite easy Easter desserts are these Easter Cookies with a classic sugar cookie dough drizzled with an easy buttercream vanilla icing and lots of cute sprinkles. Or this adorable Easter Bunny Cake, which is made from two 9" round cakes.

    Or bake up these elegant Coconut Macaroon Cookies, they are so pretty on the Easter dinner table. Take a look at my collection of Easter Desserts for your Easter Celebration.

    • Easter cookies with sprinkles and icing on parchment paper lined cookie tray.
      Easter Cookies
    • An adorable bunny cake on a hot pink background surrounded with jelly beans.
      Easter Bunny Cake
    • An overhead view of fresh baked and decorated Easter dessert coconut macaroon cookies.
      Easter Coconut Macaroons
    • Easter Dessert recipes showing bright colored bunny cupcakes and Easter bunny cakes and desserts.
      Easter Dessert Recipes
    A display of Easter cupcakes decorated with chocolate bunnies and green sprinkles.
    Print

    Chocolate Easter Bunny Cupcakes

    Chocolate Bunny Cupcakes are an easy Easter dessert. Top baked cupcakes with buttercream frosting, sprinkles, and chocolate bunnies!
    Course Desserts & Sweets
    Cuisine American
    Keyword Bunny Cupcakes, Easter dessert, vanilla buttercream frosting
    Prep Time 15 minutes minutes
    Cook Time 20 minutes minutes
    Total Time 35 minutes minutes
    Servings 12
    Calories 517kcal
    Author Lisa Hatfield

    Ingredients

    Chocolate Bunny Cupcakes

    • 1 dozen baked vanilla cupcakes homemade or storebought
    • 12 Hershey's Easter Milk Chocolate Bunnies
    • ¼ cup Green grass sprinkles

    Vanilla Buttercream Frosting

    • 1 cup salted butter (2 sticks, room temperature butter)
    • ½ cup vegetable shortening
    • 5 cups powdered sugar (confectioners sugar)
    • 2 tablespoons hot water
    • 2 teaspoons vanilla extract
    • ¼ teaspoon almond extract
    US Customary - Metric

    Instructions

    • Bake or No-bake- your choice! Assemble with pre-made unfrosted cupcakes, you can use any flavor vanilla or chocolate cupcakes work. And see if frosting at your local grocery store bakery, just ask in the bakery.

    Make Buttercream Frosting

    • Beat soft butter and shortening in an electric mixer on high speed with the whisk attachment until creamy for 5 minutes. Scrape down the sides of the bowl.
      At low speed, add powder sugar 1 cup at a time until smooth into the mixing bowl. On high speed, mix in vanilla, almond extract, and hot water for 5 minutes until fluffy and smooth.

    Decorate The Bunnies

    • Use a small offset spatula to frost each cupcake, or pipe on cupcakes using a pastry bag.
    • Pour green "grass" sprinkles in a small dish, and dip and roll the top of the cupcake to coat with sprinkles.
    • Push the tip of a knife into the cupcake, push a milk chocolate bunny down into the center of the cupcake and you are done!

    Video

    Notes

    Freezing Buttercream Frosting

    This frosting is great at room temperature and covers cakes and cupcakes beautifully. If you freeze it, it is spreadable within an hour or so of bringing it to room temperature. Simply place in a bowl and re-whip. Simply remove from the freezer at least an hour before using, and remix in a bowl or stand mixer to get it soft again from that thicker consistency.

    Nutrition

    Calories: 517kcal | Carbohydrates: 70g | Protein: 4g | Fat: 27g | Saturated Fat: 15g | Trans Fat: 1g | Cholesterol: 32mg | Sodium: 251mg | Potassium: 140mg | Fiber: 2g | Sugar: 58g | Vitamin A: 393IU | Vitamin C: 1mg | Calcium: 78mg | Iron: 1mg

    Bunny Butt Easter Cupcakes

    [heart_this] · Apr 13, 2022 · 3 Comments

    Easter dessert idea, bunny butt cupcakes digging in the garden.

    Last Updated April 29th, 2024 at 07:41 pm by Lisa

    Bunny Butt Cupcakes are an easy dessert to make with kids for Easter. Bake cupcakes, add fluffy buttercream, and the cute decorations.

    You can whip up some homemade cake frosting, or buy some at the store. The sprinkles, bunny paws, and tail are sold as a kit, so it's simple to make these adorable cupcakes really fast.

    Everyone will get a kick out of these "naughty" bunnies digging up the garden on your Easter dinner table or buffet...

    And Here Is The Best Part

    • Bake or No-bake- your choice! Assemble with pre-made unfrosted cupcakes and frosting at your local grocery store, just ask in the bakery! I bought mine at Albertsons.
    • Frost with vanilla buttercream frosting - again, make your own with this easy recipe or buy at the store, and add the cute decorations from the craft store or online.
    • Everything you need is at the store, you can either use store-bought ingredients like cake mix or bake cupcakes from scratch.
    • And kids, even the little ones, can help you assemble and decorate these for your Easter celebration.

    How To Make Bunny Butt Cupcakes

    • 12 baked vanilla cupcakes
    • Vanilla buttercream frosting
    • Decorations: Wilton Bunny Feet Decorations and Wilton Cupcake Wraps, and Chocolate Carrots candies.

    Fluffy White Buttercream

    Whip up a batch of this super fluffy frosting that is so popular with readers! It is so easy, not too sweet, and a fraction of store-bought versions. It spreads so smooth and doesn't tear up cakes and cupcakes.....

    Fluffy Buttercream "Bakery-Style" Frosting
    Frosting that is not-too-sweet, fluffy, and so spreadable. A "bakery-style" vanilla buttercream frosting that mixes together in minutes and holds its shape on any dessert like cakes or cupcakes.
    GET THE RECIPE PIN IT
    A red bowl with fluffy vanilla frosting ready to frost a cake.

    Let's Put Them Together

    1. Buy plain vanilla cupcakes from the bakery, bake them at home from scratch, or boxed cake mix.
    2. Make the buttercream frosting or buy it from the grocery store.
    3. Use a small offset spatula to frost each cupcake on top, or pipe on cupcakes using a pastry bag.
    4. Pour white sprinkles into a small dish, and dip and roll the top of the cupcake to coat with sprinkles.
    5. Use more frosting a "glue" to stick on the feet and tail.
    6. Wrap each cupcake with a Wilton white picket fence cupcake wrapper. Serve on a tray with Easter candies or decorations.
    How do you decorate cute Easter cupcakes?

    You can decorate with so many sweet treats and ingredients, here are some great ways to make adorable Easter cupcakes:

    -Color shredded coconut pink, blue, green, yellow, etc. for decorating. Put coconut in a small baggie with a drop or two of coloring and toss until coconut is colored.
    -Frost with green icing and top with a cluster of chocolate eggs
    -Add some buttercream and press a peanut butter egg on top
    -Make marshmallow bunny ears. Snip large marshmallows with kitchen scissors to look like bunny ears.
    -Decorate marshmallow bunny ears with pink sugar and small balls of marshmallow for the nose.
    -Use thin black licorice for whiskers and two mini white jelly beans for bunny teeth.
    -Order edible eyes to use on your cupcakes.
    -Color regular sugar by putting it in a zip-top bag with a drop or two of food coloring, close, and mix around until you get the color you want
    -Melt candy melts in different colors and pipe on decorations.
    -Use green buttercream frosting with Ateco's 259 Tip "grass tip" and create a grassy cupcake top then add jelly beans or eggs.
    -Shape mini birds nets from rice crispy treats, and nestle little chocolate eggs inside.

    More Easy Easter Desserts

    Of course, my all-time favorite is this Bunny Cake, it was the first cake recipe I baked as a young girl. 🐰💝🐇

    Coconut Macaroons shaped like bird nests with chocolate eggs are so dang cute!! 🐣💛

    Lemon Bars are a classic for springtime, but these take you to a tropical island with coconut and lime 🍋💛🥥

    Cake Mix Cookies are an easy recipe baked in 11-minutes and just 4-ingredients. You can mix in candies, sprinkles, or chocolate chips. 💕🍪🥣

    And Chocolate Bunny Cupcakes are an easy dessert. Top baked cupcakes with buttercream frosting, sprinkles, and chocolate bunnies-nothing could be easier. 🐰🥕🐇🌸🌷

    Easter Cookies are great to set up a decorating station for the kids at your party, where they can decorate cookies, eggs, or a cake together. Or bake up a batch of these gorgeous Coconut Macaroon Easter Cookies!

    • Easter cookies with sprinkles and icing on parchment paper lined cookie tray.
      Easter Cookies
    • An adorable bunny cake on a hot pink background surrounded with jelly beans.
      Easter Bunny Cake
    • An overhead view of fresh baked and decorated Easter dessert coconut macaroon cookies.
      Easter Coconut Macaroons
    • Easter Dessert recipes showing bright colored bunny cupcakes and Easter bunny cakes and desserts.
      Easter Dessert Recipes

    Did you love this recipe? We would love to hear from you! If you make this recipe and love it, give it a 5-star rating ⭐⭐⭐⭐⭐ with a comment. THANK YOU!! Follow Delicious Table with my free newsletter and share this recipe with your friends on Facebook, Pinterest, and Instagram.

    Easter dessert idea, bunny butt cupcakes digging in the garden.
    Print

    Bunny Butt Easter Cupcake Idea

    Bunny Butt Cupcakes are an easy dessert to make with kids for Easter. Bake cupcakes, add fluffy buttercream, and the cute decorations.
    Course Desserts & Sweets
    Cuisine American
    Keyword Bunny Cupcakes, Easter cupcakes, Easter desserts
    Prep Time 30 minutes minutes
    Total Time 30 minutes minutes
    Servings 12
    Calories 604kcal
    Author Lisa Hatfield

    Equipment

    • Wilton Cupcake Wrapper

    Ingredients

    • 12 baked vanilla cupcakes

    Homemade Vanilla Frosting

    • 1 cup softened salted butter (2 sticks, room temperature butter)
    • ½ cup vegetable shortening
    • 5 cups powder sugar (confectioners sugar)
    • 2 tablespoons hot water
    • 2 teaspoons vanilla extract
    • ¼ teaspoon almond extract
    US Customary - Metric

    Instructions

    • Bake or buy cupcakes.

    Make Homemade Fluffy Frosting

    • Beat soft butter and shortening in an electric mixer on high speed with the whisk attachment until creamy for 5 minutes. Scrape down the sides of the bowl. At low speed, add powder sugar 1 cup at a time until smooth into the mixing bowl.
    • On high speed, mix in vanilla, almond extract, and hot water for 5 minutes until fluffy and smooth. Or skip this and buy frosting from the bakery and just decorate!

    Decorate Bunny Bottom Cupcakes

    • Use a small offset spatula to frost each cupcake, or pipe on cupcakes using a pastry bag.
    • Pour white sprinkles in a small dish, and dip and roll the top of the cupcake to coat with green sprinkles for grass.
    • Use more frosting as "glue" to stick on feet and tail.
    • Wrap Wilton each cupcake with a white picket fence cupcake wrapper.

    Video

    Notes

    Freezing Buttercream Frosting
    This frosting is great at room temperature and covers cakes and cupcakes beautifully. If you freeze it, it is spreadable within an hour or so of bringing it to room temperature. Simply place in a bowl and re-whip. Simply remove from the freezer at least an hour before using, and remix in a bowl or stand mixer to get it soft again from that thicker consistency.

    Nutrition

    Calories: 604kcal | Carbohydrates: 80g | Protein: 3g | Fat: 31g | Saturated Fat: 17g | Cholesterol: 65mg | Sodium: 356mg | Potassium: 61mg | Sugar: 69g | Vitamin A: 750IU | Vitamin C: 0.1mg | Calcium: 92mg | Iron: 0.8mg

    Spring Crostini Appetizers

    [heart_this] · Apr 10, 2022 · 4 Comments

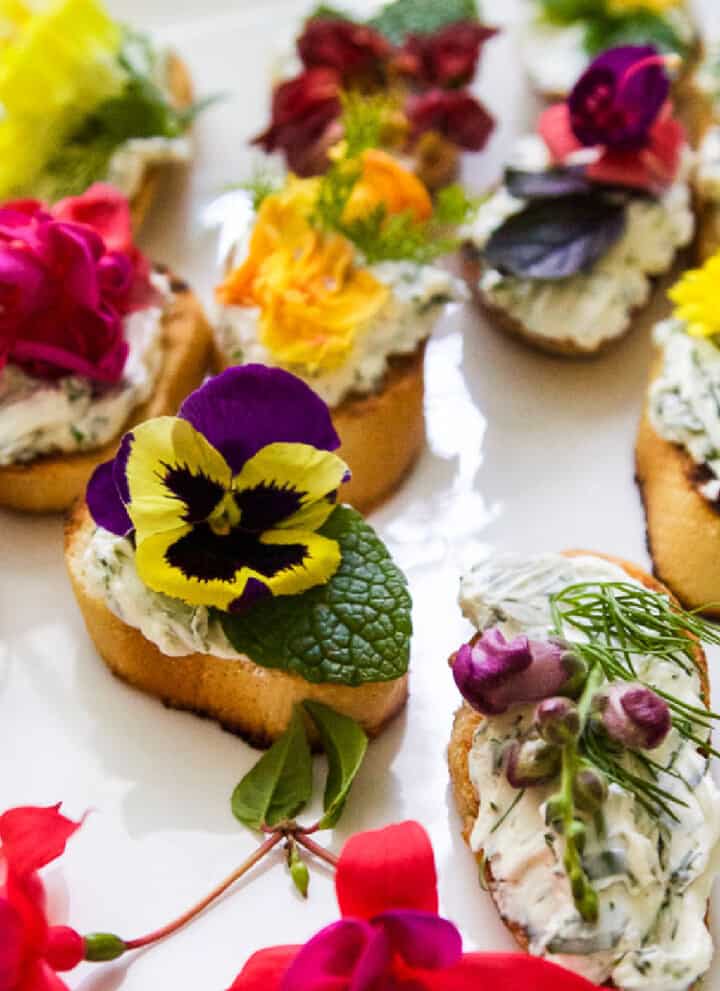
    A white platter with crostini recipe topped with edible flowers and herbs.

    Last Updated April 4th, 2024 at 01:36 pm by Lisa

    Spring Crostini Appetizers are little toasts topped with a creamy cheese spread, edible flowers, and herbs for Easter, bridal showers, teas, or Mother's Day.

    The baguette slices are brushed with garlic and good olive oil, and toasted golden brown with a crisp crunch.  The crostini is slathered with an herby creamy spread and then crowned with Spring garden (safe and edible 😉) flowers and herbs.

    Your celebration will be one to remember with gorgeous finger food like this...

    What is Crostini?

    Crostini Defined: (noun) small pieces of toasted or fried bread served with a topping as an appetizer or canapé. In Italian, crostini means "little toasts".

    The word also describes canapés consisting of small bread slices with a savory topping such as cheese, shrimp, pâté, or anchovies. And it is pronounced kraw-stee-nee. An interesting fact to know is that these are Italian appetizers and one single crostini is called a crostino!

    Crostini topped with Cream Cheese Spread and edible flowers.

    How To Make Spring Crostini

    • 1 French baguette or loaf of French bread
    • ¼ cup extra-virgin olive oil

    Cream Cheese Spread

    • 8 oz. cream cheese softened, whipped preferred
    • ¼ teaspoon celery salt
    • ½ teaspoon garlic powder
    • 2-3 tablespoons heavy cream
    • 2 tablespoons finely minced: parsley, basil, dill, chives
    • optional: kosher salt sea and salt black pepper to taste

    Garnish

    • ¼ cup mint and dill small pieces
    • 1 box edible flowers use flowers or petals

    Making Crostini Toasts

    Step 1: Slice 1 baguette diagonally with a serrated knife.

    Step 2: Cut a clove of garlic in half, and rub each piece of crostini bread with the cut side of the garlic clove on all sides of each piece of bread.

    The fresh garlic flavors the bread. Next, brush each slice with good olive oil on both sides with a small pastry brush.

    Step 3: Choose your cooking method for the baguette slices.

    Outdoor Grill: toast for 15 to 20 seconds on each side, until nicely marked, then remove with tongs and set aside.

    Oven Broil: Place the sliced bread on a baking sheet (do not line with parchment paper or it might catch on fire!) in a single layer after rubbed with garlic and brushed with olive oil. Adjust the rack so the slices are 2 inches from the flame and turn when the crostini starts to get golden at the edges, this happens in just a couple of minutes, so stay by the stove!

    Indoor Grill Pan: Heat your cast iron grill pan and flip over after 30-60 seconds once toasted brown.

    Step 4: Cool the bread on a tray before assembling.

    This is how I made my crostini toasts, on a cast iron grill pan on the stovetop. If you don't have a cast-iron pan, simply use your broiler or take it out to your grill.

    Creamy Cheese Spread

    1. Finely mince all your fresh herbs: parsley, basil, dill, chives. You will need 2 tablespoons. I put the fresh herb leaves in a coffee cup and snip away with clean kitchen scissors.
    2. In a stand mixer with a beater, (or a bowl with a hand mixer, or bowl with a spoon), stir whipped cream cheese or softened cream cheese, heavy cream, celery salt, and the fresh herbs.  Use a hand mixer to soften the cream cheese block quickly and make it fluffy if you didn't buy whipped cream cheese. Rest the block in a bowl on the counter for an hour to soften. It will be easier to mix in the herbs and celery salt.
    3. Snip your herbs into small pieces, and select the flowers you want to use. I like to sometimes just use some petals, it looks beautiful.
    4. You can make this ahead and store in a small glass bowl with a lid and refrigerated.

    Or if you want, make my Homemade Boursin Cheese spread, it will go great on crostini toasts!

    Boursin Cheese Recipe
    Boursin Cheese whips together in just minutes for an easy appetizer. One of the best ways to eat it is simply with toasted warm bread or crackers. What makes this herb cream cheese spread so good? The creamy texture from the whipping process, a grate of real parmesan cheese, and fresh herbs.
    GET THE RECIPE PIN IT
    A wooden cutting board with small baguettes sliced open with a white bowl of whipped creamed cheese spread on a slice.

    Spring Crostini Tips

    • Slice the baguette at a slight diagonal angle so you have larger bread slices to toast as the perfect base for a variety of toppings. You can also cut straight across the bread for small toasts that are 1-2 bites.
    • Cut ¼" thin slices or ½ inch thick slices, both work well.
    • You can garnish your crostini in so many ways, I love fresh herbs, edible flowers or petals, and a sprinkle of good sea salt like Maldon flakes.
    • A great way to use a day-old stale baguette is to make crostini, but it gets rock hard and almost impossible to slice after one day.
    • Serve a beautiful charcuterie board and make an easy crostini recipe for an instant party! I have lot's of recipe combinations below.
    • It's best to slice your bread the day you buy it and then make the homemade crostini when you have time. You can freeze them in a zip-top bag.
    • I have found the best way to get even small slices of toast is to use a small serrated knife, it seems to be the perfect size for good crostini.

    Now, Let's Talk About Edible Flowers

    Hey, you certainly don't have to eat them, but they make a beautiful statement. Take a look at this edible flower chart.

    Crostini topped with Cream Cheese Spread and edible flowers.

    Where To Order Edible Flowers

    • Edible flowers can be ordered through the produce department of your local grocery store, gourmet markets, ordered online, or through Costco.
    • You can grow edible flowers in your garden, just be sure that they are organic, pesticide-free, and safe to eat as an edible flower.
    • Organic edible dried flowers are an option, look beautiful, and are available online.

    Common Edible Flower List

    Arugula, Bachelor's Buttons, Basil Blossom, Borage, Buzz Button, Calendula, Carnation, Camelia, Chive, Blossom, Chrysanthemum, Dahlia, Daylily, Garlic Blossom, Hibiscus, Hollyhock, Lavender, Lilac, Marigold, Nasturtium, Orchid, Pansy, Peony, Rose, Snapdragon, Squash Blossom, Violet, and Viola.

    • Buy flowers that are marked edible flowers online. Not all flowers are safe.
    • Please do your research, and make sure your flowers are safe to eat. If they are known as safe edible flowers, they are okay to eat. But hey, you don't have to eat them, they sure look pretty though.
    • If you’re unsure, don't experiment.
    • Avoid flowers from a florist.
    • Wash and use clean flowers thoroughly before using them in recipes or eating them, even if you grow them yourself or buy them. Avoid fertilizers, contaminated water, etc.

    This is the box of edible flowers from Costco, I had it shipped to my home. It arrived packed with cool packs and was in great condition, and is a large box and costs $39.99.

    It was fine in the fridge for a couple of days until I made the crostini recipe. Costco does not ship perishables over the weekend or for delivery on the weekend.  I love Costco Delivery, it is FREE, have you tried this yet? It could change your life ; )

     Also see my post on how to make a DIY Garden Party Flower Ice Bucket to chill wine, champagne, or any large bottle, and it is perfect to use the extra flowers from this recipe.  So easy and SO cute!

    Can you make crostini toasts ahead of time?

    To make the crostini toasts ahead of time, grill them, and cool completely to room temperature. Store in airtight containers for up to two days on the counter. You may need to re-crisp the crostini in the oven on a sheet pan for a few minutes, to remove any moisture.

    More Crostini Toppings & Combinations


    These are the best flavors, combinations, and favorite toppings for crostini.

    -Tomato Bruschetta, Basil, Drizzle Of Aged Balsamic Vinegar

    -Sliced-Smoked Salmon, Whipped Cream Cheese, Dill, and Capers
    -Blue Cheese, Pear, and Honey
    -Olive Tapenade or Good Pitted Olives With Any Creamy Dip
    -Caprese - Heirloom, Fresh Basil, Mozerella, & Balsamic Drizzle Glaze
    -Goat Cheese, Honey, and Strawberry Slices
    -Roast Beef slices and Prepared Horseradish
    -BLT - Mayo, Crispy Bacon, Lettuce, and Tomato
    -Pesto, Ricotta, and Red Pepper Flakes
    -Holiday: Cranberry and Brie
    With Jam

    What is the best kind of bread for crostini?


    Nowadays you can find good quality fresh bread at your grocery store or local bakery.

    The best type of bread to use is a French baguette, thinner French bread loaf, or a sourdough bread loaf that is long.

    Buy a good quality loaf of crusty bread that is long in shape. Flatbreads like white bread don't work as well and won't have the crusty bread edges.

    A great way to use up day-old bread is to make crostini. Slice it and keep in an airtight container chilled in the refrigerator then toast within a couple days. Or you can freeze the sliced bread, then defrost the frozen slices and toast when you want them.

    More Party Appetizers

    Easy recipes and tasty appetizers to make for your next party...

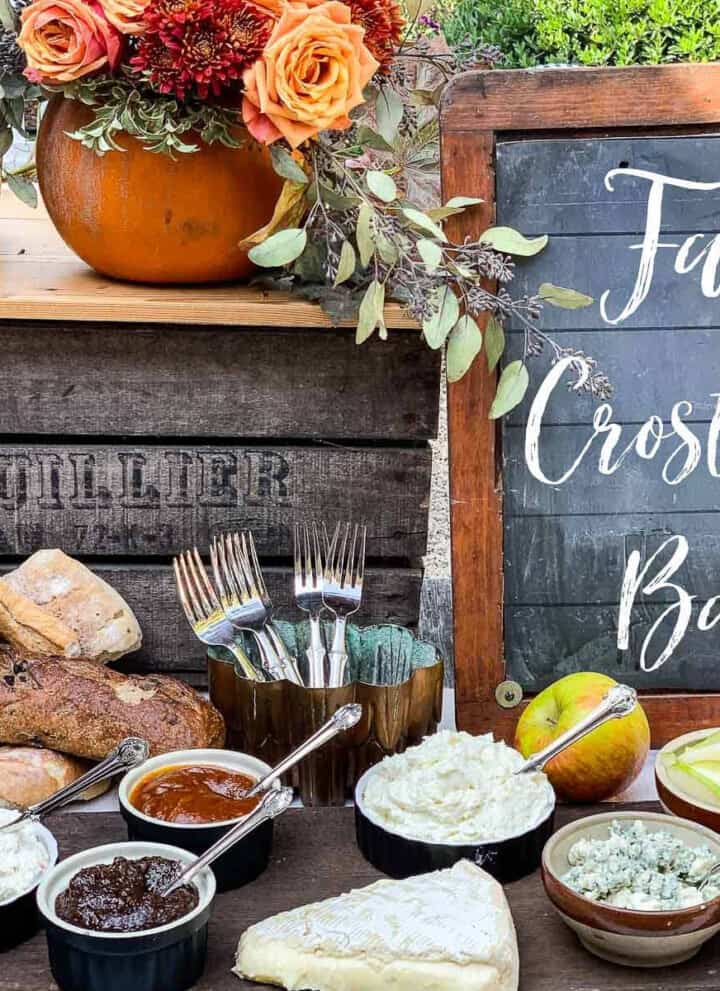
    You will LOVE entertaining with a Fall Crostini Bar! Learn how to set up a crostini bar step by step loaded with crostini appetizers to entertain for Fall, Friendsgiving, or Thanksgiving. It is my favorite way to entertain.

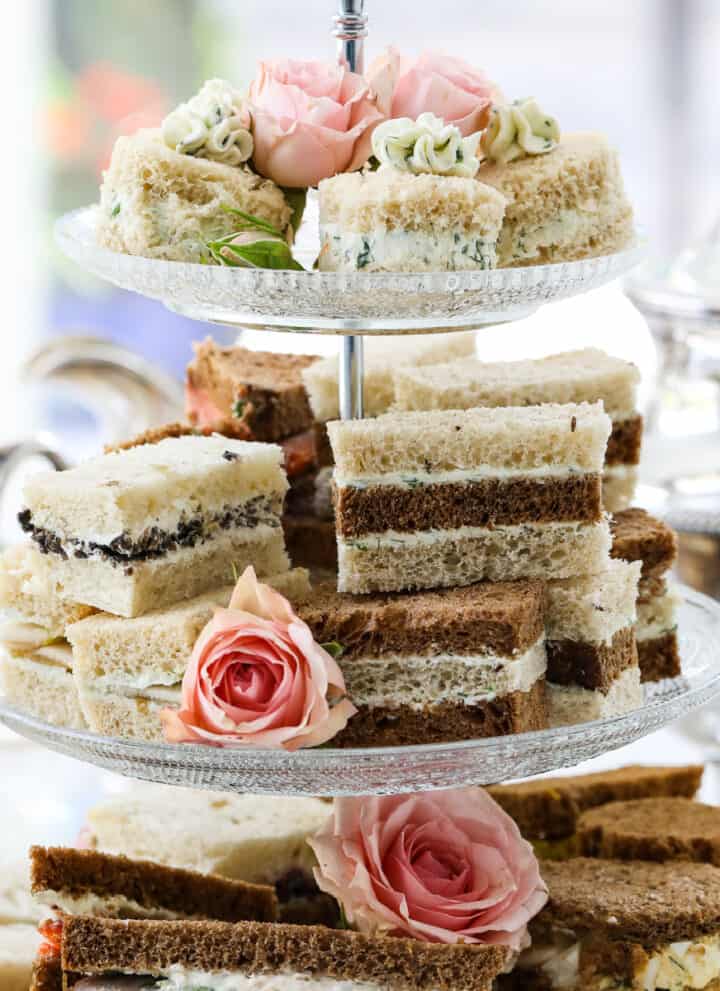
    Elegant, dainty, crustless Tea Sandwiches are quintessential pinkies-up party food for a beautiful light lunch garden party, a bridal shower, or a Mother’s Day brunch. Choose from dozens of recipes from classic cucumber tea sandwiches from Buckingham Palace, egg salad sandwiches, easy ham salad, and much more.

    An easy appetizer recipe, Shrimp Cocktail is made by oven roasting large shrimp and dipped into a delicious recipe for fresh homemade cocktail sauce!

    For holiday parties, try a few of these Thanksgiving Appetizers. These easy holiday recipes include Deviled Eggs, Brie and Bacon Palmiers, and a gorgeous Crostini Bar! This gorgeous finger food Cheese Appetizer has layers of deli-style sliced cheese, and a cream filling loaded with chopped nuts and dried fruit.

    • A rustic table with small bowls filled with toppings for a fall appetizer crostini bar.
      Fall Crostini Bar
    • Tea sandwiches stacked on a 3 tiered glass tray at a tea party with assorted fillings and flavors.
      Tea Sandwiches
    • A clear glass plate with shrimp cocktail, cocktail sauce, and two glasses of champagne.
      Shrimp Cocktail
    • A collection of Thanksgiving appetizers with recipe ideas, and party decorating tips for a Fall party.
      36 Thanksgiving Appetizers
    • White round plate filled with cheese appetizers with crackers and garnished with basil.
      Easy Layered Cheese Appetizers
    • A white platter filled with brie and bacon palmier appetizers golden brown and ready to eat.
      Brie and Bacon Palmiers

    Did you love this recipe? We would love to hear from you! If you make this recipe and love it, give it a 5-star rating ⭐⭐⭐⭐⭐ with a comment. THANK YOU!! Follow Delicious Table with my free newsletter and share this recipe with your friends on Facebook, Pinterest, and Instagram.

    A white platter with crostini recipe topped with edible flowers and herbs.
    Print

    How To Make Spring Crostini Appetizers

    Spring garden crostini with edible flowers and herbs is a spectacular easy appetizer, perfect for a tea, garden party, wedding shower, or Mother's Day.
    Course Appetizers, Dips, & Snacks
    Cuisine American
    Keyword crostini, edible flowers, spring appetizer
    Prep Time 15 minutes minutes
    Cook Time 20 minutes minutes
    Servings 24 pieces
    Calories 80kcal
    Author Lisa Hatfield

    Equipment

    • Cast Iron Reversable Grill Pan
    • Small Serrated Knife
    • Mini Basting Brush
    • Edible Flower Seed Collection
    • Organic Edible Flowers

    Ingredients

    Crostini

    • 1 baguette
    • ¼ cup olive oil

    Cream Cheese Spread

    • 8 oz. cream cheese softened, whipped prefered
    • ¼ teaspoon celery salt
    • ½ teaspoon garlic powder
    • 1-2 tablespoons heavy cream or milk
    • 2 tablespoons fresh parsley, basil, dill, and or chives finely minced

    Garnish

    • ¼ cup mint and dill small pieces
    • 1 box edible flowers use flowers or petals
    US Customary - Metric

    Instructions

    Make Crostini Toasts

    • Slice 1 baguette diagonally with a serrated knife about ¼-1/2" slices.
    • Cut a clove of garlic in half, and rub each piece of crostini bread with the cut side of the garlic clove on all sides of each piece of bread. The fresh garlic flavors the bread.
    • Next, brush each slice with good olive oil on both sides with a small pastry brush.
    • Choose your grill method for the Baguette Slices:
      Outdoor Grill: toast for 15 to 20 seconds on each side, until nicely marked, then remove with tongs and set aside.
      Oven Broil: Place the sliced bread on a parchment paper lined baking sheet in a single lay after rubbed with garlic and brushed with olive oil. Adjust the rack so the slices are 2 inches from the flame and turn when the crostini starts to get golden at the edges, this happens in just a couple of minutes, so stay by the stove!
      Indoor Grill Pan: Heat your cast iron grill pan and flip over after 30-60 seconds once browned and grill-marked. Cool the bread on a tray before assembling.
    • Cool the bread on a tray before assembling.

    Make Cream Cheese Spread

    • Finely mince all your fresh herbs: parsley, basil, dill, chives. You will need 2 tablespoons. I put the fresh herb leaves into a coffee cup and snip away with clean kitchen scissors.
    • Prepare Garnish: Snip your herbs into small pieces, and select the flowers you want to use for the top. I like to sometimes just use some flower petals, it looks beautiful.
    • In a stand mixer with beater or bowl with hand mixer, or bowl with spoon, stir whipped cream cheese or softened cream cheese, heavy cream, celery salt, and herbs.
      Tip: Use a hand mixer to soften the cream cheese block quickly and make it fluffy. Rest the block in a bowl on the counter for an hour to soften. It will be easier to mix in the herbs and celery salt.
    • The cream cheese spread can be made up to a day ahead, covered, and refrigerated.

    Garnish and Decorate

    • Spread Cream Cheese Spread on each slice of cooled bread.
    • Garnish with edible flowers either whole or use the petals, mint, parsley, and dill or anything you like from your garden or farmers market just be sure they are organic and safely edible!

    Notes

    Grilled Crostini

    Grill marks look great, but it's more important to get a nice golden toast on the bread. The herb spread will cover the bread, so don't be too concerned if they aren't all perfect.

    Herb Spread

    You can use whipped cream cheese! Or try my Boursin spread, it is fantastic. Or a regular block of cream cheese. Use a hand mixer to soften the cream cheese quickly and get it fluffy, otherwise rest in a bowl on the counter for an hour to soften, this makes it easier to stir in the herbs and celery salt. This Cream Cheese Herb Topping can be made a day ahead, covered, and refrigerated. Just pull it out of the fridge an hour or so before you want to use it, so it spreads easier.

    Make Crostini Toasts Ahead

    To make the crostini toasts ahead of time, grill them, and cool completely to room temperature. Store in airtight containers for up to two days on the counter. You may need to re-crisp the crostini in the oven on a sheet pan for a few minutes, to remove any moisture.

    Edible Flowers and Herbs

    • Edible flowers can be ordered through the produce department of your local grocery store, ordered online, or through Costco.
    • You can grow edible flowers in your garden, just be sure that they are organic, pesticide-free, and safe to eat as an edible flower.
    • Organic edible dried flowers are an option, look beautiful, and are available online.

    Nutrition

    Serving: 2g | Calories: 80kcal | Carbohydrates: 5g | Protein: 1g | Fat: 5g | Saturated Fat: 2g | Cholesterol: 10mg | Sodium: 118mg | Potassium: 28mg | Fiber: 0g | Sugar: 0g | Vitamin A: 175IU | Vitamin C: 0.4mg | Calcium: 18mg | Iron: 0.4mg

    Picnic Food: Pressed Italian Sandwiches

    [heart_this] · Apr 10, 2022 · 22 Comments

    Picnic sandwiches on a red and white check table with sliced sandwiches.

    Last Updated November 16th, 2025 at 09:10 am by Lisa

    Summer picnic food is easy with pressed Italian sandwiches that are neat to hold and eat! This pressed picnic sandwich recipe is bursting with flavor from the olives, pepperoncini, salami, deli meat, and more.

    These summer sandwiches keep very well overnight in the fridge. Make the day before, then grab and go. You can make these sandwiches in countless ways using meats, cheeses, and fillings you love.

    Pop into a picnic lunch basket or cooler for al fresco meals. And head off to the beach, a concert, or a picnic in the park...

    A red and white picnic basket with picnic sandwiches, watermelon and mac salad.
    Triangle sliced picnic sandwiches stacked on top of each other at a picnic.

    What Are Pressed Picnic Sandwiches?

    A pressed sandwich is a loaf of rustic bread (like a sourdough boule) that's split, filled with delicious layers of ingredients, and then wrapped tightly with plastic wrap and refrigerated overnight under a weight to flatten the layers and meld the flavors. This helps hold the sandwich together after it is sliced and easier to eat at a picnic, as we usually have a glass of something in the other hand!

    A round pressed picnic sandwich with a watermelon and red check picnic basket.

    What Ingredients Are Good?

    What I LOVE about this recipe, is that you can use what you have on hand, or make the sandwich using your favorite ingredients from the grocery store. Make a version of these sandwiches that you and your family and friends will love. And try some new flavors and combinations during the picnic season...

    • large loaf of bread - round boule, French bread, focaccia, or any thick hearty breads will work
    • a spread - that adds flavor using parsley, vinegar, little olive oil, chopped olives, capers, and pepperoncini's
    •  some leaft greens - fresh baby spinach, small spring lettuce leaves, or peppery arugula
    • sliced cheeses - Colby-jack, sharp cheddar, swiss, fresh mozzarella, pepper jack, provolone, Havarti, white cheddar, or creamy goat cheese
    • thinly sliced cold cuts or deli meats - slices of ham, chicken, turkey, salami, or prosciutto
    • other optional ingredients - artichoke hearts, artichoke spread (Trader Joes), olive tapenade, pickled red onions, roasted red peppers, or fresh basil leaves
    • you can easily make these a vegetarian sandwich too!
    • wrap it up - if you want, you can wrap each of the individual sandwiches in a small piece of parchment paper then tie with a cute ribbon or red and white string. It isn't necessary, because they hold together after being pressed, chilled, and sliced.

    Special Occasions To Serve These

    These are one my go-to recipes I love to parties and fun events. Most recently I took them to a girls' weekend at local beach cottages and everyone loved them. You can make these the night before for...

    • girls getaway weekends
    • baby showers
    • beach and mountain picnics
    • bridal showers
    • pool parties
    • Al fresco music concerts
    • hiking and outdoor trips
    • sports events
    • great for a road trip

    How to Make Picnic Sandwiches

    Pressed Sandwich Ingredients

    • flat-leaf parsley
    • white wine vinegar
    • extra virgin olive oil
    • kalamata olives (or swap in Olive Tapenade)
    • capers
    • pepperoncini's
    • black pepper
    • Round Boule Bread Loaf or French bread loaf
    • Colby cheese or cheese you like
    • Italian dry salami
    • turkey or chicken deli meat
    • fresh organic baby spinach
    • Optional sandwich filling ideas: Chopped Cooked Ham, pepperoni, roasted red peppers, different cheeses, artichoke spread, and chopped olives - any kind.

    How To Make Pressed Sandwiches

    Prep The Bread

    Use a round boule bread loaf, and a small serrated knife and cut the boule around the side evenly.

    Rotate the loaf of bread, and cut the boule loaf all the way in half removing the top from the bottom.

    Use your fingers and scoop out the bread from the top and bottom of the boule.

    Leave about a ½ inch rim around the top and bottom of the bread shells to allow the filling to be pressed flat inside the bread loaf and stay inside.

    Make The Filling

    In a small bowl add: finely chop the olives (or olive tapenade), chopped pepperoncini's, chopped parsley, olive oil, vinegar, chopped and drained capers, and black pepper. Spread 1 cup of the olive mixture on the bread bottom.

    Next, layer all the sandwich ingredients: cheese, deli meats, spinach/lettuce spreads, or toppings you like. Add the rest of the olive mixture if you have any left.

    Place the bread tops of the boule loaf back on, and press gently down.

    Wrap And Press The Sandwich

    Use plastic wrap to tightly wrap the sandwich. Wrap the sandwich tightly a couple of times, and cover it completely.

    Place the sandwich between two baking sheets and weigh it down with some heavy objects like a large can, containers of juice, or a heavy skillet to press down the sandwich.

    The reason you want to do this is so it slices neatly and holds together with "one hand" hold at the picnic!

    Keep in the refrigerator for at least a couple of hours, overnight is better as it has time to press and the flavors are better the next day.

    PRO TIP: The SECRET TO THIS SANDWICH is to wrap it tightly in plastic wrap and to press or weigh it down between 2 cookie sheets. Use cans or jars in the fridge to "press" the sandwich flatter. It will cut very easily when cold, and looks so pretty!

    Use a serrated knife to cut the sandwich into 8 wedges.

    Showing how to make pressed picnic sandwiches step by step.

    What to eat with pressed sandwiches?

    Serve with side salads like Easy Pasta Salad, Macaroni Salad, and cut Watermelon Salad.

    PRO TIP: Buy inexpensive paper take out containers and pack salads in these. People love to have their own box at a summer picnic.

    How do I pack picnic food?


    When the warmer weather arrives, it is so fun to get outside and enjoy the perfect picnic sandwich at your favorite place.

    -Pack in a cooler or picnic basket and use frozen water bottles in your cooler, then you can drink them.
    -The best option is to pack a picnic box for each guest! Order larger disposable food take-out containers online. That way the work is done, and you can relax and not have to pass and serve food.
    -Pack up those napkins and prepacked utensils from the take-out food deliveries you have been saving!
    -Use small paper takeout boxes ordered inexpensively online for salads, fresh fruit, sides, and desserts.
    -Small foldable picnic table in a bag, table cloth, blanket, glasses, plates, and utensils.

    Make food that is easy to eat like pressed picnic sandwiches, desserts that won't melt like cookies, and sides the night before. Then just box them up in the cooler or picnic basket and go have fun!

    Where does the word picnic come from?


    The picnic was originally a 17th Century French word, picque-nique. Its meaning was similar to today's meaning: a social gathering where each person shares a dish of food.

    What to pack in a picnic?

    The best picnic food recipes are ones that can be served in small containers and passed around, or held in your hand like a cut sandwich that stays together, sausage rolls, or hand-held meat pies.

    Small bite-size desserts that hold their shapes (and don't melt) are a great choice as well like bars and cookies. You can slice them into smaller portions for each guest too.

    Get your cooler or basket packed and go have a picnic..try a new place, it will be delicious and Happy Picnicking!

    Glad these are not real ants marching at our picnic today!

    More Picnic Food Ideas

    Cool refreshing Watermelon Salad is served in the carved-out watermelon as the salad bowl. Serve chilled on a hot day for summer picnics, beach, or pool parties!

    An easy Pasta Salad with fresh herbs, bell pepper, and cheese. This is a mayo-less salad, perfect to serve at outdoor picnics or cookouts.

    Broccoli Salad with crisp green apples, crunchy broccoli, and grapes create this summer salad with a creamy 3-ingredient orange dressing.

    A Classic Macaroni Salad Recipe loaded with chopped eggs, crunchy celery, dill pickles, and the secret ingredient pickle juice! A cherished old-fashioned family recipe and a real crowd-pleaser.

    • Looking down into a scooped out watermelon filled with rounded watermelon balls garnished with mint and feta cheese.
      Watermelon Salad
    • A wooden bowl filled with pasta salad and wooden serving tongs.
      Easy Pasta Salad
    • A turquoise salad bowl filled with broccoli salad with colorful grapes and pistachios.
      Broccoli Salad
    • Looking down on a white plate filled with macaroni salad and a silver fork.
      Classic Macaroni Salad Recipe

    These Patriotic M&M Sugar Cookies are decorated with red, white, and blue M&Ms, icing stripes, and star sprinkles. Great for beach days, picnics, summer parties, and the 4th of July.

    Ice cold Blueberry Lemonade captures Summer in every sip, it is made in minutes with homemade blueberry syrup, fresh lemon juice, and honey.

    Cole Slaw with an easy vinegar dressing and no-mayo, is great on pulled pork sandwiches, with grilled hamburgers, or BBQ chicken. This coleslaw recipe works as a summer side dish for picnics and cookouts.

    The best Potato Salad BBQ side dish loaded with crispy bacon and blue cheese for summer cookouts, potlucks, and a great picnic food idea!

    • A white plate filled with July 4th red white and blue cookies with icing and star sprinkles.
      Patriotic July 4th M&M Cookies
    • Mason jar handled glasses with blueberry lemonade garnished with blueberries, mint, and lemons halves.
      Blueberry Lemonade
    • A clear glass bowl filled with tri color cole slaw and wooden tongs stuck in the slaw.
      Coleslaw Recipe (No Mayo)
    • A small white bowl filled with bacon potato salad garnished with crispy bacon.
      Bacon Potato Salad

    Did you love this recipe? We would love to hear from you! If you make this recipe and love it, give it a 5-star rating ⭐⭐⭐⭐⭐ with a comment. THANK YOU!! Follow Delicious Table with my free newsletter and share this recipe with your friends on Facebook, Pinterest, and Instagram.

    Picnic sandwiches on a red and white check table with sliced sandwiches.
    Print

    Pressed Picnic Sandwiches Recipe

    Yummy Picnic Food is easy with Pressed Italian Sandwiches that are both neat to eat, and easy to make ahead. This pressed sandwich recipe is bursting with flavor from the olives, pepperoncini, salami, deli meat, and more! These summer sandwiches keep very well overnight in the fridge. Make the day before, then grab and go. You can make these sandwiches in countless ways using meats, cheeses, and fillings you love. Pop into a picnic lunch basket or cooler for al fresco meals. And head off to the beach, a concert, or a picnic in the park!
    Course Lunch & Picnic
    Cuisine American
    Keyword picnic ideas, picnic sandwiches, pressed sandwiches
    Prep Time 30 minutes minutes
    Total Time 2 hours hours 14 minutes minutes
    Servings 8
    Calories 588kcal
    Author Lisa Hatfield

    Equipment

    • Picnic Take Out Containers
    • Epicurean Non-Slip Cutting Board
    • Chef Knife
    • Small Serrated Knife
    • Picnic Table (Small Roll-Up)

    Ingredients

    • ½ cup fresh flat-leaf parsley finely chopped
    • 2 tablespoons white wine vinegar red is fine too
    • 2 tablespoons extra virgin olive oil
    • ½ cup kalamata olives finely chopped (or use olive tapenade)
    • ¼ cup capers drained and finely chopped
    • ¼ cup pepperoncini's finely chopped
    • ½ teaspoon cracked black pepper
    • 1 Italian Round Boule Bread Loaf
    • 6-8 slices Colby cheese or cheese you like
    • 10-12 slices Italian dry salami
    • 8 slices turkey or chicken deli meat
    • 2 cups fresh organic baby spinach
    • Optional sandwich filling ideas: ham pepperoni, roasted red peppers, different cheeses, artichoke spread, and chopped olives-any kind.
    US Customary - Metric

    Instructions

    • Use a round boule bread loaf, and a small serrated knife and cut the boule around the side evenly.
    • Rotate the loaf of bread, and cut the boule loaf in half removing the top from the bottom.
    • Use your fingers and scoop out the bread from the top and bottom of the boule.
    • Leave about a ½ inch rim around the top and bottom of the bread shells to allow the filling to be pressed flat inside the bread loaf and stay inside.
    • In a small bowl, mix the olives (or olive tapenade), pepperoncinis, parsley, olive oil, vinegar, capers, and black pepper. Spread 1 cup of the olive mixture on the bread bottom.
    • Next, layer all the sandwich ingredients: cheese, deli meats, spinach/lettuce spreads or toppings you like. Add the rest of the olive mixture if you have any left.
    • Place the bread tops of the boule loaf back on, and press gently down. Use plastic wrap to tightly wrap the sandwich. Wrap sandwich tightly a couple times, and cover completely.
    • Place the sandwich between two baking sheets and weigh it down with some heavy objects like a large can, containers of juice, or a heavy skillet to press down the sandwich. The reason you want to do this is so it all holds together neatly in a "one hand" hold at the picnic!
    • Keep in the refrigerator at least couple of hours, overnight is better as it has time to press and the flavors are better the next day.
    • Use a serrated knife to cut the sandwich into 8 wedges.
    • Serve with side salads like easy pasta salad, macaroni salad and cut watermelon.

    Nutrition

    Calories: 588kcal | Carbohydrates: 39g | Protein: 15g | Fat: 41g | Saturated Fat: 20g | Cholesterol: 33mg | Sodium: 1081mg | Potassium: 320mg | Fiber: 3g | Sugar: 22g | Vitamin A: 1280IU | Vitamin C: 10.6mg | Calcium: 165mg | Iron: 2.5mg

    Cabernet Rosemary Grilled Rack Of Lamb

    [heart_this] · Apr 9, 2022 · 4 Comments

    A beautiful grilled rack of lamb on a white platter with rosemary sprigs and watermelon skewers.

    Last Updated June 15th, 2023 at 08:55 pm by Lisa

    Grilled rack of lamb paired with refreshing watermelon skewers is an elegant special occasion recipe ready in just 45 minutes. The racks are seasoned with a dry rub and then slathered with a Cabernet wine and rosemary marinade.

    There are also lots of inspiring sides to serve with these incredible petite lamb chops. These are perfect for a traditional Easter meal or a fancy dinner party...

    Grilled Rack of Lamb

    • 2 racks of grass-fed lamb
    • watermelon  (2 " cubes on skewers)

    dry seasoning rub

    • 2 tablespoons of sea salt
    • 1 tablespoon fresh cracked pepper
    • 1 tablespoon garlic powder

    cabernet rosemary wet marinade

    • 2 tablespoons rosemary leaves chopped
    • 2 garlic cloves minced
    • 2 shallots chopped
    • 2 tablespoons  Dijon mustard
    • 2 tablespoons Cabernet Sauvignon red wine
    • 1-2 tablespoons of olive oil

    First, preheat your grill to 450-500 degrees.

    PRO TIP: 1 hour before grilling, pull the lamb out of the refrigerator and add dry rub and wet marinade to both racks.

    Prepare Grilled Rack Of Lamb

    Step 1: make seasoning rub

    Mix sea salt, pepper, and garlic powder in a small bowl. Rub on top of the meat all over both racks.

    Step 2: make lamb chop marinade 

    Mix rosemary, garlic, shallots, Dijon, Cabernet sauvignon, and olive oil in a mini food processor, or chop ingredients finely, and mix in a bowl.

    Using a small silicone brush, spread the lamb meat herb marinade all over the racks leaving a nice thick coating, and rest on a baking tray for at least 30 minutes at room temperature before grilling.

    Step 3: Grill your rack of lamb & watermelon skewers

    Heat grill to 450-500. Grill for 3-4 minutes on the grill rack on each side. Then cook indirect high heat for about 15-18 more minutes. This will all depend on the heat of your grill at home.

    (On a Big Green Egg, pull out the rack, and put on deflector shield, then add grill back down to cook indirectly.)

    Grill the watermelon for just a couple of minutes per side until grill marks appear.

    How To Serve

    Rest the chops about 5 minutes before slicing.

    Slice the rack in between the individual rib bones for lamb chops, and serve with watermelon skewers or any sides you choose on a warm serving platter.

    How To Grill Medium Rare

    Finish grilling the meat until the internal temperature is 135 degrees for medium-rare, or more well done if you prefer.  

    How To Test Temperature

    One of the best ways to test temperature is to use a professional-grade thermometer. I love these digital meat thermometers, they are easy to use, very affordable, and make a great gift!

    Lamb FAQ

    How To Marinade Lamb?

    Place your lamb and marinade in a zip-lock bag and remove all air before sealing. Gently massage the meat for a couple of minutes to work the marinade into the meat.

    Then let the marinade work its magic. A good time rule is 1 hour for thin cuts; 6 to 8 hours for thick cuts; and overnight for roasting cuts like shoulders and legs of lamb.

    How To Carve Juicy Lamb Chops?

    Resting – It’s a chef’s trick to let the meat rest between cooking and slicing. Once off the heat, the meat relaxes and starts to reabsorb the juices.

    Give lamb chops 5 to 10 minutes, and you’ll be thrilled with the juicier results.

    How To Grill Lamb?


    Bring lamb up to room temperature – For a good exterior sear and a more even interior temperature take your lamb out of the fridge for 15 to 20 minutes before cooking or grilling.

    What Temperature For Lamb?


    Rare: 115 to 120°F
    Medium-rare: 120 to 125°F
    Medium: 130 to 135°F
    Medium-well: 140 to 145°F
    Well-done: 150 to 155°F


    Test in the thickest part of the meat.

    What To Serve With Rack of Lamb?

    Grilled watermelon skewers are amazing paired with these rosemary lamb chops. The best part of this recipe is the prep just takes minutes, and you have a fancy delicious dish to serve your friends and family for any special occasion.

    These side dishes are all great to serve on your dinner table with this rack of lamb recipe. Grilled Peaches bring a burst of flavor and Grilled Butter Corn is one of the best sides ever, and there are 3 flavors to try. Or try spring vegetables like Roasted Cabbage Steaks, a vegetable salad, or regular potatoes roasted on a sheet pan like these Smashed Potatoes.

    To cool things down, serve a chilled Wedge Salad with an avocado pistachio dressing. Yum! Another great side is a Mango Jicama slaw, it's clean, light and so refreshing next to the grilled lamb.

    • Cabbage steaks on a white rectangle platter garnished with parmesan cheese and toasted pine nuts.
      Roasted Cabbage Steaks
    • A sheet pan of smashed potatoes with fresh herbs baked with crispy golden brown edges.
      Crispy Smashed Potatoes
    • Wedge salad with avocado dressing drizzled on top with pistachios on a black slate board.
      Iceberg Wedge Salad
    • Pouring dressing on a full plate of mango slaw with a gold fork on edge of ceramic plate.
      Mango Jicama Slaw

    More Grilling Recipes

    Easy, elegant Grilled Lamb Chops rubbed with seasoned mint salt, are served with sweet juicy Peaches, and topped with a fresh parmesan pesto. Serve with cool drinks and a salad, and it's a party everyone will remember.

    The Gyro Grilled Lamb Kabobs are sublime with the cool veggies and tzatziki sauce all tucked in a pita.

    Take a look at my entire Cookout Menu to keep you inspired all summer to try all kinds of new recipes. And finally my childhood favorite, Shish Kabobs, with an easy marinade and bright colorful vegetables.

    • A white platter filled with grilled lamb chops topped with mint pesto and grilled peaches.
      Grilled Lamb Chops
    • Greek gyros on parchment paper topped with lamb meatballs cucumber and tomatoes.
      Lamb Gyros With Greek Tzatziki Sauce
    • A square collage of colorful grilled food, side dishes, desserts, and drink recipes to serve at an outdoor bbq cookout.
      75+ Cookout Recipes & BBQ Party Ideas
    • A wooden platter filled with Shish Kabob grilled skewers.
      Shish Kabobs

    Did you love this recipe? We would love to hear from you! If you make this recipe and love it, give it a 5-star rating ⭐⭐⭐⭐⭐ with a comment. THANK YOU!! Follow Delicious Table with my free newsletter and share this recipe with your friends on Facebook, Pinterest, and Instagram.

    A beautiful grilled rack of lamb on a white platter with rosemary sprigs and watermelon skewers.
    Print

    Cabernet-Rosemary Grilled Rack Of Lamb Recipe With Side Dishes

    Grilled rack of lamb paired with refreshing watermelon skewers is an elegant special occasion recipe ready in just 45 minutes. The lamb is seasoned with a dry rub and then slathered with a Cabernet wine and rosemary marinade.
    There are also lots of inspiring sides to serve with these incredible chops. These are perfect for a traditional Easter meal or a fancy dinner party...
    Course Dinner & Main Dishes
    Cuisine American
    Keyword grilled lamb, lamb chops, lamb recipes
    Prep Time 15 minutes minutes
    Cook Time 30 minutes minutes
    Total Time 15 minutes minutes
    Servings 8
    Calories 495kcal
    Author Lisa Hatfield

    Equipment

    • Mini Food Processor
    • Mini Basting Brush
    • Chef Knife
    • Epicurean Non-Slip Cutting Board
    • Digital Meat Thermometer

    Ingredients

    • 2 racks of lamb grass fed prefered
    • 1 small watermelon cut into 2" cubes on skewers

    lamb chop seasoning dry rub:

    • 2 tablespoons kosher salt
    • 1 tablespoon fresh cracked black pepper
    • 1 tablespoon garlic powder

    cabernet rosemary wet marinade:

    • 2 tablespoons rosemary leaves chopped
    • 2 garlic cloves minced
    • 2 shallots chopped
    • 2 tablespoons  Dijon mustard
    • 2 tablespoons cabernet sauvignon red wine
    • 1 tablespoon olive oil
    US Customary - Metric

    Instructions

    • Preheat your grill for direct heat at 450-500 degrees.
    • 30 minutes before grilling, pull the lamb out of the refrigerator to bring to room temperature.

    rack of lamb seasoning rub

    • Mix sea salt, pepper, and garlic powder in a small bowl.
    • Rub all over both racks of lamb on each side.

    cabernet rosemary lamb wet marinade

    • Mix rosemary, garlic, shallots, Dijon mustard, Cabernet sauvignon wine, and olive oil in the bowl of a food processor or chop ingredients finely, and mix in a bowl.
    • Using a small brush, brush the wet marinade all over the racks leaving a nice thick coating, rest on a tray for at least 30 minutes at room temperature before grilling.

    grilling lamb chops:

    • Heat grill to 450-500. Grill 3-4 minutes on grill rack on each side. (On BGE, pull out rack, and put on deflector shield, then add grill back down) Finish grilling lamb 22 more minutes on indirect heat or until internal temperature is 135 degrees for medium rare, or more well done if you prefer.  
    • Grill the watermelon just a couple minutes per side until grill marks appear.

    Video

    Notes

    grilling tips

    Bring lamb chops up to room temperature – For a good exterior sear and a more even interior temperature, take your lamb chops out of the fridge for 15 to 20 minutes before cooking or grilling.
    It’s a chef’s trick to let the meat rest between cooking and slicing. Once off the heat, the meat relaxes and starts to reabsorb the juices. Give lamb chops 5 to 10 minutes, and you’ll be thrilled with the juicier results.

    temperature doneness

    Rare: 115 to 120°F
    Medium-rare: 120 to 125°F
    Medium: 130 to 135°F
    Medium-well: 140 to 145°F
    Well-done: 150 to 155°F

    Nutrition

    Calories: 495kcal | Carbohydrates: 3g | Protein: 18g | Fat: 44g | Saturated Fat: 19g | Cholesterol: 94mg | Sodium: 1857mg | Potassium: 288mg | Vitamin A: 15IU | Vitamin C: 1.1mg | Calcium: 34mg | Iron: 2.1mg

    Classic Macaroni Salad Recipe

    [heart_this] · Apr 6, 2022 · 4 Comments

    Looking down on a white plate filled with macaroni salad and a silver fork.

    Last Updated July 31st, 2023 at 10:01 am by Lisa

    A classic macaroni salad recipe loaded with flavor from chopped eggs, crunchy celery, dill pickles, and the secret ingredient pickle juice! A cherished old-fashioned family recipe and a real crowd-pleaser. The chopped pickles and pickle juice make it super tangy and tasty.

    Make a big bowl of the best macaroni salad, and watch it disappear at your next party, I guarantee it will become one of your family's favorite recipes...

    How To Make Macaroni Salad

    Serve mac salad to a large crowd for cookouts, potlucks, BBQs, or serve as picnic food. Friends and family have laughed as they fill up their plates chuckling at themselves, can't stop eating this, and go back for seconds. I have seen thirds happen, the struggle is real.

    With just a few simple ingredients you will be enjoying a small bowl (or huge) of this salad, the flavorful dressing comes from you guessed it, all the pickles! Here are the macaroni salad ingredients you will need.

    • 16 ounces short pasta 1 lb bag short pasta - Anthony's brand
    • 6 hard-boiled eggs chopped
    • 3 cups chopped celery
    • 2 cups green onions  sliced
    • 2 cups dill pickles chopped
    • 2 cups picked juice from dill pickles
    • 1 cup black sliced olives (2 small cans)
    • 1 cup mayonnaise
    • ¼ cup yellow mustard
    • 1 teaspoon sea salt
    • 1 teaspoon black pepper
    1. Make and peel 6 hard-boiled eggs. Try my recipe to make Steam Hard Boiled Eggs.
    2. Fill a large pot with cold water, and add a teaspoon of sea salt. Heat on the stove to boil the pasta. Follow the cooking time and the package instructions of your pasta brand. Adding salt is optional but recommended.
    3. Gradually add pasta, stirring to separate it, and return to a boil. Boil uncovered, stirring occasionally until you have tender macaroni that is al dente pasta.
    4. While the pasta is boiling, chop the fresh ingredients: celery, green onions, dill pickles, and chop the eggs into small pieces.
    5. Drain the large pot of pasta, and pour it into a very large bowl.
    6. Into the large bowl, add the chopped ingredients to the warm cooked pasta. Add celery, green onions, chopped pickles, pickle juice, chopped eggs, black olives, mayonnaise, yellow mustard, sea salt, and black pepper.
    7. Stir well to combine, and chill for several hours or overnight. The warm pasta will absorb the pickle juice as it sits in the refridgerator, that is what makes it so good!
    8. Optional: Slice a couple of eggs and places them on top with sprinkles of paprika to make it pretty.
    9. Serve macaroni pasta salad in a large bowl or inexpensive paper Chinese takeout containers (order online), great for picnics and parties. Keep this macaroni salad chilled at all times in an airtight container, or serve immediately.

    For the absolute best way to make Steamed Hard Boiled Eggs, be sure to take a look at my all-time favorite method....steaming! It is fast and makes gorgeous perfect eggs that actually peel.

    Steamed Hard Boiled Eggs Recipe
    Steamed hard boiled eggs cook perfectly every time with no green ring. So easy to peel, the eggshells miraculously slip right off in minutes!
    GET THE RECIPE PIN IT
    6 perfectly hard boiled eggs with a cracked half of an egg shelf on top.

    Mac Salad Recipe Swaps & Variations

    This Pasta Salad recipe calls for classic ingredients. But you can add different things you love or have on hand:

    • Crunchy celery is one of my personal favorite things, but you could swap or add in red bell pepper, carrots, or green peppers.
    • Creamy mayonnaise is classic, but you can use miracle whip or sour cream. It will not be as creamy but works just fine in a pinch. You can also add some Dijon mustard with regular yellow mustard.
    • Dill pickles or sweet pickles both work, even sweet pickle relish will add a nice crunch, and sweet pickle juice works too!
    • Season it your way, garlic powder tastes great, and so does some chopped fresh parsley.
    • Elbow macaroni or any macaroni noodles will swap in just fine, the Anthony brand short pasta is easy to find in most grocery stores.
    • Chicken is a nice addition, toss in some cooked cubed diced chicken or shred in a rotisserie chicken.

    What Main Dishes Go With Macaroni Salad?

    So what else goes with this easy macaroni salad recipe? Well, here are some of my favorite ways to eat mac salad all summer long...

    Take it on a picnic with Pressed Italian Sandwiches which you make the night before, then grab the cooler and go! Cheeseburgers or Spiral Grilled Hot Dogs go great with a side of cold pasta salad.

    • Picnic sandwiches on a red and white check table with sliced sandwiches.
      Picnic Food: Pressed Italian Sandwiches
    • A person holding a messy grilled burger topped with melted cheese, burger sauce, lettuce, tomato, and pickles.
      The Best Cheeseburger
    • A red plastic food basket lined with paper holding a loaded grilled hot dog.
      Spiral Grilled Hot Dogs

    Next time you are hosting a gathering, you can serve a delicious macaroni salad alongside other classic side dishes, and some main course recipes like Oven Pulled Pork or Cowboy Baked Beans.

    The first time I made these baked beans people were begging for the recipe! Or take a look at my entire collection of 60+ Cookout recipes, ideas, and tips.

    • A large white spoon scooping a serving of cowboy baked beans out of a casserole dish.
      Cowboy Beans
    • A white casserole dish with oven roasted pulled pork shredded and ready to eat in tacos or a recipe for dinner.
      Oven Roasted Pulled Pork
    • A square collage of colorful grilled food, side dishes, desserts, and drink recipes to serve at an outdoor bbq cookout.
      75+ Cookout Recipes & BBQ Party Ideas

    Side Dishes To Serve With Mac Salad

    And here are more sides and salads that are always perfect with macaroni pasta salad. Here are my go-to faves for summertime parties.

    Watermelon Salad is a simple side dish that steals the show with a carved-out watermelon for the serving bowl.

    The best Potato Salad BBQ side dish loaded with crispy bacon and blue cheese for summer cookouts, potlucks, and a great picnic food idea.

    This easy cold Pasta Salad is a mayo-less salad, tossed with a macaroni salad dressing made from a little olive oil, red wine vinegar, or white vinegar, apple cider vinegar works too, or even a splash of lemon juice would work. The cavatappi pasta is tossed with chopped red onion, cubed cheese, and other crisp vegetables. Perfect to serve at outdoor picnics or cookouts. And it's okay to serve more than one kind of macaroni salad at your party. Doesn't Hawaiian macaroni salad sound good?

    7 Layer Salad is a great option to take to a picnic party or cookout because you can put it together a day ahead and the creamy dressing goes right on top!

    This version has classic ingredients like boiled eggs, cheddar cheese, cherry tomatoes, and other fresh vegetables but you can use what you love. I listed lots of ideas to inspire you, and probably some are already in your fridge. You can toss it together at the party, or just let people dig right in...

    • Looking down into a scooped out watermelon filled with rounded watermelon balls garnished with mint and feta cheese.
      Watermelon Salad
    • A small white bowl filled with bacon potato salad garnished with crispy bacon.
      Bacon Potato Salad
    • A wooden bowl filled with pasta salad and wooden serving tongs.
      Easy Pasta Salad
    • A glass trifle dish filled with 7 Layer Salad full of colorful ingredients.
      7 Layer Salad

    Picnic Pasta Mac Salad FAQ

    How long can you keep macaroni salad?


    Keep macaroni salad for up to five days stored in the refrigerator in a sealed container. Again, this mac salad should always be kept cold as it has eggs and mayonnaise.

    How do I keep a salad cold or chilled outside?


    Keep salads cold and or chilled if they have mayonnaise in the ingredients. For food safety, you don't want to keep it at room temperature, especially on a hot day.

    You can place it on a bowl of ice, or ice packs during a party, or take it from the fridge right before serving, and put it back in the fridge or cooler after an hour.

    There are also chilled platters and bowls available for serving chilled dishes outdoors.

    What is the easiest way to serve macaroni salad at picnics?


    Put macaroni salad in small inexpensive take-out boxes for picnics. They make it so easy to give a small container to each guest, making serving easy at your picnic. Plus kids and people love having their own little box to eat out of!

    Did you love this recipe? We would love to hear from you! If you make this recipe and love it, give it a 5-star rating ⭐⭐⭐⭐⭐ with a comment. THANK YOU!! Follow Delicious Table with my free newsletter and share this recipe with your friends on Facebook, Pinterest, and Instagram.

    Looking down on a white plate filled with macaroni salad and a silver fork.
    Print

    Classic Macaroni Salad Recipe

    A classic macaroni salad recipe with chopped eggs, dill pickles, pickle juice, and crunchy celery. A cherished old fashioned family recipe!
    Course Side Dishes & Vegetables
    Cuisine American
    Keyword classic macaroni salad, macaroni salad, macaroni salad recipe
    Prep Time 30 minutes minutes
    Cook Time 15 minutes minutes
    Total Time 45 minutes minutes
    Servings 12
    Calories 334kcal
    Author Lisa Hatfield

    Equipment

    • Epicurean Non-Slip Cutting Board
    • Chef Knife
    • Picnic Take Out Containers

    Ingredients

    • 16 ounces short pasta 1 lb bag short pasta - Anthony's brand
    • 6 hard-boiled eggs chopped
    • 3 cups celery diced
    • 2 cups green onions  sliced
    • 2 cups dill pickles chopped
    • 2 cups picked juice from dill pickles
    • 1 cup black sliced olives 2 small cans of sliced black olives
    • 1 cup mayonnaise
    • ¼ cup yellow mustard
    • 1 teaspoon sea salt
    • 1 teaspoon pepper
    US Customary - Metric

    Instructions

    • Make and peel 6 hard-boiled eggs. Try my recipe to make Steam Hard Boiled Eggs.
    • Put a large pot of salted water and heat on the stove to boil the pasta. Follow the cooking time and the package instructions of your pasta brand. Adding salt is optional but recommended.
    • Gradually add pasta, stirring to separate it, and return to a boil. Boil uncovered, stirring occasionally until you have tender macaroni that is al dente pasta.
    • While the pasta is boiling, chop the fresh ingredients: celery, green onions, dill pickles, and chop the eggs into small pieces.
    • Drain the large pot of pasta, and pour it into a very large bowl.
    • Into the large bowl, add the chopped ingredients to the warm cooked pasta. Add celery, green onions, chopped pickles, pickle juice, chopped eggs, black olives, mayonnaise, yellow mustard, sea salt, and black pepper.
    • Stir well to combine, and chill for several hours or overnight. The warm pasta will absorb the pickle juice as it sits in the fridge, that is what makes it so good!
    • Optional: Slice a couple of eggs and places them on top with sprinkles of paprika to make it pretty.
    • Serve macaroni pasta salad in a large bowl or inexpensive paper Chinese takeout containers (order online), great for picnics and parties. Keep this macaroni salad chilled at all times in an airtight container, or serve immediately.

    Video

    Notes

    Pasta

    I use a small macaroni pasta made by Anthony's Pasta, I love the way it looks, but any small pasta will work fine. 

    Servings Tips

     Keep this macaroni salad chilled at all times, or serve immediately.

    Hard Boiled Eggs

    Take a look at my all-time favorite method....steaming! It is fast and makes gorgeous perfect eggs that actually peel.

    Swaps & Variations

    This Pasta Salad recipe calls for classic ingredients. But you can add different things you love or have on hand:
    • Crunchy celery is one of my personal favorite things, but you could swap or add in red bell pepper or green peppers.
    • Creamy mayonnaise is classic, but you can use miracle whip or sour cream. It will not be as creamy but works just fine in a pinch.
    • Dill pickles or sweet pickles both work, even sweet pickle relish will add a nice crunch, and sweet pickle juice works too!
    • Elbow macaroni or any macaroni noodles will swap in just fine, the Anthony brand short pasta is easy to find in most grocery stores.

    Nutrition

    Calories: 334kcal | Carbohydrates: 34g | Protein: 9g | Fat: 17g | Saturated Fat: 3g | Cholesterol: 101mg | Sodium: 1369mg | Potassium: 273mg | Fiber: 2g | Sugar: 3g | Vitamin A: 495IU | Vitamin C: 4.3mg | Calcium: 64mg | Iron: 1.4mg

    Steamed Hard Boiled Eggs

    [heart_this] · Apr 5, 2022 · 5 Comments

    6 perfectly hard boiled eggs with a cracked half of an egg shelf on top.

    Last Updated July 23rd, 2022 at 08:42 pm by Lisa

    Steamed hard-boiled eggs cook perfectly every time with no green ring. So easy to peel, that the eggshells miraculously slip right off.

    These are the ultimate in perfectly hard cooked eggs that are made fast to slice and chop beautifully for your recipes. Or simply enjoy for breakfast or snacks...

    Steamer Baskets Are The Little Trick!

    There are so many different ways to make hardboiled eggs. There is the classic boil method, starting in cold water, pinpricks into the eggshell, and even oven baking in a muffin tin.

    People use new eggs, and older eggs, and often even those get green rings around the yolks, which is not a pretty sight. And worst of all, all seem impossible to peel, and chunks of egg break off.

    Recipes that require boiled or chopped eggs as one of the main ingredients will now be easy to prep and serve for your gathering once you learn the secret.

    This new way to cook the perfect egg has a simple trick of using steam to hard boil eggs, it takes less time, and you can have them ready for recipes fast. All you need is an inexpensive vegetable steamer basket and you are good to go!

    • this is a no-fail technique
    • perfectly cooked yolks
    • easy peel hard-cooked eggs
    • no stuck egg shells
    • surprisingly simple
    • faster than boiling method

    How To Steam Easy Peel Eggs

    • 1 dozen organic eggs (small or large)
    • water
    1. In a medium large pot, add 2 inches of water to the bottom of the pan and bring to a boil over high heat.
    2. Place your steamer basket or steaming rack in and carefully add the eggs into the steamer basket with a fine mesh strainer. I found that if you load on alternating sides, it keeps it from tipping over into the boiling water.
    3. Cover with a lid and steam for 12 minutes of steaming time.
    4. Prepare a large bowl with lots of ice and water.
    5. After 12 minutes of steaming the eggs, turn off the heat and place all the eggs in an ice water bowl to chill for 15 minutes, add more ice if necessary.
    6. Roll the egg on a cutting board or any flat surface, and slip the shells right off! Dip in a bowl of clean water to remove any pieces of shells. You will get perfectly smooth hard boiled eggs to use in recipes.

    Why Steaming Eggs Works VS. Boiled

    We want to avoid overcooked yolks, tough rubbery whites, and ripped-up, torn eggs. The best way to cook hard-cooked eggs is to steam them in a pot as we avoid all those things.

    Start the eggs in hot water: By starting the eggs steaming on a rack over boiling water (rather than cold water) makes the egg white protein fuse and stick together, preventing them from clinging onto the shell membrane. This is why the egg shell slips right off!

    Less overall cooking time: Since you are steaming, you don't need as much water in a large pot of water for boiling eggs. And the water for steaming is only a couple inches and it's just enough water to come up under the steamer rack and boils in minutes saving time.

    Steam, don’t boil: Steaming doesn’t lower the temperature of the water as the eggs rest on the rack and begin to cook, and they steam evenly all at the same time.

    Peel immediately after steaming: Fill a large bowl with ice water. Chill the eggs for 15 minutes in the icy cold water. This shock assists to get the shell ready to come loose. Gently tap each one on a board, till it cracks, and then comes right off. All your eggs will peel in just a couple minutes.

    Peeling eggs fast: The best part of this cooking process is you can peel a great number of eggs very fast, each will have a smooth surface.

    A large clear glass bowl filled with perfectly boiled eggs on a cutting board.
    Why do hard-boiled eggs get a green ring?


    An unattractive yet harmless green-gray ring can appear around the yolk when they are hard cooked in boiling water for too long.
    It is due to hydrogen in the egg white combining with sulfur in the yolk and this discoloration

    The discoloration is caused by a chemical reaction from sulfur (the white) and iron (the yolk), which both react naturally to form ferrous sulfide at the surface of the yolk making the ring appear.

    More Hard Boiled Eggs Recipes

    There are so many egg dishes in the world, you can take a look at my entire collection of Left Over Hard-Boiled Egg Recipes for easy dish ideas.

    Here are a few of my all-time favorites, like a Classic Original Cobb Salad. This great recipe is the original from The Brown Derby in Los Angeles California. A simple dish that is now iconic and as the story goes was created late one night for a hungry customer.

    For picnics, cookouts, and family gatherings make this Seven Layer Salad. It's an easy recipe that serves a crowd. Put this great dish together the night before your party!

    Make some Jalapeno Pickled Eggs or Chili Pepper Pickled Eggs. These are like the ones at old-fashioned delis. The peppers add extra flavor to both of these recipes.

    • 12 creative ways to use hard boiled eggs in recipes showing deviled eggs for holidays, egg salad, ham salad, and potluck salads.
      12 Recipes For Hard Boiled Eggs
    • A white square plate filled with colorful Cobb Salad made with chicken, eggs, avocados, tomatoes, and bacon.
      Cobb Salad
    • A large glass clamp jar filled with pickled eggs, fresh jalapeno slices, and spices.
      Jalapeno Pickled Eggs Recipe
    • A glass trifle dish filled with 7 Layer Salad full of colorful ingredients.
      7 Layer Salad

    Did you love this recipe? We would love to hear from you! If you make this recipe and love it, give it a 5-star rating ⭐⭐⭐⭐⭐ with a comment. THANK YOU!! Follow Delicious Table with my free newsletter and share this recipe with your friends on Facebook, Pinterest, and Instagram.

    6 perfectly hard boiled eggs with a cracked half of an egg shelf on top.
    Print

    Steamed Hard Boiled Eggs Recipe

    Steamed hard boiled eggs cook perfectly every time with no green ring. So easy to peel, the eggshells miraculously slip right off in minutes!
    Course Breakfast & Brunch
    Cuisine Breakfast or Brunch
    Keyword easy peel eggs, hard boiled eggs recipe, steam boiled eggs
    Prep Time 3 minutes minutes
    Cook Time 12 minutes minutes
    Total Time 15 minutes minutes
    Servings 12
    Calories 755kcal
    Author Lisa Hatfield

    Equipment

    • Vegetable Steamer Basket
    • Cast Iron Dutch Oven

    Ingredients

    • 1 dozen organic eggs
    • water

    Instructions

    • In a medium large pot, add 2 inches of water to the bottom of the pan and bring to a boil over high heat.
    • Place your steamer basket or steaming rack in and carefully add the eggs into the steamer basket with a fine mesh strainer. I found that if you load on alternating sides, it keeps it from tipping over into the boiling water.
    • Cover with a lid and steam for 12 minutes of steaming time.
    • Prepare a large bowl with lots of ice and water.
    • After 12 minutes of steaming the eggs, turn off the heat and place all them immediately in ice water bowl to chill for 15 minutes, add more ice if necessary.
    • Roll the egg on a cutting board or any flat surface, and slip the shells right off! Dip in a bowl of clean water to remove any pieces of shells. You will get perfectly smooth hard boiled eggs to use in recipes.

    Video

    Notes

    All you need is an inexpensive vegetable steamer basket and you are good to go!
    • this is a no-fail technique
    • perfectly cooked yolks
    • peelable hard-cooked eggs
    • no stuck egg shells
    • surprisingly simple
    • faster than boiling method

    Nutrition

    Calories: 755kcal | Carbohydrates: 4g | Protein: 67g | Fat: 50g | Saturated Fat: 17g | Polyunsaturated Fat: 10g | Monounsaturated Fat: 19g | Trans Fat: 1g | Cholesterol: 1964mg | Sodium: 750mg | Potassium: 729mg | Sugar: 2g | Vitamin A: 2851IU | Calcium: 296mg | Iron: 9mg

    Double Smoked Ham With Orange Honey Glaze

    [heart_this] · Mar 31, 2022 · 6 Comments

    A double smoked ham on a outdoor smoker ready to eat.

    Last Updated June 15th, 2023 at 09:53 pm by Lisa

    Make a twice smoked spiral cut ham just like a smokehouse pit boss. This holiday meal classic has an amazing smoky flavor with an apple cider orange honey glaze!

    The double smoking of this holiday ham cook is great for Easter dinner, Thanksgiving, Christmas dinner, or anytime during the year. You will save space in your oven for other dishes, and be rewarded with a glorious ham.

    Nothing like a long low and slow cook on a lazy weekend, with smoke drifting up and out as you brush on the sweet glaze...

    Why Double Smoke A Ham?

    Okay here is the deal. Since hams are cured, smoked, baked, and “pre-cooked” why would we double smoke a ham? Well, the answer is simple, we are chasing that perfect smoky flavor!

    The entire process takes time, but you will be rewarded with incredible flavor that will never come out of the spiral ham package and a basic brown sugar glaze...

    PRO TIP: Plan on about ½ pound of bone-in spiral ham for each guest.

    How To Make A Double Smoked Ham

    • 1 large spiral-cut ham (smoked and bone-in)

    Smoked Ham Glaze Recipe

    • ¼ cup melted butter
    • ½ cup brown sugar
    • ¼ cup honey
    • 2 tablespoons Dijon mustard
    • 1 whole orange zest and orange juice
    • 2 cups apple cider
    • 1 teaspoon ground cinnamon
    • 1 teaspoon ground cloves

    Heat The Smoker

    1. The first step is to pull your ham from the refrigerator and let it sit at room temperature while you get everything else done. It helps to not put cold meat in your smoker.
    2. Preheat your smoker, this recipe is not tested on a gas grill.
    3. Cook indirectly at low heat smoke temperature of 250-275 degrees, using hardwood lump charcoal and a couple of small chunks of fruitwood like cherry or apple.
    4. If using a BGE see notes below for more tips and details.

    Prepare Glaze

    1. In a small saucepan, melt the butter, add the brown sugar, honey, Dijon mustard, orange zest and juice, apple cider, ground cinnamon, and ground cloves. Cook over medium heat to medium high heat, keep stirring the glaze ingredients with a whisk just until it comes to a boil. Remove from the heat immediately.
    2. If it gets too thick, add a tablespoon or two of some warm water or more apple cider to get to a brush-able consistency.

    Smoke The Ham

    Place ham flat side down on a baking rack on a sturdy pan filled with ½ an inch of warm water in the bottom of the pan.

    PRO TIP: The rack allows the smoke to get all the way around. I used a deep dish round pizza pan, but a shallow low roasting pan or a large cast iron skillet will work too.

    Control Your Smoker & Meat Temperature

    Set up your smoke alarm or wireless probe thermometer if using one in the center but not touching the ham bone.

    Once your smoker temperature reaches 250 degrees, open up the smoker and place the ham inside, close the lid, and smoke for 1 hour.

    Brush the glaze all over the top of the ham at the 1-hour mark and every 30-45 minutes.

    How Long To Smoke A Ham?

    Smoke the ham for 20 minutes per pound. The size of the ham will determine the cooking smoke time.

    A 10-pound ham will take about 3.5 hours or until the internal temperature reaches 140 degrees F on a meat thermometer.

    How To Freeze Leftover Ham

    To store leftover ham, slice off from the bone using a sharp knife and use the meat within 3-5 days. Freeze and use within 2 months in zip-top bags or a food saver vacuum sealer.

    Cut it into cubes for use in ham salad, omelets, or casseroles. And flat slices for sandwiches and for a traditional ham dinner.

    One of the best things is you will have leftovers to use in all kinds of ways...

    Variations & Swaps

    Create your own savory glaze the way you like it! Here are a few ideas to mix it up. Then get basting and brushing on the outside of the ham while it slowly smokes...

    • pineapple juice instead of apple cider
    • maple syrup in place of honey
    • orange marmalade in place of orange zest and juice
    • Rootbeer, Coca Cola, or Dr. Pepper in place of apple cider

    PRO SMOKE TIP: Air equals higher heat. Lower air equals lower heat. The more air coming into the flames will grow in your fire, and so you want to adjust the vents to control the airflow and thus the cooking temperature.

    Can I Smoke A Ham In My Grill?

    Okay, let's clear this up, this recipe is for a smoker, but so many people have figured out how to smoke on the indirect heat side of the grill very successfully. The smoking process will work on either a gas or charcoal grill.

    There are many good recipes out there for that smoking technique, and I say go for it! I have smoked on my grill, it has a small tray for wood chips and I have experimented with it a great deal, just not on this particular recipe.

    A good reference book for smoking is Project Smoke by Steven Raichlen, a very comprehensive book loaded with tips and techniques.

    You will find everything from the different kinds of smokers available with their pros and cons, the different woods for a kiss of additional smoke, fire-starting tips, and many smoke recipes you can do!

    The book literally encourages you to smoke everything including cheese, salt, drinks, and more.

    A big juicy slices ham on a cutting board ready to eat.

    What Kind Of Gear Do I Need?

    • a smoker - pellet grill smoker, electric smoker, water smoker "aka bullet", ceramic cooker, upright barrel smoker, or offset smoker.
    • lump hardwood charcoal - easy to find at any big box hardware store
    • tumbleweed firestarters - these are inexpensive and get that fire going!
    • smaller pieces of fruit wood - cherry wood, apple, or pecan are really nice, and maple, and hickory wood or wood smoker chips - apple, cherry, hickory, etc. The type of wood you choose can change the smoke flavor.
    • sturdy shallow metal pan - I found a foil pan or aluminum pans or a foil pan were not sturdy enough to hold the rack on top.
    • silicone brush and sauce pot for glaze
    • BBQ gloves or silicone mitts
    • wireless bluetooth smoke thermometer or instant read thermometer

    Smoking On A Big Green Egg or Kamado Grill 

    • Use hardwood lump charcoal with 3 smaller pieces of apple or cherry fruitwood. These are easily available at big box hardware stores.
    • Never use charcoal briquettes or lighter fluid! It will give an off-taste to your cook in ceramic grill smokers.
    • Open all the vents all the way at the top and bottom, light the hardwood lump charcoal, and once the heat reaches around 300 degrees, you will then set up for a long slow smoke. 
    • Close the bottom vent to just a ⅛" opening, and the daisy wheel almost all the way closed after heat up to keep the temperature at 250-275 degrees F throughout the smoke.

    Water Pan Tips & Advantages

    Cook with a water pan when smoking gives you the benefit of creating humidity. Simply use a larger pan as I did. Put the rack on top or fill a small aluminum pan off to the side.

    A water pan keeps the smoker's temperature lower and more consistent throughout the smoke chamber. Helping the process of low and slow smoking. As the water reaches its boiling point, it begins to evaporate. Then it turns to steam rather than heat up any further and removes hot spots in your smoker. In other words, evens out the temperature.

    The end result is the humidity from the water pan will make the meat even juicier! And will help the smoke adhere to the meat during the cook, giving flavor!

    Best Tool For Monitoring Ham Temperature

    Use a Wireless Bluetooth Meat Thermometer for the best temperature accuracy while smoking. You can have the wireless receiver nearby in the shade or in the house. And monitor your temps both in the smoker and the meat in your cook on your phone. A great advantage so you don't have to get up and open up your smoker! These are what the competitive BBQ Pit Masters use...

    Ham Smoke FAQ

    How long to smoke a spiral ham?

    It will take about three hours to smoke a ham at 240 degrees F on your smoker. This equates to about 20 minutes per pound of pre-cooked ham. You will want the internal temperature of the ham to be 140 degrees F when it's completely warmed through.

    So for a 10-pound ham, you will be smoking it for 3.5 hours.

    One tip is to pull the ham out about an hour before the cook. So it doesn't go in the smoker as cold, so the ham cooks evenly.

    Spiral sliced hams range from 7 to 10 pounds.

    What is blue smoke?

    When you first light a smoker, that is not the time to put your meat on, resist the temptation. The white, rolling, puffy smoke is "dirty" and will give an off-taste to your cook.

    Let the fire calm down, and the smoke will settle into a clearer "blue" trail. Not puffy billows of cloudy smoke.

    That beautiful sight is called "Blue Smoke". And that is when we put our meat into our smokers for the best results and flavor.

    My Other Holiday Ham Dinner Recipe

    If you are a ham fan, try my baked ham recipe. This Kahlua Pineapple Glazed Ham has a juicy pineapple right alongside while it cooks. The surface of the ham has a gorgeous Kahlua glaze. Absolutely incredible...

    Kahlua Pineapple Glazed Ham Recipe
    Kahlua Pineapple Glazed Ham elevates party food for holidays and special celebrations. A tropical spin on a classic spiral ham dinner!
    GET THE RECIPE PIN IT
    A spiral baked ham on white platter with wedges of pineapple and sliced oranges.

    More Pork Recipes

    For something fancier, this Cherry Balsamic Pork Loin takes minutes to prep and is a gorgeous presentation. I have served this holiday meal for New Year's Eve with rave reviews.

    Super popular Pulled Pork (made low and slow in the oven. And you can use the leftovers for these Cuban Pulled Pork Sliders which are perfect for lunch or dinner.

    Slow Cooker Pulled Pork made with pork loin is so juicy. Top with coleslaw, pickle chips, and tangy BBQ sauce all on a golden bun.

    • A sliver carving fork and knife next to a pork loin roast and topped with cherries.
      Cherry Balsamic Pork Loin
    • A white casserole dish with oven roasted pulled pork shredded and ready to eat in tacos or a recipe for dinner.
      Oven Roasted Pulled Pork
    • Three pulled pork sandwiches on Hawaiian buns with pickles, cheese and ham on a cutting board.
      Pulled Pork Sliders
    • Red white check paper lined basked holding a pulled pork sandwich topped with coleslaw.
      Slow Cooker Pulled Pork

    Did you love this recipe? We would love to hear from you! If you make this recipe and love it, give it a 5-star rating ⭐⭐⭐⭐⭐ with a comment. THANK YOU!! Follow Delicious Table with my free newsletter and share this recipe with your friends on Facebook, Pinterest, and Instagram.

    A double smoked ham on a outdoor smoker ready to eat.
    Print

    Twice Smoked Ham With Orange Honey Glaze Recipe

    Twice smoked spiral cut ham made just like a famous smokehouse. This double smoked ham has an amazing orange honey glaze with apple cider!
    Course Dinner & Main Dishes
    Cuisine American
    Keyword Big Green Egg Smoked Ham, double smoked ham, ham glaze, smoked ham, Twice Smoked ham
    Prep Time 15 minutes minutes
    Cook Time 3 hours hours 30 minutes minutes
    Total Time 3 hours hours 45 minutes minutes
    Servings 18
    Calories 686kcal
    Author Lisa Hatfield

    Equipment

    • Grill Basting Brush
    • Microplane Grater
    • Wood Chunks For Smoking
    • Wood Smoker Chips
    • Fire Starter Tumbleweeds
    • Wireless Bluetooth Oven/BBQ/Smoke Meat Thermometer (4 Probe)

    Ingredients

    • 1 large spiral ham smoked and bone in

    Glaze Ingredients

    • ¼ cup melted butter
    • ½ cup brown sugar
    • ¼ cup honey
    • 2 tablespoons Dijon mustard
    • 1 whole orange - zest and juice
    • 2 cups apple cider
    • 1 teaspoon ground cinnamon
    • 1 teaspoon ground cloves

    Instructions

    Heat The Smoker

    • Preheat your smoker (this recipe is not tested on a gas grill) to cook indirect 250-275 degrees, using hardwood lump charcoal and a couple of small chunks of fruitwood like cherry or apple.
    • If using a BGE see notes for more tips and details below.

    Prepare Glaze

    • In a medium saucepan, melt the butter, add the brown sugar, honey, Dijon mustard, orange zest and juice, apple cider, ground cinnamon, and ground cloves. Cook over medium high heat, keep stirring with a whisk just until the glaze comes to a boil. Remove from the heat immediately.
    • If it gets too thick, add a tablespoon or two some warm water or more apple cider to get to a brush-able consistency.

    Let's Get Smoking!

    • Set the ham flat side down on a baking rack on a sturdy pan filled with ½ of water. Set the pan with the rack and ham down on the grill grates. The rack allows the smoke to get all the way around the ham. I used a deep dish round pizza pan, but a shallow low roasting pan will work too.
    • Set up your smoke alarm or wireless probe thermometer if using one into the center of the ham but not touching the bone.
    • Once your temperature reaches 250 degrees, open up the smoker and place the ham inside, close the lid and smoke the ham for 1 hour.
    • Brush on glaze all over the top of the ham at 1 hour and every 30-45 minutes.
    • Smoke the ham for 20 minutes per pound. A 10-pound ham will take about 3.5 hours or until the internal temperature reaches 140 degrees F.
    • To store leftover ham, slice off the ham slices from the bone and use within 3-5 days. Freeze and use within 1-2 months in zip top bags or a foodsaver vacummn sealer.

    Notes

    PRO TIP: The rack allows the smoke to get all the way around the ham. I used a deep dish round pizza pan, but a shallow low roasting pan or cast iron skillet will work too.

    Big Green Egg Tips 

    • Use hardwood lump charcoal with 3 smaller pieces of cherry wood. These are easily available at big box hardware stores.
    • If using a BGE, never use charcoal briquettes or lighter fluid! It will give an off taste to your cook. 
    • Open all the vents all the way at the top and bottom, light the hardwood lump charcoal, and once the heat reaches around 300 degrees, you will set up for a long slow smoke. 
    • Close the bottom vent to just a ⅛" opening, and the daisy wheel almost all the way closed. Each smoker is a bit unique, you probably know yours quite well!

      Variations & Swaps

      Create your own savory glaze the way you like it! Here are a few ideas to mix it up. Then get basting and brushing on the outside of the ham while it slowly smokes...
      • pineapple juice instead of apple cider
      • maple syrup in place of honey
      • orange marmalade in place of orange zest and juice
      • Rootbeer, Coca Cola, or Dr. Pepper in place of apple cider

    What Kind Of Gear Do I Need?

    • a smoker - pellet grill smoker, water smoker "aka bullet", ceramic cooker, upright barrel smoker, or an offset smoker.
    • lump hardwood charcoal - easy to find at any big box hardware store
    • tumbleweed firestarters
    • smaller pieces of fruit wood - cherry wood, apple, or pecan are really nice, and maple, and hickory wood or wood smoker chips - apple, cherry, hickory, etc.
    • sturdy shallow metal pan - I found a foil pan or aluminum pans or a foil pan were not sturdy enough to hold the rack on top.
    • silicone brush and pot for glaze
    • BBQ gloves or silicone mitts
    • wireless smoke thermometer or instant read thermometer
     

    Nutrition

    Calories: 686kcal | Carbohydrates: 13g | Protein: 55g | Fat: 45g | Saturated Fat: 17g | Polyunsaturated Fat: 5g | Monounsaturated Fat: 21g | Trans Fat: 1g | Cholesterol: 163mg | Sodium: 3033mg | Potassium: 763mg | Fiber: 1g | Sugar: 12g | Vitamin A: 81IU | Vitamin C: 1mg | Calcium: 29mg | Iron: 2mg

    Kahlua Pineapple Glazed Ham

    [heart_this] · Mar 31, 2022 · 3 Comments

    A spiral baked ham on white platter with wedges of pineapple and sliced oranges.

    Last Updated February 15th, 2023 at 10:02 am by Lisa

    Kahlua Pineapple Glazed Ham elevates party food for holidays and special celebrations. This one takes a tropical island spin on a classic spiral ham.

    This recipe could start a "new tradition" for Easter dinner, Christmas, holidays, family get-togethers, or even brunch.

    The heavenly glaze is brushed on both the ham and wedges of pineapple. As it bakes, you get gorgeous fruity, candy, caramelized edges...

    Why This Recipe Works

    • Buy a spiral-cut ham! These are easy to find in supermarkets and grocery stores year-round. All are presliced and cooked, so all you do for this recipe is add a glaze and reheat. What could be easier?
    • Hey, you know those little packets that come in the package? Well, they have nothing on this glaze recipe.
    • As you guys know, I love using fresh seasonal ingredients and skipping preservatives and chemicals. So ditch that packet!
    • Remember when Candian Bacon and Pineapple pizza was all the rage? This flavor combination is a favorite by so many people.

    Ingredients

    • 1 8 lb bone-in spiral cut ham
    • 2 pineapples
    • 1 cup Kahlua (rum & coffee liquor)
    • 1 cup brown sugar
    • ½ cup honey
    • 1 whole orange
    • 2 tablespoons Dijon mustard
    • ½ teaspoon ground cinnamon
    • 2 teaspoons fresh grated ginger
    • 1 teaspoon vanilla extract

    How To Make The Pineapple Ham Glaze

    1. Cut one pineapple into chunks, removing the skin and core. Place ⅓ of the pieces in a high-speed blender, and turn on high for about 15-20 seconds. (1 cut pineapple makes approximately 3 cups of juice if you blend all the chunks, or you can keep the leftover pieces for snacks.) The pineapple juice will be thick, and that is fine for this recipe. Set aside, this will go into the glaze.
    2. In a small saucepan, combine 1 cup Kahlua, 1 cup fresh pineapple juice, 1 cup brown sugar, ½ cup honey, 2 tablespoons orange zest (zest the orange first, then juice it), the juice of 1 orange, 2 tablespoons Dijon mustard, ½ teaspoon ½ teaspoons cinnamon, 2 teaspoons grated ginger, and 1 teaspoon vanilla extract.
    3. Bring just to a boil, keep stirring with a whisk, reduce heat, and simmer for 3-5 minutes on low heat. Set aside, off heat to cool. 
    A white bowl with a large flat brush in ham glaze to make a ham recipe.

    How To Make Kahlua Baked Ham

    Cut one pineapple in half, and set aside. This one will bake alongside the ham.

    Preheat the oven to 275 degrees. Place spiral ham in a low roasting pan flat side down uncovered. Place in the oven and bake for 1 hour.

    After 1 hour, pull out of the oven, place the 2 pineapple halves on each side of the ham and brush the ham and pineapple halves with the yummy glaze. 

    Place back in the oven for 1 more hour until the glaze forms a nice crust. Reglaze the ham and pineapples every 20 minutes. You will have some extra glaze let over.

    Depending on the size of your ham, it will bake for 15-20 minutes per pound. An 8lb. ham takes about 2 hours. Use a meat thermometer, it is ready at 140 internal temperature.

    Carve and take the tops off the baked pineapple, cut into smaller portions, serve warm, enjoy!

    What Is Kahlua?


    Kahlua is a coffee-flavored, rum-based liqueur from Mexico. It is typically used in coffee drinks and cocktails. But I thought it would make a spectacular ham glaze, and went to work putting full fresh flavors together for this recipe, and the pineapple works so well with ham.

    How To Pick A Ripe Pineapple?

    First, smell the bottom for sweetness.  This is the first tell-tale sign to determine how sweet and ripe your pineapple will be.  Sugar comes from the bottom of the fruit, where it migrates to the top as it ripens.  The bottom is where it should be most fragrant, so put your nose there (not on the crown).

    If it smells sweet, like pineapple juice, it is ripe.  If you smell nothing, that means there is insufficient sugar and the fruit will not be sweet ( it has been harvested too early).  Pineapples ripen very little after they have been harvested, so you don't want to pick one that is underripe, hoping it will become ripe later. Unfortunately, it won't.

    Look at the pineapple before you buy it, is it all GREEN?

    The greener the color, the earlier they were picked. 

    What you want to look for is a yellow-golden color. As the fruit starts to ripen, starting from the bottom, the higher the yellow rises toward the crown, the more sugar (and sweetness) it will have!  Yellow on the bottom and green on the top will yield inconsistency in sweetness (i.e., some parts are sweet, other parts are not).  Ideally, you want the yellow color to rise all the way to the crown, which means the sugar is distributed evenly through the fruit.

    Use the "Press Test."  A sweet ripe one will yield slightly to pressure.

    Make sure to avoid overripe ones, they usually have reddish-brownish skins and dark dried leaves that crumble when you touch them and have a fermented smell. Pass on that one, it will taste off and be mushy and overripe inside.

    A bone in glazed ham with a whole pineapple cut in half in a roasting pan.

    More Pork & Ham Recipes

    Make a Twice Smoked Spiral Cut Ham just like a smokehouse pit boss. This holiday meal classic has an amazing smoky flavor with an apple cider orange honey glaze!

    Twice Smoked Ham With Orange Honey Glaze Recipe
    Twice smoked spiral cut ham made just like a famous smokehouse. This double smoked ham has an amazing orange honey glaze with apple cider!
    GET THE RECIPE PIN IT
    A double smoked ham on a outdoor smoker ready to eat.

    For something fancier, this Cherry Balsamic Pork Loin takes minutes to prep and is a gorgeous presentation. I have served this holiday meal for New Year's Eve with rave reviews.

    Super popular Pulled Pork (made low and slow in the oven, and use the leftovers for these Cuban Pulled Pork Sliders which are perfect for lunch or dinner.

    Slow Cooker Pulled Pork made with pork loin is so juicy, top with coleslaw, pickle chips, and tangy BBQ sauce all on a golden bun.

    • A sliver carving fork and knife next to a pork loin roast and topped with cherries.
      Cherry Balsamic Pork Loin
    • A white casserole dish with oven roasted pulled pork shredded and ready to eat in tacos or a recipe for dinner.
      Oven Roasted Pulled Pork
    • Three pulled pork sandwiches on Hawaiian buns with pickles, cheese and ham on a cutting board.
      Pulled Pork Sliders
    • Red white check paper lined basked holding a pulled pork sandwich topped with coleslaw.
      Slow Cooker Pulled Pork

    Did you love this recipe? We would love to hear from you! If you make this recipe and love it, give it a 5-star rating ⭐⭐⭐⭐⭐ with a comment. THANK YOU!! Follow Delicious Table with my free newsletter and share this recipe with your friends on Facebook, Pinterest, and Instagram.

    A spiral baked ham on white platter with wedges of pineapple and sliced oranges.
    Print

    Kahlua Pineapple Glazed Ham Recipe

    Kahlua Pineapple Glazed Ham elevates party food for holidays and special celebrations. A tropical spin on a classic spiral ham dinner!
    Course Breakfast & Brunch, Dinner & Main Dishes, Holiday
    Cuisine American
    Keyword baked ham, ham glaze, spiral-cut ham recipe
    Prep Time 20 minutes minutes
    Cook Time 2 hours hours 5 minutes minutes
    Total Time 2 hours hours 25 minutes minutes
    Servings 12 people
    Calories 270kcal
    Author Lisa Hatfield

    Equipment

    • Roasting Pan
    • Mini Basting Brush

    Ingredients

    • 1 8 lb bone-in spiral ham
    • 2 pineapples

    Ham Glaze

    • 1 cup Kahlua (rum & coffee liquor)
    • 1 cup fresh pineapple juice *see below
    • 1 cup brown sugar
    • ½ cup honey
    • 2 tablespoons orange zest
    • 1 whole orange juice
    • 2 tablespoons Dijon mustard
    • ½ teaspoon cinnamon
    • 2 teaspoons fresh grated ginger
    • 1 teaspoon vanilla extract

    Instructions

    Make Ham Glaze

    • Cut one pineapple into chunks, removing the skin and core. Place ⅓ of the pieces in a high-speed blender, and turn on high for about 15-20 seconds. (1 cut pineapple makes approximately 3 cups of juice if you blend all the chunks, or you can keep the leftover pieces for snacks. ) The pineapple juice will be thick, and that is fine for this recipe. Set aside, this will go into the glaze.
    • In a small saucepan, combine 1 cup Kahlua, 1 cup fresh pineapple juice, 1 cup brown sugar, ½ cup honey, 2 tablespoons orange zest (zest the orange first, then juice it), the juice of 1 orange, 2 tablespoons Dijon mustard, ½ teaspoon ½ teaspoons cinnamon, 2 teaspoons grated ginger, and 1 teaspoon vanilla extract.
    • Bring just to a boil, keep stirring with a whisk, reduce heat, and simmer for 3-5 minutes on low heat. Set aside, off heat to cool. 

    Bake The Ham

    • Cut one pineapple in half, and set aside. This one will bake with the ham.
    • Preheat the oven to 275 degrees. Place spiral ham in a low roasting pan flat side down uncovered. Place in the oven and bake for 1 hour.
    • After 1 hour, pull out of the oven, place the 2 pineapple halves on each side and brush the ham and pineapple halves with the yummy glaze. 
    • Place back in the oven for 1 more hour until the glaze forms a nice crust. Reglaze the ham and pineapples every 20 minutes. You will have extra glaze let over.
    • Depending on the size of your ham, it will bake 15-20 minutes per pound. An 8lb. ham takes about 2 hours. Use a meat thermometer, it is ready at 140 internal temperature.
    • Carve and take the tops off the baked pineapple, cut into smaller portions, serve warm, enjoy!

    Nutrition

    Serving: 12g | Calories: 270kcal | Carbohydrates: 62g | Protein: 1g | Fat: 1g | Saturated Fat: 1g | Polyunsaturated Fat: 1g | Monounsaturated Fat: 1g | Cholesterol: 1mg | Sodium: 38mg | Potassium: 229mg | Fiber: 2g | Sugar: 55g | Vitamin A: 95IU | Vitamin C: 76mg | Calcium: 42mg | Iron: 1mg

    Stovetop Grilled Asparagus

    [heart_this] · Mar 23, 2022 · 1 Comment

    A white plate filled with cooked asparagus topped with gremolata garnished with lemon wedges.

    Last Updated July 20th, 2022 at 07:11 am by Lisa

    There are so many recipes on how to cook fresh asparagus, but I found that most cooking techniques don't give great results in flavor, color, and texture.

    This ultimate guide delivers all the tips on how to cook grilled asparagus on the stovetop perfectly every time for tasty crisp tender spears with bright green beautiful color...

    Why This Recipe Works

    • Any heavy skillet will work for this recipe - no fancy equipment required!
    • Boiling, roasting, microwaving, and steaming typically result in overcooked limp and mushy results. Yuck!
    • A Quick easy saute works every time.
    • All done in one pan, there are no ice bath bowls to wash and it's an easy clean-up.
    • This is a delicious low-carb keto-friendly recipe.
    • You keep the crisp snap in every bite.
    • They stay nice and bright green versus other cooking methods, so pretty don't ya think?
    • A simple recipe and easy cooking process done in minutes.
    • Gremolata is certainly optional but makes this healthy side dish spectacular.
    • Other great toppings are a sprinkle of parmesan cheese or fresh lemon juice.
    • Serve cooked spears over a salad either warm or cold.
    • Toss small pieces into cooked pasta dish, one of my favorite ways to use leftover asparagus!

    Stovetop Grilled Asparagus Recipe

    • 1 bunch asparagus (thick stalks prefered)
    • 2 tablespoon coconut oil (avocado oil, extra-virgin olive oil, or ghee)
    1. Prepare the asparagus, by snapping off the bottom tough ends of the spears and discard. Simply bend the spears, and where they break will remove the tough woody ends of the asparagus. Some people use a vegetable peeler on the lower bottom inch, but that takes too much time.
    2. Using a cast-iron pan, large skillet, or cast iron grill pan, add 1 tablespoon of oil to the hot pan, keep the heat on medium high heat.
    3. Place asparagus in a single layer and saute for 4 minutes, until they are bright green. Cook time of no more than 4-5 minutes max is needed!
    4. Serve on a warm serving platter with toppings like gremolata or good grated parmesan cheese.

    Cooking Oils like avocado oil have the highest smoke point and perform great for searing. Coconut is my personal favorite, but if you are not a fan of anything coconut go with avocado or olive oil. Olive oil has a bit of a lower smoke point but will work just fine.

    Smoke Point is simply the temperature where the oil starts smoking and the cooking oil no longer shimmers in the pan. It is also called the burning point and can happen in low heat of 325 F to very high 520 F.

    How To Select Asparagus

    You will often find asparagus in grocery stores wrapped with rubber bands standing upright in an inch of water on display. The grocers do this to keep the fresh spears hydrated.

    BUYING TIPS: Stalks should be plump and green, pick a fresh bundle with a firm touch and compact tips. The tender tips should be tightly closed.

    There can be thin stalks or thicker spears depending on the time of year and availability.

    Thin asparagus has slightly more concentrated fiber. They can be a little tougher and don't do well under harsh heat.

    Thick spears will hold up better for a pan saute grilling method because they will stand up to the intense dry heat that would quickly shrivel skinnier thin spears.

    STORAGE TIP: Asparagus will keep for up to seven days in the refrigerator wrapped in a wet paper towel. Serve promptly for the best flavor.

    Fresh bright beautiful asparagus in a pile ready to use in a recipe.

    Ways To Eat Asparagus

    Asparagus is a wonderful side to any main dish like grilled steaks or salmon and can be served cold with hollandaise sauce.

    Slice into small pieces, and mix in a green salad or toss in a bean or pasta salad.

    SERVING TIP: Sprinkle with good sea salt, fresh cracked black pepper, a squeeze of lemon juice or lemon zest, and a good grate of parmesan cheese.

    Top Asparagus Cooking Tips

    1. Use a cast-iron pan, large skillet, or grill pan for best results.
    2. Saute on medium-high heat.
    3. Saute with coconut oil, ghee, avocado, or a high smoke point oil.
    4. Snap off of tough ends of asparagus before cooking.
    5. Saute them fast in a grilling or frying pan , and no more than 4-5 minutes in a hot pan.
    6. You will know they are done when they are bright green, snap off a piece and make sure it's still a little crisp then, pull them from the hot pan.

    Cooking Methods Pros & Cons

    PRO TIP: After cooking asparagus with every cooking method in different ways, most result in shriveled, mushy, or tough overcooked results. I found that the best way is to saute in a pan on the stovetop!

    1. Blanching or Boiling Asparagus in a large pot of water will easily overcook and discolor green asparagus. Plus you have to chill in a bowl of ice water-resulting in more dishes to wash.
    2. Outdoor Grilled Asparagus has some flavor advantages, but it can fall through the grill grates on an outdoor grill, burn on a charcoal or gas grill, or get overcooked very easily on a grill rack with flames right underneath. Sometimes a grill basket or grill tray works, but I found it is difficult. Thicker asparagus can work but it tends to be a challenge on a hot grill.
    3. Microwaved Asparagus cooks in a way similar to steaming and typically overdoes it resulting in a limp veggie with greyish color.
    4. Oven Roasting Asparagus on a baking sheet at a high temperature tends to burn and shrivel the asparagus not to mention dramatically changes the color to an unappealing dark green.
    5. Asparagus Foil Packets are another option, but how can you see what is happening in that packet? I also prefer not cook in foil, and this would be similar to a roasted asparagus recipe where they could over cook easily.
    6. Steamed Asparagus can be done in a vegetable steamer basket over boiling water, the problem with this method is you have to cover the pot and can't see how it's cooking, I find it turns it limp and greatly discolors them to a grey-green. Plus who want to boil water and clean a pot and strainer?

    Asparagus FAQ

    Can you revive wilted asparagus?


    Yes! Simply fill a large jar with a few ice cubes and cool water. Slice off the bottom ½" of asparagus stems with a knife and place them into the water for a couple of hours.

    Pop a small plastic bag over the top keep chilled in the fridge until ready to use in your recipe.

    Is asparagus keto?


    Yes! Asparagus is considered low carb and keto-friendly.

    What asparagus colors are available?


    Color can be green, purple, or white, depending on the variety and availability.

    Asparagus Recipe Toppings

    Herb Butter (aka compound butter) is easy and great on vegetables, hot pasta, sizzling steak, warm baguettes, or spread on dinner rolls and watch as the butter melts. Use any variety of fresh herbs to create your own version.

    Serve with either remoulade sauce or hollandaise sauce.

    Gremolata is a flavor-packed condiment topping from Italy for vegetables, pasta dishes, fish, meat, salads, and classically used on osso buco.

    And a classic combination is compound butter! Two recipes to try are this Herb Butter and Lemon-Dill Butter.

    • Homemade herb butter wrapped in parchment paper on a cutting board with fresh herbs.
      How To Make Herb Butter
    • A vintage spoon scooping up remoulade sauce to use on a recipe.
      Remoulade Sauce
    • A blue vintage bowl filled with chopped Gremolata with a silver spoon.
      Italian Gremolata Condiment + 15 Uses!
    • Small brown round cutting board with slices of lemon dill butter garnished with fresh lemon and dill.
      Lemon-Dill Butter

    More Vegetable Sides

    These are some of the most favorite vegetables on Delicious Table. Grilled Corn is my go-to recipe! So easy and perfect for summer when you don't want to heat up the kitchen. Fresh Cole Slaw with no mayo comes together in minutes Vegetable Roasting is easy to get on the dinner table. with this mix of veggies all on one sheet pan. Mexican Street Corn will delight people at your next cookout or BBQ party.

    • Ears of grilled corn on a white platter seasoned with melted butter on top.
      Grilled Corn On The Cob
    • A clear glass bowl filled with tri color cole slaw and wooden tongs stuck in the slaw.
      Coleslaw Recipe (No Mayo)
    • A square white dish filled with colorful roasted vegetables and topped with squares of butter garnished with herbs.
      Vegetable Roasting
    • Several grilled elotes Mexican street corn on the cob sprinkled with Cotija cheese on a platter.
      Mexican Street Corn (Authentic Elotes)

    Did you love this recipe? We would love to hear from you! If you make this recipe and love it, give it a 5-star rating ⭐⭐⭐⭐⭐ with a comment. THANK YOU!! Follow Delicious Table with my free newsletter and share this recipe with your friends on Facebook, Pinterest, and Instagram.

    A white plate filled with cooked asparagus topped with gremolata garnished with lemon wedges.
    Print

    Stovetop Asparagus Recipe

    How to cook asparagus on the stovetop grilled perfectly every time for tasty crisp tender spears with bright green beautiful color. An easy low-carb keto healthy side dish.
    Course Side Dishes & Vegetables
    Cuisine American, Italian
    Keyword asparagus recipe, how to cook asparagus, stovetop asparagus
    Prep Time 1 minute minute
    Cook Time 4 minutes minutes
    Total Time 5 minutes minutes
    Servings 8
    Calories 26kcal
    Author Lisa Hatfield

    Equipment

    • Large Cast Iron Skillet

    Ingredients

    • 1 bunch asparagus
    • 1 tablespoon coconut oil or avocado oil, ghee, or extra virgin olive oil
    US Customary - Metric

    Instructions

    • Prepare the asparagus, by snapping off the bottom tough ends of the spears and discard. Simply bend the spears, and where they break will remove the tough woody ends of the asparagus. Some people use a vegetable peeler on the lower bottom inch, but that takes too much time.
    • Using a cast-iron pan, large skillet, or cast iron grill pan, add 1 tablespoon of oil to the hot pan, keep the heat on medium high heat.
    • Place asparagus in a single layer and saute for 4 minutes, until they are bright green. Cook time of no more than 4-5 minutes max is needed!
    • Serve on a warm serving platter with toppings like gremolata or good grated parmesan cheese.

    Video

    Notes

    Top Asparagus Cooking Tips

    1. Use a cast-iron pan, large skillet, or grill pan for best results.
    2. Saute on medium-high heat.
    3. Saute with coconut oil, ghee, avocado, or a high smoke point oil.
    4. Snap off of tough ends of asparagus before cooking.
    5. Saute them fast in a grilling or frying pan, and no more than 4-5 minutes in a hot pan.
    6. You will know they are done when they are bright green, snap off a piece and make sure it's still a little crisp then, pull them from the hot pan.

    Asparagus Toppings

    Herb Butter (aka compound butter) is easy and great on vegetables, hot pasta, sizzling steak, warm baguettes, or spread on dinner rolls and watch as the butter melts. Use any variety of fresh herbs to create your own version.
    Serve with either remoulade sauce or hollandaise sauce.
    Gremolata is a flavor-packed condiment topping from Italy for vegetables, pasta dishes, fish, meat, salads, and classically used on osso buco.
    And a classic combination is compound butter! Two recipes to try are this Herb Butter and Lemon-Dill Butter.

    Nutrition

    Calories: 26kcal | Carbohydrates: 2g | Protein: 1g | Fat: 2g | Saturated Fat: 1g | Polyunsaturated Fat: 1g | Monounsaturated Fat: 1g | Sodium: 147mg | Potassium: 116mg | Fiber: 1g | Sugar: 1g | Vitamin A: 426IU | Vitamin C: 3mg | Calcium: 14mg | Iron: 1mg

    Easter Deviled Eggs

    [heart_this] · Mar 20, 2022 · 3 Comments

    Pretty Easter deviled eggs with green filling and decorated with fresh herbs and edible flowers.

    Last Updated July 31st, 2024 at 08:30 am by Lisa

    Make the Best Deviled Eggs Recipe decorated to look like little spring Easter baskets complete with grass and flowers. This Easter food idea is super easy to make, and I promise these Easter deviled eggs will be quite the talk of your party.

    These will be the perfect appetizer for an Easter dinner buffet, easy brunch, a baby shower, or bridal celebration...

    How To Make Easter Deviled Eggs

    This recipe is just a bit different from the classic deviled eggs I have made so many times. It does not have mustard but has fresh avocado to get the pretty color of grass!

    • 6 boiled eggs
    • 1 large avocado ripe
    • 2 tablespoons mayonnaise
    • 1 tablespoon fresh lemon juice
    • ½ teaspoon sea salt
    • 1 teaspoon finely chopped fresh chives

    garnish decoration

    • 12 long parsley stems garnish
    • tiny sprigs fresh herbs - thyme, parsley, carrot tops garnish
    • tiny flowers or petals edible flowers (research to be sure they are safe)
    Steamed Hard Boiled Eggs Recipe
    Steamed hard boiled eggs cook perfectly every time with no green ring. So easy to peel, the eggshells miraculously slip right off in minutes!
    GET THE RECIPE PIN IT
    6 perfectly hard boiled eggs with a cracked half of an egg shelf on top.
    1. Make hard-boiled eggs. Use a Boil, Instant Pot, or Steam boil method for the eggs.
    2. Peel egg shells and slice the boiled eggs in half. PRO TIP: Instead of scooping out the yolk with a spoon (which can tear the egg) gently push from the back of the egg and pop the yolk out!
    3. In a bowl, add the yolks, and break up finely with a fork, then add the avocado, mayonnaise, lemon juice, sea salt, and chives.
    4. Mix until well combined with a hand mixer, or by hand (it just takes longer!)
    5. Load into a large zip-lock bag or piping bag fitted with a large star tip. PRO TIP: Use a large Mason jar to hold the pastry bag while you fill it with a spatula.
    6. Place eggs on a dish. Pipe the filling into the eggshells.

    Garnish with long parsley stems for basket handles, a few tiny sprigs of herbs, microgreens, or edible flowers. Serve on a tray garnished with more flowers and herbs.

    PRO TIP: Bend or crack the parsley stems to make them stay in the deviled eggs as little basket handles.

    A graphic showing boiled eggs and how to remove yolk from cooked eggs.

    Deviled Egg Make-Ahead Tips

    1. Boil the eggs, peel eggs, slice in half, and keep them covered on a tray.
    2. Fill your ziptop bag with a piping tip and the egg filling.
    3. Cut your tiny herb and flower pieces, keep them refrigerated, and then assemble in minutes right before your party on a beautiful white tray and garnish.
    5 Steps to make Easter deviled eggs with garden herbs and edible flowers.

    A Word On Edible Flowers

    Edible flowers are just that-edible, but not all flowers can be eaten or are safe. The best thing to do is order them online, but there are other ways to get them.

    Where To Order Edible Flowers

    • Order Edible flowers through the produce department of your local grocery store, gourmet markets, ordered online, or through Costco.
    • You can grow edible flowers in your garden, just be sure that they are organic, pesticide-free, and safe to eat as an edible flower.
    • Organic edible dried flowers are an option, look beautiful, and are available online.

    Decorating Easter Deviled Eggs

    I had so much fun decorating these, this is what I used.

    • parsley leaves
    • green carrot tops
    • thyme
    • strawberry flowers from my garden (that survived through Winter!)
    • mini roses
    • dianthus petals

    Top Edible Flower Tips

    Common Edible Flower List

    Arugula, Bachelor's Buttons, Basil Blossom, Borage, Buzz Button, Calendula, Carnation, Camelia, Chive, Blossom, Chrysanthemum, Dahlia, Daylily, Garlic Blossom, Hibiscus, Hollyhock, Lavender, Lilac, Marigold, Nasturtium, Orchid, Pansy, Peony, Rose, Snapdragon, Squash Blossom, Violet, and Viola.

    • Only buy edible flowers marked edible flowers online. Not all flowers are safe.
    • Please do your research, make sure your flowers are safe to eat. If they a known safe edible flower, they are okay to eat!
    • If you’re unsure, don't experiment.
    • Avoid flowers from a florist.
    • Wash and use clean flowers thoroughly before using them in recipes or eating them, even if you grow them yourself or buy them. Avoid fertilizers, contaminated water, etc.

    How To Transport Deviled Eggs To A Party

    The best way to make and store your deviled Easter eggs is to place them in plastic deviled egg boxes. There are trays inside with little cups that keep the eggs stable while carrying and driving in the car.

    They are easily available online and make it super easy to pack up and are the perfect way to take your pretty eggs to a party for a special occasion...

    A plastic box designed to carry deviled eggs filled with Easter deviled eggs to take to a party.

    How To Dye Deviled Eggs?

    We have all dyed eggs at Eastertime, but then I saw people color their deviled egg halves I thought it was a great way to make a festive twist!

    That is a really cute idea if you have the time to dye eggs once they are peeled and the yolk is removed. Here is how you make them!

    1. Use regular grocery store food coloring, or you can use drops of neon gel food coloring, or natural food dyes like beet juice.
    2. Bright fun colors that would be cute are yellow, blue, pink, green orange, and purple.  
    3. Make hard boil eggs and peel them, slice in half pop out the yolks.
    4. Set up a glass for each color of easter egg dye.
    5. Add ½ cup cold water in each cup with 5-10 drops of food coloring.
    6. Add 1 tablespoon white vinegar to the colored water and stir.
    7. Place egg whites into the cup.
    8. The desired color will take at different times, some white shells need to soak longer to get vibrant colors.
    9. Remove colorful egg white halves to a wire rack lined with paper towels on a sheet pan.
    10. Dry completely for an hour, then fill the colored deviled eggs and decorate.
    What are classic deviled egg ingredients?

    boiled eggs
    mayonnaise
    mustard
    paprika
    salt and pepper


    The egg yolks are whipped or mixed with mayonnaise (or sour creme, creme fraiche, or cream cheese), mustard (yellow or Dijon), paprika, salt, and pepper, they are replaced inside the egg white halves and served are cold.

    Many different flavorings and toppings can be added to deviled eggs with endless possibilities.

    History of Deviled Eggs


    Deviled eggs date back to the Roman Empire, and got popular in the 1940s. Everyone loves them! Eggs are hard-boiled, then filled with whipped yolks and other tasty ingredients.

    My Other Deviled Egg Recipes

    Thanksgiving Deviled Eggs are an easy appetizer party food idea. Gorgeous Fall color, garnished with sage and thyme to celebrate the season.

    Need a Make-Ahead easy, festive, Holiday Appetizer? Serve these Christmas Deviled Eggs with bubbly or drinks at your holiday party, they are a hit every time!

    • A slice of rustic tree wood with Thanksgiving deviled eggs garnished with fresh herbs.
      Thanksgiving Appetizer Deviled Eggs
    • White platter with Christmas Deviled Eggs garnished with rosemary and pomegranate seeds.
      Christmas Deviled Eggs

    Did you love this recipe? We would love to hear from you! If you make this recipe and love it, give it a 5-star rating ⭐⭐⭐⭐⭐ with a comment. THANK YOU!! Follow Delicious Table with my free newsletter and share this recipe with your friends on Facebook, Pinterest, and Instagram.

    Pretty Easter deviled eggs with green filling and decorated with fresh herbs and edible flowers.
    Print

    Easter Deviled Eggs Recipe

    Easter deviled eggs are the perfect appetizer and Easter food idea. Decorated like little spring baskets complete with grass and flowers!
    Course Appetizer
    Cuisine American
    Keyword appetizer recipe, deviled eggs, Easter deviled eggs, holidays
    Prep Time 30 minutes minutes
    Cook Time 20 minutes minutes
    Servings 12
    Calories 85kcal
    Author Lisa Hatfield

    Equipment

    • Deviled Egg Carrier
    • Cake Piping Tips and Pastry Bags

    Ingredients

    deviled eggs

    • 6 boiled eggs
    • 1 large avocado ripe
    • 2 tablespoons mayonnaise
    • 1 tablespoon fresh lemon juice
    • ½ teaspoon sea salt
    • 1 teaspoon fresh finely chopped chives

    garnish decoration

    • 12 long parsley stems garnish
    • tiny sprigs fresh herbs - thyme, parsley, carrot tops garnish
    • tiny flower s or petals edible flowers (research to be sure they are safe) garnish

    Instructions

    • Boil, Instant Pot, or Steam boil method the eggs. Peel and slice the boiled eggs in half.
    • PRO TIP: Instead of scooping out the yolk with a spoon (which can tear the egg) gently push from the back of the egg and pop the yolk out!
    • In a bowl, add the yolks, and break up with a fork or spatula into fine crumbs (or they get caught in the tip of the piping bag), then add the fresh avocado, mayonnaise, lemon juice, sea salt, chives.
    • Mix until well combined with a hand mixer, or by hand (it just takes longer!) and load into a large zip log back fitted with a large star tip. PRO TIP: Make sure to break up all the egg yolks or they will get stuck in the piping tip. And use a large Mason jar to hold the piping bag while you fill it with a spatula.
    • Pipe the filling into the boiled eggshells, and garnish with long parsley stems for basket handles, a few tiny sprigs of herbs, microgreens, or edible flowers. Serve on a tray garnished with flowers and herbs. PRO TIP: Bend or crack the parsley stems to make them stay.

    Video

    Notes

    Egg Filling

    • Instead of scooping out the yolk with a spoon (which can tear the egg) gently push from the back of the egg and pop the yolk out!
    • Also, you can certainly mix the deviled egg filling with a spoon or whisk, but a hand mixer gives you a creamy fluffy texture that pipes beautifully.
    • Use a large gallon zip-top bag and large star tip to pipe the filling into the egg white shells, it looks gorgeous and professional.
    • Use a large Mason jar and drop your piping tip into a pastry bag or zip-top bag and fill with your deviled egg filling mixture. 

    Make-Ahead Tip

    Boil the eggs, slice in half, and keep them covered on a tray. Fill your ziptop bag with a piping tip, and have your tiny herb and flower pieces ready to go the day of your party, then assemble in minutes right before your guests arrive!

    Edible Flowers

    Where To Order Edible Flowers

    • Edible flowers can be ordered through the produce department of your local grocery store, gourmet markets, ordered online, or through Costco.
    • You can grow edible flowers in your garden, just be sure that they are organic, pesticide-free, and safe to eat as an edible flower.
    • Organic edible dried flowers are an option, look beautiful, and are available online.
    For these cute deviled eggs for Easter, I used
    • parsley leaves
    • green carrot tops
    • thyme
    • strawberry flowers from my garden (that somehow survived through Winter!)
    • mini roses
    • dianthus petals

    Nutrition

    Calories: 85kcal | Carbohydrates: 2g | Protein: 4g | Fat: 7g | Saturated Fat: 2g | Trans Fat: 1g | Cholesterol: 95mg | Sodium: 159mg | Potassium: 119mg | Fiber: 1g | Sugar: 1g | Vitamin A: 164IU | Vitamin C: 2mg | Calcium: 17mg | Iron: 1mg

    Cake Mix Cookies

    [heart_this] · Mar 15, 2022 · 1 Comment

    A white plate filled with freshly baked cake mix cookies with pastel m&m candies.

    Last Updated April 25th, 2024 at 12:47 pm by Lisa

    Cake Mix Cookies are an easy recipe baked in 11-minutes and just 4-ingredients. You can mix in candies, sprinkles, or chocolate chips.

    What is so fun about these gooey butter cookies is that any boxed cake mix works! I used vanilla in this recipe, but any other flavor you have or buy will work just fine. These pastel m&ms are so pretty tucked into these chewy cookies...

    The best part of a basic cake mix cookie recipe is to take a simple boxed cake mix you have on hand and bake the easiest cookies with just 4 simple ingredients.

    In other words, fluffy cookies can be made in minutes for last-minute bake sales, birthday parties, or baby showers.

    There are so many different flavors and colors to create, and endless flavor combination options.

    Cake Mix Cookies Recipe

    You Need

    • 15.25 box vanilla cake mix
    • ½ cup melted butter or swap in ½ cup oil (Canola Oil, or Vegetable Oil)
    • 2 large eggs
    • ½ cup M&Ms
    • Optional Mix Ins: chocolate chips, sprinkles, coconut, nuts etc.

    Let's Bake!

    1. Preheat oven to 350 degrees. Line large cookie sheet with parchment paper.
    2. In a large bowl, add the boxed mix, melted butter, and eggs. Mix well to combine. The dough will be very sticky!
    3. Scoop using a 2” cookie scoop onto baking sheet, or use 2 tablespoons roll into little balls and drop.
    4. Bake for 11-12 minutes, remove from oven, and press in M&Ms into each cookie, and let cool on counter. You can mix the M&Ms into the cookie dough, I wanted them on top and to not be melted and stay pretty!
    5. Cookies are good up to a couple days, store in an airtight container.

    Top Baking Tips

    1. Line a large baking sheet with parchment paper, it makes clean up so easy AND FAST!
    2. Scoop cookie dough into 2" portions about 3 inches apart. Spring-loaded scoops are one of my favorite kitchen gadgets, you can use also two large spoons.

    Basic Cake Mix Cookie Recipe

    There are so many cake mixes on the market. Brands like Betty Crocker and Duncans Hines offer endless options in the baking aisle. Most of the time I have one on hand to use up, and always keep baking chips and chocolate morsels in the pantry. And of course tons of sprinkles!

    PRO TIP: Cake mix recipes are simple. For the dry ingredients, you need any kind of boxed cak (one box dry cake mix), and for the wet ingredients, it will include 2 eggs and either butter or oil but not both!

    • Favorite Boxed Cake Flavor (your choice)
    • 2 Large Eggs
    • ½ cup Melted Butter, or substitute ½ cup oil (Canola Oil, or Vegetable Oil)
    • chocolate chips, crushed candy, powdered sugar or sprinkles etc

    Popular Cake Mix Cookie Recipes

    Try one of these different flavor combos, these are a great way to get kids cooking in the kitchen...

    • Strawberry Cake: strawberry boxed mix + white chocolate chips + powdered sugar
    • Reeses: chocolate mix + peanut butter chocolate chips
    • Birthday Cake: party rainbow chip white cake + white chocolate chips + rainbow sprinkles
    • Smores: milk chocolate cake + mallow bits + graham crackers + chocolate bars
    • Peppermint Crunch: dark chocolate cake + Andes peppermint crunch
    • Lemonade: lemon + white chocolate chips + powder sugar
    • Pecan: butter pecan + heath bar baking chips + pecans
    • Red Velvet: box of red velvet mix + white chocolate chips
    • Butterfinger Cookies: butter recipe yellow cake + butterfinger bits
    • Snickerdoodles: yellow + cinnamon + sugar
    • Mint Chocolate Chip: vanilla + cream de menthe + semi sweet chocolate
    • Nestle Crunch: chocolate + Nestle candy bar pieces

    A Word About Mix-Ins

    I pressed the m&ms into the cookies right out of the oven. You can certainly mix them in with the cookie dough and bake.

    They will crack a tiny bit when you press them into the hot cookies, but won't totally melt, and they look so pretty!

    Other different mix-ins to add...

    • milk chocolate chips
    • white chocolate chips
    • add food color drops to cookie dough
    • sprinkles and sparkling sugar
    • butterscotch, heath or mint chocolate
    • dark or milk chocolate pieces
    • nuts favorite
    • chopped up mini candy bars
    • crushed peppermint candy canes
    • peanut butter chips
    • mini marshmallows
    • Hershey kisses different flavors
    • sweetened coconut
    • dried fruit-pineapple, cranberries, blueberries
    Why are cake mix cookies flat?


    Cake Mix Cookies spread and become flat due to the soft or melted butter or oil in the cookie recipe. Many people prefer this chewy style of cookie.

    Are cake mix cookies soft?


    Yes, Cake Mix Cookies are soft and chewy and will spread out, especially if the recipe calls for soft or melted butter.

    More Cookie Recipes

    Who loves the holiday baking and homemade cookies as much as I do? Put these Christmas cookies out for Santa, a Peppermint Chocolate Chip Cookies sure to make him ho ho ho. Or bake up some Valentine's Day Palmiers for your sweetie on Valentine’s day!

    Bake up these Classic Palmiers with their crisp delicate crunch, Feeling lucky? Make these no-bake Lucky Green Oreos on St. Patrick's Day. Take these Patriotic Sugar Cookies to a July 4th fireworks show, or enjoy S'more Cookies with the family.

    And if you are in search of Easter Desserts, take a look at all the sweet treats I have whipped up for you! Lots of ideas including adorable Coconut Macaroons with chocolate bird eggs nestled inside.

    • A white plate filled with July 4th red white and blue cookies with icing and star sprinkles.
      Patriotic July 4th M&M Cookies
    • Easter Dessert recipes showing bright colored bunny cupcakes and Easter bunny cakes and desserts.
      Easter Dessert Recipes
    • A white rectangle plate filled with chocolate chip peppermint cookies with a small Santa nearby.
      Chocolate Chip Christmas Cookies
    • An overhead view of fresh baked and decorated Easter dessert coconut macaroon cookies.
      Easter Coconut Macaroons
    • A collage of Christmas cookies decorated for Santa including one with a kids wish list on a mug of milk.
      Santas Cookies
    • A square white plate with green oreos decorated with shamrock sprinkles.
      Lucky Green Oreos
    • A white plate with heart shaped colorful Valentine cookies.
      Valentine Heart Shaped Cookies
    • A pile of pineapple shaped peppermint macadamia nut shortbread cookies.
      Christmas Shortbread Cookies

    Did you love this recipe? We would love to hear from you! If you make this recipe and love it, give it a 5-star rating ⭐⭐⭐⭐⭐ with a comment. THANK YOU!! Follow Delicious Table with my free newsletter and share this recipe with your friends on Facebook, Pinterest, and Instagram.

    A white plate filled with freshly baked cake mix cookies with pastel m&m candies.
    Print

    Easy Cake Mix Cookies

    Cake Mix Cookies are an easy cookie recipe baked in 11 minutes and with just 4 ingredients. Top with candies, sprinkles, or chocolate chips!
    Course Dessert
    Cuisine American
    Keyword cake mix cookies, cookie recipe, easy cookies
    Prep Time 5 minutes minutes
    Cook Time 11 minutes minutes
    Total Time 16 minutes minutes
    Servings 15
    Calories 167kcal
    Author Lisa Hatfield

    Equipment

    • Spring Loaded Cookie Scoops (3 Sizes)
    • Large Metal Sheet Pan
    • Parchment Paper Sheets

    Ingredients

    • 15.25 box vanilla cake mix
    • ½ cup melted butter or swap in ½ cup oil (Canola Oil, or Vegetable Oil)
    • 2 large eggs
    • ½ cup M&Ms
    • Optional Mix Ins chocolate chips, sprinkles, coconut, nuts

    Instructions

    • Preheat oven to 350 degrees. Line large cookie sheet with parchment paper.
    • In a large mixing bowl, add the boxed mix, melted butter, and eggs. Mix well to combine with a wooden spoon or spatula. The dough will be very sticky!
    • Scoop using a 2” cookie scoop onto baking sheet, or use 2 tablespoons roll into balls and drop.
    • Bake for 11-12 minutes, remove from oven, and press in M&Ms into each cookie, and let cool on counter. You can mix the M&Ms into the cookie dough, I wanted them on top and to not be melted and stay pretty!
    • Cookies are good up to a couple days, store in an airtight container.

    Video

    Notes

    Mix-In Ideas

    I pressed the m&ms into the cookies right out of the oven. You an mix them in with the cookie dough, I was attempting to keep them from melting. They will crack a tiny bit, and they look so pretty on top of each cookie!
    • milk chocolate chips
    • white chocolate chips
    • add food color drops to cookie dough
    • sprinkles and sparkling sugar
    • butterscotch, heath or mint chocolate
    • dark or milk chocolate pieces
    • nuts favorite
    • chopped up mini candy bars
    • crushed peppermint candy canes
    • peanut butter chips
    • mini marshmallows
    • Hershey kisses different flavors
    • sweetened coconut
    • dried fruit-pineapple, cranberries, blueberries

    Nutrition

    Serving: 2g | Calories: 167kcal | Carbohydrates: 23g | Protein: 3g | Fat: 7g | Saturated Fat: 2g | Trans Fat: 1g | Cholesterol: 24mg | Sodium: 381mg | Potassium: 55mg | Fiber: 1g | Sugar: 8g | Vitamin A: 49IU | Vitamin C: 1mg | Calcium: 63mg | Iron: 1mg

    Peach Cheesecake Pie (No-Bake)

    [heart_this] · Mar 14, 2022 · 3 Comments

    A slice of peach pie on a white plate with a silver fork on a red white check tablecloth.

    Last Updated May 21st, 2023 at 11:58 pm by Lisa

    Peach Cheesecake Pie is a 30-minute no-bake easy recipe with a crisp graham cracker crust, sweet cream cheese filling, and juicy summer peaches!

    Made in a matter of minutes, this 5 ingredient dessert idea is a refreshing recipe for family dinner, to take to a weekend potluck or cookout party...

    Of course, we loved that Mom always served this peach pie with a can of whip cream on the table, I mean that never led to any trouble with a bunch of kids around! 😜

    This simple recipe was my Mom's, which she always made in the summertime, and probably for many good reasons. Summer desserts need to have a few special things going for them...

    • Start with simple ingredients for an easy pie.
    • No baking or heating the kitchen.
    • It doesn't use eggs and there is no fuss.
    • It is simply whipped with a hand mixer!
    • Our favorite recipes don't take much time, this one is 30 minutes.
    • Buy or make a graham cracker crust, your choice.
    • Cool or cold desserts are the best when it's hot!
    • Use fun, bright, and happy summer fruit for delicious desserts.

    5 Ingredient No Bake Cheesecake Recipe

    • 1 graham cracker crust store-bought or homemade
    • 2 - 8 oz cream cheese, softened room temperature cream cheese
    • 1 cup powdered sugar (confectioners' sugar)
    • 4-5 large ripe peaches yellow peaches
    • ¼ cup honey
    • optional whip cream or cool whip

    Pull both blocks of cream cheese out of the fridge, and place them on the counter. You will want them at room temperature for this recipe.

    You can certainly buy your favorite store brand graham cracker crust, but if you want to make your own crust, it's soooo good (and easy)!

    Also, a great way to use up all those graham crackers from S'mores!

    Homemade Graham Cracker Pie Crust

    • 1 ½ cups crushed graham crackers about 2 individual packages of graham crackers (3 come in a box)
    • ⅓ cup white granulated sugar
    • 6 tablespoons melted butter
    1. Crush 2 packages graham crackers in sealed a zip-top bag using a rolling pin or pulse in a food processor into fine crumbs.
    2. In a medium bowl, add the graham cracker crumbs, ⅓ cup granulated sugar, and 6 tablespoons melted butter, mix well. Place crumb mixture into a 9-inch pie plate. Use a small measuring cup to smooth and press the crust evenly around and up the sides of a 9-inch pie dish. Chill for 30 minutes to get it nice and firm while you make the filling.

    Mix The Creamy Cheesecake Filling

    1. In an electric mixer on medium-high speed, whip the softened cream cheese and 1 cup powder sugar for about 3 minutes until it is a fluffy texture. Scrape down the sides of the bowl. You can also make this in the bowl of a stand mixer with a whisk or paddle attachment.
    2. Spread the cheesecake filling into the prepared chilled graham cracker crust using a rubber spatula. Even out to edges using a mini spatula. Chill while you slice the fruit.
    3. Slice each peach into 16 thin slices. Cut each peach in half, remove the pit and slice each half into 8 slices. Arrange peach slices into a pretty pattern spiral in the pie dish. Start in the center, lay the slices going out in a spiral ending at the edge of the dish.
    4. Brush honey onto peaches all over the entire cheesecake using a small brush.
    5. You can serve it right away, but it will set up in the fridge in about an hour so it slices neater. It's best to eat the same day with lots of whip cream or cool whip. A chilled cheesecake is easier to slice with a sharp knife, then lift each slice of cheesecake with a pie server.
    What is a no bake cheesecake pie?


    Well, classic cheesecake is absolutely amazing, and who doesn't adore the Cheesecake factory just for that heavenly bite after dinner?

    But traditional cheesecake takes a lot of time to bake in a springform pan (and not crack it), wait for it to cool on a wire rack, and fuss over oven temperature and a water bath on a baking sheet. When you don't have time or want to heat your kitchen with a baked cheesecake, whip up a no baking pie in minutes!

    Cream cheese pies are made quickly in a graham cracker or cookie crust with a creamy filling and no baking required!

    Pie Crust Flavor Variations & Swaps

    • Pulse whole cookies like chocolate wafer cookies, oreo cookies and make an oreo crust.
    • You can also swap in unsalted butter in the cookie crust.
    • Make your own whipped cream with very cold heavy cream, chill a separate bowl and beaters, and beat heavy whipping cream with sugar until stiff peaks form.
    • Instead of peaches make a no bake lemon cheesecake pie, add ¼ cup lemon juice into the filling. Top with candied lemon and lemon zest.
    • Make a fall version of pecan pie, and use candied pecans on top!
    • Mix chopped fresh fruit into the creamy cheesecake filling.
    • Make some mini cheesecakes in a muffin pan or small bundt pans.
    • Top with chocolate chips or chopped candy like heath bars or snickers!
    • Try fresh strawberries with a strawberry glaze of jam or jelly.
    • Use fresh berries like blueberries or raspberries, brush on honey glaze.
    • Use some cherry pie filling for an easy twist.
    • Drizzle chocolate and homemade caramel sauce and put a cherry on top.

    More Easy No-Bake Summer Desserts

    S'more Cookie Dough Truffles are an easy no bake dessert candy that tastes like campfire s'mores! Nut Goodie Bar Candy is an addictively sweet chocolate peanut butter candy bar famous in Midwest USA. An easy no-bake candy served right from the freezer.

    Frozen Bananas are a healthy treat dipped in dark chocolate and rolled in nuts and dried fruit. A perfect dessert for hot summer days!

    Ice Cream Cake this frozen dessert has an incredible red velvet Oreo cookie crust, layers of ice cream, pound cake, caramel, chocolate sauce, whip cream, and fun sprinkles. Great for special occasions like birthdays and graduation!

    • A lady holding a s'more cookie dough truffle cut open with mini marshmallows inside.
      S'more Cookie Dough Truffles
    • Nut Goodie Bar Candy in mini white paper cups.
      Nut Goodie Bar Candy
    • A small aluminum sheet pan with brown paper and 5 frozen bananas chocolate dipped and coated in nuts and dried fruit.
      Frozen Chocolate Covered Bananas
    • An ice cream cake with a slice removed and covered in colorful sprinkles.
      Ice Cream Cake

    Did you love this recipe? We would love to hear from you! If you make this recipe and love it, give it a 5-star rating ⭐⭐⭐⭐⭐ with a comment. THANK YOU!! Follow Delicious Table with my free newsletter and share this recipe with your friends on Facebook, Pinterest, and Instagram.

    A slice of peach pie on a white plate with a silver fork on a red white check tablecloth.
    Print

    No-Bake Cheesecake Peach Pie Recipe

    Peach Cheesecake Pie is a 30-minute no-bake recipe with a crisp graham cracker crust, sweet whipped filling, and juicy summer peaches!
    Course Desserts & Sweets
    Cuisine American
    Keyword no-bake cheesecake, peach cheesecake, peach cheesecake pie, summer dessert
    Prep Time 30 minutes minutes
    Cook Time 0 minutes minutes
    0 minutes minutes
    Total Time 30 minutes minutes
    Servings 8
    Calories 406kcal
    Author Lisa Hatfield

    Equipment

    • Hand Mixer
    • Spoon Spatula
    • Epicurean Non-Slip Cutting Board
    • Chef Knife
    • Classic Pie Dish 9"

    Ingredients

    Cheesecake Cream Cheese Mixture

    • 1 graham cracker crust store-bought or homemade (see below)
    • 2 - 8 oz cream cheese, softened room temperature cream cheese
    • 1 cup powdered sugar (confectioners' sugar)
    • 4-5 large ripe peaches yellow peaches
    • ¼ cup honey
    • optional whip cream

    Graham Cracker Pie Crust

    • 1 ½ cups crushed graham crackers about 2 individual packages of graham crackers (3 come in a box)
    • ⅓ cup white granulated sugar
    • 6 tablespoons melted butter

    Instructions

    • Pull both blocks of cream cheese out of the fridge, and place on the counter. You will want them room temperature for this recipe.
    • Make or buy store-bought graham cracker crust.

    Graham Cracker Pie Crust

    • Crush 2 packages graham crackers in sealed a zip-top bag using a rolling pin or pulse in a food processor into fine crumbs.
    • In a medium bowl, add the graham cracker crumbs, ⅓ cup granulated sugar, and 6 tablespoons melted butter, mix well. Place crumb mixture into a 9-inch pie plate. Use a small measuring cup to smooth and press the crust evenly around and up the sides of a 9-inch pie dish. Chill for 30 minutes to get it nice and firm while you make the filling.

    No-Bake Cheesecake Filling

    • In an electric mixer on medium-high speed, whip the softened cream cheese and 1 cup powder sugar for about 3 minutes until it is a fluffy texture. Scrape down the sides of the bowl. You can also make this in the bowl of a stand mixer with a whisk or paddle attachment.
    • Spread the cheesecake filling into the prepared chilled graham cracker crust using a rubber spatula. Even out to edges using a mini spatula. Chill while you slice the fruit.
    • Slice each peach into 16 thin slices. Cut each peach in half, remove the pit and slice each half into 8 slices. Arrange peach slices into a pretty pattern spiral in the pie dish. Start in the center, lay the slices going out in a spiral ending at the edge of the dish.
    • Brush honey onto peaches all over the entire cheesecake using a small brush.
    • You can serve it right away, but it will set up in the fridge in about an hour so it slices neater. It's best to eat the same day with lots of whip cream or cool whip. A chilled cheesecake is easier to slice with a sharp knife, then lift each slice of cheesecake with a pie server.

    Notes

    graham cracker pie crust

    You can certainly buy a store brand graham cracker crust from the store, but if you want to make your own, it's soooo easy and fun. And a great way to use up all those graham crackers from S'mores! 

    peaches

    For best results, use fresh peaches! You can use any kind of ripe peach, I used yellow peaches.

    serving tips

    You can serve it right after putting it together, but it will set up in the fridge in about an hour so it slices neater. It's best to eat the same day with lots of whip cream!

    Cheesecake Pie Flavor Variations and Swaps

    • Pulse whole cookies like chocolate wafer cookies, oreo cookies and make an oreo crust.
    • You can also swap in unsalted butter in the cookie crust.
    • Make your own whipped cream with very cold heavy cream, chill a separate bowl and beaters, and beat heavy whipping cream with sugar until stiff peaks form.
    • Instead of peaches make a no bake lemon cheesecake pie, add ¼ cup lemon juice into the filling. Top with candied lemon and lemon zest.
    • Make a fall version of pecan pie, and use candied pecans on top!
    • Mix chopped fresh fruit into the creamy cheesecake filling.
    • Make some mini cheesecakes in a muffin pan or small bundt pans.
    • Top with chocolate chips or chopped candy like heath bars or snickers!
    • Try fresh strawberries with a strawberry glaze of jam or jelly.
    • Top with fresh berries like blueberries or raspberries, brush with the honey glaze.
    • Use some cherry pie filling for an easy twist.
    • Drizzle chocolate and homemade caramel sauce and put a cherry on top.


    Nutrition

    Calories: 406kcal | Carbohydrates: 66g | Protein: 3g | Fat: 16g | Saturated Fat: 7g | Cholesterol: 23mg | Sodium: 289mg | Potassium: 202mg | Fiber: 2g | Sugar: 46g | Vitamin A: 505IU | Vitamin C: 5mg | Calcium: 27mg | Iron: 1.5mg

    Meyer Lemon Olive Tapenade

    [heart_this] · Mar 12, 2022 · 1 Comment

    A vintage French ceramic bowl filled with freshly made meyer lemon olive tapenade with a silver spoon and sliced baguette to eat as an appetizer.

    Last Updated April 4th, 2024 at 01:40 pm by Lisa

    Calling all you olive lovers! This delightfully fresh Meyer Lemon Olive Tapenade is an anchovy free recipe and the perfect addition to cheese boards with crackers and golden crostini toasts.

    Once you make your own tapenade, it will become a favorite way to entertain with appetizers...

    A vintage bowl with green olive tapenade and bread nearby.

    Green Olive Tapenade Recipe

    Many of us are not a fan of anchovy, anchovy fillets, or anchovy paste as one of the main ingredients in dishes. The strong flavor they add can overwhelm a recipe. But those little anchovies are classically used in a French Tapenade. This is a vegetarian and vegan version that tastes just as good as the ones you will find in the outdoor markets of France!

    These staple ingredients are always in my pantry which makes this a snap to put together.

    • 1 cup green olives pitted and drained
    • 1 cup Kalamata olives pitted and drained
    • ¼ cup capers drained
    • ¼ cup fresh parsley leaves chopped
    • ¼ cup extra-virgin olive oil
    • 1 Meyer lemon - lemon zest and lemon juice
    • ½ teaspoon fresh cracked black pepper
    • ½ teaspoon garlic powder

    Olives: Use different types of olives. Green or black olives are great choices, and kalamata olives all work very well. If you can find niçoise olives from Southern France, those would be ideal for a traditional tapenade.

    Take a look at an olive bar at your local gourmet grocery store, and combine olives. Be sure to use an olive pitter to remove any pits before chopping. Castelvetrano olives are another good option and are a Sicilian green olive, irresistible buttery-sweet flavor, and crisp, meaty texture.

    Capers: Are pickled green flower buds that have a lemony tang, and echo a green olive flavor with some tartness. They bring a bold salty, savory flavor and just 1 tablespoon of capers will pack a flavor punch dishes like chicken piccata.

    Olive Oil: Use a good quality extra virgin olive oil. You can use a flavored one like garlic or lemon. Drizzle a little extra olive oil on top of the bowl to add additional flavor.

    Meyer Lemons: For best results use fresh lemon juice from Meyer lemons as they are not as tart and sweeter. You can use regular Eureka lemons too.

    Garlic: Fresh garlic can overpower the tapenade, garlic powder is just right. If you use garlic cloves, be sure to crush them well into a thick paste and mix well. You can smash on a board or use a mortar and pestle.

    Variations: A great addition would be to add some ribbons of fresh basil or fresh mint. Fresh thyme would also be perfect!

    An outdoor picnic with cheeses, sliced loaf of French bread, grapes, and olive tapenade.

    How To Mix Tapenade

    1. Remove any pits from olives. In a small food processor (see below how to chop by hand), add kalamata and green olives, capers, and fresh parsley. Pulse 8 times, or until it is chunky.
    2. Next, add olive oil, scrape down the bowl, and pulse 4 more times.
    3. Then pour this mixture into a bowl. Add the Meyer lemon juice and zest, black pepper, and garlic powder.
    4. Mix the tapenade ingredients well.
    5. NOTE: If making tapenade the simple way by hand, finely chop green and kalamata olives, capers, and parsley on a cutting board. Then add to a bowl and add the extra virgin olive oil, Meyer lemon juice and zest, pepper, and garlic powder.
    6. Stores well in a mason jar or an airtight container in the fridge for up to a week.

    How To Eat Tapenade

    Homemade olive tapenade will hold up in hot weather and can be served outdoors for a picnic or garden party. We all love an easy recipe to serve at room temperature in the summer months!

    What To Serve With Olive Tapenade?

    • assorted crackers
    • plain or flavored pita chips
    • pickled vegetables
    • cheesy crouton shards
    • mini bell pepper halves (keto/low carb light option)
    • baguette slices
    • wide variety of cheeses
    • crostini toasts
    • breadsticks
    • sliced crusty bread

    What are Meyer Lemons?

    Meyer lemons are orangy yellow and rounder than a regular lemon. The skin is thin, not thick and they have a sweet fragrance.  

    Meyer lemon fruits have a sweeter, less acidic flavor than the more common Lisbon or Eureka supermarket lemon varieties.

    My Dad always said Meyer lemons were the best. And I believe he was right. I have a Meyer lemon tree in my garden and it always reminds me of my Dad.

    A pile of fresh lemons ready to use in a recipe.

    Tapenade FAQ

    What Is Tapenade?

    Tapenade is a chunky French Provençal dip, typically made from black olives, capers, anchovies, herbs, and seasonings. This condiment is made at home or can be storebought in a jar. Tapenade comes from Provence, in the south eastern part of France.
    Tápeno is the Provencal name or term given to capers.

    What Is Tapenade Used For?


    Tapenade is mostly thought of as an appetizer served as a topping with crostini or crudités. Often commonly used as a condiment, Tapenade is a great recipe used in preparing baked fish dishes like Fish En Papillote.

    Toss into Greek salads, sprinkle as a homemade pizza topping, add to pasta red sauce, used as a spread on pressed Italian sandwiches, add into tuna salad, or bake into bread loaves for olive bread.

    Easy Olive Tapenade Recipe Uses

    Tapenade is a flavoring ingredient and has many other uses in your cooking should you have leftovers. Here are some creative delicious recipes to use this versatile olive condiment to try...

    A couple of easy recipes that use tapenade to pack in flavor are these Tuna Salad wraps and bell pepper bowls. This is no regular tuna salad and is a perfect way to use up tapenade.

    Picnic Pressed Sandwiches are a delicious recipe for summertime. They are so easy to make a day ahead, then toss into a cooler, and off to the beach you go!

    Healthy Tuna Salad Recipe
    A healthier Tuna Salad loaded with crunchy celery, creamy avocado, basil, capers, kalamata olives, pepperoncini's, and sun-dried tomatoes. One of my favorite things about this recipe is it can be rolled up in a tortilla wrap, scooped in colorful bell pepper bowls, or put inside lettuce leaves for low carb lunches! The mayonnaise is swapped out for avocado and Greek yogurt which becomes a more creamy texture than just mayo. Each bite is full of crunchy little tasty pops of Italian flavors, and it is so fresh and clean.
    GET THE RECIPE PIN IT
    Red and green Bell pepper halves filled and green tortilla wraps filled with no mayo Greek Yogurt Tuna Salad.
    Pressed Picnic Sandwiches Recipe
    Yummy Picnic Food is easy with Pressed Italian Sandwiches that are both neat to eat, and easy to make ahead. This pressed sandwich recipe is bursting with flavor from the olives, pepperoncini, salami, deli meat, and more! These summer sandwiches keep very well overnight in the fridge. Make the day before, then grab and go. You can make these sandwiches in countless ways using meats, cheeses, and fillings you love. Pop into a picnic lunch basket or cooler for al fresco meals. And head off to the beach, a concert, or a picnic in the park!
    GET THE RECIPE PIN IT
    Picnic sandwiches on a red and white check table with sliced sandwiches.
    • toss into Greek salads
    • scoop up with different flavored pita chips
    • sprinkle as a homemade pizza garnish topping
    • add to pasta red sauce for a delicious sauce
    • on busy weeknights, toss into hot spaghetti
    • a topping for deviled eggs
    • roasted green beans and top with tapenade
    • make easy green olive tapenade stuffed French bread
    • top thick tomato slices with feta, tapenade, and mint
    • put into compound herb butter for use on fish
    • baked into bread loaves for olive bread
    • mix into a big batch of great tasting pasta salads
    • mix with mayo, for a tapenade mayo for a sandwich spread
    • spread goat cheese on crostini top with a spoonful of tapenade and top with a little bit of red pepper flakes
    • an olive spread to serve on crostini
    • stir little tapenade into hummus for a dip
    • mix into chicken or tuna salad the best flavor
    • bake fish in parchment paper with a spoonful over the top for easy dinner parties
    • put some on morning avocado toast for a perfect addition
    • toss tapenade into main dishes like hot pasta sauce
    • make tomato tapenade, mix roasted tomatoes, olive tapenade, and fresh herbs with olive oil

    Appetizer Party Ideas

    For a happy hour or a family gathering put out a great spread. Load a charcuterie board with pita bread triangles, a nice whole olive mix, various cheeses, nuts, fresh crisp green beans, roasted red bell peppers, and your favorite crackers.

    perfect recipe

    Lidy Baars of French Garden House and I put together this Autumn Entertaining Series with this gorgeous appetizer display.

    And let me just say, we sure had fun creating this party appetizer series for you! We might have just giggled and nibbled our way through this entire photoshoot...

    Lidy set this table with her FABULOUS styling talent, I just love how she makes it look so easy. All the food was served down the center of a beautiful table, all within reach. It makes entertaining so elegant and easy. You can read all about how she pulls this look together on her blog post, Autumn Entertaining | How To Design A Stunning Appetizer Display.

    We served a gorgeous Hibiscus Tea Cocktail that is on the “healthy” side and might just be your go-to holiday cocktail choice as it has low sugar, 3-ingredient Brie and Bacon Palmiers, and Spicy Candied Pecans will be a favorite in festive Holiday salads and on cheese boards.

    Lidy pulled this gorgeous table together so effortlessly and shares how to get this look for Autumn Entertaining on her blog.  We hope this inspires you to entertain outdoors and relax with friends and family.

    More Easy Appetizer Recipes

    • A glass bowl filled with horseradish dipping sauce with bacon wrapped filet mignon appetizers on toothpicks.
      Filet Mignon Steak Appetizer
    • White round plate filled with cheese appetizers with crackers and garnished with basil.
      Easy Layered Cheese Appetizers
    • A white platter filled with brie and bacon palmier appetizers golden brown and ready to eat.
      Brie and Bacon Palmiers
    • A clear glass plate with shrimp cocktail, cocktail sauce, and two glasses of champagne.
      Shrimp Cocktail
    • A rustic table with small bowls filled with toppings for a fall appetizer crostini bar.
      Fall Crostini Bar
    • A pumpkin shaped cheese ball on a platter with pita chips and crackers.
      Everything Bagel Pumpkin Cheese Ball
    • Ruffled potato chips on a plate with homemade French onion dip.
      French Onion Dip
    • A collection of Thanksgiving appetizers with recipe ideas, and party decorating tips for a Fall party.
      36 Thanksgiving Appetizers

    Did you love this recipe? We would love to hear from you! If you make this recipe and love it, give it a 5-star rating ⭐⭐⭐⭐⭐ with a comment. THANK YOU!! Follow Delicious Table with my free newsletter and share this recipe with your friends on Facebook, Pinterest, and Instagram.

    A vintage French ceramic bowl filled with freshly made meyer lemon olive tapenade with a silver spoon and sliced baguette to eat as an appetizer.
    Print

    Meyer Lemon Olive Tapenade (Anchovy Free)

    Delightfully fresh Meyer Lemon Olive Tapenade is an anchovy free recipe. Perfect addition to cheese boards with crackers and crostini toasts!
    Course Appetizers, Dips, & Snacks
    Cuisine American
    Keyword anchovy free tapenade recipe, olive tapenade, tapenade, tapenade recipe
    Prep Time 10 minutes minutes
    Total Time 10 minutes minutes
    Servings 12
    Calories 111kcal
    Author Lisa Hatfield

    Equipment

    • Cuisinart Food Processor
    • Epicurean Non-Slip Cutting Board
    • Chef Knife
    • Olive Pitter

    Ingredients

    • 1 cup green olives pitted and drained
    • 1 cup Kalamata olives pitted and drained
    • ¼ cup capers drained
    • ¼ cup fresh parsley leaves chopped
    • ¼ cup extra-virgin olive oil
    • 1 whole Meyer lemon
    • ½ teaspoon fresh cracked black pepper
    • ½ teaspoon garlic powder
    US Customary - Metric

    Instructions

    • Remove any pits from olives. In a small food processor, add kalamata and green olives, capers, and fresh parsley. Pulse 8 times, or until it is chunky.
    • Next, add olive oil, scrape down the bowl, and pulse 4 more times.
    • Then pour this mixture into a bowl. Add the Meyer lemon juice and zest, black pepper, and garlic powder.
    • NOTE: If making tapenade by hand, finely chop green and kalamata olives, capers, and parsley on a cutting board. Then add to a bowl and add the extra virgin olive oil, Meyer lemon juice and zest, pepper, and garlic powder.
    • Stores well in mason jars or in an airtight container in the fridge for up to a week.

    Notes


    What To Serve With Olive Tapenade?

    • assorted crackers
    • plain or flavored pita chips
    • pickled vegetables
    • cheesy crouton shards
    • mini bell pepper halves (keto/low carb light option)
    • baguette slices
    • wide variety of cheeses
    • crostini toasts
    • breadsticks
    • sliced crusty bread

    Other Tapenade Uses

    Try tapenade on grilled vegetables, grilled chicken, or toss into a salad, or with pasta and herbs.
    • toss into Greek salads
    • scoop up with different flavored pita chips
    • sprinkle as a homemade pizza garnish topping
    • add to pasta red sauce for a delicious sauce
    • on busy weeknights, toss into hot spaghetti
    • a topping for deviled eggs
    • roasted green beans and top with tapenade
    • make easy green olive tapenade stuffed French bread
    • top thick tomato slices with feta, tapenade, and mint
    • put into compound herb butter for use on fish
    • baked into bread loaves for olive bread
    • mix into a big batch of great-tasting pasta salads
    • mix with mayo, for a tapenade mayo for a sandwich spread
    • spread goat cheese on crostini top with a spoonful of tapenade and top with a little bit of red pepper flakes

      Nutrition

      Calories: 111kcal | Carbohydrates: 1g | Fat: 11g | Saturated Fat: 1g | Sodium: 677mg | Potassium: 24mg | Fiber: 1g | Vitamin A: 300IU | Vitamin C: 2.7mg | Calcium: 22mg | Iron: 0.4mg

      Meyer Lemon Citrus Vinaigrette

      [heart_this] · Feb 28, 2022 · 3 Comments

      A vintage silver spoon resting on an open jar of vinaigrette.

      Last Updated September 4th, 2023 at 07:57 pm by Lisa

      Mix up some tangy lemon citrus vinaigrette, a homemade dressing made in minutes with Meyer lemons that is absolutely delightful.

      I can't tell you how many times people have asked for this recipe. Once you see how simple it is, you'll make your own dressings over and over skip the bottled dressings...

      How To Make Meyer Lemon Vinaigrette

      Keep these simple ingredients on hand to whip together this citrus vinaigrette recipe in minutes. Always be sure to grab lemons from the grocery store, and try some Meyer Lemons next time when they are in season.

      • ¼ cup Meyer fresh lemon juice (Meyer or regular lemons)
      • ½ cup extra-virgin olive oil
      • ½ teaspoon salt
      • ¼ teaspoon fresh cracked pepper
      • 2 tablespoons Dijon Mustard

      Lemon Citrus Vinaigrette Instructions

      My Mom always made salad dressing recipes this way, and she taught me all her secrets. It's fast, easy, and you just pop it in the fridge after dinner to use all week.

      1. Add the sea salt, pepper, Dijon mustard, extra virgin olive oil, and Meyer lemon juice in the pint jar or small bowl.
      2. Place the lid on the jar and shake for about a minute or two until well combined or whisk to combine in a small bowl.
      3. Store chilled in the refrigerator, take out about 30 minutes before reusing and shake right before pouring on salad.

      How To Serve Citrus Vinaigrette

      Serve this citrus vinaigrette over a simple green salad with fresh ingredients. I love easy healthy recipes and pour this over fresh spinach with a few shaves of good parmesan cheese. This is one of my all-time favorite healthy salad recipes to serve for either a weeknight dinner or for company.

      • Toss into on a summer salad made with spring mix, Iceberg or Romaine lettuce.
      • Homemade salad dressings are ideal for special diets as this citrus vinaigrette dressing has no sugar and is great on a keto or low carb diet.
      • Grate lemon zest on top of the salad for a citrus punch.
      • Toast pine nuts, sprinkle with sea salt and toss in some in your salad.
      • To mix it up make this same recipe an orange salad. Use fresh orange juice in place of lemon juice. Slice some fresh orange zest, and maybe some orange segments on top of your salad.
      • Add pieces of goat cheese for a tasty combination.
      • "Make and shake" in one container, is a great way to save on cleanup!
      • Another great option, try other fresh fruit like grapefruit, blood oranges, or lime juice in this recipe to go with your favorite salad.
      • Drizzle and toss this healthy dressing onto any grain salads.
      • To add a little bit of sweetness, you can as a couple teaspoons honey.
      A small wooden bowl filled with fresh spinach, parmesan cheese shavings and vinaigrette.

      Citrus Vinaigrette FAQ

      What are Meyer Lemons?


      Meyer lemon fruits have a sweeter, less acidic flavor than the more common Lisbon or Eureka supermarket lemon varieties, and were introduced to the United States from China in the early 20th century by Frank Meyer. It is believed that this sweeter lemon was developed as a cross between a regular lemon and a mandarin orange.

      Meyer lemons are smaller, rounder, and have smoother thin skins that are orangy yellow.

      When Are Meyer Lemons Available?

      Regular lemons are always available, but Meyer lemons are seasonal. You are most likely to find them in stores from December through May.

      Does Lemon Vinaigrette Need To Be Refrigerated?


      Yes, it must be refrigerated in a sealed jar or airtight container.

      How To Store Homemade Lemon Vinaigrette?


      Store in an air-tight container or covered jar chilled in the refrigerator. Place it on the counter about 30 minutes before you are ready to use it.

      It will solidify due to the olive oil in the vinaigrette. Whisk or shake it in a mason jar to combine, before pouring over salad. You can also re-whip it up in a mini food processor.

      How Much Juice In A Lemon?


      On average, one medium-sized lemon yields 2 tablespoons of lemon juice.

      What Is A Vinaigrette?

      A vinaigrette is a salad dressing (or marinade) made from oil and either an acid, usually vinegar, or lemon juice. Salt, pepper, and other herbs, spices, and flavorings are added to customize the flavor.

      Traditionally, a simple vinaigrette is made from 3 parts oil to 1 part vinegar ratio, mixed into a stable emulsion. However, it can also be used to describe recipes with different proportions and for unstable emulsions which last only a short time before separating into layers.

      Different acids can be used such as citrus juices like lemon, lime, orange, or grapefruit. Various kinds of vinegar can be used including regular white vinegar, apple cider vinegar, rice vinegar, white balsamic vinegar, white wine vinegar, or red wine vinegar.

      Different oils can be used including olive oil, avocado oil, walnut oil, or sesame oil.

      In order to help the vinaigrette mix and combine together, it needs several teaspoons Dijon mustard to act as an emulsifier. This helps the oil blend into the vinegar without separating, to create a salad dressing.

      More Lemon Recipes

      Fresh juice adds brightness to any dish, and there are so many creative ways to use citrusy flavors in your cooking.

      Living in Southern California, I grow lemons in my garden, and friends gift them to me all the time in the Spring. Next time someone offers you free lemons, take them! 🍋🍋🍋

      A pile of fresh lemons ready to use in a recipe.

      There are so many fresh lemon recipes to use them in, here are some of my faves. Coconut Lime Lemon Bars are incredible and take you straight to an island with their tropical twist. You can easily make Preserved Lemons and use them in dishes from pasta to marinades. Melt some Lemon-Dill Butter on fresh grilled salmon, or serve up some Meyer Lemon Tapenade on crackers or crostini toasts for an appetizer.

      Try my other citrus salad dressing, Parmesan Lemon Vinaigrette on a crisp salad. It is one of my favorite dressings of all time. Limoncello is so easy, makes a great after-dinner drink or gourmet gift. Lemon Sheet Pan Chicken preps in minutes and makes healthy eating easy even on weeknights. When the summer heat rises, make a pitcher of ice-cold Blueberry Lemonade to quench your thirst and cool you down.

      • A large clamp jar of Preserved Lemons with a brown craft paper tag that says Preserved Lemons.
        Preserved Lemons
      • Small brown round cutting board with slices of lemon dill butter garnished with fresh lemon and dill.
        Lemon-Dill Butter
      • A vintage French ceramic bowl filled with freshly made meyer lemon olive tapenade with a silver spoon and sliced baguette to eat as an appetizer.
        Meyer Lemon Olive Tapenade
      • A mason jar with lemon vinaigrette inside on a messy cutting board.
        Parmesan Lemon Vinaigrette
      • Two small glasses of icy cold limoncello (lemoncello) ready to sip.
        Limoncello
      • A white platter filled with sheet pan chicken dinner including lemons, potatoes, and croutons.
        Sheet Pan Chicken
      • Mason jar handled glasses with blueberry lemonade garnished with blueberries, mint, and lemons halves.
        Blueberry Lemonade

      Did you love this recipe? We would love to hear from you! If you make this recipe and love it, give it a 5-star rating ⭐⭐⭐⭐⭐ with a comment. THANK YOU!! Follow Delicious Table with my free newsletter and share this recipe with your friends on Facebook, Pinterest, and Instagram.

      A vintage silver spoon resting on an open jar of vinaigrette.
      Print

      Meyer Lemon Citrus Vinaigrette Recipe

      Meyer Lemon Citrus Vinaigrette is a homemade salad dressing recipe made in minutes to use all week long. Flavor-packed, low sugar, and keto.
      Course Salads & Dressing
      Cuisine Condiment
      Keyword lemon vinaigrette, meyer lemon salad dressing, vinaigrette
      Prep Time 5 minutes minutes
      Cook Time 0 minutes minutes
      Total Time 5 minutes minutes
      Servings 8
      Calories 124kcal
      Author Lisa Hatfield

      Equipment

      • Mason Ball Pint Jar

      Ingredients

      • ¼ cup Meyer lemon juice
      • ½ cup extra virgin olive oil
      • ½ teaspoon Kosher sea salt
      • ¼ teaspoon fresh cracked pepper
      • 2 tablespoons Dijon mustard

      Instructions

      • Add the sea salt, pepper, Dijon mustard, extra virgin olive oil, and Meyer lemon juice in the pint jar.
      • Place the lid on the jar and shake for about a minute or two until well combined.
      • Store chilled in the refrigerator, take out about 30 minutes before reusing, and shake right before pouring on salad.

      Notes

      How To Serve Citrus Vinaigrette

      Serve this citrus vinaigrette over a simple green salad with fresh ingredients. I love easy healthy recipes and pour this over fresh spinach with a few shaves of good parmesan cheese. This is one of my all-time favorite healthy salad recipes to serve for either a weeknight dinner or for company.
      • Toss into on a summer salad made with spring mix, Iceberg or Romaine lettuce.
      • Homemade salad dressings are ideal for special diets as this citrus vinaigrette dressing has no sugar and is great on a keto or low carb diet.
      • Grate lemon zest on top of the salad for a citrus punch.
      • Toast pine nuts, sprinkle with sea salt and toss in some in your salad.
      • To mix it up make this same recipe an orange salad. Use fresh orange juice in place of lemon juice. Slice some fresh orange zest, and maybe some orange segments on top of your salad.
      • Add pieces of goat cheese for a tasty combination.
      • "Make and shake" in one container, is a great way to save on cleanup!
      • Another great option, try other fresh fruit like grapefruit, blood oranges, or lime juice in this recipe to go with your favorite salad.
      • Drizzle and toss this healthy dressing onto any grain salads.
      • To add a little bit of sweetness, you can as a couple teaspoons honey.

      Nutrition

      Serving: 8g | Calories: 124kcal | Carbohydrates: 1g | Protein: 1g | Fat: 14g | Saturated Fat: 2g | Sodium: 188mg | Potassium: 13mg | Fiber: 1g | Sugar: 1g | Vitamin C: 3mg | Calcium: 2mg | Iron: 1mg

      Turkey Chili With Black Beans

      [heart_this] · Feb 24, 2022 · 1 Comment

      A bowl of turkey chili topped with sour cream, grated cheese, and green onions with corn bread muffins.

      Last Updated January 4th, 2024 at 11:31 pm by Lisa

      Earning years of rave reviews, this one ranks in the all-time family favorites. This Turkey Black Bean Chili Recipe has earned the title of a great recipe. I have made and handed it out countless times over the years.

      People love that you can make it in a slow cooker, a crockpot, or on the stovetop. A simple recipe for an easy dinner or party food idea to serve a crowd on big game days.

      Whip up a big batch and top with cool sour cream. One of my favorite parts is the mixed the cheese and onions. Bake up some cornbread muffins, and you have warm cozy comfort food in a bowl...

      Why This Recipe Works

      • Only one pot to clean.
      • Cook on the stove!
      • An easy slow cooker turkey chili recipe.
      • It's a healthy turkey chili.
      • An easy weeknight dinner.
      • One pot meals save time.
      • An easy turkey chili for beginner cooks.
      • You can make it spicier if you wish.
      • Freeze last night leftovers in an airtight storage container.
      • An easy recipe that is fast to put together.
      • Serve ground turkey chili at parties or on game days.
      • The leftovers are incredible!

      How To Make Turkey Black Bean Chili

      All You Need...

      ground turkey: Lean ground turkey is healthier than ground beef and gives a lighter flavor to the chili. You can swap in ground beef or ground chicken if you wish. You can also turn this into a vegetarian chili, just leave out the meat.

      jalapenos: Can add a lot of heat..so go easy if you use a fresh jalapeño. I recommend finely diced canned jalapeños into very small pieces, taste them before adding. Watch the heat scale on the side of the can. Add just a tablespoon or so. You could also swap in chipotle peppers in adobo sauce for some smoky flavor. Another idea is to add ancho chili powder, but it can run really spicy so taste it first and add tiny small amounts. If the whole family doesn't like it spicy, you could just add some sweet orange bell pepper or red bell peppers.

      butter: It is one of my top cooking secrets to building a winning flavor profile when sauteing onions, but you can swap in a tablespoon vegetable oil or olive oil in its place.

      beer: This is optional, if you don't want beer in the chili, it will be just as delicious. But a pub-style lager beer (try English Boddingtons if you can find it) adds something special and might just be my secret ingredient. You can leave it out or add an equal amount of chicken broth or stock.

      black beans: Drain the beans, you don't have to rinse them but can if you wish. I prefer the size of black beans in this recipe, but you can substitute other types of canned beans like pinto beans, navy, or kidney beans.

      • 3 tablespoons butter
      • 2 cups yellow diced onion (2 medium or 1 large onion)
      • 3 pound ground turkey package
      • ¼ teaspoon cayenne
      • 3 tablespoons regular chili powder
      • 2 teaspoons garlic powder
      • 1 tablespoon cumin
      • 1 teaspoon crushed red pepper flakes
      • ½ teaspoon black pepper
      • 1 teaspoon of sea salt
      • 28 oz organic cans of tomatoes undrained
      • 1 tomato paste
      • 1 small can of green chilies (low heat)
      • 2 organic black beans drained
      • 12 ounces good beer Lagers give rich flavor-I use Boddington's or Longboard

      Toppings

      One of my favorite ways to eat a hot bowl of black bean turkey chili is to load on the toppings!

      • grated cheese - Mexican 4 cheese blend
      • sliced green onions
      • sour cream
      • tortilla chips

      Turkey Chili Recipe Instructions

      1. In a regular slow cooker, simply add the butter and onions to the bottom of the pan. If you have a slow-cooker with the sauté function, turn it on medium-high heat or are using a large pot, saute the diced onion in butter until just turning brown scraping up the brown bits with a wooden spoon. This is not necessary but adds great flavor.
      2. Next, add all 7 spices (cayenne, chile powder, garlic powder, cumin, crushed red pepper, black pepper, sea salt) to the onions, and stir for 2-3 minutes.
      3. Add ground turkey, tomato paste, beer, tomatoes, green chiles, and black beans. Stir to combine.
      4. Cook for 4 hours on low in Slow Cooker. Stir once an hour. Or cook on high for 2 hours, stir once an hour.
      5. Stovetop: In a large pot, saute onions and 7 spices, brown ground turkey, add tomato paste, beer, tomatoes, green chilis, and black beans. Cover and cook for 1 hour on medium heat.
      6. Stir and serve in soup bowls with grated cheese, sour cream, green onions, and tortilla chips.

      A Word On Slow Cookers/Crockpots

      For years I owned an inexpensive ceramic crockpot that finally wore out. I replaced it, and learned that slow cookers have come a long way!

      PRO TIP: Buy a slow cooker that has a browning saute function. What a game-changer. I upgraded to a Wolf Gourmet Multi-Cooker with a stainless lining. I love it, and it offers many other features like sous vide. But it is pricy, there are many models available now. The stainless lining was a priority so I chose this one. I LOVE to saute onions and spices first before adding all the other ingredients into recipes. I believe it is a great way to build a strong flavor profile, making you one heck of a good cook!

      Turkey Chili Crockpot FAQ

      Can chili be frozen?

      Yes! Cool the traditional turkey chili down safely in the refrigerator and scoop it into serving portions in freezer zip-top bags or containers.

      How do you thicken chili?

      The best way is to remove the lid while on a heat source to reduce the liquid.
      Another way is to add a can of refried beans! It brings in more flavor and thickens your chili.

      What Goes With Turkey Chili?

      Everyone loves a hot bowl of turkey chili covered in toppings. Here are some great new ways to enjoy chili
      -Put a huge dollop into a steamy hot baked potato with cheese and sour cream.
      -Make an omelet and add in chili for a delicious breakfast.
      -Thicken the chili with a can of beans, mix in some cheese and serve with tortilla chips for a hot dip.
      -Put a layer of chili on your hot dog with cheese, onions, and more toppings for a chili dog.
      -Layer hot chili onto your hamburger for one messy delicious dinner!
      -Put a layer of chili on top of creamy mashed potatoes, and bake until hot and bubbly, add some grated cheddar cheese in the last few minutes to melt all over.

      More Slow Cooker Recipes

      These Slow Cooker recipes and Crock-Pot Dinners will have your friends and family serving seconds.

      Cowboy Baked Beans are a top reader favorite party food side to serve for family gatherings, potlucks, and the holidays!

      Chicken Gnocchi Soup is so easy to put together and a hearty dinner recipe. Loaded with creamy shredded chicken, vegetables, and gnocchi which are soft puffy "Italian dumplings".

      Hot Dog Chili is so easy. Learn my hack to make it nice and thick so it loads on Grilled Hot Dogs and stays! Slow Cooker Pulled Pork made with pork loin is so juicy, top with coleslaw, pickle chips, and tangy BBQ sauce all on a golden bun.

      • A large white spoon scooping a serving of cowboy baked beans out of a casserole dish.
        Cowboy Beans
      • A white bowl full of Chicken Gnocchi Soup with a silver spoon and bread nearby.
        Chicken Gnocchi Soup
      • A game day food table with chili dogs loaded with relish, cheese, and onions.
        Hot Dog Chili
      • Red white check paper lined basked holding a pulled pork sandwich topped with coleslaw.
        Slow Cooker Pulled Pork

      Did you love this recipe? We would love to hear from you! If you make this recipe and love it, give it a 5-star rating ⭐⭐⭐⭐⭐ with a comment. THANK YOU!! Follow Delicious Table with my free newsletter and share this recipe with your friends on Facebook, Pinterest, and Instagram.

      A bowl of turkey chili topped with sour cream, grated cheese, and green onions with corn bread muffins.
      Print

      Turkey Chili With Black Beans Recipe

      Turkey Chili with Black Beans can be made in a slow cooker, crockpot, or stovetop. An all-time family favorite with years of rave reviews!
      Course Dinner & Main Dishes
      Cuisine American
      Keyword slow cooker turkey chili, turkey chili, turkey chili recipe, turkey chili with black beans
      Prep Time 15 minutes minutes
      Cook Time 4 hours hours
      Total Time 4 hours hours 15 minutes minutes
      Servings 10
      Calories 206kcal
      Author Lisa Hatfield

      Equipment

      • Slow Cooker / Crock Pot
      • Cast Iron Dutch Oven
      • Chef Knife
      • Epicurean Non-Slip Cutting Board
      • Wolf Gourmet Multi Cooker

      Ingredients

      • 3 tablespoons butter
      • 2 cups diced yellow onions 2 medium onions
      • 3 lbs ground turkey
      • ¼ teaspoon cayenne
      • 3 tablespoons chili powder
      • 2 teaspoons garlic powder
      • 1 tablespoon cumin
      • 1 teaspoon crushed red pepper
      • ½ teaspoon black pepper
      • 1 teaspoon sea salt
      • 28 oz organic tomatoes undrained
      • 1 tomato paste
      • 1 small can green chilis low heat
      • 2 organic black beans drained
      • 12 ounces good lager beer

      Toppings:

      • grated cheese - Mexican 4 cheese blend
      • sliced green onions
      • sour cream
      • tortilla chips
      US Customary - Metric

      Instructions

      • In a regular slow cooker, simple add the butter and onions. If you have a slow-cooker with the saute setting or are using a large pot, saute diced onions in butter until just turning brown. This is not necessary, but adds great flavor
      • Next add all 7 spices (cayenne, chili powder, garlic powder, cumin, crushed red pepper, black pepper, sea salt) to the onions, and stir for 2-3 minutes.
      • Add ground turkey, tomato paste, beer, tomatoes, green chiles, and black beans. Stir to combine.
      • Cook for 4 hours on low in Slow Cooker. Stir once an hour. Or cook on high for 2 hours, stir once an hour.
      • Stovetop: In a large pot, saute onions and 7 spices, brown ground turkey, add tomato paste, beer, tomatoes, green chilis, and black beans. Cover and cook 1 hour on medium-low heat.
      • Stir and serve in bowls with grated cheese, sour cream, green onions, and tortilla chips.

      Video

      Notes

      ground turkey: Lean ground turkey is healthier than ground beef and gives a lighter flavor to the chili. You can swap in ground beef or ground chicken if you wish. You can also turn this into a vegetarian chili, just leave out the meat.

      jalapenos: Can add a lot of heat..so go easy if you use a fresh jalapeño. I recommend finely diced canned jalapeños into very small pieces, taste them before adding. Watch the heat scale on the side of the can. Add just a tablespoon or so. You could also swap in chipotle peppers in adobo sauce for some smoky flavor. Another idea is to add ancho chili powder, but it can run really spicy so taste it first and add tiny small amounts. If the whole family doesn't like it spicy, you could just add some sweet orange bell pepper or red bell peppers.

      butter: It is one of my top cooking secrets to building a winning flavor profile when sauteing onions, but you can swap in a tablespoon vegetable oil or olive oil in its place.

      beer: Is optional, if you don't want beer in the chili, it will be just as delicious. But a pub-style lager beer adds something special and might just be my secret ingredient. You can leave it out or add an equal amount of chicken broth or stock.

      black beans: Drain the beans, you don't have to rinse them but can if you wish. I prefer the size of black beans in this recipe, but you can substitute other types of canned beans like pinto beans, navy, or kidney beans.


      freezing chili

      Cool the chili down safely in the refrigerator and scoop into serving portions in freezer zip-top bags or containers. Defrost in the refrigerator or pop into a pan with some water and reheat on medium-low. 

      serving ideas

      Serve with toppings of grated cheese, green onions, sour cream, and tortilla chips. Other sides to serve with chili are Jalapeño Cornbread Muffins are simple to make with only 3 ingredients. The BEST Macaroni Salad with chopped eggs, pickles, and pickle juice in this old-fashioned recipe loved by all. Make a huge batch, it's always a hit! Or the VERY BEST Potato Salad with crispy bacon, blue cheese, crisp celery and green onions.

      thicker chili

      The best way is to remove the lid of the slow cooker or pot on the stove while on a heat source to reduce the liquid. Another way is to add a can of refried beans! It brings in more flavor and thickens your chili.


      Nutrition

      Serving: 10g | Calories: 206kcal | Carbohydrates: 10g | Protein: 29g | Fat: 6g | Saturated Fat: 2g | Cholesterol: 70mg | Sodium: 404mg | Potassium: 632mg | Fiber: 3g | Sugar: 4g | Vitamin A: 924IU | Vitamin C: 8mg | Calcium: 45mg | Iron: 3mg

      Chicken Stock (Bone Broth)

      [heart_this] · Feb 24, 2022 · 4 Comments

      3 small Mason jars filled with chicken stock and black heart shaped labels.

      Last Updated November 14th, 2023 at 03:12 pm by Lisa

      Learn how to make your own homemade chicken stock, also known as bone broth. This recipe has all the step-by-step top cooking tips I have learned over the years. How to freeze it, plus 15 delicious new recipe ideas. Save money and have some ready to elevate dinner, soups, and stews.

      Stock can be made inexpensively, so save all those leftover bones! And use up different bits of vegetables you probably already have on hand. You don't have to buy whole chickens and waste them, more on that later. But the real reason to make your own bone broth is the flavor it adds to your cooking...

      A large white cooking pot filled with ingredients to make chicken stock at home.

      Table of Contents

      • How to Make Chicken Stock
      • Ingredients For Stock
      • How To Make Chicken Stock
        • Gather Your Ingredients
        • Start Your Stock
        • Simmering
        • Cooling Down Stock
        • Strain & Storage
      • Why This Recipe Really Works!
      • How To Freeze Chicken Stock
      • What containers can I freeze the chicken stock in?
        • How long does chicken stock last in the freezer?
        • How do I reheat frozen homemade chicken stock?
      • Chicken Stock vs. Broth vs. Boullion
        • Chicken Stock
        • Bone Broth
        • Chicken Bouillon
      • Top Stock And Bone Broth Tips
      • Chicken Stock Bone Broth FAQ
      • Chicken Stock (Bone Broth)Recipes
      • More Chicken Stock Recipes

      How to Make Chicken Stock

      The simple ingredients for this recipe are so easy to keep on hand right in your freezer. Chicken bones or whole chicken carcasses, vegetables and their peels, herbs, seasoning, and water all go into the pot.

      My Mom always made it this way with fresh ingredients, and it has a rich flavor and is wonderful compared to the store boxed version.

      Ingredients For Stock

      • 4 pounds frozen chicken bones (all parts; bones from chicken thighs, drumsticks, ribs, and breast bones all work!)
      • 1 large peeled onion cut into 4 pieces
      • 6 carrots peeled and cut in ½
      • 6 ribs celery cut in ½
      • 12 sprigs of fresh parsley with stems
      • 3 bay leaves
      • 1 teaspoon black peppercorns
      • 1 small lemon sliced (try it, they add wonderful brightness!)
      • 3 teaspoons sea salt
      • 1-2 whole cloves peeled garlic (optional)
      • other assorted herbs - thyme, sage, or rosemary are nice!
      • cold water to fill over the ingredients

      PRO TIP: The addition of salt makes a huge difference in the taste of stock/bone broth. You might be tempted to reduce the amount of salt, but it makes the flavor taste right. If you reduce it, you will a "muddy" flavor.

      A table filled with ingredients to make a chicken stock recipe all labeled.
      Large freezer bags filled with frozen chicken bones, lemons, and parsley to make chicken stock.

      How To Make Chicken Stock

      Gather Your Ingredients

      Step 1: In a large pot or stockpot, place frozen chicken bones (no need for thawing!), vegetables, fresh herbs, and spices. I plan to make a lot of stock all at once from my freezer.

      PRO TIP: Making stock is a great way to use up pieces of celery, onion, lemon, and carrot and clean out that fridge or freezer!

      Start Your Stock

      Step 2: Add additional water to just cover the top of the contents in the pot. Turn the heat on high and cook until you begin to see bubbles. Turn the heat down to a low simmer, you don't want it boiling. I like to add a nice handful of parsley on top. As the stock cooks,  the ingredients will drop down into the pot and become fully submerged.

      Simmering

      Step 3: Simmer uncovered for 4-6 hours, on a low simmer. A simmer will create foamy bubbles on top, and you will see steam rising, and an occasional bubble will rise to the surface. It takes a while to cook, and your home will smell amazing. In the meantime, watch a movie, read a book, or take a nap!

      Cooling Down Stock

      Step 4: When done, turn the heat off. Carefully pull the large pieces out of the pot with tongs and discard them into the trash. I put the can right by the stove and will admit this is a laborious task, but it is the easiest way I have found. You will be rewarded with delicious results.

      Strain & Storage

      Step 5: Strain the stock through a colander or sieve into another large bowl or heatproof container and again discard any remaining bones and vegetables.

      Now it is time to cool and freeze your stock.

      PRO TIP: Be careful with the large container of hot liquid you cook in. You need to chill it down quickly and not let it just sit at room temperature. Carefully pour the hot stock into smaller bowls and chill with ice or in the fridge.

      Why This Recipe Really Works!

      • It's healthier than the boxed stuff because you control the ingredients, and use fresh veggies.
      • This Chicken Stock recipe is just like bone broth you see in stores.
      • If you use whole chickens to make stock results in a thick and rich due to the collagen in the bones. Sometimes I make it that way, but find this recipe is inexpensive as you don't need whole birds, and produces less waste. I just can't throw all that chicken meat away!
      • You will notice the difference in your cooking when you use your own stock. And will love the flavor of soups, stews, and gravies!
      • That "homemade chicken stock" smell fills your home and is the most pleasant aroma. Enough said!
      • If someone isn't feeling so well, the first thing I do is break out stock and whip up a nice pot of chicken noodle soup or a cup of broth.

      How To Freeze Chicken Stock

      It is so easy to freeze stock, here is how you do it.

      • Cool Stock: Pour your stock into bowls on the counter to cool, don't leave it on the counter for more than an hour. What I sometimes do is place ice packs (carefully) under the bowls to chill it down quickly so you can get it in the refrigerator/freezer quickly. Cool before storing it. You can add ice, and it will cool down quickly.
      • Before freezing: Remove solidified fat from the surface of the top of the liquid.
      • Ziplock bags: Take a ziplock bag, label it with the date, place it in a bowl or large glass measuring cup, turn the top edge of the bag down, fill using a measuring cup, then let the air out and zip closed. Lay on a cookie sheet to freeze and easily stack in the freezer.
      • More ideas: Freeze in 1-cup measurements and pop into freezer bags. You can also freeze the stock in freezer-safe containers like Tupperware.
      • Ice cube trays: Freeze in ice-cube trays, pop out, and put into dated/labeled freezer bags. Add cubes to make quick sauces and gravy.
      Two large ziptop bags filled with frozen chicken stock ready to use in a recipe.

      What containers can I freeze the chicken stock in?

      There are different ways to freeze chicken bone broth or stock, here are some different storage method options and tips to choose the proper container.
      You can use mason jars, covered glass airtight containers, a plastic container (just make sure it is BPA-free plastic), Ziploc bags, or heavy-duty freezer bags.
      -freezer-safe container
      -BPA-free plastic bags
      -zip top quart bag or gallon bag
      -canning jars

      PRO TIP: You can freeze in a glass container like a mason jar, but it can crack and will need extra room in the jar for the stock to expand while it freezes.

      A gallon-sized freezer bag works really well, simply label it first, fill it, and gradually lay on the counter to let the air out as you zip it closed.

      For small leftover broth or 1 cup portions, freeze in muffin tins or make frozen cubes in ice cube trays. These can be tossed into sauces and avoid opening a large container.

      PRO TIP: Pour chicken stock into bags, freeze flat on cookie sheets to store easier in the freezer! Freeze in ice cube trays, then pop into zip-top bags. Toss into sauce recipes, quick delicious soups, chicken dishes, rice, and many other uses.

      How long does chicken stock last in the freezer?

      Homemade Chicken Stock will store in the freezer for up to 6 months in freezer-safe air-tight containers or freezer bags.
      For the best quality, use in 2-3 months. Also, try to remove as much air out of the container to avoid freezer burn.

      How do I reheat frozen homemade chicken stock?

      Take your frozen container from the freezer, it can take a long time to defrost in the refrigerator. Never bring to room temperature on the kitchen counter, it will not be food safe. Run the bottom of the container under hot water for a couple of minutes, remove the top, and let it release into a large pan. Add a cup of hot water, and turn the heat to melt the homemade chicken broth.

      If stored in a Ziploc freezer bag, cut and peel off the zip-top bag, or run water over the container until the block releases. Place the frozen block in the pot, add a bit of water to the bottom of the pan, melt, and bring to boil for 2 minutes. Use as a base for dishes, soups, and sauces.

      Chicken Stock vs. Broth vs. Boullion

      While I was in cooking school, the first night we learned to make both chicken and beef stocks from professional chefs. In culinary terms, stocks are used frequently in the kitchen and elevate your cooking, think of them as a base ingredient just like salt and pepper.

      But with all the terms chicken stock, bone broth, broth, and bouillion things got confusing! In class we were all asking so many questions, so let's talk about the slight differences...

      PRO TIPS: Next to homemade stock, the store-bought is a great choice, and the Better Than Bouillion chicken base is terrific. You keep it refrigerated and simply mix it with water. There are chicken, beef and vegetable versions available in your grocery store.

      Chicken Stock

      Chicken Stock is made from primarily bones and vegetables just like this recipe. The traditional definition for a stock is more viscous due to the collagen that seeps out of joints and bones during long-term cooking.

      You can make chicken stock using a whole chicken or just bones. I find that it is just fine with bones and thus little to no meat, skin, etc. However, some people prefer the thicker traditional style of stock and use whole chickens. I find that very expensive and wasteful.

      Bone Broth

      Bone Broth is thinner than stock and is made with more actual meat (versus just bones without meat) it is a new term on the culinary scene. I first heard it about 5 years ago, and said, "You mean chicken stock right?" And yes, that is what the person meant. I believe the term bone broth became popular with food manufacturers as a marketing term, as it became the trendy name on store packages.

      The broth is a rarely used culinary term, it refers to making a thin soup from water that has been boiled with meat, fish, or vegetables.

      Chicken Bouillon

      Chicken Bouillon is a store-bought item and is concentrated in several forms. Small cubes, granules made by dehydration, or made into a chicken broth concentrate paste made from meat stock and natural juices. You might see it labeled as a chicken base.

      Bouillon dissolves in plain water and is used to flavor other dishes, stocks, and soups. Also use it to flavor curries, gravy, stews, chili, and casseroles.

      Top Stock And Bone Broth Tips

      • Freeze the main ingredients: Keep your chicken bones and veggie scraps like parsley, celery and onions in bags in your freezer. Once the bag is full, I start a large pot on the stove or in the slow cooker on a cold lazy weekend day. Grab a few other things and you are on your way.
      • Freeze bones from rotisserie chickens, wings, and even fried chicken. You can freeze right in the plastic box they come in from the grocery store or a ziplock bag. Collect bones from cooking; raw chicken pices, leftover bones, and any bony parts all work.
      • Divide into frequently used portions (1 cup, 2 cups, or 1 quart) for easy usage. Label your containers or bags first, then measure into portions and fill your containers or zip lock bags.
      • Lay filled ziptop bags on a cookie tray and freeze flat for easy storage.
      • Take a spoon and do a taste test of your fresh batch of chicken stock before packing it up. You can adjust the salt a little bit if you need to.
      • Toss lemons in, just squeeze in the juice and place the lemon halves right in your large pot. Trust me on this tip the lemons add a fresh brightness and extra flavor to your amber color stock...

      Chicken Stock Bone Broth FAQ

      How long can I store chicken stock in the refrigerator?

      According to the USDA, chicken broth or stock can be refrigerated safely for 3-4 days in a container. If you choose not to immediately use or freeze your Chicken Stock (Bone Broth), keep it in the coldest back part of your refrigerator under 40 degrees, and use it within 3 days to ensure the broth’s freshness.

      Is a thick layer of fat normal on top of the frozen chicken stock?

      Yes! Sometimes a little layer of chicken fat will form on the top of the broth once it is chilled or frozen. If you prefer, simply scrape it off with a spoon and you are ready to reheat.

      Did I make Chicken Stock correctly if it is more solid and wiggles?

      Yes! And this is a good thing and a sure sign you have made an excellent Chicken Stock. What happened is that the collagen from the chicken bones causes the soup to gel. Well-cooked stock will have a rich depth of flavor.

      Can you substitute chicken stock for chicken broth?

      In a pinch, add chicken bouillon in water. Another good substitute is to use vegetable stock you have on hand and add some shelf-stable bouillon. You can also use beef stock or beef broth. And red wine or white wine will work great! Note: These additions to a recipe will change the flavor profile of the dish.

      Chicken Stock (Bone Broth)Recipes

      The best thing is to have homemade for cooking at home. It isn't always possible, but these are my favorite ways to use flavorful stock in recipes...

      • Chicken Noodle Soup
      • Chili
      • Rice ~ you will be amazed at the flavor rather than just using water!
      • Risotto
      • Alfredo Sauce
      • Marinara Sauce
      • Curry
      • Gravy
      • Stuffing
      • Chicken Pot Pies

      Oven-Baked Easy Parmesan Artichoke Risotto Risotto is a classic side dish made with arborio rice. This version cooks hands-free in the oven and has an amazing flavor!

      Gorgonzola Leek Stuffed Chicken (One Pan) This one-pan dish is a hit for entertaining, special occasions, or a romantic date night dinner.

      Tomato Soup with Basil Dumplings Hearty soups are so comforting in Winter. These easy fluffy basil dumplings soak up the tomato soup and make a filling dinner.

      It doesn't get any more classic than Chicken Noodle Soup made with Homemade Chicken Stock. As a matter of fact, it makes all your soup recipes amazing!

      • A black cast iron pan with risotto made from arborio rice topped with artichokes and pine nuts.
        Parmesan Risotto
      • Cooked Gorgonzola Stuffed Chicken in pan sauce garnished with fresh thyme.
        Stuffed Chicken Breasts
      • A bowl of tomato soup and cup of soup in a white cup garnished with fresh basil.
        Tomato Soup With Basil Dumplings
      • A blue bowl filled with homemade chicken noodle soup.
        Chicken Noodle Soup

      More Chicken Stock Recipes

      Make a perfect Turkey Gravy in just 10 minutes with this step-by-step guide and four simple ingredients.

      This might just become your new Stuffing Recipe this holiday season. The texture is incredible, there is something different in each bite. Soft, crunchy, crispy, and chewy all in one happy stuffing.

      A Turkey Dry Brine adds bold flavor to your whole Thanksgiving bird, and is easy to put together with a good spice blend right from your kitchen pantry. Skip those store-bought mixes. A perfect Roast Turkey has a great flavor that starts with the best seasoning.

      A Spatchcock Turkey is also called a butterflied bird, roasts about 30 minutes faster than most recipes, has golden crispy skin, juicy meat, and carves like a dream!

      • A dark golden roast turkey with a white gravy boat pouring turkey gravy on top.
        Turkey Gravy
      • A white casserole dish filled with Sausage Stuffing baked to a golden brown.
        Sausage Stuffing Dressing
      • Roast Turkey (Dry Brine Recipe)
      • A collage of spatchcock turkey sliced on a platter, with one in a roasting pan, and on a table with side dishes.
        Spatchcock Turkey

      Did you love this recipe? We would love to hear from you! If you make this recipe and love it, give it a 5-star rating ⭐⭐⭐⭐⭐ with a comment. THANK YOU!! Follow Delicious Table with my free newsletter and share this recipe with your friends on Facebook, Pinterest, and Instagram.

      3 small Mason jars filled with chicken stock and black heart shaped labels.
      Print

      Chicken Stock (Bone Broth) Plus Freezer Tips and 15+ Recipe Uses!

      Make Chicken Stock aka Bone Broth at home to create other tasty recipes with chicken stock, plus cooking tips and 15+ delicious recipe ideas!
      Course Seasoning
      Cuisine American
      Keyword bone broth, chicken stock, frozen bone broth
      Prep Time 15 minutes minutes
      Cook Time 4 hours hours
      Total Time 4 hours hours 15 minutes minutes
      Servings 12
      Calories 24kcal
      Author Lisa Hatfield

      Equipment

      • Cast Iron Dutch Oven
      • Fine-Mesh Strainer
      • OXO Good Grips 12" Tongs

      Ingredients

      • 4 pounds frozen chicken bones use rotisserie chicken bones
      • 1 large peeled onion cut in 4 pieces
      • 6 carrots peeled and cut in ½
      • 6 ribs celery cut in ½
      • 12 sprigs fresh parsley with stems
      • 3 bay leaves
      • 1 teaspoon peppercorns
      • 1 small lemon
      • 3 teaspoons sea salt
      • 3 whole cloves peeled garlic optional
      • cold water to fill over ingredients
      • other assorted fresh herbs: sage or thyme optional
      US Customary - Metric

      Instructions

      • In a large pot, Dutch oven, or stockpot, place chicken bones, vegetables, herbs and spices. I use bones previously frozen right from the freezer. Lemons add a wonderful brightness to chicken stock, just squeeze in the juice and place the lemon halves right in your stockpot.
      • Add water to just cover the top of the contents in the pot and within an inch of the pot rim. Turn the heat to medium high heat and cook until you begin to see bubbles and some foam will appear on the top.
      • Now, turn heat down to a low simmer, you don't want it boiling. Just some steam rising, some foam, and an occasional bubble. As it cooks, the ingredients will drop down into the pot and become fully submerged. About once an hour, you can push the ingredients under the surface to get all the flavor in there!
      • Simmer on low for at least 4 hours, cool about an hour on the stove, then pull out the large solids carefully with a strainer and a large bowl. Discard the solids, they have done their job! Do one final straining with a finer sieve to pull the smaller pieces out and you have now made chicken stock.
      • You can chill the stock quickly by adding ice to your stock. Once cooled, store in labeled freezer-safe ziplock or freezer containers. Be sure to get your stock chilled down and either in the freezer or fridge within an hour of cooking to keep it food safe.

      Video

      Notes

        Top Tips

        • Freeze the main ingredients: Keep your chicken bones and veggie scraps like parsley, celery and onions in bags in your freezer. Once the bag is full, I start a large pot on the stove or in the slow cooker on a cold lazy weekend day. Grab a few other things and you are on your way.
        • Freeze bones from rotisserie chickens, wings, and even fried chicken. You can freeze right in the plastic box they come in from the grocery store or a ziplock bag. Collect bones from cooking; raw chicken pices, leftover bones, and any bony parts all work.
        • Divide the stock into frequently used portions (1 cup, 2 cups, or 1 quart) for easy usage. Label your containers or bags first, measure the stock into frequently used portions (1 cup, 2 cups, or 1 quart) and fill your containers or zip lock bags.
        • Lay filled ziptop bags on a cookie tray and freeze flat for easy storage.
        • Take a spoon and do a taste test of your fresh batch of chicken stock before packing it up. You can adjust the salt a little bit if you need to.
        • Toss lemons in, just squeeze in the juice and place the lemon halves right in your large pot. Trust me on this tip the lemons add a fresh brightness and extra flavor to your amber color stock...
        PRO TIP: Pour chicken stock into bags, freeze flat on cookie sheets to store easier in the freezer! Freeze in ice cube trays, then pop into zip-top bags. Toss into sauce recipes, quick delicious soups, chicken dishes, rice, and many other uses.
        These are great ways to use homemade chicken stock:
        • Chicken Noodle Soup
        • Chili
        • Rice ~ you will be amazed at the flavor rather than just using water!
        • Risotto
        • Alfredo Sauce
        • Marinara Sauce
        • Curry
        • Gravy
        • Stuffing
        • Chicken Pot Pies

        Nutrition

        Serving: 10g | Calories: 24kcal | Carbohydrates: 6g | Protein: 1g | Fat: 1g | Saturated Fat: 1g | Sodium: 620mg | Potassium: 189mg | Fiber: 2g | Sugar: 2g | Vitamin A: 5275IU | Vitamin C: 9mg | Calcium: 27mg | Iron: 1mg

        French Gourmet Grilled Cheese

        [heart_this] · Feb 22, 2022 · 1 Comment

        A stacked gourmet grilled cheese sandwich with cheese, tomato, red onions, and lettuce.

        Last Updated August 7th, 2022 at 10:55 pm by Lisa

        American classic comfort food elevated to the next level. A chic, fancy gourmet grilled cheese straight out of a French cafe.

        It has a toasty exterior made from parmesan encrusted golden bread. Each slice has a bit of Dijon mustard, stacked with creamy melted brie, crunchy cornichon pickles, pink pickled onions, and topped with crisp spring salad tossed with parmesan vinaigrette.

        At first bite, this will take you straight to a sidewalk bistro, and might just be the best sandwich you ever tasted...

        A golden brown grill cheese sandwich stuffed with cheese, cornichon pickles, red pickled onions, and lettuce.

        How To Make A Fancy Grill Cheese

        • 2 slices sourdough bread
        • 2 tablespoons soft butter
        • 2 tablespoons grated parmesan
        • 4 slices brie
        • 5 cornichon pickles
        • pickled red onion 3-4 slices
        • heirloom tomato 2-3 thick slices
        • 1 tablespoon whole grain Dijon mustard
        • 1 cup baby spring lettuce
        • parmesan vinaigrette
        1. Make pickled red onions if using them in your sandwich. Set out your butter, its easier with soft butter.
        2. Heat a hot griddle or a cast iron skillet over medium heat. Spread a bit of butter on each slice of bread, sprinkle parmesan on the pan and lay the buttered bread side down on top of the cheese in the pan.
        3. Slightly move the bread in the pan, this is the easy way to get all the cheese melted on the outside of the bread. Grill the bread until it is golden brown and you have crispy bread on the outside. Turn the heat down to medium-low heat if it is browning to fast.
        4. Next, spread Dijon mustard in a thin layer on the side of each bread slice. Then top with sliced Brie and allow to melt.
        5. Remove the toasted bread slices from the large skillet to a plate. Stack on heirloom tomato, cornichons, pickled red onions, and pile the salad tossed in vinaigrette. Close, slice, and enjoy!

        What Kind Of Bread Is Best?

        The best bread is found in any grocery store. The main thing is to use a good quality of thicker sliced bread to hold all the ingredients.

        • sliced French bread
        • regular or multi grain sandwich bread
        • garlic bread
        • Challah bread
        • sourdough bread

        Types Of Cheese

        You can use grated or slices. Avoid pre-shredded in bags as it has an anticaking agent that doesn't allow it to melt as well as hand-grated or slices.

        The best one to use will have flavor and melts well. There really are endless possibilities, and even a combination or mix of cheeses will be wonderful.

        • Gruyere
        • swiss
        • slice of Havarti
        • manchego cheese
        • Boursin
        • French compte
        • blue cheese
        • white cheddar
        • Monterey jack
        • American
        • sharp cheddar
        • pepper jack
        • chevre goat cheese
        Looking at a hot grilled cheese sandwich loaded with cornichons pickles, lettuce, cheese, and tomato.

        Fancy Gourmet Grilled Cheese FAQ


        Butter or Mayo For Grilled Cheese


        Store bought mayonnaise is made from eggs and oil and holds a higher smoke point than butter. Many restaurants use mayo to grill sandwiches of all kinds, to get that crunchy golden exterior. 


        The pan or griddle can be at a higher temperature and gives the cheese more time to melt inside.


        How To Eat A Grill Cheese?


        For this hot sandwich with gooey cheeses, pair it with a small bowl of creamy tomato soup, some crackers, or potato chips. You can also serve with chicken noodle soup or a side salad for a great lunch.


        Gourmet Grill Cheese Flavors


        Almost any condiment like mustard, jam, or chutney will work on a grilled cheese. All the things you like in sandwiches will be great in your own cheese sandwich recipes you create at home. Use meats, vegetables, and things you have on hand.


        Caramelized Onions, Cheddar, and Sun-Dried Tomatoes
        Tomato, Basil, and Mozzarella
        Goat Cheese, Fig Jam, and Arugula
        Olive Tapenade, Fire Roasted Peppers, and Compte
        Turkey, Brie, and Cranberry Sauce
        Grilled Vegetables and Mango Chutney
        Sliced Apples, Ham, and Swiss
        Kimchi, Crisp Bacon, and American Cheese
        Shredded Chicken and Buffalo Hot Sauce
        Pulled Pork, Coleslaw, BBQ Sauce, and Monterey Jack
        Cooked Lobster, Crispy Bacon, and White Cheddar

        More Sandwich Recipes

        Italian Tuna Salad can be made as a sandwich wrap or in a low-carb style in a colorful bell pepper bowl, and has no mayo! It is a healthier and flavor-packed version of the classic.

        You have gotta make this Lobster BLT Sandwich that has succulent lobster, crispy applewood smoked bacon, golden grilled sourdough bread, an easy dill-caper aioli, and won a 1rst Place Blue Ribbon at the OC Fair.

        Cheesy Meatball Subs are loaded with gooey melted cheese and homemade marinara sauce. Use frozen or homemade ground beef, turkey, or pork meatballs.

        Yummy Picnic Food is easy with Pressed Italian Sandwiches that are both neat to eat and hold. You can make these a day ahead, they keep very well overnight in the fridge.

        Make an elegant beef roast for a special dinner, then serve thick deli-style Roast Beef Sandwiches the next day. These are out of this world heavenly, and all made at home.

        • Red and green Bell pepper halves filled and green tortilla wraps filled with no mayo Greek Yogurt Tuna Salad.
          Healthy Tuna Salad
        • A sliced open BLT sandwich loaded with succulent lobster, bacon, lettuce and tomato stacked on a board.
          BLT Lobster Sandwich
        • A meatball sub with marinara sauce and melted golden gooey cheese on a toasted baguette.
          Cheesy Meatball Subs
        • Picnic sandwiches on a red and white check table with sliced sandwiches.
          Picnic Food: Pressed Italian Sandwiches
        • A stacked gourmet grilled cheese sandwich with cheese, tomato, red onions, and lettuce.
          French Gourmet Grilled Cheese
        • Thick sliced roast beef on baguettes with lettuce, horseradish sauce, and shaved parmesan.
          Roast Beef Sandwiches

        Did you love this recipe? We would love to hear from you! If you make this recipe and love it, give it a 5-star rating ⭐⭐⭐⭐⭐ with a comment. THANK YOU!! Follow Delicious Table with my free newsletter and share this recipe with your friends on Facebook, Pinterest, and Instagram.

        A stacked gourmet grilled cheese sandwich with cheese, tomato, red onions, and lettuce.
        Print

        Gourmet Grilled Cheese Sandwich Recipe

        Classic comfort food elevated to the next level. A chic, fancy, and amazing gourmet grilled cheese sandwich with a French cafe twist.
        Course Dinner & Main Dishes, Lunch & Picnic
        Cuisine French
        Keyword cheese sandwich, fancy grilled cheese, gourmet grilled cheese sandwich, grilled cheese sandwich
        Prep Time 30 minutes minutes
        Cook Time 5 minutes minutes
        Total Time 35 minutes minutes
        Servings 2
        Calories 623kcal
        Author Lisa Hatfield

        Equipment

        • Epicurean Non-Slip Cutting Board
        • Chef Knife
        • Large Cast Iron Skillet

        Ingredients

        grilled cheese sandwiches

        • sourdough bread 2 slices
        • 2 tablespoons butter softened
        • 2 tablespoons Parmesan grated
        • 4 slices brie
        • 5 cornichons
        • pickled red onions 3-4 slices
        • heirloom tomato 2-3 thick slices
        • 1 tablespoon whole grain Dijon mustard
        • 1 cup baby spring lettuce
        • 2 tablespoons vinagigrette dressing

        parmesan vinaigrette

        • 1 cup olive oil
        • 2 tablespoons tarragon vinegar
        • ½ cup grated Parmesan cheese
        • 2 tablespoons regular Dijon mustard
        • 2 tablespoons fresh lemon juice
        • ½ teaspoon cracked pepper
        • ½ sea salt
        • ½ small shallot peeled and minced (about 1 tablespoon)

        Pickled Red Onions

        • 2 cups red onions thinly sliced ¼” strips
        • 2 garlic cloves peeled and cut in half
        • 2 teaspoons white sugar
        • 2 teaspoons sea salt
        • 2 teaspoons mustard seeds
        • 1 small chile
        • 2 teaspoons peppercorns
        • 2 cups white wine vinegar
        US Customary - Metric

        Instructions

        pickled onions

        • Make pickled red onions if using them in your cheese sandwiches.
        • Place sliced onions, peeled/halved garlic cloves, and chile in a 1 quart jar.
        • Make the brine; in a small pan add sea salt, sugar, peppercorns, and vinegar.
        • Bring the pickling liquid up to a rapid boil, pour boiling liquid over onions & garlic, chile, in a jar.
        • Make sure the onions are under the liquid and cool to room temperature.
        • Once the onions cool, close the lid and store in the refrigerator for up to 3-4 weeks.

        parmesan vinaigrette

        • Add all ingredients to a mason jar with a fitted lid and shake.
        • Toss 1 tablespoon of vinaigrette with the cup of lettuce. Set aside.

        make the grilled cheese

        • Set out your butter, its easier with soft butter. Heat a hot griddle or a cast iron skillet over medium heat.
        • Spread a bit of butter on each slice of bread, sprinkle parmesan cheese on the pan, and lay the buttered bread side down on top of the cheese in the pan. Slightly move the bread in the pan, this is the easy way to get all the cheese melted on the outside of the bread.
        • Grill the bread until it is golden brown and you have crispy bread on the outside. Turn the heat down to medium-low heat if the cheese is browning to fast.
        • Next, spread Dijon mustard in a thin layer on the side of each bread slice. Then top with sliced Brie and allow to melt. Remove the toasted bread slices from the large skillet to a plate.
        • Stack on heirloom tomato, cornichons, pickled red onions, and pile the salad tossed in vinaigrette, and close the grilled cheese. Slice, serve and enjoy!

        Notes

        What Kind Of Bread Is Best?

        The best bread is found in any grocery store. The main thing is to use a good quality of thicker sliced bread to hold all the ingredients.
        • sliced French bread
        • regular or multi grain sandwich bread
        • garlic bread
        • Challah bread
        • sourdough bread

        Types Of Cheese

        You can use grated or sliced. Avoid pre-shredded in the bag as it has an anticaking agent that doesn't allow it to melt as well as hand-grated or slices.
        The best one to use will have flavor and melts well. There really are endless possibilities, and even a combination or mix of cheeses will be wonderful.
        • gruyere
        • Swiss
        • slice of Havarti
        • manchego cheese
        • Boursin
        • French compte
        • blue cheese
        • white cheddar 
        • Monterey jack
        • American
        • sharp cheddar 
        • pepper jack 
        • chevre goat cheese
        Almost any condiment like mustard, jam, or chutney will work on a grilled cheese. All the things you like in sandwiches will be great in your own cheese sandwich recipes you create at home. Use meats, vegetables, and things you have on hand.

        Fancy Grilled Cheese Flavors

        Caramelized Onions, Cheddar, and Sun-Dried Tomatoes
        Tomato, Basil, and Mozzarella
        Goat Cheese, Fig Jam, and Arugula
        Olive Tapenade, Fire Roasted Peppers, and Compte
        Turkey, Brie, and Cranberry Sauce
        Grilled Vegetables and Mango Chutney
        Sliced Apples, Ham, and Swiss
        Kimchi, Crisp Bacon, and American Cheese
        Shredded Chicken and Buffalo Hot Sauce
        Pulled Pork, Coleslaw, BBQ Sauce, and Monterey Jack
        Cooked Lobster, Crispy Bacon, and White Cheddar

        Nutrition

        Calories: 623kcal | Carbohydrates: 13g | Protein: 19g | Fat: 53g | Saturated Fat: 22g | Cholesterol: 96mg | Sodium: 3188mg | Potassium: 323mg | Fiber: 2g | Sugar: 5g | Vitamin A: 1250IU | Vitamin C: 37.8mg | Calcium: 286mg | Iron: 2.2mg

        Huli Huli Chicken

        [heart_this] · Feb 17, 2022 · 5 Comments

        Two pineapple halves carved out filled with coconut rice, grilled pineapple and huli huli chicken.

        Last Updated April 19th, 2022 at 02:10 pm by Lisa

        Grill Hawaiian Huli Huli Chicken, pineapple, and add some coconut lime rice into pineapple bowls. A gorgeous way to entertain for luaus, graduation celebrations, pool parties, or summer cookouts.

        On the islands of Hawaii, people line up at roadside stands, to order "plates" as whole chickens are slowly turning over hot mesquite wood coals and mopped with huli sauce. You will find families grilling this dish for gatherings, and it is served at fundraisers and community events like hulas.

        This sweet sticky chicken recipe is truly part of Hawaiian cuisine and culture and oh so ono. In the Hawaiian language, ono translates to delicious...

        Hawaiian Huli Huli Chicken Recipe

        Huli Sauce Marinade

        Sweet juicy pineapple...brown sugar...and honey that is balanced by the tart lemon, sharp ginger, and garlic. The ginger bite and slight heat from some crushed red pepper create a marinade sauce that is AMAZING!

        These ingredients make the marinade, grill mopping sauce, and a dipping sauce all in one!

        PRO TIP: I recommend you use fresh pineapple so you have extra to grill and the bowls for presentation. Canned pineapple and juice works too but it's not the same fresh flavor, and the pineapple pieces are smaller.

        • 1 cup fresh pineapple juice (grill large pieces)
        • ¼ cup ketchup
        • ¼ cup soy sauce
        • ½ cup brown sugar
        • ¼ cup honey
        • 2 tablespoons dark sesame oil
        • 1 teaspoon red crushed chili pepper 
        • 2 tablespoons fresh ginger (or ginger paste)
        • 3 cloves garlic crushed
        • ½ teaspoon Hawaiian sea salt
        • 3 tablespoons Worcestershire sauce
        • juice of one small lemon
        1. In a small bowl, mix the pineapple juice (you can add some pineapple pieces too), ketchup, soy sauce, brown sugar, Hawaiian sea salt, honey, sesame oil, red crushed chili pepper, fresh ginger, garlic, Worcestershires sauce, and lemon juice ingredients and whisk to combine.
        2. Reserve 1 cup for basting while grilling. And ½ cup to use as a dippping sauce.
        3. Place 4 skinless chicken breasts and 2 cups marinade in a sealed container or a zip top bag in the fridge in a large bowl to prevent leaks. Marinate for at least a half-hour up to 4 hours.

        Grill Chicken And Pineapple

        1. Preheat the grill to medium high heat, brush the chicken with 1 cup of remaining marinade. Flip the pieces 3 or 4 times, brush with marinade each time your turn over. This gets the color dark and builds flavor. The grilling cook time will vary based on the heat of your grill and thickness of meat.
        2. Use a good thermometer and it is cooked when the meat registers 165 degrees internal temperature.
        3. Grill the large pineapple chunks on grill grates or on a piece of heavy foil. Move over indirect heat if they start to char or burn.
        4. Slice or cut the chicken into smaller pieces making it easier to eat. Move all to a platter or serve in pineapple bowls with a scoop of rice.

        PRO TIP: Keep the marinade sauce hot on the grill as you brush it on your chicken. Use a BBQ saucepot or small saucepan on the grill. You can use reuse the marinade, but you must make it food safe and heat it over 165 degrees. You MUST COOK the marinade that had raw chicken in it!

        Ways To Make It Authentic

        • Baste the chicken over and over, keep turning it with tongs every few minutes.
        • This famous Hawaiian chicken recipe can be cooked on a home gas grill or but a rotisserie style grill will get more even basting and is more authentic.
        • Mesquite wood or Hawaiian kiawe wood are traditionally used for the unique smoke flavor of this dish.
        • Set up a smoker box with wood chips, preferably mesquite chips, or if can find the Hawaiian kiawe wood chips online.
        • Serve some reserved sauce on the side. Do not use any of the leftover marinade that has not been heated to 165 degrees, as it is not food safe after marinating the chicken.
        • Heating the huli sauce helps to thicken it as you are basting and makes it so finger-licking good!
        • Just pour it into the small sauce pan or sauce-pot and keep stirring it. Keep an eye on it, as the sugars can make it burn if it gets too hot. Pull it to a cooler side of the grill or off the grill if it's too hot. Use a basting brushe to mop on the sauce.

        What To Serve With It?

        My favorite sides to get are the macaroni salad, pineapple, rice, and extra dipping sauce.

        • Hawaiian Macaroni Salad
        • Big Scoop White Rice
        • Iceberg Green Salad
        • Grilled Pineapple
        • Grilled Shrimp
        • Kahlua Pork
        • Extra Huli Dipping Sauce

        PRO TIP: use a large scoop to serve the rice into a pretty round presentation in your pineapple bowl. Tuck in some grilled pieces of pineapple and chicken.

        What Is Huli Huli Chicken?

        Huli is a Hawaiian word that means turn.  In Hawaii, the whole chicken is traditionally cooked over an open fire on a rotisserie. The chicken self bastes and gets a dark deep color and rich flavor.

        It has become a staple at school fundraisers for sports like football, soccer, and softball teams. And locals commonly grill it at hula groups, and at home on weekends with friends and family.

        There are huli chicken stands all over Hawaii. As the story goes, Mike Fuse grew up on the North Shore in Haleiwa, Hawaii. The coastline was overgrown with Kiawe trees. Mike’s Huli Chicken is grilled over Kiawe wood which gives it that authentic smoked flavor.

        A chicken plate from Mike's will be packed with side dish items like a big scoop of white rice, green salad/dressing, pineapple, and extra dipping sauce. Some of the other items on his menu include a Half or Whole Chicken To Go. Other popular items are Kalua Pork, Chinese BBQ Pork, Steak Teriyaki, Garlic Shrimp, and Ahi. It usually comes in a white styrofoam box, and people eat on picnic tables right there by the road. He has even been featured on the Food Network.

        Recipe Variations

        Some recipes call for a glaze or sauce with a variation of other ingredients:  lemon juice, Worcestershire sauce, Sriracha, red pepper flakes, teriyaki sauce, pineapple juice, ketchup, onion powder, soy sauce, honey, brown sugar, ginger, rice wine, rice vinegar, sherry vinegar, chicken broth, white wine, or mustard.

        You will also see versions that call for brine chicken made in a solution with kosher salt, sugar, bay leaves, dry rub, garlic, sesame oil, or thyme, before marinating it in the sauce.

        Again, no one has the true original recipe, this one is based on the food stands all over the islands.

        Coconut Lime Rice

        • 2 cups uncooked jasmine rice
        • 3 cups coconut water
        • 1 tablespoon Thai red curry paste
        • 1 teaspoon garlic powder
        • 1 tablespoon ginger paste
        • juice of 1 lime
        • 1 teaspoon sea salt
        • ½ teaspoon fresh cracked black pepper
        1. Rinse jasmine rice until water runs clear in a large fine-mesh strainer. Place in large heavy pot.
        2. Add coconut water, Thai red curry paste, garlic powder, ginger paste, lime juice, sea salt, and pepper.
        3. Stir well, bring to a boil, cover and simmer on low for 20 minutes until rice is cooked and all the liquid is absorbed. Let stand for 10 minutes covered.
        4. Garnish the rice with shredded coconut, roasted salted cashews, and green onions right before serving.
        5. In each pineapple bowl, load your grilled huli chicken pieces, scoop in your tropical coconut lime rice, and grilled pineapple.

        Pineapple Bowls

        You can take a look at my entire post on how to make pineapple bowls, I summarized the steps below to help you make these, so easy when you know the tips and tricks...

        How To Make Pineapple Bowls
        Learn how to cut pineapple bowls or boats the easy way plus how to use the chunks for recipes like shish kabobs, huli huli chicken or sorbet.
        GET THE RECIPE PIN IT
        A pineapple bowl filled with fresh cut chunks of pineapple ready to eat.
        1. Using a large knife cut the pineapple lengthwise and through the leaves into 2 halves.
        2. Use a small serrated paring knife, cut around the edge of the pineapple leaving about ¾” of pineapple.
        3. Next, remove the center core by cutting down both sides of the core at a slight angle.
        4. Remove core.
        5. Discard core.
        6. Cut across the pineapple into a grid pattern.
        7. Scoop out pieces with a large spoon.
        8. Place back into the pineapple.
        Steps 1-4 for how to cut pineapple bowls for use in recipes or to eat as a snack.
        Steps 5-8 to cut pineapple bowls for use in recipes or to eat as a snack.

        Huli Huli Chicken FAQ

        What Is Huli Huli Chicken Served With?

        Macaroni Salad, Rice, Grilled Pineapple, Iceberg Green Salad, Grilled Shrimp, Kahlua Pork, and Extra Dipping Sauce.

        How To Grill Huli Huli Chicken?

        Preheat the grill to medium-high heat, brush the chicken with sauce/marinade. And don't forget to turn 3 or 4 times, brush with each time your turn over. This gets the color deep and flavor-rich.

        What's In Huli Huli Sauce?


        Fresh pineapple, ketchup, soy sauce, brown sugar, honey, sesame oil, red crushed chili pepper, ginger, garlic, Worcestershire sauce, and lemon. But there are many ingredients and variations of this recipe.

        What Does Huli Huli Chicken Taste Like?


        Basted and grilled with a marinade that is made from pineapple, honey, brown sugar, soy sauce, garlic, and can have a slight spice level from seasonings like a chili pepper. Recipes vary widely, but the general taste is a sweet sticky teriyaki taste.

        Who Invented Huli Chicken?


        In 1955 Ernest Morgado of Pacific Poultry Company and Mike Asagi a chicken farmer started serving bbq chicken at farm bureau meetings.
        Morgado used his mother's version of teriyaki chicken marinade recipe. Soon his barbeque chicken recipe became so popular he began selling it at private functions and fundraisers.

        Morgado kept the recipe as a trade secret and registered the trademark "huli-huli" for Hawaii in 1958 and the federal government in 1965. 

        He first sold it bottled in stores in 1986, and though he never published an original recipe, many people have come up with their own versions inspired by the original sauce.

        More Delicious Chicken Recipe Ideas

        Easy pretzel-coated Honey Mustard Chicken can be on the table for your family in under an hour, with four simple store-bought ingredients and a 10-minutes to put together. Gnocchi Soup is so easy to put together and is a hearty dinner. Loaded with creamy shredded chicken, vegetables, and gnocchi which are soft puffy "Italian dumplings".

        Sheet Pan Chicken with croutons and small potatoes takes 20 minutes to prep and this entire sheet pan dinner bakes in 50 minutes. Gorgonzola Leek Stuffed Chicken is one of my go-to dinner party ideas for entertaining. 

        • A piece of chicken coated in a pretzel crust and and salad on the plate for a honey mustard chicken recipe.
          Honey Mustard Pretzel Chicken
        • A white bowl full of Chicken Gnocchi Soup with a silver spoon and bread nearby.
          Chicken Gnocchi Soup
        • A white platter filled with sheet pan chicken dinner including lemons, potatoes, and croutons.
          Sheet Pan Chicken
        • Cooked Gorgonzola Stuffed Chicken in pan sauce garnished with fresh thyme.
          Stuffed Chicken Breasts

        Did you love this recipe? We would love to hear from you! If you make this recipe and love it, give it a 5-star rating ⭐⭐⭐⭐⭐ with a comment. THANK YOU!! Follow Delicious Table with my free newsletter and share this recipe with your friends on Facebook, Pinterest, and Instagram.

        Two pineapple halves carved out filled with coconut rice, grilled pineapple and huli huli chicken.
        Print

        Huli Huli Chicken Recipe (Pineapple Bowls & Coconut Lime Rice)

        Huli Huli Chicken, Grilled Pineapple, and Coconut Lime Rice served in gorgeous pineapple bowls are ideal for BBQs, celebrations, entertaining, or cookouts!
        Course Dinner & Main Dishes
        Cuisine American
        Keyword chicken marinade, grilled chicken, huli huli chicken
        Prep Time 1 hour hour
        Cook Time 30 minutes minutes
        Total Time 1 hour hour 30 minutes minutes
        Servings 4
        Calories 975kcal
        Author Lisa Hatfield

        Equipment

        • Epicurean Non-Slip Cutting Board
        • Chef Knife
        • BBQ Sauce Pot
        • Large Scoop

        Ingredients

        • 4 chicken breasts - boneless skinless brest
        • 2 large pineapples 4 pineapple bowls & 4 cups pineapple chunks
        • 4 cups cooked rice

        chicken marinade

        • 1 cup fresh pineapple juice
        • ¼ cup ketchup
        • ¼ cup soy sauce
        • ½ cup brown sugar
        • ¼ cup honey
        • 2 tablespoons dark sesame oil
        • 1 teaspoon red crushed chili pepper 
        • 2 tablespoons ginger paste
        • 3 cloves garlic crushed
        • 3 tablespoons Worcestershire sauce
        • juice of one small lemon
        • ½ teaspoon Hawaiian sea salt

        coconut lime rice

        • 2 cups uncooked jasmine rice
        • 3 cups coconut water
        • 1 tablespoon Thai red curry paste
        • 1 teaspoon garlic powder
        • 1 tablespoon ginger paste
        • juice of 1 lime
        • 1 teaspoon Hawaiian sea salt
        • ½ teaspoon fresh cracked pepper

        garnish ideas

        • 3 tablespoons shredded coconut flakes
        • 1-2 green onions sliced thin
        • 1 cup salted roasted cashews
        US Customary - Metric

        Instructions

        marinade sauce

        • In a small bowl, mix the pineapple juice (you can add some pineapple pieces too), ketchup, soy sauce, brown sugar, Hawaiian sea salt, honey, sesame oil, red crushed chili pepper, fresh ginger, garlic, Worcestershire sauce, and lemon juice ingredients and whisk to combine.
        • Reserve 1 cup for basting while grilling. And reserve ½ cup to use as a dipping sauce.
        • Place 4 skinless chicken breasts and 2 cups marinade in a sealed container or a zip top bag in the fridge in a large bowl to prevent leaks. Marinate for at least a half-hour up to 4 hours.

        grilling

        • Preheat the grill to medium high heat, brush the chicken with the 1 cup of remaining marinade as you flip the chicken pieces 3 or 4 times, brush with marinade each time your turn over. This gets the color dark and builds flavor. The grilling cook time will vary based on the heat of your grill, and the chicken cooks differently based on thickness of the meat. Use a good thermometer and it is cooked when the meat registers 165 degrees internal temperature.
        • Grill the large pineapple chunks on grill grates or on a piece of heavy foil. Move over indirect heat if they start to char or burn.
        • Slice or cut the chicken into smaller pieces making it easier to eat. Move all to a platter or serve in pineapple bowls with a scoop of rice.

        pineapple bowls

        • Using a large knife cut the pineapple lengthwise and through the leaves into 2 halves. use small pieces finely diced with juice (grill the larger pieces of the cut pineapple)
        • Use a small serrated paring knife, cut around the edge of the pineapple leaving about ¾” of pineapple. Next, remove center core by cutting down both sides of the core at a slight angle. Remove core.
        • Cut across the pineapple into a grid pattern, and scoop out pieces with a large spoon and place into a bowl.

        coconut lime rice

        • Rinse jasmine rice until water runs clear in a large fine-mesh strainer. Place in large heavy pot.
        • Add coconut water, Thai red curry paste, garlic powder, ginger paste, lime juice, Hawaiian sea salt, and pepper.
        • Stir well, bring to a boil, cover and simmer on low for 20 minutes until rice is cooked and all the liquid is absorbed. Let stand for 10 minutes covered.
        • Garnish the rice with shredded coconut, roasted salted cashews, and green onions right before serving.
        • PRO TIP: use a large scoop to serve the rice into a pretty round serving in your pineapple bowl.

        Notes

        What's Huli Huli Chicken Served With?

        Depending on what you order alongside the juicy chicken will usually be the following sides. One of my favorite things is to get the chicken plate with macaroni salad and rice.
        • Hawaiian Macaroni Salad
        • Big Scoop White Rice
        • Iceberg Green Salad
        • Grilled Pineapple
        • Grilled Shrimp
        • Kahlua Pork
        • Extra Huli Dipping Sauce
        PRO TIP: Place the zip-top bag with marinade and chicken in a bowl to prevent leaks (because I learned the hard way once 😂).
        PRO TIP: you can add the chicken to a ziptop bag with all the marinade, then pour your huli marinade in a BBQ saucepot on the grill which makes it food safe once heated over 165 degrees-but you must reach that temperature. You must cook this marinade as you are basting the chicken to be food-safe!
        Just pour it into a small sauce-pot and keep stirring it. Keep an eye on it, as the sugars can make it burn if it gets too hot. Pull it to a cooler side of the grill or off the grill if it's too hot. You can use a regular small pan or a special one for the grill available online. 

        basting the chicken

        The huli marinade will thicken on the grill as you are basting the chicken, giving it that sticky sauce thing that makes the grilled chicken so finger-licking good! All the flavors really develop with the pineapple, ginger, garlic, lemon etc. 

        rice

        You can use regular steamed rice or this tropical rice. PRO TIP: use a large scoop to serve the rice into a pretty round serving in your pineapple bowl, that's how they do it in Hawaii!
         

        Nutrition

        Calories: 975kcal | Carbohydrates: 164g | Protein: 35g | Fat: 20g | Saturated Fat: 6g | Cholesterol: 72mg | Sodium: 1559mg | Potassium: 1418mg | Fiber: 9g | Sugar: 101g | Vitamin A: 930IU | Vitamin C: 241.7mg | Calcium: 165mg | Iron: 5.5mg

        Blue Cheese Dressing

        [heart_this] · Feb 8, 2022 · 1 Comment

        A ceramic plate with sliced apples, chicken on lettuce with homemade blue cheese dressing.

        Last Updated April 25th, 2024 at 12:34 pm by Lisa

        With just 5 simple ingredients, this Blue Cheese Dressing is an easy recipe made in minutes. It also works great as a dip for buffalo wings or a chip dip.

        For years I have made my own salad dressings, in jars. I learned how to make them decades ago watching my Mom, and her dressings were so simple and fresh.

        Next time you are craving a creamy dressing skip the bottled stuff and make the best blue cheese dressing right at home...

        Homemade simply tastes amazing, has no yucky ingredients, and is very cost-effective. We all grew up with our favorite brand of salad dressing, but I promise this beats even your fave.

        We are not going to make a big mess in the kitchen today either. One of my favorite ways to make easy homemade dressing is simply to load the ingredients in a large jar. Pop the lid on, (metal or plastic) shake and your dressing is done! It also acts as a storage container, and no other dishes to wash!

        An open jar of blue cheese dressing next to apples and a plate of sliced chicken salad.

        How To Make Blue Cheese Dressing

        Take the time to make homemade dressing. You will be rewarded, it is not oily or filled with strange shelf stabilizers and additives. Sure to become an instant family favorite and go-to for any green salad or chilled classic Wedge Salad.

        • ½ cup crumbled blue cheese
        • ½ cup plain Greek yogurt (or ½ cup mayonnaise)
        • ½ fresh lemon juice (or ¼ cup white wine vinegar)
        • ½ teaspoon kosher salt (sea salt)
        • ½ teaspoon fresh cracked pepper

        Add the crumbled blue cheese, yogurt, lemon juice, and sea salt into a Mason jar. Close the lid tightly, shake well for 1 minute. Or simply whisk in a small bowl.

        Open and add 2 more tablespoons of crumbles to make it even chunkier. Add a little bit of water, buttermilk, or little milk to thin if desired. 

        PRO TIP: The secret for a thicker dressing is to use plain Greek Yogurt. You can also swap in light mayo or miracle whip, but it will change the texture and flavor a bit.

        Storage Tips - Just screw on the lid of the jar or any other airtight container in the refrigerator for up to two weeks.

        Serving Ideas - Pair with a nice loaf of crusty bread, soft butter, herb butter, or sun-dried tomato butter.

        Type of Blue Cheese FAQ

        What are the classic blue cheeses?


        Today blue cheese is made in many countries and in a growing variety of styles. There are dozens of different kinds found around the world. The classics are French Roquefort, English stilton, Italian gorgonzola, and Spanish cabrales.

        Roquefort is a sheep milk cheese from Southern France and is one of the world's best-known blue cheeses. Though similar cheeses are produced elsewhere, EU law dictates that only those cheeses aged in the natural Combalou caves of Roquefort-sur-Soulzon may bear the name Roquefort, as it is a recognized geographical indication, or has a protected designation of origin. The cheese is white, tangy, crumbly, and slightly moist, with distinctive veins of blue mold. It has a characteristic fragrance and flavor with a notable taste of butyric acid; the blue veins provide a sharp tang. It has no rind; the exterior is edible and slightly salty.

        Stilton is an English cheese, produced in two varieties: Blue, which has Penicillium roqueforti added to generate a characteristic smell and taste, and White, which does not. Both have been granted the status of a protected designation of origin (PDO) by the European Commission, requiring that only such cheese produced in the three counties of Derbyshire, Leicestershire, and Nottinghamshire may be called Stilton. The cheese takes its name from the village of Stilton, now in Cambridgeshire, where it has long been sold.

        Gorgonzola is made from unskimmed cow's milk, this is one of the most popular blue cheeses. Gorgonzola is not just the Italian name. Similar to Parmigiano-Reggiano and Gruyère, it is a unique style of cheese manufactured according to specific regulations defined by European Union law.

        Cabrales (Spanish: queso de Cabrales) is a blue cheese made in the artisan tradition by rural dairy farmers in Asturias, Spain. This cheese can be made from pure, unpasteurized cow’s milk or blended in the traditional manner with goat and/or sheep milk, which lends the cheese a stronger, spicier flavor.

        How To Eat Blue Cheese Dressing?


        Blue cheese dressing is a popular side sauce, salad dressing, and dip in the United States. Here are some creative ways to enjoy it...

        Dip hot spicy buffalo wings in this creamy dressing.
        Use with Crudite in a carved-out purple cabbage as a bowl.
        Drizzle on any salad.
        Mix into a Bacon Potato Salad.
        Serve with potato chips or buffalo ranch-flavored chips as a dip.
        Drizzle on buffalo chicken pizza.
        Serve with a 7 Layer Salad or a classic Cobb Salad.
        Pair with Buffalo Cauliflower as a dip.
        Top your Burger with a dollop and add extra crumbles.
        Use as a dipping sauce with these Buffalo Chicken Appetizers

        What is blue cheese dressing made with?

        Most are usually made of some combination of blue cheese, mayonnaise, buttermilk, sour cream or yogurt, milk, vinegar, onion powder, and garlic powder.

        Recipe variations also can include dijon mustard, apple cider vinegar, Worcestershire sauce, fresh parsley, full fat cream cheese, too much sugar, red wine vinegar, green onion, and a fresh garlic clove. And some recipes use a blender or food processor. Although you can easily whisk it in a bowl or shake the ingredients in a jar.

        A plate with fresh spinach, sliced apples and chicken topped with chunky blue cheese.

        Make A Blue Cheese Salad

        • 2 cups lettuce or fresh spinach
        • 3 apples Granny Smith, Hidden Rose ("pink"), or Green Dragon
        • roast chicken, rotisserie chicken, or cubed chicken
        • blue cheese dressing
        • ¼ cup crumbled blue cheese salad garnish

        Place a good layer of fresh green salad on each plate, layer the roast chicken, sliced apples, top with more crumbles and pour on the dressing.

        You can also toss this salad in a medium bowl, and let people pour their own chunky dressing on it.

        More Salad Dressings

        Green Goddess Dressing bursts with fresh herbs and flavor. Serve as a salad dressing, veggie dip, with shrimp, or toss into hot pasta.

        Make Ranch Dressing at home including 20+ creative recipe ideas, plus my best tips on how to make ranch dressing the easy way, a Mason jar.

        Wedge Salad with Pistachio-Avocado Dressing is super-chilled and a refreshing cookout side with hot grilled steaks, chicken, or shish kabobs. 

        An easy Taco Salad recipe works as lunch, family dinner, or party food for a large gathering. This classic taco salad reminds me so much of summertime at the beach or lounging poolside with family and friends.

        • A small glass bowl with green goddess dressing and white plates of mixed salad greens on a table.
          Green Goddess Dressing Recipe
        • A large Mason jar filled with ranch dressing made at home with a small serving bowl and spoon.
          Homemade Buttermilk Ranch Dressing
        • Wedge salad with avocado dressing drizzled on top with pistachios on a black slate board.
          Iceberg Wedge Salad
        • A white plate full of taco salad topped with taco meat, grated cheese, Fritos, sour cream, black olives and tomatoes.
          Easy Taco Salad

        Did you love this recipe? We would love to hear from you! If you make this recipe and love it, give it a 5-star rating ⭐⭐⭐⭐⭐ with a comment. THANK YOU!! Follow Delicious Table with my free newsletter and share this recipe with your friends on Facebook, Pinterest, and Instagram.

        A ceramic plate with sliced apples, chicken on lettuce with homemade blue cheese dressing.
        Print

        Best Blue Cheese Dressing Recipe

        The best homemade Blue Cheese Dressing Recipe with just 5 ingredients. Shake in a Mason jar for easy fridge storage to use all week. It also works great as a dip for buffalo wings, appetizers, or a chip dip.
        Course Dinner & Main Dishes, Lunch & Picnic
        Cuisine American
        Keyword blue cheese dressing recipe, blue cheese dresssing, blue cheese salad, healthy chicken salad
        Prep Time 15 minutes minutes
        Cook Time 50 minutes minutes
        Total Time 1 hour hour 5 minutes minutes
        Servings 4
        Calories 79kcal
        Author Lisa Hatfield

        Equipment

        • Chef Knife
        • Epicurean Non-Slip Cutting Board
        • Regular and Wide Mouth Mason Jar Plastic Lids

        Ingredients

        • ½ cup crumbled blue cheese
        • ½ cup Greek yogurt (or swap buttermilk for a thinner dressing)
        • ½ lemon juiced
        • ½ teaspoon sea salt
        • ½ teaspoon fresh cracked pepper

        Instructions

        • Add the crumbled blue cheese, yogurt, lemon juice, and sea salt into a Mason jar. Close the lid tightly, shake well for 1 minute.
        • Open and add 2 more tablespoons crumbles to make it chunkier.
        • Add a little bit of water, buttermilk, or little milk to thin if desired.  

        Notes

        PRO TIP: The secret for a thicker dressing is to use plain Greek Yogurt. You can also swap in light mayo or miracle whip.
        Storage Tips - Just screw on the lid of the jar or any other airtight container in the refrigerator for up to two weeks.
        Serving Ideas - Pair with a nice loaf of crusty bread, soft butter, herb butter, or sun-dried tomato butter.

        How To Eat Blue Cheese Dressing

        A popular side sauce, salad dressing, and dip in the United States. Here are some creative ways to enjoy it...
        Dip hot spicy buffalo wings in this creamy dressing.
        Use with Crudite in a carved-out purple cabbage.
        Drizzle on any chilled salad.
        Mix into Bacon Potato Salad.
        Serve with potato chips as a dip.
        Drizzle on buffalo chicken pizza.
        Serve with a 7 Layer Salad or Cobb Salad.
        Pair with Buffalo Cauliflower as a dip.
        Top your Burger with a dollop and add extra crumbles.
        Use as a dipping sauce with these Buffalo Chicken Appetizers

        Nutrition

        Calories: 79kcal | Carbohydrates: 3g | Protein: 6g | Fat: 5g | Saturated Fat: 3g | Polyunsaturated Fat: 1g | Monounsaturated Fat: 1g | Trans Fat: 1g | Cholesterol: 14mg | Sodium: 535mg | Potassium: 100mg | Fiber: 1g | Sugar: 1g | Vitamin A: 134IU | Vitamin C: 7mg | Calcium: 121mg | Iron: 1mg

        Cheese Croutons

        [heart_this] · Feb 5, 2022 · 1 Comment

        Cheese topped croutons on a parchment lined baking sheet.

        Last Updated June 3rd, 2022 at 08:35 am by Lisa

        Make Croutons with a leftover baguette and simple ingredients in minutes. Serve with hot soup, chilled salad, or as a snack on a cheeseboard!

        We will also go through using different types of bread that have a short shelf life and all the amazing recipes and different ways you can use them in your cooking.

        The best way to make this baguette crouton recipe is to simply slice thick long diagonal slices of bread, dry out them overnight so they crisp up, shake them and the ingredients in a bag, bake, flip, and sprinkle with shaved parmesan cheese, and finish baking in the oven.

        And the next time you have half a baguette from your dinner party the best thing to do is use it in tonight's dinner. Whatever you do, don't throw it out!

        Absolutely addictive. Buttery, crisp, with melted parmesan cheese on top...

        Why This Recipe Works...

        • Covered in melted butter and parmesan cheese. Need I say more?
        • Dip into hot soup or serve on a cheese board for a crowd.
        • A great way to use up day-old French baguettes.
        • Quickly slice up the bread and toss in a bag. EASY RECIPE.
        • Use sourdough baguette bread slices or sliced crusty baguettes.
        • Those crispy buttery golden edges are everything. Yum.
        • Use part of the entire baguette for croutons, but don't waste it!

        How To Make Croutons

        PRO TIP: Plan ahead by slicing the baguettes and letting them dry overnight so the croutons get nice and crisp. If you have a leftover baguette, slice it BEFORE it becomes rock-hard and un-sliceable.

        1. Use a serrated knife to cut the fresh baguette.
        2. Cut into long diagonal thin slices about ¼" thick.
        3. Set on a parchment lined baking sheet.
        4. And dry overnight to get them crisp.

        Bake The Croutons

        The next day or once the baguette slices are dry, melt butter. In a large ziplock plastic bag, combine the baguette slices, melted butter, grated parmesan cheese, garlic powder, and pepper. Set shaved parmesan aside for later.

        Shake the bag to coat the baguette slices.

        Preheat the oven to 375 degrees.

        Line a large sheet pan with parchment paper, and spread the slices out in a single layer, giving them space in between.

        Bake 10 minutes until slightly golden brown and crisp.

        Flip the croutons over and sprinkle shaved parmesan on top of each one. Bake 5-10 more minutes until parmesan cheese melts and edges turn golden brown.

        Storing Croutons

        Remove the croutons from the hot oven, cool on the counter. Freeze them in an airtight container or airtight freezer bag. They are good for up to 3 months in the freezer.

        How To Use Leftover Baguettes FAQ

        There are so many different ways and amazing recipes to use up leftover bread loaves, slices of bread, or baguettes.

        The good news is that you can still use that stale loaf of bread, various sliced bread, or breadcrumbs in so many ways.

        What can I do with a leftover baguette?


        Baguettes come home golden and chewy and then turn rock hard solid so fast. Don't throw them out, try one of these delicious recipes.

        Croutons - slice in long thin shards, toss in butter cheese and parmesan, and toast for soup and salad croutons.

        Panzanella - use cubes of baguette for an Italian bread salad. Panzanella is a salad made out of bread, tomatoes, onions, and other ingredients.

        Breakfast Cheese Strata - use pieces to bake up a bubbly breakfast casserole and a perfect dish to feed a crowd. Stratas are made in a baking dish loaded with bread cheese, and breakfast meats like sausage, and can have mushrooms, bell peppers, and other ingredients.

        Top French Onion Soup - tear small pieces on top with melted gruyere cheese, and toast under the broiler.

        Crostini - slice long pieces, rub with peeled garlic cloves, drizzle on olive oil, and toast for crostini. Add toppings you love like tapenade, charcuterie sliced meats, dips, and cheeses.

        Thicken Soup & Stews - use torn toasted bread as a thickening agent in blended soups and stews.

        Bruschetta - thick slices of bread grilled, rubbed with garlic, drizzled with olive oil, often topped with tomatoes and herbs, and usually served as an appetizer.

        What are the best leftover or stale bread recipes?


        Day-old bread, stale slices, or an entire loaf can all be used in creating delicious recipes. Here are some of the most popular ways to use day-old bread.

        Bread Pudding - use small bread pieces of Challah or Brioche for this bread-based dessert popular in many countries' cuisines. Made with stale bread and milk or cream, generally containing eggs, a form of fat such as oil, butter, or suet, and depending on whether the pudding is sweet or savory, a variety of other ingredients. 

        French Toast - make the best french toast try Texas toast, leftover cinnamon bread, slightly stale day-old sourdough bread, brioche bread, French bread, or challah.

        Dressing or Stuffing - a favorite Thanksgiving dish, use up a loaf of French Bread in addition to the cornbread. The larger pieces of bread crisp up while baking and add a wonderful texture to the stuffing. Foccacia is also amazing as it is so well seasoned.


        What To Do With Homemade Bread Crumbs?

        Crumbs - run through a food processor to use in meatballs, top baked macaroni, coat chicken schnitzel, or fried foods like chicken nuggets.

        Italian Bread Crumbs - are added to a variety of different recipes, including meatballs, pasta, burgers, and schnitzels. They're simply regular bread crumbs with Italian seasonings like oregano and basil. They also contain salt, pepper, parsley flakes, and garlic and onion powders.

        Meatballs & Meatloaf - create homemade breadcrumbs, soak in milk and mix into use in either meatballs or meatloaf to help bind the ground meat mixture from falling apart while baking.

        Apple Brown Betty - is a traditional American dessert made from fruit and sweetened crumbs. Similar to a cobbler or apple crisp, the fruit is baked, and, in this case, the sweetened crumbs are placed in layers between the fruit. It is usually served with lemon sauce or whipped cream.

        Square white bowl with cheese soup and a large crouton on top.

        Ways To Enjoy Parmesan Cheese Croutons

        • With a chilled wedge salad
        • Dip into tapenade
        • As a snack with cool drinks
        • Stack on a beautiful cheese board
        • Plate with a creamy spreadable dip
        • Next to a bowl of creamy soup or stew

        Try these parmesan-topped Baguette Croutons with my Famous Cheese Soup recipe or any creamy soups you love.

        Cheese Soup Recipe
        An easy classic famous Cheese Soup Recipe that is so creamy, has simple ingredients, and extraordinarily deep rich flavors. Serve with croutons. Serve with crispy croutons. Famously served at The Driskill Hotel in Austin, Texas in the 1886 Bakery and Cafe.
        GET THE RECIPE PIN IT
        White bowl filled with cheese soup and a homemade crouton on top.

        Leftover Baguette Recipes

        Here are some of my recipes to use stale baguette recipes and bread in other recipes. Use up a large load of French bread in this Sheet Pan Chicken, Italian bread crumbs in some homemade Turkey Meatballs, or make bread toasts for Fall or Spring Crostini with cocktails.

        • A white platter filled with sheet pan chicken dinner including lemons, potatoes, and croutons.
          Sheet Pan Chicken
        • A rustic table with small bowls filled with toppings for a fall appetizer crostini bar.
          Fall Crostini Bar
        • A white platter with crostini recipe topped with edible flowers and herbs.
          Spring Crostini Appetizers
        • A red Italian bowl with hot pasta, sauce and turkey meatballs topped with shaved parmesan cheese.
          Baked Turkey Meatballs

        Did you love this recipe? We would love to hear from you! If you make this recipe and love it, give it a 5-star rating ⭐⭐⭐⭐⭐ with a comment. THANK YOU!! Follow Delicious Table with my free newsletter and share this recipe with your friends on Facebook, Pinterest, and Instagram.

        Cheese topped croutons on a parchment lined baking sheet.
        Print

        Croutons ~ Plus Leftover Baguette Recipes

        Serve with hot soup, chilled salad, as a snack, or on a cheese board, these croutons are made in minutes with baguette, butter, spices and parmesan cheese.
        Course Appetizers, Dips, & Snacks
        Cuisine American
        Keyword crouton recipe, croutons, homemade croutons
        Prep Time 10 minutes minutes
        Cook Time 20 minutes minutes
        Total Time 30 minutes minutes
        Servings 48 croutons
        Calories 41kcal
        Author Lisa Hatfield

        Equipment

        • Large Metal Sheet Pan
        • Parchment Paper Sheets
        • Small Serrated Knife

        Ingredients

        • 1 baguette sliced thin let slices dry out
        • ½ cup melted butter 1 stick
        • ½ cup grated parmesan cheese
        • 1 teaspoon garlic powder
        • 1 teaspoon fresh cracked pepper
        • 2-3 oz shaved parmesan cheese
        US Customary - Metric

        Instructions

        • PRO TIP: Plan ahead by slicing the baguettes and letting them dry overnight so the croutons get nice and crisp. If you have a leftover baguette, slice it BEFORE it becomes rock-hard and un-sliceable.
        • Use a serrated knife to cut the fresh baguette. Cut into long diagonal thin slices about ¼" thick. Set on a parchment lined baking sheet.And dry overnight to get them crisp.
        • The next day or once the baguette slices are dry, melt butter. In a large ziplock plastic bag, combine the baguette slices, melted butter, grated parmesan cheese, garlic powder, and pepper. Set shaved parmesan aside for later.
        • Preheat oven to 375.
        • Shake the bag to coat the baguette slices.
        • Line a large sheet pan with parchment paper, spread the slices out in a single layer, giving them space in between.
        • Bake 10 minutes until slightly golden brown and crisp.
        • Flip the croutons over and sprinkle shaved parmesan on top of each one.
        • Bake 5-10 more minutes until parmesan cheese melts and edges turn golden brown.
        • Remove the croutons from the hot oven, cool on the counter. Freeze them in an airtight container or airtight freezer bag. They are good for up to 3 months in the freezer.
        • Serve with soup, salad, as a snack, or on a cheese board.

        Notes

        slice ahead

        Plan ahead to slice the baguette and dry overnight to get the croutons nice and crisp.

        bread

        Use a new or day-old baguette loaf of bread.

        Leftover Baguette Recipe Ideas

        Baguettes come home golden and chewy and then turn rock hard solid so fast. Don't throw them out, try one of these delicious recipes.
        Panzanella - use cubes of baguette for an Italian bread salad. Panzanella is a salad made out of bread, tomatoes, onions, and other ingredients.
        Breakfast Cheese Strata - use pieces to bake up a bubbly breakfast casserole and a perfect dish to feed a crowd. Stratas are made in a baking dish loaded with bread cheese, breakfast meats like sausage, and can have mushrooms, bell peppers, and other ingredients.
        Top French Onion Soup - tear small pieces on top with melted gruyere cheese, and toast under the broiler.
        Crostini - slice long pieces, rub with peeled garlic cloves, drizzle on olive oil, and toast for crostini. Add toppings you love like tapenade, charcuterie sliced meats, dips, and cheeses.
        Thicken Soup & Stews - use torn toasted bread as a thickening agent in blended soups and stews.
        Bruschetta - thick slices of bread grilled, rubbed with garlic, drizzled with olive oil, often topped with tomatoes and herbs, and usually served as an appetizer.

        Nutrition

        Serving: 48g | Calories: 41kcal | Carbohydrates: 3g | Protein: 1g | Fat: 3g | Saturated Fat: 2g | Cholesterol: 7mg | Sodium: 84mg | Potassium: 9mg | Fiber: 1g | Sugar: 1g | Vitamin A: 77IU | Calcium: 30mg | Iron: 1mg

        Healthy Alfredo Sauce

        [heart_this] · Feb 4, 2022 · 2 Comments

        A fork holding twirled fettuccine out of a large skillet.

        Last Updated June 15th, 2023 at 08:38 pm by Lisa

        A healthier alfredo sauce recipe is possible with just a fraction of the calories. Let's lighten things up and ditch the high fat version loaded with carbs. I normally make classic alfredo sauce with heavy cream, tons of butter, and piles of grated parmesan cheese. A Traditional version is not healthy.

        Once the blender stops, taste this easy alfredo sauce. It has the right creamy texture and clings to the fettuccini with cheesy goodness. I licked the fork over and over...                         

        This recipe is made with healthy ingredients like cauliflower and plant-based milk. I was a little bit skeptical about a cauliflower sauce. The first time I whipped up this healthy recipe, it was shocking, as you really can't tell! The alfredo is so close to the real thing but is a healthy version.

        An easy recipe for all home cooks, absolutely rich and bursting with flavor. Finally, the best homemade alfredo sauce that can be made light and gluten-free right at home.

        How To Make Alfredo Healthy

        Replace typical alfredo sauce with a clean light version of alfredo sauce that will become one of your favorite dinner recipes. Next time you are at the grocery store, grab these simple ingredients to keep on hand for the best alfredo sauce.

        • 7 cups vegetable stock (swap in chicken stock bone broth)
        • 1 medium cauliflower (6 cups) cut into pieces
        • 2 tablespoons butter
        • 1 large shallot finely minced
        • ¼ teaspoon nutmeg freshly grated
        • 1 teaspoon garlic powder or minced garlic
        • 1 teaspoon kosher sea salt
        • 1 teaspoon fresh cracked black pepper
        • ½ cup unsweetened plant-based milk or skim milk
        • ¼ cup grated parmesan cheese (or swap nutritional yeast)
        • 1 pound fettuccine pasta gluten-free brand of choice or regular fettuccine½ cup fresh parsley finely chopped

        Let's Make Cauliflower Alfredo Sauce

        1. Cut the cauliflower into small chunks, set aside.
        2. In a large pot, bring the vegetable stock to boil. Or use a large pot of salted water.
        3. Place a large skillet (or sauce pan) over medium heat, melt butter (or swap olive oil) and saute' minced shallot, garlic, nutmeg, salt, and pepper. Cook until the shallot just turn light brown, tender and soft. Remove from heat and set aside.
        4. Add all the cauliflower in the large pot and boil for 7-10 minutes until fork tender. Turn off heat, keep the hot vegetable stock.
        5. In a high-speed blender, use a large strainer, and add the cauliflower, 1 cup of the vegetable cooking broth, sautéed shallot mixture, milk, and parmesan cheese. Puree on high until very smooth. Stop the blender and push down the cream sauce as needed. Pour the alfredo sauce, back into the pan you cooked the shallot mixture.
        6. Boil your fettuccine pasta in the same pot you cooked the cauliflower, add more water to cover the pasta if needed. Drain the pasta, add to the large skillet with the sauce, using tongs to combine.
        7. Turn the skillet on low heat with the sauce and pasta.
        8. Serve warm, and garnish with parsley and more parmesan cheese.
        9. Leftovers can be stored in an airtight container for up to 4 days.

        Light Alfredo Sauce Tips

        plant-based milk - Creates a creamy sauce, try almond milk, coconut milk, soy milk, oat milk, or flax milk. If you use regular whole milk, try low-fat milk or skim milk.

        garlic - You can use garlic powder or fresh garlic. Minced garlic will add a more garlicky flavor.

        butter - Okay, it's only 2 tablespoons! That fat from the melted butter adds loads of flavor, but if you want you can swap it out for olive oil.

        parmesan cheese - Swap in nutritional yeast in place of the cheese, the great thing is it also works as a thickening agent for a nice thick sauce.

        shallots - Are just right in this recipe and preferred for best results as they don't bring an overwhelming onion taste to the sauce. Try to find these, but if you can't go with a sweet mild onion or a yellow onion and avoid white onions.

        pasta - The choices here are endless for what to use a healthier fettuccine alfredo, try a gluten-free brand of choice. You can also use whole wheat noodles, make spiralized zoodles, or your favorite pasta.

        vegetable stock - This is the top choice for a low-fat alfredo sauce, it is much lower in calories, fat, and carbs. But you can use Chicken Stock (Bone Broth), try my recipe if you wish to swap it instead.

        Why is alfredo sauce delicious?


        Alfredo sauce is a decadent sauce made by melting butter, heavy cream, and parmesan cheese together. Most pasta sauces use tomatoes as a base, alfredo has no vegetables and uses rich dairy ingredients for a fabulous depth of flavor.

        Who created alfredo sauce?

        Alfredo di Lelio, an Italian restaurateur, is credited for Fettuccine Alfredo in 1908. His wife had lost her appetite after giving birth to their first son. So he gave her a dish of pasta with this creamy parmesan cheese and butter white sauce to help encourage her to eat.

        Healthy Chicken Alfredo

        Traditional alfredo sauce over hot fettuccine noodles is a family favorite and a delicious recipe we all adore. To turn this into a hearty weeknight meal, add cubed chicken, and dinner is on the table.

        You can use chicken breast, canned chicken, or rotisserie chicken to pull this skinny alfredo sauce dinner together in minutes. You can even use slice leftover turkey or cooked ground turkey to make a wholesome dinner.

        More Sauce Recipes

        Lobster Ravioli with a Lemon Butter Sauce uses a baked ravioli technique you can make in just over an hour or prep ahead for dinner parties, holidays, and romantic nights. Remoulade Sauce is a popular condiment or dipping sauce, usually paired with seafood, cold meats, and fried foods like French fries, and is awesome on Fried Green Tomatoes.

        Creamy Balsamic Horseradish Sauce is amazing on thick slices of Roast Beef for dinner, on prime rib, or to slather on Roast Beef Sandwiches.

        Make Burger Sauce at home, this recipe is very similar to the In-N-Out Spread from Southern California.

        • A white plate filled with heart shaped lobster ravioli garnished with parsley.
          Lobster Ravioli
        • A vintage spoon scooping up remoulade sauce to use on a recipe.
          Remoulade Sauce
        • Looking down into a wooden bowl with creamy balsamic horseradish sauce swirled in the center, and a wooden spreader resting on the edge of the bowl with a rustic beige tablecloth underneath and on a woven rattan placemat.
          Creamy Balsamic Horseradish Sauce
        • A messy grilled burger topped with lettuce, tomato, cheese, pickles and burger sauce in a basket with a bottle of burger sauce.
          Burger Sauce

        Did you love this recipe? We would love to hear from you! If you make this recipe and love it, give it a 5-star rating ⭐⭐⭐⭐⭐ with a comment. THANK YOU!! Follow Delicious Table with my free newsletter and share this recipe with your friends on Facebook, Pinterest, and Instagram.

        A fork holding twirled fettuccine out of a large skillet.
        Print

        Healthy Alfredo Sauce Recipe

        A healthy alfredo sauce recipe is possible with just a fraction of the calories. Let's ditch the high fat version loaded with fat and carbs. This Cauliflower Alfredo is absolutely rich and bursting with flavor, gluten-free, and a healthier recipe of a classic comfort food dish.
        Course Dinner & Main Dishes
        Cuisine American
        Keyword cauliflower alfredo sauce, healthy alfredo sauce
        Prep Time 15 minutes minutes
        Cook Time 15 minutes minutes
        Total Time 30 minutes minutes
        Servings 8
        Calories 276kcal
        Author Lisa Hatfield

        Equipment

        • Large Cast Iron Skillet

        Ingredients

        • 7 cups vegetable stock (swap in chicken stock bone broth)
        • 1 medium cauliflower (6 cups) cut into pieces
        • 2 tablespoons butter (swap in olive oil)
        • 1 large shallot finely minced
        • ¼ teaspoon nutmeg freshly grated
        • 1 teaspoon garlic powder
        • 1 teaspoon kosher sea salt
        • 1 teaspoon fresh cracked pepper
        • ½ cup unsweetened plant-based milk (swap in skim milk)
        • ¼ cup grated parmesan cheese (swap in nutritional yeast)
        • 1 pound fettuccine pasta gluten free or regular fettuccine
        • ½ cup fresh parsley finely chopped
        US Customary - Metric

        Instructions

        • Cut the cauliflower into small chunks, set aside.
        • In a large pot, bring the vegetable stock to boil. You can also swap in chicken stock or use a large pot of salted water with a teaspoon salt.
        • Place a large skillet or sauce pan over medium heat, melt butter (or swap olive oil) and saute' minced shallot, garlic powder, nutmeg, salt, and pepper. Cook until the shallot just turn light brown, tender and soft. Remove from heat and set aside.
        • Add all the cauliflower in the large pot and boil for 7-10 minutes until fork tender. Turn off heat, keep the hot vegetable stock.
        • In a high-speed blender, use a large strainer, and add the cauliflower, 1 cup of the veggie cooking broth, and sautéed shallot miture, milk, parmesan cheese, and puree on high until very smooth. Stop the blender and push down the cream sauce as needed.
        • Pour the alfredo sauce back into the pan off the heat you cooked the shallots and butter.
        • Boil your fettuccine pasta in the same pot as you cooked the cauliflower in the vegetable stock, add more water to cover the pasta if needed. Drain the pasta, add to the large skillet with the sauce, using tongs to combine.
        • Turn the skillet on low heat with the sauce and pasta.
        • Serve warm and garnish with parsley and more parmesan cheese.
        • Leftovers can be stored in an airtight container for up to 4 days.

        Notes

        Light Alfredo Sauce Tips

        plant-based milk - Creates a creamy sauce, try almond milk, coconut milk, soy milk, oat milk, or flax milk. If you use regular whole milk, try low-fat milk or skim milk.

        garlic - You can use garlic powder or fresh garlic. Minced garlic will add a more garlicky flavor.

        butter - Okay, it's only 2 tablespoons! That fat from the melted butter adds loads of flavor, but if you want you can swap it out for olive oil.

        parmesan cheese - Swap in nutritional yeast in place of the cheese, the great thing is it also works as a thickening agent for a nice thick sauce.

        shallots - are just right in this recipe and preferred for best results as they don't bring an overwhelming onion taste to the sauce. Try to find these, but if you can't go with a sweet mild onion or a yellow onion and avoid white onions.

        pasta - The choices here are endless for what to use a healthier fettuccine alfredo, try a gluten-free brand of choice. You can also use whole wheat noodles, make spiralized zoodles, or your favorite pasta.

        vegetable stock - This is the top choice for alow-fat alfredo sauce, it is much lower in calories, fat, and carbs. But you can use Chicken Stock (Bone Broth), try my recipe if you wish to swap it instead.

        Healthy Chicken Alfredo

        Traditional alfredo sauce over hot fettuccine noodles is a family favorite and a delicious recipe we all adore. To turn this into a hearty weeknight meal, add cubed chicken, and dinner is on the table.
        You can use chicken breast, canned chicken, or rotisserie chicken to pull this skinny alfredo sauce dinner together in minutes. You can even use slice leftover turkey or cooked ground turkey to make a wholesome dinner.


        Nutrition

        Calories: 276kcal | Carbohydrates: 50g | Protein: 8g | Fat: 6g | Saturated Fat: 3g | Polyunsaturated Fat: 1g | Monounsaturated Fat: 1g | Trans Fat: 1g | Cholesterol: 10mg | Sodium: 1249mg | Potassium: 266mg | Fiber: 3g | Sugar: 5g | Vitamin A: 901IU | Vitamin C: 40mg | Calcium: 81mg | Iron: 1mg

        Cheese Soup

        [heart_this] · Feb 3, 2022 · 9 Comments

        White bowl filled with cheese soup and a homemade crouton on top.

        Last Updated April 26th, 2024 at 11:11 am by Lisa

        A classic famous Cheese Soup with simple ingredients and extraordinarily deep rich flavors. An easy recipe and one of my favorite things to serve on chilly nights when it's soup time.

        Put out lots of toppings like croutons, extra cheese, or crumbled bacon. Serve it hot with homemade Croutons for a hearty and amazing lunch or dinner.

        One of the good things is you can whip up this in just 45 minutes for ultimate comfort food in a bowl and love at first spoonful...

        How To Make Cheese Soup

        A creamy soup from not one but two kinds of melted cheese. The first time I tasted this recipe was with an entire group of food bloggers. We all wanted the recipe, it was love at first sip. The whole family will love the cheesy flavor, you could serve it in bread bowls to make it extra special.

        • ¼ cup butter
        • 1 cup diced yellow onion
        • 1 teaspoon salt
        • 1 teaspoon white pepper (or black pepper)
        • ½ cup diced carrot
        • 1 cup diced celery (6 small ribs)
        • ¼ cup all-purpose flour
        • 1 tablespoons cornstarch
        • 4 cups chicken broth or chicken stock 32 oz. box or a quart
        • 1 cup heavy cream (whipping cream)
        • 1 pound cubed Velveeta
        • 2 cups grated sharp cheddar cheese (grate it, don't use pre-grated or it won't melt well!)
        • 1 teaspoon dried parsley or fresh chopped
        • ¼ teaspoon cayenne
        • ¼ paprika

        Let's Make This Soup!

        1. Dice the onions, carrots, and celery. Grate the cheddar cheese, and cube the Velvetta.
        2. In a heavy large dutch oven or large soup pot over medium heat, melt butter, salt, and pepper. Saute onions, carrots and celery until tender 5 minutes . Stir in flour and cornstarch, cook another 3 minutes.
        3. Add chicken stock bone broth (or chicken broth) and heavy whipping cream gradually, blending until smooth about 3-5 minutes.
        4. Turn heat down to medium-low, don’t allow soup to boil at any point.
        5. Add cubed Velveeta cheese and grated cheddar cheese, stir until melted, about 5 minutes.
        6. Add parsley, cayenne, and paprika.
        7. Using an immersion blender (stick blender), mix the soup until smooth and creamy. Or blend in a blender in small batches, and be careful it's hot!
        8. Simmer on medium-low heat for 20 minutes until it thickens.
        9. Serve in bowls or mugs with bread or croutons.
        10. Cool this delicious soup leftovers, and keep in an airtight container in the fridge until ready to reheat on the stovetop or microwave.

        PRO TIP: You can easily turn any leftover soup into a Broccoli Cheddar Soup recipe the next day by adding small handfuls of cut broccoli florets and broccoli stems. Blend a few in with your stick blender and reheat on the stove and dinner is ready for a busy weeknight!

        Cheddar Cheese Soup Serving Ideas

        Make it soup time for lunch or main dish for dinner, and a great way is to have lots of toppings...

        • Cheese Croutons
        • popcorn
        • grate extra cheese
        • crusty bread
        • soup crackers
        • bacon crumbles
        • Roasted Pumpkin Seeds
        • breadsticks (grissini)
        • serve in a bread bowl
        • toasted baguettes and Herb Butter
        • hot sauce
        • small pieces of fresh broccoli

        Beer Cheese Soup Recipe: To make this a beer cheese soup, swap in 2 cups of a good beer you would drink in place of the chicken stock and a dash or two of Worcestershire sauce. Top with crumbled bacon and green onions.

        Crouton Baguette Shards are amazing floating on this cheesy soup. These are long slices of a crusty baguette, coated with melted butter, parmesan cheese, and seasoning like garlic powder. They are toasted in the oven and are divine with salads and soup.

        Croutons ~ Plus Leftover Baguette Recipes
        Serve with hot soup, chilled salad, as a snack, or on a cheese board, these croutons are made in minutes with baguette, butter, spices and parmesan cheese.
        GET THE RECIPE PIN IT
        Cheese topped croutons on a parchment lined baking sheet.

        The Story Of This Cheese Soup Recipe

        While on a culinary tour at a food conference, a large group of fun and friendly food bloggers and writers had lunch at The Driskill Hotel (Austin, Texas) in the 1886 Cafe and Bakery, inside The Driskill Hotel.

        The Cheese Soup came highly recommended,  so several of us ordered a bowl along with salads and sandwiches. Next time you are in Austin, you have to try this great recipe, if it's the only thing you do at The Driskell.

        It really was love at first sip, and we all just couldn't believe how good it tasted. The creamy texture has a slight kick of heat from the cayenne and all the melted cheese makes an incredibly rich soup. We all kinda giggled when we learned it has Velveeta, but that is the secret why it is so creamy and thick.

        Of course, I jokingly, yet boldly asked our waitress for the recipe. The giggles and laughter bounced down the table, and then our waitress said, "Of course, we can share the cheese soup recipe with you!" We all looked at one another in pure delight.

        Once we received our copies, we again giggled that it had VELVEETA in it, but you know what? It is sooooo creamy and delicious!

        Who is Helen Corbitt?

        But that isn't the whole story, when I got home, I did some more research and learned that the original Cheese Soup recipe at the Driskell Hotel comes from Helen Corbitt.

        Well, Helen Corbitt served as the Culinary Director of the Driskill Hotel in the late 1950s and later as the Head of Culinary Operations at Neiman Marcus.

        She is an American chef, cookbook author, and award-winning pioneer of classic Texan Cuisine and is known as the "Julia Child" of Texas.

        For over 40 years, Helen shared her gourmet cuisine in Texas finding new and unusual flavor combinations, and ingredients.

        How Did Helen Corbitt Impact Texas Cuisine?

        An early advocate of using the finest, freshest ingredients and in the years b.c. (before Corbitt), Texans had no artichokes, no fresh raspberries, no herbs except decorative parsley, only beef (chicken-fried, barbecued, or well-done), potatoes (fried or mashed and topped with cream gravy), and wedges of Iceberg with sweet orange dressing.

        President and Lady Bird Johnson were served at The Driskill Hotel, and adored Helen's cuisine, and took her recipes all the way to the White House. Today, Helen Corbitt’s Cheese Soup recipe is still on the 1886 Cafe and Bakery Menu for $4 per cup or $6 a bowl.

        Helen Corbitt's Cookbook

        In her cookbook titled,  Helen Corbitt's Cookbook, Helen states,

        "By far the most asked-for soup everywhere I have traveled is my Canadian Cheese Soup. My men, customers are mad about it. Where it comes from I do not know; it has been a part of my life so long it could have come with the stork."

        The Driskill Hotel in Austin, Texas,  was built in 1886 as the showplace of cattle baron Jesse Driskill.  Today, the hotel remains a legendary landmark in Texas hospitality offering its guests an elite level of luxury accommodations and services for more than a century.

        More Easy Soup Recipes

        Creamy Chicken Gnocchi Soup is so easy to put together, a hearty soup dinner recipe, and one will become a family favorite. Loaded with juicy shredded chicken, vegetables, and gnocchi which are soft puffy "Italian dumplings".

        Learn how to make Chicken Stock (aka bone broth) step by step with cooking tips on how to store and freeze it plus 15 delicious recipe ideas. Save money and have it ready to elevate your cooking for dinner, soups, and stews.

        The classic flavors from simple ingredients make this the Best Homemade Chicken Noodle Soup recipe. It is comfort food in a bowl and a great way to use up leftover chicken. 

        • A white bowl full of Chicken Gnocchi Soup with a silver spoon and bread nearby.
          Chicken Gnocchi Soup
        • 3 small Mason jars filled with chicken stock and black heart shaped labels.
          Chicken Stock (Bone Broth)
        • A blue bowl filled with homemade chicken noodle soup.
          Chicken Noodle Soup

        Tomato Soup with Basil Dumplings can be rich and chunky or creamy smooth and is loaded with a veggie rainbow for a hearty lunch or dinner.

        Creamy Jalapeño Popper Soup tastes just like the cheesy jalapeño poppers we love. The spicy heat of the peppers is mild as this original recipe uses canned jalapenos and green chiles for just the right kick and level of heat.

        Every spoonful of this Cajun Sausage And Potato Soup comforting and zesty. This spicy, cozy dinner has hearty chunks of vegetables and slices of andouille sausage. And takes just 20 minutes of prep time.

        • A bowl of tomato soup and cup of soup in a white cup garnished with fresh basil.
          Tomato Soup With Basil Dumplings
        • Two bowls of creamy jalapeno popper soup in white handled soup bowls garnished with thin sliced jalapenos and cheese.
          Jalapeno Popper Soup
        • A wooden board with two bowls of sausage potato soup with spoons and pieces of bread.
          Cajun Sausage Potato Soup

        Did you love this recipe? We would love to hear from you! If you make this recipe and love it, give it a 5-star rating ⭐⭐⭐⭐⭐ with a comment. THANK YOU!! Follow Delicious Table with my free newsletter and share this recipe with your friends on Facebook, Pinterest, and Instagram.

        White bowl filled with cheese soup and a homemade crouton on top.
        Print

        Cheese Soup Recipe

        An easy classic famous Cheese Soup Recipe that is so creamy, has simple ingredients, and extraordinarily deep rich flavors. Serve with croutons. Serve with crispy croutons. Famously served at The Driskill Hotel in Austin, Texas in the 1886 Bakery and Cafe.
        Course Soup
        Cuisine American
        Keyword cheese soup, Helen Corbitts cheese soup, soup recipe, velveeta cheese soup
        Prep Time 25 minutes minutes
        Cook Time 20 minutes minutes
        Total Time 45 minutes minutes
        Servings 8
        Calories 479kcal
        Author Lisa Hatfield

        Equipment

        • Cast Iron Dutch Oven
        • Spoon Spatula
        • Box Grater
        • Immersion Blender

        Ingredients

        • ¼ cup butter
        • 1 cup diced yellow onion
        • 1 teaspoon salt
        • 1 teaspoon white pepper (or swap black pepper)
        • ½ cup diced carrot
        • 1 cup diced celery (6 small ribs)
        • ¼ cup all-purpose flour
        • 1 tablespoons cornstarch
        • 4 cups chicken stock bone broth 32 oz. box or a quart
        • 1 cup heavy cream whipping cream
        • 1 pound cubed Velveeta
        • 2 cups grated cheddar cheese (grate it, don't use pre-grated or it won't melt well!)
        • 1 teaspoon dried parsley or fresh chopped
        • ¼ teaspoon cayenne
        • ¼ paprika
        US Customary - Metric

        Instructions

        • Dice the onions, carrots, and celery. Grate the cheddar cheese, and cube the Velvetta.
        • In a heavy large dutch oven or large soup pot over medium heat, melt butter, salt, and pepper. Saute onions, carrots and celery until tender 5 minutes.
        • Stir in flour and cornstarch, cook another 3 minutes. Add chicken stock bone broth (or chicken broth) and heavy whipping cream gradually, blending until smooth about 3-5 minutes.
        • Turn heat down to medium-low, don’t allow soup to boil at any point. Add cubed Velveeta cheese and grated cheddar cheese, stir until melted, about 5 minutes. Add parsley, cayenne, and paprika.
        • Using an immersion blender (stick blender), mix the soup until smooth and creamy. Or blend in a blender in small batches, and be careful it's hot!
        • Simmer on medium-low heat for 20 minutes until it thickens. Serve in bowls or mugs with bread or croutons. Cool these delicious soup leftovers, and keep in an airtight container in the fridge until ready to reheat.

        Notes

        topping ideas for cheese soup

        • Cheese Croutons
        • popcorn
        • grate extra cheese
        • crusty bread
        • soup crackers
        • bacon crumbles
        • Roasted Pumpkin Seeds
        • breadsticks (grissini)
        • serve in a bread bowl
        • toasted baguettes and Herb Butter
        • hot sauce
        • small pieces of fresh broccoli

        sharp cheddar cheese

        Finely grate to melt properly for the soup, pre-shredded cheese has an anticaking agent and doesn't melt as well as freshly grated cheddar cheese. 
        This recipe is inspired by the Driskill Hotel, Austin, Texas. Driskill Hotel Recipe was adapted from the original recipe in "Helen Corbitt's Cookbook” (Hougton Mifflin, 1957).

        Nutrition

        Calories: 479kcal | Carbohydrates: 18g | Protein: 25g | Fat: 34g | Saturated Fat: 20g | Cholesterol: 120mg | Sodium: 1806mg | Potassium: 455mg | Fiber: 0g | Sugar: 8g | Vitamin A: 4225IU | Vitamin C: 1.7mg | Calcium: 564mg | Iron: 0.9mg

        Valentine Heart Shaped Cookies

        [heart_this] · Feb 1, 2022 · 2 Comments

        A white plate with heart shaped colorful Valentine cookies.

        Last Updated April 24th, 2024 at 05:50 pm by Lisa

        The cute heart shape for these Valentine's day cookies is created by baking up a batch of palmiers. A flaky crisp French cookie made with store-bought puff pastry and sugar.

        Easy recipes like these delicious heart cookies are great to decorate with melted white chocolate and gorgeous sparkling sugar and sprinkles.

        You don't need to make sugar cookie dough, wait for chilled doughs to firm, or fuss over cutout cookies. Simply roll, bake, and decorate these homemade heart cookies...

        Why This Recipe Works

        • The basic palmier recipe needs just 2 ingredients. Well, this really isn't a recipe, to be honest!
        • No measuring ingredients, and no hand-mixer like with sugar cookies.
        • The best part is these are so easy, kids can help you.
        • No sugar cookie recipe ingredients and dough to mix in the bowl of a stand mixer.
        • Easy cookies to bake in 20 minutes.
        • No heart cookie cutter is needed.
        • Sweet, crisp, and tasty, both kids and adults love these fun cookies.
        • You can make these anytime and they pair perfectly with coffee or tea, as a sweet festive treat any time of day.
        • Try to eat just one, impossible!

        How to Make Heart Shaped Cookies

        You Need...

        • 1 box puff pastry Pepperidge Farm
        • 2 cups granulated white sugar
        • 10 oz white chocolate melting wafers
        • Different color cookie decorations - heart candies, red and pink festive sprinkles, conversation hearts, red, white, and pink color sugars or chocolate chips.

        Puff Pastry Tips

        Puff pastry is available in the freezer section of your grocery store. The brand I use is Pepperidge Farm, but any brand will do just fine.

        You can thaw it overnight in the refrigerator, or take it out of the box and paper wrapper and rest for 40 minutes on the kitchen counter.

        You can make your own puff pastry at home. I made it in professional cooking school once with a French Chef's help, but it is a difficult and lengthy process. And exhausting!

        So why would you make it when it's so easy to buy and tastes just as good?

        Keep a box in the freezer for last-minute dessert baking or party appetizers. Try my Brie and Bacon Palmiers, they are always a huge hit at parties, with just 3 ingredients. By the way, the rolling pin above belonged to my Mother Corinne.

        The sound of how it rolls reminds me of the countless times I heard her baking with it in our kitchen growing up.

        She was a passionate home cook as well as a professional cooking instructor and had a definite influence on my culinary passion. Thanks, Mom!

        Roll Out Cookies

        PRO TIP: The granulated sugar pressed into the puff pastry sweetens the cookies, and gives a crunchy cookie texture.

        1. Thaw puff pastry sheet at room temperature 40 minutes or until it unfolds easily.
        2. Pre-heat oven to 400 degrees.
        3. Sprinkle ½ cup of white granulated sugar evenly on the counter or wooden board.
        4. Open one sheet from the paper wrapper and lay flat it on the work surface. Evenly sprinkle ½ cup of sugar on top of puff pastry.
        5. Use a rolling pin, and roll the sheet until it's about 13 x 13 inches square

        How To Create Beautiful Heart Shapes

        Try different sugars, and mix different colors. Each beautiful heart cookie will be a special treat for your Valentine that they will...L-O-V-E!!!

        1. After you roll the puff pastry with white sugar, mix color sprinkles or sparkling sugars and press into the pastry.
        2. Roll or fold from the outside edge into the center from both sides and chill.
        3. Chill for at least 30 minutes in the fridge, this helps the pastry "puff".
        4. You can also add sprinkled colored sugar on one or both sides and gently roll the rolling pin to set it, before rolling up.
        5. Slice the dough into ½ inch slices, and place on a piece of parchment paper on a large baking sheet with the edges up.
        6. Slightly pinch the bottom of each palmier into a point on the baking sheet to get the HEART shape valentine's cookies.

        Palmier Baking Tips

        1. Place the slices, cut side up, on baking sheets lined with Silpat mats or parchment paper.
        2. It is best to rechill the sliced dough before baking, this helps it puff as the butter resets.
        3. The baking time for the cookies is 20 minutes at 400 degrees until golden brown.
        4. Transfer to a wire rack or cooling rack.
        5. Palmiers will get crunchier as they cool, and are the best to eat the same day.
        6. Store them in an airtight container, but they will go soft in a couple of days.

        Decorating

        There is no one perfect way to decorate these cookies. You can work on a piece of wax paper or plastic wrap to make cleanup easier while you decorate.

        1. Melt white chocolate chips in a bowl over simmering water.
        2. Dip ½ of the cookie into the white melted chocolate.
        3. Sprinkle with sugar sprinkles or press on small heart-shaped candies.
        4. You can also dip them in melted milk or dark chocolate.
        How is puff pastry made?

        Puff pastry is made by the layering of dough and butter, rolled and folded over and over to create hundreds of flaky layers that "puff" in the hot oven.

        When you look at the dough, it looks similar to pie dough, but it’s actually many thin layers of butter and dough.

        Why does puff pastry "puff"?


        Since puff pastry doesn't have yeast, baking soda, or baking powder, how does it rise and get flaky layers?

        Puff pastry is made from flour, butter, and water. The water in the dough recipe combined with the water in the melting fat (butter or other solid fat) turns into steam in the hot oven. The pastry is pushed and lifted into airy flaky layers by that steam during the baking process and evaporates into the oven.

        A white plate full of palmiers ready to eat as dessert.

        More Valentine's Day Recipes

        Valentine's Day recipes include romantic dinners, drinks, and desserts. These heart-shaped recipes will especially wow your family and sweetheart!

        S'more Cookie Dough TrufflesS'more Cookie Dough Truffles are an easy no-bake dessert candy. These have cookie dough studded with chocolate chips and mini marshmallows.

        A romantic delicious dinner idea is Baked Lobster Ravioli with Lemon Butter Cream Sauce. People ADORE this wildly popular recipe because it can be made ahead for date night, is heart-shaped, uses wonton wrappers (no pasta), plus no boiling pots of water or fuss.

        Low carb, low sugar, low-calorie Strawberry Smash Cocktails are a healthy drink for date night or on a hot summer day for your sweetheart!

        Make an elegant Beef Roast (aka Roast Beef) from tenderloin or New York steak. Wonderful to serve for dinner parties, special occasions, or the holidays with a rich red wine sauce.    

        • A lady holding a s'more cookie dough truffle cut open with mini marshmallows inside.
          S'more Cookie Dough Truffles
        • A white plate filled with heart shaped lobster ravioli garnished with parsley.
          Lobster Ravioli
        • Close up view of strawberry cocktails with heart shaped garnish made from a strawberry on the rim.
          Strawberry Cocktails
        • Thick sliced roast beef on a cutting board with pan juices and ingredients in the background.
          Beef Roast

        Did you love this recipe? We would love to hear from you! If you make this recipe and love it, give it a 5-star rating ⭐⭐⭐⭐⭐ with a comment. THANK YOU!! Follow Delicious Table with my free newsletter and share this recipe with your friends on Facebook, Pinterest, and Instagram.

        A white plate with heart shaped colorful Valentine cookies.
        Print

        How To Make Heart Shaped Cookies

        Palmiers are flaky crisp French cookies with only 3 ingredients, are easy to bake, and these heart cookies are perfect for Valentine's Day!
        Course Desserts & Sweets
        Cuisine French
        Keyword French cookies, heart cookies, heart shapped cookies, palmiers, puff pastry palmiers, valentines cookies
        Prep Time 30 minutes minutes
        Cook Time 20 minutes minutes
        Total Time 50 minutes minutes
        Servings 20
        Calories 289kcal
        Author Lisa Hatfield

        Equipment

        • Large Metal Sheet Pan
        • Parchment Paper Sheets
        • Wood Rolling Pin
        • Chef Knife

        Ingredients

        • 1 box puff pastry Pepperidge Farm
        • 2 cups sugar
        • 10 oz white chocolate melting wafers
        • Valentine's cookie decorating sprinkles Different color cookie decorations - heart candies, red and pink festive sprinkles, conversation hearts, and red, white, and pink color sugars.
        US Customary - Metric

        Instructions

        • Thaw puff pastry sheet at room temperature 40 minutes or until it unfolds easily.
        • Preheat oven to 400 degrees.

        Roll Out Pastry

        • Sprinkle ½ cup of white granulated sugar evenly on the counter or wooden board.
        • Open puff pastry sheet and lay flat on work surface. Evenly sprinkle ½ cup of sugar on top.
        • Use a rolling pin, roll the pastry sheet until it's about 13 x 13 inches square.

        Heart Shape Palmiers

        • After you roll the puff pastry with white sugar, mix color sprinkles or sparkling sugars and press into the rolled out pastry.
        • Roll or fold from the outside edge of puff pastry into the center from both sides and chill. Chill for at least 30 minutes in the fridge, this helps the pastry "puff" in the heat of the oven.
        • You can also add sprinkle colored sugar on one or both sides and gently roll the rolling pin to set it, before rolling up.
        • Slice the dough into ½ inch slices, and place on a piece of parchment paper on a large baking sheet with the edges up. Slightly pinch the bottom of each palmier into a point on the baking sheet to get the HEART shape.

        Bake Palmiers

        • Place the slices, cut side up, on baking sheets lined with Silpat mats or parchment paper. It is best to rechill the sliced dough before baking, this helps it puff as the butter resets.
        • Baking time for the cookies is 20 minutes at 400 degrees until golden brown. Transfer to a wire baking rack to cool.
        • Palmiers will get crunchier as they cool, and are the best to eat the same day. Store them in an airtight container, but they will go soft in a couple of days.
        • Melt white chocolate chips in a bowl over simmering water.Dip ½ of the cookie into the melted white chocolate.Sprinkle with sugar sprinkles or press on small heart shaped candies.You can also dip them in melted milk or dark chocolate.

        Notes

        palmier baking tips

        1. It is best to rechill the sliced dough before baking, this helps it puff as the butter resets.
        2. Palmiers will get crunchier as they cool, and are the best to eat the same day.
        3. To get the classic folded Palmier shape, chill the puff pastry after rolling up, and slicing. This helps it keep its shape during baking. I use a small baking sheet and pop in the refrigerator for about 20 minutes just before baking.
        4. Press a lot of sugar into the pastry dough. The more sugar, the more crunchy and caramelized your palmier will bake.

        decorating tips

        1. For a fun Valentine's Day idea, melt white chocolate chips in a heatproof bowl over simmering water.
        2. Dip in half the palmier and sprinkle with color sugars, sprinkles, or candies.

        storage

        Store them in an airtight container, but they will go soft in a couple of days.

        Nutrition

        Serving: 20g | Calories: 289kcal | Carbohydrates: 39g | Protein: 3g | Fat: 14g | Saturated Fat: 5g | Cholesterol: 3mg | Sodium: 74mg | Potassium: 56mg | Fiber: 1g | Sugar: 29g | Vitamin A: 4IU | Vitamin C: 1mg | Calcium: 31mg | Iron: 1mg

        Cheeseburger Meatloaf Recipe

        [heart_this] · Jan 24, 2022 · 3 Comments

        A close up view of meatloaf sliced open and cooked bacon strips on top.

        Last Updated June 27th, 2022 at 04:34 pm by Lisa

        The best juicy Cheeseburger Meatloaf Recipe is bursting with flavor. The ground beef is loaded with a sauteed vegetable and spice mixture, cheeses, wrapped in bacon slices, and baked. Each slice is light, fluffy, tender, and holds together.

        We all grew up eating classic meatloaf recipes for dinner. It is one of the best comfort foods we crave, and at a low cost per serving. But I decided to make a version that was company-worthy with scrumptiousness hidden inside.

        So here is my little spin for cheeseburger lovers. The loaded meat mixture has lots of seasoned flavors and cheeses, I skipped all the ketchup and swapped in bacon right on top...

        Why This Is The Best Meatloaf

        Regular meatloaf is a classic, and typically has ingredients like ground chuck, some additional ketchup, skim milk, plain bread crumbs, brown sugar, onion powder, and a cup ketchup mixture on top. That original recipe is all fine and good, but you will have a hard time ever making it that way again!

        What makes this recipe so good, is the full flavor of all the ingredients. The vegetable saute mixture packs in the flavor. The oregano and chili powder spices toast in the pan while the celery, onion, and garlic soften.

        Cheddar and parmesan cheese play their part to add flavor and also act as a binder. This also creates that cheeseburger flavor we all love. Soy sauce is called for in this recipe, but you can easily swap in Worcestershire sauce.

        And the next day, be sure to make meatloaf sandwiches everyone in the whole family will love.

        • Simple Ingredients
        • Absolutely PACKED With Flavor
        • About $2.50 dollars Per Serving
        • Wrapped In Crispy Bacon 🥓
        • Stuffed With Cheeses and Seasoned Veggies
        • Will Become One Of Your Favorite Easy Dinner Recipes
        • Bakes In An Hour - Fast Cooking Time
        • Using Fully-Cooked Bacon Saves Time
        • Different From Traditional Meatloaf
        • Perfect For First Time Cooks

        How To Make Cheeseburger Meatloaf

        Cheeseburger Meatloaf Ingredients

        • 1 tablespoon extra virgin olive oil
        • 1 cup onion finely chopped
        • ½ cup celery finely chopped
        • 3 cloves garlic finely minced
        • 1 teaspoon dried oregano
        • 1 teaspoon chili powder
        • 2 pounds ground beef 85/15
        • 1 ½ cups sharp cheddar cheese
        • ½ cup AP flour or almond flour
        • ½ cup grated parmesan cheese
        • 1 tablespoon soy sauce (or use Worcestershire sauce)
        • 1 teaspoon sea salt
        • ½ teaspoon black pepper
        • 12 pieces fully cooked bacon

        Saute Vegetables

        Place a small skillet over medium heat. Add olive oil, then add finely chopped onion and celery. Stir for 3 minutes until soft, and then add garlic, oregano, and chile powder.

        Mix The Meatloaf

        In a large mixing bowl, add the ground beef, sauteed vegetable/spice mixture, grated cheddar cheese, flour (almond or regular AP flour), Parmesan cheese, eggs, and soy sauce.

        Using a spatula, stir the mix in the large bowl until well combined and all the ingredients are mixed throughout the ground beef.

        Shape the meatloaf mixture into a long oval loaf shape.

        Place in the sprayed baking dish, large loaf pan, or rimmed baking sheet. Place the precooked bacon strips diagonally, slightly overlapping covering the entire surface. The addition of bacon adds flavor, looks beautiful, and prevents a dry tough meatloaf.

        Bake The Cheesburger Meatloaf

        Heat Oven to 400 degrees.

        Bake on the center rack for 1 hour at 400 degrees until the internal temperature reaches 160+ degrees with a meat thermometer. 160 degrees is a safe internal temperature for ground beef.

        PRO TIP: If the bacon is browning too dark, tent with a piece of aluminum foil.

        Let your meatloaf rest about 5 minutes before slicing so it holds together. If any liquid is in the baking dish, discard it. Slice into thick slices and serve warm.

        Meatloaf Ingredient Tips

        Ground Beef

        Ground beef that is 85% lean and 15% fat works great in this recipe. You can go with lean ground beef or ground turkey but you will lose some of the lightness and flavor of good meatloaf due to the lower fat content of lean meat.

        Fully Cooked Bacon

        It is packaged and pre-cooked bacon strips within a resealable package. You will find it in the bacon section of the grocery store. It saves time and keeps the stovetop clean as you don't have to cook the bacon.

        I absolutely love this product, and it is a staple in my freezer! There is no prep and no mess. It can be easily reheated and made crisp for use in recipes right in the microwave or in a skillet. It turns out perfectly every time and is a great price point at Costco. A big package is around $10. It keeps great in the freezer at home, so you always have bacon ready to enjoy.

        PRO TIP: I tested this recipe with fully cooked bacon, if you can't find that, precook your bacon in the microwave until most of the fat renders out yet it is still pliable to bend on the meatloaf.

        Cheeses

        For this recipe, I went with cheddar and parmesan. The melted cheddar cheese is the best way to bind the meat mixture together. You could try different cheese varieties like Colby, Monterey Jack, Pepperjack, or even Swiss. I use grated parmesan in a lot of my recipes, good swaps here are grated asiago or pecorino romano.

        Preheat oven to 400 degrees Fahrenheit. Spray a medium baking dish with coconut oil cooking spray.

        Flour

        If you are avoiding carbs and flour, you can swap in almond flour just fine.

        Recipe Variations and Additions

        There are so many recipes and variations on meatloaf, and no perfect way to make it! But here are a few of the popular ingredients people add to this recipe.

        Small pieces of bacon bits would add flavor all through the meatloaf. Another idea is to lay slices of cheese melted on top of and put pickle slices on top just like a cheeseburger!

        You can use egg whites instead of whole eggs. Eggs add some binding to the meat mixture so it holds together in the baking. Another really fun idea is to add those amazing fried onions into the meat mixture before baking. Yummmm.

        • yellow mustard or spicy brown mustard
        • cheese slices; pepper jack cheese or American cheese
        • French Fried Onions
        • Dill Pickles
        • Egg Whites
        • Pickle Relish
        • Bacon Bits
        • mustard glaze

        Different Ways Serve With Hot Meatloaf?

        For a classic dinner, serve this bacon cheeseburger meatloaf recipe with a side of hot Mashed Potatoes and some hot bread or these Dinner rolls with Herb Butter.

        Grilled Corn would be a great side, with cool fresh Cole Slaw that happens to be mayo-less. Another classic side would be some Smashed Potatoes that have crispy edges and soft centers. Or serve some Cowboy Baked Beans, a wildly popular recipe that everyone adores.

        Can Meatloaf Be Frozen?

        Yes. You can bake, slice, and freeze it for leftovers. Place into zip-top bags or freezer containers. Or carefully wrap the entire meatloaf uncooked, defrost in the fridge overnight, then bake.

        How Long To Cook Meatloaf?


        Bake meatloaf for approximately 1 hour at 375-400 degrees and bring the internal temperature of meatloaf to 160 degrees Fahrenheit or 71 Celsius.

        Why Does Meatloaf Fall Apart?


        Usually, it is because there are not enough binding ingredients like eggs and breadcrumbs. Our recipe has both eggs and two kinds of cheese to make sure the meatloaf stays together and moist! Another reason could be that it's overcooked and dried out.

        More Easy Dinner Recipes

        Try a Beef Stroganoff recipe with tri-tip steak, mushrooms, and creamy rich stroganoff sauce. It is easy enough for a weeknight dinner and yummy enough for company.

        Shish Kabobs are the best for grilling and cookouts. These use top sirloin beef, and an incredible marinade that has pineapple juice.

        These Cheeseburgers are slathered with burger sauce, the meat patties are made with an amazing burger seasoning, tons of melted cheese, pickle chips, tomato slices, and crisp cold lettuce.

        The low temperature and slow, long cooking process make the pork roast easy to shred as it becomes tender over the hours. The result: perfectly moist yet slightly caramelized edges, a super savory Pulled Pork made from pork loin!

        • White plate filled with Beef Stroganoff on noodles with mushrooms.
          Best Beef Stroganoff Recipe
        • A wooden platter filled with Shish Kabob grilled skewers.
          Shish Kabobs
        • A person holding a messy grilled burger topped with melted cheese, burger sauce, lettuce, tomato, and pickles.
          The Best Cheeseburger
        • A white casserole dish with oven roasted pulled pork shredded and ready to eat in tacos or a recipe for dinner.
          Oven Roasted Pulled Pork

        Did you love this recipe? We would love to hear from you! If you make this recipe and love it, give it a 5-star rating ⭐⭐⭐⭐⭐ with a comment. THANK YOU!! Follow Delicious Table with my free newsletter and share this recipe with your friends on Facebook, Pinterest, and Instagram.

        A close up view of meatloaf sliced open and cooked bacon strips on top.
        Print

        Bacon Cheeseburger Meatloaf Recipe

        The best meatloaf recipe bursting with flavor. It is stuffed with a sauteed vegetable and spice mixture, cheeses, then wrapped in bacon.
        Course Dinner & Main Dishes
        Cuisine American
        Keyword bacon meatloaf, best meatloaf, meatloaf, meatloaf recipe, stuffed meatloaf
        Prep Time 15 minutes minutes
        Cook Time 1 hour hour
        Total Time 1 hour hour 15 minutes minutes
        Servings 8
        Calories 596kcal
        Author Lisa Hatfield
        Cost $15

        Ingredients

        • 1 tablespoon extra virgin olive oil
        • 1 cup onion finely chopped
        • ½ cup celery finely chopped
        • 3 cloves garlic finely minced
        • 1 teaspoon dried oregano
        • 1 teaspoon chili powder
        • 2 pounds ground beef 85/15
        • 1 ½ cups sharp cheddar cheese
        • ½ cup flour AP flour or almond flour
        • ½ cup grated parmesan
        • 1 tablespoon soy sauce or swap Worcestershire sauce
        • 1 teaspoon sea salt
        • ½ teaspoon cracked pepper
        • cooking spray coconut prefered
        • 12 pieces fully cooked bacon

        Instructions

        • Preheat oven to 400 degrees. Spray a medium baking dish with cooking spray.
        • Place a small skillet over medium heat. Add olive oil, then add finely chopped onion, celery, salt, and pepper. Stir for 3 minutes, until soft and then add garlic, oregano, and chile powder. Stir for another 2 minutes. Turn off heat.
        • In a large bowl, add the ground beef, sauteed vegetable/spice mixture, grated cheddar cheese, flour (almond or regular AP flour), Parmesan cheese, eggs, and soy sauce.
        • Using a spatula, mix until well combined and all the ingredients are mixed throughout the ground beef.
        • Shape the meatloaf mixture into a long oval loaf shape. Place in the sprayed baking dish. Place the precooked bacon strips diagonally, slightly overlapping covering the entire surface.
        • Bake on center rack for 1 hour at 400 degrees until the internal temperature reaches 160+ degrees. Use a meat thermometer and be sure it is cooked to 160 degrees, a safe internal temperature for ground beef. If the bacon is browning too dark, tent with a piece of aluminum foil.
        • Let rest about 5 minutes before slicing so it holds together. If any liquid is in the baking dish, discard and slice into thick slices and serve warm.

        Video

        Notes

        Ground Beef

        Ground beef that is 85% lean and 15% fat works great in this recipe. You can go with leaner beef but will lose some of the lightness and flavor of the meatloaf due to its lower fat content.
        160 degrees is a safe internal temperature for cooked ground beef.

        Fully Cooked Bacon

        It is packaged and pre-cooked bacon strips within a resealable package. You will find it in the bacon section of the grocery store. It saves time and keeps the stovetop clean as you don't have to cook the bacon.
        There is no prep and no mess. It can be easily reheated and made crisp for use in recipes.
        PRO TIP: I tested this recipe with fully cooked bacon, if you can't find that, precook your bacon in the microwave until most of the fat renders out yet it is still pliable to bend on the meatloaf.

        Cheeses

        For this recipe, I went with cheddar and parmesan. You could try different cheese varieties like Colby, Monterey Jack, Pepperjack, or even Swiss. I use grated parmesan in a lot of my recipes, good swaps here are grated asiago or pecorino romano.

        Flour

        If you are avoiding carbs and wheat/flour in general, you can swap in almond flour just fine.
         

        Nutrition

        Calories: 596kcal | Carbohydrates: 10g | Protein: 33g | Fat: 47g | Saturated Fat: 19g | Trans Fat: 1g | Cholesterol: 130mg | Sodium: 948mg | Potassium: 473mg | Fiber: 1g | Sugar: 1g | Vitamin A: 386IU | Vitamin C: 2mg | Calcium: 260mg | Iron: 3mg

        S'more Cookie Dough Truffles

        [heart_this] · Jan 21, 2022 · 1 Comment

        A lady holding a s'more cookie dough truffle cut open with mini marshmallows inside.

        Last Updated April 25th, 2024 at 11:40 am by Lisa

        S'more Cookie Dough Truffles are an easy no-bake dessert candy. These have cookie dough studded with chocolate chips and mini marshmallows. Then rolled in crushed graham crackers and a dip into melted chocolate. Each one has sprinkles of mini marshmallows and crushed graham crackers so they taste like campfire s'mores.

        This is a kid-friendly dessert recipe, and they will love to make these s'more candy treats. You can easily keep them in the refrigerator for up to two weeks (if they last that long) for parties and special occasions.

        Sure to be a hit with both kids and adults, especially with cookie dough desserts being so popular...

        I created this recipe and originally and shared it on CocoandAsh.com so you might see it there as well.

        How To Make S'more Cookie Dough Truffles

        Make Cookie Dough Balls

        Step 1: Make the cookie dough: In a medium bowl, mix butter, brown sugar, vanilla, salt, flour, milk, 1 cup semi-sweet chocolate chips, and ½ cup mini marshmallows.

        Step 2: Place 4 graham crackers in a zip-lock bag. Roll a rolling pin over it to crush the graham crackers. Place in a small bowl.

        Step 3: Use a 1” scoop or small teaspoon, and roll into 1” balls. Then roll all 36 cookie dough balls in crushed graham crackers, and place them on a parchment-lined tray.

        Step 4: Freeze for at least an hour.

        Decorate The Truffles

        Step 5:  Once truffles have chilled an hour or more, place a heatproof (metal) bowl, over a small pan filled with water. Melt 3 cups of semi-chocolate chips and 3 teaspoons vegetable oil in a double boiler. Stir until melted. Using 2 forks dip each truffle, you will need to roll it around until the chocolate coats each truffle.

        Step 6:  Place on a parchment-lined tray. Then immediately sprinkle with mini marshmallows, and sprinkle crushed graham crackers right away before the chocolate is firms. Go one by one so the toppings stick.

        Step 7:  Keep in the fridge on a small plate (covered with a zip-lock bag) until ready to enjoy! They will last a week refrigerated, and I have kept them in the freezer for up to 3 weeks. Keep them in an airtight container or on a paper plate sealed in a zip-top bag.

        What Are Chocolate Truffles?

        A candy chocolate truffle is a type of chocolate confectionery dessert. Traditionally made with a chocolate ganache center, coated in chocolate, cocoa powder or chopped toasted nuts. Typically they are in a round spherical, conical, or curved shape.

        Truffles originate from France around 1895, and their name derives from their resemblance to truffles, an edible fungi or mushroom of the genus Tuber that is a dark and has a rough surface like a truffle from the earth.

        S'more FAQ

        What Are S'mores?


        A s'more is a popular nighttime campfire dessert in the United States and Canada, consisting of roasting marshmallows on a stick or metal skewer over a fire until toasty brown and gooey, then a layer of chocolate bar (usually Hershey's Chocolate Bars) sandwiched between two pieces of graham crackers and all squished together.

        In the US most of us are very in love with this as a summer or fall dessert, but my friends in the UK had not heard of these years ago when they visited, now they love to make them at home.

        Who Invented S'mores?


        There is quite a bit of debate about who invented the s'more, and no one knows for sure. However, one of the first published recipes for “some mores" was in a 1927 publication called Tramping and Trailing with the Girl Scouts. Loretta Scott Crew, who made them for Girl Scouts by the campfire, is often given credit for the original s'more recipe.

        Why the 'S in S'mores?


        S'more is simply an abbreviation of the phrase "some more". 

        What Is The History Of S'mores?


        An early published recipe for a s'more is found in a book of recipes published by the Campfire Smores company in the 1920's where it was called a "Graham Cracker Sandwich". The text indicates that the treat was already popular with both Boy Scouts and Girl Scouts.

        The term "s'mores" appears in conjunction with the recipe in a 1938 publication aimed at summer camps. A 1956 recipe uses the name "S'Mores", and lists the ingredients as "a sandwich of two graham crackers, toasted marshmallow, and 1⁄2 chocolate bar". A 1957 Betty Crocker cookbook contains a similar recipe under the name of "s'mores".

        The 1958 publication Intramural and Recreational Sports for High School and College makes the reference to "marshmallow toasts" and "s'mores hikes" as does its related predecessor, the "Intramural and Recreational Sports for Men and Women" published in 1949.

        More No-Bake Desserts

        In the heat of the summer, it's nice to have recipes that don't require the heat of your oven. Here are my favorite go-to recipes I have made for years.

        Nut Goodie Bar Candy is an addictively sweet chocolate peanut butter candy bar famous in Midwest USA. An easy no-bake dessert candy served right from the freezer.

        Easy No-Bake Peach Cheesecake has a crisp graham cracker crust topped with sweet whipped cream cheese filling and juicy ripe peaches.

        Only 7 ingredients and 30 minutes for this refreshing summer dessert!

        Easy to make, this Caramel Apple Dip has crisp green apples, salted caramel sauce, and crushed Health bars. A beloved recipe and pot-luck party hit for Thanksgiving, Halloween, and all through Autumn.

        Chocolate Bananas (aka choco bananas) have a chocolate coating with chopped nuts and fruit, a refreshing frozen dessert treat for hot summer days.

        • Nut Goodie Bar Candy in mini white paper cups.
          Nut Goodie Bar Candy
        • A slice of peach pie on a white plate with a silver fork on a red white check tablecloth.
          Peach Cheesecake Pie (No-Bake)
        • Slices of green Granny Smith apples around a white dish with a sweet dessert dip inside a low small white dish with a ruffled edge, and a piece of apple sticking into the dip.
          Caramel Apple Dip
        • A small aluminum sheet pan with brown paper and 5 frozen bananas chocolate dipped and coated in nuts and dried fruit.
          Frozen Chocolate Covered Bananas

        Did you love this recipe? We would love to hear from you! If you make this recipe and love it, give it a 5-star rating ⭐⭐⭐⭐⭐ with a comment. THANK YOU!! Follow Delicious Table with my free newsletter and share this recipe with your friends on Facebook, Pinterest, and Instagram.

        A lady holding a s'more cookie dough truffle cut open with mini marshmallows inside.
        Print

        S'more Cookie Dough Truffles

        S'more Cookie Dough Truffles are an easy no-bake dessert candy with chocolate chips, graham crackers, and mini marshmallows just like a campfire s'mores!
        Course Desserts & Sweets
        Cuisine American
        Keyword cookie dough, cookie dough bites, easy truffles recipe
        Prep Time 25 minutes minutes
        1 hour hour
        Total Time 25 minutes minutes
        Servings 36
        Calories 180kcal
        Author Lisa Hatfield

        Equipment

        • Spring Loaded Cookie Scoops (3 Sizes)

        Ingredients

        make the s'more cookie dough balls

        • ½ cup 1 stick unsalted butter, very soft room temp
        • ¾ cup brown sugar light or dark
        • 1 teaspoon vanilla extract
        • ½ teaspoon sea salt
        • 1 cup all-purpose flour
        • 2 tablespoons milk
        • 4 graham crackers crushed into crumbs
        • 1 cup semi-sweet chocolate chips any variety
        • ½ cup Kraft Jett Puffed Mallow Bits mini marshmallows

        decorate the s'more truffles

        • 3 cups semi-sweet chocolate chips
        • 3 teaspoons vegetable oil
        • sprinkle with mini marshmallows
        • sprinkle with crushed graham crackers

        Instructions

        • In a medium bowl, mix butter, brown sugar, vanilla, salt, flour, milk, 1 cup semi-sweet chocolate chips, and ½ cup mini marshmallows.
        • Place 4 graham crackers in a zip-lock bag, roll a rolling pin over it to crush the graham crackers. Place in a small bowl.
        • Use a 1” scoop or small teaspoon, and roll into 1” balls. Then roll all 36 cookie dough balls in crushed graham crackers, and place them on a parchment lined tray.
        • Freeze for at least an hour.
        • Once truffles have chilled an hour or more, place a heatproof (metal) bowl, over a small pan filled water. Melt 3 cups of semi-chocolate chips and 3 teaspoons vegetable oil in double boiler. Stir until melted, and using 2 forks dip each truffle, you will need to roll it around until the chocolate coats each truffle.
        • Place on a parchment lined tray, and sprinkle with mini marshmallows and sprinkle crushed graham crackers right away while the chocolate is melted, go one by one so the toppings stick.
        • Keep in the fridge on a small plate (covered with a zip-lock bag) until ready to enjoy! They will last a week refrigerated, and I have kept them in the freezer for up to 3 weeks. Keep them in an airtight container or on a paper plate sealed in a zip-top bag.

        Notes

        Mini Marshmallows

        The mini marshmallows used in this recipe are made by Kraft, look for Jet-Puffed Mallow Bits, or you could use regular mini marshmallows and cut them into tiny pieces.

        Melted Chocolate Chips

        Adding a few teaspoons of vegetable oil to chocolate chips helps the chocolate melt smoothly and stay glossy. Be sure to keep water out of the chocolate when melting in the double boiler or heat-proof pan over simmering water. 

        Scooping Cookie Dough Balls

        Use a 1" cookie scoop to quickly and evenly scoop out the dough balls. 


        Nutrition

        Serving: 36g | Calories: 180kcal | Carbohydrates: 19g | Protein: 1g | Fat: 10g | Saturated Fat: 6g | Cholesterol: 8mg | Sodium: 69mg | Potassium: 127mg | Fiber: 1g | Sugar: 12g | Vitamin A: 90IU | Calcium: 20mg | Iron: 1.5mg

        Filet Mignon Steak Appetizer

        [heart_this] · Jan 20, 2022 · 1 Comment

        A glass bowl filled with horseradish dipping sauce with bacon wrapped filet mignon appetizers on toothpicks.

        Last Updated December 21st, 2022 at 07:11 pm by Lisa

        Bacon-Wrapped Filet Mignon makes a special steak appetizer for parties or special occasions. Pair it with a cool creamy balsamic horseradish sauce for dipping. It has a touch of spicy horseradish and a savory depth of flavor from the balsamic.

        For appetizer parties, pick a couple of hot cooked appetizer recipes and several cold dips or maybe a crudites platter. It's nice to serve a couple of things hot out of the kitchen during the party, and have other dishes ready to go, so you can dive into the yumminess...

        Filet Mignon Steak Appetizer Recipe

        Bacon-Wrapped Filet Ingredients

        PRO TIP: Drying the beef helps the filet sear in the pan. Use paper towels to dry the filet mignon and cut it into 1-inch pieces.

        • 1 pound filet mignon
        • ½ pound thin-sliced bacon ~ use fully cooked - 12 slices
        • salt and pepper
        • coconut oil spray
        • 2 tablespoons Worcestershire sauce for basting

        Slice bacon strips into half, wrap around each filet piece, and push a toothpick through to hold them together. Sprinkle sea salt and pepper on both sides.

        PRO TIP: Use Fully Cooked Bacon - it cooks fast and doesn't splatter, also the filet will cook at the same time as the bacon.

        Next, spray a skillet or grill pan with coconut oil, heat to medium-high heat.

        Turn your kitchen fan on (and open a window) as the beef will smoke in the pan as it sears. I have set off my smoke alarm to make this recipe!

        Add several filet bites to the pan, careful to not crowd the pan. Sear for 2-3 minutes on each side. Sear and flip after a couple of minutes when they easily release. 

        Flip the steak pieces over to the other bacon side and saute for an additional 2-3 minutes until cooked to your liking. Brush with Worcestershire sauce to add even more flavor.

        Remove to a platter and serve hot with the Creamy Balsalmic Horseradish Sauce.

        What Is Fully Cooked Bacon?


        It is packaged and pre-cooked bacon strips within a resealable package. You will find it in the bacon section of the grocery store. It saves time and keeps the stovetop clean as you don't have to cook the bacon.

        There is no prep and no mess. It can be easily reheated and made crisp for use in recipes.

        Mix The Creamy Horseradish Sauce

        makes 1 ½ cups

        • 1 cup regular sour cream
        • ¼ cup prepared (white) horseradish
        • 1 tablespoon balsamic vinegar
        • 1 tablespoon Dijon-style mustard
        • ½ teaspoon sea salt
        • ¼ teaspoon ground pepper
        • Dash Worcestershire sauce

        In a small bowl, mix the sour cream, prepared horseradish, balsamic vinegar, Dijon mustard, sea salt, pepper, and Worcestershire sauce. Cover and chill until serving.

        Use the leftovers on Roast Beef Sandwiches, totally incredible!

        Top Steak Appetizer Searing Tips

        • Use fully-cooked bacon: it cooks faster, gets crisp, and won't overcook the filet mignon it is wrapped around. 
        • Turn your kitchen fan on high as you sear the appetizers to manage the smoke. 
        • Work in bunches of 10-12 at a time, don't overcrowd the pan. This gives them all a chance to evenly sear.
        • Sear and flip after a couple of minutes when they easily release. 
        • The bacon-filet pieces will shrink up smaller as they sear in the pan. 
        • A cast-iron pan is best, but a stainless skillet will work as well. 
        • Don't use a non-stick skillet, you won't get the sear on the bacon.
        • You can use a cast iron grill pan or an outside grill with a small grate.

        More Appetizers

        Delicious party food can be easily assembled with simple store-bought ingredients and ready in just minutes.  Look below for some more ideas for quick, easy, fun appetizers for your next party.

        For the holidays take a look at these Thanksgiving Appetizers, there are over 18+ ideas for your gathering and one of the most popular for fall is this Everything Bagel Cheeseball shaped like a pumpkin!

        Jalapeno Popper Dip is a friend and family favorite for game time or holidays. Make a plate of this gorgeous Cheese Appetizer that can be made ahead and sliced for the party.

        French Onion Dip is classic party food, I also have a simple version of Sour Cream Onion Dip to try in a hurry with just two ingredients. If you are watching your calories, go for Buffalo Cauliflower! All the taste without the guilt and calories.

        Appetizer parties are a relaxed way to entertain with a couple of chip dips like Guacamole and Salsa Verde served with tortilla chips.

        • A white oval casserole dish with a hot dip being scooped out with a large corn chip.
          Jalapeno Popper Dip
        • White round plate filled with cheese appetizers with crackers and garnished with basil.
          Easy Layered Cheese Appetizers
        • A pumpkin shaped cheese ball on a platter with pita chips and crackers.
          Everything Bagel Pumpkin Cheese Ball
        • A collection of Thanksgiving appetizers with recipe ideas, and party decorating tips for a Fall party.
          36 Thanksgiving Appetizers
        • Ruffled potato chips on a plate with homemade French onion dip.
          French Onion Dip
        • Baked Buffalo Cauliflower on a plate with ranch dip sprinkled with fresh herbs.
          Buffalo Cauliflower Wings
        • A lady dipping a potato chip into onion dip.
          Sour Cream Onion Dip
        • A blue glass bowl filled with guacamole and a chip stuck inside with a bowl of tortilla chips.
          How To Make Guacamole

        Did you love this recipe? We would love to hear from you! If you make this recipe and love it, give it a 5-star rating ⭐⭐⭐⭐⭐ with a comment. THANK YOU!! Follow Delicious Table with my free newsletter and share this recipe with your friends on Facebook, Pinterest, and Instagram.

        A glass bowl filled with horseradish dipping sauce with bacon wrapped filet mignon appetizers on toothpicks.
        Print

        Filet Steak Appetizer With Horseradish Cream

        Bacon-wrapped filet mignon steak appetizer paired with a creamy balsamic horseradish sauce for dipping. These will be a hit at your party!
        Course Appetizers, Dips, & Snacks
        Cuisine American
        Keyword filet mignon, steak appetizers
        Prep Time 25 minutes minutes
        Cook Time 15 minutes minutes
        Total Time 40 minutes minutes
        Servings 24
        Calories 118kcal
        Author Lisa Hatfield

        Equipment

        • Wood Toothpicks

        Ingredients

        bacon-wrapped steak

        • 1 pound filet mignon
        • ½ pound fully cooked bacon 12 slices
        • salt and pepper
        • coconut oil spray
        • 2 tablespoons Worcestershire sauce for basting

        creamy horseradish sauce

        • 1 cup regular sour cream
        • 2 tablespoons prepared (white) horseradish
        • 1 tablespoon balsamic vinegar
        • 1 tablespoon Dijon-style mustard
        • ½ teaspoon kosher salt
        • ¼ teaspoon ground pepper
        • 1 teaspoon Worcestershire sauce

        Instructions

        Horseradish Dipping Sauce

        • Combine the sour cream, horseradish, balsamic, Dijon mustard, salt, pepper, and Worcestershire in a medium bowl.
        • Set aside or chill until ready to use. If you have any leftover use on Roast Beef Sandwiches, totall amazing!

        Sear The Filet Mignon

        • Use paper towels to dry the filet mignon and cut it into 1-inch square pieces. Slice fully-cooked bacon strips into half, wrap around each filet piece and push a toothpick through to hold together. Sprinkle sea salt and pepper on both sides.
        • Spray grill pan or skillet with coconut oil, heat to medium-high heat. Turn your fan on high as the skillet will smoke, you might want to open a window as well.
        • Add several filet bites to the pan, careful to not crowd the pan. Sear for 2-3 minutes on each side. Sear and flip after a couple of minutes when they easily release.  Flip the steak pieces over to the other bacon side and for an additional 2-3 minutes until cooked to your liking. Brush with Worcestershire sauce to add additional flavor.
        • Serve hot with Creamy Balsamic Horseradish Sauce.

        Notes

        Top Steak Appetizer Searing Tips

        • Use fully-cooked bacon: it cooks faster, gets crisp, and won't overcook the filet mignon it is wrapped around. 
        • Turn your kitchen fan on high as you sear the appetizers. 
        • Work in bunches of 10-12 at a time, don't overcrowd the pan. This gives them all a chance to evenly sear.
        • Sear and flip after a couple of minutes when they easily release. 
        • The bacon-filet pieces will shrink up smaller as they sear in the pan. 
        • A cast-iron pan is best, but a stainless skillet will work as well. 
        • Don't use a non-stick skillet, you won't get the sear on the bacon.
        • You can use a cast iron grill pan or an outside grill with a small grate

        Nutrition

        Calories: 118kcal | Carbohydrates: 1g | Protein: 7g | Fat: 9g | Saturated Fat: 4g | Polyunsaturated Fat: 1g | Monounsaturated Fat: 4g | Trans Fat: 1g | Cholesterol: 27mg | Sodium: 256mg | Potassium: 137mg | Fiber: 1g | Sugar: 1g | Vitamin A: 65IU | Vitamin C: 1mg | Calcium: 16mg | Iron: 1mg

        Tachos Tater Tot Nachos

        [heart_this] · Jan 13, 2022 · 1 Comment

        A close up of a oval cast iron pan with tater tots, pulled pork, cut avocado, and drizzled with white sauce.

        Last Updated April 4th, 2024 at 02:44 pm by Lisa

        Tachos are a delicious modern twist on the classic nachos appetizer! Tater tot nachos have layers of golden crispy tater tots in place of tortilla chips loaded with juicy pulled pork or rotisserie chicken, creamy tomatillo sauce, lots of melted cheese, and other scrumptious favorite nacho toppings.

        Tater Tatchos are an easy comfort food dish that can be put together quickly for snacks, cozy game day football food, or heck why can't this be dinner...

        Tater Tot Nachos Recipe

        I first tried a similar tachos recipe while traveling for a food conference in Salt Lake City Utah. I couldn't believe how good they sounded on the menu and ordered a plate to share with friends I was meeting at a restaurant. Honestly, I ate the whole order before they arrived!

        Weekends are made for this kind of food, spent relaxing with family and friends watching movies or games, and munching away on comfort food. To make these you will need...

        • frozen tater tots
        • pepper jack or shredded cheddar cheese
        • pulled pork (or shredded rotisserie chicken or ground beef taco meat)
        • pickled jalapeños
        • green onions
        • tomatillo salsa (any brand or make my recipe!)
        • sour cream
        • avocado
        1. Preheat oven to 400 degrees. 
        2. Bake tater tots on a parchment-lined baking sheet for 20 minutes. Leave oven on.
        3. Make tomatillo sauce: mix equal portions of sour cream and green tomatillo salsa in a small bowl. Set aside.
        4. On a sheet pan (or cast iron pan) layer golden brown cooked tater tots, grated pepper jack cheese, shredded pulled pork (chicken or beef), and pickled jalapenos and repeat layering until all the pork, cheese, and jalapeno peppers are used. 
        5. Reheat for 5 minutes to melt the cheese in the oven at 400 degrees.
        6. Garnish with diced avocado and green onions, and drizzle with tomatillo sauce.
        7. Keep leftovers in an airtight container and use them within 3 days. Or freeze leftovers and use it up within a month.

        More Tachos Nachos Toppings

        Use your favorite nacho toppings, shred cheddar cheese or any kind of cheeses you have on hand, and even drizzle some nacho cheese sauce. Sprinkle any savory toppings on your tacho recipe. Here are some more tater tot nachos ingredients, take a look in your fridge, I bet there are quite a few additions you can come up with, or try some of my Mexican recipes linked below...

        • chopped tomatoes
        • Mexican pickled Red Onion
        • black beans
        • Guacamole
        • Griilled Corn
        • Mexican Street Corn (Authentic Elotes)
        • black olives
        • melted queso cheese
        • blue cheese crumbles
        • Tomatillo Salsa
        • grilled caramelized onions
        • nacho cheese sauce
        • Avocado Salsa
        • diced bell pepper
        • cilantro
        • Mexican pickled red onions in a clamp jar and white bowl with chiles and limes on a colorful striped cloth.
          Mexican Pickled Red Onions
        • Several grilled elotes Mexican street corn on the cob sprinkled with Cotija cheese on a platter.
          Mexican Street Corn (Authentic Elotes)
        • A blue glass bowl filled with guacamole and a chip stuck inside with a bowl of tortilla chips.
          How To Make Guacamole
        • A wood bowl with green avocado salsa taco sauce and blue corn tortilla chips on the table.
          Avocado Salsa
        • A wood bowl with a lady scooping out homemade salsa with a tortilla chip.
          Tomatillo Salsa
        • Ears of grilled corn on a white platter seasoned with melted butter on top.
          Grilled Corn On The Cob

        Totchos With Ground Beef

        Make taco meat for these instead of pulled pork nachos. Cook the ground beef over medium heat in a large skillet. Drain the fat if you wish. Mix in some taco seasoning and add some salsa, it makes the best spicy ground beef for nachos, tacos, or taco salad.

        Totchos Recipes With Chicken & Turkey

        You can also use lean ground turkey, rotisserie chicken, cooked diced chicken, or ground chicken. Mix in some seasonings and layer into your recipe for totchos.

        Buffalo Chicken Tots

        Load crispy baked tater tots with pulled chicken seasoned with a chicken dry rub tossed in buffalo sauce and topped with crumbled blue cheese, sliced pickled jalapeno peppers, green onions, and ranch dressing.

        BBQ Pulled Pork Tots

        Load crispy baked tater tots with smoked pulled brisket with grilled caramelized onions, melted queso, drizzled with bbq sauce, sliced pickled jalapeno peppers, green onions, and cotija cheese.

        Put pulled pork over golden baked potato tater tots, sprinkle with sauteed caramelized onions, and drizzle with buffalo sauce.

        Spoon over cheese queso. Bake for 8 to 10 minutes or until meat is hot. Top with pickled jalapeño peppers, green onion, and Cotija cheese.

        How To Make Pulled Pork In The Oven

        Try my recipe for Pulled Pork Oven Low and Slow, it makes a lot so you can pop the extra in the freezer. By the way, did you know you can make pulled pork in the oven? It is easy, amazing, and is one of my most popular recipes.

        Oven Roasted Pulled Pork Recipe (Pork Loin)
        Oven Roasted Pulled Pork is moist and super savory! Season with a homemade rub and cook it with these slow-roasting secrets. We cover how to make pulled pork at a low oven temperature as opposed to slow cooked in a crockpot. And why a loin is the best cut! The low heat temperature and a long cooking process make the meat easy to shred as it becomes tender over the hours. The result: perfectly moist yet slightly caramelized edges with the best flavor.
        GET THE RECIPE PIN IT
        A white casserole dish with oven roasted pulled pork shredded and ready to eat in tacos or a recipe for dinner.
        Pieces of pulled pork in a white casserole dish ready for dinner.
        Who invented tater tots?

        The founders of Ore-Ida created them in 1953 when trying to come up with a creative profitable way to use up leftover cut-up potatoes.
        They chopped up the potatoes, added seasoning and flour, and "tots" were born.

        At first, Americans didn't buy them, they were priced so low people thought that such an inexpensive product was worthless. Once the price was raised, they became a national sensation. Today, Americans consume over 70 million pounds of tater tots a year.

        How did Tater Tots get their name?

        A name was needed when Tater Tots were first created, so an employee contest was held to pick a name. The winning entry was made by Clora Lay Orton, a young housewife. She chose tater-slang for potato and tot- for their small size. And she won!

        More Appetizer Recipes

        Delicious party food can be easily assembled with simple store-bought ingredients and ready in just minutes.  Look below for some more ideas for quick, easy, fun appetizers for your next party!

        Today I am sharing the secrets to Crispy Dry Rub Chicken Wings, the ultimate bar snack and big game appetizer with tons of flavor, tender juicy meat, a crispy coating, and a deep-fried texture without going through the trouble of frying. Perfectly cooked wings are totally possible with a super crisp exterior that looks and tastes deep-fried.

        Take a look at all of my game-day food recipes! 🏈⚾️🏟⚽️🏀 And this collection of legendary 75+ Football Party Food Ideas with spectacular, delicious Super Bowl recipes for the biggest game of the year. And tailgate in style with all your fan favorites with these amazing, creative tips and ideas.

        Whip up this Buffalo Chicken Appetizer made with tortilla chips, buffalo wing sauce, blue cheese, and crisp celery. It comes together in 20 minutes with just simple 6 ingredients. It takes a nod to hot wings, and is so easy!

        Jalapeno Popper Dip is a friend and family favorite for game time or holidays. Make a plate of this gorgeous Cheese Appetizer that can be made ahead and sliced for the party.

        • A white platter filled with crispy chicken wings and one dipping into buffalo sauce.
          Crispy Chicken Wings
        • Loaded plate of hot appetizers of Buffalo Chicken on tortilla chips ready for game day food
          Buffalo Chicken Appetizer
        • A football shaped cheese ball coated with crumbled bacon, green onions, and cheddar cheese and white cheese to look like laces on the football surrounded by crackers on a platter.
          75+ Football Food Recipes
        • A white oval casserole dish with a hot dip being scooped out with a large corn chip.
          Jalapeno Popper Dip

        French Onion Dip is classic party food, I also have a simple version of Onion Dip to try in a hurry with just two ingredients. If you are watching your calories, go for Buffalo Cauliflower Wings! All the taste without the guilt and calories. And for a classic serve roasted Shrimp Cocktail with Cocktail Sauce you make in minutes, totally fresh and delish...

        • White round plate filled with cheese appetizers with crackers and garnished with basil.
          Easy Layered Cheese Appetizers
        • Ruffled potato chips on a plate with homemade French onion dip.
          French Onion Dip
        • Baked Buffalo Cauliflower on a plate with ranch dip sprinkled with fresh herbs.
          Buffalo Cauliflower Wings
        • A clear glass plate with shrimp cocktail, cocktail sauce, and two glasses of champagne.
          Shrimp Cocktail

        Did you love this recipe? We would love to hear from you! If you make this recipe and love it, give it a 5-star rating ⭐⭐⭐⭐⭐ with a comment. THANK YOU!! Follow Delicious Table with my free newsletter and share this recipe with your friends on Facebook, Pinterest, and Instagram.

        A close up of a oval cast iron pan with tater tots, pulled pork, cut avocado, and drizzled with white sauce.
        Print

        Tachos Tater Tot Nachos Recipe

        Tachos are a delicious modern twist on the classic nachos appetizer! Tater tot nachos have layers of golden crispy tater tots in place of tortilla chips loaded with juicy pulled pork or rotisserie chicken, creamy tomatillo sauce, lots of melted cheese, and other scrumptious favorite nacho toppings. Tater Tatchos are an easy comfort food dish that can be put together quickly for snacks, cozy game day football food, or heck why can't this be dinner...
        Course Appetizers, Dips, & Snacks
        Cuisine American
        Keyword loaded totchos, recipe for totchos, tacho recipe, tachos, tatcho, Tater Tot Nachos, Tater Totchos, totchos recipe
        Prep Time 5 minutes minutes
        Cook Time 20 minutes minutes
        Total Time 25 minutes minutes
        Servings 10
        Calories 332kcal
        Author Lisa Hatfield

        Equipment

        • Large Metal Sheet Pan
        • Parchment Paper Sheets
        • Large Cast Iron Skillet

        Ingredients

        • 2 lb tater tots frozen
        • 2 cups pepper jack cheese grated
        • 1 cup pulled pork (or sub shredded rotisserie chicken)
        • ½ cup pickled jalapenos drained
        • 1 cup roasted tomatillo salsa
        • 1 cup sour cream
        • 2-3 green onions sliced
        • 1 avocado diced

        Instructions

        • Preheat oven to 400 degrees. 
        • Bake tater tots on a parchment lined baking sheet for 20 minutes. Leave oven on.
        • Make tomatillo sauce: mix equal portions of sour cream and green tomatillo salsa in a small bowl. Set aside.
        • On a sheet pan (or cast iron pan) layer golden brown cooked tater tots, grated pepper jack cheese, shredded pulled pork (chicken or beef), and pickled jalapenos and repeat layering until all the pork, cheese, and jalapeno peppers are used. 
        • Reheat for 5 minutes to melt the cheese in the oven at 400 degrees.
        • Garnish with diced avocado and green onions, drizzle with tomatillo sauce.
        • Keep leftovers in an airtight container and use within 3 days. Or freeze leftovers and use up within a month.

        Notes

        Pulled Pork

        This recipe time does not include the time to make pulled pork at home. Try my recipe for Pulled Pork Oven Low and Slow. You can make pulled pork in the oven, it is easy and amazing. 
        Instead of pulled pork, try shredded chicken breast, shredded rotisserie chicken, crumbled or sliced grilled sausages. Those would all be great. 

        Tomatillo Salsa

        Tomatillo Salsa is green, but you can use any salsa brand you like. 

        More Tachos Nachos Toppings

        Use your favorite nacho toppings, shred cheddar cheese or any kind of cheeses you have on hand, and even drizzle some nacho cheese sauce. Sprinkle any savory toppings on your tacho recipe. Here are some more tater tot nachos ingredients, take a look in your fridge, I bet there are quite a few additions you can come up with, or try some of my Mexican recipes linked below...
          • chopped tomatoes
          • Mexican pickled Red Onion
          • black beans
          • Guacamole
          • Griilled Corn
          • Mexican Street Corn (Authentic Elotes)
          • black olives
          • melted queso cheese
          • blue cheese crumbles
          • Tomatillo Salsa
          • grilled caramelized onions
          • nacho cheese sauce
          • Avocado Salsa
          • diced bell pepper
          • cilantro

        Totchos With Ground Beef

        Make taco meat for these instead of pulled pork nachos. Cook the ground beef over medium heat in a large skillet. Drain the fat if you wish. Mix in some taco seasoning and add some salsa, it makes the best spicy ground beef for nachos, tacos, or taco salad.

        Totchos Recipes With Chicken & Turkey

        You can also use lean ground turkey, rotisserie chicken, cooked diced chicken, or ground chicken. Mix in some seasonings and layer into your recipe for totchos.

        Buffalo Chicken Tots

        Load crispy baked tater tots with pulled chicken seasoned with a chicken dry rub tossed in buffalo sauce and topped with crumbled blue cheese, sliced pickled jalapeno peppers, green onions, and ranch dressing.

        BBQ Pulled Pork Tots

        Load crispy baked tater tots with smoked pulled brisket with grilled caramelized onions, melted queso, drizzled with bbq sauce, sliced pickled jalapeno peppers, green onions, and cotija cheese.
        Put pulled pork over golden baked potato tater tots, sprinkle with sauteed caramelized onions, and drizzle with buffalo sauce.
        Spoon over cheese queso. Bake for 8 to 10 minutes or until meat is hot. Top with pickled jalapeño peppers, green onion, and Cotija cheese.


        Nutrition

        Calories: 332kcal | Carbohydrates: 27g | Protein: 8g | Fat: 22g | Saturated Fat: 8g | Cholesterol: 32mg | Sodium: 692mg | Potassium: 441mg | Fiber: 3g | Sugar: 2g | Vitamin A: 510IU | Vitamin C: 10.3mg | Calcium: 210mg | Iron: 0.8mg

        Buffalo Chicken Appetizer

        [heart_this] · Jan 13, 2022 · 1 Comment

        Loaded plate of hot appetizers of Buffalo Chicken on tortilla chips ready for game day food

        Last Updated August 29th, 2022 at 10:02 am by Lisa

        Whip up this Buffalo Chicken Appetizer made with tortilla chips, buffalo wing sauce, blue cheese, and crisp celery. It comes together in 20 minutes with just simple 6 ingredients. It takes a nod to hot wings, and is so easy!

        A party food recipe that will win cheers at your big Game Day Food party or gathering. Think of this as buffalo chicken dip already scooped into hot tortilla chips ready to munch and topped with celery, just like buffalo wings...

        ↑ Buffalo Chicken Tortilla Scoops Video ↑

        I think we all love loves buffalo chicken wings with blue cheese dipping sauce and crunchy celery in the USA! A fun fact, Americans eat over 1.3 billion chicken wings just on Superbowl Sunday alone. Can you believe that? And since we love our wings, an appetizer with classic wing flavors sounded so good.

        Buffalo Chicken Appetizer Recipe

        • 24 Tostito's Tortilla Chips
        • 2 cups chopped rotisserie chicken meat
        • 1 cup shredded cheese
        • ¼ cup Frank's Buffalo RedHot Wings Sauce
        • ¼ cup blue cheese dressing
        • 1 cup finely diced celery for garnish
        1. In a medium bowl, mix until well combined: chopped rotisserie chicken, Frank's Buffalo Red Hot Wings Sauce, Blue Cheese dressing, and grated cheese.
        2. Use a regular spoon to load each Tostito Scoop (or tortilla chip) on a parchment lined baking sheet.
        3. Bake 400 for 8-10 minutes until hot and cheese is melted.
        4. Garnish with diced celery.
        5. Serve warm with lots of beer!

        Game Day Food

        Delicious party food can be easily assembled with simple store-bought ingredients and ready in just minutes.  Look below for some more ideas for quick, easy, fun appetizers for your next party!

        Take a look at all of my game-day food recipes! 🏈⚾️🏟⚽️🏀

        Jalapeno Popper Dip is a friends and family favorite for game time or holidays. Make a plate of this gorgeous Cheese Appetizer that can be made ahead and sliced for the party.

        French Onion Dip is classic party food, I also have a simple version for Onion Dip to try in a hurry with just two ingredients. If you are watching your calories, go for Buffalo Cauliflower! All the taste without the guilt and calories.

        • White round plate filled with cheese appetizers with crackers and garnished with basil.
          Easy Layered Cheese Appetizers
        • Ruffled potato chips on a plate with homemade French onion dip.
          French Onion Dip
        • A white oval casserole dish with a hot dip being scooped out with a large corn chip.
          Jalapeno Popper Dip
        • Baked Buffalo Cauliflower on a plate with ranch dip sprinkled with fresh herbs.
          Buffalo Cauliflower Wings

        Did you love this recipe? We would love to hear from you! If you make this recipe and love it, give it a 5-star rating ⭐⭐⭐⭐⭐ with a comment. THANK YOU!! Follow Delicious Table with my free newsletter and share this recipe with your friends on Facebook, Pinterest, and Instagram.

        Loaded plate of hot appetizers of Buffalo Chicken on tortilla chips ready for game day food
        Print

        Buffalo Chicken Appetizer

        Buffalo Chicken Appetizer made with tortilla chips, buffalo wing sauce, blue cheese, and crisp celery made in 20 minutes with 6 ingredients.
        Course Appetizers, Dips, & Snacks
        Cuisine American
        Keyword buffalo chicken, buffalo chicken appetizer, buffalo wing sauce
        Prep Time 10 minutes minutes
        Cook Time 10 minutes minutes
        Total Time 20 minutes minutes
        Servings 24
        Calories 57kcal
        Author Lisa Hatfield

        Ingredients

        • 24 Tostito's Tortilla Chips
        • 2 cups chopped rotisserie chicken meat
        • 1 cup shredded cheese
        • ¼ cup Frank's Buffalo RedHot Wings Sauce
        • ¼ cup blue cheese dressing
        • 1 cup finely diced celery for garnish
        US Customary - Metric

        Instructions

        • In a medium bowl, mix until well combined: chopped rotisserie chicken, Frank's Buffalo RedHot Wings Sauce, Blue Cheese dressing, and grated cheese. Use a regular spoon to load each Tostito Scoop (or tortilla chip) on a parchment lined baking sheet.
        • Bake 400 for 8-10 minutes until hot and cheese is melted.
        • Garnish with diced celery.
        • Serve warm with lots of beer!

        Video

        Notes

        tortilla chips

        You can use any tortilla chip, but the Tostitos Tortilla chips are a small cup shape that holds the buffalo chicken really well.  

        Nutrition

        Calories: 57kcal | Carbohydrates: 2g | Protein: 4g | Fat: 3g | Saturated Fat: 1g | Cholesterol: 12mg | Sodium: 154mg | Potassium: 45mg | Vitamin A: 60IU | Vitamin C: 0.2mg | Calcium: 34mg | Iron: 0.3mg

        Lobster Ravioli

        [heart_this] · Jan 6, 2022 · 51 Comments

        A white plate filled with heart shaped lobster ravioli garnished with parsley.

        Last Updated April 19th, 2022 at 02:10 pm by Lisa

        Lobster Ravioli with a Lemon Butter Sauce uses a baked ravioli technique you can make in just over an hour or prep ahead for dinner parties, holidays, and romantic nights.

        What if I told you that these can be made without pasta dough and not boiled. Would you believe it?

        This is a recipe I developed to have everything ready when entertaining or having a special celebration dinner like a birthday or anniversary. The last thing you want to be doing is cooking in the kitchen!

        Simply pull the sheet pan out, and bake them while the sauce reheats. The edges get a golden color with soft succulent lobster ravioli filling tucked inside.

        Heart-shaped lobster ravioli, what a sweet way to say I love you...

        Why This Recipe Works

        • Wonton wrappers are easy to find in any grocery store, and bake all at once on a sheet pan.
        • This recipe can be prepped the night before your dinner party, and simply baked in the oven.
        • The sauce reheats in just minutes.
        • No pots of boiling water to fuss over when you bake ravioli!
        • The Lemon Butter Sauce is seriously incredible. Try it on lobster tails, shrimp, scallops, or grilled fish.
        • Baked wontons have a nice firm texture, with gorgeous brown edges, and great rich flavor.
        • If you knew it took an hour to make lobster ravioli with a dreamy lemon buttercream sauce, would that make you happy?

        Readers Comments and Reviews

        "You had me at Limoncello. 😉 I made these for date night with my boyfriend. I thought I might be getting in too deep with this recipe but your encouragement made me go for it! I am so glad I did, these were so delicious! I served these up with asparagus on the side and it was perfection. Fancy dinner, take that!" Allison

        "I did not use Limoncello and they were still amazing! I love using wonton papers, so inexpensive and great texture. This is a new staple in my house!!!" Sarah

        "This is very flavorful…yey! Thank you for sharing! Used the sauce over spinach/ricotta ravioli. Also, added shallots and, of course, Garlic?, as well as lemon zest. Oh! So good! And easy!" Theresa

        5 stars "WOW!!! Well, I only made the lemon butter cream sauce cuz I already had some shrimp & crab raviolis. And just needed a sauce. I was a little apprehensive, but I made it anyway. I did not have the Italian liqueur, so I used the lemon juice like suggested. OMG !!!wow!!!! This sauce is amazing !! thank you thank you thank you.!!! I will be adding this recipe to my recipe book for easy to reach to white sauce for pasta. Thank you again you saved my dinner… I love it, EAZY Peezy and delicious too…I ain’t kidding you... ❤❤❤" Carmen

        How To Make Lobster Ravioli

        Basically, for this recipe you will:

        1. boil the lobster tails
        2. mix the ravioi filling
        3. assemble the ravioli
        4. make the lemon butter sauce
        5. bake
        A silver fork cutting into a lobster ravioli on a white china plate.

        How To Boil Lobster Tails

        1. You can buy smaller lobster tails in most grocery stores. These are small, approximately 5.5 ounces each with the shell on. Larger tails are available at wherehouse stores, seafood shops or online.
        2. Once the water boils, they take 10 minutes to cook. Simmer, uncovered, for 8 to 10 minutes or until shells turn bright red, the meat is not translucent, and the tails will curve. For larger or smaller tails, adjust the cooking time as needed.
        3. Keep your heat on high. The water will foam, that is normal. If it comes close to the top of the pot, lay a wooden spoon across the pot and the foam will magically drop down.
        4. Use curved seafood shears (kitchen scissors work fine too), they can be used on lobster and shrimp. Cut down the center of the lobster shell tail.
        5. Cut down the center of the under side of the shell.

        How To Remove Lobster Meat

        1. It helps to hold the cooked lobster tail in a clean kitchen towel while using kitchen scissors (or curved lobster shears).
        2. Once you cut down the middle of both sides of the shell, crack open.
        3. Pull out the lobster meat.
        4. Place your thumb under the lobster meat down by tail, and push the meat out of the shell. Be careful of the sharp points of the lobster shell.
        5. Discard the empty shell, and any grey "sand vein" from the cooked lobster that runs down the tail. Also check for any small pieces of shell and discard.

        How To Make Lobster Ravioli Filling

        1. Dice the lobster meat into ½ inch pieces. In a medium saute pan, heat olive oil and saute the diced shallot for two minutes. Add the diced cooked lobster and parsley, and stir until mixed for 2 more minutes, let cool down.
        2. Add the lobster meat mixture into a bowl, add lemon juice (or limoncello), ricotta, Asiago cheese, and mascarpone. Mix until combined.

        Assemble Ravioli

        1. Take 1 wonton wrapper, place on a board and fill with 1 teaspoon of the lobster filling. Don't overfill your ravioli or they won't seal, this will be plenty once you press the air out and cut or fold.
        2. Place another wonton wrapper on top, press down to push the air out, and cut with a ravioli (heart-shaped) cutter of your choice. Wonton ravioli can be cut into shapes: round, square, or heart using an inexpensive ravioli cutters, and the cutter will seal the edges.
        3. If you don't have a cutter, simply place the teaspoon of filling onto one wonton sheet, and fold into a triangle corner to corner, and press the air out, and press edges closed with your fingers. That's it! Easy.
        4. Place all filled ravioli onto a parchment lined tray, and brush with melted butter.
        5. Bake Ravioli 400 degrees for 10 minutes. The edges of the ravioli will brown slightly, and get a crispy edge. The baking adds amazing flavor!

        I love the heart shapes so much. Look for ravioli cutters online or in gourmet kitchen stores.

        Lobster ravioli, filled, cut, and brushed with butter ready for the oven...

        Bake The Ravioli

        Bake at 400 degrees for 10 minutes, make the easy sauce in minutes, and you are ready to have a special dinner!

        How To Make Lobster Ravioi Sauce

        Lemon Butter Sauce is one word, H-E-A-V-E-N.

        Oh my gosh, it is spoon licking good... and four simple ingredients.

        Lemon Butter Sauce Ingredients

        • 4 tablespoons limoncello or use lemon juice in place of limoncello
        • 2 tablespoons lemon juice
        • ½ cup salted butter cut into ½" cubes
        • ¼ cup heavy cream
        • garnish: finely chopped parsley
        1. In a small pan, simmer the limoncello, lemon juice, and whisk in the cubed butter until well combined, then pour in heavy cream, whisk to mix and turn off heat.
        2. Drizzle sauce over baked lobster ravioli, and garnish with finely chopped parsley and parmesan cheese.

        Lemon butter-cream sauce can be made by adding either lemon juice or limoncello, an Italian lemon liqueur made with the zest of lemons and easily found in grocery stores.

        I found the limoncello to make the lemon butter-cream sauce even tastier, but lemon juice will be absolutely delicious. To learn how to make your own Limoncello, take a look at my recipe post.

        How To Make Limoncello
        Make your own Limoncello, (aka lemoncello) an icy cold lemon liqueur popular in Italy. You can serve this as an after-dinner apéritif drink, drizzle on good ice cream for dessert, sprinkle on fresh fruit, mix a limoncello spritz cocktail, or make a lemon cream sauce to go on lobster ravioli! Enjoy this lemony sipper year-round, it is great on hot summer nights or after rich holiday feasts. This limoncello recipe is an easy homemade gift for food lovers!
        GET THE RECIPE PIN IT
        Two small glasses of icy cold limoncello (lemoncello) ready to sip.

        Serve The Lobster Ravioli

        Plate the baked lobster ravioli on warm plates, and drizzle the lemon butter sauce all over. Serve with a fresh green salad and garlic bread.

        Try This Lobster Recipe

        You have gotta make this Award-Winning Lobster BLT Sandwich, the judges at the Orange County fair voted it #1!

        BLT Lobster Sandwich Recipe
        A BLT Lobster Sandwich recipe with succulent lobster, thick crispy applewood smoked bacon, golden grilled sourdough bread, and slathered with an easy dill-caper aioli sauce. Oh, and it won a 1rst Place Blue Ribbon at the Orange County Fair during a live cooking competition!
        GET THE RECIPE PIN IT
        A sliced open BLT sandwich loaded with succulent lobster, bacon, lettuce and tomato stacked on a board.

        More Romantic Dinner Recipes

        Make an elegant Beef Roast (aka Roast Beef) from tenderloin or New York steak. Wonderful to serve for dinner parties, special occasions, or the holidays with a rich red wine sauce.  Gorgonzola Stuffed Chicken will be a hit at family dinner with everyone, plus it's a low-carb recipe.

        A Beef Stroganoff recipe with tri-tip steak, mushrooms, and creamy rich stroganoff sauce! Grilled Lamb Chops are first rubbed and seasoned with mint salt and paired with sweet juicy peaches for an easy summer side.

        • Thick sliced roast beef on a cutting board with pan juices and ingredients in the background.
          Beef Roast
        • Cooked Gorgonzola Stuffed Chicken in pan sauce garnished with fresh thyme.
          Stuffed Chicken Breasts
        • White plate filled with Beef Stroganoff on noodles with mushrooms.
          Best Beef Stroganoff Recipe
        • A white platter filled with grilled lamb chops topped with mint pesto and grilled peaches.
          Grilled Lamb Chops

        Did you love this recipe? We would love to hear from you! If you make this recipe and love it, give it a 5-star rating ⭐⭐⭐⭐⭐ with a comment. THANK YOU!! Follow Delicious Table with my free newsletter and share this recipe with your friends on Facebook, Pinterest, and Instagram.

        A white plate filled with heart shaped lobster ravioli garnished with parsley.
        Print

        Lobster Ravioli With Lemon Butter Sauce

        Lobster Ravioli with a Lemon Butter Sauce uses a baked ravioli technique you can prep ahead for dinner parties, holidays, and romantic nights. This recipe can be made ahead with wonton wrappers and baked instead of boiling the ravioli. It is a perfect recipe for the holidays or special dinners like Valentine's Day.
        Course Dinner & Main Dishes
        Cuisine American
        Keyword lobster ravioli, lobster ravioli recipe, lobster ravioli sauce
        Prep Time 1 hour hour
        Cook Time 15 minutes minutes
        Total Time 1 hour hour 15 minutes minutes
        Servings 24 large ravioli
        Calories 197kcal
        Author Lisa Hatfield

        Equipment

        • Large Metal Sheet Pan
        • Seafood Scissors
        • Parchment Paper Sheets
        • Heart Ravioli Cutter

        Ingredients

        Ravioli

        • 1 tablespoon olive oil
        • 1 large shallot finely diced
        • 2 teaspoons chopped parsley
        • 2 cups lobster tail meat 4 small 5.5 ounce tails
        • 1 teaspoon limoncello or lemon juice
        • ¼ cup ricotta
        • 2 tablespoons Asiago cheese or Parmesan/Pecorino Romano
        • 1 tablespoon mascarpone cheese or cream cheese
        • 1 package won ton wrappers or sub ravioli pasta dough and boil
        • ½ cup melted butter

        Lemon Butter Sauce

        • 4 tablespoons limoncello or use lemon juice in place of limoncello
        • 2 tablespoons lemon juice
        • ½ cup salted butter cut into ½" cubes
        • ¼ cup heavy cream
        • garnish: finely chopped parsley
        US Customary - Metric

        Instructions

        Lobster Meat

        • Boil the lobster. If the lobster tails are frozen, thaw them overnight in the refrigerator. To cook small 8 oz tails, bring 6 cups salted water to boiling in a 3-quart saucepan. Add the lobster tails. Simmer, uncovered, for 8 to 10 minutes or until shells turn bright red, the meat is not translucent, and the tails will curve. For larger or smaller tails, adjust the cooking time as needed.
        • To remove the lobster meat, it helps to hold the cooked lobster tail in a clean kitchen towel while using kitchen scissors (or curved lobster shears). Once you cut down the middle of both sides of the shell, crack open. Pull out the lobster meat. Place your thumb under the lobster meat down by tail, and push the meat out of the shell. Be careful of the sharp points of the lobster shell.
        • Discard shell, and dice lobster meat into ½" pieces, be sure to remove and discard any small pieces of lobster shell.

        Lobster Ravioli Filling

        • In a medium saute pan, heat olive oil and saute the diced shallot for two minutes. Add the diced cooked lobster and parsley, and stir until mixed for 2 more minutes, let cool down.
        • Add the lobster meat mixture into a bowl, add lemon juice (or limoncello), ricotta, Asiago cheese, and mascarpone. Mix until combined.

        Assemble Lobster Ravioli

        • Take 1 wonton wrapper, place on a board and fill with 1 teaspoon of the lobster filling. Don't overfill your ravioli or they won't seal, this will be plenty once you press the air out and cut or fold.
        • Place another wonton wrapper on top, press down to push the air out, and cut with a ravioli (heart-shaped) cutter of your choice. Wonton ravioli can be cut into shapes: round, square, or heart using an inexpensive ravioli cutters, and the cutter will seal the edges.
        • If you don't have a cutter, simply place the teaspoon of filling onto one wonton sheet, and fold into a triangle corner to corner, and press the air out, and press edges closed with your fingers. That's it! Easy..
        • Place all filled ravioli onto a parchment lined tray, and brush with melted butter.
        • Bake Ravioli 400 degrees for 10 minutes. The edges of the ravioli will brown slightly, and get a crispy edge. The baking adds amazing flavor!

        Make Lemon Butter Sauce

        • In a small pan, simmer the limoncello, lemon juice, and whisk in the cubed butter until well combined, then pour in heavy cream, whisk to mix and turn off heat.
        • Drizzle sauce over baked lobster ravioli, and garnish with finely chopped parsley and grated Asiago or parmesan cheese.

        Notes

        Won Ton Wrappers

        I tested boiling with won-ton wrappers, and they resulted in less delicious flavor, a pale color, and the filling leaked out! So I went with baking them, it is faster, easier, and tastes amazing. Plus the whole point of this technique is you can prep the sheet pan ahead and bake them when you are ready to eat. 
        You can certainly make these ravioli with ravioli pasta and boil them the traditional way. But the advantage to baking ravioli is you can prep these ahead of a dinner party or romantic evening.

        Nutrition

        Calories: 197kcal | Carbohydrates: 14g | Protein: 6g | Fat: 11g | Saturated Fat: 7g | Cholesterol: 61mg | Sodium: 317mg | Potassium: 73mg | Sugar: 1g | Vitamin A: 360IU | Vitamin C: 0.7mg | Calcium: 48mg | Iron: 0.8mg

        Cherry Balsamic Pork Loin

        [heart_this] · Dec 13, 2021 · 21 Comments

        A sliver carving fork and knife next to a pork loin roast and topped with cherries.

        Last Updated November 17th, 2025 at 02:22 pm by Lisa

        Cherry Balsamic Pork Roast is perfect for family dinner, entertaining, or the holidays. An easy 10-minute prep pork loin recipe that serves a crowd.

        One of my favorite ways to entertain for a large dinner party is to serve an elegant beautiful pork loin roast. This happens to be my favorite go-to recipe. It is EASY to make at the last minute with simple ingredients, and always a crowd-pleaser...

        Why This Recipe Works

        • The positives of pork loin: It will slice easily (what you want while entertaining or getting dinner on the table), are inexpensive, and are so delicious.
        • Easy ingredients: All the ingredients for this recipe are easy to find in your local grocery store.
        • Have these ingredients on hand to make entertaining even easier when it comes time for your party.
        • Perfect for holidays, parties, or any time of the year: The cherries, rosemary, and oranges definitely say holidays, but this roasted pork loin is perfect to serve year-round for dinner or any get-together.
        • The flavor: Cherries, balsamic, rosemary (optional but definitely recommended), and oranges are a heavenly flavor combination.

        Reader Comments

        "This recipe is delicious!! I’ve made it with both frozen and fresh cherries. My entire family loves it! Making it tonight for my parents. :)" Helene

        "5 stars Could this be easier and come out more amazing? I’m not the most coordinated cook so this recipe makes me pretty happy. It is dinner party-worthy and did not cause me dinner party stress. The glaze makes the dish, as does the super easy but totally amazing and rustic presentation." Courtney.

        "FANTASTIC!!! Made it last night major hit!!! Pam

        How to Make This Pork Loin Recipe

        I love how easily sourced all of the ingredients are, Keep them on hand in your kitchen and whip up this pork loin recipe when you need to impress in a hurry!

        • 4-lb pork loin (boneless)

        Cherry balsamic glaze ingredients

        • 1 cup finely chopped brown onion
        • 3 tablespoons balsamic vinegar
        • 4 oz cherry preserves
        • ¾ teaspoon ground allspice
        • 1 tablespoon olive oil
        • ½ teaspoon kosher sea salt
        • ½ teaspoon pepper
        • ¼ teaspoon cayenne pepper
        • 16 oz. bag frozen cherries pitted

        Optional Garnishes

        • rosemary sprigs
        • fresh or dried orange slices

        Step 1: Preheat the oven to 425 degrees.

        Step 2: Trim pork loin of fat, and lay in a shallow roasting pan (metal or ceramic). Pat dry pork loin using paper towels, then sprinkle with salt and pepper.

        Step 3: Roast pork loin in the oven for 30 minutes to get the beautiful color on your roast.

        Meanwhile, make the cherry pork glaze

        Step 4: Mix chopped onion, balsamic vinegar, cherry preserves, allspice, olive oil, sea salt, pepper, cayenne pepper, and frozen cherries in a medium bowl. Set aside.

        Note: This can be done ahead and kept in the fridge.

        Step 5: After 30 minutes, pull pork loin from the oven, and pour cherry glaze on the roast and around the pan, and finish roasting about 30 minutes more. (Cooking time is 60 minutes total).

        Step 6: Transfer pork to platter. Let rest for 10 minutes. Carve and serve warm with cherry pan sauce.

        PRO TIP: For a thicker cherry sauce, pour cherry sauce from a sheet pan in a small saucepan and heat on low.

        What is the Difference Between Pork Loin and Pork Tenderloin?

        A pork loin is a wide thick boneless or bone-in cut of meat, producing large pieces when sliced, and is cut from the back rib cage area of a pig. Pork loin makes great roasts and is used to make Canadian bacon.

        Pork tenderloin is a long and narrow, boneless cut from the central spine portion of the pig. The tenderloin comes from the full pork loin. As the name indicates, the tenderloin is one of the most tender cuts of pork. Typically, pork tenderloin weighs between ¾ and 1 ½ pounds.

        How Long Do You Cook a Pork Loin in the Oven?


        For this recipe, I cooked a 4-lb pork loin for 60 minutes at 425° F.
        According to  The National Pork Board, you can cook whole boneless pork loin at 350° F for 8-11 minutes per lb.

        What Temperature For Pork Loin?

        Boneless pork loin should be cooked to an internal temperature of 145°-160° F according to the National Pork Board. Measure with a digital cooking thermometer.

        The board advises that "pork today is very lean and shouldn't be overcooked," which is why a digital cooking thermometer is so useful.

        More Pork Loin Recipes

        Here are some of my favorite easy entertaining and holiday recipes using pork loin.

        The low temperature and slow long cooking process make this oven Pork Roast easy to shred as it becomes tender over the hours. The result: perfectly moist yet slightly caramelized edges, a super savory pulled pork made from pork loin.

        Slow Cooker Pulled Pork made with pork loin and Coca Cola is so juicy, top with coleslaw, pickle chips, and tangy BBQ sauce all on a golden bun.

        Inspired by the famous Cuban sandwich, these easy Pulled Pork Sliders bake to a golden brown with Dijon butter brushed on sweet Hawaiian bread rolls, I mean what could be better?

        Make these Tater Tot Nachos "Totchos" with Pulled Pork and a creamy Tomatillo Sauce for relaxed weekends at home, parties, on game day, or even a simple dinner.

        • A white casserole dish with oven roasted pulled pork shredded and ready to eat in tacos or a recipe for dinner.
          Oven Roasted Pulled Pork
        • Red white check paper lined basked holding a pulled pork sandwich topped with coleslaw.
          Slow Cooker Pulled Pork
        • Three pulled pork sandwiches on Hawaiian buns with pickles, cheese and ham on a cutting board.
          Pulled Pork Sliders
        • A close up of a oval cast iron pan with tater tots, pulled pork, cut avocado, and drizzled with white sauce.
          Tachos Tater Tot Nachos

        Did you love this recipe? We would love to hear from you! If you make this recipe and love it, give it a 5-star rating ⭐⭐⭐⭐⭐ with a comment. THANK YOU!! Follow Delicious Table with my free newsletter and share this recipe with your friends on Facebook, Pinterest, and Instagram.

        A sliver carving fork and knife next to a pork loin roast and topped with cherries.
        Print

        Cherry Balsamic Pork Loin

        Easy 10-minute prep, festive Cherry Balsamic Pork Loin serves a large crowd and is perfect for family dinner, entertaining, special occasions, or the holidays! One of the best ways to entertain for a large dinner party is to serve an elegant beautiful pork loin roast with a few simple ingredients.
        Course Dinner & Main Dishes
        Cuisine American
        Keyword pork loin, pork loin recipe, roasted pork loin
        Prep Time 10 minutes minutes
        Cook Time 1 hour hour
        Total Time 1 hour hour 10 minutes minutes
        Servings 12
        Calories 280kcal
        Author Lisa Hatfield

        Equipment

        • Roasting Pan
        • Epicurean Non-Slip Cutting Board
        • Chef Knife

        Ingredients

        • 4 lb pork loin boneless

        Cherry Balsamic Glaze

        • 1 cup finely chopped brown onion
        • 3 tablespoons balsamic vinegar
        • 4 oz cherry preserves
        • ¾ teaspoon ground allspice
        • 1 tablespoon olive oil
        • ½ teaspoon kosher sea salt
        • ½ teaspoon pepper
        • ¼ teaspoon cayenne pepper
        • 16 oz. bag frozen (or fresh) cherries pitted

        optional garnish:

        • rosemary sprigs
        • fresh or dried orange slices
        US Customary - Metric

        Instructions

        • Pre-heat oven to 425 degrees.
        • Trim pork loin of fat, and lay in a shallow roasting pan (metal or ceramic). Pat dry pork loin using paper towels, then sprinkle with salt and pepper.
        • Roast pork loin in the oven for 30 minutes to get beautiful color on your roast.

        Meanwhile, Make Cherry Glaze:

        • Mix chopped onion, balsamic vinegar, cherry preserves, allspice, olive oil, sea salt, pepper, cayenne pepper, and frozen cherries in a medium bowl. Set aside. (This can be done ahead and kept in fridge).
        • After 30 minutes, pull pork loin from oven, and pour cherry glaze on the roast and around the pan, and finish roasting about 30 minutes more. (Cooking time is 60 minutes total).
        • Transfer pork to platter. Let rest 10 minutes. Carve and serve warm with cherry pan sauce.
        • Optional: Pour cherry sauce from sheet pan in a small saucepan and heat on low to thicken the cherry balsamic sauce.

        Notes

        cherry sauce:

        Pour cherry sauce from sheet pan in a small saucepan and heat on low to thicken the cherry balsamic sauce.
         

        cherries: 

        You can use either frozen or fresh cherries, both work just as well. 


        Nutrition

        Calories: 280kcal | Carbohydrates: 16g | Protein: 34g | Fat: 7g | Saturated Fat: 2g | Cholesterol: 95mg | Sodium: 176mg | Potassium: 731mg | Fiber: 2g | Sugar: 11g | Vitamin A: 205IU | Vitamin C: 11.3mg | Calcium: 38mg | Iron: 1.4mg

        Roast Beef Sandwiches

        [heart_this] · Dec 9, 2021 · 1 Comment

        Thick sliced roast beef on baguettes with lettuce, horseradish sauce, and shaved parmesan.

        Last Updated May 21st, 2023 at 11:59 pm by Lisa

        Make an elegant beef roast for a special dinner, then serve thick deli style roast beef sandwiches the next day. These are out of this world heavenly, and all made at home.

        Take a crusty baguette, slather it with a creamy balsamic horseradish sauce, place long shaves of parmesan cheese, some crisp lettuce, and load on the roast beef.

        This is one of those recipes to make over and over, it's like having a deli counter at home. Simple yet so complex and special...

        Roast Beef Sandwich Recipe

        I keep it simple. There is no one perfect way to make this classic.

        A fresh baguette, or slices of bread, leftover roast beef (more on that later), a creamy spread, crisp lettuce like romaine, and a slice of cheese liked shaved parmesan.

        • 1 French Baguette
        • 8 oz Sliced Beef Filet (see recipe below)
        • 4 tablespoons Creamy Basamic Horseradish Sauce
        • 1 ounce Shaved Parmesan
        • 1 cup Spring Lettuce Mix
        1. Slice the baguette open and spread the creamy balsamic horseradish sauce on both sides.
        2. Layer spring lettuce, shaved parmesan cheese (tip: use a potato peeler), and sliced store bought or homemade roast beef.

        Homemade Deli Roast Beef Recipe

        You can take a look at my entire recipe post on how to make this classic thin-sliced deli meat right at home!

        Beef Roast (Roast Beef) with Port-Wine Sauce
        Serve this Beef Roast Recipe with a wine marinade as an elegant dinner or for the holidays. Slice leftovers for roast beef sandwiches.   
        GET THE RECIPE PIN IT
        Thick sliced roast beef on a cutting board with pan juices and ingredients in the background.
        • 5 pounds Strip Steak (or Beef Tenderloin) butcher tied
        • 2 tablespoons extra virgin olive oil
        • 1 ½ teaspoons sea salt
        • 1 teaspoon ground black pepper
        • ½ cup shallots
        • 2 cup good port wine
        • 3 tablespoons butter
        1. Let the beef stand at room temperature for about 1 hour before roasting. Preheat the oven to 450 degrees fahrenheit.
        2. Dice the shallots and set aside.
        3. Pat the beef dry with a paper towel, this helps it sear in the pan which creates carmelization (aka Maillard Reaction). Rub the olive oil all over the beef and sides of the roast, spinkle with salt and pepper on all sides.
        4. On medium-high heat, heat a large cast iron skillet, sear the beef on each side until golden brown and caramelized, and stir the shallots around in the pan. The shallots will turn dark, and that is ok, but don't let them burn, adjust your heat if necessary.
        5. Turn off the stove, remove beef from the pan and rest on a large platter.
        6. In the large skillet pan (don't clean it out!) add 2 cups of red wine (a good port prefered) and 3 tablespoons of butter, use a wooden spoon to scrape up all the bits known as the "fond" on the bottom of the pan. There is a lot of flavor down on the pan and you want that in your sauce! Next, add the beef back in the pan.
        7. Carefully place the cast iron skillet into the 450 degree oven on the center rack, for 10 minutes, then flip over the beef for another 10 minutes.
        8. The beef is done when internal temperature reaches medium rare 130-135 degrees, use a good accurate thermometer.
        9. Remove from oven, rest 15 minutes, and slice thick with a good sharp knife for dinner portions and spoon the sauce over each portion, or slice thinly for sandwiches.
        10. Serve with creamy horseradish sauce for dinner.
        Overhead view of a cast iron pan with a seared beef roast (roast beef) cooked to the right temperature.

        What Kind Of Beef Is Best?

        For the best sandwich, go for a quality cut of beef at the grocery store. It will produce the best flavor and will be melt in your mouth tender.

        PRO TIP: You can splurge and get a center-cut beef tenderloin roast, also called a filet of beef, or filet roast, that runs around $22 per pound. But I found a less expensive option…New York Strip Steak!

        New York Strip steak tied into a roast by the butcher is a cost-effective option for this recipe and is amazing. It’s up to you, I found that the strip steak was well priced and just as delicious!

        • New York Strip Steak Benefits – cost-effective, tender, and full of flavor
        • Filet Tenderloin Benefits – more expensive, very tender, a premium cut
        Searing roast beef in a pan with tips to tie the beef and pat it dry.
        Thick sliced roast beef made with a rich wine sauce sliced on a board.

        Roast Beef Sandwich ~ Swaps & Options

        Here are options to create your own or use things you have on hand...

        • Homemade or Good Store-Bought Deli Roast Beef
        • Horseradish Cream
        • Shaved parmesan cheese
        • Tomato slices
        • Honey, Dijon, or yellow mustard
        • Caramelized onions
        • Sliced red onion
        • Pickled Onions
        • Mayonnaise
        • Sour cream
        • Lettuce
        • Whipped or Regular Cream cheese
        • Freshly grated horseradish (or you can use prepared in a jar)
        • Fresh basil chiffonade
        • Slices Of Cheese - Cheddar, Pepper Jack, Swiss Cheese, Havarti, etc.

        PRO TIP: Use a vegetable peeler to "shave" thin pieces of good parmesan cheese.

        Three stacked and sliced roast beef sandwiches on French bread with lettuce, cheese and a creamy spread on parchment paper ready to eat.

        Creamy Horseradish Sauce Is EASY!

        1. In a small bowl, use a small rubber spatula and mix sour cream, prepared horseradish, balsamic vinegar, Dijon mustard, sea salt, pepper, and Worcestershire sauce until well combined.
        2. Keep covered with plastic wrap or in an airtight container chilled in the fridge, will keep for 2-3 weeks.
        A wooden bowl with creamy balsamic horseradish sauce swirled in the center, and a wooden spreader resting on the edge of the bowl with a rustic beige tablecloth underneath.
        Creamy Balsamic Horseradish Sauce
        If you enjoy spicy foods, this Creamy Balsamic Horseradish Sauce is a great compliment to savory dishes like thick slices of Beef Roast, prime rib, Corned Beef. Or to slather on beef tenderloin Roast Beef Sandwiches. Add deep flavor and a spicy fiery kick to your home cooking. Dollop this creamy sauce on a good french dip sandwich or grilled filet mignon. And it lasts in the fridge for over two weeks. You will feel like you are dining at the finest restaurant or steak house every day.
        GET THE RECIPE PIN IT
        Looking down into a wooden bowl with creamy balsamic horseradish sauce swirled in the center, and a wooden spreader resting on the edge of the bowl with a rustic beige tablecloth underneath and on a woven rattan placemat.

        Roast Beef FAQ

        Quality Roast Beef Store Brand Recommendations

        These are high-quality popular brands for sandwiches that you can easily find in most grocery stores.

        Applegate Organics Greenridge Farm
        Boar’s Head
        Columbus
        Deitz and Watson


        What Is Prepared Horseradish vs Horseradish Sauce?

        Prepared Horseradish - Is sold in grocery stores and is made with horseradish root, vinegar, water, and salt. You can make it at home as well.

        Horseradish Sauce - Is made at home or in restaurants and combines prepared horseradish with cream, sour cream, or mayonnaise, and other ingredients to add flavor and make creamy for use on dishes like prime rib, steak, or deli style sandwiches.

        What is the best bread for roast beef sandwiches?

        Ciabatta
        French Baguette
        Sourdough
        Kaiser Rolls
        Croissant
        Rustic Artisan
        Sandwich Bread Slices

        More Sandwich Recipes

        Plenty of easy sandwich ideas to make for all kinds of reasons. Every delicious sandwich here will thrill your family or guests and are one of the most popular finger foods in America. You have gotta make this Lobster BLT Sandwich that has succulent lobster, crispy applewood smoked bacon, golden grilled sourdough bread, an easy dill-caper aioli, and won a 1rst Place Blue Ribbon at the OC Fair.

        Yummy Picnic Food is easy with Pressed Italian Sandwiches that are both neat to eat and hold. You can make these a day ahead, they keep very well overnight in the fridge.

        The Best Egg Salad recipe starts with perfectly cooked eggs and fresh, quality, simple ingredients. It's mixed together into a rich creamy texture. And loaded onto Rye or Pumpernickel sandwich bread with a pickle on top!

        Serve a GIANT Sub Sandwich with edible eyeballs for Halloween. You can add any deli meat, sliced cheese, or toppings you like.

        • A sliced open BLT sandwich loaded with succulent lobster, bacon, lettuce and tomato stacked on a board.
          BLT Lobster Sandwich
        • Picnic sandwiches on a red and white check table with sliced sandwiches.
          Picnic Food: Pressed Italian Sandwiches
        • An egg salad sandwich on brown bread stacked on a wood stand with a pickle on top.
          Egg Salad
        • A giant sub sandwich that looks like a Monster with giant edible radish eyes and small black olive eyes.
          Halloween Sandwich Ideas

        Did you love this recipe? We would love to hear from you! If you make this recipe and love it, give it a 5-star rating ⭐⭐⭐⭐⭐ with a comment. THANK YOU!! Follow Delicious Table with my free newsletter and share this recipe with your friends on Facebook, Pinterest, and Instagram.

        Thick sliced roast beef on baguettes with lettuce, horseradish sauce, and shaved parmesan.
        Print

        Roast Beef Sandwiches

        Roast Beef Sandwiches with a homemade deli meat, creamy balsamic horseradish sauce, shaved parmesan, and lettuce on crusty baguettes!
        Course Lunch & Picnic
        Cuisine American
        Keyword roast beef, roast beef deli meat, roast beef recipe, roast beef sandwiches
        Prep Time 10 minutes minutes
        Cook Time 0 minutes minutes
        Total Time 10 minutes minutes
        Servings 4
        Calories 274kcal
        Author Lisa Hatfield

        Equipment

        • Epicurean Non-Slip Cutting Board
        • Small Serrated Knife
        • Mini Spatula Set (Silicone)

        Ingredients

        • 1 French Baguette
        • 8 oz Sliced Roast Beef Filet
        • 4 tablespoons Creamy Basamic Horseradish Sauce
        • 1 ounce Shaved Parmesan
        • 1 cup Spring Lettuce Mix

        Instructions

        • Slice the baguette open and spread the creamy balsamic horseradish sauce on both sides.
        • Layer spring lettuce, shaved parmesan cheese (tip: use a potato peeler), and sliced store bought or homemade roast beef.

        Notes

        What Is Good On A Roast Beef Sandwich?

        • Homemade or storebought thin-sliced beef
        • Horseradish Sauce
        • Shaved parmesan cheese (shave with a vegetable peeler)
        • Tomato slices
        • Honey, Dijon, or yellow mustard
        • Caramelized onions
        • Sliced red onion
        • Pickled onions
        • Mayonnaise
        • Sour cream
        • Lettuce
        • Whipped or Regular Cream cheese
        • Freshly grated horseradish (or you can use prepared in a jar)
        • Fresh basil chiffonade
        • Cheese slices - Cheddar, Pepper Jack, Havarti etc.
        • Chopped chives

        Bread Options

        • Ciabatta
        • French baguette
        • Sourdough
        • Kaisar
        • Croissant
        • Rustic Artisan
        • Sandwich Bread Slices

        Creamy Balsamic Horseradish Sauce

        • ¼ cup prepared horseradish
        • 1 tablespoon balsamic vinegar
        • 1 tablespoon Dijon-style mustard
        • ½ teaspoon kosher salt
        • ¼ teaspoon ground pepper
        • Dash Worcestershire sauce
        1. In a glass prep bowl, use a small rubber spatula and mix sour cream, prepared horseradish, balsamic vinegar, Dijon mustard, sea salt, pepper, and Worcestershire sauce until well combined.
        2. Keep covered and chilled in the fridge, will keep for 2-3 weeks.

        Nutrition

        Serving: 4g | Calories: 274kcal | Carbohydrates: 34g | Protein: 21g | Fat: 6g | Saturated Fat: 2g | Cholesterol: 37mg | Sodium: 1414mg | Potassium: 293mg | Fiber: 2g | Sugar: 2g | Vitamin A: 1079IU | Vitamin C: 30mg | Calcium: 304mg | Iron: 3mg

        Beef Roast

        [heart_this] · Dec 6, 2021 · 1 Comment

        Thick sliced roast beef on a cutting board with pan juices and ingredients in the background.

        Last Updated June 15th, 2023 at 09:52 pm by Lisa

        Make an elegant Beef Roast (aka Roast Beef) from tenderloin or New York steak. Wonderful to serve for dinner parties, special occasions, or the holidays with a rich red wine sauce.          

        As an added bonus, the next day it will make incredible roast beef sandwiches. Pile on crusty French bread slathered with creamy horseradish sauce.

        This roast beef recipe is ready in under 45 minutes and serves 10 people. The results are simply stunning, a deep rich color results from the pan sear and the rich port wine sauce. Slice it thick and serve...

        What Kind Of Beef Is Best?

        You can splurge and get a center-cut beef tenderloin roast, also called a filet of beef or filet roast. Those run around $38 per pound currently (2021).

        But I found a less expensive option...New York Strip Steak!

        PRO TIP: Buy New York Strip steak, and ask the butcher to tie it into a roast for you! My market did not charge anything extra for the service. It is a cost-effective option for this recipe. It's up to you, with beef prices these days. Strip steak is well priced and absolutely delicious!

        • New York Strip Steak Benefits - cost-effective, tender, and full of flavor
        • Filet Tenderloin Benefits - more expensive, very tender, a premium cut

        Here Is What You Need...

        You can use a Syrah, Cabernet, or Pinot Noir, the Port is amazing...I hope you try it!

        How To Make Roast Beef

        1. Let the beef stand at room temperature for about 1 hour before roasting. Preheat the oven to 450 degrees.
        2. Dice the shallots and set aside.
        3. Pat the beef dry with a paper towel, this helps it sear in the pan which creates caramelization (aka Maillard reaction which is FLAVOR). Rub the olive oil all over the beef, sprinkle with salt and pepper on all sides.

        How To Sear A Beef Roast

        On medium-high heat, heat a large cast-iron skillet. Sear the beef on each side until golden brown and caramelized, and stir the shallots around in the pan. The shallots will turn dark, that is ok but don't let them burn.

        Turn off the stove, remove beef from the pan and rest on a large platter.

        Make The Red Wine Sauce

        In the large skillet pan (don't clean it out!) add 2 cups of red wine, good Port preferred. Add 3 tablespoons of butter. Use a wooden spoon to scrape up all the bits known as the "fond" on the bottom of the pan.

        There is a lot of flavor down on the pan and you want that in your pan sauce! Next, add the beef back to the pan.

        Now, Finish The Roast

        Carefully place the cast iron skillet into the 450-degree oven on the center rack, for 10 minutes. Then flip over the beef for another 10 minutes.

        The roast beef is done when the internal temperature reaches medium-rare 130-135 degrees.

        1. Remove from oven, rest 15 minutes. Slice 2" thick for dinner portions and spoon the sauce over each portion, or slice thinly for roast beef sandwiches.
        2. Serve with creamy horseradish sauce for dinner or on sandwiches.

        Roast Beef Cooking Time & Temperatures

        It is recommended to cook beef for roast beef just to medium internal temperature. This keeps it tender and full of flavor. 

        Use a good wireless meat thermometer with probes or instant-read meat thermometer,

        rare 120-125 degrees medium 140-145 medium-rare 130-135

        Good Cut Of Meat For Roast Beef?

        You need a tender cut of beef if you are pan searing and finishing your beef in the oven, or it will become tough. Choose a tender cut of beef:

        New York Strip Steak Benefits - cost-effective, tender, and full of flavor.
        Filet Tenderloin Benefits - more expensive, very tender, a premium cut.
        PRO TIP: Have your butcher tie the cut of meat for you!

        What Is The Maillard Reaction?


        The Maillard reaction is a chemical reaction between amino acids and reducing sugars that gives that distinctive golden caramelized color and deep rich flavor. When you sear a steak, roast meats, make caramel from milk and sugar, bake bread or cookies, toast marshmallows, those are all examples of this reaction when you get that beautiful golden tone and color on the food you are cooking.

        Shaved parmesan on roast beef sandwiches on baguettes.

        Make Roast Beef Sandwiches!

        Although it seems obvious, I want to say that this recipe makes AAMMMMMMAAAAZZZZZINNNNNG ROAST BEEF SANDWICHES!

        Roast Beef Sandwiches
        Roast Beef Sandwiches with a homemade deli meat, creamy balsamic horseradish sauce, shaved parmesan, and lettuce on crusty baguettes!
        GET THE RECIPE PIN IT
        Thick sliced roast beef on baguettes with lettuce, horseradish sauce, and shaved parmesan.

        I had a longtime friend over for lunch with her young kids. And they all went crazy for these sandwiches and her son still begs me to make these for him.

        I used quality ingredients and served them on good French baguettes, slathered with homemade creamy horseradish sauce, thin-sliced roast beef, shaved aged parmesan, and a spring lettuce mix.

        Creamy Balsamic Horseradish Sauce
        If you enjoy spicy foods, this Creamy Balsamic Horseradish Sauce is a great compliment to savory dishes like thick slices of Beef Roast, prime rib, Corned Beef. Or to slather on beef tenderloin Roast Beef Sandwiches. Add deep flavor and a spicy fiery kick to your home cooking. Dollop this creamy sauce on a good french dip sandwich or grilled filet mignon. And it lasts in the fridge for over two weeks. You will feel like you are dining at the finest restaurant or steak house every day.
        GET THE RECIPE PIN IT
        Looking down into a wooden bowl with creamy balsamic horseradish sauce swirled in the center, and a wooden spreader resting on the edge of the bowl with a rustic beige tablecloth underneath and on a woven rattan placemat.
        Roast beef sandwiches with the beef cut ¼-1/2" thick for sandwiches.

        How To Serve Roast Beef?

        • Slice in thick 1 ½ - 2 inch slices for dinner, spoon pan sauce over beef. 
        • Sides that go well with roast beef are Mashed Potatoes or Smashed Potatoes, a cool green Wedge Salad, and Dinner Rolls.
        Four thick slices of roast beef with the whole roast in the background and juices running down the black slate cutting board.

        More Beef Recipes

        Try a Beef Stroganoff recipe with tri-tip steak, mushrooms, and creamy rich stroganoff sauce. It is easy enough for a weeknight dinner and yummy enough for company.

        Shish Kabobs are the best for grilling and cookouts. These use top sirloin beef, and an incredible marinade that has pineapple juice.

        These Cheeseburgers are slathered with burger sauce, the meat patties are made with an amazing burger seasoning, tons of melted cheese, pickle chips, tomato slices, and crisp cold lettuce. 

        • White plate filled with Beef Stroganoff on noodles with mushrooms.
          Best Beef Stroganoff Recipe
        • A wooden platter filled with Shish Kabob grilled skewers.
          Shish Kabobs
        • A person holding a messy grilled burger topped with melted cheese, burger sauce, lettuce, tomato, and pickles.
          The Best Cheeseburger

        Did you love this recipe? We would love to hear from you! If you make this recipe and love it, give it a 5-star rating ⭐⭐⭐⭐⭐ with a comment. THANK YOU!! Follow Delicious Table with my free newsletter and share this recipe with your friends on Facebook, Pinterest, and Instagram.

        Thick sliced roast beef on a cutting board with pan juices and ingredients in the background.
        Print

        Beef Roast (Roast Beef) with Port-Wine Sauce

        Serve this Beef Roast Recipe with a wine marinade as an elegant dinner or for the holidays. Slice leftovers for roast beef sandwiches.   
        Course Dinner & Main Dishes
        Cuisine American
        Keyword beef roast, roast beef, roast beef recipe
        Prep Time 15 minutes minutes
        Cook Time 30 minutes minutes
        Total Time 45 minutes minutes
        Servings 12
        Calories 541kcal
        Author Lisa Hatfield

        Equipment

        • Large Cast Iron Skillet
        • Epicurean Non-Slip Cutting Board
        • Chef Knife
        • Wireless Bluetooth Oven/BBQ/Smoke Meat Thermometer (4 Probe)
        • Digital Meat Thermometer

        Ingredients

        • 5 pounds Strip Steak (or Beef Tenderloin) butcher tied
        • 2 tablespoons extra virgin olive oil
        • 1 ½ teaspoons sea salt
        • 1 teaspoon ground black pepper
        • ½ cup shallots
        • 2 cup good port wine
        • 3 tablespoons butter

        Instructions

        • Let the beef stand at room temperature for about 1 hour before roasting. Preheat the oven to 450 degrees.
        • Dice the shallots and set aside.
        • Pat the beef dry with a paper towel, this helps it sear in the pan which creates carmelization (aka Maillard Reaction). Rub the olive oil all over the beef, spinkle with salt and pepper on all sides.
        • On medium high heat, heat a large cast iron skillet, sear the beef on each side until golden brown and caramelized, and stir the shallots around in the pan. The shallots will turn dark, and that is ok, but don't let them burn, adjust your heat if necessary.
        • Turn off the stove, remove beef from the pan and rest on a large platter.
        • In the large skillet pan (don't clean it out!) add 2 cups of red wine (a good port prefered) and 3 tablespoons of butter, use a wooden spoon to scrape up all the bits known as the "fond" on the bottom of the pan. There is a lot of flavor down on the pan and you want that in your sauce! Next, add the beef back in the pan.
        • Carefully place the cast iron skillet into the 450 degree oven on the center rack, for 10 minutes, then flip over the beef for another 10 minutes.
        • The roast beef is done when internal temperature reaches medium rare 130-135 degrees, use a good accurate thermometer.
        • Remove from oven, rest 15 minutes, and slice thick for dinner portions and spoon the sauce over each portion, or slice thinly for roast beef sandwiches.
        • Serve with creamy horseradish sauce for dinner or on sandwiches.

        Notes

        beef cut

        New York Strip steak tied into a roast by the butcher is a cost-effective option for this recipe and is amazing.
        You can splurge and get a center-cut beef tenderloin roast, also called a filet of beef, or filet roast, that runs around $22 per pound. It's up to you!
        Ask the butcher to tie the roast for you if you buy a less expensive cut like New York Strip.

        beef temperature

        It is recommended to cook beef for roast beef just to medium internal temperature to keep it tender and full of flavor. 
        rare 120-125 degrees
        medium rare 130-135
        medium 140-145

        serving

        Dinner: Slice in thick 1 ½ - 2 inch slices for dinner, spoon pan sauce over beef. 
        Sandwiches: Slice thin, for sandwiches. 

        wine

        You can use a Syrah, Cabernet, or Pinot Noir, the Port is amazing...hope you try it!

        Nutrition

        Serving: 12g | Calories: 541kcal | Carbohydrates: 7g | Protein: 39g | Fat: 34g | Saturated Fat: 14g | Cholesterol: 159mg | Sodium: 419mg | Potassium: 661mg | Fiber: 1g | Sugar: 4g | Vitamin A: 87IU | Vitamin C: 1mg | Calcium: 51mg | Iron: 3mg

        Christmas Tree Salad

        [heart_this] · Nov 30, 2021 · 1 Comment

        A salad shaped like a Christmas tree with red bell pepper garland, white apple stars and ornaments of nuts and fruit.

        Last Updated December 21st, 2022 at 11:03 pm by Lisa

        A festive, easy, Christmas Salad with a Cranberry Vinaigrette (made in a Mason jar) will be the talk of your holiday party. Shape this salad like a Christmas tree and decorate it with "garland, ornaments, and snow".

        Serve on a holiday paper-wrapped cutting board and tongs tied with a festive bow...

        Christmas Salad Ingredients

        • 8 cups of fresh spinach leaves (or any cut lettuce)
        • 1 red bell pepper cut in thin long strips
        • ½ cup pomegranate seeds
        • ½ cup pistachios
        • ½ cup feta cheese
        • 2-3 slices of apple cut into star shapes using cookie cutters
        Pomegranates: Seed, Juice, and Recipe Ideas
        Get Pomegranate Seeds out the easy way. Learn the simple trick to open, seed, and juice pomegranate arils in step-by-step instructions.
        GET THE RECIPE PIN IT
        A white ceramic dish with pomegranate seeds ready to use in a recipe.

        If you would prefer to use another dressing, try my Parmesan Lemon Vinaigrette, Green Goddess Dressing, or Meyer Lemon Vinaigrette.

        Mix The Cranberry Vinaigrette

        The Cranberry Vinaigrette takes just minutes to make in a mason jar and is a great way to use up cranberry sauce.

        The dressing calls for 3 tablespoons of cranberry sauce. I highly recommend it because of the wonderful color it adds to the dressing, but it's not necessary. You can make some Pineapple-Orange Cranberry Sauce for Christmas dinner and use a little in the vinaigrette.

        • cranberry juice
        • cranberry sauce (optional, it adds color!)
        • apple cider vinegar
        • orange zest and orange juice
        • Dijon mustard
        • extra virgin olive oil
        • Worcestershire sauce
        • fresh cracked pepper
        • kosher sea salt

        Add cranberry juice, cranberry sauce, apple cider vinegar, orange juice, and zest, Dijon mustard olive oil, Worcestershire sauce sea salt, and pepper to a mason jar, put the lid on, and shake until combined... that's it.

        Or add all the ingredients into a bowl, and whisk well until combined.

        How to Assemble A Christmas Tree Salad

        PRO SERVING TIPS: Wrap a cutting board, flat platter, or square board in a wrapping paper of your choice. Tie a festive bow & tuck tongs under the bow, and serve the dressing in a small gravy boat.

        Step 1: Place spinach (or chopped lettuce of your choice) in the shape of a Christmas tree.

        Step 2: Add "garland" of red bell pepper. Cut into thin long strips.

        Step 3: Add "ornaments" of pomegranate seeds and pistachios.

        Step 4: Add "snow" of feta cheese.

        Step 5: Add "tree topper and stars" of apples using different star-shaped cookie cutters.

        Step 6: Drizzle with a Cranberry Vinaigrette or dressing of your choice.

        Other Salad Topping Ideas

        This Christmas green salad is only limited by your creativity. Here are a few more Christmas salad topping ideas.

        • Candied Pecans
        • Dried Cranberries
        • Red Tomatoes
        • Red Grapes
        • Sliced Almonds
        • Walnuts
        • Sugared Cranberries
        A salad shaped like a christmas tree with garland and ornaments made from fruit, nuts, and red bell pepper.

        More Salad Recipes

        Make a festive red and green holiday Christmas Salad with an easy pomegranate dressing. Top with gorgeous sparkling pomegranate seeds, D'Anjou pears for the little trees, Spicy Candied Pecans, ruby red dried cranberries, and juicy raspberries.

        Or for a crowd, make a classic 7 Layer Salad. It's always a crowd-pleaser, and so pretty in a trifle bowl. Serve a simple elegant Wedge Salad with steaks like filet mignon or beef tenderloin. And for a colorful classic, serve Cobb Salad. This recipe comes right from the Los Angeles restaurant that made it famous in Hollywood.

        • Two plates of Christmas salad with forks topped with fruit and nuts.
          Christmas Holiday Salad
        • A glass trifle dish filled with 7 Layer Salad full of colorful ingredients.
          7 Layer Salad
        • Wedge salad with avocado dressing drizzled on top with pistachios on a black slate board.
          Iceberg Wedge Salad
        • A white square plate filled with colorful Cobb Salad made with chicken, eggs, avocados, tomatoes, and bacon.
          Cobb Salad

        Did you love this recipe? We would love to hear from you! If you make this recipe and love it, give it a 5-star rating ⭐⭐⭐⭐⭐ with a comment. THANK YOU!! Follow Delicious Table with my free newsletter and share this recipe with your friends on Facebook, Pinterest, and Instagram.

        A salad shaped like a Christmas tree with red bell pepper garland, white apple stars and ornaments of nuts and fruit.
        Print

        Christmas Tree Salad Recipe

        Holiday Christmas Tree Salad with a Cranberry Vinaigrette will be the talk of your Christmas party. Shape this salad and decorate it like a Christmas tree with garland, ornaments, and snow!
        Course Holiday, Salads & Dressing
        Cuisine American
        Keyword Christmas salad, Christmas salad recipe, Christmas tree salad, cranberry vinaigrette, holiday salad recipe
        Prep Time 20 minutes minutes
        Total Time 20 minutes minutes
        Servings 8
        Calories 248kcal
        Author Lisa Hatfield

        Equipment

        • Star Shape Cookie Cutter Set

        Ingredients

        Christmas Tree Salad

        • 8 cups of fresh spinach leaves
        • 1 red bell pepper cut in thin long strips
        • ½ cup pomegranate seeds
        • ½ cup pistachios
        • ½ cup feta cheese
        • 2-3 slices of apple cut into star shapes using cookie cutters

        Cranberry Vinaigrette (or dressing of choice)

        • 4 tablespoons cranberry juice
        • 3 tablespoons cranberry sauce optional
        • 2 tablespoons apple cider vinegar
        • 1 orange zest & juiced
        • 4 tablespoons Grey Poupon Dijon mustard
        • ½ cup extra virgin olive oil
        • 1 tablespoon Worcestershire sauce
        • ½ teaspoon fresh cracked pepper
        • ½ teaspoon kosher sea salt
        US Customary - Metric

        Instructions

        • Wrap cutting board or square board in wrapping paper of your choice, or simply serve from a platter. Tie a festive bow around the corner of the board and tuck in a pair of tongs.
        • Add all vinaigrette ingredients to mason jar, put the lid on and shake until combined!
        • Place spinach (or chopped lettuce of your choice) in a triangle shape of a Christmas tree.
        • Add "garland" of red bell pepper. Cut into thin long strips.
        • Add "ornaments" of pomegranate seeds and pistachios.
        • Add "snow" of feta cheese.
        • Add "tree topper and ornament stars" of apples using different star-shaped cookie cutters.
        • Drizzle with Cranberry Vinaigrette or dressing of your choice.

        Notes

        Cranberry Sauce

        Use some cranberry sauce to add color to the dressing, it is optional but great. 

        Other Salad Topping Ideas

        • Candied Pecans
        • Dried Cranberries
        • Red Tomatoes
        • Red, Green, or Burgandy Grapes
        • Sliced Almonds
        • Walnuts
        • Sugared Cranberries

        Serving Tips

        • Wrap a cutting board, flat platter, or square board in wrapping paper of your choice.
        • Tie a festive bow & tuck tongs under the bow.
        • Serve the dressing in a small gravy boat.
        • Store the dressing in a Mason jar in the fridge for up to a week. Rest on the kitchen counter about 30 minutes, give it a good shake and serve. 


        Nutrition

        Calories: 248kcal | Carbohydrates: 16g | Protein: 4g | Fat: 19g | Saturated Fat: 3g | Cholesterol: 8mg | Sodium: 383mg | Potassium: 399mg | Fiber: 3g | Sugar: 10g | Vitamin A: 3400IU | Vitamin C: 40.1mg | Calcium: 99mg | Iron: 1.6mg

        Food Gifts

        [heart_this] · Nov 26, 2021 · Leave a Comment

        Last Updated April 4th, 2024 at 02:48 pm by Lisa

        Homemade Christmas Gifts are easy and inexpensive. There are 8 Holiday DIY food gift ideas here including Chocolate Chip Peppermint Cookies, an edible Candy Plate, Peppermint Vodka to make Candy Cane Martinis, Preserved Lemons, Candied Pecans, BBQ Grill Rub, Flavor Infused Gourmet Salts, and Dog Biscuits personalized with doggies name.

        One of these gifts will be sure to make someone very happy. Handmade gifts are so fun to make and people really love to receive them.

        For as long as I can remember, I made Christmas gifts during the holidays. I have even made handpainted boxes, wrapping paper, and even stockings. But food gifts are the best kind of gifts if you ask me...

        Chocolate Chip Peppermint Cookies

        Santa’s Chocolate Chip Peppermint Cookies are loaded with candy cane peppermint crunch pieces, milk chocolate chips, and minty creme de menthe chips.

        Leave these out for Santa or give them as a gift. The Christmas cookies took first place at a cookie exchange party!

        A white rectangle plate filled with chocolate chip peppermint cookies with a small Santa nearby.
        Chocolate Chip Peppermint Christmas Cookies
        Bake Chocolate Chip Peppermint Cookies with candy cane peppermint crunch, chocolate chips, and minty creme de menthe chips. Leave these out for Santa or make them for a holiday party, cookie exchange, gift them to friends and neighbors.
        GET THE RECIPE PIN IT
        A white rectangle plate filled with chocolate chip peppermint cookies with a small Santa nearby.

        Peppermint Candy Plate ~ Edible Food Gift

        Serve mugs of hot cocoa with toppings, or any holiday dessert or treats. Take Christmas cookies on a Peppermint Candy Plate to a holiday party and it will be a huge hit!

        I took this candy plate to my cousin's home for Christmas Eve, and they loved it. And yes you can eat the plate, it's just made of candy...

        Candy Plate
        Make a Peppermint Candy Plate for Christmas in only 20 minutes. Serve cookies, candy, hot cocoa, coffee, tea, festive drinks or holiday cocktails! You need 1 bag of mints, a pan, and parchment paper.
        Check out this recipe
        A peppermint candy plate made from peppermints with a pile of fresh baked colorful Christmas cookies.
        A peppermint candy plate made from peppermints with a pile of fresh baked colorful Christmas cookies.

        Homemade Candy Cane Vodka

        A Festive Christmas party cocktail, Candy Cane Martinis are made with Homemade Peppermint Vodka that makes an easy homemade holiday or Christmas gift.

        AND this peppermint vodka is so easy and simple, it’s made with vodka and candy canes.

        Two peppermint martinis with a bottle of peppermint vodka.
        Candy Cane Martinis ~ Plus Homemade Peppermint Vodka
        Candy Cane Martinis (aka Peppermint Martinis) is a festive Christmas cocktail made with Peppermint Vodka that you can make at home.
        GET THE RECIPE PIN IT
        A silver tray with Candy Cane Martinis with crushed peppermint rim and candy cane garnish.

        Homemade Grill & BBQ Rub

        You can use up extra spices that might otherwise be thrown out or expire, and make your own delicious BBQ Rub.

        There are ZERO preservatives in a homemade spice blend!

        Makes a wonderful gift to guys, a hostess or a holiday gift, you can personalize your gift tags or label with a cute container like a Mason or clamp jar...

        A small glass clamp jar filled with Grill and BBQ rub mix and a black tag and wood spoon wrapped as a gift.
        The Best BBQ Dry Rub
        Use this grilling and BBQ dry rub on chicken, steaks, pork, hamburgers, and as a rib rub. This seasoning blend adds amazing flavor and color!
        GET THE RECIPE PIN IT
        A large pork loin roast with a lot of dry rub seasoning pouring over the top.

        Preserved Lemons

        An excellent gourmet gift to give a person who loves to cook. Preserved Lemons add INCREDIBLE fresh intense “lemony” flavor; try on roast chicken, grilled fish, or lemon hummus.

        Mix into drinks, salads, and lemon dressings. You can keep adding to the jar all year long and include a card with the recipe and directions on how to use them...

        Preserved Lemon Recipe
        Preserved lemons add an incredible fresh intense "lemony" flavor with a mild tartness to a variety of dishes. Follow this easy simple recipe and step-by-step tutorial to make them the traditional way, or a superfast method to make them quickly in much less time, just 30 minutes! Then grab your jar and try one of the 25 ways to use them on roast chicken, grilled fish, potatoes, or lemon hummus, or mix or into stews, pasta, and salad dressings.
        GET THE RECIPE PIN IT
        A large clamp jar of Preserved Lemons with a brown craft paper tag that says Preserved Lemons.
        A tall clamp jar filled with preserved lemons, bay leaves, and a brown paper tag.

        Personalized Dog Treats

        Any doggy will love these homemade Dog Treats packed with nutritious pumpkin, peanut butter, spinach, zucchini, carrots, and oats.

        It was so fun to make these personalized for Sassy using a cookie cutter with her name on it and believe me she fully approves. You can bake the dog biscuits and gift the personalized cookie cutter!

        White Shih Tzu dog with a large box of homemade dog treats.
        Homemade Dog Treats
        Your doggy will love these homemade dog treats (dog biscuit recipe) packed with nutritious pumpkin, peanut butter, spinach, zucchini, carrots, and oats.
        GET THE RECIPE PIN IT
        A wooden bowl with homemade dog treats and the name of the dog Sassy stamped in each of them in a pile.

        Flavored Finishing Salts

        Flavored Finishing Sea Salt Recipes; Sriracha, Pinto Noir, Mustard, Celery, and House Seasoning plus recipe ideas and cooking suggestions!

        All the step-by-step instructions and recipes to use finishing salts. My personal favorite is Sriracha salt on Avocado Toast or the rim of a Bloody Mary...

        A wood platter with 5 seasoning jars open filled with flavored finishing salts.
        5 Flavored Finishing Salt Recipes
        Make tasty homemade finishing salts in flavors like sriracha salt, celery salt, house salt, mustard salt, and even pinot noir salt! These DIY salts would make a great gift too - gifts for foodies and gifts for food lovers.
        GET THE RECIPE PIN IT
        A wood platter with 5 seasoning jars open filled with flavored finishing salts.

        Spicy Candied Pecans

        These Candied Spiced Pecans are the perfect mix of spicy and sweet and have all the wonderful flavors of pumpkin pie. They’re almost impossible to resist!

        Toss these candied pecans on a Festive Holiday Salad to a sweet-spicy crunch, serve on a gorgeous Cheese Board, or a trendy "grazing table", or simply serve with drinks.

        Wrap in decorated Mason jars and gifts as a gourmet holiday hostess gift or party favor...

        Candied Pecans Recipe
        Candied Pecans with pumpkin pie spice flavors are crunchy and sweet with cinnamon-sugar, and a kick of heat. Use as a holiday or Fall appetizer on a grazing table, or charcuterie cheeseboard, or pack up as a homemade holiday food gift. These easy candy pecans are egg-free, gluten-free, and great for snacks. Wrap in pretty decorated mason jars, and add gift tags. Someone will be delighted.
        GET THE RECIPE PIN IT
        A white bowl with candied pecans and a few on the table with jars filled with them nearby.

        Now that is quite a list to pick from, here is to making homemade simple and inexpensive gifts from the heart. I love gifts that are edible or "sippable" and to enjoy right away.

        Wishing you the happiest of Holidays! It's all about loving and giving and cooking. Take a look at all my Christmas and Thanksgiving recipes for more party food inspiration.

        Did you love this recipe? We would love to hear from you! If you make this recipe and love it, give it a 5-star rating ⭐⭐⭐⭐⭐ with a comment. THANK YOU!! Follow Delicious Table with my free newsletter and share this recipe with your friends on Facebook, Pinterest, and Instagram.

        Everything Bagel Pumpkin Cheese Ball

        [heart_this] · Nov 22, 2021 · 11 Comments

        A pumpkin shaped cheese ball on a platter with pita chips and crackers.

        Last Updated November 14th, 2022 at 10:20 am by Lisa

        Serve a "pumpkin-shaped" Everything Bagel Cheese Ball appetizer for your next Fall party, it's always a hit! Easy to make ahead in 15 minutes, chill, and take to a gathering.

        Every time I make this pumpkin cheese ball, people just go crazy and want the recipe. Oh, and we will talk about an easy way to get a real pumpkin stem and how to get that cute shape, it is easy peasy...

        Although this easy cheeseball is not my original idea, it was all over Pinterest. I wanted an easy way to make the pumpkin shape, and most recipes had you carve it.

        So I tried butcher string to shape it rather than fussing around carving it with a knife, SO MUCH EASIER! It takes just minutes, and I promise your friends and family will just LOVE IT.

        How To Make A Pumpkin Cheese Ball

        • Cream Cheese - soften at room temperature on the counter for an hour
        • Everything Bagel Seasoning Trader Joe's brand or see recipe below
        • Sour Cream
        • Prepared Horseradish - you can find it in the condiments section
        • Worcestershire sauce
        • Sharp Cheddar - get a good aged one for extra flavor
        • Fresh Chives - or swap in green onions aka scallions
        • Pita Chips, Bagel Chips, Crackers, or Pretzels
        • Real Pumpkin Stem - or a piece of celery, or even broccoli stems work!
        1. Carefully cut the top off a small pumpkin.
        2. Then, cut off the extra pumpkin and carefully remove the stem using a small knife.
        3. Reserve 2 tablespoons of Everything Bagel Seasoning and set aside for decoration.
        4. In a medium bowl, mix softened cream cheese, 2 tablespoons of Everything Bagel Seasoning, sour cream, horseradish, Worcestershire sauce, grated sharp cheddar cheese, and fresh chives. Using a rubber spatula, blend until well combined, and form it into a round ball in the bowl.
        5. Next, place the cheese mixture on a large piece of plastic wrap, and pull the wrap up around the cheese ball and tie it tightly at the top to form a ball shape. Cut 4 pieces of butcher string about 2 feet long each. Lay them in a star pattern over each other, place the wrapped cheese ball in the center and tie up and around tightly to form the pumpkin shape. Chill in the fridge for at least a couple of hours or overnight until your party.
        6. When ready to serve your cheeseball, simply unwrap, cut the strings, place on a platter, and sprinkle with 2 tablespoons of everything bagel seasoning all over evenly.
        7. Place the pumpkin stem on top, and serve with pita chips, crackers, or bagel chips! Unwrap, sprinkle well with Everything Bagel Seasoning, pop the pumpkin stem on top, and serve with crackers or pretzels.

        Cheese Ball Variations

        • Mix in some white cheddar cheese instead of regular sharp cheddar.
        • Coat the outside of the pumpkin cheese ball with any orange-colored cheddar grated cheese, and add your stem on top to look just like a pumpkin!
        • To make it a bit healthier, serve this appetizer with veggies like carrots, bell peppers cut into strips, or celery sticks.
        • Add some crumbled cooked bacon or bacon bits into the cheese ball for an amazing flavor boost.
        How can I make my own everything bagel seasoning?


        1 tablespoon white sesame seeds
        1 tablespoon black sesame seeds
        1 tablespoon dried minced garlic
        1 tablespoon dried minced onion
        2 teaspoons sea salt (or flaked sea salt)
        2 tablespoons poppy seeds

        Mix and store in an airtight container for up to 6 months.

        Gorgeous Autumn Entertaining Inspiration

        Is this a gorgeous party spread for Autumn or what? My dear friend Lidy Baars from the French Garden House and I put together an easy outdoor party and menu, all set in her spectacular French garden. Her home literally feels just like I jetted off to France without a plane ticket!

        We kept it simple and used beautiful things she has on hand, her home is just stunning in every way. You can see how Lidy displayed things high and low, using different textures and containers. For this Fall appetizer party, we served Hibiscus Tea Cocktails, Salted Caramel Apple Dip, and this Everything Bagel Cheese Ball with pita chips and breadsticks.

        We gathered French Vintage cutting boards, buttery soft-aged linens, one-of-a-kind bowls, and different platters.

        It all came together very easily, and food and drinks really look beautiful on this so very French table.

        You could set this up indoors or in the garden depending on the weather of course.

        Your party will come to life using what you have, cherished family items like books, and baskets, and add fresh real items like flowers, fruit, pumpkins, bread, and of course delicious food!!!

        More Fall & Thanksgiving Appetizers

        Over 25+ Thanksgiving recipes for your holiday party or Friendsgiving potluck. Plus, Thanksgiving Appetizers and side dishes for your Thanksgiving Dinner, whether you're planning a simple party or a spectacular Thanksgiving dinner feast.
        Learn how to set up a Fall Crostini Bar with topper ideas to entertain for Fall, Friendsgiving, or Thanksgiving. Elegant no-fuss Fall party food to serve at your gathering.

        Jalapeno Popper Dip is a party appetizer to serve a crowd. An easy hot dip made with 6 ingredients and scooped with corn chips. Always a hit!

        An easy appetizer and party food, Shrimp Cocktail is made by oven roasting large shrimp, then dipping them in the homemade cocktail sauce!

        • A collection of Thanksgiving appetizers with recipe ideas, and party decorating tips for a Fall party.
          36 Thanksgiving Appetizers
        • A rustic table with small bowls filled with toppings for a fall appetizer crostini bar.
          Fall Crostini Bar
        • A white oval casserole dish with a hot dip being scooped out with a large corn chip.
          Jalapeno Popper Dip
        • A clear glass plate with shrimp cocktail, cocktail sauce, and two glasses of champagne.
          Shrimp Cocktail

        Which of these 40 Best Puff Pastry Recipes will you choose? Every impressive appetizer and delicious dessert in this collection is wrapped with irresistible golden flaky layers of freshly baked pastry and creative filling combinations. Create a stunning Thanksgiving Charcuterie Board filled with sliced meats, cheeses, crackers, fruit, nuts, and a few festive and sugary holiday treats for hungry guests on turkey day or anytime during the holiday season!

        Mini Beef Wellington Appetizers are delicious fancy hors d'oeuvres to bake for your next dinner party, for special occasions, or anytime during the holiday season. There is nothing easier than Marinated Mozzarella Balls on a gorgeous Charcuterie Board with some crackers, crusty bread, and drinks...

        • A number of puff pastry appetizers, dinner ideas, and desserts in a collection.
          40 Puff Pastry Appetizer Recipes
        • A bountiful Thanksgiving charcuterie cheeseboard fill with colorful meats, cheeses nuts and more for Thanksgiving.
          Thanksgiving Charcuterie Board
        • Five freshly baked puff pastry beef wellington appetizers on a rectangle white platter.
          Beef Wellington Appetizers
        • Marinated mozzarella balls in a beige ceramic dish with appetizer toothpicks.
          Marinated Mozzarella Balls

        More Cheese Ball Recipes

        Take a look at my Festive Holiday Cheese Balls shaped like Christmas tree ornaments too, they are SO delicious! And this recipe has FOUR flavors to choose from...all delish...how do you pick just one?

        4 Cheese Balls
        Make Cheese Balls for holiday appetizers this year. There are four flavors of these Christmas appetizers to serve for party food all season.
        GET THE RECIPE PIN IT
        4 cheese balls shaped round and topped with curly bows and ornament hooks to serve as Christmas appetizers.

        Did you love this recipe? We would love to hear from you! If you make this recipe and love it, give it a 5-star rating ⭐⭐⭐⭐⭐ with a comment. THANK YOU!! Follow Delicious Table with my free newsletter and share this recipe with your friends on Facebook, Pinterest, and Instagram.

        A pumpkin shaped cheese ball on a platter with pita chips and crackers.
        Print

        Everything Bagel Cheese Ball

        Serve a pumpkin-shaped Everything Bagel Cheese Ball Fall appetizer for your next party, it's always a hit! Easy to make-ahead in 15 minutes, chill, and take to a party. This cheeseball makes a wonderful Thanksgiving appetizer!
        Course Appetizer
        Cuisine American
        Keyword cheese ball, how to make cheeseballs, Thanksgiving Appetizer
        Prep Time 15 minutes minutes
        Cook Time 0 minutes minutes
        Fridge Chill Time 2 hours hours
        Total Time 15 minutes minutes
        Servings 12
        Calories 119kcal
        Author Lisa Hatfield

        Equipment

        • White Cotton Butcher String
        • Small Serrated Knife
        • Global Kitchen Scissors

        Ingredients

        • 1 - 8 oz Cream Cheese softened, room temp
        • 4 tablespoons Everything Bagel Seasoning (reserve 2 tablespoons for decoration) Trader Joes brand or see homemade recipe
        • ¼ cup sour cream
        • 2 teaspoons prepared horseradish
        • 2 teaspoons Worcestershire sauce
        • 1 cup Sharp Cheddar (aged) shredded
        • 2 tablespoons fresh chives or sub green onions
        • 1 bag Pita Chips bagel chips or crackers
        • 1 pumpkin stem or piece of celery

        Instructions

        Easy Way To Remove A Pumpkin Stem

        • Cut the top off a small pumpkin, (I used a Sugar Pumpkin) and cut off the extra pumpkin and stem using a small knife.
        • NOTE: This works better than trying to pull the stem right off which will usually break. Use the pumpkin and seeds in another recipe, try my Roasted Pumpkin Seeds recipe!

        Make "pumpkin-shaped" Everything Bagel Cheese Ball:

        • Reserve 2 tablespoons Everything Bagel Seasoning and set aside for decoration.
        • In a medium bowl, mix softened cream cheese, 2 tablespoons of Everything Bagel Seasoning, sour cream, horseradish, Worcestershire sauce, grated sharp cheddar cheese, and fresh chives. Using a rubber spatula, mix and form a round ball in the bowl.
        • Next, place the cheese ball mix on a large sheet of plastic wrap, and pull the wrap up around the cheese ball and tie tightly at the top to form a ball shape. Cut 4 pieces of butcher string about 2 feet long each. Lay them in a star pattern over each other, place the wrapped cheese ball in the center and tie up and around tightly to form the pumpkin shape. Chill in the refrigerator for at least a couple of hours or overnight until your party.
        • When ready to serve your cheeseball, simply unwrap, cut the strings, sprinkle with 2 tablespoons of everything bagel seasoning all over evenly. Place the pumpkin stem on top, and serve with pita chips, crackers, pretzels, or bagel chips!

        Video

        Notes

        Leftovers

        If you have cheese ball left try spreading it on toasted BAGELS! Amazing...

        everything bagel seasoning

        • 1 tablespoon white sesame seeds
        • 1 tablespoon black sesame seeds
        • 1 tablespoon dried minced garlic
        • 1 tablespoon dried minced onion
        • 2 teaspoons sea salt (or flaked sea salt)
        • 2 tablespoons poppy seeds
        Mix and store in an airtight container for up to 6 months. 

        Cheese Ball Variations

        • Mix in some white cheddar cheese instead of regular sharp cheddar.
        • Coat the outside of the pumpkin cheese ball with any orange-colored cheddar grated cheese, and add your stem on top to look just like a pumpkin!
        • To make it a bit healthier, serve this appetizer with veggies like carrots, bell peppers cut into strips, or celery sticks.
        • Add some crumbled cooked bacon or bacon bits into the cheese ball for an amazing flavor boost.
         

        Nutrition

        Serving: 0g | Calories: 119kcal | Carbohydrates: 12g | Protein: 4g | Fat: 6g | Saturated Fat: 3g | Cholesterol: 12mg | Sodium: 197mg | Potassium: 67mg | Fiber: 1g | Sugar: 1g | Vitamin A: 180IU | Vitamin C: 1mg | Calcium: 109mg | Iron: 2mg

        Nut Goodie Bar Candy

        [heart_this] · Nov 11, 2021 · 7 Comments

        Nut Goodie Bar Candy in mini white paper cups.

        Last Updated November 11th, 2023 at 03:16 pm by Lisa

        Nut Goodie Bar Candy is an addictively sweet chocolate peanut butter candy bar famous in the Midwest USA made by Pearson's Candy Company. An easy no-bake dessert candy served right from the freezer.

        Some people call these "Nut Goodies", and they are loaded with creamy nougat and crunchy peanuts.

        Start a family tradition with this candy at Christmas, of course, it is yummy all year long.

        This recipe comes from the Leaf/Olson family in Minnesota (love you guys!) While staying at their cabin, I took one bite from a piece and fell in love. I simply couldn't stop eating it...

        How To Make Nut Goodie Bar Candy

        When I first made this candy at home, it makes 80 pieces. So I gave plates to neighbors and friends thinking, "I hope they like it."  They didn't just like it, they LOVED it!

        So this is a great recipe to make and share.

        One of my neighbors comes from a family of candy makers, and she had never tasted or heard of this delicious dessert until now.

        Ingredients

        • semi-sweet chocolate chips (you can also use milk chocolate chips)
        • peanut butter chips
        • butterscotch chips
        • creamy peanut butter
        • butter
        • heavy whipping cream
        • Jello vanilla Cook and Serve Pudding Mix
        • maple extract flavoring
        • powdered sugar
        • salted cocktail peanuts (Spanish peanuts or Virginia peanuts)

        How To Make Nut Goodie Bar Candy

        Step 1: Make room in the freezer for your 12 x 16 baking sheet tray or jelly roll pan that you will make your candy on, and butter your sheet pan well.

        Step 2: Melt all 3 chips; semisweet chocolate chips, peanut butter chips, and butterscotch chips with the creamy peanut butter in a double boiler (or saucepan/over water pan), stirring frequently over medium-high heat for 1 minute. Turn off heat.

        Step 3: Spread ½ of the melted chocolate mixture onto a buttered 12 x 16 baking sheet. Freeze for 10-15 minutes until firm.

        Step 4: In a (clean) medium saucepan, melt the butter, heavy whipping cream, Jello vanilla pudding mix, and maple flavoring. Melt and bring to a boil (it will separate). Remove from heat and mix using a hand mixer in the confectioner's sugar, and it will come together.

        Step 4: Next, spread the nougat evenly over the chilled chocolate layer. Freeze for 10-15 minutes until firm. It will look like this...

        Step 5: Meanwhile, add the peanuts to the remaining ½ chocolate mixture and then spread evenly over the nougat layer. It will look like this...

        Step 6: Freeze for 30 minutes. Cut into ¾-1 inch squares. Serve in small mini candy/baking paper cups you can find these at grocery or craft stores.

        Nut Goodie Candy will melt a bit at room temperature, and it is AWESOME right from the freezer. The candy is soft right from the freezer, and the texture is just amazing.

        PRO TIP: Place candy pieces on a paper plate, and cover them with a ziplock bag or an airtight container, it will store well in the freezer for a couple of weeks.

        Cut pieces of Nut Goodie Bar Candy in white paper cups.

        Pearson Candy Company

        What is Nut Goodie candy?

        Nut Goodie is a premium chocolate candy cluster bar that’s been proudly made in the USA since 1912 by Pearson's Candy Company. They make several other famous candies including Mint Patties, Salted Nut Rolls, and Bun Cluster Bars.

        The Pearson's Nut Goodie has real milk chocolate, creamy maple nougat, and fresh roasted peanuts. The salt of those crunchy peanuts goes so well with sweet chocolate and creamy nougat.

        More Christmas Candy

        Make a Peppermint Candy Plate in only 20 minutes. Serve desserts like cookies, candy, hot cocoa, coffee, tea, festive drinks, or holiday cocktails!

        S'more Cookie Dough Truffles are an easy no-bake dessert candy. These have cookie dough studded with chocolate chips and mini marshmallows. Then rolled in crushed graham crackers and a dip into melted chocolate. 

        Candy Cane Martinis (aka Peppermint Martinis) are festive Christmas cocktails made with peppermint vodka that you can make at home.

        Candied Pecans with pumpkin pie spice flavors are crunchy and sweet with cinnamon-sugar, and a kick of heat. 

        • A red and white peppermint candy plate made from melted candy in a round shape.
          Peppermint Candy Plate
        • A lady holding a s'more cookie dough truffle cut open with mini marshmallows inside.
          S'more Cookie Dough Truffles
        • A silver tray with Candy Cane Martinis with crushed peppermint rim and candy cane garnish.
          Candy Cane Martinis
        • A white bowl with candied pecans and a few on the table with jars filled with them nearby.
          Candied Pecans

        Did you love this recipe? We would love to hear from you! If you make this recipe and love it, give it a 5-star rating ⭐⭐⭐⭐⭐ with a comment. THANK YOU!! Follow Delicious Table with my free newsletter and share this recipe with your friends on Facebook, Pinterest, and Instagram.

        Nut Goodie Bar Candy in mini white paper cups.
        Print

        Nut Goodie Bar Candy

        Nut Goodie Bar Candy is an addictively sweet chocolate peanut butter candy bar famous in Midwest USA. An easy no-bake candy served right from the freezer.
        Course Desserts & Sweets
        Cuisine American
        Keyword no-bake candy, no-bake dessert, nut cluster, nut goodie candy, nut goodies
        Prep Time 1 hour hour
        Cook Time 1 minute minute
        Total Time 1 hour hour 1 minute minute
        Servings 80
        Calories 136kcal
        Author Lisa Hatfield

        Equipment

        • Half Sheet Pans
        • Candy Paper Cups

        Ingredients

        • 2 tablespoons butter to grease sheet pan
        • 12 oz semi sweet chocolate chips 2 cups
        • 6 oz peanut butter chips 1 cup
        • 6 oz butterscotch chips 1 cup
        • 2 cups creamy peanut butter
        • 1 cup butter
        • 8 tablespoons heavy whipping cream
        • ¼ cup Jello vanilla pudding Cook and Serve Pudding Mix
        • 1 teaspoon maple extract flavoring
        • 5 cups powder sugar
        • 2 cups salted cocktail peanuts Spanish peanuts or Virginia peanuts
        US Customary - Metric

        Instructions

        • Make room in the freezer for your 12 x 16 baking sheet tray or jelly roll pan that you will make your candy on, and butter your sheet pan well.
        • Melt all 3 chips; semisweet chocolate chips, peanut butter chips, and butterscotch chips with the creamy peanut butter into a heatproof safe bowl of a double boiler (or saucepan/over water pan), stirring frequently over medium-high heat for 1 minute. Turn off heat.
        • Pour mixture and then spread ½ of the melted chocolate mixture onto a buttered 12 x 16 baking sheet. Freeze for 10-15 minutes until firm.
        • In a (clean) medium saucepan, melt the butter, heavy whipping cream, Jello vanilla pudding mix, and maple flavoring. Melt and bring to a boil (the pudding mixture will separate). Remove from heat and mix using a hand mixer. Add in the confectioner's sugar, and it will come together!
        • Next, spread the maple nougat evenly over the chilled chocolate layer. Freeze for 10-15 minutes until firm.
        • Meanwhile, add the peanuts to the remaining chocolate mixture and then spread evenly over the maple nougat pudding layer.
        • Freeze for 30 minutes. Cut into ¾-1 inch squares. Serve in small mini candy/baking paper cups or store in an airtight sealed container.
        • Nut Goodie Candy will melt a bit at room temperature, and it awesome right from the freezer!

        Notes


        Storage Freezer Tips

        Place candy pieces on a paper plate, and cover with a ziplock bag or an airtight container, stores well for a couple of weeks. The candy is soft right from the freezer, and the texture is just amazing.

        Nutrition

        Calories: 136kcal | Carbohydrates: 12g | Protein: 3g | Fat: 8g | Saturated Fat: 3g | Cholesterol: 9mg | Sodium: 81mg | Potassium: 71mg | Fiber: 0g | Sugar: 10g | Vitamin A: 105IU | Calcium: 8mg | Iron: 0.3mg

        Candy Cane Martinis

        [heart_this] · Nov 10, 2021 · 1 Comment

        A silver tray with Candy Cane Martinis with crushed peppermint rim and candy cane garnish.

        Last Updated January 2nd, 2023 at 06:19 pm by Lisa

        Candy Cane Martinis (aka Peppermint Martinis) are festive Christmas cocktails made with peppermint vodka that you can make at home.

        You can make or buy vodka, and it makes an easy homemade, holiday, or Christmas gift. Cheers...

        A silver tray with a peppermint martini garnished with a candy cane.

        Let's Make Peppermint Vodka (aka Candy Cane Vodka)

        • It's a necessary ingredient in Candy Cane Martinis sure, you can buy peppermint vodka... but making it is so fun.
        • It's so easy you won't believe it.
        • It's perfect for serving at our holiday parties.
        • It makes a wonderful homemade food gift.

        All You Need...

        • 1 large bottle of good vodka
        • 16 full-size candy canes

        All You Do Is...

        Step 1: Unwrap 14 full-size candy canes, crush in a food processor for 30 seconds or use a ziplock bag and a rolling pin. Crush to a fine powder.

        Step 2: Using a funnel, pour the crushed powder into a large pretty decorative bottle.

        Step 3: Fill the bottle or container with good vodka. Shake to mix crushed, it will completely dissolve overnight.

        Peppermint Vodka Drink Ideas

        • Peppermint Hot Chocolate
        • Peppermint Eggnog
        • Peppermint White Russian
        • Peppermint Mocha Coffee
        • Bailey's Peppermint Martinis

        An Easy Holiday Food Gift

        Add your peppermint-infused vodka to a pretty glass bottle and add a festive tag, bow, or other decorations.

        Who wouldn't want to receive this fun holiday food gift?

        Let's Make Candy Cane Martinis

        • 2 full-size candy canes crushed; reserve some for rim garnish
        • 3 tablespoons Cream de Cacao - white clear
        • 2 tablespoons Peppermint Schnapps
        • Marshmallow Creme
        • 2 cups homemade (or storebought) peppermint vodka

        Step 1: Garnish the martini glass rim: crush 2 full-size candy canes into small pieces. Use a ziplock bag and a rolling pin.

        Step 2: Dip the glass rim in marshmallow cream, spread on a plate, and then dip in the crushed candy cane on a second plate.

        Step 3: Combine 2 cups candy cane vodka (peppermint vodka), 3 tablespoons of white creme de cacao, and 2 tablespoons of peppermint schnapps in an ice-filled cocktail shaker.

        Step 4: Shake vigorously. Pour into a martini glass. Hang a candy cane off the glass rim.

        Who invented candy canes?

        Candy canes might date back over 250 years!
        As the folklore goes, the choirmaster at the Cologne Cathedral invented them to quiet the noisy children during his Christmas Eve church service of a Live Nativity. He asked a local candy maker to create some "candy sticks" for the children, and so peppermint candy canes were born.

        Why are peppermint candies used for Christmas?


        A recipe for straight peppermint candy sticks, white with colored stripes, was published in 1844. The "candy cane" is found in literature in 1866, though no description of color or flavor was provided. The Nursery monthly magazine noted them in association with Christmas in 1874 and the Babyland magazine mentioned canes being hung on Christmas trees in 1882 in the United States.

        More Christmas Cocktails

        Ring in the holidays, and make Mulled Wine infused with warm winter spices, apple cider, lemon, orange, and apple slices. Through the years, this cherished holiday recipe has been at so many parties, and it is one of the best Christmas Punch recipes. Aperol Spritz Cocktails have apple cider, Aperol, prosecco, and blood oranges.

        Champagne Cocktails glitter with real gold and bubbles from champagne or prosecco. A festive chic holiday drink perfect for New Year's Eve! For your guests who want to enjoy a Christmas drink or two but are following a low carb or keto diet, serve them Hibiscus Cocktails. They are low in sugar and SO good.
        Fireball Punch "big batch cocktails" are made with orange juice, apple cider, and Fireball whisky that tastes like cinnamon red hot candies.

        • A lady holding a tray of mulled wine garnished with cinnamon sticks and orange peel.
          Festive Christmas Mulled Wine
        • A big glass beverage container filled with holiday Christmas Punch.
          Christmas Punch
        • Three glasses of Aperol Spritz on a table with appetizers at a Fall party.
          Autumn Aperol Spritz
        • A New Years Eve party with champagne cocktails made with Goldschlager gold liquor.
          Champagne Cocktails
        • A decorative etched cocktail glass with a red hibiscus keto cocktails garnished with an orange slice.
          Hibiscus Cocktails
        • A large glass punch bowl filled with Fall and Thanksgiving punch with apples and oranges floating on top.
          Fireball Punch

        Did you love this recipe? We would love to hear from you! If you make this recipe and love it, give it a 5-star rating ⭐⭐⭐⭐⭐ with a comment. THANK YOU!! Follow Delicious Table with my free newsletter and share this recipe with your friends on Facebook, Pinterest, and Instagram.

        A silver tray with Candy Cane Martinis with crushed peppermint rim and candy cane garnish.
        Print

        Candy Cane Martinis ~ Plus Homemade Peppermint Vodka

        Candy Cane Martinis (aka Peppermint Martinis) is a festive Christmas cocktail made with Peppermint Vodka that you can make at home.
        Course Drinks & Cocktails
        Cuisine American
        Keyword Candy Cane Martini, Christmas Cocktail, peppermint martinis, Peppermint Vodka
        Prep Time 15 minutes minutes
        Total Time 15 minutes minutes
        Servings 4
        Calories 442kcal
        Author Lisa Hatfield

        Equipment

        • Tall Glass Flip Top Bottle
        • Cuisinart Food Processor

        Ingredients

        Peppermint Vodka

        • 1 large bottle vodka
        • 16 full-size candy canes

        Candy Cane Martinis

        • 2 full-size candy canes crushed reserve for rim garnish
        • 3 tablespoons Cream de Cacao - white clear
        • 2 tablespoons Peppermint Schnapps
        • Marshmallow Creme
        • 2 cups Peppermint Vodka homemade or buy
        US Customary - Metric

        Instructions

        Peppermint Vodka

        • Unwrap 14 full-size candy canes, crush in a food processor for 30 seconds or use a ziplock bag and a rolling pin. Crush to a fine powder.
        • Using a funnel, pour the candy powder into a large pretty glass decorative bottle and fill with vodka. Shake to mix, it will completely dissolve overnight.

        Candy Cane Martinis

        • Garnish the martini glass rim: crush 2 full-size candy canes into small pieces. Use a ziplock bag and a rolling pin.
        • Dip the glass rim in marshmallow cream, spread on a plate, and then dip in the crushed candy cane on a second plate.
        • Combine 2 cups candy cane vodka (or peppermint vodka), 3 tablespoons white creme de cacao, and 2 tablespoons peppermint schnapps in an ice-filled cocktail shaker.
        • Shake vigorously. Pour into martini glass. Hang a candy cane off glass rim. Cheers

        Notes

        Peppermint Vodka

        Try homemade Peppermint Vodka in hot chocolate or eggnog, or hot coffee, and this makes a wonderful Christmas gift with a cute tag.
        • Peppermint Hot Chocolate
        • Peppermint Eggnog
        • Peppermint White Russian
        • Peppermint Mocha Coffee
        • Bailey's Peppermint Martinis

        An Easy Holiday Food Gift

        Add your peppermint-infused vodka to a pretty glass bottle and add a festive tag, bow, or other decorations like little bells.
        Who wouldn't want to receive this fun holiday food gift?

        Nutrition

        Calories: 442kcal | Carbohydrates: 33g | Sodium: 2mg | Potassium: 9mg | Sugar: 27g
        • « Go to Previous Page
        • Page 1
        • Interim pages omitted …
        • Page 4
        • Page 5
        • Page 6
        • Page 7
        • Page 8
        • Go to Next Page »

        Primary Sidebar

        MEET LISA

        Hey Everyone! I've been cooking passionately for over 30 years with professional culinary training and thousands of recipes in my collection. Let's get cooking! ♥

        Find out more →

        FOLLOW US ON SOCIAL

        • Facebook
        • Instagram
        • LinkedIn
        • Pinterest
        • YouTube

        MOST POPULAR RECIPES

        • Three golden crispy edged hash browns baked in a muffin tin on cutting board.
          Oven Baked Hash Browns
        • A white ceramic dog dish that says woof filled with homemade dog food.
          Homemade Dog Food Recipes (30+ Ideas!)
        • A large spoon holding a scoop of hot potato casserole serving it for dinner.
          Cheesy Potato Casserole
        • Marinated mozzarella balls in a beige ceramic dish with appetizer toothpicks.
          Marinated Mozzarella Balls
        • A white casserole dish with oven roasted pulled pork shredded and ready to eat in tacos or a recipe for dinner.
          Oven Roasted Pulled Pork
        • A baked loaf of pumpkin bread sliced thick with a silver knife.s
          Pumpkin Bread

        ALL READER FAVES ►

        FALL RECIPES

        • A ceramic dish full of golden brown roast pumpkin seeds.
          Roasted Pumpkin Seeds
        • Dozens of pictures of 200 Halloween recipes including adult drinks, appetizers, treats, snacks, desserts for kids and families all with a Halloween theme.
          200+ Best Halloween Recipes
        • Apple Crisp in a red bowl with a silver spoon, ice cream, and drizzled with caramel sauce.
          Apple Crisp
        • Slices of green Granny Smith apples around a white dish with a sweet dessert dip inside a low small white dish with a ruffled edge, and a piece of apple sticking into the dip.
          Caramel Apple Dip
        • A large jar filled with apple pie filling with a lid and bow.
          Apple Pie Recipe Filling
        • A white pie dish with a slice of apple crumble pie, also known as a dutch apple pie with a crumbled topping and green apples in the background in a wood bowl.
          Dutch Apple Pie

        Footer

        Most Popular "Reader Favorite" Recipes

        Three golden crispy edged hash browns baked in a muffin tin on cutting board.

        Oven Baked Hash Browns

        A white ceramic dog dish that says woof filled with homemade dog food.

        Homemade Dog Food Recipes (30+ Ideas!)

        A large spoon holding a scoop of hot potato casserole serving it for dinner.

        Cheesy Potato Casserole

        Marinated mozzarella balls in a beige ceramic dish with appetizer toothpicks.

        Marinated Mozzarella Balls

        A white casserole dish with oven roasted pulled pork shredded and ready to eat in tacos or a recipe for dinner.

        Oven Roasted Pulled Pork

        A baked loaf of pumpkin bread sliced thick with a silver knife.s

        Pumpkin Bread

        A large glass clamp jar filled with pickled eggs, fresh jalapeno slices, and spices.

        Jalapeno Pickled Eggs Recipe

        A large pork loin roast with a lot of dry rub seasoning pouring over the top.

        The Best BBQ Dry Rub

        Mexican pickled red onions in a clamp jar and white bowl with chiles and limes on a colorful striped cloth.

        Mexican Pickled Red Onions

        A white plate filled with heart shaped lobster ravioli garnished with parsley.

        Lobster Ravioli

        A sliver carving fork and knife next to a pork loin roast and topped with cherries.

        Cherry Balsamic Pork Loin

        A Cinco de Mayo party with frozen margaritas called Coronaritas, guacamole, and chips on a green table.

        CoronaRita Margaritas

        A large white spoon scooping a serving of cowboy baked beans out of a casserole dish.

        Cowboy Beans

        More Delicious Recipes

        PLEASE FOLLOW US!

        • Amazon
        • Facebook
        • Instagram
        • LinkedIn
        • Pinterest
        • TikTok
        • Twitter
        • YouTube

        Footer

        DELICIOUS TABLE

        • MEET LISA
        • SEE MY WORK! PRESS & DIGITAL MEDIA PUBLICATIONS
        • PRIVACY POLICY
        • ACCESSIBILITY STATEMENT

        POPULAR LINKS

        • EMAIL SIGN-UP newsletters and updates
        • RECIPE INDEX
        • AMAZON STORE As an Amazon Associate, I earn from qualifying purchases.

        LET'S CONNECT

        • PINTEREST
        • FACEBOOK
        • INSTAGRAM
        • YOUTUBE
        • TIKTOK
        • LINKEDIN
        • X / TWITTER

        2026 COPYRIGHT © ♥︎ DELICIOUS TABLE ®️