
• Skip to main content
  • Skip to primary sidebar
  • Skip to footer

Delicious Table ® logo

menu icon
go to homepage
  • ALL RECIPES
  • HALLOWEEN PARTY FOOD
  • FALL RECIPES
  • WELCOME TO DT!
    • Facebook
    • Instagram
    • Pinterest
    • YouTube
  • subscribe
    search icon
    Homepage link
    • ALL RECIPES
    • HALLOWEEN PARTY FOOD
    • FALL RECIPES
    • WELCOME TO DT!
    • Facebook
    • Instagram
    • Pinterest
    • YouTube
  • ×
    Home » Recipes

    Latest Recipes

    Strawberry Cocktails

    [heart_this] · Jul 20, 2022 · 4 Comments

    Close up view of strawberry cocktails with heart shaped garnish made from a strawberry on the rim.

    Last Updated April 4th, 2024 at 02:33 pm by Lisa

    Strawberry Cocktails are wonderful for romantic date nights, Valentine's Day, or cocktail party celebrations. Oh, and these are keto, low carb, low sugar, and low-calorie, now how can you beat that?

    Enjoy every sip of these summer cocktails that don't have processed sugar or simple syrup. You can make them that way, but these are refreshing, light, and so pretty...

    Pink strawberry cocktails with whole berries and heart shaped garnish.

    Strawberry Cocktail Recipe

    Years ago during the holidays, I researched ways to make cocktails without all the sugar syrup and came up with using stevia drops.

    It saves calories and makes them friendly for those watching their carb and sugar intake.

    Makes 2 Cocktails

    • 10 fresh strawberries
    • 20 drops Stevia (liquid)
    • 2-4 shots of vodka
    • 2 squeezes of orange or tangerine
    • 2 cups ice
    • 1 splash of sparkling water or club soda
    • 2 strawberry halves for heart garnish

    Mix Strawberry Cocktails

    1. In a cocktail shaker, place several strawberries cut in half (or bits of strawberries from cutting the heart garnish) in the bottom of the shaker, and 20 drops liquid stevia. Use a wood muddler stick, and smash the berries well. 
    2. Add 2-4 shots of vodka, a good squeeze of orange or tangerine, and 2 cups of ice cubes. Place lid on and shake well. Pour into glasses through the strainer and garnish with heart strawberries on the rim. Add splashes of zero-calorie seltzer water, stir with a spoon, and add ice if desired.
    Heart shaped garnish made from strawberry on edge of pink cocktail.

    Strawberry Heart Garnish

    The berry's freshness will make a difference, use fresh strawberries with bright green stems and berries that have a bright red color and natural shine so they look pretty! 🍓🍓🍓

    Step 1: Pick a pretty red strawberry! Pull the stem or simply slice the stem off. Cut the strawberry in half. Lay the sliced strawberries flat on the cutting board.

    Step 2: Press a small heart-shaped cookie cutter to make the heart shape. Cut in a tiny slice in the side, and slip onto the glass rim.

    Strawberry Cocktail Swaps & Variations

    garnishes: you can use any fresh herbs on top like thyme or mint leaves, or a basil leaf would all look so pretty. You can also muddle those herbs in with the strawberries. Just be sure to strain the cocktail mix with strainer to get the herb pieces out.

    citrus juices: for added flavor and no calories, put in a squeeze of lime juice lemon juice, or orange juice. Each will pair well with strawberries. The lemon addition will make it taste more like a strawberry lemonade cocktail, add sugar if you wish.

    strawberry syrup: if you like it sweeter, and not watching your carbs, mix up a batch of simple syrup with equal parts of water and sugar, with a strawberry muddle of more slice fruit. You can also add honey for a sweet flavor. A drop of bitters will balance out the extreme sweetness of any drink, and is a nice addition to a fine cocktail.

    liquors: instead of vodka, swap in white rum, gin, or tequila.

    frozen drinks: put this mix in a high-speed blender with lots of ice, and blend into a thick slushy cocktail. Pour the mixture into a pitcher and the party is on served with a couple appetizers.

    make it sparkling: add some sparkle with a splash of refrigerator cold champagne prosecco, sparkling wine, or tonic water.

    mix it up: Add in some good cold rosé, frozen frosé, or sangria for a summer twist! This cocktail is a great low-calorie base that you can do so many things with at parties.

    Two glasses of strawberry cocktails with heart shaped strawberry garnish.

    Strawberry Cocktails FAQ

    What are the most popular strawberry cocktails?

    -Strawberry Mojitos are made with white rum, lime juice, fresh mint, simple syrup, and club soda.
    -Strawberry Daiquiris are made with rum, simple syrup, lime juice, and fresh strawberries.

    Why use stevia in strawberry cocktails?


    Stevia is available in both drops and in a powder to use in recipes like cocktails. It saves calories and reduces sugar intake. You can find stevia products right in your grocery store baking aisle, health stores, or online. And can use it to make simple syrup for drinks and cocktails.

    Stevia is a sugar substitute extracted from the stevia plant and is calorie-free which is wonderful. One thing to know about stevia is that it tastes so much sweeter than regular sugar, so a little goes a long way.

    Close up view of strawberry cocktail.

    More Cocktail Recipes

    For a slushy refreshing drink, whip up a CoronaRita Margarita or Aperol Spritz cocktail perfect for pool parties, outdoor pot lucks, and BBQs. And learn to make these classic cocktails, real Cuban Mojitos ~ I learned to make these IN CUBA just for YOU!

    Fall Drinks, Thanksgiving Cocktails, and Game Day drinks are a must and we have some fun options like Fireball Cocktails or a  Fireball Punch that serves a crowd, and even GUYS love it! These are both made with famous Fireball whiskey.

    Hibiscus Tea Cocktails are low carb, low sugar, vegan, keto, and gluten-free. A healthier refreshing keto cocktail under 100 calories! These St. Germain Cocktails are easy summer cocktail spritzers with Elderflower liqueur, Prosecco, hibiscus tea, and a splash of club soda over crushed ice. Cuba Libre is a famous Cuban cocktail similar to Rum and Coke. During my trip to Cuba, I learned how they make them in a uniquely Cuban way and it is the national drink of Cuba.

    • A Cinco de Mayo party with frozen margaritas called Coronaritas, guacamole, and chips on a green table.
      CoronaRita Margaritas
    • Three glasses of Aperol Spritz on a table with appetizers at a Fall party.
      Autumn Aperol Spritz
    • Four Havana club glasses filled with mojitos garnished with mint.
      Authentic Mojito Recipe
    • Fireball Whisky Cocktails with cinnamon sticks wrapped in orange peel for garnish.
      Fireball Whisky Cocktails
    • A large glass punch bowl filled with Fall and Thanksgiving punch with apples and oranges floating on top.
      Fireball Punch
    • A decorative etched cocktail glass with a red hibiscus keto cocktails garnished with an orange slice.
      Hibiscus Cocktails
    • Two glasses filled with St Germain cocktails garnished with tiny purple orchids and white jasmine flowers.
      St. Germain Cocktails
    • Four tall Havana Club glasses with Cuba Libre cocktails garnished with lime on a wood tray.
      Cuba Libre Cocktails

    Did you love this recipe? We would love to hear from you! If you make this recipe and love it, give it a 5-star rating ⭐⭐⭐⭐⭐ with a comment. THANK YOU!! Follow Delicious Table with my free newsletter and share this recipe with your friends on Facebook, Pinterest, and Instagram.

    Close up view of strawberry cocktails with heart shaped garnish made from a strawberry on the rim.
    Print

    Strawberry Cocktail Recipe

    Strawberry Cocktails are wonderful for romantic date nights, Valentine's Day, or cocktail party celebrations. Oh, and these are keto, low carb, low sugar, and low-calorie, now how can you beat that? Enjoy every sip of these summer cocktails that don't have processed sugar or simple syrup.
    Course Drinks & Cocktails
    Cuisine American
    Keyword low carb cocktail, low sugar cocktail, strawberry cocktail, strawberry cocktail recipe, strawberry keto cocktails, strawberry vodka cocktails
    Prep Time 10 minutes minutes
    Total Time 10 minutes minutes
    Servings 2
    Calories 171kcal
    Author Lisa Hatfield

    Equipment

    • Assorted Heart Cookie Cutters

    Ingredients

    • 10 fresh strawberries
    • 20 drops Stevia (liquid)
    • 2-4 shots vodka
    • 2 squeezes orange or tangerine
    • 2 cups ice
    • 1 splash sparkling water
    • 2 halves strawberries for heart garnish
    US Customary - Metric

    Instructions

    Strawberry Heart Garnish

    • Remove the stem, and cut a pretty red strawberry into two halves.  Lay them on the cutting board.
    • Use a small heart-shaped cookie cutter to make the heart garnish. Cut a small slit to place on rim of the glass.

    Shake Strawberry Cocktails

    • In a cocktail shaker, place several strawberries cut in half (or bits of strawberries from cutting the heart garnish) in the bottom of the shaker, and 20 drops liquid stevia. Use a wood muddler stick, and smash the berries well. 
    • Add 2-4 shots of vodka, a good squeeze of orange/tangerine, and 2 cups of ice cubes. Place lid on and shake well. Pour into glasses through the strainer and garnish with heart strawberries on the rim. Add splashes of zero-calorie seltzer water, stir with a spoon, and ice if desired.

    Notes

    stevia

    You can find these products right in your grocery store baking aisle, health stores, or online.
    Stevia is a sugar substitute extracted from the stevia plant and is calorie-free which is wonderful. One thing to know about stevia that it tastes so much sweeter than regular sugar, so a little goes a long way.

    garnishes

    Use any fresh herbs on top like thyme or mint leaves, or a basil leaf would all look so pretty. You can also muddle those herbs in with the strawberries. Just be sure to strain the cocktail mix with strainer to get the herb pieces out.

    citrus juices

    For added flavor and no calories, put in a squeeze of lime juice lemon juice, or orange juice. Each will pair well with strawberries. The lemon addition will make it taste more like a strawberry lemonade cocktail, add sugar if you wish.

    strawberry syrup

    If you like it sweeter, and not watching your carbs, mix up a batch of simple syrup with equal parts of water and sugar, with a strawberry muddle of more slice fruit. You can also add honey for a sweet flavor. A drop of bitters will balance out the extreme sweetness of any drink, and is a nice addition to a fine cocktail.

    liquors

    Instead of vodka, swap in white rum, gin, or tequila.

    frozen drinks

    Put this mix in a high-speed blender with lots of ice, and blend into a thick slushy cocktail. Pour the mixture into a pitcher and the party is on served with a couple appetizers.

    make it sparkling

    Add some sparkle with a splash of refrigerator cold champagne prosecco, sparkling wine, or tonic water.

    mix it up

    Add in some good cold rosé, frozen frosé, or sangria for a summer twist! This cocktail is a great low-calorie base that you can do so many things with at parties.

    Nutrition

    Serving: 2g | Calories: 171kcal | Carbohydrates: 16g | Protein: 1g | Fat: 1g | Saturated Fat: 1g | Sodium: 15mg | Potassium: 327mg | Fiber: 4g | Sugar: 10g | Vitamin A: 27IU | Vitamin C: 125mg | Calcium: 41mg | Iron: 1mg

    Shish Kabobs

    [heart_this] · Jul 16, 2022 · 5 Comments

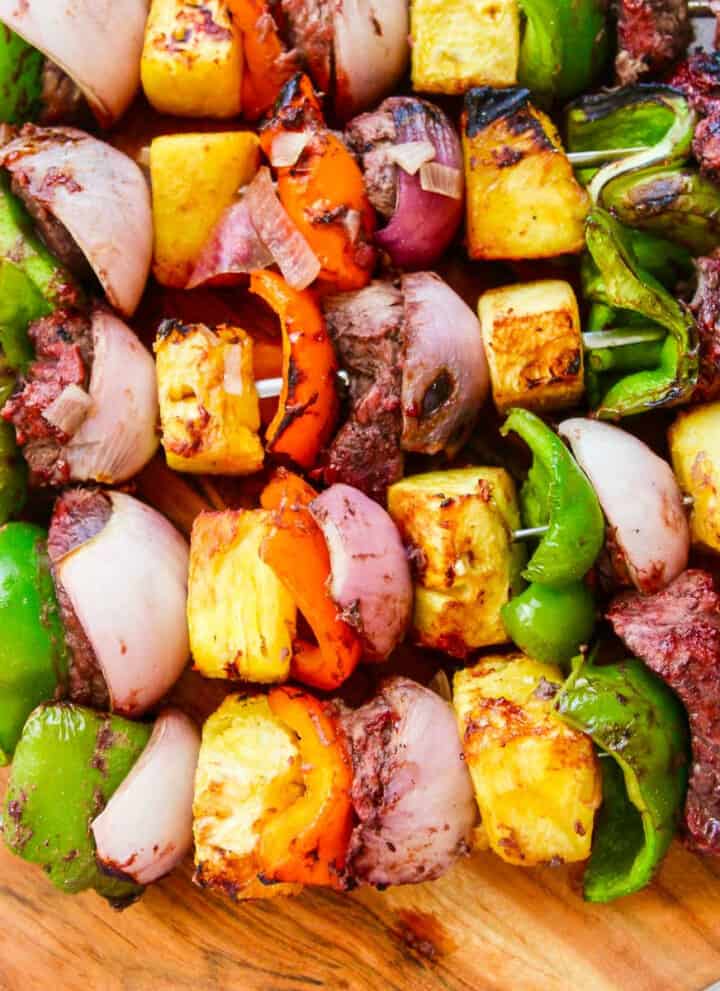
    A wooden platter filled with Shish Kabob grilled skewers.

    Last Updated April 29th, 2024 at 07:45 pm by Lisa

    Make these Shish Kabobs with a beef marinade that has pineapple and dark rum this grilling season. The rum is totally optional of course! And take a look at dozens of ideas to make these colorful grilled skewers your way with all the best shish kebob side dish ideas.

    Marinade the top sirloin a few hours ahead of family dinner or your party, and have the skewers ready to go when guests arrive. Your cookout will be one to remember with this easy recipe...

    A wooden platter filled with Shish Kabob grilled skewers.

    Shish Kabob Recipe Tips

    Growing up, our favorite summer meal for family dinner is these juicy steak kabobs. My Mom made them, and Dad would grill them out by our pool. We could hardly wait for dinner.

    • The raw pineapple in the marinade helps to tenderize the top sirloin due to an enzyme called Bromelain. It breaks down the protein and muscle structure of the meat.
    • The rum and pineapple add sweetness to the marinade and a depth of flavor.
    • Brushing the heated marinade from the saucepot on the kabobs while grilling, and adds more flavor as they grill.
    • Top sirloin is a good meat cut and is a reasonably priced cut of beef, plus it is quite tender.
    • Some people prefer to load all the pieces of meat on a single skewer. The meat chunks do grill slower than the vegetables, especially if they are cut larger. When you grill the beef chunks on separate skewers, you get the meat and veggies grilled at the right doneness you prefer.

    How To Grill Shish Kabobs

    Kabob Skewers

    • 3 lbs boneless top sirloin steak 2" cubes
    • 1 large pineapple 2" pieces
    • 1 large purple onion 2" pieces
    • 6 medium bell peppers (green, yellow, orange, or red peppers) 2" pieces

    Top Sirloin Steak Marinade Ingredients

    • 2 medium shallots finely diced
    • 1 cup pineapple juice
    • ¼ cup Myers Dark rum
    • 1 cup beef stock
    A graphic with shish kabobs on a grill with colorful vegetables.

    Let's Grill The Kabobs!

    1. If using wooden skewers, kabob sticks or bamboo skewers, soak them in water for an hour so they don't burn. The advantage metal skewers have over wood skewers is they are reusable, don't burn, and clean easily in the dish washer!
    2. Trim and cube the top sirloin into 2" steak cubes, and place into a large zip-lock bag. Mix the marinade, and pour into the zip-lock plastic bag with steak. You can add additional flavors, see my list in the recipe notes. Seal, and toss to coat well, keep refrigerated for 3-4 hours. Or marinate in an airtight container or medium bowl covered with plastic wrap.
    3. Cut the pineapple chunks, red onions, and colorful bell peppers into large 2-inch pieces. Larger pieces stay on the skewers as they grill.
    4. Remove the steak and pour the marinade into a small grill heat-safe pot or pan. Using stainless steel skewers, thread on steak pieces and veggies in alternating colors until all the steak and veggies are on skewers. Or put all the meat on their skewer, so it grills to the doneness you prefer.
    5. Use a paper towel and rub vegetable oil on the grill grates so the kabobs don't stick. Heat the charcoal or gas grill to 400 degrees, or medium-high heat.
    6. Optional: Place the small heatproof sauce pot of marinade directly over the flames of the grill. The heat of the grill will heat the marinade up over 165 degrees making the glaze safe to brush onto the skewers. Use a heat-safe silicone brush, and mop over the skewers every 5 minutes or so.
    7. Place kabobs on an outdoor grill for about 10-15 minutes over medium heat until the steak is medium-rare is 130-135 degrees internal temperature. Grilling times will vary depending on the size and type of the meat. Move skewers to indirect heat once grilled to keep warm. Serve with rice, and enjoy.
    Grilling Shish Kabobs outside on a Big Green Egg over charcoal.

    Swaps, Flavor Additions, and Variations

    These are different ingredients and additions for this basic marinade for steak shish kabobs. I often toss in more fresh ingredients for flavor depending on what I have on hand or what my people prefer to eat. There are so many different ways to make great kabobs, and you can create your own unique flavors right at home.

    Meat Swaps or Additions: pork tenderloin, thick bacon, shrimp, lamb, sausage, chicken breasts, chicken thighs, strip steak (don't use stew meat it's too tough to grill!)

    Marinade Additions

    • soy sauce
    • lemon juice, lime juice, orange juice
    • onion powder, garlic salt, garlic powder
    • black pepper
    • crushed garlic
    • olive oil
    • Worcestershire sauce
    • brown sugar
    • balsamic vinegar
    • for a little extra spicy kick, add hot sauce!
    Grilled skewer shish kabobs made with beef, bell pepper, pineapple, and onion.

    What are the best Shish Kabob sides?

    Find the perfect side dish for a complete meal right here. These are some of the best side dishes with kabobs...

    • Side of Rice: brown rice, coconut rice, lemon rice, or rice pilaf.
    • Bread: bake some Dinner Rolls with all kinds of toppings or some garlic bread, or warm pita bread.
    • Salad: 7 Layer Salad, Caesar Salad, Greek Salad, Caprese salad, Cobb Salad, or a simple salad like a Wedge Salad, or green salad with romaine lettuce and fresh veggies you have on hand.
    • Great Side Dish Ideas: sweet potato fries, homemade potato chips, green beans, German potato salad, classic Macaroni Salad, Blue Cheese Bacon Potato Salad, baked sweet potatoes, or regular baked potatoes.
    • Easy Side Dish: Fresh fruit kabobs or Corn on The Cob are simple side dish ideas.

    More Types Of Kabobs

    • Hawaiian chicken kabobs
    • beef kabobs
    • chicken skewers
    • veggie kabobs
    • shrimp kabobs
    • bacon and beef kabobs
    • steak kebabs
    • sausage kabobs
    • lamb kabobs
    • chicken shish kabobs
    • pork kabobs

    What kind of vegetables are best on kabobs?

    Heartier vegetables are great choices and are the best vegetables to grill on skewers. Use up extra veggies you have on hand or that are abundant in your garden!

    • Yellow Squash or Summer Squash
    • Bell Peppers: Red Peppers, Green Peppers, Orange Peppers
    • New Potatoes (microwave first on high 5 minutes)
    • Zucchini
    • Red Onions
    • Bell Peppers
    • Mushrooms
    • Corn
    • Cauliflower
    • Broccoli
    • Tomatoes - Grape or Cherry Tomatoes

    Kabobs, Kebabs, or Kebobs FAQ

    Are Kabobs, Kebabs or Kebobs Different?

    Kabobs, kebabs, or kebobs are all considered the same thing in English-speaking countries, and the terms are used interchangeably. The most familiar traditional kebab dishes are shish kebab and doner kebab.


    Shish Kababs, Kabobs, Kebabs, or Kebobs are usually meat grilled over high heat on a metal skewer, although some are not cooked. Their origins are in Middle Eastern cuisine and are commonly found in Asian cooking worldwide.

    What meat is typically used for Kabobs, Kebabs, or Kebobs?


    Usually, they are made with ground or finely cut meat or seafood, and sometimes vegetables or fruits. Kabobs are typically cooked or grilled on a skewer over a hot fire or heat source.  

    The traditional meat for kebabs in the Middle East is most often mutton or lamb, but regional recipes may include beef for beef kebabs, chicken, fish, or pork.

    Grilled skewer shish kabobs made with beef, bell pepper, pineapple, and onion.

    More Grilling & Cookout Food Recipes

    Fire up the Grill and make summer spectacular with one of these grilling or BBQ Cookout Food recipes. Delicious recipes start by making Grill and BBQ Rub. It is a great recipe to make and goes on beef, chicken, and pork. Try that homemade rub on some Grilled Corn for an easy dinner.

    What an elegant outdoor dining menu to serve, this Cabernet Rosemary Grilled Rack of Lamb with Watermelon Skewers will wow your guests for the main course.

    If you want a delicious meal, you will love these Greek Gyros with Tzatziki Sauce, gorgeous and impressive Grilled Lamb Chops or Hawaiian Huli Huli Chicken Pineapple Rice Bowls served in pineapples!

    For the easy classics go for Grilled Cheeseburgers or Spiral Hot Dogs! Or for a healthier option, make Cedar Grilled Salmon, it has all the veggies tucked inside...

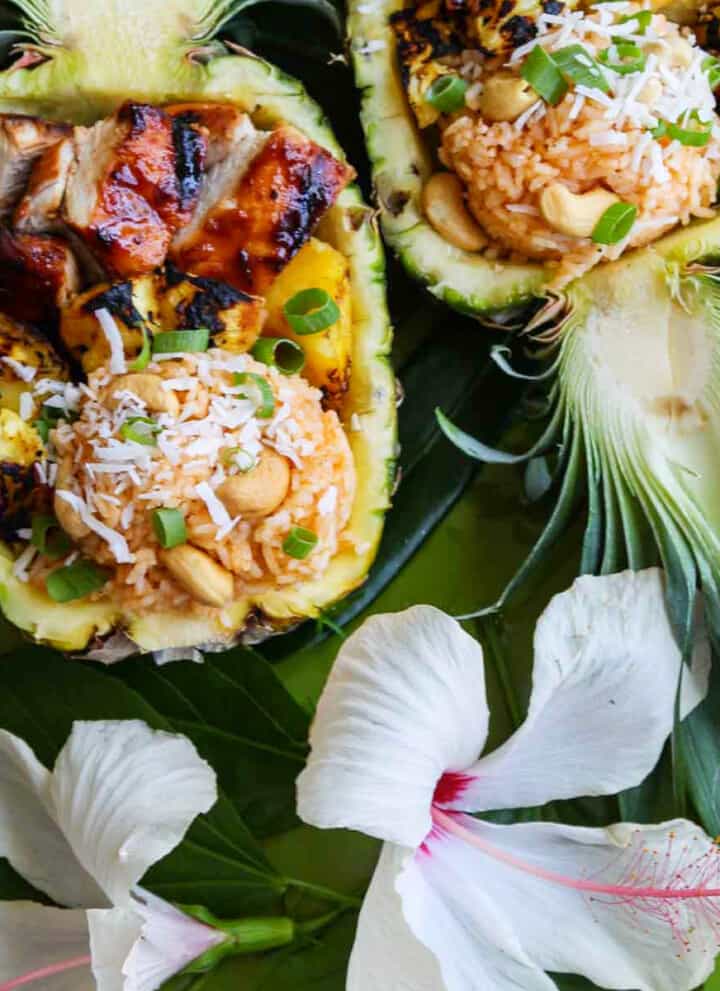
    • Two pineapple halves carved out filled with coconut rice, grilled pineapple and huli huli chicken.
      Huli Huli Chicken
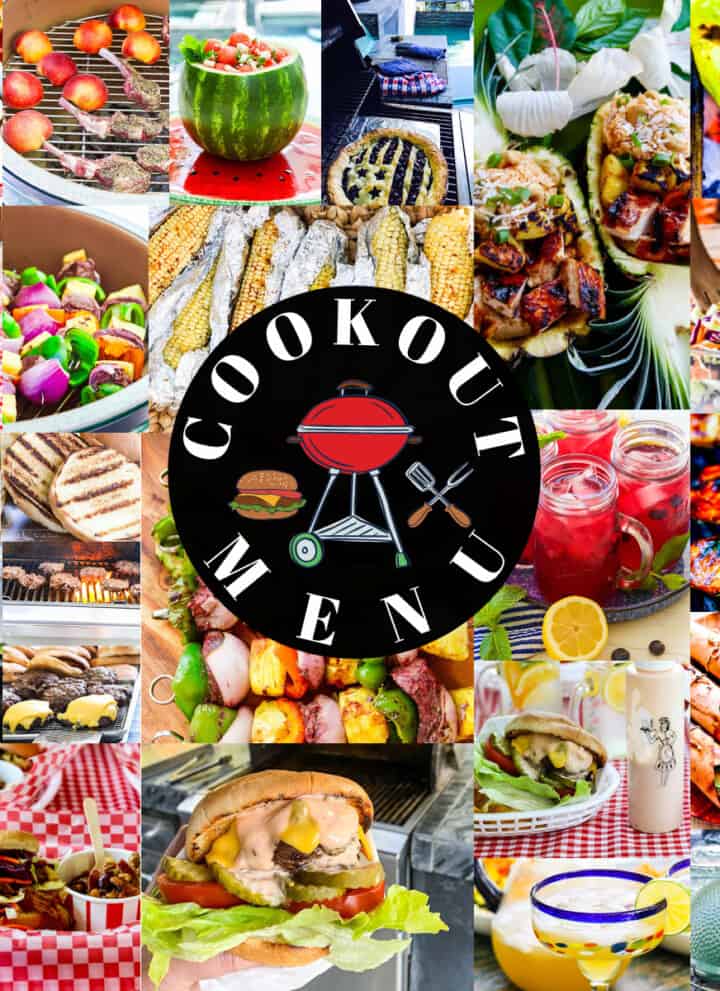
    • A square collage of colorful grilled food, side dishes, desserts, and drink recipes to serve at an outdoor bbq cookout.
      75+ Cookout Recipes & BBQ Party Ideas
    • A beautiful grilled rack of lamb on a white platter with rosemary sprigs and watermelon skewers.
      Cabernet Rosemary Grilled Rack Of Lamb
    • A person holding a messy grilled burger topped with melted cheese, burger sauce, lettuce, tomato, and pickles.
      The Best Cheeseburger
    • A wooden platter with cedar wrapped salmon, asparagus, and lemon butter.
      Cedar Grilled Salmon
    • A red plastic food basket lined with paper holding a loaded grilled hot dog.
      Spiral Grilled Hot Dogs
    • Ears of grilled corn on a white platter seasoned with melted butter on top.
      Grilled Corn On The Cob
    • Greek gyros on parchment paper topped with lamb meatballs cucumber and tomatoes.
      Lamb Gyros With Greek Tzatziki Sauce

    Did you love this recipe? We would love to hear from you! If you make this recipe and love it, give it a 5-star rating ⭐⭐⭐⭐⭐ with a comment. THANK YOU!! Follow Delicious Table with my free newsletter and share this recipe with your friends on Facebook, Pinterest, and Instagram.

    A wooden platter filled with Shish Kabob grilled skewers.
    Print

    Shish Kabob Recipe

    Grilling season is perfect for these Shish Kabobs with a beef marinade made with pineapple and dark rum. The rum is totally optional of course! Plus take a look at dozens of ideas to make these colorful grilled skewers your way with all the best shish kebob side dish ideas.
    Course Dinner & Main Dishes
    Cuisine American
    Keyword grilled shish kabobs, grilled skewers, kabob, kebab, shish kabob, shish kabob recipe
    Prep Time 20 minutes minutes
    Cook Time 20 minutes minutes
    Total Time 40 minutes minutes
    Servings 12 people
    Calories 232kcal
    Author Lisa Hatfield

    Equipment

    • Grilling/Shish Kabob Stainless Skewers
    • BBQ Sauce Pot
    • Grill Basting Brush

    Ingredients

    Skewers

    • 3 lbs top sirloin 2" cubes
    • 1 large pineapple 2" pieces
    • 1 red onion 2" pieces
    • 6 bell peppers (red, green, yellow, or orange) 2" pieces

    Marinade

    • 2 medium shallots finely diced
    • 1 cup pineapple juice
    • ¼ cup Myers Dark rum
    • 1 cup beef stock

    Instructions

    • If using wooden skewers, kabob sticks or bamboo skewers, soak them in water for an hour so they don't burn. The advantage metal skewers have over wood skewers is they are reusable, don't burn, and clean easily in the dish washer!
    • Trim and cube the top sirloin into 2" steak cubes, and place into a large zip-lock bag. Mix the marinade, and pour into the zip-lock plastic bag with steak. You can add additional flavors, see my list in the recipe notes. Seal, and toss to coat well, keep refrigerated for 3-4 hours. Or marinate in an airtight container or medium bowl covered with plastic wrap.
    • Cut the pineapple chunks, red onions, and colorful bell peppers into large 2-inch pieces. Larger pieces stay on the skewers as they grill.
    • Remove the steak and pour the marinade into a small grill heat-safe pot or pan. Using stainless steel skewers, thread on steak pieces and veggies in alternating colors until all the steak and veggies are on skewers. Or put all the meat on their skewer, so it grills to the doneness you prefer.
    • Use a paper towel and rub vegetable oil on the grill grates so the kabobs don't stick. Heat the charcoal or gas grill to 400 degrees, or medium-high heat.
    • Optional: Place the small heatproof sauce pot of marinade directly over the flames of the grill. The heat of the grill will heat the marinade up over 165 degrees making the glaze safe to brush onto the skewers. Use a heat-safe silicone brush, and mop over the skewers every 5 minutes or so.
    • Place kabobs on an outdoor grill for about 10-15 minutes over medium heat. until the steak is medium-rare is 130-135 degrees internal temperature. Grilling times will vary depending on the size and type of the meat.
      Move skewers to indirect heat once grilled to keep warm. Serve with rice, and enjoy.

    Video

    Notes

    Shish Kabob Tips

    • The raw pineapple in the marinade helps to tenderize the top sirloin due to an enzyme called Bromelain. It breaks down the protein and muscle structure of the meat.
    • The rum and pineapple add sweetness to the marinade and a depth of flavor.
    • Brushing the heated marinade from the saucepot on the kabobs while grilling, and adds more flavor as they grill.
    • Top sirloin is a good meat cut, and is a reasonably priced cut of beef plus it is quite tender.
    • Some people prefer to load all the pieces of meat on a single skewer. The meat chunks do grill slower than the vegetables, especially if they are cut larger. When you grill the beef chunks on separate skewers, you get the meat and veggies grilled at the right doneness you prefer.

    Meat Swaps or Additions

    pork tenderloin, thick bacon, shrimp, lamb, sausage, chicken breasts, chicken thighs, strip steak (don't use stew meat it's too tough to grill!)

    Marinade Additions

    • soy sauce
    • lemon juice, lime juice, orange juice
    • onion powder, garlic salt, garlic powder
    • black pepper
    • crushed garlic
    • olive oil
    • Worcestershire sauce
    • brown sugar
    • balsamic vinegar
    • for a little extra spicy kick, add hot sauce!

    Shish Kabob Vegetables

    • Yellow Squash or Summer Squash
    • Bell Peppers: Red Peppers, Green Peppers, Orange Peppers
    • New Potatoes (microwave first on high 5 minutes)
    • Zucchini
    • Red Onions
    • Bell Peppers
    • Mushrooms
    • Corn
    • Cauliflower
    • Broccoli
    • Tomatoes - Grape or Cherry Tomatoes

    Kabob Side Dishes

    • Side of Rice: brown rice, coconut rice, lemon rice, or rice pilaf.
    • Bread: bake some Dinner Rolls with all kinds of toppings or some garlic bread, or warm pita bread.
    • Salad: 7 Layer Salad, Caesar Salad, Greek Salad, Caprese salad, Cobb Salad, or a simple salad like a Wedge Salad, or green salad with romaine lettuce and fresh veggies you have on hand.
    • Great Side Dish Ideas: sweet potato fries, homemade potato chips, green beans, German potato salad, classic Macaroni Salad, Blue Cheese Bacon Potato Salad, baked sweet potatoes, or regular baked potatoes.
    • Easy Side Dish: Fresh fruit kabobs or Corn on The Cob are simple side dish ideas.

    Nutrition

    Calories: 232kcal | Carbohydrates: 17g | Protein: 26g | Fat: 4g | Saturated Fat: 1g | Cholesterol: 66mg | Sodium: 107mg | Potassium: 703mg | Fiber: 2g | Sugar: 12g | Vitamin A: 1905IU | Vitamin C: 115.1mg | Calcium: 47mg | Iron: 2.5mg

    BLT Lobster Sandwich

    [heart_this] · Jul 15, 2022 · 1 Comment

    A sliced open BLT sandwich loaded with succulent lobster, bacon, lettuce and tomato stacked on a board.

    Last Updated April 27th, 2023 at 09:22 pm by Lisa

    A BLT Lobster Sandwich recipe with succulent lobster, thick crispy applewood smoked bacon, golden grilled sourdough bread, and slathered with an easy dill-caper aioli sauce. Oh, and it won a 1rst Place Blue Ribbon at the Orange County Fair during a live cooking competition!

    The layers of flavor and crunch are heavenly. It tastes like a bacony lobster roll but is so much more. Is your mouth watering yet? It will right before you take a bite out of this ultimate BLT sandwich...    

    A sliced open BLT sandwich loaded with succulent lobster, bacon, lettuce and tomato stacked on a board.

    How To Make A BLT Lobster Sandwich

    1. Butter Sourdough Bread: Heat a heavy cast iron pan. Butter sourdough bread with soft butter and put the slice of toast in the pan butter side down.
    2. Grill the toasted bread until it is golden brown and crispy, flip one time just to warm the other side of the bread for one minute, and remove from the pan. Turn off the heat.
    3. Make/Spread Dill-Caper Aioli: on each slice of bread, leave the brown buttered side as the outside of the sandwich.
    4. Add looseleaf lettuce leaves, like Romaine or Iceberg lettuce.
    5. 2-3 pieces of juicy ripe heirloom tomato slices.
    6. Crispy applewood smoked cooked bacon (get the thick cut bacon).
    7. Add cooked lobster pieces (cut into bite-size pieces). See below for how to cook lobster meat the easy way.
    8. Place another slice of bread on top slathered with aioli. Slice and serve!

    Easy, Fast, 4-Minute Dill Caper Aioli Recipe

    A real French aioli takes an effort to make by hand. It achieves a thick emulsified texture that no mixer can possibly achieve. However, this is how real aioli is made:

    • a mortar and pestle
    • a lot of time and "elbow grease"
    • fresh garlic, sea salt, egg yolk
    • usually adding Dijon mustard
    • and drizzling in lots of olive oil one pour at a time while stirring

    BUT, honestly, it takes A LOT of elbow grease to mix it in a mortar and pestle, plus your time.  So, today I am introducing an easier way to make aioli in 4 minutes flat. Here are the ingredients you need.

    • ½ cup mayonnaise
    • 1 tablespoon fresh lemon juice
    • 1 tablespoon chopped capers (these are immature flower buds from a Caper plant that are usually pickled)
    • 1 tablespoon finely minced fresh dill
    • 1 garlic clove minced
    • 2 tablespoons extra-virgin olive oil
    • pinch of salt and freshly ground black pepper

    In a small bowl, whisk the mayonnaise with the lemon juice, capers, chopped dill, and crushed garlic. Whisk in the extra virgin olive oil in a steady stream and season with salt and pepper. Whisk until well combined, and keep chilled until ready to use. 

    Cooked Lobster Tips

    You will need 1 small lobster tail per BLT Sandwich (or about ½ cup of chopped meat), there are several types of lobsters available in the US and around the world.

    Lobsters come large and small, locally in Southern California I find small lobster tails at our local supermarket that weigh 5.2 -5.7 ounces with the shell on.

    You can find frozen tails at Costco, or order online from many excellent seafood shop sources. Read on for all the step-by-step instructions to boil lobster tails, and remove the meat.

    How To Boil Lobster Tails

    1. You can buy smaller lobster tails in most grocery stores. These are small, approximately 5.5 ounces each with the shell on. Larger tails are available at gourmet stores, warehouse stores, seafood shops, or online.
    2. Once the water boils, they take 10 minutes to cook. Simmer, uncovered, for 8 to 10 minutes or until shells turn bright red, the meat is not translucent, and the tails will curve. For larger or smaller tails, adjust the cooking time as needed.
    3. Keep your heat on high. The water will foam, which is normal. If it comes close to the top of the pot, lay a wooden spoon across the pot and the foam will magically drop down.
    4. Once the tails are cooked, let them cool down for about 15 minutes on a plate. It helps to hold the tail in a clean kitchen towel while using kitchen scissors (or curved seafood scissors) they can be used on shrimp as well. Cut down the center of the lobster shell tail outer shell.
    5. Cut down the center of the underside of the shell.

    How To Remove Lobster Meat From The Shell

    1. Once you cut down the middle of both sides of the shell, hold in the kitchen towel, and crack it open by pushing holding on to each side.
    2. Pull out the lobster meat.
    3. Place your thumb under the meat down by the tail, and push the meat out of the shell. Be careful of the sharp points of the lobster shell.
    4. Discard the empty shell and any grey "sand vein" from the cooked lobster that runs down the tail. Also, check for any small pieces of shell and discard them.

    Romantic Lobster Dinner Recipe

    My wildly popular Lobster Ravioli recipe is great to serve for celebrations like birthdays, the holidays, or for romantic dinners. The limoncello lemon butter sauce is absolutely incredible...

    Lobster Ravioli With Lemon Butter Sauce
    Lobster Ravioli with a Lemon Butter Sauce uses a baked ravioli technique you can prep ahead for dinner parties, holidays, and romantic nights. This recipe can be made ahead with wonton wrappers and baked instead of boiling the ravioli. It is a perfect recipe for the holidays or special dinners like Valentine's Day.
    GET THE RECIPE PIN IT
    A white plate filled with heart shaped lobster ravioli garnished with parsley.
    Cooked lobster meat on a cutting board ready to use in a recipe.
    Assembly of a lobster BLT sandwich with bread, lettuce, tomato, bacon, and lobster meat.

    How to make crispy bacon for a BLT?

    How do you get crisp bacon?


    STOVETOP METHOD: Heat a skillet, place the bacon and cook until done approximately 10 minutes.

    Pros: Fast and easy, the old-fashioned tried and true way to cook thin cut or thick cut bacon.

    Cons: Your stovetop gets messy and a cast iron pan to clean.

    PRO TIP: Use a splatter screen for 2 reasons. One it helps keep the stovetop cleaner (but it isn't perfect) and second, it keeps the bacon cooking in the pan from popping hot grease on you! It can be put right in the dishwasher and cleans easily.

    OR...

    OVEN METHOD: Preheat the oven to 400 degrees. Lay the bacon on a wire rack over a sheet pan covered with heavy aluminum foil and bake for 15-20 minutes until the bacon is really crispy. Place on paper towels to drain grease and cool. Once the bacon grease is cool, simply toss the aluminum foil and bacon grease.

    Pros: Works well, but the pan and rack are more work to clean than just a skillet. You can cook a large amount of bacon this way in a short amount of time.

    Cons: You must wash the sheet pan and rack, which are more work to clean than just a skillet.

    Lobster Sandwich Swaps, Adds, & Variations

    • Keep it simple with toasted white bread, and swap in cooked diced chicken in place of lobster meat, with a little mayo, paprika, and onion.
    • Add some turkey bacon in place of regular bacon
    • Put some sliced cheddar cheese or sliced avocados for some extra creaminess.
    • Some people love a fried egg in their version of the best BLT sandwich.
    • Fresh basil will be really nice with the lobster or chicken salad mixture.

    Blue Ribbon Lobster Sandwich Recipe

    In 2018 I was asked to enter a live on-stage cooking competition at the Culinary Arts of the OC Fair in Orange County, California.

    A BLT sounded like a classic recipe idea, since the contest required bacon as a key ingredient, and I knew the aioli would be a delicious addition. So I created this Ultimate Lobster BLT Recipe for the competition and practiced this recipe over and over.

    In front of a live screaming audience full of my friends, it was a nerve-wracking 20 minutes to cook and assemble the BLT on stage and present to a panel of local So Cal Chef judges. This sandwich was a big hit with them and they mentioned my entry was very reflective of California Food.

    What a thrill to win my first blue ribbon at the fair. It was the first and only time I have been on stage cooking in front of a live audience. I will never forget how terrifying and exciting that day was, and how joyful, grateful, and blessed to be a winner...

    More Sandwich Recipes

    There is nothing like Roast Beef Sandwiches made with this roast beef recipe, slathered with creamy balsamic horseradish sauce, long shaves of parmesan cheese, and crisp lettuce on a crusty baguette. Slow Cooker Pulled Pork Sandwiches made with pork loin is so juicy, top with coleslaw, pickle chips, and tangy BBQ sauce all on a golden bun.

    Pulled Pork Sliders are an easy dinner ready in under 30 minutes, with melted swiss cheese, pulled pork, Black Forest ham, and pickles. Yummy Picnic Food is easy with Pressed Italian Sandwiches that are both neat to eat and hold. You can make these a day ahead, they keep very well overnight in the fridge.

    • Thick sliced roast beef on baguettes with lettuce, horseradish sauce, and shaved parmesan.
      Roast Beef Sandwiches
    • Red white check paper lined basked holding a pulled pork sandwich topped with coleslaw.
      Slow Cooker Pulled Pork
    • Three pulled pork sandwiches on Hawaiian buns with pickles, cheese and ham on a cutting board.
      Pulled Pork Sliders
    • Picnic sandwiches on a red and white check table with sliced sandwiches.
      Picnic Food: Pressed Italian Sandwiches

    Did you love this recipe? We would love to hear from you! If you make this recipe and love it, give it a 5-star rating ⭐⭐⭐⭐⭐ with a comment. THANK YOU!! Follow Delicious Table with my free newsletter and share this recipe with your friends on Facebook, Pinterest, and Instagram.

    A sliced open BLT sandwich loaded with succulent lobster, bacon, lettuce and tomato stacked on a board.
    Print

    BLT Lobster Sandwich Recipe

    A BLT Lobster Sandwich recipe with succulent lobster, thick crispy applewood smoked bacon, golden grilled sourdough bread, and slathered with an easy dill-caper aioli sauce. Oh, and it won a 1rst Place Blue Ribbon at the Orange County Fair during a live cooking competition!
    Course Dinner & Main Dishes
    Cuisine American
    Keyword BLT lobster sandwich, BLT Sandwich, lobster BLT sandwich, lobster recipe
    Prep Time 5 minutes minutes
    Cook Time 20 minutes minutes
    Total Time 25 minutes minutes
    Servings 4
    Calories 644kcal
    Author Lisa Hatfield

    Equipment

    • Seafood Scissors

    Ingredients

    dill-caper aioli

    • ½ cup mayonnaise
    • 1 tablespoon fresh lemon juice
    • 1 tablespoon chopped capers
    • 1 tablespoon finely minced fresh dill
    • 1 garlic clove minced
    • 2 tablespoons extra-virgin olive oil
    • pinch salt and freshly ground pepper

    Lobster Sandwich

    • 2 tablespoon soft butter
    • 4 slices sourdough bread
    • 4 tablespoons dill-caper aioli spread
    • 4 pieces looseleaf lettuce
    • 4 slices heirloom tomato
    • 6 pieces cooked applewood smoked bacon
    • 1 cup cooked lobster meat (boiled or grilled) approximetly 2 small 5.5 ounce lobster tails

    Instructions

    cook the crispy bacon (pick one method)

    • STOVETOP METHOD: Heat a large skillet, place bacon in the skillet and cook until done, approximately 10 minutes.  OR...
    • OVEN METHOD: Preheat oven to 400 degrees. Lay the bacon on a rack over a sheet pan and bake for 15-20 minutes until the bacon is really crispy. Place on paper towels, set aside.  

    make the dill-aioli spread

    • Meanwhile, in a small bowl, whisk the mayonnaise with the lemon juice, capers, chopped dill, and crushed garlic. Whisk in the extra virgin olive oil in a steady stream and season with salt and pepper. Whisk until well combined, keep chilled till ready to use. 

    lobster meat

    • Put a medium pot of water on the stove, once boiling, add lobster tails and boil. Larger lobster tails will need more time to cook. Boil uncovered on high, for 8 to 10 minutes or until shells turn bright red, the meat is not translucent, and the tails will curve.
    • The water will foam, which is normal. If it comes close to the top of the pot, lay a wooden spoon across the pot and the foam will magically dropdown.
    • Once the lobster tails are cooked, let them cool down about 15 minutes on a plate. It helps to hold the lobster tail in a clean kitchen towel while using kitchen scissors (or curved seafood scissors) they can be used on shrimp as well. Cut down the center of the lobster shell tail outer shell.
    • Next, cut down the middle of the inside of the shell, crack open, and pull out the lobster meat. Place your thumb under the lobster meat down by tail, and push the meat out of the shell. Be careful of the sharp parts of the lobster shell. Discard any grey "sand vein" from the cooked lobster that runs down the tail. 
    • Chop the cooked lobster into bite-size pieces, this makes the sandwich easier to eat!

    assemble the lobster BLT

    • Heat a heavy cast iron pan. Butter sourdough bread with soft butter, put in pan butter side down. Grill the bread until it is golden brown and crispy, flip one time just to warm the other side of the bread for one minute, remove from pan. Turn off heat. 
    • Spread dill-caper aioli on each slice of bread (leave the brown buttered side as the outside of the sandwich), add looseleaf lettuce, 2-3 pieces of heirloom tomato slices, crispy applewood smoked bacon, and add cooked lobster pieces (cut into bite-size pieces). Place other slice of bread on top. Slice and serve!

    Notes

    lobster tails

    You will need 1 small lobster tail per BLT Sandwich.
    Lobsters come large and small, locally in Southern California I find small lobster tails at our local market that weigh 5.2 -5.7 ounces with the shell on. Once you remove the lobster meat, you will need about ½ cup of small lobster pieces per sandwich. 

    Nutrition

    Calories: 644kcal | Carbohydrates: 38g | Protein: 14g | Fat: 48g | Saturated Fat: 12g | Cholesterol: 68mg | Sodium: 898mg | Potassium: 242mg | Fiber: 1g | Sugar: 2g | Vitamin A: 490IU | Vitamin C: 5.4mg | Calcium: 44mg | Iron: 2.6mg

    Hatch Chiles (80+ Recipes)

    [heart_this] · Jul 14, 2022 · 11 Comments

    Showing how to remove seeds from roasted Hatch Chiles to use them in recipes.

    Last Updated April 25th, 2024 at 01:34 pm by Lisa

    You will find over 80+ amazing New Mexico Hatch Chile recipes here, and tons of cooking tips on how to roast, prep, and freeze them at home.

    With a short 2-month Hatch Chile season from mid-August through late September, we must wait 10 months for the next season to roll around! Let's talk about how to find roasting events near you at your local grocery store, or roast them at home so you can enjoy these delicious chiles all year long. Whether you buy them already roasted or do it yourself, Hatch Peppers have a loyal following of "chile heads" across the USA.

    Why Are Hatch Chile Peppers So Special?

    • Also known as New Mexico Chiles, they are in season in summer from late August into the early fall of September. Since they are only available for a short time, they are super popular for many dishes in the Southwest and that is what all the hoopla is about!
    • These inspire a cultish frenzy among devoted chile heads who make a big deal about Hatch green chile peppers. Boasting intense sunlight by day and a still coolness during the night, the Mesilla Valley region they’re grown in gives this chile variety and unique flavor unlike any other.
    • Peppery with a bright citrus finish with variations in spiciness from mild to medium-hot.
    • Grown in the Hatch Valley region of New Mexico, which stretches along the Rio Grande’s southern-most bend before crossing into Texas and Mexico, is covered with row after row of these green peppers on leafy chile plants for most of the summer awaiting harvest time.
    • Chefs say that the intense sunlight and cool nights in the Hatch Valley of New Mexico result in a uniquely flavored chile that's unrivaled by any other.
    Boxes of Hatch Chiles

    Where does the name come from?

    Where are they grown? Authentic Hatch Chiles are a favorite Southwestern chile and are named after the original growing area in Hatch, New Mexico.

    Hatch is widely known as the chile capital of the world for growing a wide variety of fresh chile peppers and is most famous for the New Mexico green Hatch chiles.

    Named after the original growing area in Hatch, New Mexico, authentic Hatch Chiles are truly a Southwestern favorite. No other chile is prized more than this variety which grows in the Hatch Valley, just north of Las Cruces New Mexico.

    Today, most are grown in the Mesilla Valley just north of Las Cruces, New Mexico. Well known, especially in the states of New Mexico, Texas, and Arizona, and used in many different dishes.

    How to pick fresh green chiles?

    In Southern California, during Hatch green chile season I was able to buy them right in the grocery store. And they were roasting them out front in a fire roaster, and selling them both fresh whole chiles and char roasted and ready for recipes. You can also take a look online at the Hatch Chile Store for all kinds of chile products. When buying them fresh, look for the following:

    1. choose ones with a bright green color
    2. the pepper chile skin should be glossy, not dull
    3. pick firm chiles with medium to thick flesh
    4. avoid chiles with soft spots or cuts

    How To Roast Hatch Chiles On The Grill

    So many new recipe ideas are here for you like salsas, main dishes of mac and cheese, and even bloody mary mix are some of the many new ways to enjoy them. With a short season, stock up on these seasonal chiles, and get all the tips and the best way

    How To Store Prior To Roasting

    Refrigerate, unwashed Hatch chilies in a plastic bag for up to 5 days. Or 1-2 days at room temperature.

    Prep For Grill Roasting

    1. In a large bowl, rinse your chiles in cool water.
    2. Heat your grill to medium high, and place your stainless grill tray over the burner. It isn't necessary, you can grill the chiles right on the grill grate but helps to roast them more evenly. 
    3. Place chiles in a single layer, and use tongs to turn them until black char blisters form on each side of the chiles. 

    How To Make Grilled Hatch Chiles

    STEP 1: Transfer the roasted peppers to a platter to cool. Some people place them in a bag or other container you can seal, or a covered dish with plastic wrap to make them sweat. Mine peeled just fine without this step. 

    STEP 2: Allow the chiles to cool, then cut the stem end off first. Next, on a cutting board pull all the tough outer skin of the chiles off. Use a small waste bowl to discard the seeds, stems, and skin.

    STEP 3: Dice the clean chiles into small dice, and either use in your recipe or seal in an airtight freezer-safe bag in the freezer - see below for more storage tips.

    STEP 4: Freeze and store processed chiles for use all year long. You can use a freezer bag or Food Saver vacuum bags. Look below for more ideas for frozen chiles.

    What is a good substitute for Hatch Chiles?

    If you can't find fresh Hatch Chiles, they are similar to Anaheim or California chiles. The one thing is they must be roasted to bring out their special flavor and taste and to remove their tough outer skins. When they are not easily available in August, you can use green Anaheim chiles instead.

    Also, look for dried Hatch Chiles, they are shelf-stable for 12 months and can be ready to use in minutes, With just a quick toast and soak in water is all you need to re-hydrate dried chiles!

    A clear cellophane bag filled with dried red Hatch chiles to use in recipes.

    What Is  A Hatch Chile Roast?

    Hatch Chiles are roasted with high direct gas flames and heat in a roasting machine that turns the chiles constantly. Once they are dark black and blistered, they are put in plastic to start removing their tough outer skins.

    You don't want to eat the skins on these chiles, it is thick and tough. This roasting was at Gelson's markets, and they sell both fresh and roasted ready to go in container boxes.

    Four shots in a collage of a commercial Hatch chile roasting with blackened chiles out of roaster.

    Where Do I Find Hatch Chile Roasts?

    Becoming more and more popular every year, local supermarkets are now hosting Hatch Chile Roasts where you can buy and have them roasted right in front of you!

    Check with your local supermarkets online, some in our area that offer roasts are Albertsons, Gelson's, Bristol Farms, Pavilions, Safeway, and Smart and Final.

    A happy smiling man holding a box of roasted Hatch Chiles in a box lined with plastic.
    How To Store & Freeze Hatch Chiles

    FoodSaver Bags: Dice the roasted Hatch Chiles, and store them in airtight bags. FoodSaver bags are ideal, as you want to keep as much air out of the bag as possible because the chiles get mushy if ice crystals form on them. Good for up to 12-18 months in the freezer.

    Zip-Top Bags: Alternatively, use a small zip-top bag, and press all the air out before sealing and freezing. Good for up to 4-6 months in the freezer.

    How hot are Hatch Chiles?

    Some Hatch chiles are mild with heat levels on the Scoville scale similar to the Anaheim or poblano peppers around 1,000 – 1,500 Scoville heat units (SHU) others can meet the heat of a serrano 8,000+ SHU.

    The mediums are near equal heat levels of jalapeño peppers, somewhere in the 2,000 – 4,000 SHU range.

    It is always a good idea to wear gloves, like latex gloves when handling hot chile peppers or you might learn the hard way as it can burn your skin or irritate your eyes!

    What is a hatch chile ristra?

    A Ristra is an arrangement of drying chile pepper pods, garlic bulbs, or other vegetables like onions. Typically, large chiles such as New Mexico Hatch Chiles and Anaheim peppers are used, although any kind of chile may be used to construct a ristra.

    80+ Hatch Chile Recipes

    Hatch Chiles have a meaty flesh and mild-medium heat making them ideal for use in Chile Con Queso, Chile Rellenos, and Chile Verde. You can also try roasting and using them in salads, soups, a green chile stew, dips, and sandwiches.

    Nine recipes featuring Hatch Chiles all cooked and ready to eat.

    They’re best enjoyed after being roasted and can be added to so many different recipes such as Empanadas, Quesadillas, and even Ice Cream!

    1. Hatch Pepper Pepperoni Pizza by Melissa's Produce
    2. Hatch Chile-Glazed Chicken by A Communal Table
    3. Roasted Hatch Chile & Jicama Salmon by Strength and Sunshine
    4. Hatch Pork Green Chile by Three Olives Branch
    5. Green Chile Pasta Noodles by New Mexican Foodie
    6. Sriracha Hatch Pepper Sauced Wings by Chef Tom Fraker
    7. Potato Enchiladas With Hatch Chile Sauce by From A Chef's Kitchen
    8. Blue Cheese Stuffed Hatch Chile Burgers by Melissa's Produce
    9. Roasted Hatch Chile Hummus by Three Olives Branch
    10. Hatch Pepper Apple Pie by Chef Tom Fraker
    11. Hatch Pepper & Crab Cream Puffs by Melissa's Produce
    12. Hatch Chile Green Enchilada Sauce by Pinch and Swirl
    13. Strawberry Rhubarb Preserves by Chicken Fried Kitchen
    14. Green Chicken Enchiladas by Christina's Cucina
    15. Homemade Hatch Chile Refried Beans by Three Olives Branch
    16. Grilled Rib Eye With Hatch Chile Avocado Salsa by Cooking Chat
    17. Hatch Chile and Corn Fritters by A Communal Table
    18. New Mexico Hatch Green Chile Sauce by Culinary Ginger
    19. Hatch Green Chile Grilled Turkey Burgers by Saportio Kitchen
    20. Four Cheese Mac & Cheese With Hatch Chiles by Christina's Cucina
    21. Hatch Chile Grilled Quesadilla by Melissa's Produce
    22. Hatch Chile Deviled Eggs by Melissa's Produce
    23. Hatch Chile Cheddar Egg Bites by What A Girl Eats
    24. Green Chile Nachos by Homemade For Elle
    25. Hatch Pozole Verde by Melissa's Produce
    26. Hatch Pepper Steak Sandwich by Chef Tom Fraker
    27. Hatch Chile With Turkey & Paso Wine by Cooking Chat
    28. Roasted Hatch Mac n Cheese by Melissa's Produce
    29. Gluten-Free Baked Hatch Chile Rellenos by Moon And Spoon And Yum
    30. Potato and Hatch Chile Au Gratin by Melissa's Produce
    31. Spiced Pork Stuffed Hatch Chile by The Flavor Bender
    32. Easy Hatch Chile Chocolate Chip Cookies by Melissa's Produce
    33. Hatch Chile and Lemon Rice Salad by A Communal Table
    34. Hatch Chile-Cheese Biscuits by Melissa's Produce
    35. Low Carb Hatch Chile Rellenos Casserole by What A Girl Eats
    36. Instant Pot Cheesecake With Hatch Green Chile Raspberry Coulis by Chicken Fried Kitchen
    37. Hatch Chile and Vanilla Bean Ice Cream by Melissa's Produce
    38. Stuffed Roasted Hatch Green Chile by Chef de Home
    39. Shrimp Hatch Chile Jalapeno Poppers by Melissa's Produce
    40. Hatch Green Chile Mashed Potatoes by Erica's Recipes
    41. Hatch Green Chile Sausage Breakfast Burritos by Three Olives Branch
    42. New Mexico Hatch Chile Dogs by Melissa's Produce
    43. Roasted Green Chile, Potato, Quinoa Soup by Moon and Spoon and Yum
    44. New Mexico Hatch Pepper Chili by Chef Tom Fraker
    45. Hatch Chile Devils Food Cookies by Chef Tom Fraker
    46. Hatch Pepper Chicken Tortilla Soup by Chef Tom Fraker
    47. Hatch Chile Farro Risotto by Chef Jamie Gwen
    48. Hatch Sweet Onion Marmalade by Chef Debbi Dubbs
    49. Hatch, Berry, Mango Smoothie by Chef Tom Fraker
    50. Hatch Chile Stuffed Roasted Pork Tenderloin by Chef Tom Fraker
    51. Hatch Chile Grilled Cheese Sandwich by Melissa's Produce
    52. Meaty Cheesy Bread with New Mexico Hatch Chiles by Melissa's Produce
    53. New Mexico Hatch Chile Casserole with Roasted Tomatillo Salsa by Chef Ida
    54. Party Chili with New Mexico Hatch Chiles by Chef Tom Fraker
    55. Layered Hatch Chile Hummus Dip by Chef Tom Fraker
    56. Baby Dutch Yellow® Potatoes with Roasted Hatch Pepper Vinaigrette
    57. 50/50 Burger With Hatch Chiles (50% meat 50% mushroom)
    58. Fried Cheese with Hatch Chile Dipping Sauce by Melissa's Produce
    59. Pretzel Bread Bites with Hatch Chile Mustard Spread
    60. Grilled Baby Artichokes with Hatch Chile Dusted Hollandaise
    61. Ground Beef Tacos with New Mexico Hatch Chiles
    62. Shredded Beef Burritos with New Mexico Hatch Chiles
    63. Hatch Chile and Chicken With Dumpling Soup by Chicken Fried Kitchen
    64. Veggie Cheesy Bread with New Mexico Hatch Chiles
    65. Shredded Chicken Burritos with New Mexico Hatch Chiles
    66. Slow Cook Hatch Stew by Dennis Linden
    67. Hatch Chile Chicken Enchiladas by Tao of Spice
    68. Hatch Hot Tamales by Chicken Fried Kitchen
    69. Hatch Green Chile Mac & Cheese by Chicken Fried Kitchen
    70. Baked Gluten-Free Hatch Green Chiles Rellenos by Moon and Spoon and Yum
    71. Quick Hatch Chile Salsa Fresca by Melissa's Produce
    72. Chicken and Hatch Green Chile Pozole by Three Olives Branch
    73. Hatch Green Chile Queso Fundido by Three Olives Branch
    74. Vibrant Summer Salad with Hatch Chile Vinaigrette
    75. Hatch Pepper Guacamole
    76. Hatch Ranchero Sauce
    77. Bacon Hatch Chile Burgers by Tao of Spice
    78. Hatch Chile Corn Chowder with Blackend Shrimp by Chicken Fried Kitchen
    79. Hatch Pepper Green Sauce by Chef Tom Fraker
    80. Hatch Chile Smores by Melissa's Produce
    81. Hatch Chile Dip by Chef Tom Fraker
    82. Hatch Chiles Low Carb Stuffed Peppers
    83. Hatch Pepper Jelly by Melissa's Produce
    84. Hatch Cranberry Sauce by Melissa's Produce

    More Hatch Chile Recipes

    Tomatillo Salsa takes 20 minutes to make. This homemade salsa uses Hatch chiles, but you can use Anaheim or Poblanos peppers with a Jalapeno in this recipe. Homemade salsa has a fresh taste you will never get out of a jar or from any store. The fire-grilled flavor and medium heat in this homemade salsa will have people loving each and every bite.

    Cook Green Enchilada Sauce at home, and skip the cans at the store! With a few simple steps, it will become one of your favorite ways to enjoy fresh green chilis (like roasted Hatch Chiles!), onions, and tomatillos.

    This Bloody Mary Mix Recipe has beautiful fire-roasted green chiles, (or Hatch Chiles) tomatoes, and onions.  Serve these for brunch and game days, after tasting these amazing bloody marys, you will never want the bottled mix again.

    There are layers of soft tortillas, filled with tender juicy shredded chicken, melted cheeses, sliced black olives, and fire roasted salsa verde (use your Hatch Chiles and my Green Enchilada Sauce Recipe for authentic delicious flavors in this traditional Mexican dish of Chicken Enchiladas.

    • A glass jar with a clamp filled with green enchilada sauce on a colorful striped piece of cloth.
      Green Enchilada Sauce
    • A wood bowl with a lady scooping out homemade salsa with a tortilla chip.
      Tomatillo Salsa
    • A pitcher of bloody marys with two drinks garnished with olives, pepperoncinis, and beef sticks.
      Spicy Bloody Marys
    • A white casserole dish with chicken enchilada casserole topped with black olives and lots of melted cheese.
      Chicken Enchilada Casserole

    Did you love this recipe? We would love to hear from you! If you make this recipe and love it, give it a 5-star rating ⭐⭐⭐⭐⭐ with a comment. THANK YOU!! Follow Delicious Table with my free newsletter and share this recipe with your friends on Facebook, Pinterest, and Instagram.

    Showing how to remove seeds from roasted Hatch Chiles to use them in recipes.
    Print

    Hatch Chiles ~ 80+ Recipe Ideas!

    80+ Amazing New Mexico Hatch Chile Recipes and How To Roast, Prep, and Freeze them at home. Hatch Chile season tips for roasting events near you, and more.
    Course Sauces, Marinades, & Condiments
    Cuisine Condiment
    Keyword Hatch Chile Recipes, Hatch Chiles, Hatch green chile peppers, New Mexico Hatch Chiles, Roasting Hatch Chiles
    Prep Time 5 minutes minutes
    Cook Time 15 minutes minutes
    Total Time 20 minutes minutes
    Servings 24
    Calories 7kcal
    Author Lisa Hatfield

    Equipment

    • Stainless Steel Grill Tray
    • Epicurean Non-Slip Cutting Board
    • Chef Knife

    Ingredients

    • 1 pound Hatch Chiles

    Instructions

    Prep For Roasting

    • In a large bowl, rinse your Hatch chiles in cool water.

    How To Grill Hatch Chiles

    • Heat your grill on medium high, place your stainless grill tray over the burner. It isn't necessary, you can grill the chiles right on the grill grate but helps to roast them more evenly. 
    • Space the Hatch chiles in a single layer over the open flames on a charcoal or gas grill. Use tongs to turn them until black char skin blisters form on each side of the chiles. 

    How To Process Roasted Chiles

    • Transfer roasted peppers to a platter to cool. Some people place in a bag or other container that you can close - you want them to sweat. Mine peel just fine without this step. 
    • Allow the chiles to cool, then cut the stem end off first. Next, on a cutting board pull all the tough outer skin of the chiles off. Use a small waste bowl to discard the seeds, stems, and skin.
    • Clean the peppers into a small dice, and either use in your recipe or seal for the freezer.
      You can use a zip-top freezer bag or store them using Food Saver vacuum bags for use all year long. Look below for more ideas for frozen chiles.

    Video

    Notes

    How To Pick The Best Fresh Hatch Chiles

    1. choose bright green hatch chiles
    2. the skin of the chile  should be glossy
    3. pick firm peppers with medium to thick flesh
    4. avoid chiles with soft spots or cuts

    How To Store Hatch Chiles Prior To Roasting

    • Refrigerate, unwashed in a plastic bag for up to 5 days

    How To Store Freeze Hatch Chiles

    1. FoodSaver Bags: Dice the roasted Hatch Chiles, and store in airtight bags. FoodSaver bags are ideal, as you want to keep as much air out of the bag as possible because the chiles get mushy if ice crystals form on them. Good for up to 12-18 months in the freezer.
    2. Zip-Top Bags: Alternatively, use a small zip-top bag, and press all the air out before sealing and freezing. Good for up to 4-6 months in the freezer.

    How To Stuff Hatch Chiles

    If you plan to stuff your Hatch chiles, leave the stem on, and cut a slit to remove the seeds or leave them in for extra heat.

    Nutrition

    Calories: 7kcal | Carbohydrates: 1g | Protein: 0g | Fat: 0g | Saturated Fat: 0g | Cholesterol: 0mg | Sodium: 1mg | Potassium: 60mg | Fiber: 0g | Sugar: 1g | Vitamin A: 180IU | Vitamin C: 27.1mg | Calcium: 3mg | Iron: 0.2mg

    Watermelon Salad

    [heart_this] · Jul 13, 2022 · 16 Comments

    Looking down into a scooped out watermelon filled with rounded watermelon balls garnished with mint and feta cheese.

    Last Updated June 2nd, 2023 at 09:22 am by Lisa

    Watermelon Salad is one of the most incredible refreshing summer fruit salads. It has a light citrus dressing, and fresh mint, topped with crumbled feta cheese. Serve this side dish for picnics, potlucks, and BBQ cookouts in a carved-out watermelon for the salad bowl!

    People love this tasty beautiful watermelon recipe. Make it a day ahead for your gathering or adventure, chill it in the fridge the night before your party, then grab it and go! The savory salty feta is surprisingly yummy with the juicy sweet watermelon...

    How To Make Watermelon Feta Salad

    • 1 small watermelon washed (or large one on its side)
    • ¼ cup good extra virgin olive oil
    • 1 cup fresh mint leaves minced (plus extra for garnish)
    • 2 oranges zest and juice
    • 2 limes the zest and lime juice (or swap in lemon juice and zest)
    • ½ teaspoon salt
    • a pinch of black pepper to taste
    • 4 oz. crumbled feta cheese optional (8 oz for a larger watermelon)

    Step One: Wash the skin of the watermelon in cool water and a splash of vinegar. Dry well with a clean towel.

    Step Two: Slice a small portion off the bottom of the watermelon so it sits flat on the counter.

    PRO TIP: Cut that little slice off the bottom will help it sit flat and not roll. You can cut your watermelon bowl the long way or upright for a deeper bowl.

    Step Three: Cut the top off, about 2 " down to form your salad bowl.

    Step Four: In a medium bowl, whisk olive oil, orange zest, orange juice, lime zest, and lime juice. Mix in mint (fine ribbons or minced), and crumbled feta cheese. Add salt and pepper to taste. Optional, serve the feta cheese in a little bowl on the side and let people add their own.

    Step Five: Using a small 1" melon baller, scoop out all the watermelon, into a large bowl, leaving just the watermelon rind as your "bowl".  Pour any remaining watermelon juice in with the dressing. Then pour the dressing over the watermelon pieces, and toss to combine all ingredients well.

    Step Six: Place the watermelon salad into the carved-out watermelon rind to serve, and garnish with more mint sprigs and feta cheese (optional).

    Cover with plastic wrap and chill in the refrigerator until ready to serve.

    Swaps and Variations

    Watermelon: Either a small or large watermelon will work for this recipe. Cut the watermelon into small cubes or scoop it into small balls.

    Feta Cheese: The feta cheese is totally optional but so good.

    Fresh Herbs & Greens: Try fresh basil cut into ribbons, a few sprigs of fresh thyme, or arugula tossed in to create a nice bite to the sweetness of the fruit salad.

    Vegetables: You can slice and cut in some different fresh garden veggies too like cucumbers, tomatoes, bell pepper, or kalamata olives.

    Dressing: Change up the flavor of the sweet fruit dressing entirely and drizzle in some Lemon Vinaigrette with white or red wine vinegar or balsamic vinegar for a tart, tangier taste.

    Why This Recipe Works

    1. It can be made ahead and nothing needs to be done before a party.
    2. How dang adorable is it served in the watermelon rind bowl? You can also use a large salad bowl, large dish, or large deep serving platter.
    3. No bowl to wash or clean up, and you can toss it after a picnic...or potluck...brilliance!
    4. Your picnic or party will look so festive with this as a centerpiece or on a potluck table.
    5. People love that it is a healthy option...and the feta is of course optional, you can have a little bowl of feta next to the watermelon salad and let people sprinkle it on top if they want some.
    A watermelon carved out full of watermelon balls and topped with mint and feta cheese.

    More Summer Salad Recipes

    Wedge Salad with Pistachio-Avocado Dressing is super-chilled and a refreshing cookout side with hot grilled steaks, chicken, or shish kabobs.

    A 7 Layer Salad recipe is also called an overnight salad because it can hold without wilting overnight. This is a favorite salad and is famous for its colorful charm to serve large groups for picnics, potlucks, BBQ cookouts, or for Mother's Day.

    Broccoli Salad with crisp green apples, crunchy broccoli, and grapes create this summer salad with a creamy 3-ingredient orange dressing.

    This Easy Vinegar Coleslaw Recipe has a clean vinegar-based dressing and has no-mayo. It goes great with pulled pork sandwiches, or as a classic side dish.

    Now you can make this famous iconic Cobb Salad at home exactly how it was made back in the day in the golden age of Hollywood, California.

    The best Potato Salad loaded with crisp bacon and blue cheese. A perfect side for summer potlucks, picnics, cookouts, and BBQs.

    An easy Easy Pasta Salad with fresh herbs, bell pepper, and cheese. This is a mayo-less salad, perfect to serve at outdoor picnics or cookouts

    Whip up this easy Taco Salad recipe loaded with all the best Mexican food toppings and Catalina dressing. Plus get my two secret ingredients for the best taco meat!

    You must use the category name, not a URL, in the category field.

    Did you love this recipe? We would love to hear from you! If you make this recipe and love it, give it a 5-star rating ⭐⭐⭐⭐⭐ with a comment. THANK YOU!! Follow Delicious Table with my free newsletter and share this recipe with your friends on Facebook, Pinterest, and Instagram.

    Looking down into a scooped out watermelon filled with rounded watermelon balls garnished with mint and feta cheese.
    Print

    Watermelon Salad Recipe

    Watermelon Salad is one of the most incredible refreshing summer fruit salads. It has a light citrus dressing, and fresh mint, topped with crumbled feta cheese. Serve this side dish for picnics, potlucks, and BBQ cookouts in a carved-out watermelon for the salad bowl!
    Course Salads & Dressing
    Cuisine American
    Keyword picnic salad, watermelon recipe, watermelon salad
    Prep Time 15 minutes minutes
    Total Time 15 minutes minutes
    Servings 8
    Calories 167kcal
    Author Lisa Hatfield

    Equipment

    • Melon Baller
    • Epicurean Non-Slip Cutting Board
    • Chef Knife

    Ingredients

    • 1 small watermelon washed
    • ¼ cup good olive oil
    • 1 cup fresh mint leaves minced or tiny ribbons (plus extra for garnish)
    • 2 oranges zest and juice
    • 2 limes zest and juice
    • salt and pepper to taste
    • 4 oz. crumbled feta cheese optional (8 oz for a larger watermelon)
    US Customary - Metric

    Instructions

    • Wash skin of watermelon in cool water and a splash of vinegar.
    • Slice a small portion off the bottom of the watermelon so it sits flat on the counter.
    • Cut the top off, about 2 " down to form your salad bowl.
    • In a medium bowl, whisk olive oil, orange zest and juice, lime zest and juice, mix in mint, and feta cheese. Add salt and pepper to taste. Optional, serve the feta cheese in a little bowl on the side and let people add their own.
    • Using a small melon baller, scoop out all the watermelon, into a medium bowl, leaving just the watermelon rind.  Pour any remaining watermelon juice into the bowl with the dressing. Pour the dressing over the watermelon pieces, and toss to combine all ingredients well.
    • Place the watermelon salad back into the carved out watermelon bowl, and garnish with mint sprigs. Optional, serve the feta cheese in a little bowl on the side and let people add their own.
    • Keep covered with plastic wrap in refrigerator until ready to serve.
    • Serve chilled.

    Notes

    watermelon

    Either a small round or large ripe watermelon will work, a large watermelon will serve a bigger crowd. 
    PRO TIP: cutting that little slice off the bottom will help it sit flat and not roll!

    feta cheese

    You can have a little bowl next to the watermelon salad and let people sprinkle it on top if they want some. 4 oz. crumbled feta cheese is good for a small watermelon, and 8 oz for a larger watermelon.

    make-ahead

    One of the things I love most about this recipe, is I make it the day before, and wrap it up with plastic wrap, then serve it at the party nice and chilled. 
     

    Nutrition

    Calories: 167kcal | Carbohydrates: 18g | Protein: 3g | Fat: 10g | Saturated Fat: 3g | Cholesterol: 12mg | Sodium: 161mg | Potassium: 287mg | Fiber: 2g | Sugar: 13g | Vitamin A: 1245IU | Vitamin C: 36.4mg | Calcium: 113mg | Iron: 0.9mg

    Frozen Chocolate Covered Bananas

    [heart_this] · Jul 13, 2022 · 5 Comments

    A small aluminum sheet pan with brown paper and 5 frozen bananas chocolate dipped and coated in nuts and dried fruit.

    Frozen Chocolate Covered Bananas are dipped in melted chocolate and rolled in your favorite toppings of dried fruit, chopped nuts, colorful sprinkles, crushed cookies, or candies for a wholesome frozen dessert.

    The Original Frozen Bananas were made in Newport Beach California, and are now a famous beach treat for locals and tourists alike. You can make them taste the way you want with endless topping ideas.

    Freeze up these iconic beach town treats for long hot summer days...

    Let's Make Chocolate Covered Bananas

    • 6 whole bananas (ripe bananas)
    • 2 cups dark chocolate chips
    • 2 tablespoons crushed mixed nuts
    • 2 tablespoons grated coconut flakes
    • 2 tablespoons chopped dried fruit

    PRO TIP: Your bananas will need to be on the sticks and frozen before decorating. This helps the chocolate firm quickly and so the toppings will not slide off!

    Freezing Bananas - Prep Ahead 2 hours

    1. Line an airtight container or sheet pan with parchment baking paper. Make sure it fits in your freezer.
    2. Peel the bananas. Keep them whole or slice them in half for kids. Insert a popsicle stick pushing it into the banana about halfway through. Place the banana in the prepared container and freeze for 2 hours. Your bananas will need to be on the sticks and frozen before dipping in chocolate. This helps the chocolate firm quickly and so the toppings will not slide off!
    3. Have all your toppings ready to go; chop or crush your nuts, candy, cookies, or dried fruit. Chop the nuts or cookies on a cutting with a knife or run them through a food processor.

    Chocolate Dipping And Toppings

    1. Melt the dark chocolate in a heatproof bowl set over a pan of simmering water. Stir the chocolate every so often.
    2. Dip 1 frozen banana into the melted chocolate and using a spoon, cover any parts that remain uncoated.
    3. Sprinkle the frozen banana with the crushed nuts or dried fruit and set it aside in a single layer on a parchment paper lined baking sheet to flash freeze in the freezer. The melted chocolate becomes hard quickly, so work fast. If you use candy bars and cookies chop those into smaller pieces so they stick to the bananas.
    4. When all the bananas are dipped and coated, keep frozen until ready to serve. Store them in a freezer bag or airtight container.

    Frozen Banana Slices

    You can also make frozen sliced bananas, and cut the bananas into ½" thick slices with a knife. Then freeze the slices, and use a skewer or fork to dip them into the melted chocolate and sprinkle with toppings.

    A frozen banana with a bite taken out of it resting on the edge of an aluminum sheet pan.

    More Frozen Banana Topping Ingredients

    • shredded coconut
    • crushed banana chips
    • pistachios
    • hazelnuts
    • candied ginger
    • dried apricots
    • dried cranberries
    • granola
    • dried blueberries
    • sprinkles (they make vegan sprinkles too!)
    • dried cherries
    • dried pineapple
    • mini chocolate chips
    • crushed Oreo cookies
    • mini peanut butter cups
    • peanuts
    • slivered almonds
    • small mini candies of your choice!

    Who invented the Frozen Banana?


    Don Phillips, also known as the frozen banana king, opened the first frozen banana stand - The Original Frozen Banana - opened on Balboa Peninsula, located in Orange County, California, circa 1940. There are two places on Balboa Island in Newport Beach, California that still make them to this day.

    Where can you buy frozen bananas?

    There are several small shops on Balboa Island California that are famous for their frozen bananas and sell them to the locals and tourists topped with all kinds of fantastic toppings.

    Some people also call these chocolate bananas or choco bananas.

    More Frozen Desserts

    Raspberry Lemon Sorbet is a real fruit dessert, that is dairy-free, vegan, and has no refined sugar.

    Fruit Popsicles made with coconut water, strawberries, raspberries, and blueberries are refreshing low-sugar treats for hot summer days.

    Make this easy Oreo Ice Cream Cake recipe in a 9 x 11 glass dish or in a pan that is a springform mold for the classic round cake shape.

    5 ingredient Cherry Pie Ice Cream Sandwiches are an easy summer treat to cool you down on hot days, and no ice cream maker is needed.

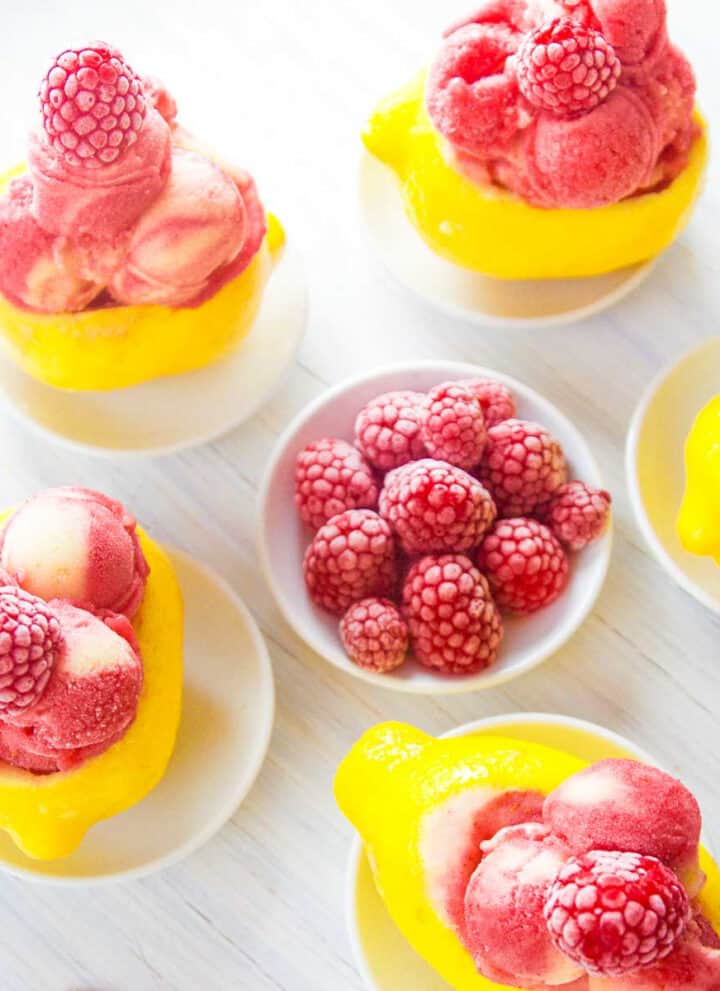
    • Bright yellow lemons carved out and filled with raspberry strawberry lemon sorbet as a summer dessert.
      Raspberry Lemon Sorbet
    • A single coconut water popsicle with strawberries, blueberries, and raspberries.
      Homemade Fruit Popsicles
    • An ice cream cake with a slice removed and covered in colorful sprinkles.
      Ice Cream Cake
    • A white platter with cherry pie ice cream sandwiches.
      Cherry Pie Ice Cream Sandwiches

    Did you love this recipe? We would love to hear from you! If you make this recipe and love it, give it a 5-star rating ⭐⭐⭐⭐⭐ with a comment. THANK YOU!! Follow Delicious Table with my free newsletter and share this recipe with your friends on Facebook, Pinterest, and Instagram.

    A small aluminum sheet pan with brown paper and 5 frozen bananas chocolate dipped and coated in nuts and dried fruit.
    Print

    Frozen Chocolate Covered Bananas

    Frozen Chocolate Covered Bananas are dipped in melted chocolate and rolled in your favorite toppings of dried fruit, chopped nuts, colorful sprinkles, crushed cookies, or candies for a wholesome frozen dessert.
    Course Appetizers, Dips, & Snacks, Desserts & Sweets
    Cuisine American
    Keyword choco bananas, chocolate bananas, chocolate covered bananas, frozen bananas, frozen chocolate bananas
    Prep Time 5 minutes minutes
    Cook Time 20 minutes minutes
    Freeze Bananas 2 hours hours
    Total Time 2 hours hours 25 minutes minutes
    Servings 12
    Calories 237kcal
    Author Lisa Hatfield

    Equipment

    • Wood Popsicle Sticks

    Ingredients

    • 6 ripe bananas
    • 2 cups dark chocolate chips
    • 2 tablespoons crushed mixed nuts slivered almonds, pistachios, or peanuts
    • 2 tablespoons grated coconut flakes
    • 2 tablespoons chopped dried fruit
    US Customary - Metric

    Instructions

    Freezing Bananas - Prep Ahead 2 hours

    • Line an airtight container or sheet pan with parchment baking paper. Make sure it fits in your freezer.
    • Peel the bananas. Keep them whole or slice in half for kids. Insert a popsicle stick pushing it into the banana about halfway through. Place the banana in the prepared container and freeze for 2 hours. Your bananas will need to be on the sticks and frozen before dipping in chocolate. This helps the chocolate firm quickly and so the toppings will not slide off!
    • Have all your toppings ready to go; chop or crush your nuts, candy, cookies, or dried fruit. Chop the nuts or cookies on a cutting with a knife or run them through a food processor.

    Dip And Decorate Frozen Bananas

    • Melt the dark chocolate in a heatproof bowl set over a pan of simmering water. Stir the chocolate every so often.
    • Dip 1 frozen banana into the melted chocolate and using a spoon, cover any parts that remain uncoated.
    • Sprinkle the frozen banana with the crushed nuts or dried fruit and set aside in a single layer on a parchment paper lined baking sheet to flash freeze in the freezer. The melted chocolate becomes hard quickly, so work fast. If you use candy bars and cookies chop those into smaller pieces so they stick on the bananas.
    • When all the bananas are dipped and coated, keep frozen until ready to serve. Store them in a freezer bag or airtight container.

    Notes

    Be Sure To Prep Ahead!

    Your bananas will need to be on the sticks and frozen before decorating. This helps the chocolate firm quickly and so the toppings will not slide off!
    Have all your toppings ready to go; chop or crush your nuts, candy, cookies or dried fruit.

    More Frozen Banana Topping Ingredients

    • shredded coconut
    • crushed banana chips
    • pistachios
    • hazelnuts
    • candied ginger
    • dried apricots
    • dried cranberries
    • granola
    • dried blueberries
    • sprinkles (they make vegan sprinkles too!)
    • dried cherries
    • dried pineapple
    • mini chocolate chips
    • crushed cookies
    • mini peanut butter cups
    • peanuts
    • slivered almonds
    • small mini candies of your choice!

    Nutrition

    Calories: 237kcal | Carbohydrates: 33g | Protein: 3g | Fat: 11g | Saturated Fat: 9g | Sodium: 35mg | Potassium: 415mg | Fiber: 2g | Sugar: 19g | Vitamin A: 40IU | Vitamin C: 5.3mg | Calcium: 95mg | Iron: 0.6mg

    Parmesan Lemon Vinaigrette

    [heart_this] · Jul 12, 2022 · 5 Comments

    A mason jar with lemon vinaigrette inside on a messy cutting board.

    Put this Parmesan Lemon Vinaigrette recipe together in minutes with real lemon juice, Dijon mustard, and parmesan cheese. Shake in a jar, whisk in a bowl, either way, it elevates any green salad into something special.

    With a few simple ingredients, you can make a basic vinaigrette. The ratio is 3 parts olive oil to 1 part lemon juice or vinegar. The Dijon mustard acts as a natural emulsifier to bind the dressing together. All the other ingredients add the pizzazz to this simple Dijon vinaigrette...

    How To Make Parmesan Lemon Vinaigrette

    My dear friend Kim fell in love with a mustard vinaigrette recipe where the Chef added good parmesan cheese! Once home, I created my best recipe version testing it over and over for a dinner party. I love to serve this dressing on a simple green salad, with white lasagna, and cheese toast.

    I bet you have most, if not all, of these things in your kitchen pantry right now...

    • 1 cup good extra-virgin olive oil
    • 2 tablespoons white wine vinegar
    • 1 whole lemon zest (zest first!)
    • 2 tablespoons lemon juice (regular or Meyer lemons)
    • 2 tablespoons shallot (peeled and minced)
    • 1 tablespoon Dijon mustard
    • ½ cup parmesan cheese grated 
    • ½ teaspoon salt (Kosher sea salt)
    • ½ teaspoon cracked black pepper
    • optional: add a clove of crushed or minced garlic

    Step 1: In a clean mason jar with a tightly fitted lid, add all the extra virgin olive oil, white wine vinegar, shallot, Dijon mustard, parmesan cheese, sea salt, pepper, lemon zest, lemon juice, and optional addition of a clove of crushed garlic.

    Step 2: Place the lid on tight, and shake for about a minute. That's it! Or whisk in a measuring cup or small bowl with a wire whisk. You can mix in a food processor or use an immersion blender in a cup.

    Step 3: Re-shake jar with the lid on to recombine, drizzle over salad. There are several ways to make your own lemon dressing, but I found the best way is to mix it right in a jar.

    Then pop this simple mustard vinaigrette in the fridge right in that jar to chill and enjoy all week...

    PRO TIP: You can use any blender, a Vitamix, food processor, or immersion blender and mix away. Or whisk in a bowl, but a common mason jar is so fast and easy, stores perfectly in the fridge, and makes for easy clean-up!

    Easy Dijon Vinaigrette Recipe Top Tips

    • It is full of real, fresh simple ingredients. No hard-to-pronounce preservatives, chemicals, and additives inside. Commercial dressings are full of canola oil, sunflower oil, and soybean oil. It is much better to use good olive oil in your homemade dressings.
    • It's a versatile dressing. This lemon dressing with parmesan will go well on almost any salad and is terrific with Italian dishes. You can sprinkle in a bit of oregano to make it more Italiano!
    • I like to serve this on a big dinner salad with things like cucumbers, cauliflower fresh spinach, chickpeas, and other crunchy vegetables I have on hand.
    • Once you mix this vinaigrette, leave it at room temperature before dinner. Pull it out an hour before dinner, give it a good shake or whisk and drizzle on your salad.
    • Easy Prep. This lemon salad dressing couldn't be easier. Make it by putting all of the ingredients in a small jar like a mason jar, and shaking the jar to combine. The Dijon mustard works as a natural emulsifier. Then serve and enjoy. No mason jar on hand? A blender works or whisking in a small bowl will work too.
    • It stores perfectly in the fridge. If you can keep from using it all as soon as you make it, the leftovers will store perfectly in the fridge right in that jar.
    • It's a low carb dressing recipe. In fact, it is a no carb keto dressing recipe too. If you are following a low-carb or keto diet, this is the perfect salad dressing to pair with your salads, it tastes amazing to make your own and is a fantastic healthy eating recipe.
    • You can bring up the sweetness if you like with a dash of honey or maple syrup. Sometimes I make it that way, but that is optional.
    • Fresh herbs will go great in this dressing, and depending on the time of year, I sometimes add some fresh thyme, rosemary, or sage.

    Once you see how simple this lemon vinaigrette is, you'll make this over and over, and skip bottled dressings.

    This Meyer Lemon Citrus Vinaigrette is a fresh light new twist for salads and oh-so-good...

    Meyer Lemon Citrus Vinaigrette Recipe
    Meyer Lemon Citrus Vinaigrette is a homemade salad dressing recipe made in minutes to use all week long. Flavor-packed, low sugar, and keto.
    GET THE RECIPE PIN IT
    A vintage silver spoon resting on an open jar of vinaigrette.

    And speaking of lemons, take a look at my collection of 15+ Lemon Recipes.🍋🍋🍋 This has been so popular with readers!

    Some Swaps & Variations

    Vinegar: You can substitute apple cider vinegar or red wine vinegar for white wine vinegar. White wine vinegar is milder than regular white distilled vinegar and better for dressings.

    Honey mustard vinaigrette: Make this into a honey-mustard vinaigrette simply add 2-3 tablespoons Dijon mustard and 2 tablespoons of honey to this recipe and leave out the parmesan cheese.

    Vinaigrette FAQ

    What's in a vinaigrette?


    If you've ever wondered what qualifies a salad dressing as a "vinaigrette," it has to do with the ingredients:

    To be a vinaigrette, an acidic ingredient like lemon juice or vinegar, or both must be mixed with oil like olive oil or vegetable oil.

    "Traditional" vinaigrettes are three parts oil to one part vinegar, but the vinaigrettes of today often break that precise ratio.

    What to do with leftover vinaigrette dressing?


    There are so many different ways to use a vinaigrette in delicious recipes. Use it as a marinade for roast or grilled chicken, toss a sliced baguette in vinaigrette, then toast in the oven for croutons. Drizzle on fish wrapped in parchment with lemon slices and capers then bake.

    It's divine on a fresh tomato garden salad. Toss it in a feta salad made with bell peppers. It pairs perfectly with pasta salad, just toss it on.
    Mix in some good balsamic vinegar, and dip golden crusty fresh bread into the mix. Spoon some leftover vinaigrette into a potato salad or chicken salad for an added boost of flavor.

    More Homemade Salad Dressings

    These are some ideas for salad recipes for light lunch or fancy dinner. It is so easy to make your own homemade salad dressing, and I promise you it is worth your time, people ask me for these recipes all the time when I entertain at home.

    Green Goddess Dressing bursts with fresh herbs and flavor. Serve this famous great dressing on a delicious salad, as a crudite veggie dip, with shrimp, or toss it into hot pasta.

    Serve this ice-cold Wedge Salad with a super creamy Avocado Dressing. Get my trick for chilling the iceberg wedge, you will love it with a classic salad dressing drizzled on top, like my recipe for Buttermilk Ranch!

    Mix up some tangy Meyer Lemon Vinaigrette, a homemade dressing made in minutes with Meyer lemons that is absolutely delightful.

    With just 5 simple ingredients, this Blue Cheese Dressing is an easy recipe made in minutes. It also works great as a dip for Cauliflower Buffalo Wings or a chip dip.

    • A small glass bowl with green goddess dressing and white plates of mixed salad greens on a table.
      Green Goddess Dressing Recipe
    • Wedge salad with avocado dressing drizzled on top with pistachios on a black slate board.
      Iceberg Wedge Salad
    • A vintage silver spoon resting on an open jar of vinaigrette.
      Meyer Lemon Citrus Vinaigrette
    • A ceramic plate with sliced apples, chicken on lettuce with homemade blue cheese dressing.
      Blue Cheese Dressing

    Did you love this recipe? We would love to hear from you! If you make this recipe and love it, give it a 5-star rating ⭐⭐⭐⭐⭐ with a comment. THANK YOU!! Follow Delicious Table with my free newsletter and share this recipe with your friends on Facebook, Pinterest, and Instagram.

    A mason jar with lemon vinaigrette inside on a messy cutting board.
    Print

    Parmesan Lemon Vinaigrette Recipe

    Put this Parmesan Lemon Vinaigrette recipe together in minutes with real lemon juice, Dijon mustard, and parmesan cheese. Shake in a jar, whisk in a bowl, either way, it elevates any green salad into something special.
    Course Salads & Dressing
    Cuisine American
    Keyword lemon vinaigrette, lemon vinaigrette recipe, mustard vinaigrette recipe, vinaigrette dressing, vinaigrette recipe
    Prep Time 10 minutes minutes
    Total Time 10 minutes minutes
    Servings 16
    Calories 142kcal
    Author Lisa Hatfield

    Equipment

    • Classic Citrus Zester
    • Lemon/Lime Juicer
    • Mason Ball Pint Jar

    Ingredients

    • 1 whole lemon zest (zest first!)
    • 2 tablespoons lemon juice (regular or Meyer lemons)
    • 1 cup good olive oil
    • 2 tablespoons white wine vinegar
    • 2 tablespoons shallot (peeled and minced)
    • 1 tablespoon Dijon mustard
    • ½ cup parmesan cheese grated 
    • ½ teaspoon sea salt
    • ½ teaspoon cracked black pepper
    US Customary - Metric

    Instructions

    • Finely mince the shallot and grate the parmesan cheese.
    • In a clean mason jar with a fitted lid, add all the ingredients; olive oil, white wine vinegar, shallot, Dijon mustard, parmesan cheese, sea salt, pepper, lemon zest and lemon juice. Optional, add one clove of crushed garlic. Place the lid on tight, and shake for about a minute. That's it!
    • Or you can whisk this lemon vinaigrette in a small bowl or a glass mixing cup.
    • Re-shake jar with lid on to recombine, drizzle over salad. Store in an airtight container in the fridge and use within 2 weeks.

    Video

    Notes

    Mixing

    You can use a blender, or Vitamix, and blend away or a whisk and bowl. But a mason jar is so fast and easy, and stores perfectly in the fridge!
    The olive oil will firm up in the fridge, just pull the dressing out about 30 minutes before using, and give it a good whisk or shake in the jar.

    Leftover Vinaigrette Ideas

    • It's divine on a salad full of fresh tomatoes.
    • Use as a chicken marinade, and roast or grill.
    • Toss it in a feta salad made with bell peppers.
    • It pairs perfectly with pasta salad, just toss it on.
    • Give it a try drizzled on crusty fresh bread.

    Vinegar

    You can substitute apple cider or red wine vinegar for white wine vinegar. White wine vinegar is milder than regular distilled vinegar and better for dressings. 


    Nutrition

    Calories: 142kcal | Protein: 1g | Fat: 15g | Saturated Fat: 2g | Cholesterol: 2mg | Sodium: 142mg | Potassium: 8mg | Vitamin A: 25IU | Vitamin C: 1.6mg | Calcium: 39mg | Iron: 0.1mg

    Refrigerator Dill Pickles

    [heart_this] · Jul 11, 2022 · 26 Comments

    A person pulling a dill pickle chip out of a clear glass canning jar of homemade pickles.

    Last Updated November 7th, 2023 at 10:22 am by Lisa

    Refrigerator Dill Pickles with jalapenos, garlic, and fresh dill require no canning and make perfectly crisp, crunchy pickles. Pickling cucumbers at home is easy, anyone can do it. I promise you will enjoy the process, it is quite relaxing.

    Make spears, chips, and halves, and wait just one day to let the flavors build. Once you can't wait any longer, crack open a jar...

    Refrigerator Dill Pickle Recipe

    Refrigerator pickles are made without CANNING! While they don't last as long as canned and processed ones that are shelf stable, they are still just as crisp, crunchy, and delicious.

    Jar Ingredients

    • pickling cucumbers
    • fresh jalapeno peppers sliced
    • garlic cloves
    • fresh dill sprigs (or 2 tablespoons dry dill seeds)

    Note: 1 - 16 oz. package (1 pound) of mini Perian cucumbers will typically have 6 cucumbers.

    Pickling Liquid

    • distilled white vinegar
    • water
    • whole black peppercorns (or mixed color peppercorns)
    • coriander seeds
    • mustard seeds
    • kosher sea salt

    Note: You will have pickling liquid left over depending on how you pack your jars with cucumbers, jalapenos, and dill.

    PRO TIP: To refresh wilted herbs like dill, simply cut off ½ inch of the bottom stem, and submerge it in a bowl of ice water for 30 minutes. You will be amazed as it springs back to life! Discard any black or spoiled bits of dill, and use fresh pieces in your recipe.

    Prepare Cucumbers And Jalapenos

    1. Wash cucumbers and jalapenos in water with a splash of vinegar.
    2. Slice jalapeno into ¼" slices and set aside. Peel the garlic cloves, and slightly smash or slice them to release more flavor.
    3. Lay cucumbers on a clean cutting board, and slice cucumbers into spears, halves, or ½" round chips. You can even cut the chips using a crinkle cutter so they look like commercial pickles! I love mine.
    4. Optional: If you have time, let the cut cucumbers rest with a sprinkle of salt on them for up to 3 hours so they are crisp and the flavor is better. Even better if you leave them overnight salted in the fridge, but that is totally optional for 10-12 hours.

    Top Dill Pickle Recipe Tips

    • The printable recipe card below is adjustable so you can make 1-4 quart jars of quick pickles. Click the button to scale it for your needs.
    • You will probably have some extra pickling liquid left over, if you are short, top off with some water and vinegar.
    • Watch the video inside the recipe card below to watch me make these delicious pickles!
    • This dill pickle recipe is ready to eat the next day and will last about a month in the fridge. Give extra jars to a friend, or neighbor! Serve them at family cookouts and picnics to top burgers, sandwiches, and sliders.
    • Each Mason glass quart jar holds 32 ounces. Clean and sterilize your jars in the dishwasher or hot water and soap.

    Make Pickling Liquid

    1. In a large pot, bring vinegar and 6 cups of water to a boil.
    2. Add 2 tablespoons salt, mustard seeds, coriander seeds, and whole peppercorns. You can use a mix of colored peppercorns, I mixed black and rose peppercorns.
    3. Bring pickling liquid to a boil, stirring occasionally, then reduce to a simmer for 5 minutes.
    4. Remove from heat and cool till lukewarm. You don't want super hot brine in a quick pickle, so they stay crunchy!

    Fill The Mason Jars

    1. In each jar, place 2-3 peeled garlic cloves, 2 fresh dill pieces (or dry dill seeds), and 5-8 jalapeno slices.
    2. Divide the cucumbers between the jars, they should fit in fairly tight.
    3. Pour the lukewarm brine into jars and cover the cucumbers completely, fill within ½" of the jar rim. Use a clean funnel and ladle it into the jars.
    4. Let jars rest on the counter uncovered for an hour.
    5. Put lids and rings on jars and keep the pickles in the refrigerator.
    6. Wait 24 hours before eating for the best flavor.
    7. Store in the fridge for up to 1 month.

    5 stars
    "OMG Great crunchy pickles. My husband & I absolutely luv them. About to make more." Iris

    "These pickles are very good! Easy to make, just the right amount of salt. Next time, I will add more Jalapeno for a bit more heat!" Elena

    "These are great! My family loves them!!" Monica

    "Crunchy and delicious!" Beth

    "Made these with dill seeds because that's what I had on hand. And processed them for canning. They are delicious. Hubby loves them." Melissa

    Several jars of homemade pickles on a white table.
    Two glass mason jars filled with dill pickle ingredients ready to add the pickling liquid.

    Ways To Use Refrigerator Dill Pickles

    There are so many ways to enjoy homemade pickles. Put pickle chips on these Cheeseburgers, they are the best burger ever! Eat them as a clean healthy snack, pack them into Pressed Picnic Sandwiches, and chop them up to top Grilled Hot Dogs, or load them onto Cuban Pulled Pork Sliders or Slow Cooker Pulled Pork Sandwiches with some tangy and clean Vinegar Cole Slaw.

    My Kitchen Garden

    On the far right, you can see the pickling cucumber vine creeping up the trellis in early spring.

    You can easily grow pickling cucumbers or buy them in stores.

    And here is a pickling cucumber just before I picked it...

    A large cucumber growing on a vine in a garden resting on a black iron trellis.

    Refrigerator Dill Pickles FAQ

    What are Quick Pickles?

    Refrigerator pickles are also known as Quick Pickles.  They are a quick easy way to preserve vegetables short-term without canning and processing. The veggies are packed with a pickling liquid of vinegar, water, and salt (sometimes sugar), mixed with spices, stored in the refrigerator, and used within a month.

    What kind of cucumbers are best for making pickles?

    Pickling cucumbers are the best for recipes or use regular garden cucumbers. Do not use waxed cucumbers sold in supermarkets that are sold as salad cucumbers, the vinegar and salt will not penetrate them properly.

    Kirby cucumbers or Persian cucumbers are great varieties for quick refrigerator pickles.

    Also, avoid using thin-skinned English cucumbers, they don't hold up well to pickling, and can make softer pickles.

    How long do refrigerator pickles last?


    You can eat your refrigerator pickles after about 1 day. They will keep in the refrigerator for 1 month and will start to lose their crunch after 30 days.

    Why are my pickles soft?


    Two possible reasons...
    1. Failure to cut off the blossom end of the cucumber is important, as it has enzymes that make the cucumbers go soft. The stem end is indented and smooth, the blossom end is rough, simply trim it off.

    2. Not salting the cut cucumbers to pull the excess water, and let them rest for at least an hour.

    Dried dill seed vs. fresh dill?


    You can use dry dill seed instead of fresh dill, 1 teaspoon dried dill seed equals a tablespoon of fresh dill.

    More Easy Quick Pickle Recipes

    Try one of these recipes that don't need to be processed and no canning! Mexican Pickled Red Onions are an easy beginner pickle that takes 10 minutes to prepare and they're ready to eat in 30 minutes but taste even better after a couple of days. Pickled Green Beans (aka "Dilly Beans") jazz up relish trays, pop into Bloody Marys or toss pickled beans into salads.

    Zucchini Pickles are ready in 30 minutes. These are refrigerator pickles (aka quick pickles) and last 30 days refrigerated. The pickling brine gives these a zippy flavor and crisp texture, and what a great way to use up the summer squash that grows so fast in our gardens.

    Make a jar of these old-fashioned Deli-Style Pickled Eggs using jalapenos, garlic, and Pickling Spice. A healthy protein-packed snack ready in 7 days right in your kitchen. These Chili Pepper Pickled Eggs get their bright cheery color from yellow chili peppers, turmeric, and pickling spice. 

    You must use the category name, not a URL, in the category field.

    Did you love this recipe? We would love to hear from you! If you make this recipe and love it, give it a 5-star rating ⭐⭐⭐⭐⭐ with a comment. THANK YOU!! Follow Delicious Table with my free newsletter and share this recipe with your friends on Facebook, Pinterest, and Instagram.

    A person pulling a dill pickle chip out of a clear glass canning jar of homemade pickles.
    Print

    Refrigerator Dill Pickles Recipe (No-Canning)

    Refrigerator Dill Pickles with jalapenos, garlic, and fresh dill require no canning and make perfectly crisp, crunchy pickles. Pickling cucumbers at home is easy, anyone can do it. I promise you will enjoy the process, it is quite relaxing. Make spears, chips, and halves, and wait just one day to let the flavors build. Once you can't wait any longer, crack open a jar.
    Course Sauces, Marinades, & Condiments
    Cuisine American
    Keyword dill pickle recipe, quick dill refrigerator pickles, quick pickles, refrigerator dill pickle recipe, refrigerator pickles
    Prep Time 20 minutes minutes
    Cook Time 10 minutes minutes
    salt cucumbers 3 hours hours
    Total Time 3 hours hours 30 minutes minutes
    Servings 16 people
    Calories 35kcal
    Author Lisa Hatfield

    Equipment

    • 4- 1 Quart Mason jars, lids, rings
    • Epicurean Non-Slip Cutting Board
    • Chef Knife
    • Crinkle-Cut Knife

    Ingredients

    Jar Ingredients

    • 3-4 pounds pickling cucumbers
    • 1 tablespoon sea salt to draw moisture out of cucumbers
    • 4 fresh jalapenos sliced
    • 8 peeled cloves garlic
    • 8 pieces fresh dill or use 2 tablepsoons dry dill seeds

    Pickling Liquid

    • 6 cups distilled white vinegar
    • 6 cups water
    • 2 tablespoons whole mixed color peppercorns or black peppercorns
    • 1 tablespoon coriander seeds
    • 1 tablespoon mustard seeds
    • 1 tablespoons kosher sea salt

    Instructions

    sterilize your quart jars

    • Each quart holds 32 ounces. Clean and sterilize your glass jars in the dishwasher or wash with hot water and soap.

    prep cucumbers and jalapenos

    • Wash cucumbers and jalapenos in water with a splash of vinegar.
    • Slice jalapeno into ¼" slices and set aside. Peel the garlic cloves, and slightly smash or slice it to release more flavor.
    • Lay cucumbers on a clean cutting board, slice cucumbers into spears, halves, or ½" round chips. You can even cut the chips using a crinkle cutter so they look like commercial pickles.
    • Optional: If you have time, let the cut cucumbers rest with salt on them for up to 3 hours so they are crisp and the flavor is better. Even better if you leave them overnight salted in the fridge, but that is totally optional for 10-12 hours.

    Make Pickling Liquid

    • In a large pot, bring 6 cups of vinegar and 6 cups of water to a boil.
    • Add salt, mustard seed, coriander seeds, and whole peppercorns.
    • Bring pickling liquid to a quick boil, stirring occasionally, then reduce to a low simmer for 5 minutes.
    • Remove from heat and cool till lukewarm.

    Fill Mason Jars

    • In each jar, place 2 peeled garlic cloves, 2 fresh dill pieces (or dry dill seeds), and 5-8 jalapeno slices.
    • Divide the cucumbers between the jars, they should fit in tight.
    • Pour the lukewarm brine into jars and cover the cucumbers completely, fill within ½" of jar rim. Use a clean funnel and ladle it into the jars. Add any extra spices too!
    • Let jars rest on the counter uncovered for an hour.
    • Put lids and rings on jars and keep the pickles chilled in the refrigerator.
    • Wait 24 hours before eating the pickles for best flavor.
    • Store in the fridge for up to 1 month.

    Video

    Notes

    cucumber cuts

    Slice cucumbers into spears, halves, or ½" round chips. You can even cut the chips using a crinkle cutter so they look like commercial pickles. 

    wait time

    Wait 24 hours before eating the pickles for the best flavor. Store in the fridge for up to a month. 

    quart jars

    Each quart holds 32 ounces. Clean and sterilize your glass jars in the dishwasher (or a pot of boiling water to sterilize for 10 minutes), and lids and rings in a pan of simmering water on the stove.

    best cucumber varieties

    Pickling cucumbers are the best for recipes or use regular garden cucumbers. Do not use waxed cucumbers sold in supermarkets that are sold as salad cucumbers, the vinegar and salt will not penetrate them properly.
    Kirby cucumbers or Persian cucumbers are great varieties for quick refrigerator pickles.
    Also, avoid using thin-skinned English cucumbers, they don't hold up well to pickling, and can make softer pickles.

    dill

    You can use dry dill seed instead of fresh dill, 1 teaspoon of dried dill seed equals a tablespoon of fresh dill.
    So for this recipe, use 2 tablespoons of dill seeds.

    Nutrition

    Serving: 0g | Calories: 35kcal | Carbohydrates: 3g | Protein: 0g | Fat: 0g | Saturated Fat: 0g | Cholesterol: 0mg | Sodium: 1312mg | Potassium: 159mg | Fiber: 1g | Sugar: 1g | Vitamin A: 145IU | Vitamin C: 7.8mg | Calcium: 31mg | Iron: 0.5mg

    Cobb Salad

    [heart_this] · Jul 11, 2022 · 1 Comment

    A white square plate filled with colorful Cobb Salad made with chicken, eggs, avocados, tomatoes, and bacon.

    Last Updated May 21st, 2023 at 11:55 pm by Lisa

    The original Cobb Salad became famous in Los Angeles at the Brown Derby restaurant served with red wine vinaigrette French dressing loaded with chopped tomato, cubed chicken, crumbled bacon, diced avocado, chopped eggs, and topped with Roquefort cheese.

    Now you can make this famous iconic salad at home exactly how it was made back in the day in the golden age of Hollywood, California...

    How To Make Cobb Salad

    Cobb Salad Dressing (Red Wine Vinaigrette)

    The Brown Derby dressing for this salad is a vinaigrette recipe, similar to an old-fashioned French dressing.

    • ¼ cup water
    • ¼ cup red wine vinegar
    • ¼ teaspoon sugar
    • 1 ½ teaspoon fresh lemon juice
    • ½ teaspoon kosher salt
    • ½ teaspoon black pepper
    • ½ teaspoon Worcestershire sauce
    • ¾ teaspoon dry English mustard
    • ½ clove garlic minced (small clove garlic)
    • ¼ cup olive oil
    • ¾ cup vegetable oil

    Cobb Salad Ingredients

    • ½ head iceberg lettuce
    • ½ bunch watercress
    • 1 small bunch curly endive
    • ½ head Romaine lettuce
    • 2 tablespoons fresh chives minced
    • 2 medium ripe tomatoes diced (cherry tomatoes are fine)
    • 1 chicken breast boneless, cooked, diced, skinless
    • 6 strips of bacon cooked and diced
    • 1 avocado diced
    • 3 hard-boiled large eggs diced
    • ½ cup Roquefor cheese crumbled
    All the ingredients on a table listed to make Cobb Salad including lettuce, bacon and blue cheese.

    Make The Salad Components

    The first thing to grab is a large platter, oval, square, rectangle all work, or a shallow wide large pasta bowl. Another option is you can make the salad right in a large salad bowl and use serving bowls.

    1. Mix French Dressing: In a small bowl whisk water, vinegar, sugar, lemon juice, salt, pepper, Worcestershire, dry mustard, garlic, olive oil, and vegetable oil. Store in the fridge chilled makes about 1 ½ cups. Shake or stir well before using. An easy way to serve it is in a cruet glass container.
    2. Roast Chicken Breasts: Line a large sheet pan with parchment paper for easy cleanup. Place 4 split chicken breasts on a sheet pan, and season well with salt and pepper on both sides. Heat oven to 400 degrees, and roast chicken breast for 30-35 minutes until cooked to 165 internal temperature. Let chicken rest until cool enough to handle, remove skin and bones (freeze for chicken stock), and cut into large diced pieces. Alternatively, you can poach or roast skinless chicken breasts. You want to cube cold breast of chicken for the salad.
    3. Make Hardboiled Eggs: And roughly chop. The method I like the best is to "steam boil" eggs. Add water to a large pan with a lid, bring the water to a boil, and set a steamer basket in the water. Carefully add eggs to the steamer basket, cover, and let steam at high heat for 12 minutes. Remove eggs to ice bath for 15 minutes, roll crack and the peels on a board, they slip RIGHT OFF! I love making eggs this way.
    4. Make Crumbled Bacon: Cook strips of bacon in a skillet over medium heat until crisp, about 8 minutes. Drain on a paper towel-lined plate. Or buy precooked bacon and cook it in the microwave. Chop bacon on a cutting board into small ½" pieces.
    5. Prep Veggies: Finely mince chives, chop tomatoes, and remove the watery seeds, they don't have any flavor anyway! Chop half of an iceberg head of lettuce, half a head Romaine, the endive lettuce, and a bunch of watercress using a knife on a cutting board. Slice the avocado into cubes, and hold the avocado half in a towel when cutting.
    Diced Chicken Recipes
    Keep shredded, sliced, cubed, or finely diced chicken ready so you can whip out easy chicken dinner recipes in a rush saving time and money. No more stressing out about last-minute weeknight dinners while the entire family is hungry. Oven-baked or roasting is so easy to do at home and elevates all your recipes into deliciousness.
    GET THE RECIPE PIN IT
    Cutting boneless chicken breasts into diced cubes of meat to use in recipes.
    Showing how to make Cobb Salad with dressing, chopped eggs, cubed avocado, crumbled bacon and chopped lettuce.

    Take a look at my recipe to make Hard-Boiled Eggs Perfectly every time, and the egg shells slip right off...

    Steamed Hard Boiled Eggs Recipe
    Steamed hard boiled eggs cook perfectly every time with no green ring. So easy to peel, the eggshells miraculously slip right off in minutes!
    GET THE RECIPE PIN IT
    6 perfectly hard boiled eggs with a cracked half of an egg shelf on top.

    And take a look at all my Diced Chicken Recipes in case you have extra chicken leftover. Roasting chicken is an easy way to get the most flavor and has a fast cleanup.

    Diced Chicken Recipes
    Keep shredded, sliced, cubed, or finely diced chicken ready so you can whip out easy chicken dinner recipes in a rush saving time and money. No more stressing out about last-minute weeknight dinners while the entire family is hungry. Oven-baked or roasting is so easy to do at home and elevates all your recipes into deliciousness.
    GET THE RECIPE PIN IT
    Cutting boneless chicken breasts into diced cubes of meat to use in recipes.

    Assemble The Cobb Salad

    1. Mix together the chopped iceberg, romaine, endive, and watercress, and place into the bottom of a large square or rectangle dish or individual salad bowls. Sprinkle some finely diced chives on top of the salad mix.
    2. Arrange Toppings side-by-side in separate lines across the green salad in wide strips of diced tomatoes, cubed chicken, small pieces of crumbled bacon, diced avocado, and chopped eggs.
    3. Sprinkle all over with crumbled Roquefort cheese and more chives for the garnishes.
    4. Pour dressing at serving time.

    Special French Dressing

    This dressing will settle, and that's ok. Just shake the container and pour, and it's all good! A true French vinaigrette will blend due to the proportion of oil and acid like vinegar, lemon juice, and other ingredients that help it emulsify and bind the dressing together such as Dijon mustard.

    This recipe was whipped together in a hurry as the story goes, and not designed to mix into a perfect dressing like you buy in the store, and those are full of all kinds of extra things you really don't want to eat.

    So I recommend either whisking it in a bowl, shaking it in a jar, or putting it into a glass salad mixing cruet container similar to this one.

    Authentic Cobb Salad Tips

    • Authentic versions of Cobb salad are prepared using four varieties of greens: iceberg lettuce, watercress, endive, and Romaine lettuce.
    • Prepare all your ingredients and chill them; boiled eggs, diced chicken, and tomatoes.
    • Make the bacon close to serving so it stays crisp. Or make it and crumble it into a small airtight container in the fridge.
    • Cut the avocado last, as it discolors fast and you want it to look pretty on your salad.
    • Watercress was available at my grocery store, but if you could leave it out or substitute arugula, or small bunch of chicory leaves also called Frisee lettuce.
    • For the chicken, you can poach, roast, broil, grill, or bake the chicken or even use a rotisserie chicken from the store. You can also sub cubed cooked turkey breast.
    • Be sure to whisk or shake the dressing if stored in a container before pouring it onto the salad, it will separate a bit and that's ok.
    • Cook the bacon in a large skillet over medium heat until crisp, 6-8 minutes, drain on a paper-towel-lined plate, or buy precooked bacon, and it's ready in minutes in the microwave.
    • My parents, our family, and many friends loved the Brown Derby. I was born in Los Angeles and grew up eating this salad, and LOVE it the original traditional way. If you want to add some of the "new" twists on this salad that is great to make your own dressing or use Ranch Dressing. I have seen recipes where people add their own thing from turkey breast, grated cheddar cheese, to red onions, to this salad. But that is NOT the original recipe from back in the day.

    The Brown Derby Cobb Salad is so beloved California Food all over the United States. The original recipe was printed in the LA Times. My Mom clipped it out and made it often for our family on hot summer days in Southern California. We had it out by our pool, at the beach house, on dessert vacations and it always hit the spot...

    Brown Derby Cobb Salad History FAQ

    Where did Cobb Salad get its name?


    One fact we know is that the first cobb salad was named after Robert Howard Cobb, the Hollywood Brown Derby restaurant's owner. Many stories exist about how the famous salad was invented and became the signature dish.

    What's in Cobb Salad?


    The Cobb Salad became iconic with Brown Derby customers and was made from 4 lettuces (romaine, endive, watercress, and iceberg), hard-boiled eggs, blue cheese, tomatoes, bacon, chives, avocado, and Roquefort cheese. The Cobb Salad dressing is a French Dressing similar to a vinaigrette.

    Where does Cobb Salad come from?


    The famous Cobb Salad's official story has many legends. But most agree it came out of the golden age of Hollywood and most agree that it was a late-night snack quickly tossed together with ingredients found in the Brown Derby restaurant’s cooler in Hollywood, California in 1937.

    Who first made the Cobb Salad?

    Robert Howard "Bob" Cobb: Bob quickly tossed the ingredients together he had on hand for his friend Sid Grauman the theater magnate and mogul of Grauman’s Chinese Theatre. Mr. Grauman was so impressed that he asked for a “Cobb Salad” the next day at the restaurant, and a classic overnight sensation was born.

    The lettuce, hard-boiled eggs, cheese, tomatoes, chives, and avocado were chopped fine, because Grauman had just had dental work done, and couldn't chew well.

    Chef Paul J Posti: Stories vary about whether the salad was invented by Robert Cobb or by his chef, Paul J. Posti. The legend is that Cobb had not eaten until near midnight, and so the Chef mixed together leftovers he found in the kitchen, along with some bacon cooked by the line cook, and tossed it with their French dressing.

    Chef Robert Kreis: Another story credits the Brown Derby restaurant’s Executive Chef Robert Kreis for creating the salad in 1929 for the grand opening of the Hollywood location and named it in honor of the owner Bob Cobb. 

    More Salad Recipes

    Wedge Salad with Pistachio-Avocado Dressing is super-chilled and a refreshing cookout side with hot grilled steaks, chicken, or shish kabobs. It works great for lunch with hot soup or a sandwich.

    A 7 Layer Salad recipe is also called an overnight salad because it can hold without wilting overnight. This is a favorite salad and is famous for its colorful charm to serve large groups for picnics, potlucks, BBQ cookouts, or for Mother's Day.

    Broccoli Salad with crisp green apples, crunchy broccoli, and grapes create this summer salad with a creamy 3-ingredient orange dressing.

    Whip up this easy Taco Salad recipe loaded with all the best Mexican food toppings and Catalina dressing. Plus get my two secret ingredients for the best taco meat!

    You must use the category name, not a URL, in the category field.

    Did you love this recipe? We would love to hear from you! If you make this recipe and love it, give it a 5-star rating ⭐⭐⭐⭐⭐ with a comment. THANK YOU!! Follow Delicious Table with my free newsletter and share this recipe with your friends on Facebook, Pinterest, and Instagram.

    A white square plate filled with colorful Cobb Salad made with chicken, eggs, avocados, tomatoes, and bacon.
    Print

    Cobb Salad Recipe

    The original Cobb Salad became famous in Los Angeles at the Brown Derby restaurant served with French Dressing loaded with chopped tomato, cubed chicken, crumbled bacon, diced avocado, chopped eggs, and topped with Roquefort cheese. Now you can make this famous iconic salad at home exactly how it was made back in the day in the golden age of Hollywood, California.
    Course Salads & Dressing
    Cuisine American
    Keyword Brown Derby Cobb Salad, Cobb Salad, Special French Dressing
    Prep Time 30 minutes minutes
    Cook Time 30 minutes minutes
    Total Time 1 hour hour 30 minutes minutes
    Servings 8
    Calories 488kcal
    Author Lisa Hatfield

    Equipment

    • Chef Knife
    • Epicurean Non-Slip Cutting Board
    • Salad Dressing Cruet With Stopper

    Ingredients

    Special French Dressing

    • ¼ cup water
    • ¼ cup red wine vinegar
    • ¼ teaspoon sugar
    • 1 ½ teaspoon lemon juice
    • ½ teaspoon salt
    • ½ teaspoon pepper
    • ½ teaspoon Worcestershire sauce
    • ¾ teaspoon dry mustard
    • ½ clove garlic minced
    • ¼ cup olive oil
    • ¾ cup vegetable oil

    Cobb Salad

    • ½ head iceberg lettuce
    • ½ bunch watercress
    • 1 small bunch curly endive
    • ½ head Romaine
    • 2 tablespoons chives minced
    • 2 medium tomatoes diced
    • 1 chicken breast boneless, cooked, diced, skinless
    • 6 strips bacon cooked and diced
    • 1 avocado diced
    • 3 hard boiled eggs diced
    • ½ cup Roquefor cheese crumbled

    Instructions

    • Mix French Dressing: In a small bowl whisk water, vinegar, sugar, lemon juice, salt, pepper, Worcestershire, dry mustard, garlic, olive oil, and vegetable oil. Store in the fridge chilled, makes about 1 ½ cups. Shake or stir well before using.
    • Roast Split Chicken Breasts (these have bones and that adds flavor!): Line a large sheet pan with parchment paper for easy cleanup. Place 4 split chicken breasts on the sheet pan, season well with salt and pepper on both sides. Heat oven to 400 degrees, and roast chicken breast 30-35 minutes until cooked to 165 internal temperature. Let chicken rest until cool enough to handle, remove skin and bones (freeze for chicken stock), and cut into large diced pieces. Alternatively, you can poach or roast skinless chicken breasts.
    • Make Hardboiled Eggs: And roughly chop. The method I like the best is to "steam boil" eggs. Add water to a large pan with a lid, bring the water to a boil, and set a steamer basket in the water. Carefully add eggs on steamer basket, cover and let steam at high heat for 12 minutes. Remove eggs to ice bath for 15 minutes, roll crack and the peels on a board, they slip RIGHT OFF! I love making eggs this way.
    • Make Crumbled Bacon: Cook strips of bacon in a skillet over medium heat until crisp, about 8 minutes. Drain on a paper towel-lined plate. Or buy precooked bacon and cook it in the microwave. Chop bacon on a cutting board into small ½" pieces.
    • Prep Veggies: Finely mince chives, and chop tomatoes, and remove the watery seeds, they don't have any flavor anyway!
      Chop iceberg, romaine, endive lettuce, and watercress using a knife on a cutting board.
      Slice avocado into cubes, hold the avocado half in a towel when cutting.
    • Assemble Cobb Salad
      Mix together the chopped iceberg, romaine, endive, and watercress, place into the bottom of a large square or rectangle dish or individual salad bowls. Sprinkle finely diced chives on top of the salad mix.
    • Arrange Toppings in long side-by-side strips across the green salad place; diced tomatoes, diced chicken, crumbled bacon, diced avocado, and chopped eggs.
    • Sprinkle all over with crumbled Roquefort cheese and more chives.
    • Pour dressing all over at serving time.

    Video

    Notes

    Cobb Salad Top Tips

    • Prepare all your ingredients and chill them; boiled eggs, diced chicken, and tomatoes.
    • Make the bacon close to serving so it stays crisp. Or make it and crumble it into a small airtight container in the fridge.
    • Cut the avocado last, as discolors fast so it looks pretty on your salad.
    • Watercress was available at my grocery store, but if you could leave it out or substitute arugula or chicory (Frisee lettuce).
    • For the chicken, you can poach, roast, broil, grill, or bake the chicken or even use a rotisserie chicken from the store. You can also sub cubed cooked turkey.
    • Be sure to whisk or shake the dressing if stored in a container before pouring it onto the salad, it will separate a bit and that's ok.
    • Cook the bacon in a large skillet over medium heat until crisp, 6-8 minutes, drain on a paper-towel-lined plate, or buy precooked bacon, and it's ready in minutes in the microwave.

    Nutrition

    Calories: 488kcal | Carbohydrates: 8g | Protein: 16g | Fat: 45g | Saturated Fat: 24g | Polyunsaturated Fat: 3g | Monounsaturated Fat: 15g | Trans Fat: 1g | Cholesterol: 112mg | Sodium: 606mg | Potassium: 650mg | Fiber: 4g | Sugar: 3g | Vitamin A: 5835IU | Vitamin C: 18mg | Calcium: 168mg | Iron: 2mg

    Grilled Lamb Chops

    [heart_this] · Jul 9, 2022 · 2 Comments

    A white platter filled with grilled lamb chops topped with mint pesto and grilled peaches.

    Last Updated June 15th, 2023 at 09:40 pm by Lisa

    Grilled lamb chops seasoned with a mint salt rub, topped with parmesan pesto, and paired with juicy summertime peaches.

    Years ago, a professional Chef taught a dinner class I attended on how to cut a rack of lamb into chops, season, and then grill them to the correct temperature while holding in the juices of the meat.

    Get all the pro chef tips for grilling lamb lollipops at your next cookout party scented with the elegant sublime taste of peaches, parmesan, and mint...

    How To Make The Best Grilled Lamb Chops

    Take the lamb meat out of the fridge, and let them rest while you work on preparing the peaches, the mint salt rub, and parmesan pesto.

    • 8 lamb chops - French trimmed (see below for detailed pro tips to cut a rack into chops!)
    • 4 whole fresh peaches halved/pits removed
    • 1 bunch of fresh mint leaves

    seasoned mint salt rub

    • ½ cup kosher sea salt
    • ⅛ cup ground black pepper
    • 15 fresh mint leaves
    • 2 lemons zested

    grilled peaches

    • 8 peach halves
    • ½ teaspoon sea salt
    • ½ teaspoon fresh cracked pepper
    • 2 tablespoons extra virgin olive oil
    1. Make the seasoned mint salt rub; mix salt, black pepper, mint leaves, and lemon zest in a mini food processor or chop finely on board.
    2. Rub each chop generously with the seasoned mint salt rub on both sides, and set on a platter.
    3. To season the peaches, wash and cut peaches in half, remove pits, and place in a bowl. Sprinkle with salt, pepper, and a drizzle of olive oil, and add to the platter.

    make the parmesan mint pesto

    This will be a condiment on top of your grilled lamb chops, it is amazing!

    • 20 leaves fresh mint
    • 2 cloves garlic
    • ¼ cup pine nuts
    • ¼ cup parmesan cheese grated
    • ¼ teaspoon sea salt
    • ¼ cup olive oil
    1. In a mini food processor blend or finely chop on a cutting board; the fresh mint, garlic cloves, pine nuts, parmesan, and a pinch of salt. You can also swap in fresh rosemary, parsley, rosemary or thyme for mint, but the mint pairs so well!
    2. Slowly add the olive oil to the moving food processor, or mix in a small bowl if done by hand.  
    3. It should be thick and chunky like a paste, not drippy with olive oil. Set aside, this will top your grilled chops just before serving.

    grill the lamb chops and peaches

    Preheat your grill/gas grill to 400 degrees.

    1. Place the lamb and peaches (cut side down) on the hot grill, and close the lid for 4-5 minutes.
    2. Carefully open the grill lid, and flip them over. Sear for another 4-5 minutes until just golden brown.
    3. Check the peaches, and remove them from the grill once they have nice grill marks on a platter. 
    4. Arrange the grilled meat and peaches on a platter with parmesan mint pesto over each lamb lollypop.
    5. A serving size for one adult is 2 individual chops and goes so well with cool drinks and a salad.
    A charcoal grill with lamb chops and peaches grilling over hot coals.
    A graphic showing lamb chops and peaches being grilled on a charcoal grill.

    How To Buy Lamb Chops

    When you head out to the grocery store or butcher shop, buy a good quality rack of lamb, preferably a wet-aged French trimmed rack. Usually, rib chops are sold partially trimmed. You will have to remove some of the white fat, the silver skin, and clean them up a tiny bit.

    PRO TIP: You can ask the butcher to trim your cut of meat at the store and slice it into thick chops for you.

    Slicing A Rack Of Lamb Into Chops At Home

    A few years ago I was invited to attend a cooking class for professionals, and we did a deep dive all about lamb. I can still remember the delicious flavor of lunch that day and never knew tender chops could be so delicious with a unique smoky flavor from the grill! The chef showed us step-by-step how to break down racks into chops...

    1. To prep racks yourself, carefully scrape any meat or fat off the bones with a small sharp pairing knife.
    2. Cut equally in between the rib bones to keep them even, and cut out the extra fat.
    3. Slice straight through the chops, and then twist that section to finish cutting off a single chop.
    4. Remove any extra end bones if necessary to leave one bone per chop.

    Well, that wasn't too hard, was it? These are photos from our class as we broke down racks into chops with the Chef coaching us...

    Grilled Lamb FAQ

    What is the difference between Lamb Rib Chops and Loin Chops?


    Lamb Rib Chops:
    French trimmed lamb chops, are elegant, and the meat is scraped from the ends of the rib bones. 

    Cut from the front half of the lamb rib section. These are a tender cut of lamb, with nice marbling.

    You can buy a full rack of ribs, and cut them into chops.

    One option is to cut them into single or double chops. Lamb Rib chops are sometimes called "Lollypops".

    Lamb Loin Chops:

    Are a rounder-shaped lamb chop cut of delicate tenderloin, divided by a piece of bone.

    They are cut from behind the rib chops and don't have the rib bone.

    Lamb Loin chops don't have elegant rib bones or lollypop shapes like French-trimmed lamb rib chops.


    What is a French Rack of Lamb?

    A rack of lamb with most of the fat and several inches of rib bone exposed and cleaned.

    Often, you can find racks of lamb already frenched at the supermarket, or you can request them from the butcher.

    What temperature for Grilled Lamb Chops?


    According to the American lamb board, grill each lamb chop for 4-5 minutes per side at 400 degrees.

    Check internal temperature with a good quality meat thermometer or instant probe thermometer. Here are suggested cooking times for different a degree of doneness.

    135 degrees for medium-rare
    150 degrees for medium
    160 degrees for well-done

    Once grilled, lamb meat temperature will rise as it rests by about 10 degrees to its final temperature.

    What To Serve With Grilled Lamb Chops?

    For a special meal like Valentine's Day, hosting dinner guests, or special occasion easy dinners at home, these are the best side dishes to make for tender lamb chops.

    The grilled peaches that I made with this recipe go perfectly and are so easy to throw on the grill. You could also make grilled watermelon skewers, grilled butter corn, a spinach salad, or a no-stir oven-baked parmesan risotto. Any simple salad will go so well with any of these easy recipes.

    Pair these little lamb chops with a sweet potato dish. This Sweet Potato Casserole is Ruth Chris's Steakhouse copycat recipe, and is absolutely amazing! It's a simple side dish made with pecan crumble topping, vanilla extract, and a bit of maple syrup.

    Or make some Smashed Potatoes served with melted herb butter is one of the most heavenly potato recipes. These crispy potatoes are a beautiful side dish for a special family dinner, romantic date nights, holidays, or a dinner party and would go so well with lamb.

    Serve this mix of colorful Roasted Vegetables with grilled lollypops including sweet potato, butternut squash, rainbow carrots, and Brussel sprouts.

    This ultimate guide delivers all the tips on how to cook Grilled Asparagus on the stovetop perfectly every time for tasty crisp-tender asparagus spears with bright green beautiful color.

    • Lifting a scoop of sweet potato casserole out of a white casserole dish with large serving spoon.
      Sweet Potato Casserole (Ruth's Chris Recipe)
    • A sheet pan of smashed potatoes with fresh herbs baked with crispy golden brown edges.
      Crispy Smashed Potatoes
    • A square white dish filled with colorful roasted vegetables and topped with squares of butter garnished with herbs.
      Vegetable Roasting
    • A white plate filled with cooked asparagus topped with gremolata garnished with lemon wedges.
      Stovetop Grilled Asparagus

    More Grilling Recipes 

    • Take a look at my Cookout Menu collection of over 60 recipes.
    • Shish Kabobs are easy to make ahead and throw on the grill.
    • Huli Huli Chicken Pineapple Rice Bowls are perfect for entertaining.
    • Greek Gyros with Tzatziki Sauce will be a hit at your grill party!
    • Or these elegant Cabernet Grilled Rack of Lamb and Watermelon Skewers...this recipe is ready in 45 minutes!
    • And, did you know you can bake on your grill? Try this amazing recipe for Grill Baked Blueberry Pie!
    • A wooden platter filled with Shish Kabob grilled skewers.
      Shish Kabobs
    • Two pineapple halves carved out filled with coconut rice, grilled pineapple and huli huli chicken.
      Huli Huli Chicken
    • Greek gyros on parchment paper topped with lamb meatballs cucumber and tomatoes.
      Lamb Gyros With Greek Tzatziki Sauce
    • A beautiful grilled rack of lamb on a white platter with rosemary sprigs and watermelon skewers.
      Cabernet Rosemary Grilled Rack Of Lamb

    Did you love this recipe? We would love to hear from you! If you make this recipe and love it, give it a 5-star rating ⭐⭐⭐⭐⭐ with a comment. THANK YOU!! Follow Delicious Table with my free newsletter and share this recipe with your friends on Facebook, Pinterest, and Instagram.

    A white platter filled with grilled lamb chops topped with mint pesto and grilled peaches.
    Print

    Grilled Lamb Chops Recipe

    Grilled Lamb Chops rubbed with seasoned mint salt, sweet juicy peaches, and topped with parmesan mint pesto, what a cookout party food idea!
    Course Dinner & Main Dishes
    Cuisine American
    Keyword grilled lamb, grilled lamb chops, lamb chops recipe, lamb recipe
    Prep Time 20 minutes minutes
    Cook Time 10 minutes minutes
    Total Time 30 minutes minutes
    Servings 4
    Calories 424kcal
    Author Lisa Hatfield

    Equipment

    • Classic Citrus Zester
    • Chef Knife
    • Epicurean Non-Slip Cutting Board
    • Digital Meat Thermometer

    Ingredients

    • 8 lamb chops - French trimmed
    • 4 whole fresh peaches halved/pits removed
    • 1 bunch fresh mint leaves

    grilled peaches

    • 8 peach halves
    • ½ teaspoon sea salt
    • ½ teaspoon fresh cracked pepper
    • 2 tablespoons extra virgin olive oil

    seasoned mint salt rub

    • ½ cup kosher sea salt
    • ⅛ cup ground black pepper
    • 15 fresh mint leaves
    • 2 lemons zested

    parmesan mint pesto

    • 20 leaves fresh mint
    • 2 cloves garlic
    • ¼ cup pine nuts
    • ¼ cup parmesan cheese grated
    • ¼ teaspoon sea salt
    • ¼ cup olive oil
    US Customary - Metric

    Instructions

    make the parmesan mint pesto

    • In a mini food processor blend or finely chop on a cutting board; the fresh mint, garlic cloves, pine nuts, parmesan, and a pinch of salt. You can also swap in fresh rosemary, parsley, rosemary or thyme for mint.
    • Slowly add the ¼ cup olive oil (four tablespoon of olive oil) to the moving food processor, or mix in a small bowl if doing by hand.  
    • It should be thick and chunky like a paste, not drippy with olive oil. Set aside.

    prepare the lamb and peaches

    • Slice the rack of lamb into individual chops when the meat is cold. Then bring the meat to room temperature before grilling.
    • Make the seasoned mint salt rub; mix salt, black pepper, mint leaves, and lemon zest in a mini food processor or dice finely on board. 
    • Rub the meat generously with the seasoned mint salt rub on both sides, set on a platter.
    • Wash and cut peaches in half, remove pits and place in a bowl. Sprinkle with salt, pepper, and a drizzle of olive oil, and add onto the platter.

    grill the lamb and peaches

    • Preheat your grill to 400 degrees ( medium high heat) Place the lamb chops and peaches (cut side down) on the grill grates of an outdoor grill, and close the lid for 4-5 minutes.
    • Carefully open the grill, and flip them over them over and sear another 4-5 minutes until golden brown, or less time if you prefer rare.
    • Check the peaches, and remove from grill once they have nice grill marks to a platter. 
    • Transfer grilled lamb and peaches to a warm platter with parmesan mint pesto over each one. Serve with cool drinks and a salad.
    • Store leftover lamb in an airtight container refrigerated, and eat within 3-4 days after cooking.

    Video

    Notes

    How To Buy Lamb Chops

    When you head out to the grocery store or butcher shop, buy a good quality rack of lamb, preferably wet-aged. Usually, French lamb chops are sold partially trimmed. You will have to remove some of the white fat, the silver skin, and clean them up a tiny bit.
    You can ask the butcher to trim your cut of meat at the store and slice it into thick chops for you.

    Slicing A Rack Of Lamb Into Chops At Home

    A few years ago I was invited to attend a cooking class for professionals, and we did a deep dive all about lamb. I can still remember the delicious flavor of lunch that day and never knew tender chops could be so delicious with a unique smoky flavor from the grill! The chef showed us step-by-step how to break down racks into chops...
    1. To prep racks yourself, carefully scrape any meat or fat off the bones with a small sharp pairing knife.
    2. Cut equally in between the rib bones to keep them even, and cut out the extra fat.
    3. Slice straight through the chops, and then twist that section to finish cutting off a single chop.
    4. Remove any extra end bones if necessary to leave one bone per chop.

    Lamb Chops Internal Temperature

    According to the American lamb board, grill each chop for 4-5 minutes per side at 400 degrees.
    Check internal temperature with a good quality meat thermometer or instant probe thermometer. Here are suggested cooking times for different a degree of doneness.
    • 135 degrees for medium-rare
    • 150 degrees for medium
    • 160 degrees for well-done
    Once grilled, lamb meat temperature will rise as it rests by about 10 degrees to its final temperature.
     

    Nutrition

    Calories: 424kcal | Carbohydrates: 41g | Protein: 8g | Fat: 29g | Saturated Fat: 5g | Polyunsaturated Fat: 5g | Monounsaturated Fat: 17g | Cholesterol: 6mg | Sodium: 14689mg | Potassium: 847mg | Fiber: 9g | Sugar: 27g | Vitamin A: 1299IU | Vitamin C: 51mg | Calcium: 166mg | Iron: 3mg

    Homemade Buttermilk Ranch Dressing

    [heart_this] · Jul 8, 2022 · 4 Comments

    A large Mason jar filled with ranch dressing made at home with a small serving bowl and spoon.

    Last Updated July 20th, 2022 at 10:27 am by Lisa

    Buttermilk Ranch Dressing from scratch uses real fresh ingredients, and it tastes so much better than bottled products. Get the secret mixing tip with 20+ creative ways to use it in recipes all week long.

    Then drizzle, dip, and pour your own ranch dressing on everything in sight...

    A large Mason jar filled with Ranch Dressing made at home on a blue napkin with a small bowl and spoon.

    Buttermilk Ranch Salad Dressing Recipe

    Drizzled, poured, and part of many beloved recipes in America, Ranch is now the most popular salad dressing in the United States. Buttermilk Ranch Dressing can be used in so many ways, like a green salad dressing or for an easy appetizer dip. Try this beloved California Food recipe originating from Hidden Valley Ranch in Santa Barbara. California.

    • ½ cup sour cream
    • ½ cup buttermilk
    • ½ cup mayonnaise
    • 2 cloves garlic, minced (or 1 ½ teaspoon jar minced garlic)
    • 1 teaspoon sea salt
    • ½ teaspoon black pepper
    • 1 tablespoon dried parsley (or ¼ cup fresh parsley)
    • ¼ cup fresh chives (or 2 tablespoons dried chives)
    • 1 tablespoon fresh lemon juice
    • 4 dashes hot sauce
    1. Prep your ingredients; slice your fresh herbs (parsley and chives) and crush your garlic.
    2. Into a large Mason jar or bowl, add the buttermilk, mayonnaise, sour cream, fresh/dried chives, garlic, fresh/dried parsley, sea salt, black pepper, hot sauce, and lemon juice. It helps to use a large funnel if you are using a quart mason jar.
    3. Pop the lid on, and shake well until combined in the jar, or stir in a bowl whisking well to combine.
    4. Keep chilled in the refrigerator for up to 2 weeks.
    A graphic with four steps numbered to make ranch dressing in a mason jar.
    A small white bowl filled with ranch dressing and a tiny spoon to use on a salad.

    Ranch Dressing Recipe Tips

    This is one of those recipes, where the quality of your ingredients really matters. I have a few swaps for you in the tips section, but highly recommend you use the best possible ingredients to make the best ranch dressing. You will taste the difference!

    • Herbs: You can use fresh or dried herbs. If you want to use fresh, simply use 3X more than dried. Dry herbs have much more of a flavor punch.
    • Shake & Mix: You can add the ingredients into a large Mason jar and "shake it". As you know, this is how I love to make my dressings. My Mom did it that way, and it is so easy. Plus you have a built-in storage container to pop in the fridge with no extra dishes to clean.
    • Buttermilk: Substitute Greek yogurt in place of sour cream, or regular milk, and some lemon (or white vinegar) for buttermilk. The flavor will change a bit, but it will work.
    • Garlic: Use ¼ teaspoon of granulated garlic powder (or dehydrated or freeze-dried garlic) to replace 1 whole clove of fresh garlic. You can use minced refrigerated garlic in a jar for this recipe, but fresh garlic is awesome!
    Can Ranch Dressing be used as a dip?


    Yes. Ranch Dressing is also a popular dip in the United States for anything from chips, veggies, and fried appetizers like fried green tomatoes and french fries.

    What makes the best ranch dressing?


    Real fresh high-quality ingredients include buttermilk, sour cream, mayonnaise, garlic, fresh or dry herbs like parsley and chives, and seasoning with lemon, salt, pepper, and hot sauce.

    Where did Ranch Dressing originate?


    Steve Henson was working to keep his plumming work crews happy, he created a new salad dressing. Henson retired with his wife and they moved to Santa Barbara County, California where they purchased the Sweetwater Ranch in San Marcos Pass in 1956 and renamed it Hidden Valley Ranch.

    On the menu for the ranch kitchen, Henson served the Ranch salad dressing he had created. By 1957, a packaged mix to make the dressing at home was sold in stores.

    A white low bowl of colorful salad with ranch dressing in a glass carafe.

    Ways To Use Ranch Dressing

    There are so many ways to enjoy homemade ranch dressing. These are a few recipes I love to use it on, and it REALLY is so much better than bottled products or the Hidden Valley Ranch packet you buy at the store...

    • drizzle on corn on the cob
    • serve with grilled or roasted potatoes
    • squash chips
    • buffalo wings
    • fried green tomatoes
    • spread on grilled burgers
    • a dip for french fries
    • use on chicken tacos
    • dip chicken strips
    • buffalo cauliflower
    • potato skins
    • drizzle on pizza
    • buffalo chicken sliders
    • drizzle on hot dogs
    • dip jalapeno poppers
    • pour on smashed potatoes
    • use as a crudite' dip
    • dip carrots, cucumbers, and broccoli in small cups

    Ranch dressing is always great on a classic green salad with fresh ripe cherry tomatoes from the garden...

    A white round plate filled with colorful green salad topped with ranch dressing.

    Drizzle ranch on hot Fried Green Tomatoes, with some remoulade sauce...

    A stack of fried green tomatoes with ranch and remoulade drizzled on top.

    More Salad Dressing Recipes

    Green Goddess Dressing bursts with fresh herbs and flavor. Serve as a salad dressing, veggie dip, with shrimp, or toss into hot pasta. This is my Mom's classic California Green Goddess recipe exactly the way she made it!

    Serve this ice-cold Wedge Salad with a super creamy Avocado Dressing. Get my trick for chilling the iceberg wedge, you will love it with ranch dressing drizzled on top too!

    Mix up some tangy Meyer Lemon Vinaigrette, a homemade dressing made in minutes with Meyer lemons that is absolutely delightful.

    With just 5 simple ingredients, this Blue Cheese Dressing is an easy recipe made in minutes. It also works great as a dip for buffalo wings or a chip dip.

    • A small glass bowl with green goddess dressing and white plates of mixed salad greens on a table.
      Green Goddess Dressing Recipe
    • Wedge salad with avocado dressing drizzled on top with pistachios on a black slate board.
      Iceberg Wedge Salad
    • A vintage silver spoon resting on an open jar of vinaigrette.
      Meyer Lemon Citrus Vinaigrette
    • A ceramic plate with sliced apples, chicken on lettuce with homemade blue cheese dressing.
      Blue Cheese Dressing

    Did you love this recipe? We would love to hear from you! If you make this recipe and love it, give it a 5-star rating ⭐⭐⭐⭐⭐ with a comment. THANK YOU!! Follow Delicious Table with my free newsletter and share this recipe with your friends on Facebook, Pinterest, and Instagram.

    A large Mason jar filled with ranch dressing made at home with a small serving bowl and spoon.
    Print

    Homemade Buttermilk Ranch Dressing Recipe

    Buttermilk Ranch Dressing from scratch uses real fresh ingredients, and it tastes so much better than bottled products. Get the secret mixing tip with 20+ creative ways to use it in recipes all week long.
    Course Salads & Dressing
    Cuisine Salad Dressing
    Keyword buttermilk ranch dressing recipe, buttermilke ranch, ranch dressing, ranch dressing recipe
    Prep Time 10 minutes minutes
    Cook Time 0 minutes minutes
    Total Time 10 minutes minutes
    Servings 10
    Calories 69kcal
    Author Lisa Hatfield

    Equipment

    • 4- 1 Quart Mason jars, lids, rings
    • Regular and Wide Mouth Mason Jar Plastic Lids

    Ingredients

    • ½ cup sour cream
    • ½ cup buttermilk
    • ½ cup mayonnaise
    • 2 cloves garlic, minced (or 1 ½ teaspoon jar minced garlic)
    • 1 teaspoon sea salt
    • ½ teaspoon black pepper
    • 1 tablespoon dried parsley (or ¼ cup fresh parsley)
    • ¼ cup fresh chives (or 2 tablespoons dried chives)
    • 1 tablespoon fresh lemon juice
    • 4 dashes hot sauce

    Instructions

    • Prep your ingredients; slice your fresh herbs, crush your garlic.
    • Into a large Mason jar, add the sour cream, buttermilk, mayonnaise, garlic, sea salt, black pepper, dried parsley, fresh chives, lemon juice, and Tabasco.
    • Shake well until combined in a jar, or stir in a bowl.
    • Keep chilled in the fridge for up to 2 weeks.

    Video

    Notes

    Herbs

    You can use fresh or dried herbs. If you want to use fresh, simply use 3X more than dried. Dry herbs have much more of a flavor punch.

    Shake & Mix

     You can add the ingredients into a large Mason jar and "shake it". As you know, this is how I love to make my dressings. My Mom did it that way, and it is so easy. Plus you have a built-in storage container to pop in the fridge with no extra dishes to clean.

    Buttermilk

     Substitute Greek yogurt in place of sour cream, or regular milk, and some lemon (or white vinegar) for buttermilk. The flavor will change a bit, but it will work.

    Garlic

     Use ¼ teaspoon of granulated garlic powder (or dehydrated or freeze-dried garlic) to replace 1 whole clove of fresh garlic. You can use minced refrigerated garlic in a jar for this recipe, but fresh garlic is awesome!

    Nutrition

    Calories: 69kcal | Carbohydrates: 1g | Protein: 1g | Fat: 7g | Saturated Fat: 2g | Trans Fat: 1g | Cholesterol: 10mg | Sodium: 174mg | Potassium: 40mg | Fiber: 1g | Sugar: 1g | Vitamin A: 150IU | Vitamin C: 1mg | Calcium: 29mg | Iron: 1mg

    7 Layer Salad

    [heart_this] · Jul 7, 2022 · 3 Comments

    A glass trifle dish filled with 7 Layer Salad full of colorful ingredients.

    Last Updated September 4th, 2023 at 07:56 pm by Lisa

    A 7 Layer Salad recipe is also called an overnight salad because it can hold without wilting overnight! Famous for its colorful charm, this great party food idea serves large groups for picnics, potlucks, cookouts, or as a BBQ side.

    Put this easy salad together up to a day ahead. Have it ready to go chilling in your fridge overnight complete with the dressing on top. You can toss it together at the party, or just let people dig right into this gorgeous layered salad recipe...

    How To Make Seven Layer Salad

    This version has classic traditional seven layer salad ingredients, but you can use what you love. I listed lots of ideas to inspire you, and probably some are already in your fridge.

    As this salad chills, the flavors and taste get better! It is a wonderful crunchy creamy mix with a bit of sweetness in the dressing, and saltiness from the bacon.

    Salad Dressing

    • ½ cup sour cream
    • ½ cup mayonnaise
    • 1 tablespoon sugar

    Mix the dressing, stir ½ cup mayonnaise, ½ cup sour cream, and 1 tablespoon sugar in a small bowl. Set aside.

    Layered Salad

    • 2 cups iceberg lettuce and or romaine lettuce
    • 6 hard boiled eggs chopped
    • 12 slices bacon crumbled
    • 6 green onions
    • 2 cups cherry tomatoes (sliced grape tomatoes or regular)
    • 1 ½ cups shredded cheddar cheese
    • 1 cup frozen petite peas

    Top 7 Layer Salad Tips

    • Chop the ingredients fairly the same size, to help them lay flat and get even layers.
    • As you build the layers, use the back of a spoon to gently press each layer flat.
    • Use a pastry bench scraper to pick up chopped ingredients saving time.
    • Use more ingredients toward the edge of the glass bowl, that's the pretty part. It's ok if you don't have enough to completely cover the layer, just build the outside ring that people see.
    • Precise measurements don't matter that much, I often swap out things I have on hand or try new combinations that sound good.
    • The BEST part of this potluck wonder is that it really stays crunchy for up to 24 hours, just spread the dressing to the edge of the dish.

    Prep The Salad Ingredients

    Cook the bacon until crispy, and crumble.

    Chop the tomatoes, and green onions, and grate the cheddar cheese.

    Boil the eggs. Try my steam boiled method for perfect peel eggs every time! It is a total game-changer and saves time.

    Steamed Hard Boiled Eggs Recipe
    Steamed hard boiled eggs cook perfectly every time with no green ring. So easy to peel, the eggshells miraculously slip right off in minutes!
    GET THE RECIPE PIN IT
    6 perfectly hard boiled eggs with a cracked half of an egg shelf on top.

    Assemble Your 7 Layer Salad

    LAYER 1: Finely chop the lettuce and place it in the bottom of the bowl. 

    PRO TIP: Use extra ingredients toward the outside edge of the glass trifle bowl which makes it a pretty salad for parties.

    LAYER 2: Slice 2 or 3 eggs into long quarters and position facing out of the bowl, then finely chop the rest of the eggs and sprinkle on the lettuce. 

    PRO TIP: Use the back of a spoon to gently press down the layer to keep it flat, this helps you build even layers.

    LAYER 3: Place the crumbled bacon on next, and smooth gently with a spoon.

    LAYER 4: Sprinkle on the green onions, and spread them around using the spoon to smooth out that layer.

    LAYER 5: Now, place the tomatoes on and adjust and smooth them out using a spoon.

    LAYER 6: Sprinkle on the grated cheddar cheese, and be generous! Everyone loves the cheese.

    LAYER 7: Now the frozen petite peas go on, try to make the layer even, and smooth with your spoon.

    The Top Dressing Layer

    1. Use a small spatula, offset spatula, or bread knife to spread the dressing on top, and take it to the edge of the glass bowl. This helps to keep the ingredients chilled and the dressing won't drip down, it is thick enough to stay on top until the next day.
    2. Cover and seal with plastic wrap and chill in the fridge until you are ready to serve. Serve within 24 hours. Garnish with more bacon, cheese, green onions, or egg if you wish. Toss and serve, or let people dig right in!

    Other Ingredient Swaps and Ideas

    Here are ways to mix it up, and inspire you to create your own custom layers...

    Lettuce: besides romaine and iceberg, people love fresh spinach, baby spring mix, or butter lettuce.

    Meats: diced chicken or turkey, sliced salami or pepperoni, shredded rotisserie chicken, or sliced ham.

    Cheeses: white cheddar, pepper jack cheese, or Colby cheese would all be delicious. You can shred or cut small cubes of cheese. A sprinkle of parmesan cheese would be really good too.

    Vegetables: grilled, fresh or sauteed corn, sugar snap peas, broccoli, celery, mushrooms, cauliflower, red onion, shredded carrots, cucumbers, red bell peppers, avocados, or green or black olives.

    Dressings: Green Goddess, Ranch Dressing, or a Lemon Vinaigrette.

    Garnishes: You can decorate the top of the salad and sprinkle more cheddar cheese, crumbled bacon, chopped eggs, or fresh herbs like chives and dill.

    PRO TIP: When using other dressings besides the one in this recipe (that is VERY thick), don't add these to the salads until right before serving or the salad will wilt down and be watery.

    Can you make 7 layer salad the night before?


    Absolutely! That is why this recipe is so beloved across America. The thick dressing stays on top, and seals in the crisp salad layers until serving time. This special salad dressing is thick and doesn't drip down and wilt the salad.

    What's in a classic 7 layer salad?


    lettuce
    hard-boiled eggs
    crumbled bacon
    grated cheese
    green onions
    green peas

    However, there are endless variations and options. Many recipes have all kinds of subs and alternatives, but the ultimate sign of a classic layered salad is the 3 ingredient dressing, that adds lots of creaminess without making the salad wilt!


    More Party Food and Cookout Side Dishes

    These summer side dishes and BBQ sides like Easy Pasta Salad, 7 Layer Salad, Watermelon Salad, Macaroni Pasta Salad, or Cowboy Baked Beans are the recipes everyone will be talking about at your next party!

    An easy classic side dish, Coleslaw with an EASY Mason jar dressing made in 15 minutes including slicing cabbage with no mayo!

    • A wooden bowl filled with pasta salad and wooden serving tongs.
      Easy Pasta Salad
    • A glass trifle dish filled with 7 Layer Salad full of colorful ingredients.
      7 Layer Salad
    • Looking down into a scooped out watermelon filled with rounded watermelon balls garnished with mint and feta cheese.
      Watermelon Salad
    • Looking down on a white plate filled with macaroni salad and a silver fork.
      Classic Macaroni Salad Recipe
    • A large white spoon scooping a serving of cowboy baked beans out of a casserole dish.
      Cowboy Beans
    • A clear glass bowl filled with tri color cole slaw and wooden tongs stuck in the slaw.
      Coleslaw Recipe (No Mayo)

    Did you love this recipe? We would love to hear from you! If you make this recipe and love it, give it a 5-star rating ⭐⭐⭐⭐⭐ with a comment. THANK YOU!! Follow Delicious Table with my free newsletter and share this recipe with your friends on Facebook, Pinterest, and Instagram.

    A glass trifle dish filled with 7 Layer Salad full of colorful ingredients.
    Print

    7 Layer Salad

    7 Layer Salad (aka Overnight Salad) is one of the most popular potluck dishes for picnics, a BBQ side for cookouts, or a summer side dish.
    Course Salads & Dressing
    Cuisine American
    Keyword 7 Layer Salad, Layered Salad, Seven Layer Salad, Seven Layer Salad Recipe
    Prep Time 30 minutes minutes
    Cook Time 0 minutes minutes
    Total Time 30 minutes minutes
    Servings 12
    Calories 338kcal
    Author Lisa Hatfield

    Equipment

    • Chef Knife
    • Glass Trifle Dish
    • Bench Scraper
    • Offset Icing Spatula

    Ingredients

    Dressing

    • ½ cup sour cream
    • ½ cup mayonnaise
    • 1 tablespoon sugar

    Salad Layers

    • 2 cups iceberg and or romaine lettuce
    • 6 eggs hard boiled chopped
    • 12 slices bacon crumbled
    • 6 green onions
    • 2 cups tomatoes sliced grape tomatoes or regular
    • 1 ½ cups cheddar cheese
    • 1 cup frozen petite peas

    Instructions

    Make The Dressing

    • Mix the Seven Layer dressing: ½ cup mayonnaise, ½ cup sour cream, and 1 tablespoon sugar in a small bowl. Set aside.
    • You will need a deep large glass bowl like a salad bowl or a trifle bowl. An inexpensive clear plastic salad bowl will work well too.
    • Cook the bacon until crispy. Boil the eggs and peel them. Chop the tomatoes, green onions, grate the cheddar cheese.
    • LAYER 1: Finely chop the lettuce and place it in the bottom of the bowl. PRO TIP: Use extra ingredients toward the outside edge of the glass bowl which makes it a pretty salad.
    • LAYER 2: Slice 2 or 3 eggs into long quarters and position facing out of the bowl, then finely chop the rest of the eggs and sprinkle on top of the lettuce. PRO TIP: Use a large spoon to gently press down the layer to keep it flat, this helps you build the layers.
    • LAYER 3: Place the crumbled bacon on next, and smooth gently with the back of a spoon.
    • LAYER 4: Sprinkle on the green onions, and spread them around using the spoon to smooth out that layer.
    • LAYER 5: Now, place the chopped tomatoes on and adjust and smooth them out using a large spoon.
    • LAYER 6: Sprinkle on the grated cheddar cheese, and be generous! Everyone loves the cheese.
    • LAYER 7: Now the frozen petite peas go on, try to make the layer even, and smooth with your large spoon.

    3 Ingredient Dressing Layer

    • Use a small spatula, offset spatula, or bread knife to spread the dressing on top, and take it the edge of the glass bowl. This helps to keep the ingredients chilled and the dressing won't drip down, it is thick enough to stay on top until the next day.
    • Cover with plastic wrap and seal the salad well. Chill in the fridge until you are ready to serve. Garnish with more bacon, cheese, green onions, or egg if you wish. Toss and serve, or let people dig in!

    Video

    Notes

    Top Seven Layer Salad Tips

    • Chop the ingredients fairly the same size, to help them lay flat and get even layers.
    • As you build the layers, use a large spoon to gently press each layer flat.
    • Use more ingredients toward the edge of the glass bowl, that's the pretty part. It's ok if you don't have enough to completely cover the layer, just build the outside ring that people see.
    • Precise measurements don't matter that much, I often swap out things I have on hand or try new combinations that sound good.
    • The BEST part of this potluck wonder is that it really stays crunchy for up to 24 hours, just spread the dressing to the edge of the dish.

    Layered Salad Swaps

    Lettuce: besides romaine and iceberg, people love fresh spinach, baby spring mix, or butter lettuce.
    Meats: diced chicken or turkey, sliced salami or pepperoni, shredded rotisserie chicken, or sliced ham.
    Cheeses: white cheddar, pepper jack cheese, or Colby cheese would all be delicious. A sprinkle of parmesan cheese is nice too. 
    Vegetables: grilled, fresh or sauteed corn, sugar snap peas, broccoli, celery, mushrooms, cauliflower, red onion, shredded carrots, cucumbers, red bell pepper, avocados, or green or black olives.
    Dressings: Green Goddess, Ranch Dressing, or a Lemon Vinaigrette. Add these to the salads right before serving to avoid wilting the salad as they are too thin, unlike the traditional 3 ingredient dressing for this recipe. 
    Garnishes: you can decorate the top of the salad and sprinkle more cheddar cheese, crumbled bacon, chopped eggs, or fresh herbs like chives and dill.

    Nutrition

    Serving: 1cup | Calories: 338kcal | Carbohydrates: 6g | Protein: 21g | Fat: 25g | Saturated Fat: 9g | Trans Fat: 1g | Cholesterol: 477mg | Sodium: 361mg | Potassium: 321mg | Fiber: 1g | Sugar: 4g | Vitamin A: 1905IU | Vitamin C: 10mg | Calcium: 194mg | Iron: 3mg

    Spiral Grilled Hot Dogs

    [heart_this] · Jul 7, 2022 · 1 Comment

    A red plastic food basket lined with paper holding a loaded grilled hot dog.

    Last Updated May 21st, 2023 at 11:55 pm by Lisa

    Spiral-Cut Grilled Hot Dogs get nice nooks and crannies to hold more mustard, ketchup, and relish. Grill these full-flavor dogs at your next cookout and put out a bar loaded full of toppings and condiments.

    The edges get darker char marks that add more flavor. Plus these hold your fixings so they don't slide off the franks and make a mess!

    These are the perfect hot dogs for Memorial Day, July 4th, and Labor Day. I love to serve them in reuseable plastic food baskets lined with paper, just like a famous hot dog stand...

    A spiral hot dog on a bun in a red paper lined basket.

    How To Make Spiral Hot Dogs

    • 8 jumbo beef hot dogs (large beef franks, pork, or thick sausages)
    • 8 hot dog buns

    Hot Dog Relish

    • 1 bell pepper chopped fine
    • 1-2 dill pickles chopped fine
    • 1 cup green cabbage finely shredded
    • ¼ cup finely chopped onion 
    • 1 tablespoon apple cider vinegar
    • 2 tablespoons yellow mustard
    • ½ teaspoon sea salt
    • ½ teaspoon ground pepper
    All the ingredients to make grilled hot dogs for a cookout laying on a table and labled.

    Top Hot Dog Grilling Tips

    1. To make spiral-cut hot dogs, push a metal skewer through the center of each hot dog. Place onto a cutting board, and run a sharp knife at an angle scoring into a spiral all the way down each one to the end, but don't cut all the way through. Carefully pull the hot dog off the skewer, and it is ready to grill.
    2. Clean your outdoor gas grill or charcoal grill grate with a wire brush and brush some oil on the grate to create a nonstick surface. Preheat your grill on medium high for 5 minutes. For a charcoal grill, light it and be sure the charcoal has some white ash and is burning hot, then grill.
    3. Grill hot dogs on medium heat for about 7-10 minutes over low open flames until grill marks are all over the surface area of the dogs. They will darken, char, and curl slightly and the spiral cut dogs will expand and get deeper slits while grilling. Turn them often using tongs every few minutes. You can also cook hot dogs in a cast iron grill pan right on the stove.
    4. Pull the cooked dogs over to indirect heat to keep warm. Load onto buns with toppings, and serve in a food basket lined with paper for easy cleanup. You can toast the bread buns over the grill for a couple of minutes, some people spread a little butter or oil to get a nice toast on the bread buns.
    5. Load up with your favorite toppings and enjoy! Try my homemade Hot Dog Relish, it is fresh crunchy, and delicious.

    SPIRAL CUT PRO TIP: Jumbo hot dogs work better to cut and grill as sprial dogs, but regular classic one will work. Nathan's Jumbo Beef Franks are ideal for spiral cuts. Thick sausages are a great option as well.

    An outdoor grill with spiral cut hot dogs and regular hot dogs grilling and grilled on a tray with hot dog buns.

    Hot Dog Toppings

    The best part of a grilled dog, is you guessed it...what you put on it! The choices are endless, and all personal. Here are some all-time favorites for cookouts.

    • chili
    • grated cheddar cheese
    • coleslaw
    • relish
    • mustard
    • ketchup
    • mayonnaise
    • chopped onions
    • chopped tomatoes
    • green onions
    • pickles
    • sauerkraut
    • pickled jalapenos
    • caramelized onions & mushrooms
    • crumbled bacon
    A white bowl filled with hot dog relish topping and red plastic baskets filled with grilled hot dogs.

    More Toppings And Hot Dog Recipes

    How long do you grill hot dogs?


    Hot dog sizes need different grilling times. The amount of time you grill the dogs will depend on the size of the dogs.

    regular-sized dogs 5-7 minutes
    jumbo-sized dogs - 7-10 minutes
    quarter-pound dogs - 15 minutes

    Why spiral cut a hot dog?


    Spiral cut dogs have deep cuts that puff up and add more nooks and crannies for condiments to hold on to like mustard, ketchup, relish, and grated cheese! The edges get nice char marks and it adds more flavor plus holds the toppings on so they don't run off the hot dog.

    What kind of relish for hot dogs?


    -Sweet Pickle Relish - classic and sweeter of course.
    -Dill Pickle Relish - for people who prefer a tart tang.
    -Chicago-style Relish is a type of sweet pickle relish typically used on Chicago-style dogs. The unique color of the relish often referred to as "neon green", is created by adding blue dye to regular pickle relish.

    A hot dog with homemade relish and mustard toppings in a red plastic basket lined with paper.

    More Hot Dog Toppings

    Homemade Relish is a mix of clean crunchy fresh ingredients. You can make it coarse or fine as you prefer. Top classic hot dogs or load-on burgers as part of your cookout menu.

    This Easy Coleslaw Recipe has a clean vinegar-based dressing and has no mayo. It goes great with pulled pork sandwiches, or as a classic side dish topping at potluck summer picnics and BBQ cookouts. Crunchy Refrigerator Dill Pickles with jalapeno zing, garlic, and fresh dill require no canning and make perfectly crisp and crunchy dill pickles for a hot dog topping.

    Chili Dogs are loaded with toppings, this is a fast 20-minute hot dog chili recipe perfect for a cookout party. Learn the secrets to make this recipe fast, with all kinds of scrumptious toppings like cheese, onions, and thick hearty chili...

    • A small white bowl with homemade relish in to top hot dogs in paper lined baskets.
      Homemade Relish
    • A clear glass bowl filled with tri color cole slaw and wooden tongs stuck in the slaw.
      Coleslaw Recipe (No Mayo)
    • A person pulling a dill pickle chip out of a clear glass canning jar of homemade pickles.
      Refrigerator Dill Pickles
    • A game day food table with chili dogs loaded with relish, cheese, and onions.
      Hot Dog Chili

    Did you love this recipe? We would love to hear from you! If you make this recipe and love it, give it a 5-star rating ⭐⭐⭐⭐⭐ with a comment. THANK YOU!! Follow Delicious Table with my free newsletter and share this recipe with your friends on Facebook, Pinterest, and Instagram.

    A red plastic food basket lined with paper holding a loaded grilled hot dog.
    Print

    Spiral Cut Grilled Hot Dog Recipe

    Spiral-Cut Grilled Hot Dogs get nice nooks and crannies to hold more toppings like mustard, ketchup and relish. Grill these full-flavor dogs at your next cookout and put out a bar of condiments.
    Course Dinner & Main Dishes
    Cuisine American
    Keyword grilled hot dogs, hot dog recipes, hot dog toppings, spiral hot dogs, spiral-cut hot dogs
    Prep Time 10 minutes minutes
    Cook Time 10 minutes minutes
    Total Time 20 minutes minutes
    Servings 8
    Calories 278kcal
    Author Lisa Hatfield

    Equipment

    • Pop Up Food Tents (picnics, BBQ)
    • Grilling Tongs
    • Grilling/Shish Kabob Stainless Skewers
    • Parchment Paper Sheets
    • Plastic Food Baskets

    Ingredients

    • 8 jumbo beef hot dogs
    • 8 hot dog buns

    Hot Dog Relish

    • 1 bell pepper chopped fine
    • 1-2 dill pickles chopped fine
    • 1 cup green cabbage finely shredded
    • ¼ cup chopped onion chopped fine
    • 1 tablespoon apple cider vinegar
    • 2 tablespoons yellow mustard
    • ½ teaspoon sea salt
    • ½ teaspoon ground pepper

    Instructions

    • Jumbo hot dogs work better, but the regular classic size will work just fine, and you can also spiral-cut sausages
    • To make spiral-cut hot dogs, push a metal skewer through the center of each one. Place onto a cutting board, and run a sharp knife at an angle scoring them into a spiral all the way down each one to the end, but don't cut all the way through.
    • Carefully pull the hot dog off the skewer, and it is ready to grill. Clean your outdoor gas grill or charcoal grill grate with a wire brush and brush some oil on the grate to create a nonstick surface. Preheat your grill on medium high for 5 minutes. For a charcoal grill, light it and be sure the charcoal has some white ash and is burning hot, then grill.
    • Grill on medium heat for about 7-10 minutes over low open flames until grill marks are all over the surface appear. They will darken, char, and curl slightly and get deeper slits while grilling. Turn them often using tongs every few minutes. You can also cook hot dogs in a cast iron grill pan right on the stove. Pull the cooked ones over to indirect heat to keep warm.
    • Load onto bread buns with toppings, and serve in a food basket lined with paper for easy cleanup. You can toast the buns over the grill for a couple of minutes, some people spread a little butter or oil to get a nice toast. Load up with your favorite toppings and enjoy! Try my homemade Hot Dog Relish, it is fresh crunchy, and delicious.

    Video

    Notes

    cooking time

    Hot dog sizes need different grilling times. The amount of time you grill the dogs will depend on the size of the dogs.
    regular-sized dogs 5-7 minutes
    jumbo-sized dogs - 7-10 minutes
    quarter-pound dogs - 15 minutes

    Hot Dog Toppings

    • chili
    • grated cheese
    • cole slaw
    • relish
    • mustard
    • ketchup
    • chopped onions
    • chopped tomatoes
    • green onions
    • pickles
    • sauerkraut
    • pickled jalapenos
    • caramelized onions & mushrooms
    • crumbled bacon

    Cookout Party Checklist

    • Serving Trays - regular or ones that stay chilled 
    • Pop-Up Food Tents/Covers (keep critters off your food!) 🐜🐜🐜
    • Small Bowls
    • Serving Spoons
    • Grilling Tongs
    • Napkins
    • Utensils
    • Plastic Baskets/Paper Liners or Paper Plates
    • Red Solo Cups
    • Cooler/Ice
    • Beer, Wine, Drinks/Cocktails
    • Bottled Water
    • Iced Tea, Lemonade, or Soda
    • Chips, Dips, Pretzels, Snacks
    • Cookout, BBQ, and Grill Items
    • Pressed Sandwiches
    • Cocktails and Drinks
    • Desserts
    • Bottle opener/Corkscrew

    Nutrition

    Calories: 278kcal | Carbohydrates: 25g | Protein: 10g | Fat: 15g | Saturated Fat: 6g | Polyunsaturated Fat: 1g | Monounsaturated Fat: 7g | Cholesterol: 25mg | Sodium: 935mg | Potassium: 182mg | Fiber: 2g | Sugar: 5g | Vitamin A: 493IU | Vitamin C: 23mg | Calcium: 90mg | Iron: 2mg

    Dutch Apple Pie

    [heart_this] · Jul 6, 2022 · 5 Comments

    A white pie dish with a slice of apple crumble pie, also known as a dutch apple pie with a crumbled topping and green apples in the background in a wood bowl.

    Last Updated January 4th, 2024 at 11:11 pm by Lisa

    Dutch Apple Pie is also known as Apple Crumble Pie baked with a homemade filling, a foolproof flaky crust, and a crumble topping.

    This type of apple streusel pie is also called a French Apple Pie recipe. The apple filling and crumbly streusel topping are out of this world. I promise this is one of the best desserts ever and will become a favorite all year long...

    What's A Dutch Apple Pie?

    Traditionally, it has a bottom crust, apple filling, and crumb topping made of butter, sugar, and flour.

    This is the first recipe I had published, and it has been lovingly perfected for over 25 years. It first appeared in print in the Balboa Island community cookbook, where my version of this original recipe was published back in the 1990s. Although that recipe was good, this one is even better...

    Many years ago, I can remember baking in my little beach house, and I had several neighbors over for a slice of pie! Little did I know what was in store for this recipe. That memory makes me so thankful and happy. 🥧🍏 Here is what's to love about this cherished dessert...

    • A classic American dessert for family dinner and celebrations.
    • It is an American tradition to bake pies for July 4th, Thanksgiving, or Christmas.
    • Store-bought boxed crust or a frozen pie shell will work just as well as homemade to save some time.
    • A great recipe to put a lot of apples to good use, read on for more apple varieties and recommendations.
    • The crumble topping is so yummy, and just 3 ingredients.
    • The homemade filling is thick and doesn't turn the crust soggy... a very big deal when baking. Learn my secret technique!
    • Classic apple pie is great, but you need to make a second crust for the top crust, making those a bit more work.
    • Holiday tables will be spectacular with delicious desserts like pecan pie, pumpkin pie, and this scrumptious apple pie recipe.
    • You can make the filling beforehand days ahead or freeze it.
    • And the crust can be premade and ready to go from the freezer as well.

    How To Make This Dutch Apple Pie Recipe

    • Pie Dough — you can make this recipe or you can buy it from the store if you're short on time.
    • Apple Filling — of course, you can buy canned filling, but once you make your own, you will always make it at home and the flavor is simply divine. You make the filling ahead of time and keep it refrigerated or pack it in zip-top bags in the freezer beforehand and have it ready to go, so convenient!
    • Crumble Topping — pull your butter out an hour ahead so it softens, toss the ingredients of flour, butter, and brown sugar in a small bowl and crumble with a fork.

    "Foolproof" Pastry Crust Recipe

    • all-purpose flour
    • kosher sea salt
    • baking powder
    • cold diced butter

    Step 1: In a food processor, add the dry ingredients; flour, salt, and baking powder. Then add the cubed cold butter. Pulse 10 times until the butter is the size of “peas”. You can also blend using a pastry blender, chill the ingredients first to get a flakier crust.

    Step 2: Add ⅓ cup ice water, and pulse until the ball forms.

    Step 3: Wrap in plastic wrap, and chill in the fridge for 30 minutes before baking.

    Use in a baked or hand recipe, or freeze for later.

    Handmade Pie Dough (No Food Processor)

    If you don't have a food processor, you can make the dough in a bowl!

    1. Simply add the flour, salt, cubed cold butter, and baking powder, then use a large fork or a pastry cutter to cut the butter into the flour until it forms a crumbled mixture. 
    2. There should be large chunks remaining in the mixture. Then, add the ice water a few tablespoons at a time, and mix with a rubber spatula. Sprinkle in additional ice water one tablespoon at a time.
    3. Toward the end of using your ice-cold water, mix after each addition. The dough will have large clumps. Once you can squeeze it with your hands and it holds together, don't add more water or overwork the dough.
    4. Push the dough together on a board, wrap it in plastic, and chill at least 30 minutes before using it in a recipe.

    PRO TIP: To make a perfect pie crust, the amount of water in the dough is important! Too much, and it will become sticky requiring more flour which changes the ratio resulting in a tough crust. Not enough water, the dough will be dry and crumbly and not pull together correctly. 

    A large glass jar filled with apple pie filling and wood bowl of green apples.

    How to Make Filling

    • Granny Smith apples peel, core, and cut into ½" dice
    • butter
    • lemon juice
    • cornstarch
    • sugar (white granulated)
    • brown sugar
    • kosher salt
    • cinnamon
    • ground nutmeg

    Granny Smith Apples: Are my go-to pick for baking! They have a slight tart flavor that balances perfectly with the sweet crumble topping. Plus they hold up well during baking and are a classic choice.

    Lemon Juice: This is my secret ingredient in my apple filling. Take a look at my other 15 Lemon Recipes!

    1. Wash the apples, peel, core (use a corer/slicer), and cut into ½" size. Place the sliced apples into a bowl with lemon juice to prevent browning.
    2. Squeeze ¼ cup fresh lemon juice, and whisk in 1 tablespoon of cornstarch. Set aside, this is your filling ingredients thickener.
    3. In a large skillet or cast iron pan, melt 3 tablespoons of butter and cook the cut apples for about 5 minutes, stirring every minute until they just turn soft. I like them with a little firmness, so taste them and cook them to the firmness you prefer.
    4. Next, pour the lemon juice and cornstarch "thickening" mixture over the apples and stir until well combined for a couple of minutes.
    5. Sprinkle ½ cup brown sugar, ½ cup white sugar over the apples, and the sea salt. Stir until well combined.
    6. Remove from the heat and add the cinnamon and nutmeg off the heat. The reason you do this is to keep the flavor of the spices!
    7. Let the apple mixture cool completely so it thickens. Once cool, use it in a recipe, store in the refrigerator for up to 3-4 days in a Mason jar, or freeze in zip-top bags.
    Cooking apple pie filling in a stainless skillet.

    How To Make Crumble Topping

    • ½ cup butter softened
    • ½ cup brown sugar
    • 1 cup flour

    Simply mix soft butter, brown sugar, and flour in a bowl with two forks until it's a small crumbled mix.

    PRO TIP: If you are short some filling, simply peel an apple or two, slice them thinly, and add to the filling. The slices add a nice texture to the filling.

    A clear glass bowl with flour, brown sugar, and a cube of butter with a fork to make crumbled topping for apple crumble pie.
    A clear glass bowl with crumble topping to put in a recipe for apple crumble pie or dutch apple pie.

    Growing up I would watch my Mom bake, and I still use her rolling pin. Yes, that rolling pin below was my Mom's, the sound it makes reminds me so much of her cooking in the kitchen...

    Assemble and Baking

    Step 1: Preheat the oven to 400 degrees.

    Step 2: In a 9" or 10" dish, roll the dough ¼" thick, just slightly larger than the dish. Place the crust in the bottom of the dish, and make the edge of the dough neat around the dish.

    Step 3: Add 4 cups of filling. (Add 5-6 cups of filling for larger dishes like a 10" deep dish)

    Step 4: Sprinkle crumble topping on top of the filling.

    Step 5: Pre heat oven to 400 degrees, and bake for 45 minutes until the crust is golden brown and bubbly.

    Step 6: Cool pie on a rack, and run a sharp knife around the edge of the crust a bit to get the first slice out.

    PRO TIP: All our ovens bake slightly differently, the dish type, size, and amount of filling can make a difference.  If baking in a large deep dish, it can take up to 1 hour.

    A wood bowl filled with green apples a towel, and bowl of cooked apple pie filling.
    A white pie dish with a slice of apple crumble pie, also known as a dutch apple pie with a crumbled topping and green apples in the background in a wood bowl.

    Dutch Apple Pie FAQs

    How do I know when a dutch apple pie is baked?


    The crust will be golden brown, and the crumble topping will turn a little darker brown, the apples in the filling should be soft.

    -If baking a deep dish pie plate: it can take up to 1 hour.  
    -Factors that affect baking are; ovens bake differently - gas or electric, the dish type-ceramic or metal, standard 9-inch pie pans vs 10" deep dish, and the amount of filling can all make a difference in the bake time. 

    It is best to check during baking every 10-15 minutes to see how they are doing until you learn how your oven bakes!


    Do you need to refrigerate apple pies?


    It is fine on the counter for a few hours while cooling but then needs to be refrigerated. Simply cover with plastic wrap, and keep cold.

    What's the best way to reheat apple crumble pie?

    Pull the pie from the refrigerator about an hour before bringing it to room temperature. Preheat the oven to 400 degrees, and heat for 10 minutes or until warmed through.

    How do you eat apple crumble pie?

    A large scoop of ice cream like vanilla, dollops of whip cream, or cool whip.
    Another great topping is to drizzle caramel sauce on top of the pie once baked.

    What kinds of apples are best for pies?


    These ten apple varieties are classic favorites. Some fall into the firm tart apple category, and some the firm-sweet. You can even use a combination of the two listed below.

    Granny Smith
    Honeycrisp
    Esopus Spitzenburg
    Northern Spy
    Idared
    Pink Pearl
    Ginger Gold
    Golden Delicious
    Jazz
    Jonagold
    Pink Lady

    A large piece of apple crumble pie on a white plate with a silver fork and the pie plate with half a pie left in the background.

    More Pie Recipes

    Bake an American Flag Pie for your patriotic dessert this July 4th, which is baked on a rimmed baking sheet, and will serve 20 people for summer cookouts and picnics.

    Bake this Blueberry Pie Recipe outdoors on your gas or charcoal grill. It works just like an indoor oven and keeps your house cool on scorching hot days.

    Cherry Chocolate Hand Pies have an amazing sugar crust, this hand pie recipe uses boxed pie crust, chocolate chips, and frozen cherries.

    Make Empanadas after Thanksgiving. Use this as a turkey leftover recipe, and add ham, mashed potatoes, gravy, dressing/stuffing, and more.

    • A sheet pan filled with a flag pie made with strawberries, blueberries, and pie crust.
      American Flag Pie
    • A blueberry pie that is baked outdoors on a grill with a flag shaped pie crust.
      Blueberry Pie Baked Outdoors
    • A red cookie plate filled with heart shaped chocolate hand pies.
      Chocolate-Cherry Hand Pies
    • Golden brown baked empanadas decorated with pie crust leaves on a Fall tray.
      Empanadas ~ Turkey Leftover Recipe

    Did you love this recipe? We would love to hear from you! If you make this recipe and love it, give it a 5-star rating ⭐⭐⭐⭐⭐ with a comment. THANK YOU!! Follow Delicious Table with my free newsletter and share this recipe with your friends on Facebook, Pinterest, and Instagram.

    A white pie dish with a slice of apple crumble pie, also known as a dutch apple pie with a crumbled topping and green apples in the background in a wood bowl.
    Print

    Dutch Apple Pie Recipe

    Dutch Apple Pies are also known as Apple Crumble Pies baked with a homemade filling, a foolproof flaky crust, and a crumble topping. This type of apple streusel pie is also called a French Apple Pie recipe. The apple filling and crumbly streusel topping are out of this world.
    Course Desserts & Sweets
    Cuisine American
    Keyword apple crumble pie, apple crumble pie recipe, apple pie, dutch apple pie, French Apple Pie
    Prep Time 45 minutes minutes
    Cook Time 45 minutes minutes
    Total Time 1 hour hour 30 minutes minutes
    Servings 8
    Calories 614kcal
    Author Lisa Hatfield

    Equipment

    • Cuisinart Food Processor
    • Apple Corer Slicer
    • Classic Pie Dish 9"
    • Pastry Cutter

    Ingredients

    Foolproof Homemade Pie Dough

    • 1 ½ cup all-purpose flour
    • 1 teaspoon kosher sea salt
    • ½ teaspoon baking powder
    • ½ cup cold diced butter

    Apple Filling

    • 6 large Granny Smith apples cored and cut into ½" size
    • 3 tablespoons butter
    • ¼ cup fresh lemon juice
    • 1 tablespoon cornstarch
    • ½ cup granulated sugar
    • ½ cup brown sugar
    • 1 teaspoon kosher salt
    • 1 teaspoon cinnamon
    • ¼ teaspoon ground nutmeg

    Crumble Topping

    • ½ cup butter softened
    • ½ cup brown sugar
    • 1 cup flour
    US Customary - Metric

    Instructions

    Pie Dough - food processor method

    • In a food processor, blend flour, salt, baking powder, butter and pulse 10 times until the butter is the size of “peas”.
    • Add ⅓ cup ice water, pulse until ball forms.
    • Wrap in a zip-top bag, chill in the fridge for 30 minutes. This makes the butter firm and makes a flaky pie crust.

    Pie Dough - by hand

    • In a large mixing bowl, simply add the flour, salt, cubed cold butter, and baking powder, then use a large fork or a pastry cutter to cut the butter into the flour until it forms a crumbled mixture. 
    • There should be large chunks remaining in the mixture. Then, add the ice water a few tablespoons at a time, and mix with a rubber spatula. Sprinkle in additional ice water one tablespoon at a time. Toward the end of using your ice-cold water, mix after each addition.
    • The dough will have large clumps. Once you can squeeze it with your hands and it holds together, don't add more water or overwork the dough.
    • Push the dough together on a board, wrap it in plastic, and chill at least 30 minutes before using it in a recipe.

    Apple Filling

    • Wash the apples, peel, core (use a corer/slicer or knife), and cut into ½ pieces. Place the apple slices into a small bowl with lemon juice to prevent browning.
    • Squeeze ¼ cup fresh lemon juice, whisk in 1 tablespoon cornstarch. Set aside. This is your pie filling thickener.
    • In a large skillet or cast iron pan, melt 3 tablespoons butter and cook the cut apples for about 5 minutes, stir every minute until they just turn soft. I like them with a little firmness, so taste them and cook them to the firmness you prefer.
    • Next, pour the lemon juice and cornstarch mixture over the apples and stir until well combined for a couple of minutes.
    • Sprinkle ½ cup brown sugar, ½ cup white sugar over the apples, and the sea salt. Stir until well combined.
    • Remove from the heat and add the cinnamon and nutmeg off heat. The reason you do this is to keep the flavor of the spices!
    • Let the filling cool completely so it thickens. Once cool, use it in a recipe, store it in the refrigerator for up to 3-4 days in a Mason jar, or freeze in zip-top bags.

    Crumble Topping

    • In a large bowl, mix soft butter, brown sugar, and flour.
    • Blend with two forks until it's a small crumbled mix.

    Assemble and Baking

    • Pre-heat oven to 400 degrees.
    • Roll the dough ¼" thick on a floured surface. Place in bottom of the pie dish, and crimp the edge of the pie crust.
    • Add 4 cups apple filling, spread out evenly. Sprinkle ¼ cup crumble topping all over the top.
    • Bake 400 degrees, 45-60 minutes until crust is golden brown and bubbly. Baking time will vary based on the size of your dish. Always check every 15 minutes to be sure your crust isn't overbrowning. You can place a piece of aluminum foil with couple of holes poked in (to release steam) over the pie to protect the crust.
    • If baking in a large dish, it will take up to 1 hour. And up to for 1 hour 15 minutes for deep dish pies.
    • Cool before before slicing, serve with a scoop of vanilla ice cream, whip cream, or a drizzle of caramel sauce.

    Video

    Notes

    filling and pie crust tips

    If you are short some filling, simply peel an apple or two, slice them thinly, and add to the filling. A fresh apple adds a nice texture, you will LOVE IT!

    The amount of water in pie dough is important.

    If you add too much, the dough will become too soft and sticky requiring more flour which changes the ratio resulting in a tough crust.
    If you don’t add enough water, the dough will be dry and crumbly and not pull together correctly. 

    baking tips

    The crust will be golden brown, and the crumble apple topping will turn a little darker brown, the apples in the filling should be soft.
    If baking a large pie, it can take up to 1 hour, all our ovens bake differently-gas or electric, the dish type-ceramic or metal, size of that dish 9" is standard, deep dish is 10", and the amount of filling can all make a difference in baking. 

    apples

    Granny Smith are my go-to pick for baking. They have a slight tart flavor that balances perfectly with the sweet crumble topping. Granny Smith apples hold up well during baking and are a classic choice.
    These ten apple varieties are classic favorites for apple pie. Some fall into the firm-tart category, and some the firm-sweet. You can even use a combination the ones listed below.
    • Granny Smith
    • Honeycrisp
    • Esopus Spitzenburg
    • Northern Spy
    • Idared
    • Pink Pearl
    • Ginger Gold
    • Golden Delicious
    • Jazz
    • Jonagold
    • Pink Lady

    reheating pie

    Pull the pie from the refrigerator about an hour before bringing it to room temperature. Preheat the oven to 400 degrees, and heat for 10 minutes or until warmed through.

    Nutrition

    Serving: 8g | Calories: 614kcal | Carbohydrates: 90g | Protein: 5g | Fat: 28g | Saturated Fat: 17g | Cholesterol: 72mg | Sodium: 832mg | Potassium: 258mg | Fiber: 4g | Sugar: 54g | Vitamin A: 914IU | Vitamin C: 9mg | Calcium: 58mg | Iron: 2mg

    Bacon Potato Salad

    [heart_this] · Jun 27, 2022 · 8 Comments

    A small white bowl filled with bacon potato salad garnished with crispy bacon.

    Last Updated July 31st, 2023 at 05:11 pm by Lisa

    The best potato salad loaded with crisp bacon and blue cheese. A perfect side dish for summer potlucks, picnics, cookouts, and BBQs. Since there are no eggs or mayonnaise, this is a great picnic food idea. And goes great with everything from grilled burgers to steak, ribs, hot dogs, and so much more.

    Make a double batch of this no mayo potato salad, and it disappears quickly. Maybe it's all that crispy bacon on top...

    Potato Salad Recipe With Bacon

    This recipe is a classic potato salad, with a red, white, and blue twist! The red is bacon, the white is potatoes, and the blue is blue cheese. But all these ingredients can be mixed up as you please, and this potato salad no eggs version keeps things simple, but you can add eggs of course and other things, read on for those ideas.

    Loaded Potato Salad Ingredients

    • 5 pounds Yukon potatoes (peeled and cubed)
    • 8 strips of bacon (crumbled)
    • ¼ cup crumbled blue cheese
    • 1 cup chopped parsley
    • 2 cups sliced green onions
    • 2 cups sliced celery
    • 2 tablespoons fresh thyme leaves

    Dressing Ingredients

    • 2 tablespoons apple cider vinegar
    • 2 tablespoons fresh lemon juice
    • 1 ½ teaspoons Dijon mustard
    • 2 teaspoon sea salt (kosher salt)
    • 1 teaspoon fresh cracked black pepper
    • ½ cup olive oil
    • ½ cup blue cheese salad dressing or swap in Ranch Dressing
    • ¼ cup sour cream
    A large mixing bowl with all the ingredients needed for a bacon potato salad recipe loaded inside before mixing those ingredients.

    Potato Salad With Bacon Instructions

    1. Cook 8 strips of bacon until crispy. Set aside.
    2. Bring a large pot of water to a boil. Peel and cube your potatoes, and add to the boiling water. Boil potatoes for about 20-25 minutes, until a piece is fork-tender when pierced. Drain water from potatoes, or remove with a slotted spoon into the large bowl with the dressing.
    3. Meanwhile, add all the dressing ingredients into a large mixing bowl; apple cider vinegar, lemon juice, Dijon mustard, sea salt, pepper, olive oil, blue cheese salad dressing, and sour cream, whisking after adding each one.
    4. Next, add crispy bacon pieces, crumbled blue cheese, chopped parsley, sliced green onions, chopped celery, and thyme leaves.
    5. The warm potatoes will help melt the blue cheese and absorb the dressing. Toss well and give your potato bacon salad a good stir, then store in a sealed container in the fridge, gets even better by the next day so it's perfect to make ahead.

    PRO TIP: You can garnish potato salad recipes with some additional crispy crumbled bacon and a little parsley, and green onions to make it really pretty.

    Years ago while running late to an outdoor concert picnic,  I grabbed a small container of a similar bacon potato salad recipe from a local gourmet market.

    The potato salad bacon with blue cheese was so incredible and full of deep flavors, I couldn't stop eating it that night. And yes, I ate most of the container. I came home and made it many times, over many years, until it became my version of the best potato salad recipe. Over the years, it became one of my go-to July 4th recipes!

    What is the easy way to make crisp bacon?

    Try a pre-cooked bacon brand. Since it is half cooked, it prepares easily without the mess and crisps up beautifully in the microwave on paper plates. Costco Kirkland brand is great, but they are easy to find in any grocery store.
    Or bake bacon on a rack over a cookie sheet in the oven.
    Or saute bacon in a heavy skillet until crisp, this is messier but gets the job done.
    Drain on paper towels after cooking by your method to keep the bacon crisp.

    Bacon Potato Salad Recipes Ingredient Notes

    • Blue cheese: Bacon and crumbled blue cheese make this potato salad creamy and so full of flavor. It is a classic flavor combo, but you can leave out either the blue cheese or bacon. Add any grated cheese you love!
    • Make-Ahead: A great bacon potato salad to make the day before you need it and becomes even better the next day. (Like everything!)
    • Garnish: Reserve some crispy bacon to sprinkle on the top. Add some finely minced fresh chives or parsley too for a pretty garnish.
    • Blue Cheese Dressing: Substitute Ranch Dressing or use a ranch seasoning packet mixed with milk or even buttermilk for the blue cheese dressing and use a grated cheddar cheese like a sharp cheddar cheese or one you like for a bacon ranch potatoes salad! You can also swap in Greek yogurt in place of the sour cream.
    • Potatoes: Red potatoes, Yukon gold potatoes, or russet potatoes will all work in this recipe.
    • Crunch: The crisp crunchy celery is so clean and fresh against the creamy texture. And the parsley adds a clean fresh flavor with pop of green.
    • Potato Salad Recipe No Eggs / Potato Salad No Mayo: Since there is NO EGG or MAYO, this is a safer potato salad for hot summer days at picnics. Eggs and Mayo should not be at room temperature for more than 2 hours.
    • Variations: You can add Diced Chicken in potato salad recipes with bacon instead. Then add Buffalo chicken hot sauce dressing for a wonderful twist! Bake the potatoes instead of boiling them. Then scoop them out into a bowl for a loaded baked potato salad!

    More Cookout Side Dishes

    These summer side dishes and BBQ sides like Easy Pasta Salad, 7 Layer Salad, Watermelon Salad, Macaroni Pasta Salad, or Cowboy Baked Beans are the recipes everyone will be talking about at your next party!

    An easy classic side dish, No Mayo Coleslaw with an EASY Mason jar dressing made in 15 minutes including slicing cabbage with no mayo!

    • A wooden bowl filled with pasta salad and wooden serving tongs.
      Easy Pasta Salad
    • A glass trifle dish filled with 7 Layer Salad full of colorful ingredients.
      7 Layer Salad
    • Looking down into a scooped out watermelon filled with rounded watermelon balls garnished with mint and feta cheese.
      Watermelon Salad
    • Looking down on a white plate filled with macaroni salad and a silver fork.
      Classic Macaroni Salad Recipe
    • A large white spoon scooping a serving of cowboy baked beans out of a casserole dish.
      Cowboy Beans
    • A clear glass bowl filled with tri color cole slaw and wooden tongs stuck in the slaw.
      Coleslaw Recipe (No Mayo)

    Did you love this recipe? We would love to hear from you! If you make this recipe and love it, give it a 5-star rating ⭐⭐⭐⭐⭐ with a comment. THANK YOU!! Follow Delicious Table with my free newsletter and share this recipe with your friends on Facebook, Pinterest, and Instagram.

    A small white bowl filled with bacon potato salad garnished with crispy bacon.
    Print

    Potato Salad Recipe With Bacon

    Bacon potato salad is loaded with crispy bacon and blue cheese. A perfect side for summer potluck cookouts and BBQs. Since there are no eggs and no mayonnaise, this is a great picnic food idea. Make a double batch, and it disappears quickly!
    Course Side Dishes & Vegetables
    Cuisine American
    Keyword bacon potato salad, how to make potato salad, loaded potato salad, potato salad, potato salad recipe
    Prep Time 1 hour hour
    Cook Time 30 minutes minutes
    Total Time 1 hour hour 30 minutes minutes
    Servings 16
    Calories 246kcal
    Author Lisa Hatfield

    Equipment

    • Epicurean Non-Slip Cutting Board
    • Chef Knife

    Ingredients

    Potato Salad

    • 5 pounds Yukon potatoes (peeled and cubed)
    • 8 strips bacon (crumbled)
    • ¼ cup crumbled blue cheese
    • 1 cup chopped parsley
    • 2 cups sliced green onions
    • 2 cups sliced celery
    • 2 tablespoon fresh thyme leaves

    Dressing

    • 2 tablespoon apple cider vinegar
    • 2 tablespoons fresh lemon juice
    • 1 ½ teaspoons Dijon mustard
    • 2 teaspoon salt
    • 1 teaspoon fresh cracked black pepper
    • ½ cup olive oil
    • ½ cup blue cheese salad dressing or swap in ranch dressing
    • ¼ cup sour cream
    US Customary - Metric

    Instructions

    • Cook 8 strips of bacon until crispy. Set aside.
    • Bring a large pot of water to boil. Peel and cube your potatoes, and add into the boiling water. Boil potatoes for about 20-25 minutes, until a piece is fork tender when pierced. Drain water from potatoes, or remove with a slotted spoon into the large bowl with the dressing.
    • Meanwhile, add all the dressing ingredients into a large mixing bowl; apple cider vinegar, lemon juice, Dijon mustard, sea salt, pepper, olive oil, blue cheese salad dressing (or ranch dressing), and sour cream, whisking after adding each one.
    • Next, add crispy bacon pieces, crumbled blue cheese, chopped parsley, sliced green onions, chopped celery, and thyme leaves.
    • The warm potatoes will help melt the blue cheese and absorb the dressing. Toss well and store in a sealed container in fridge, gets even better by the next day so it's perfect to make ahead.

    Notes

    Ingredient Notes & Variations

    • Blue cheese: Bacon and crumbled blue cheese make this potato salad creamy and so full of flavor. It is a classic flavor combo, but you can leave out either the blue cheese or bacon. Add any grated cheese you love!
    • Make-Ahead: A great bacon potato salad to make the day before you need it and becomes even better the next day. (Like everything!)
    • Garnish: Reserve some crispy bacon to sprinkle on the top. Add some finely minced fresh chives or parsley too for a pretty garnish.
    • Blue Cheese Dressing: Substitute Ranch Dressing or use a ranch seasoning packet mixed with milk or even buttermilk for the blue cheese dressing and use a grated cheddar cheese like a sharp cheddar cheese or one you like for a bacon ranch potatoes salad! You can also swap in Greek yogurt in place of the sour cream.
    • Potatoes: Red potatoes, Yukon gold potatoes, or russet potatoes will all work in this recipe.
    • Crunch: The crisp crunchy celery is so clean and fresh against the creamy texture. And the parsley adds a clean fresh flavor with pop of green.
    • Potato Salad Recipe No Eggs / Potato Salad No Mayo: Since there is NO EGG or MAYO, this is a safer potato salad for hot summer days at picnics. Eggs and Mayo should not be at room temperature for more than 2 hours.
    • Variations: You can add Diced Chicken in potato salad recipes with bacon instead. Then add Buffalo chicken hot sauce dressing for a wonderful twist! Bake the potatoes instead of boiling them. Then scoop them out into a bowl for a loaded baked potato salad!

    How To Get Crispy Bacon 

    • Try a pre-cooked bacon brand Since it is half cooked, it prepares easily without the mess and crisps up beautifully in the microwave on paper plates. (I use Costco Kirkland brand, but they are easy to find in the grocery store.)
    • Or bake bacon on a rack over a cookie sheet in the oven
    • Or saute bacon in a heavy skillet until crisp, this is messier but gets the job done.

    Garnish

    • Reserve some crispy bacon to sprinkle on the top. Add some finely minced fresh chives or parsley too for a pretty garnish.

    Nutrition

    Calories: 246kcal | Carbohydrates: 27g | Protein: 6g | Fat: 13g | Saturated Fat: 3g | Trans Fat: 1g | Cholesterol: 11mg | Sodium: 496mg | Potassium: 729mg | Fiber: 4g | Sugar: 2g | Vitamin A: 586IU | Vitamin C: 38mg | Calcium: 64mg | Iron: 2mg

    White Wine Sangria

    [heart_this] · Jun 24, 2022 · 22 Comments

    Two tall glasses of white sangria loaded with blueberries, raspberries, strawberries, and apple star garnish.

    Last Updated August 14th, 2023 at 10:51 pm by Lisa

    Serve this white wine sangria recipe for a light and refreshing summer sipper. It is great for July 4th celebrations, picnics, barbecue cookouts, or any summer party.

    Made with sweet summer fruit and white wine, I infused strawberries, raspberries, pineapple, blueberries, and apples to get a "red, white, and blue" look. The sweet fruit gets mixed into the wine and looks so pretty and inviting on any hot summer day...

    White Wine Sangria Recipe

    The basic idea of Sangria is to slice fruit so it infuses into the white wine. Let it chill in the fridge overnight in a large pitcher for at least 5 hours so the fruit can infuse. If you like it sweeter, stir in some sugar, apple juice, simple syrup, ginger ale, or 7up.

    1. Slice strawberries and cut pineapple chunks, and place in pitcher.
    2. Add blueberries and raspberries.
    3. Make the stars for garnish, and squeeze lemon juice over the stars to keep them from turning brown.
    4. Pour a bottle of wine (25 ounces 750ml) into the pitcher.
    5. Mix, cover, and chill in the fridge overnight.
    6. Serve in glasses on ice with straws, flag pics, and white apple stars for garnish.
    7. Optional: Add a splash of champagne, 7up, or sparkling water when serving.

    Top Sangria Tips

    Ice Cubes: Serve in a glass over ice, or with freeze fun ice cubes frozen in different shapes like stars! I set up a star-shaped ice tray and froze flag picks inside the cubes. Try freezing fruit or berries into the ice cubes for a fun touch.

    Add Fizz: Add some additional splashes of sparkling water, club soda, lemon-lime soda like 7-up or Sprite, champagne, or prosecco. Anything bubbly adds a festive sparkle!

    Brandy: Many people add brandy into sangria, it tastes amazing, and you can also swap other alcoholic ingredients that go well like Grand Marnier, triple sec, orange liqueur like triple sec, and Cointreau, or peach schnapps.

    Finishing Touches: Add colorful striped straws, and party toothpicks, and top with herbs like fresh mint, a splash of orange juice, or even punch.

    The top of two glasses of white sangria with apple star garnish loaded with fruit, and white wine.

    PRO TIP: Apple Stars are cut from ¼ round slices of apple. I used Granny Smith apples but any apples will work. Cut the stars with small star cookie cutters, and placed the cut apple stars in a small bowl with freshly squeezed lemon juice to keep them a fresh white color. Just pour the stars and the lemon juice right into the pitcher, and garnish with a couple of stars on each glass of white sangria!

    Sangria FAQ

    What is classic Spanish Sangria?

    Sangria should have at least two different fruits with one a citrus fruit. Classic Spanish red wine sangria is made with red wine, lemons, limes, and oranges.

    What is the best wine for white sangria?

    Use a crisp dry white wine like chardonnay, a sauvignon blanc, a Spanish white wine, pinot grigio, or a riesling are great for white sangria.

    What fruit goes in sangria?


    raspberries
    strawberries
    blueberries
    watermelon
    mango
    nectarine
    peaches
    pineapple
    grapes
    lemons
    oranges
    apples

    More Summer Cocktails

    Easy Margaritas made with 3 simple ingredients made in a pitcher with ice. No blender is needed, and these margaritas taste incredible! Just mix, pour, and sip.

    Straight from my trip to Cuba, this Mojito is 100% an authentic Cuban mojito! Learn the secret ingredient in these famous Cuban cocktails and what secrets make them totally authentic.

    Make a DIY Ice Bucket for your party and add instant style to your celebration. Chill your summer beverage like wine or champagne bottles to fit your party theme. Add flowers or decorations to the ice!

    These St. Germain Cocktails are easy spritzers with a blend of Elderflower liqueur, Prosecco, hibiscus tea, and a splash of club soda over crushed ice.

    • Blue rimmed margarita glasses with margaritas in them on ice cubes with sliced lime garnish.
      Easy Limeade Margaritas
    • Four Havana club glasses filled with mojitos garnished with mint.
      Authentic Mojito Recipe
    • The side of a frozen floral ice bucket with pink and purple flowers and a bottle of wine inside chilling.
      Party Ice Bucket
    • Two glasses filled with St Germain cocktails garnished with tiny purple orchids and white jasmine flowers.
      St. Germain Cocktails

    Did you love this recipe? We would love to hear from you! If you make this recipe and love it, give it a 5-star rating ⭐⭐⭐⭐⭐ with a comment. THANK YOU!! Follow Delicious Table with my free newsletter and share this recipe with your friends on Facebook, Pinterest, and Instagram.

    Two tall glasses of white sangria loaded with blueberries, raspberries, strawberries, and apple star garnish.
    Print

    White Sangria Recipe

    Serve this white wine sangria recipe for a light and refreshing summer sipper. It is great for July 4th celebrations, picnics, BBQ, cookouts, or any summer party. Made with sweet summer fruit and white wine, I infused strawberries, raspberries, pineapple, blueberries, and apples to get a "red, white, and blue" look. The sweet fruit gets mixed into the wine and looks so pretty and inviting on any hot summer day.
    Course Drinks & Cocktails
    Cuisine American
    Keyword july 4th cocktail, white sangria, white sangria recipe
    Prep Time 30 minutes minutes
    Total Time 30 minutes minutes
    Servings 10 glasses
    Calories 194kcal
    Author Lisa Hatfield

    Equipment

    • Star Shape Cookie Cutter Set
    • Patriotic Straws and Flag Pics

    Ingredients

    • 25 ounces white wine 1 bottle - pinot grigio, sauvignon blanc , or chardonnay
    • 2 cups fresh blueberries
    • 2 cups fresh raspberries
    • 2 cups fresh pineapple chunks
    • 1 small box fresh strawberries sliced
    • 3 whole granny smith apples
    • 1 whole lemon
    • 24 ounces 7 up soda or champagne or prosecco optional
    • sparkling water
    US Customary - Metric

    Instructions

    • Slice strawberries and cut pineapple chunks, place in pitcher.
    • Add blueberries and raspberries.
    • Make the stars for garnish, squeeze lemon juice over the stars to keep them from turning brown.
    • Pour a bottle of wine into the pitcher.
    • Mix, cover and chill in the fridge overnight.
    • Serve in glasses on ice with straws, and flag pics, and white apple stars for garnish.
    • Optional: Add a splash of 7up or sparkling water when serving.

    Video

    Notes

    Serving Tips

    • Serve in a glass over ice, or with fun ice cubes frozen in different shapes. Try freezing fruit or berries into the ice cubes for a fun touch.
    • Add some additional splashes of sparkling water or champagne. Anything bubbly adds a festive sparkle!

    Apple Stars

    Are cut from ¼ round slices of apple. I used Granny Smith apples but any apples will work, cut the stars with small star cookie cutters, and placed the cut apple stars in a small bowl with freshly squeezed lemon juice to keep them a fresh white color.

    What Other Fruit To Use for White Wine Sangria?

    • raspberries
    • strawberries
    • blueberries
    • watermelon
    • peaches
    • pineapple
    • lemons
    • oranges
    • apples
     

    Wine Options

    Use a 25-ounce bottle of crisp dry white wine, a sauvignon blanc, or pinot grigio that works well for this white sangria as it is lighter than chardonnay. I have used Chardonnay many times and it is delicious as well.

    Sangria Tips

     The basic idea of Sangria is to slice fruit so it infuses into the WHITE wine.  Let it chill in the fridge overnight in a large pitcher for at least 5 hours so the fruit can infuse. If you like it sweeter, stir in some sugar, apple juice, simple syrup, ginger ale, or 7up.

    Nutrition

    Calories: 194kcal | Carbohydrates: 35g | Protein: 1g | Fat: 0g | Saturated Fat: 0g | Cholesterol: 0mg | Sodium: 12mg | Potassium: 287mg | Fiber: 4g | Sugar: 28g | Vitamin A: 80IU | Vitamin C: 33.2mg | Calcium: 38mg | Iron: 0.9mg

    Blueberry Lemonade

    [heart_this] · Jun 24, 2022 · 24 Comments

    Mason jar handled glasses with blueberry lemonade garnished with blueberries, mint, and lemons halves.

    Last Updated May 21st, 2023 at 11:56 pm by Lisa

    Ice cold Blueberry Lemonade captures Summer in every sip. This tasty summer drink can be made in minutes with homemade blueberry syrup, fresh lemon juice, and sweet honey.

    The combination of berry and lemon is so refreshing. You can make a pitcher, or serve in cute mason jars with handles, and garnish with berrys or mint...

    Enjoy all the summer has to offer, spend some time putting together a small party or a picnic with sandwiches, and make some memories, be sure to pack some ice-cold lemonade!

    Homemade Blueberry Lemonade Recipe

    • 1 cup extra fine granulated sugar
    • 2 cups fresh blueberries
    • 4-6 fresh lemons (1 ½ cups lemon juice) 
    • 4-6 tablespoons of honey
    • fresh mint garnish

    Step 1: Make Blueberry Simple Syrup

    1. Combine the sugar and 1 cup of water in a small saucepan over medium heat, stirring until the sugar has dissolved.
    2. Stir in blueberries and bring to a boil; reduce heat and simmer until blueberries have broken down about 3-4 minutes.
    3. Strain the blueberry mixture through a fine mesh strainer, press down to get all the blueberry juice in through, and let cool.
    Making blueberry syrup with the sugar and blueberries bubbling in a pot.

    Step 2: Squeeze the Lemon Juice

    Using a hand juicer, squeeze 1 ½ cups of lemon juice from the lemons.

    Step 3: Mix the Blueberry Lemonade

    In a large pitcher stir the blueberry simple syrup, lemon juice, honey, and 5 cups of water.

    Step 4: Chill and Serve

    Serve over ice, with blueberries in mason jar glasses. Garnish with lemon slices, mint, or blueberries.

    How long does blueberry syrup last?


    Blueberry syrup will last chilled in the refrigerator for 2-3 weeks in an airtight container or jar.

    What goes well with lemonade?


    Classic lemonade is great for picnics and parties. Serve it with grilled burgers, hot dogs, and some side salads like pasta or potato salad.

    You can also enjoy lemonade with desserts like cookies or ice box pies, or with a birthday cake.

    Mason jar handled glasses with blueberry lemonade garnished with blueberries, mint, and lemons halves.

    Flavor Variations

    You can take any fruit or berry and make a simple syrup. Try flavors like pineapple, strawberry, raspberry, or cherries.

    On a hot summer day, add plenty of ice, and top off the lemonade with the fizz of a clear soda.

    More Summer Picnic Food Recipes

    Summer picnic food is easy with Pressed Italian Sandwiches that are neat to hold and eat. This pressed picnic sandwich recipe is bursting with flavor from the olives, pepperoncini, salami, deli meat, and more.

    Serve your sandwiches with some Classic Macaroni Salad, Watermelon Salad served in the carved-out watermelon, or a fantastic Blue Cheese and Bacon Potato Salad, and be sure to bring some Blueberry Lemonade that will make your picnic complete...

    • Picnic sandwiches on a red and white check table with sliced sandwiches.
      Picnic Food: Pressed Italian Sandwiches
    • Looking down on a white plate filled with macaroni salad and a silver fork.
      Classic Macaroni Salad Recipe
    • Looking down into a scooped out watermelon filled with rounded watermelon balls garnished with mint and feta cheese.
      Watermelon Salad
    • A small white bowl filled with bacon potato salad garnished with crispy bacon.
      Bacon Potato Salad

    Did you love this recipe? We would love to hear from you! If you make this recipe and love it, give it a 5-star rating ⭐⭐⭐⭐⭐ with a comment. THANK YOU!! Follow Delicious Table with my free newsletter and share this recipe with your friends on Facebook, Pinterest, and Instagram.

    Mason jar handled glasses with blueberry lemonade garnished with blueberries, mint, and lemons halves.
    Print

    Blueberry Lemonade Recipe

    Ice cold Blueberry Lemonade captures Summer in every sip, it is made in minutes with homemade blueberry syrup, fresh lemon juice, and honey.
    Course Beverages
    Cuisine American
    Keyword blueberry lemonade, lemonade, lemonade recipe
    Prep Time 15 minutes minutes
    Cook Time 5 minutes minutes
    Total Time 20 minutes minutes
    Servings 6
    Calories 223kcal
    Author Lisa Hatfield

    Equipment

    • Lemon/Lime Juicer
    • Ball Glass Mugs
    • Fine-Mesh Strainer

    Ingredients

    • 1 cup extra fine granulated sugar
    • 2 cups fresh blueberries
    • 1 ½ cup freshly squeezed lemon juice 4-6 lemons
    • 4-6 tablespoons honey
    US Customary - Metric

    Instructions

    blueberry syrup

    • Combine the sugar and 1 cup water in a medium saucepan over medium heat, stirring until the sugar has dissolved.
    • blueberry puree
    • Stir in blueberries and bring to a boil; reduce heat and simmer until blueberries have broken down, about 3-4 minutes.
    • Strain blueberry mixture through a fine mesh sieve, and press down to get all the blueberry juice in through and let cool.

    mix lemonade

    • Squeeze 1 ½ cups of lemon juice.
    • Mix the cooled blueberry syrup, fresh squeezed lemon juice, local honey, and 5 cups water.
    • Chill in the fridge.
    • Serve over ice with blueberries, lemon slices, and garnish with mint.

    Notes

    Serving Tips

    • You can make a pitcher and serve in cute mason jars with handles
    • Garnish with lemon slices, blueberries, and mint.
    • Classic lemonade is great for picnics and parties. Serve it with grilled burgers, hot dogs, and some side salads like pasta or potato salad.
    • You can also enjoy lemonade with desserts like cookies or cool ice box pies or a birthday cake for a children's party. 

    Fruit Flavors

     I used fresh blueberries, but frozen will work just fine!
    You can take any fruit or berry and make a simple syrup. Try flavors like pineapple, strawberry, raspberry, or cherries.
    On a hot summer day, add plenty of ice, and top off the lemonade with the fizz of a clear soda.


    Nutrition

    Calories: 223kcal | Carbohydrates: 59g | Protein: 0g | Fat: 0g | Saturated Fat: 0g | Cholesterol: 0mg | Sodium: 2mg | Potassium: 109mg | Fiber: 1g | Sugar: 54g | Vitamin A: 25IU | Vitamin C: 28.4mg | Calcium: 7mg | Iron: 0.3mg

    Homemade Granola

    [heart_this] · Jun 22, 2022 · 2 Comments

    A handmade ceramic bowl filled with yogurt and topped with granola, raspberries, and black berries.

    Last Updated July 20th, 2022 at 07:08 am by Lisa

    Homemade Granola made with fresh quality ingredients is the perfect breakfast cereal and is great in yogurt parfait bowls, granola bars, cookies, and more.

    Mix up a big batch of this healthy granola recipe loaded with natural sweeteners, lots of texture, and a super great crunch...

    Homemade Coconut Granola Recipe

    Easy homemade granola recipes are everywhere, but this one comes from a Bed and Breakfast in California where they are known for having the best granola! They make this homemade coconut oil granola year-round, and I was lucky enough to get this delicious granola recipe.

    wet ingredients

    • ¾ cup melted coconut oil
    • 3 tablespoons vanilla extract
    • 1 cup honey

    dry ingredients

    • ¼ cup chia seeds
    • 1 teaspoon cinnamon
    • 3 tablespoons brown sugar
    • 1 cup unsweetened coconut flakes
    • 1 cup wheat germ
    • 1 ½ cup pistachios, almonds, pecans
    • 2 cups bran flake cereal
    • 6 cups rolled oats (not quick oats)

    Let's Make Granola!

    1. In a large mixing bowl, add the wet ingredients; coconut oil, vanilla extract, and honey. Mix, it won't totally incorporate, just give it a good stir.
    2. Roughly chop the nuts you chose. Sliced almonds work really well, pistachios are the right size too, just rough chop larger nuts like walnuts and pecans.
    3. Next add all dry ingredients: chia seeds, cinnamon, brown sugar, pistachios, almonds, pecans, coconut, wheat germ, bran flake cereal, and rolled oats.
    4. Mix all ingredients well, place in a single layer on a large 10 x 15 sheet baking pan or cookie sheet and spread evenly for best results.
    5. Bake 225 degrees for 1 hour, and stir every 20 minutes while baking.
    6. Remove from the oven, and stir every 20 minutes until the granola is cool. This prevents the granola from forming clumps of granola clusters.
    7. Once cool, store in small ziptop bags or airtight containers like a mason jar in the refrigerator, and will keep up to two months. Don't leave it at room temperature or it will go stale.

    rolled oats

    Use old fashioned oats also labeled old-fashioned rolled oats as opposed to quick-cook oats, they have a better texture. 

    nuts

    I love sliced raw almonds, pecans, and pistachios. Other options are sunflower seeds, walnuts, flax seeds, cashews, pumpkin seeds, macadamia nuts, or sesame seeds would all be great.

    coconut oil

    Sometimes called virgin coconut oil, unrefined coconut oil is oil that has been pressed from coconut meat and undergone no further processing. Do not use different oils like olive oil as it will add an off flavor, or a vegetable oil like canola oil as it is too neutral in flavor.

    optional add-ins

    If you plan on making your own homemade granola for snacks, add some chocolate chips or dried fruit! You can also change the flavor entirely and add a sprinkle of Pumpkin Pie Spice when mixing, for a fall twist!

    Why Make Your Own Granola?

    • The taste is incredible, and you can customize the recipe with nuts and other ingredients you love.
    • It will save you money. Have you seen the price of granola, especially s quality one without additives? You can easily spend $5 or $6 or more on a 12-oz. bag of "natural" and organic is even pricier!
    • You'll know exactly what's in it. Skip an excessive amount of processed sugar, you can control what's in it by making it yourself.
    • It's easy! And uses up ingredients you probably already have on hand. You will be wondering why you haven't been making it your whole life.
    Can I freeze granola?


    Yes. Granola can be frozen in freezer zip bags or airtight containers for up to six months.

    How do you keep granola crunchy?


    Baking your granola mixture will help give it a good crunch, as it drys out the ingredients. Make sure to stir while it is cooling, and store in containers once it is dry in the refrigerator.

    Storage Tips

    PRO TIP: Granola keeps well refrigerated or frozen in small zip-top bags or sealed in containers for several weeks.

    Granola Recipes

    1. Pour coconut milk or almond milk on homemade granola for your morning cereal
    2. Top ice cream scoops
    3. Sprinkle on Smoothies and Smoothie Bowls
    4. Toss on any cereal for more crunch
    5. Bake Granola Cookies
    6. Add to Hot Oatmeal
    7. Spread peanut butter on toast and add a sprinkle
    8. Cinnamon baked apples go great with a granola topping
    9. Add to muffins or pancake batter to add texture and crunch
    10. Mix crushed granola with soft butter, flour, and sugar for a different kind of streusel topping for crisps and crumbles
    11. Bake homemade granola bars
    12. Top any yogurt with granola and toss in a few fresh fruit or berries for a beautiful breakfast.

    More Healthy Breakfast Recipes

    One great way to use your granola is Yogurt Parfaits. They can be made ahead and ready for quick breakfasts or snacks.

    For a fresh clean start for breakfast, try these amazing Pink Grapefruit Green Detox Smoothies, it is one of my new favorite breakfast recipes.

    For a healthier breakfast, that the whole family will love, try my Parmesan Baked Hash Browns. They are not cooked in oil, simply baked to a golden brown. Over the years, these hash browns are a great healthy breakfast idea that has become a reader favorite!

    It doesn't get much healthier than this gorgeous green Avocado Toast.

    • Four small yogurt parfaits made with yogurt, granola and berries.
      Yogurt Parfaits
    • Two glasses of a green smoothie recipe garnished with grapefruit slices and straws.
      Green Smoothie Recipe
    • Three golden crispy edged hash browns baked in a muffin tin on cutting board.
      Oven Baked Hash Browns
    • A close up photo of a slice of avocado toast topped with small heirloom tomatoes and microgreens.
      Avocado Toast

    Did you love this recipe? We would love to hear from you! If you make this recipe and love it, give it a 5-star rating ⭐⭐⭐⭐⭐ with a comment. THANK YOU!! Follow Delicious Table with my free newsletter and share this recipe with your friends on Facebook, Pinterest, and Instagram.

    A wooden bowl filled with granola and a wooden spoon.
    Print

    Homemade Granola Recipe

    Granola made with quality ingredients is the best breakfast cereal, use this recipe in yogurt bowls, granola bars, cookies, and more!
    Course Breakfast & Brunch
    Cuisine American
    Keyword granola, granola recipe, homemade granola
    Prep Time 15 minutes minutes
    Cook Time 1 hour hour
    Total Time 1 hour hour 15 minutes minutes
    Servings 24 cups
    Calories 249kcal
    Author Lisa Hatfield

    Equipment

    • Large Metal Sheet Pan

    Ingredients

    Wet Ingredients

    • ¾ cup melted coconut oil
    • 3 tablespoons vanilla extract
    • 1 cup honey

    Dry Ingredients

    • ¼ cup chia seeds
    • 1 teaspoon cinnamon
    • 3 tablespoons brown sugar
    • 1 cup unsweetened flaked coconut
    • 1 cup wheat germ
    • 1 ½ cup pistachios, almonds, pecans
    • 2 cups bran flake cereal
    • 6 cups rolled oats (not quick oats)
    US Customary - Metric

    Instructions

    • In a large mixing bowl, add the wet ingredients; coconut oil, vanilla extract, and honey. Mix, it won't totally incorporate, just give it a good stir.
    • Roughly chop the nuts you chose. Sliced almonds work really well, pistachios are the right size too, just rough chop larger nuts like walnuts and pecans.
    • Next add all dry ingredients: chia seeds, cinnamon, brown sugar, pistachios, almonds, pecans, coconut, wheat germ, bran flake cereal, and rolled oats.
    • Mix all ingredients well, place in a single layer on a large 10 x 15 sheet baking pan or cookie sheet and spread evenly for best results.
    • Bake 225 degrees for 1 hour, and stir every 20 minutes while baking.
    • Remove from the oven, and stir every 20 minutes until the granola is cool. This prevents the granola from forming clumps of granola clusters.
    • Once cool, store in small ziptop bags or airtight containers like a mason jar in the refrigerator, and will keep up to two months. Don't leave it at room temperature or it will go stale.

    Video

    Notes

    rolled oats

    Use old-fashioned rolled oats as opposed to quick-cook oats, they have a better texture. 

    storage

    Homemade granola keeps well in a ziplock bag or sealed container for several weeks in the refrigerator or freezer. 

    nuts

    I love slice almonds, pecans, and pistachios. But other options are sunflower seeds, walnuts, cashews, pumpkin seeds, or sesame seeds would all be great.


    Nutrition

    Serving: 0.5cup | Calories: 249kcal | Carbohydrates: 34g | Protein: 5g | Fat: 12g | Saturated Fat: 8g | Trans Fat: 1g | Sodium: 25mg | Potassium: 173mg | Fiber: 5g | Sugar: 14g | Vitamin A: 85IU | Vitamin C: 1mg | Calcium: 29mg | Iron: 2mg

    Blueberry Pie Baked Outdoors

    [heart_this] · Jun 20, 2022 · 25 Comments

    A blueberry pie that is baked outdoors on a grill with a flag shaped pie crust.

    Last Updated July 20th, 2022 at 07:08 am by Lisa

    Bake this Blueberry Pie Recipe outdoors on your gas or charcoal grill. It works just like an indoor oven and keeps your house cool on scorching hot days.

    Try chicken pot pies, baked fruit dessert pies, and even dinner casseroles. Serve this grilled dessert with a scoop of cool vanilla ice cream for cookouts on July 4th. Enjoy every delicious moment of summer...

    How To Bake In A Grill

    All the credit for this creative baking idea goes to my dear friends who live in Texas. It is so hot there during Summer, they bake all kinds of recipes outside on their grill. Once I got home, I couldn't wait to try it out, it worked perfectly and was so fun. Here are all the tips I learned...

    Set Up The Grill To Bake

    • Buy fire bricks, from a builders supply store - ask for fire-rated bricks used for pizza ovens only (not red building bricks).
    • Wrap each of the 6 fire bricks with heavy duty aluminum foil.
    • Put all 6 foil-wrapped bricks on the grill grate.
    • Place grill surface and oven temperature gauges in your grill.

    Top Outdoor Baking, Pie Crust, and Filling Tips

    • Temperature Gauges: These surface and oven gauges are inexpensive and helpful to manage the internal temperature of your grill while baking.
    • Blueberries: Frozen blueberries release way more liquid when baked due to the freezing process. So I recommend you use fresh blueberries to prevent a soggy crust. If you use frozen berries or blueberries, you will need to add a thicker like corn starch.
    • Grills: Each grill will vary a bit, the key is to not let the temperature soar over 400 degrees, or you might burn the crust. If that starts to happen, simply place some foil over the pie dough edge, and lower burners.
    • Rotate: You will need to rotate your pie about every 10 minutes to even out the hot spots in of your particular grill. Use good hot pads. Grab a cool beverage and enjoy the process. Opening the grill also allows some heat to escape and ensures the gas flames below are more evenly distributed while baking.
    • Pie Crust: Prepare your pie dough and let them chill in the fridge for at least 60 minutes, this helps get a nice flaky crust!
    • Pie Dishes, Plates, Pans: You can use either glass, ceramic pie dish, or metal on your grill. As long as you have the fire bricks underneath. If you place any dish directly over the fire, it will burn and the dish will possibly crack.
    • Grill Heat: Initially heat the grill at medium-high temperature and then drop it down through the baking process as it gets hotter and hotter, and when the grill lid is open as you rotate your pie, this will drop the temperature.

    Blueberry Pie Recipe

    PRO TIP: Keep your house cool and bake outdoors on those super hot summer days. Make your fruit pie, casserole, or dinner pie, have it ready to go and then fire up your grill!

    pie dough crust

    • 2 ½ cups all-purpose flour (sifted)
    • 1 tablespoon sugar
    • 1 teaspoon salt
    • 1 cup cold butter (cut into pieces)
    • ¼ cup ice water

    blueberry filling

    • ½ cup granulated sugar
    • ½ cup flour
    • ⅛ teaspoon salt
    • ½ teaspoon cinnamon
    • 1 tablespoon lemon juice
    • ½ teaspoon lemon zest
    • 2 tablespoons butter cut into tiny pieces
    • 5 cups fresh blueberries (frozen blueberries make a runny filling)

    PRO TIP: Frozen berries release more liquid than fresh berries, which will cause a runnier consistency in your filling. I didn't find cornstarch necessary, but you can sprinkle some in to thicken your filling!

    pie crust

    1. Sift all dry ingredients, flour, sugar, and salt.
    2. Next cut the butter with a pastry blender or cutter into the mixture or use 2 knives going in opposite directions.
    3. Next, add ice water and form it into a ball, mixing with your hands until it comes together.
    4. Wrap tightly in plastic wrap, in two halves, and chill for 60 minutes.
    5. Roll out your chilled crust and place it in the bottom of your oven-safe pie dish, and rechill the dough in the dish to ensure a flaky crust.

    blueberry pie filling

    1. In a medium bowl, mix sugar, flour, salt, cinnamon, lemon juice, lemon zest, and butter cubes. Then gently fold the blueberries into the filling mix. Set aside.
    2. Roll out your chilled crust and place the bottom crust into your oven-safe 9-inch pie dish. You can use any oven safe dish, pie plate, or metal pan. Chill the crust for up to an hour so you get a flaky crust!
    3. Next, pour the blueberry filling into the chilled pie pan or dish with the crust.
    4. Place top crust on pie, I used a flag pastry cutter from William Sonoma. Roll the edges under neatly and press down to seal the edges. You can also make a lattice crust, or roll out a top crust of your own design. Use a small star cookie cutter and pizza cutter to make a flag shaped top crust. An egg wash on top is optional, I didn't use one and found it got really brown in a few spots due to the grill heat.
    5. Bake on grill 375-400 degrees for 50 minutes.
    6. Rotate the pie every 10 minutes one quarter turn, this helps to bake it evenly. It is done when the crust is golden brown and you see the filling bubbling a bit. Rest on a wire rack with a net cover. Serve slices of blueberry pie with vanilla ice cream, and enjoy!

    Rotate the pie every 10 minutes a quarter turn, this helps it to bake even as almost all grills have hot spots.

    A graphic showing steps 5-8 of baking a blueberry pie with an American flag crust.

    Grill Pie Baking Tips

    What can you bake on a grill?


    Casseroles
    Pizza
    Fruit Pies
    Chicken Pot Pies
    Gratins
    Crisps and Tarts


    As a matter of fact, anything you can bake in your regular indoor kitchen oven can easily be baked on a gas or charcoal grill, and you don't need to adjust the recipes. Take a look at Weber Grills - Baking On The Grill article for more tips and ideas.

    Can you bake outdoors on a grill?


    Yes. You can use either a ceramic pie dish or metal on your grill, as long as you have the fire-rated bricks underneath. If you place any pie dish directly over the fire, it will burn and the dish can possibly crack.

    Initially heat the grill at medium-high temperature and then drop it down through the baking process as it gets hotter and hotter, and when the grill lid is open as you rotate your pie, this will drop the temperature.

    The most important tip is to rotate it every 10 minutes a quarter turn, this helps to bake it even.

    Keep an eye on your surface grill temperature, and keep it between 350-400. The edges can get a little dark, but when you open the grill, the temperature drops fast so it will bake the pie evenly like in the oven.

    More Pie Recipes

    • Apple Crumble Pie is everything you want, with that French crumble topping...oh my is it scrumptious.
    • American Flag Pie baked in a sheet pan is so patriotic for American holidays like July 4th, Memorial Day, and Labor Day.
    • After so many attempts, I perfected this Apple Pie Filling recipe. It...is... delicious, easy, and freezes so well.
    • A white pie dish with a slice of apple crumble pie, also known as a dutch apple pie with a crumbled topping and green apples in the background in a wood bowl.
      Dutch Apple Pie
    • A sheet pan filled with a flag pie made with strawberries, blueberries, and pie crust.
      American Flag Pie
    • A large jar filled with apple pie filling with a lid and bow.
      Apple Pie Recipe Filling

    More July 4th and Cookout Menu Recipes

    If you need patriotic recipes, look at my 100+ July 4th Recipe Collection for your Cookout Menu including grilling recipes, side dishes, picnic food ideas with drinks, 100+ July 4th Desserts, and more!

    • A graphic showing lots of food for July 4th including cheeseburgers, corn, and baked beans.
      100+ July 4th Recipes
    • A square collage of colorful grilled food, side dishes, desserts, and drink recipes to serve at an outdoor bbq cookout.
      75+ Cookout Recipes & BBQ Party Ideas
    • A graphic loaded with July 4th desserts with red white and blue cakes, pies, and treats.
      100 Patriotic 4th of July Desserts

    Did you love this recipe? We would love to hear from you! If you make this recipe and love it, give it a 5-star rating ⭐⭐⭐⭐⭐ with a comment. THANK YOU!! Follow Delicious Table with my free newsletter and share this recipe with your friends on Facebook, Pinterest, and Instagram.

    A blueberry pie that is baked outdoors on a grill with a flag shaped pie crust.
    Print

    Blueberry Pie ~ Baked On The Grill

    Bake a Blueberry Pie right on your grill, just like an oven! Serve this grilled dessert all summer with ice cream at cookouts and July 4th.
    Course Desserts & Sweets
    Cuisine American
    Keyword blueberry pie, blueberry pie recipe, outdoor baking, outdoor dessert
    Prep Time 30 minutes minutes
    Cook Time 50 minutes minutes
    Total Time 1 hour hour 20 minutes minutes
    Servings 8
    Calories 505kcal
    Author Lisa Hatfield

    Equipment

    • Fire Rated Bricks
    • Grill Surface Thermometer
    • Grill/Oven Thermometer
    • Classic Pie Dish 9"
    • Stars Pie Top Cutter
    • Pastry Cutter

    Ingredients

    pie crust

    • 2 ½ cups all-purpose flour (sifted)
    • 1 tablespoon sugar
    • 1 teaspoon salt
    • 1 cup cold butter (cut into pieces)
    • ¼ cup ice water

    blueberry filling

    • ½ cup granulated sugar
    • ½ cup flour
    • ⅛ teaspoon salt
    • ½ teaspoon cinnamon
    • 1 tablespoon lemon juice
    • ½ teaspoon lemon zest
    • 2 tablespoons butter cut into tiny pieces
    • 5 cups blueberries
    US Customary - Metric

    Instructions

    set up to bake in your grill

    • Buy fire bricks, from a builders supply store - ask for fire-rated bricks used for pizza ovens only (not red building bricks).
    • Wrap each of the 6 fire-bricks in heavy duty aluminum foil.
    • Place all 6 foil-wrapped bricks on the grill.
    • Have the surface and oven temperature gauges in place.

    pie crust

    • Sift all dry ingredients; flour, sugar, salt.
    • Next cut the butter with a pastry blender or cutter into the mixture or use 2 knives going in opposite directions.
    • Next, add ice water and form into a ball, mixing with your hands until it comes together.
    • Wrap tightly in plastic wrap, in two halves and chill for 60 minutes.

    blueberry filling

    • In a medium bowl, mix sugar, flour, salt, cinnamon, lemon juice, lemon zest, and butter cubes. Then gently fold the blueberries into the filling mix. Set aside.
    • Roll out your chilled dough and place the bottom crust into your oven-safe 9-inch pie dish. You can use any oven safe dish, pie plate, or metal pan. Chill the crust for up to an hour so you get a flaky crust!
    • Next, pour the blueberry filling into the dish with the pie crust.
    • Place top crust on, I used a flag pastry cutter from William Sonoma. Roll the edges under neatly and press down to seal the edges. You can also make a lattice crust, or roll out a top crust of your own design. Use a small star cookie cutter and pizza cutter to make a flag shaped top crust. An egg wash on top is optional, I didn't use one and found it got really brown in a few spots due to the grill heat.
    • Bake on grill 375-400 degrees for 50 minutes.
    • Rotate every 10 minutes one quarter turn, this helps to bake it evenly. When the crust is golden brown, and you see the filling bubbling a bit. Rest on a wire rack with a net cover. Serve slices of blueberry pie with vanilla ice cream, and enjoy!

    Notes

    Top Outdoor Baking, Pie Crust, and Filling Tips

    • Temperature Gauges: These surface and oven gauges are inexpensive and helpful to manage the internal temperature of your grill while baking.
    • Blueberries: Frozen blueberries release way more liquid when baked into pies due to the freezing process. So I recommend you use fresh blueberries to prevent a soggy crust. If you use frozen berries or blueberries, you will need to add a thicker like corn starch.
    • Grills: Each grill will vary a bit, the key is to not let the temperature soar over 400 degrees, or you might burn the crust. If that starts to happen, simply place some foil over the pie edge, and lower burners.
    • Rotate: You will need to rotate your pie about every 10 minutes to even out the hot spots in of your particular grill. Use good hot pads. Grab a cool beverage and enjoy the process. Opening the grill also allows some heat to escape and ensures the gas flames below are more evenly distributed while baking.
    • Pie Crust: Prepare your pie crust and let them chill in the fridge for at least 60 minutes, this helps get a nice flaky pie crust!
    • Pie Dishes, Plates, Pans: You can use either glass, ceramic pie dish, or metal on your grill. As long as you have the fire bricks underneath. (If you place any pie dish directly over the fire, the pie will burn and the pie dish will possibly crack.
    • Grill Heat: Initially heat the grill at medium-high temperature and then drop it down through the baking process as it gets hotter and hotter, and when the grill lid is open as you rotate your pie, this will drop the temperature.

    Nutrition

    Calories: 505kcal | Carbohydrates: 63g | Protein: 5g | Fat: 26g | Saturated Fat: 16g | Cholesterol: 68mg | Sodium: 556mg | Potassium: 128mg | Fiber: 3g | Sugar: 23g | Vitamin A: 845IU | Vitamin C: 9.9mg | Calcium: 18mg | Iron: 2.4mg

    Patriotic July 4th M&M Cookies

    [heart_this] · Jun 16, 2022 · 22 Comments

    A white plate filled with July 4th red white and blue cookies with icing and star sprinkles.

    Last Updated May 21st, 2023 at 11:56 pm by Lisa

    These M&M Sugar Cookies are decorated with red, white, and blue M&Ms, icing stripes, and star sprinkles. Great for beach days, picnics, summer parties, and the 4th of July.

    Baked with a classic sugar cookie dough and an easy icing recipe. Get great baking tips for same-size m&m cookies, and how to freeze and reuse leftover icing. Bake a batch of July 4th cookies to celebrate America's birthday and sweet summertime...

    How To Bake Fourth of July Patriotic Cookies

    M&M cookie recipe

    • 2  ½ cups all-purpose flour
    • 1 cup granulated white sugar
    • 1 cup butter softened
    • 1 egg or Egg Beaters
    • 1 teaspoon baking powder
    • 2 tablespoons orange juice
    • 1 tablespoon vanilla extract
    • 1  ½ cups red, white & blue m&m candies

    icing recipe

    • 4 cups powdered sugar
    • ½ cup butter softened
    • 3-4 tablespoons of milk
    • 2 teaspoons vanilla
    • red white & blue sprinkles

    Sugar Cookies

    1. Pre-heat oven to 400 degrees.
    2. In a large mixer, cream butter and sugar. Add flour, egg, baking powder, orange juice, and vanilla.
    3. Beat at low speed, scraping the bowl down, and remix until well combined for 2 minutes. Mix in M&Ms using your hands or a spatula.
    4. Use a 1" ice cream scoop, and place 1” apart on parchment-lined cookie sheets.
    5. Bake 7-10 minutes at 400 until edges are just turning golden brown.
    6. Cool cookies before decorating with frosting on a cooling rack.

    Icing Recipe

    1. In a mixer, using a wire beater/s combine powdered sugar, soft butter, milk, and vanilla.
    2. Beat on low speed until soft and fluffy for 1-2 minutes.
    3. Place in gallon zip-top bag, snip a tiny corner and drizzle on cookies to decorate in a zig-zag pattern and sprinkle with star sprinkles while the frosting is wet.

    Variations and Swaps

    • Use a cup of any red, white, and blue candies in these m&m sugar cookies.
    • Bake these as chocolate chip cookies and just use the icing with colorful sprinkles on top.
    • For a chewy cookie recipe treat, use a baking tray, and bake these into m&m cookie bars. Simply press the cookie dough into the pan, bake, and slice into bars. Drizzle with icing and sprinkles.
    • You can use unsalted butter if that is all you have. The simple ratio is for every stick, half cup, or ¼ pound, use ¼ teaspoon salt.
    How long do decorated sugar cookies stay fresh?


    About a week sealed well in a container.

    How do you keep sugar cookies fresh?


    Put them chilled in a sealed airtight container in the refrigerator.

    How far in advance can you make cookies?


    The best way to keep cookies fresh is to bake them ahead and freeze them. When you are ready to eat them, pull them out defrost for a couple of hours, and decorate if desired.

    More July 4th Desserts

    Serve an Ice Cream Cake frozen dessert this summer or for birthdays, pool parties, or July 4th. This recipe has an incredible red velvet Oreo cookie crust, layers of ice cream, pound cake, caramel, chocolate sauce, whip cream, and fun sprinkles.

    Bake a Blueberry Pie right on your grill, just like an oven! Serve this grilled dessert all summer with ice cream at cookouts and July 4th.

    Flag Pie (aka sheet pan or slab pie) is a patriotic dessert that serves 20 people as a July 4th dessert or for summer cookouts and picnics.

    Fruit Popsicles made with coconut water, strawberries, raspberries, and blueberries are refreshing low-sugar treats for hot summer days.

    • An ice cream cake with a slice removed and covered in colorful sprinkles.
      Ice Cream Cake
    • A blueberry pie that is baked outdoors on a grill with a flag shaped pie crust.
      Blueberry Pie Baked Outdoors
    • A sheet pan filled with a flag pie made with strawberries, blueberries, and pie crust.
      American Flag Pie
    • A single coconut water popsicle with strawberries, blueberries, and raspberries.
      Homemade Fruit Popsicles

    Did you love this recipe? We would love to hear from you! If you make this recipe and love it, give it a 5-star rating ⭐⭐⭐⭐⭐ with a comment. THANK YOU!! Follow Delicious Table with my free newsletter and share this recipe with your friends on Facebook, Pinterest, and Instagram.

    A white plate filled with July 4th red white and blue cookies with icing and star sprinkles.
    Print

    Patriotic July 4th Cookies

    These Patriotic Sugar Cookies are made with red, white, and blue M&Ms, frosting stripes, and star sprinkles. Great for picnics, parties, and the 4th of July!
    Course Desserts & Sweets
    Cuisine American
    Keyword Icing Recipe, July 4th cookies, M&M Cookies
    Prep Time 8 minutes minutes
    Cook Time 10 minutes minutes
    Total Time 18 minutes minutes
    Servings 36
    Calories 221kcal
    Author Lisa Hatfield

    Equipment

    • Spring Loaded Cookie Scoops (3 Sizes)
    • Patriotic Sprinkles

    Ingredients

    Sugar Cookies

    • 2  ½ cups all-purpose flour
    • 1 cup granulated sugar
    • 1 cup butter softened
    • 1 egg or EggBeaters
    • 1 teaspoon baking powder
    • 2 tablespoons orange juice
    • 1 tablespoon vanilla
    • 1  ½ cups red white & blue M&Ms

    Frosting & Decorations

    • 4 cups powdered sugar
    • ½ cup butter softened
    • 3-4 tablespoons milk
    • 2 teaspoons vanilla
    • red white & blue star sprinkles
    US Customary - Metric

    Instructions

    • Pre-heat oven to 400 degrees.

    Sugar Cookie Dough

    • In a large mixer, cream butter and sugar. Add flour, egg, baking powder, orange juice, and vanilla.
    • Beat at low speed, scraping bowl down, and remix until well combined for 2 minutes. Mix in M&Ms using your hands or a spatula.
    • Use a 1" ice cream scoop, and place 1” apart on parchment lined cookie sheets.
    • Bake 7-10 minutes at 400 until edges are just turning golden brown.
    • Cool cookies before decorating with frosting on a cooling rack.

    Decorate Sugar Cookies

    • In a mixer, using a wire beater/s combine powdered sugar, soft butter, milk, and vanilla. Beat on low speed until soft and fluffy 1-2 minutes.
    • Place in gallon zip-top bag, snip a tiny corner and drizzle on cookies in a zig-zag pattern to decorate and sprinkle with star sprinkles while the frosting is wet.
    • cookie scoop stand mixer dry ingredients parchment paper baking sheet batter airtight container
    • icing4 cups powdered sugar½ cup butter softened 3-4 tablespoons of milk2 teaspoons vanillared white & blue sprinkles

    Notes

    Icing

    If you have extra icing, you can freeze it. Simply seal in a zip-top bag and freeze. When you are ready to use it in another recipe, remove it from the freezer and bring it up to room temperature. Press the icing in the bag to get it ready to pipe again. 

    Cookie Size

    To get cookies the same size, use a spring-loaded 1" scoop.  You can also freeze cookie dough this way and have it ready in the freezer to bake, and then decorate. 


    Nutrition

    Calories: 221kcal | Carbohydrates: 31g | Protein: 1g | Fat: 9g | Saturated Fat: 6g | Cholesterol: 26mg | Sodium: 76mg | Potassium: 27mg | Fiber: 0g | Sugar: 24g | Vitamin A: 265IU | Vitamin C: 0.5mg | Calcium: 21mg | Iron: 0.5mg

    Pancake Muffins

    [heart_this] · Jun 13, 2022 · 1 Comment

    Baked pancake muffins in a tin topped with blueberries, mini chocolate chips, and raspberries.

    Hand dip Pancake Muffins into warm syrup for a fast breakfast recipe or brunch party idea. The fun part is to top them with blueberries, raspberries, mini chocolate chips, and more.

    These are so much easier than standing over the stove baking traditional pancakes one by one, and these simple ingredients are easy to have ready to go.

    Kids and especially the little ones, will simply love holding these mini pancake muffins and not using their forks!! These are ideal for little hands, and always a big hit with everyone...

    A full muffin pan filled with pancake muffins topped with blueberries, mini chocolate chips, and raspberries.

    How To Make Pancake Muffins

    • 2 cups all-purpose flour
    • 2 tablespoons granulated sugar
    • 1 teaspoon baking powder
    • ½ teaspoon baking soda
    • ½ teaspoon sea salt
    • 1 ¾ cup buttermilk
    • 2 large eggs
    • 3 tablespoons salted butter melted
    • Blueberries
    • Raspberries
    • Mini Chocolate Chips
    • Small bowls of warm syrup for dipping

    Pancake Batter Mix

    1. Preheat the oven to 400 degrees.
    2. In a large mixing bowl, use a wire whisk to combine flour, sugar, baking powder, baking soda, and salt.
    3. In a separate medium bowl whisk the wet ingredients together including buttermilk, large eggs, and melted butter. Now, while whisking, pour the buttermilk mixture into the flour mixture and mix just until combined. The pancake batter will be slightly lumpy, that's ok, don't overmix. Allow batter to rest for 2 minutes.

    Add Pancake Muffin Toppings

    1. Spray each well of two 24 mini muffin cup pans or two regular muffin pans with a non stick spray like coconut oil.
    2. Fill each muffin well about ⅔ full or a heaping tablespoon into each. Use a 1 ½ tablespoon cookie scoop and fill it nearly full, and it will bake up higher to look just like a muffin so don't overfill.
    3. Add 4 blueberries, 1 raspberry, or 1 teaspoon mini chocolate chips to the muffin cups on top of the pancake batter.
    Pancake Bites

    Bake Pancake Muffins

    1. Bake in preheated oven for 10 - 12 minutes they won't get much color, but they should be nice and puffed and the centers should be dry if tested with a toothpick. You can break one open to test or insert a toothpick which should come out clean.
    2. Cool one minute then invert onto a wire rack for the blueberry version you may need to run a sharp knife around the edges to loosen. Serve immediately with warm maple syrup in little bowls on each plate.
    3. Cinnamon Sugar Topping: For a cinnamon sugar topping, once the plain muffins are baked, brush the tops lightly with melted butter, remove them from the pan and immediately roll in cinnamon sugar - these will taste like churros!
    4. The best part of these little pancake muffins is you can keep any leftovers in a zip top freezer bag or airtight container in the fridge or toss them in the freezer. Defrost later at room temperature and then reheat on busy mornings when you have no time to cook!

    Top Pancake Muffin Recipe Tips

    • You can make these the size of regular muffins, just add more batter, and bake them a little longer in a regular muffin tin. Check with a toothpick to see if they are baked all the way through.
    • Adults adore these delicious pancakes for brunch, the first time I made them everyone loved the mini chocolate chips, I just wish I had tried more toppings!
    • These are so much easier than standing over the stove baking traditional pancakes one by one, and these simple ingredients are easy to have ready to go.
    • Homemade pancakes can also be made from this recipe if people want those, use your family's favorite pancake recipe or the best pancake mixes at your store.
    • Grab your favorite pancake mix at the store to save time to make this a super easy breakfast recipe.
    • When you use a boxed or regular pancakes muffin mix, add just a little less water. When you combine pancake mix with liquid, you want this batter thicker than regular pancakes so they set up in a muffin form.
    Pancake batter in a mini muffin tin with mini chocolate chips and berries.

    Other Pancake Muffin Toppings

    Make a batch ahead of time, and then pop them into the oven to briefly rewarm them as guests arrive.  

    As you can see the variety of mix-ins and combinations are unlimited. Have fun and use up things you have on hand and come up with different flavors and combos.

    Grab your favorite pancake toppings, and bake them right into these mini muffins. Try some fruity pancake muffins with sliced fresh, dried, or candied strawberries, mango, pineapple, and nuts or different chocolate chips.

    • crisp bacon & cheese
    • crunchy cinnamon sugar sprinkled
    • cooked sausage crumbles and cheese
    • ripe bananas
    • fresh fruit pieces
    • pineapple & coconut
    • peanut butter & mini chocolate chips
    • raspberries & mini white chocolate chips
    • dried cranberries & candied orange
    • lemon zest and blueberries

    Easy Baked Pancake Muffins FAQ

    How do you reheat pancake muffins?


    Bring these easy muffins to room temperature out of the fridge or freezer. You can reheat leftovers for the entire family on a sheet pan in the oven for 5 minutes, or in the microwave for one minute.

    What kind of a pan do you bake pancake muffins in?


    You can bake in a mini muffin tin or a regular muffin pan, be sure to use a pancake batter that is thick so it bakes in a muffin shape and you can hold them in your hand.

    Another option is to use paper muffin liners or cupcake liners in your pans to bake the perfect breakfast pancake mix muffins.

    Close up of a baked pancake muffins with mini chocolate chips in a muffin baking tin.

    More Brunch and Breakfast Recipes

    Here are some great easy breakfast ideas I have served so many times for brunch to large groups. Everyone is happy with these, serve with a glass of juice, a mimosa, or a hot cup of coffee!

    Yogurt Parfaits are a great make-ahead breakfast or snack on the go. This recipe includes homemade granola and can be made the night before.

    For another easy muffin tin breakfast recipe, try my Baked Hash Browns to go with these pancake bites. These skip frying hash browns at the stove!

    Make Brie and Bacon Mini Quiche in muffin tins or small pie dishes. Serve for brunch or breakfast, the bacon and brie combination is scrumptious!

    White Chocolate Raspberry Scones filled with white chocolate, studded with sweet raspberries, and drizzled with vanilla icing! Soft, light, and fluffy because of the cream.

    • Four small yogurt parfaits made with yogurt, granola and berries.
      Yogurt Parfaits
    • Three golden crispy edged hash browns baked in a muffin tin on cutting board.
      Oven Baked Hash Browns
    • A vintage wire rack with four baked brie and bacon mini quiche.
      Brie and Bacon Mini Quiche
    • Small white cake plate with homemade raspberry scones studded with white chocolate chips and sweet red raspberries.
      Raspberry Scones

    Did you love this recipe? We would love to hear from you! If you make this recipe and love it, give it a 5-star rating ⭐⭐⭐⭐⭐ with a comment. THANK YOU!! Follow Delicious Table with my free newsletter and share this recipe with your friends on Facebook, Pinterest, and Instagram.

    Baked pancake muffins in a tin topped with blueberries, mini chocolate chips, and raspberries.
    Print

    Easy Baked Pancake Muffins

    Hand dip Pancake Muffins in warm maple syrup and serve for breakfast or brunch parties. Decorate with blueberries, raspberries, and mini chocolate chips!
    Course Breakfast & Brunch
    Cuisine American
    Keyword pancake muffin bites, pancake muffin recipe, pancake muffins
    Prep Time 20 minutes minutes
    Cook Time 12 minutes minutes
    Total Time 32 minutes minutes
    Servings 24
    Calories 70kcal
    Author Lisa Hatfield

    Equipment

    • Mini Muffin Pan
    • Spring Loaded Cookie Scoops (3 Sizes)
    • Muffin Pan

    Ingredients

    Pancake Muffin Mix

    • 2 cups all-purpose flour
    • 2 tablespoon granulated sugar
    • 1 teaspoon baking powder
    • ½ teaspoon baking soda
    • ½ teaspoon salt
    • 1 ¾ cup buttermilk or swap in milk
    • 2 large eggs
    • 3 tablespoon unsalted butter melted

    Pancake Toppings

    • fresh blueberries
    • fresh raspberries
    • mini chocolate chips
    • syrup served warm in small bowls for dipping
    US Customary - Metric

    Instructions

    Pancake Batter Mix

    • Preheat oven to 400 degrees.
    • In a large mixing bowl, use a wire whisk to combine flour, sugar, baking powder, baking soda and salt.
    • In a separate medium bowl whisk the wet ingredients together including buttermilk, large eggs and melted butter. Now, while whisking, pour the buttermilk mixture into the flour mixture and mix just until combined. The pancake batter will be slightly lumpy, that's ok, don't overmix. Allow batter to rest for 2 minutes.

    Add Pancake Muffin Toppings

    • Spray each well of two 24 mini muffin cup pans or two regular muffin pans with a non stick spray like coconut oil.
    • Fill each muffin well about ⅔ full or a heaping tablespoon into each. Use a 1 ½ tablespoon cookie scoop and fill it nearly full, and it will bake up higher to look just like a muffin so don't overfill.
    • Add 4 blueberries, 1 raspberry, or 1 teaspoon mini chocolate chips to the muffin cups on top of the pancake batter.

    Bake Pancake Muffins

    • Bake in preheated oven for 10 - 12 minutes they won't get much color, but they should be nice and puffed and the centers should be dry if tested with a toothpick. You can break one open to test or insert a toothpick which should come out clean.
    • Cool one minute then invert onto a wire rack for the blueberry version you may need to run a sharp knife around edges to loosen. Serve immediately with warm maple syrup in little bowls on each plate.
    • Cinnamon Sugar Topping: For a cinnamon sugar topping, once the plain muffins are baked, brush tops lightly with melted butter, remove from the pan and immediately roll in cinnamon sugar - these will taste like churros!
    • Store leftover muffins in an airtight container to zip top bag in the refrigerator, reheat in oven or microwave and eat within a couple days.

    Notes

    more topping ideas

    • crisp bacon & cheese
    • crunchy cinnamon sugar sprinkled
    • cooked sausage crumbles and cheese
    • ripe bananas
    • fresh fruit pieces
    • pineapple & coconut
    • peanut butter & mini chocolate chips
    • raspberries & mini white chocolate chips
    • dried cranberries & candied orange
    • lemon zest and blueberries
    Nutrition facts have been calculated without optional toppings and maple syrup.

    make ahead

    Make a batch ahead of time, and then pop them into the oven to briefly rewarm them as guests arrive.  
    As you can see the variety of mix-ins and combinations are unlimited. Have fun and use up things you have on hand and come up with different flavors and combos.
    Grab your favorite pancake toppings, and bake them right into these mini muffins. Try some fruity pancake muffins with sliced strawberries, mango, pineapple, and nuts or different chocolate chips.

    regular muffin size

    You can make these the size of regular muffins, just add more batter, and bake them a little longer in a regular muffin tin. Check with a toothpick to see if they are baked all the way through.

    boxed regular pancake mix

    When you use a boxed or regular pancakes muffin mix, add just a little less water. When you combine pancake mix with liquid, you want this batter thicker than regular pancakes so they set up in a muffin form.

    Nutrition

    Calories: 70kcal | Carbohydrates: 9g | Protein: 2g | Fat: 2g | Saturated Fat: 1g | Cholesterol: 19mg | Sodium: 98mg | Potassium: 60mg | Fiber: 0g | Sugar: 1g | Vitamin A: 95IU | Calcium: 33mg | Iron: 0.6mg

    Party Ice Bucket

    [heart_this] · Jun 8, 2022 · 1 Comment

    The side of a frozen floral ice bucket with pink and purple flowers and a bottle of wine inside chilling.

    Last Updated May 12th, 2023 at 06:14 pm by Lisa

    Make a DIY Ice Bucket for your party and add instant style to your celebration. Chill beverages, wine, or champagne bottles to fit your party theme!

    Place it somewhere so the melting ice water can neatly drip into your backyard or garden. Have fun and get creative using flowers, herbs, sliced fruit, or greenery in this gorgeous party wine chiller...

    A handmade wine bottle chiller is so much fun to have at a backyard party, bridal shower, graduation, Mother's Day, or cookout celebration.

    I put one out for a family birthday party, and it lasted about 3 hours. People just loved it, and honestly, the wine was long gone way before it melted!                   

    Creative Ice Bucket For Party Ideas

    Fresh Flowers: Pick flowers and greenery right from your garden. I used a lot of hibiscus and nasturtiums that are very bright fun colors, along with mint and other flowers I had growing in my Southern California backyard.

    Serving Idea: Place your ice bucket on a beautiful silver tray on top of a napkin, this helps it not slide around. You can also use a cake plate or tray.

    Ice Bowls: Use this same technique to make small bowls to serve shrimp cocktail and sauce, wouldn't lemon slices be gorgeous frozen in an ice bowl to serve in?

    Just use two different size bowls as your mold and the same instructions in this post. You could make one for the shrimp cocktail, and one for the cocktail sauce.

    Holiday & Celebration Ideas: For Winter, Fall and Christmas, try leaves, cranberries, greenery, pine cones, or cinnamon sticks. On July 4th, freeze patriotic red white, and blue glitter, flowers, or other decorations. Use pink or baby blue rattles and toys for baby showers. And for birthdays and graduation freeze colorful glitter and bright flower petals frozen in wide band layers.

    DIY Wine Chiller Supplies, Materials, and Tools List

    2-gallon plastic pail (hardware store paint section)
    2 ½ quart plastic pail (hardware store paint section)
    2-gallon bottles of distilled or boiled water (freezes clear)
    assorted flowers, greenery, or sliced fruit
    clear tape
    frozen ice-pack or weight
    like stones
    2 chopsticks
    silver platter or large plate (to serve it on for your party)

    Step 1: Clear Freezer Space                                                                                                                         

    Clear a large enough space in your freezer to fit your DIY wine bottle chiller ice mold on the shelf. This was not easy for me as my freezer is always packed! 😜

    Pro Tip: Distilled water (or boiled tap water) freezes clearer than plain tap water. Pick some up at the grocery store.

    Step 2: First Layer Of Ice Mold

    Pour 3-4 inches of distilled water into the bottom of the bucket and place a layer of flowers (or fruit) in the bottom.

    This is the base of your ice bucket, pop into the freezer. Freeze until solid about 4 hours. 

    Step 3: Build The Mold

    Place the smaller container inside the larger container and rest on the ice base. Now place the small bucket inside the large bucket to hold it in place using clear packing tape.

    Weigh down the smaller container with a small frozen ice pack or a weight like large stones. Add more flowers, push them down or position them with chopsticks in the outer ring. Freeze this layer for 2-3 hours.

    If your flowers are quite large, they will hold in between the buckets.

    Step 4: Add More Flowers and Greenery

    Fill with another 3 or 4 inches of distilled water and place more flowers, herbs, etc down into the water.


    Sometimes the flowers float up and you can use a chopstick to push them down to distribute them a little more evenly around the sides.

    Step 5: Add the Final Layer of Flowers, and Greenery, Water

    Repeat and freeze in 3-4 total layers depending on bucket size. Freezing in layers allows flowers to be all the way through the frozen ice.

    Otherwise, they float all to the top. Freeze overnight before taking it out of the plastic bucket.

    Step 6: Unmold your Frozen Bucket

    When you are ready to unmold and use your frozen ice bucket, pour warm water into the center small bucket which will release the small pail from the center.

    Next, run the side of the large bucket under warm water until the bucket releases from the frozen ice piece.

    Step 7: Return Ice Bucket to Freezer Quickly

    Once your ice bucket is out of the mold, return it to the freezer until your party begins, place it out after guests arrive on a pretty silver tray with a napkin underneath to keep it from sliding and a bottle of sparkling water, wine, or champagne. Of course, it melts, so place it somewhere so it can drip into your garden!

    So pretty...and by the way, I kept this in my freezer for a couple of weeks before using it, so this project can be done well in advance of your party.

    DIY Floral Ice Bucket FAQ

    What can you freeze in a DIY ice bucket?


    Try lemon, lime, apple or orange slices
    Fruit like strawberries, blueberries, or kiwis
    Use flowers and greenery from your own garden or flower shop
    Herbs from your garden: mint, rosemary, or thyme
    Use silk flowers or artificial greenery, those are great too!

    How do you use a DIY ice wine chiller?


    Pre-chill your wine bottles so they are nice and cold before your party.

    The ice bucket will begin to melt very fast so place it out at your party just after guests arrive.

    Before your party, remove the frozen floral ice bucket from the plastic pail, and keep it in the freezer so it is good to go.

    More Party Food Ideas

    Have fun, create and share something you put your heart into with your guests, that is truly entertaining in style and your guests will love it.

    Spring Garden Crostini with edible flowers and herbs is a spectacular easy appetizer, perfect for a tea, garden party, wedding shower, or Mother's Day.

    Learn how to set up a Crostini Bar for Fall with all the toppings, plus get beautiful design inspiration for arranging an easy and relaxed party for Thanksgiving, a Fall gathering, or Friendsgiving.

    Thanksgiving Appetizers plus holiday party ideas. These easy holiday recipes include deviled eggs, dips, and delicious easy-fall appetizers like a Crostini bar.

    Dozens of Easter Menu Ideas are included in this collection of recipes. You will find all the traditional Easter Dinner classics like glazed ham, rack of lamb, sides like glazed carrots, roasted or mashed potatoes, and scrumptious desserts like an adorable bunny cake.

    • A white platter with crostini recipe topped with edible flowers and herbs.
      Spring Crostini Appetizers
    • A rustic table with small bowls filled with toppings for a fall appetizer crostini bar.
      Fall Crostini Bar
    • A collection of Thanksgiving appetizers with recipe ideas, and party decorating tips for a Fall party.
      36 Thanksgiving Appetizers
    • An Easter Dinner Ideas collage of recipes for dinner, desserts, and appetizers.
      80+ Easter Dinner Ideas

    Did you love this recipe? We would love to hear from you! If you make this recipe and love it, give it a 5-star rating ⭐⭐⭐⭐⭐ with a comment. THANK YOU!! Follow Delicious Table with my free newsletter and share this recipe with your friends on Facebook, Pinterest, and Instagram.

    The side of a frozen floral ice bucket with pink and purple flowers and a bottle of wine inside chilling.
    Print

    Party Ice Bucket

    Make a DIY Ice Bucket for your party and add instant style to your celebration. Chill beverages, wine, or champagne bottles to fit your party theme! Have fun and get creative using flowers, herbs, sliced fruit, or greenery in this gorgeous party wine chiller.
    Keyword diy ice bucket, diy wine bucket, ice wine chiller
    Prep Time 10 minutes minutes
    Cook Time 30 minutes minutes
    freezing time 8 hours hours
    Total Time 8 hours hours 40 minutes minutes
    Servings 1 ice bucket
    Calories
    Author Lisa Hatfield
    Cost 10

    Ingredients

    • 1 2-gallon plastic pail (hardware store paint section)
    • 1 2 ½ quart plastic pail (hardware store paint section)
    • 2 1-gallon bottles of distilled water or boiled water (freezes clear)
    • assorted flowers, greenery, or sliced fruit
    • clear packing tape
    • frozen ice-pack or weight like stones
    • 2 chopsticks
    • silver platter or large plate (to serve it on for your party)

    Instructions

    • Clear a large enough space in your freezer to fit your DIY wine bottle chiller ice mold on the shelf. This was not easy for me as my freezer is always packed!
    • Pour 3-4 inches of distilled water into the bottom of the bucket and place a layer of flowers (or fruit) in the bottom.
    • This is the base of your ice bucket, pop into the freezer. Freeze until solid about 4 hours. 
    • Place the smaller container inside the larger container and rest on the ice base. Now place the small bucket inside the large bucket to hold it in place using clear packing tape.
      Weigh down the smaller container with a small frozen ice pack or a weight like large stones. Add more flowers, push them down or position them with chopsticks in the outer ring. Freeze this layer for 2-3 hours.
      If your flowers are quite large, they will hold in between the buckets.
    • Fill with another 3 or 4 inches of distilled water and place more flowers, herbs, etc down into the water.
      Sometimes the flowers float up and you can use a chopstick to push them down to distribute them a little more evenly around the sides.
    • Repeat and freeze in 3-4 total layers depending on bucket size. Freezing in layers allows flowers to be all the way through the frozen ice.
      Otherwise, they float all to the top. Freeze overnight before taking it out of the plastic bucket.
    • When you are ready to unmold and use your frozen ice bucket, pour warm water into the center small bucket which will release the small pail from the center.
      Next, run the side of the large bucket under warm water until the bucket releases from the frozen ice piece.
    • Once your ice bucket is out of the mold, return it to the freezer until your party begins, place it out after guests arrive on a pretty silver tray with a napkin underneath to keep it from sliding and a bottle of sparkling water, wine, or champagne. Of course, it melts, so place it somewhere so it can drip into your garden!
      So pretty...and by the way, I kept this in my freezer for a couple of weeks before using it, so this project can be done well in advance of your party.

    Notes

    distilled water
    Distilled water (or boiled tap water) freezes clearer than plain tap water. Pick some up at the grocery store.
    what can you freeze in the ice bucket?
    Try lemon, lime, apple or orange slices
    Fruit like strawberries, blueberries, or kiwis
    Use flowers and greenery from your own garden or flower shop
    Herbs from your garden: mint, rosemary, or thyme
    Use silk flowers or artificial greenery, those are great too!
    tips to use it
    Pre-chill your wine bottles so they are nice and cold before your party.
    The ice bucket will begin to melt very fast so place it out at your party just after guests arrive.
    Before your party, remove the frozen floral ice bucket from the plastic pail, and keep it in the freezer so it is good to go.

    Raspberry Scones

    [heart_this] · Jun 7, 2022 · 3 Comments

    Small white cake plate with homemade raspberry scones studded with white chocolate chips and sweet red raspberries.

    Last Updated May 12th, 2023 at 06:14 pm by Lisa

    Bake a batch of Raspberry Scones studded with sweet berries, white chocolate chips, and drizzled with vanilla icing, for light, soft fluffy results.

    Many times, homemade scones are cakey, dry, and crumbly. These raspberry scones are different because they are made with both crème fraîche and heavy whipping cream, the secret. Bake up a batch, they are everything you want in a perfect scone with a cup of hot tea or coffee...

    You'll Love This Scone Recipe!

    • These scones are made with 1 ¼ cup of heavy cream and 1 cup crème fraîche. Once you try this versus the traditional butter scones (which are fabulous too!) is these are soft, crumbly, and super moist. I learned this recipe from a very close baker friend who serves thousands of these a month at her Tea House.
    • Frozen raspberries are the secret to mixing into the dough. The reason you do this is to keep the fruit from bleeding into the dough and turning it a purplish color.
    • Freeze these then bake them right from the freezer! So great for breakfast or a special snack.
    • A raspberry white chocolate scone recipe that is perfect for summer berry picking.
    • The combination of raspberries and sweetness of white chocolate makes these the most delicious scones.
    • Top of each scone with some clotted cream and raspberry jam for a British high tea treat.
    • These are so nice to bake for a ladies brunch, wedding shower, or for Valentine’s day for your sweetie.
    • The icing is SO SO good and easy. It makes them super delicious.
    • Serve with a good strong cup of coffee, and fresh fruit, for a special breakfast, just like the bakeries and best coffee shops in town.
    • You can make larger scones if you wish, just cut into larger triangles.
    • The pretty raspberry color and icing drizzle is so elegant, and the perfect pairing with a good cup of tea for an afternoon tea or garden party.
    • Next time you make them, try small tiny bite sizes, hearts, or mini triangles for your guests.

    White Chocolate Raspberry Scones

    Scone Dough

    • 3 ¼ cup all-purpose flour
    • ½ cup sugar
    • 2 tablespoons baking powder
    • ¼ teaspoon salt
    • 1 ¼ cup heavy whipping cream
    • 1 cup crème fraîche
    • 2 teaspoons organic vanilla extract
    • 1 teaspoon raspberry flavor extract
    • 1 cup frozen raspberries (place a small box of fresh berries in the freezer overnight)
    • 1 cup white chocolate chips (or milk, dark chocolate chips, or white chocolate chunks)

    PRO TIP: Freezing the raspberries prevents them from bleeding into the dough and making it a purple color! Lay them on a small tray or plate in the freezer several hours before you bake the scones.

    1. In a large bowl, stir together the dry ingredients; flour, sugar, baking powder, and salt. Mix the coarse crumbs well, and set aside.
    2. In a large mixing bowl, mix the wet ingredients. Beat vanilla extract, raspberry extract, and 1 ¼ cups heavy whipping cream on medium-high with a wire whisk attachment until soft peaks form. Then add crème fraîche, beating this wet mixture until well combined.
    3. Next, using a rubber spatula carefully fold the white chocolate chips and dry mixture with the whipping cream to combine.
    4. Add frozen raspberries and fold the dough in by hand, it will be a sticky dough. The top of the dough might get a little wet from the frozen berries, but that's okay! Just work to distribute the raspberries through the scone dough. Don't overmix.
    5. Turn dough on a lightly floured board. Knead carefully until soft dough forms, roll dough into a ball, and push into a one-inch thick square shape. Use a bench scraper to get the scone dough loose from the work surface.
    6. Next, cut scones into rounds using a biscuit cutter or cut small triangles.
    7. Line a large sheet pan or baking tray with parchment paper, this recipe makes 32 small scones. Use a sharp knife, and cut square scone dough into 4 quarters, then cut each of those quarters into 8 small triangles and place on the large baking sheet in a single layer and space them 3 inches apart.

    bake scones

    1. You can bake all 32 scones or place unbaked scones in layers, on parchment pieces of paper in a freezer-safe container and freeze.
    2. Bake scones on the middle oven rack at 375 for 15 minutes of bake time until edges are just turning golden brown.
    3. Bake FROZEN scones at 375 for 20 minutes until edges are just turning golden brown.

    Icing Drizzle

    • 2 cups powder sugar
    • ¼ cup melted butter
    • 4 tablespoons milk
    • 1 teaspoon vanilla extract

    After baking, cool the scones and then drizzle with icing softened on the counter for an hour or so.

    If they are hot, the icing will run everywhere. Your patience will be rewarded...

    1. In a small bowl, mix the powder sugar, melted butter, milk, and vanilla with a rubber spatula. Once it becomes thin and able to pipe out of a bag, scoop it into a freezer zip lock bag.
    2. Snip off a tiny corner of the end, push the icing down into that corner, twist the bag, and go back and forth motion, over the scones to add an icing drizzle.
    3. Or place icing in a squeeze bottle (these are easy to find in grocery stores) and using the same back and forth motion, drizzle icing on each cooled scone.
    4. Another option is to make a white chocolate drizzle. Simply melt white chocolate chips with a teaspoon of vegetable oil, and drizzle on top of the scones.

    Top Scone Baking Tips

    Freeze The Raspberries:

    The answer is to use frozen raspberries. Some people also use freeze-dried raspberries, those are not as easy to find in stores, but are available and work in this recipe. Place a small box of raspberries in the freezer overnight.

    Baking Time:

    There are so many scone recipes out there showing how to make scones in a food processor, with a rolling pin, or using a pastry cutter. Some people use a cheese grater for the cold butter and fuss with all these techniques.

    From my experience, the less you handle this dough the better. What you want are tender scones! This recipe comes from one of my favorite French tea shops in Southern California and uses crème fraîche, but heavy cream works really well to make them flaky, soft, and not dry and crumbly.

    Unbaked Dough

    PRO TIP: The dough will become wet from pressing the frozen raspberries into the dough, and that is ok!

    Frozen Dough Scones

    You can either bake all the scones right away or freeze them in an airtight container and bake them later.

    These scones can be made ahead, tucked in the freezer, and baked anytime. Cool them first, drizzle with a little icing, and you have a special dessert treat!

    You can bake these right from the freezer, no thawing required...

    Frozen raspberry scones dough cut and studded with white chocolate chips and sweet red raspberries.
    What Are Scones?

    Scones are a baked sweet dessert that is often glazed with icing or egg wash and are popular to serve with afternoon tea, breakfast, or as a snack.

    Why Use Heavy Cream In Scones?

    Heavy cream makes scones very tender and crumbly, they are softer than a butter scone recipe.

    More Fruit Desserts

    Calling all Bakers. Pies and Crisp Desserts are a classic way to end a feast, so make some Apple Pie Filling, a great way to use up lots of apples and is freezer friendly, then bake THE BEST Apple Crumble Pie. Try my Apple Crisp recipe, it's one of my oldest treasured best recipes. Another fun treat is heart-shaped Chocolate Cherry Hand Pies, so romantic and sweet.

    Did you know you can bake on a grill? Well, you can! Make a Blueberry Pie Baked Outdoors and wow your friends and family (plus keep the house cool). And speaking of pie, what about a Cherry Pie Ice Cream Sandwich?

    • A large jar filled with apple pie filling with a lid and bow.
      Apple Pie Recipe Filling
    • A white pie dish with a slice of apple crumble pie, also known as a dutch apple pie with a crumbled topping and green apples in the background in a wood bowl.
      Dutch Apple Pie
    • A red cookie plate filled with heart shaped chocolate hand pies.
      Chocolate-Cherry Hand Pies
    • Apple Crisp in a red bowl with a silver spoon, ice cream, and drizzled with caramel sauce.
      Apple Crisp
    • A blueberry pie that is baked outdoors on a grill with a flag shaped pie crust.
      Blueberry Pie Baked Outdoors
    • A white platter with cherry pie ice cream sandwiches.
      Cherry Pie Ice Cream Sandwiches

    For some tropical flavor, make Pineapple Coconut Madeleines or Coconut Lemon Lime Bars, sure to whisk you off to dessert paradise! Or dip some Frozen Bananas into chocolate and sprinkle on the toppings.

    For a healthy treat, freeze some Fruit Popsicles that are guilt-free or make Raspberry Lemon Sorbet in lemon peel cups. For an easy no bake dessert, put this Peach Cheesecake Pie together in minutes!

    For a patriotic pie, make a Flag Sheet Pan Pie with a strawberry pie filling.

    And if you want to bake a REAL Fresh Strawberry Cake with Strawberry Buttercream Frosting, this delicious recipe from scratch. And for a quick dessert great for parties, make Salted Caramel Apple Dip, always a big hit!

    • Overhead looking a madeleines cooled on a round baking rack with fresh pineapple and coconut fruit.
      Pineapple Coconut Madeleines
    • A small aluminum sheet pan with brown paper and 5 frozen bananas chocolate dipped and coated in nuts and dried fruit.
      Frozen Chocolate Covered Bananas
    • A single coconut water popsicle with strawberries, blueberries, and raspberries.
      Homemade Fruit Popsicles
    • Bright yellow lemons carved out and filled with raspberry strawberry lemon sorbet as a summer dessert.
      Raspberry Lemon Sorbet
    • A slice of peach pie on a white plate with a silver fork on a red white check tablecloth.
      Peach Cheesecake Pie (No-Bake)
    • A sheet pan filled with a flag pie made with strawberries, blueberries, and pie crust.
      American Flag Pie
    • A freshly baked and decorated strawberry cake with real strawberries as decorations.
      Fresh Strawberry Cake
    • Slices of green Granny Smith apples around a white dish with a sweet dessert dip inside a low small white dish with a ruffled edge, and a piece of apple sticking into the dip.
      Caramel Apple Dip

    Did you love this recipe? We would love to hear from you! If you make this recipe and love it, give it a 5-star rating ⭐⭐⭐⭐⭐ with a comment. THANK YOU!! Follow Delicious Table with my free newsletter and share this recipe with your friends on Facebook, Pinterest, and Instagram.

    Small white cake plate with homemade raspberry scones studded with white chocolate chips and sweet red raspberries.
    Print

    White Chocolate Raspberry Scones

    White Chocolate Raspberry Scones filled with white chocolate, studded with sweet raspberries, and drizzled with vanilla icing! Soft, light, and fluffy because of the cream.
    Course Desserts & Sweets
    Cuisine American
    Keyword raspberry scones, scones, scones recipe, white chocolate raspberry scones
    Prep Time 20 minutes minutes
    Cook Time 15 minutes minutes
    Freeze Raspberries 3 hours hours
    Total Time 20 minutes minutes
    Servings 32
    Calories 181kcal
    Author Lisa Hatfield

    Equipment

    • Spoon Spatula
    • Hand Mixer
    • Classic Cookie Sheet
    • Parchment Paper Sheets

    Ingredients

    Scones

    • 3 ¼ cup all-purpose flour
    • ½ cup sugar
    • 2 tablespoons baking powder
    • ¼ teaspoon salt
    • 1 ¼ cup heavy whipping cream
    • 1 cup crème fraîche (or 1 cup of heavy cream)
    • 2 teaspoons organic vanilla extract
    • 1 teaspoon raspberry flavor extract (or swap in almond extract)
    • 1 cup frozen fresh raspberries place small box of berries in freezer overnight
    • 1 cup white chocolate chips (or dark chocolate chips)

    Icing Drizzle

    • 2 cups powder sugar
    • ¼ cup melted butter melt cold butter in microwave
    • 4 tablespoons milk
    • 1 teaspoon organic vanilla extract
    US Customary - Metric

    Instructions

    • Freeze fresh raspberries, so they mix into the scones and don't discolor the scone dough to a purplish color.
    • Lay them on a small tray or plate in the freezer several hours before you bake the scones.

    scone dough

    • In a large bowl, stir together the dry ingredients; flour, sugar, baking powder, and salt. Mix the coarse crumbs well, and set aside.
    • In a large mixing bowl, mix the wet ingredients. Beat vanilla extract, raspberry extract, and 1 ¼ cups heavy whipping cream on medium-high with a wire whisk attachment until soft peaks form. Then add crème fraîche, beating this wet mixture until well combined.
    • Next, using a rubber spatula carefully fold the white chocolate chips and dry mixture with the whipping cream to combine.
    • Add frozen raspberries and fold dough in by hand, it will be a sticky dough.
      The top of the dough might get a little wet from the frozen berries, but that's okay! Just work to distribute the raspberries through the scone dough. Don't overmix.
    • Turn dough on a lightly floured board. Knead carefully until soft dough forms, roll dough into a ball, push into a one inch thick square shape. Use a bench scraper to get the scone dough loose from the work surface.
    • Next, cut scones into rounds using a biscuit cutter or cut small triangles.
    • Line a large sheet pan with parchment paper, this recipe makes 32 small scones. Use a sharp knife, and cut square scone dough into 4 quarters, then cut each of those quarters into 8 small triangles and place on the sheet pan in a single layer and space them 3 inches apart.

    bake scones

    • You can bake all 32 scones or place unbaked scones in layers, on parchment pieces in a freezer safe container.
    • Bake scones on the middle oven rack at 375 for 15 minutes of bake time until edges are just turning golden brown.
    • Bake FROZEN scones at 375 for 20 minutes until edges are just turning golden brown.

    Icing Drizzle

    • In a small bowl, mix the powder sugar, melted butter, milk, and vanilla with a rubber spatula. Once it becomes a thinner and able to pipe out of a bag, scoop into a freezer zip lock bag.
    • Snip off a tiny corner of the end, push the icing down into that corner, twist the bag and go back and forth motion, over the scones to add an icing drizzle.
    • Or place icing in a squeeze bottle (these are easy to find in grocery stores) and using the same back and forth motion, drizzle icing on each cooled scone.
    • Another option is to melt white chocolate chips with a teaspoon of vegetable oil, and drizzle on top of the scones.

    Notes

    icing

    The icing will keep in the fridge in a ziplock bag or plastic squeeze bottle for a couple of weeks. Let it rest on the counter an hour or so until it softens, then drizzle on your cooled scones!

    bake or freeze dough

    You can bake all 32 scones or place unbaked scones in layers, on parchment pieces in a freezer-safe container.

    Nutrition

    Calories: 181kcal | Carbohydrates: 25g | Protein: 2g | Fat: 8g | Saturated Fat: 5g | Cholesterol: 21mg | Sodium: 47mg | Potassium: 130mg | Sugar: 14g | Vitamin A: 230IU | Vitamin C: 1.2mg | Calcium: 63mg | Iron: 0.7mg

    S'more Pizookie Skillet Cookies

    [heart_this] · May 31, 2022 · 1 Comment

    A cast iron skillet filled with a smore chocolate chip cookie with a fork inside.

    Last Updated July 23rd, 2023 at 12:32 pm by Lisa

    S'more chocolate chip skillet cookies also called pizookies, are baked into the ultimate cookie dessert, loaded with milk chocolate, semi-sweet chocolate chips, mini peanut butter cups, graham cracker shards, and toasted marshmallows all melted together into a gooey cookie.

    Mini skillet cookies are typically made in small cast iron skillets that bake the cookie dough and toppings. But you can make these in either large or small cast iron skillets, or on cookie sheets, and serve them with a big scoop of ice cream on top...

    Ya think there is enough chocolate in this easy dessert?

    You can of course add what you love, but one of the most perfect desserts for Summer is s'mores! I love to make these for guests out at my firepit and add a whole piece of chocolate candy like Reese's peanut butter cups in between the graham crackers and hot melted marshmallow...oh so good!

    So that inspired the mini Reeses...

    Mini Skillet Chocolate Chip Cookies Recipe

    • 2 ¼ cups all-purpose flour
    • 1 teaspoon baking soda
    • 1 teaspoon salt
    • 1 cup softened butter
    • ¾ cup granulated sugar
    • ¾ cup packed brown sugar
    • 1 teaspoon vanilla extract
    • 2 large eggs

    S'more Cookie Toppings

    • 2 milk chocolate Hershey Bars (break bar into small pieces)
    • 2 graham crackers (broken into pieces)
    • ½ cup Semi-Sweet Chocolate Chips
    • 1 cup mini marshmallows
    • ½ cup mini size Reece's Peanut Butter Cups
    • 2 scoops of vanilla ice cream optional topping

    PRO TIP: The best thing about these is you can make individual cookies for each person, or one super large one and slice it for a real crowd pleaser.

    Make Skillet Cookie Dough

    1. In the bowl of a stand mixer, beat the wet ingredients; softened butter, granulated sugar, brown sugar, and vanilla extract until creamy. Combine flour, baking soda, and salt in a small bowl. Add eggs, one at a time, beating well after each addition. Gradually beat in flour mixture until combined. Or mix ingredients in the same order with a wooden spoon in a large mixing bowl.
    2. Press cookie dough into each mini cast iron skillet, and create a slight bump in the center as the edges rise during baking.
    3. Add S'more Toppings evenly into the cookie dough, pushing the pieces in just a bit to help it bake evenly.

    Baking Skillet Cookies

    1. Place in oven and bake at 400 until the center is mostly set and the marshmallows are golden brown, about 18-20 minutes bake time. Baking time can vary a bit based on the pan you use and how thick your cookie is with toppings.
    2. Top with scoops of vanilla ice cream, and serve hot!

    Skillet Cookie Baking Tips

    cookie dough:  I used the classic Original Nestle Toll House Cookie Dough recipe. You can use any homemade or store bought cookie dough. And freeze any extra dough to bake up another day.

    cookie sheet pans: will work fine with this recipe in case you don't have a skillet pan. Use a piece of parchment paper on your sheet pan to make it easier to clean up. Shape the cookie dough into a large 6" cookie and press the s' more toppings, and bake. 

    more s'more toppings: evenly add into the cookie dough, pushing the pieces in just a bit to help it bake evenly, use any type of chocolate chip you love.

    • chocolate chunks
    • peanut butter chips
    • dark chocolate
    • heath bar chips
    • butterscotch chips
    • white chocolate chips
    • cream de Menthe chips
    • put a big scoop of ice cream on top, and you can even drizzle caramel sauce or hot fudge sauce on top!

    peanut butter skillet cookie: to make one, use a peanut butter cookie dough recipe, and add peanut butter chips and or chopped peanuts.

    Skillet Cookie and Pizookie FAQ

    What is a pizookie?


    Pizookie cookies are very popular, also known as 'pizza-cookies', thus the name pizookie was born. Baked and served in personal-sized circular pans or mini cast iron skillets, and often served hot out of the oven with ice cream on top.

    What is a S'more?

    A S'more is a delicious combination of graham crackers, a piece of a chocolate bar, and toasted marshmallows all mushed together. The marshmallows are toasted over an open campfire on a skewer.

    S'mores got their name because you always want SOME MORE!

    What pans are best for skillet cookies?


    Any kind of a smaller oven-safe skillet will work. Cast iron is great as it holds heat and bakes evenly. Look for well-priced cookie skillets at HomeGoods TJ max, Cost Plus World Market, and online.

    Mini Skillets: Use smaller skillets, like a 6 inch mini skillet, preferably a cast iron pan, or small mini skillets as they are labeled.

    Large Cookie Sheet Pan: Spray with coconut oil non-stick spray or lay a piece of parchment paper on your sheet pan to help the cookie bake evenly and easier clean up.

    Giant Cookie: You can make one gigantic cookie and use an oven safe large skillet or cast iron pan.

    More Chocolate Dessert Recipes

    Got a chocolate craving? These are sure to become some of your favorite desserts to cure that sweet tooth...

    S'more Cookie Dough Truffles are an easy no-bake dessert candy with chocolate chips, graham crackers, and mini marshmallows just like campfire s'mores!

    Nut Goodie Bar Candy is an addictively sweet chocolate peanut butter candy bar famous in Midwest USA. An easy no-bake dessert candy served right from the freezer. Some people call these "Nut Goodies", and they are loaded with creamy nougat and crunchy peanuts.

    Bake a spooky Halloween Cake (9 x 13 sheet cake) marbled inside, has chocolate frosting, and step-by-step decorating tips and ideas. You can make this graveyard cake and decorate it a day before your Halloween party. I have a free design template to download for the chocolate decorations, which are so easy. The fence, gate, tree, tombstones, "dirt" and bones make this cake enchanting.

    Frozen Chocolate-Covered Bananas always remind me of the best days of summer. Add any toppings you love, these are the easiest desserts...

    • A lady holding a s'more cookie dough truffle cut open with mini marshmallows inside.
      S'more Cookie Dough Truffles
    • Nut Goodie Bar Candy in mini white paper cups.
      Nut Goodie Bar Candy
    • A chocolate Halloween Cake with gate, fence, tree and tombstones.
      Halloween Cake
    • A small aluminum sheet pan with brown paper and 5 frozen bananas chocolate dipped and coated in nuts and dried fruit.
      Frozen Chocolate Covered Bananas

    Did you love this recipe? We would love to hear from you! If you make this recipe and love it, give it a 5-star rating ⭐⭐⭐⭐⭐ with a comment. THANK YOU!! Follow Delicious Table with my free newsletter and share this recipe with your friends on Facebook, Pinterest, and Instagram.

    A cast iron skillet filled with a smore chocolate chip cookie with a fork inside.
    Print

    S'more Pizookie Skillet Cookies

    S'more chocolate chip skillet cookies also called pizookies, are baked into the ultimate cookie dessert, loaded with milk chocolate, semi-sweet chocolate chips, mini peanut butter cups, graham cracker shards, and toasted marshmallows all melted together into a gooey cookie.
    Course Desserts & Sweets
    Cuisine American
    Keyword pizookie, s'mores cookies, skillet cookie
    Prep Time 15 minutes minutes
    Cook Time 20 minutes minutes
    Total Time 35 minutes minutes
    Servings 16
    Calories 461kcal
    Author Lisa Hatfield

    Equipment

    • Small Lodge Cast Iron 6.5" Skillet
    • Classic Cookie Sheet
    • Parchment Paper Sheets

    Ingredients

    • 2 ¼ cups all-purpose flour
    • 1 teaspoon baking soda
    • 1 teaspoon salt
    • 1 cup softened butter (salted or unsalted)
    • ¾ cup granulated white sugar
    • ¾ cup packed brown sugar
    • 1 teaspoon vanilla extract
    • 2 large eggs

    S'more Toppings

    • 2 Hershey Bar break bar into small pieces
    • ½ cup semi-sweet chocolate chips
    • 2 graham crackers broken into pieces
    • 1 cup mini marshmallows
    • ½ cup mini Reece's Peanut Butter Cups
    • 2 scoops vanilla ice cream optional topping
    US Customary - Metric

    Instructions

    pick your pans

    • Use either small 6" cast-iron skillets, a large cookie sheet pan or you can use a large oven safe skillet.
    • Spray each small skillet with coconut oil non-stick spray (OR if using cookie sheet pans, lay a piece of parchment paper on your sheet pan).

    make the cookie dough

    • In a large bowl of a stand mixer, beat the wet ingredients; softened butter, granulated white sugar, brown sugar, and vanilla extract until creamy.
    • Combine the dry ingredients; flour, baking soda, and salt in a small bowl. Add eggs, one at a time, beating well after each addition.
    • Next, gradually beat in flour mixture until combined. Or mix with a wooden spoon in a large mixing bowl.
    • Press cookie dough into each mini cast iron skillet, and create a slight bump in the center as the edges rise during baking. Add S'more toppings pushing the chocolate bar pieces, chocolate chips, peanut butter cups, and graham cracker shards in just a bit to help it bake evenly.

    bake the pizookie

    • Place in oven and bake at 400 until the center is mostly set and the marshmallows are golden brown, about 18-20 minutes bake time.
    • Baking time can vary a bit based on the pan you use and how thick your cookie is with toppings.
    • Top with big scoops of vanilla ice cream, and serve hot!

    Notes

    What pans are best for skillet cookies?

    Any kind of a smaller oven-safe skillet will work. Cast iron is great as it holds heat and bakes evenly. Look for well-priced cookie skillets at HomeGoods TJ max, Cost Plus World Market, and online.
    Mini Skillets: Use smaller skillets, like a 6 inch mini skillet, preferably a cast iron pan, or small mini skillets as they are labeled.
    Large Cookie Sheet Pan: Spray with coconut oil non-stick spray or lay a piece of parchment paper on your sheet pan to help the cookie bake evenly and easier clean up.
    Giant Cookie: You can make one gigantic cookie and use an oven safe large skillet or cast iron pan.

    Make Skillet Cookie Dough

    more s'more toppings: evenly add into the cookie dough, pushing the pieces in just a bit to help it bake evenly, use any type of chocolate chip you love.
    • chocolate chunks
    • peanut butter chips
    • dark chocolate
    • heath bar chips
    • butterscotch chips
    • white chocolate chips
    • cream de Menthe chips
    • put a big scoop of ice cream on top, and you can even drizzle caramel sauce or hot fudge sauce on top!
    peanut butter skillet cookie: to make one, use a peanut butter cookie dough recipe, and add peanut butter chips and or chopped peanuts.
     

    Nutrition

    Calories: 461kcal | Carbohydrates: 56g | Protein: 5g | Fat: 25g | Saturated Fat: 14g | Cholesterol: 53mg | Sodium: 375mg | Potassium: 215mg | Fiber: 3g | Sugar: 36g | Vitamin A: 400IU | Calcium: 41mg | Iron: 3mg

    Baked Turkey Meatballs

    [heart_this] · May 29, 2022 · 1 Comment

    A red Italian bowl with hot pasta, sauce and turkey meatballs topped with shaved parmesan cheese.

    Last Updated June 15th, 2023 at 10:06 pm by Lisa

    A Turkey Meatball recipe that is oven-baked with a special secret for flavorful, tender, moist deliciousness in every bite. Serve on hot pasta with spaghetti sauce, in soup, or layer in a cheesy meatball sub sandwich.

    With just a handful of ingredients, these make a light healthy homemade dinner. Frozen meatballs from scratch are so worth the time to make and are great for fast dinners...

    Delicious Table started because of this recipe for homemade meatballs. I was dared on a girl's weekend to post my easy meatball recipe on the internet. This was my very first recipe post back in May of 2015, and one of my all time favorite recipes.

    There are so many different ways to make a baked meatball recipe. I promise you, these have so much flavor from the veggies and parmesan cheese baked inside, they really are the very best meatballs...

    Turkey Meatball Recipe

    This recipe makes 44 - 2 inch meatballs. This is a ground turkey recipe, but you can swap in ground beef, Italian sausage, ground chicken, or ground pork.

    • 3 pounds lean ground turkey 
    • 1 medium yellow onion (2 cups roughly chopped)
    • 6 whole carrots (2 cups roughly chopped)
    • 6 stalks of celery (2 cups roughly chopped 2-3" pieces)
    • ½ cup finely chopped basil
    • ½ cup finely chopped fresh parsley (or fresh herbs like sage, thyme, or chives)
    • 1 tablespoon olive oil
    • 1 cup breadcrumbs (or swap ground almonds or almond flour for gluten-free meatballs)
    • ½ cup grated parmesan cheese

    How To Bake Meatballs In The Oven

    1. Preheat the oven to 400 degrees Fahrenheit.
    2. Rough chop veggies in batches and pulse in a food processor or grate on a box grater. 1 small onion, 5 carrots, and 5 celery stalks. Process veggies in batches and place ground vegetables into a large bowl as you go.
    3. Next dice ½ cup finely chopped basil, and ½ cup finely chopped parsley into the mixing bowl, and toss together.
    4. Heat a large pan or cast iron large skillet, add 1 tablespoon olive oil and saute the veggies for 3 minutes on medium heat, keep stirring, then turn off the heat.
    5. Place the sautéed veggie mixture in a large mixing bowl, and cool. Next, add 3 lbs of ground turkey (or ground beef, Italian pork sausage, etc.), 1 cup of breadcrumbs (or ground almonds), and ½ cup of grated parmesan cheese.
    6. Stir and completely mix with 2 forks to "fluff" the meat mixture.
    7. Line a large baking sheet with parchment paper. Use a 2" ice cream or cookie scoop to portion the meatballs. The scoop makes the meatballs all the same size and is faster than hand rolling.
    8. Preheat your oven to 400 degrees. Bake 25-30 minutes until golden brown with crispy edges.

    PRO TIP: Sauteing the veggies brings a depth of flavor, and makes them super soft, fluffy, and tasty meatballs.  

    Steps to make scratch meatballs from shredding the vegetables to adding it to ground meat, with breadcrumbs, parmesan cheese and baking them on a sheet pan.

    PRO TIP: The easiest way to portion out meatballs is to use a small ice cream scoop. The scoop makes the meatballs round and all the same size, and so must faster than hand-rolling!

    Internal Turkey Meat Temperature

    The internal temperature for ground turkey meatballs should be 165 degrees.

    One of the best ways to test temperature is to use a professional-grade meat thermometer. Use a good wireless meat thermometer with probes or instant-read meat thermometer.

    How To Make Frozen Meatballs

    PRO TIP: Frozen meatballs are so easy, simply lay them on a sheet pan and freeze them. Then seal them in a Food Saver bag, airtight container, or freezer bag and toss in the freezer!

    PRO TIP: Since this makes so many meatballs and sauce, freeze extra skinny turkey veggie meatballs on sheet pans either cooked or uncooked and place them in zip bags or use a Food Saver vacuum sealer for fast easy future meals. The pasta sauce freezes well too!

    How To Make Meatball Sauce

    This sauce is so seriously so easy and good, you might not want the stuff in the jar anymore...

    • 2 tablespoons butter
    • 1 tablespoon olive oil
    • 1 large yellow onion diced
    • 1 teaspoon Italian seasoning
    • ½ teaspoon ground pepper
    • ¼ teaspoon red pepper flakes
    • ½ teaspoon garlic powder
    • ½ teaspoon sugar
    • 1 teaspoon sea salt (kosher salt)
    • ½ teaspoon black pepper
    • 1 - 28 oz can of crushed tomatoes
    • 1 - 6 oz small can tomato paste
    1. Cook spaghetti noodles per package instructions, and keep warm but don't overcook or leave them in the boiling water or they get soggy.
    2. Heat butter and olive oil in a large heavy pan, add diced onions, saute until soft 5 minutes, then all 6 seasonings, canned tomatoes, and tomato paste.
    3. Simmer the marinara sauce until it thickens about 10-15 minutes, stir it every 5 minutes. Keep marinara sauce warm.
    4. Ladle Sauce on hot noodles, place 2-4 meatballs on noodles, top with parmesan cheese.

    Why Oven Baked Meatballs Are So Good!

    • Types Of Ground Meat: Use any type of ground meat, swap in lean ground beef, Italian sausage, ground chicken, or ground pork.
    • Healthy Turkey Meatballs: These are quite healthy, and are a cleaner version of most traditional meatball recipes; low-fat lean meat like ground turkey, secretly stashing the veggies inside, and baking versus pan-frying.
    • Cooking Temp & Time: The high temperature has a shorter cooking time, and cooks the best baked meatballs quickly which doesn't dry them out!
    • Frozen Meatballs: Make these and freeze them ahead for a day when you don't have time to figure out what to make for dinner and look like a complete kitchen genius whipping out a homemade dinner. Simply thaw in the refrigerator all day then bake when you get home.
    • Different Veggies: Use what you have on hand, or try broccoli, cauliflower, or sweet potato. Any vegetable that you can finely grind up will work, just be sure to saute it before adding it into your meat mix.
    • Herbs & Seasonings: Add fresh or dried herbs you like or have in your garden. You can add some Italian seasoning, fresh rosemary, or oregano. Go easy on oregano, it is a strong flavor! Garlic cloves are always a good option with meatballs, use crushed minced garlic and saute with your veggies so its cooked.
    • Breadcrumbs: If you don't have breadcrumbs, you can use any leftover bread. Simply dry it out, and run it through a food processor to make your own free breadcrumbs. Panko bread crumbs are great and Italian bread crumbs are really nice as well. Use a good bread like a baguette, ciabatta roll or focaccia for more flavor. Also, swap in ground almonds or almond flour for a low carb option.
    • Eggless: These meatballs are so moist you don't need to crack an egg in them! The sauteed veggies, breadcrumbs, and parmesan cheese help to bind them together perfectly.
    • Quick Clean Up: Next time you are making homemade meatballs, line a prepared baking sheet with parchment paper. This makes cleaning up a breeze! Plus you don't have to clean up your stove top from all the grease splatter. Also, you can put cooking spray on a sheet pan and bake them up.
    • Low Carb Ideas: For low-carb meals, serve these meatballs and swap the regular pasta out with cauliflower rice or zucchini noodles with your favorite sauce for a healthy dinner. Try my amazing Cauliflower Alfredo Sauce, you won't miss the real thing one bit.
    • Meatball Appetizers: These meatballs make fantastic appetizers! Scoop smaller meatballs, bake them, and stick toothpicks into each one. Then serve with a small bowl of warm marinara sauce for dipping.

    Turkey Meatball FAQ

    How do I know when turkey meatballs are done?


    When an instant-read meat thermometer reaches 165 degrees they are cooked, slice one in half to be sure they are done all the way through.

    Can you cook turkey meatballs from frozen?


    For a quick dinner, pull the frozen meatballs from the freezer and if you have time, bring to room temperature for an hour then bake on a parchment-lined sheet pan or pan saute and use them in your favorite dish. Internal temperature for turkey meatballs should be 165 degrees. You can also cook frozen meatballs right from the refrigerator, they might take slightly longer to cook depending on their size. Bake them at 400 degrees for 25-30 minutes.

    How to make moist meatballs?


    To avoid dry meatballs, try adding sauteed vegetables and parmesan cheese inside the meatball mixture. It makes the most tenter and moist meatballs possible. Plus they are way more packed with flavor than simply using breadcrumbs and eggs as the meatball binder. You will notice a huge difference when you bite into juicy meatballs versus dry ones.

    How do you keep turkey meatballs from falling apart?

    A binder needs to be inside the meatball mixture to hold them together while cooking or baking. Most recipes use breadcrumbs and eggs. Try good breadcrumbs, a little olive oil, grated hard cheese like parmesan or romano cheese, or creamy cheeses like ricotta or feta.

    How do you flavor different meatball recipes?

    Make flavorful meatballs your way, with simple ingredients at home. Use the kind of meat you have on hand or grab just a few more meatball ingredients you need from the grocery store.

    Chicken Meatballs: add in some buffalo hot sauce, minced garlic, panko, paprika, onion powder salt, and pepper.

    Italian-style meatballs: For Italian meatballs, add in Italian flavors like a good sausage, Italian bread crumbs, and mozzarella cheese. Try some Italian seasoning, dried oregano, minced garlic, and sauteed vegetables.

    Beef Meatballs: Use a combination of ground beef, and mix in some pork or ground sausage with good seasonings, sauteed ground vegetables, and some kind of cheese. You can also add in a little bit of some soy sauce, Worcestershire sauce, bbq sauce, or teriyaki sauce to up the flavor profile.

    What to make with leftover meatballs?

    -Leftover Meatball Simple Recipes: Make a piping hot bowl of turkey meatball soup with a healthy meatball recipe.

    -Serve classic meatballs and spaghetti for an easy dinner with your favorite pasta sauce and parmesan cheese bread.

    -Top the hot bowl of steamy pasta like penne, bow tie, or gnocchi, with your favorite sauce like tomato basil or a white sauce like alfredo, and add some meatballs.

    -Use these cooked meatballs for Cheesy Meatball Subs, a cozy pure comfort food dinner. Top will melted mozzarella cheese and sauce for a scrumptious meal the whole family will love.

    A red Italian bowl with hot pasta, sauce and turkey meatballs topped with shaved parmesan cheese.

    More Dinner Recipes

    Turkey Chili with Black Beans can be made in a slow cooker, crockpot, or stovetop. An all-time family favorite and one of my most tasty recipes with years of rave reviews!

    Cheesy Meatball Subs are loaded with gooey melted cheese and homemade marinara sauce. Use frozen or homemade ground beef, turkey, or pork meatballs.

    A super easy cheesy Chicken Enchilada Casserole layered with corn tortillas, Mexican Oaxaca cheese, black olives, shredded chicken, and fire roasted salsa verde for added depth of flavor from south of the border.

    Classic Beef Stroganoff made with ground beef is so popular and beloved worldwide. But what if I shared my secrets to packing in flavor and using various beef cuts?

    • A bowl of turkey chili topped with sour cream, grated cheese, and green onions with corn bread muffins.
      Turkey Chili With Black Beans
    • A meatball sub with marinara sauce and melted golden gooey cheese on a toasted baguette.
      Cheesy Meatball Subs
    • A white casserole dish with chicken enchilada casserole topped with black olives and lots of melted cheese.
      Chicken Enchilada Casserole
    • White plate filled with Beef Stroganoff on noodles with mushrooms.
      Best Beef Stroganoff Recipe

    Did you love this recipe? We would love to hear from you! If you make this recipe and love it, give it a 5-star rating ⭐⭐⭐⭐⭐ with a comment. THANK YOU!! Follow Delicious Table with my free newsletter and share this recipe with your friends on Facebook, Pinterest, and Instagram.

    A red Italian bowl with hot pasta, sauce and turkey meatballs topped with shaved parmesan cheese.
    Print

    Turkey Meatballs and Sauce

    Turkey Meatballs are oven-baked with a special secret for flavorful tender, moist deliciousness in every bite. Serve on hot pasta with sauce, in soup, or layer in a cheesy meatball sub sandwich. With just a handful of ingredients, these make a light healthy homemade dinner. Frozen meatballs from scratch are so worth the time to make and are great for fast dinners.
    Course Dinner & Main Dishes
    Cuisine American
    Keyword baked turkey meatballs, turkey meatballs
    Prep Time 30 minutes minutes
    Cook Time 52 minutes minutes
    Total Time 1 hour hour 20 minutes minutes
    Servings 10
    Calories 432kcal
    Author Lisa Hatfield

    Equipment

    • Spring Loaded Cookie Scoops (3 Sizes)
    • Parchment Paper Sheets
    • Large Metal Sheet Pan
    • Digital Meat Thermometer

    Ingredients

    • 16 ounces uncooked spaghetti

    Turkey Meatballs

    • 3 pounds lean ground turkey or swap in ground beef, Italian sausage, ground chicken, or ground pork
    • 1 medium yellow onion 2 cups roughly chopped
    • 6 whole carrots 2 cups roughly chopped
    • 6 stalks celery 2 cups roughly chopped 2-3" pieces
    • ½ cup fresh basil finely chopped
    • ½ cup fresh parsley finely chopped
    • 1 tablespoon olive oil
    • 1 cup breadcrumbs (or sub ground almonds)
    • ½ cup grated parmesan cheese

    Meatball Sauce

    • 2 tablespoons butter
    • 1 tablespoon olive oil
    • 1 large yellow onion diced
    • 1 teaspoon Italian seasoning
    • ¼ teaspoon red pepper flakes
    • ½ teaspoon garlic powder
    • ½ teaspoon sugar
    • 1 teaspoon sea salt
    • ½ teaspoon black pepper
    • 1 28 oz can of crushed tomatoes
    • 1 6 oz small can tomato paste
    US Customary - Metric

    Instructions

    Make The Meatballs

    • Preheat the oven to 400 degrees.
    • Rough chop veggies in batches and pulse in a food processor or grate on a box grater. 1 small onion, 5 carrots, 5 celery stalks. Process veggies in batches, and place ground vegetables into a large bowl as you go.
    • Next dice ½ cup finely chopped basil, and ½ cup finely chopped parsley into the mixing bowl, toss together.
    • Heat a large pan or heavy skillet, add 1 tablespoon olive oil and saute the veggies 3 minutes on medium high heat, keep stirring, then turn off the heat.
    • Place the sautéed veggie mixture in a large mixing bowl, and cool. Next, add 3 lbs ground turkey (or ground beef, Italian pork sausage etc.), 1 cup breadcrumbs (or ground almonds) and ½ cup grated parmesan cheese.
    • Stir and completely mix with 2 forks to "fluff" the meatball mixture.
    • Line a large baking sheet with parchment paper. Use a 2" ice cream scoop or cookie scoop to portion the meatballs. The scoop makes the meatballs all the same size and is faster than hand rolling. If you certainly can roll them with clean hands, that works just fine. Space them evenly in a single layer on your pan.
    • Preheat your oven to 400 degrees. Bake meatballs 25-30 minutes until golden brown with crispy edges. Use a meat thermometer food safety, turkey is cooked at 165 degrees Fahrenheit.

    Make The Spaghetti and Meatball Sauce

    • Cook spaghetti noodles per package instructions, keep warm but don't overcook or leave in the boiling water.
    • Heat butter and olive oil in a cast iron pan or large skillet, add diced onions, saute until soft 5 minutes, then add the Italian seasoning, red pepper flakes, sea salt, pepper, garlic powder, sugar, canned tomatoes, and tomato paste.
    • Stir until the marinara sauce thickens about 10-15 minutes. Keep marinara sauce warm.
    • Ladle Sauce on hot noodles, place 2-4 meatballs on noodles, top with parmesan cheese.
    • Store leftover sauce and meatballs in an air-tight container, use within 3 days or keep in the freezer for up to 3 months.

    Notes

    Pasta Sauce

    The pasta sauce freezes very well, to reheat add frozen sauce to a pan with a small amount of water and reheat until hot.

    Top Turkey Meatball Tips

    This recipe makes about forty-four two-inch meatballs. Freeze extra meatballs on sheet pans either cooked or uncooked, and place them in zip bags or use a Food Saver vacuum sealer for fast easy future meals.
    • Types Of Ground Meat: Use any type of ground meat, swap in lean ground beef, Italian sausage, ground chicken, or ground pork.
    • Healthy Turkey Meatballs: These are quite healthy, and are a cleaner version of most traditional meatball recipes; low-fat lean meat like ground turkey, secretly stashing the veggies inside, and baking versus pan-frying.
    • Cooking Temp & Time: The high temperature has a shorter cooking time, and cooks the best baked meatballs quickly which doesn't dry them out!
    • Frozen Meatballs: Make these and freeze them ahead for a day when you don't have time to figure out what to make for dinner and look like a complete kitchen genius whipping out a homemade dinner. Simply thaw in the refrigerator all day then bake when you get home.
    • Different Veggies: Use what you have on hand, or try broccoli, cauliflower, or sweet potato. Any vegetable that you can finely grind up will work, just be sure to saute it before adding it into your meat mix.
    • Herbs & Seasonings: Add fresh or dried herbs you like or have in your garden. You can add some Italian seasoning, fresh rosemary, or oregano. Go easy on oregano, it is a strong flavor! Garlic cloves are always a good option with meatballs, use crushed minced garlic and saute with your veggies so its cooked.
    • Breadcrumbs: If you don't have breadcrumbs, you can use any leftover bread. Simply dry it out, and run it through a food processor to make your own free breadcrumbs. Panko bread crumbs are great and Italian bread crumbs are really nice as well. Use a good bread like a baguette, ciabatta roll or focaccia for more flavor. Also, swap in ground almonds or almond flour for a low carb option.
    • Eggless: These meatballs are so moist you don't need to crack an egg in them! The sauteed veggies, breadcrumbs, and parmesan cheese help to bind them together perfectly.
    • Quick Clean Up: Next time you are making homemade meatballs, line a prepared baking sheet with parchment paper. This makes cleaning up a breeze! Plus you don't have to clean up your stove top from all the grease splatter. Also, you can put cooking spray on a sheet pan and bake them up.
    • Low Carb Ideas: For low-carb meals, serve these meatballs and swap the regular pasta out with cauliflower rice or zucchini noodles with your favorite sauce for a healthy dinner. Try my amazing Cauliflower Alfredo Sauce, you won't miss the real thing one bit.
    • Meatball Appetizers: These meatballs make fantastic appetizers! Scoop smaller meatballs, bake them, and stick toothpicks into each one. Then serve with a small bowl of warm marinara sauce for dipping.

    Nutrition

    Calories: 432kcal | Carbohydrates: 50g | Protein: 42g | Fat: 7g | Saturated Fat: 2g | Polyunsaturated Fat: 2g | Monounsaturated Fat: 2g | Trans Fat: 1g | Cholesterol: 79mg | Sodium: 636mg | Potassium: 868mg | Fiber: 4g | Sugar: 6g | Vitamin A: 6796IU | Vitamin C: 11mg | Calcium: 106mg | Iron: 3mg

    The Best BBQ Dry Rub

    [heart_this] · May 27, 2022 · 6 Comments

    A large pork loin roast with a lot of dry rub seasoning pouring over the top.

    Last Updated December 11th, 2022 at 09:58 pm by Lisa

    Use this grilling and BBQ dry rub on chicken, steaks, for pulled pork, and mix it into grilled burgers. This seasoning blend adds amazing flavor and color to anything you grill, smoke, or barbeque.

    Use up extra spices you have on hand, and package this in a jar, with a cute tag and a spoon. This bbq spice makes a great homemade food gift.

    Use this barbecue rub spice mixture of simple ingredients in so many more ways. Sprinkle it on a tri-tip steak, on ribs, season corn on the cob, and even popcorn. Make a jar and enjoy this seasoning in your cooking, it is so good...

    This Is The Best Dry Rub!

    • Many of the store purchased spice rubs can be a bit too salty, or smoky, this one has a perfect balance. It will become your secret ingredient in your kitchen.
    • A great way to use up extra spices that might otherwise be thrown out or expire.
    • A savory rub with ZERO preservatives! It is my "go-to" homemade spice blend.
    • Makes a wonderful hostess or holiday gift. Personalize your gift tags or a label with a cute airtight container or mason jar.
    • The taste of this blend of spices gives a nice color to the grilled meats, vegetables, and even fish like cedar grilled salmon. It is the best way to up your grilling game!

    Grill and BBQ Rub Recipe

    • ¼ cup brown sugar (golden brown, light, or dark brown sugar)
    • ¼ cup sweet paprika (not hot paprika)
    • 3 tablespoons cracked black pepper
    • 3 tablespoons sea salt (kosher salt)
    • 2 tablespoons lemon pepper
    • 2 teaspoons chili powder
    • 2 tablespoons garlic powder
    • 2 tablespoons onion powder
    • 2 teaspoons celery seeds
    • 1 teaspoon cayenne pepper

    Make A Big Batch

    1. Combine all the ingredients for this dry bbq rub recipe in a small bowl and stir to mix using a small whisk to evenly combine.
    2. Store any leftover mix at room temperature in an airtight jar out of light and heat in a dry place. It will keep for at least 3 months.
    A graphic of seasonings on a plate to make a homemade dry rub.

    Gift This Homemade Rub Recipe

    Many years ago, I gave this dry spice rub as my Christmas gift to friends and family to use for dry spice rub recipes like steak, chicken and pork.

    With a tight budget that year, I ordered inexpensive little glass shaker spice jars and ordered custom labels off the internet. Everyone raved about their gourmet food gift that year!

    Homemade BBQ Rub FAQ

    What is a dry rub?


    A mixture of various seasonings and spices, that are rubbed on a cut of meat before grilling or smoked in a BBQ.

    BBQ rubs or dry rubs as they are called, are used to add deep flavor and color to the meat as it cooks. There are many recipes to try it on, and some specific to a cut or type of meat like pork, beef, lamb, or chicken.

    How do I use a BBQ rub?


    Try a dry rub on grilled, barbeque, or smoked meats:

    pork shoulder
    chicken breasts
    baby back ribs
    pork chops
    pork ribs
    chicken legs
    tri-tip steak
    pork tenderloin
    chicken wings
    pork loin
    flank steak
    rib eyes
    beef brisket
    spare ribs
    chicken thighs
    pork butt


    Then brush on barbecue sauce for the last 5 minutes of grilling.

    PRO TIP: Buy meat on sale, and make portions ready to grill. Sprinkle BBQ rub on each piece of meat, and freeze in zip lock bags or with a FoodSaver. When ready to use, defrost overnight in the fridge, and throw on the grill!

    More Dry Spice Rub Recipes

    Make the BEST Grilled Hamburgers. Simply stir this mix into the ground beef, add some Worcestershire sauce, and grill!

    Corn on the Cob - run a stick of butter on each clean ear of corn and sprinkle on the BBQ rub, wrap in foil set on the grill, and rotate until cooked about 15 minutes. Add to hot buttered popcorn... it's great!

    The best recipe for this seasoning mix on Pork Loin Pulled Pork: Oven Roasted. Use this on a large pork loin cut to make pulled pork in the oven cooking it low and slow.

    What is more American than hamburgers or Classic Cheeseburgers? These are topped with a copycat In-N-Out Burger sauce spread and seasoning.

    • The steps to season hamburgers, with them shaped on parchment paper as burgers before grilling.
      Grilled Hamburger Seasoning
    • A white casserole dish with oven roasted pulled pork shredded and ready to eat in tacos or a recipe for dinner.
      Oven Roasted Pulled Pork
    • Ears of grilled corn on a white platter seasoned with melted butter on top.
      Grilled Corn On The Cob
    • A person holding a messy grilled burger topped with melted cheese, burger sauce, lettuce, tomato, and pickles.
      The Best Cheeseburger

    Did you love this recipe? We would love to hear from you! If you make this recipe and love it, give it a 5-star rating ⭐⭐⭐⭐⭐ with a comment. THANK YOU!! Follow Delicious Table with my free newsletter and share this recipe with your friends on Facebook, Pinterest, and Instagram.

    A large pork loin roast with a lot of dry rub seasoning pouring over the top.
    Print

    The Best BBQ Dry Rub

    Use this grilling and BBQ dry rub on chicken, steaks, pork, hamburgers, and as a rib rub. This seasoning blend adds amazing flavor and color!
    Course Seasoning
    Cuisine American
    Keyword BBQ Rub, Dry Rub, Rib Rub
    Prep Time 15 minutes minutes
    Total Time 15 minutes minutes
    Servings 25
    Calories 20kcal
    Author Lisa Hatfield

    Equipment

    • Spice Storage Jar

    Ingredients

    • ¼ cup brown sugar
    • ¼ cup paprika
    • 3 tablespoons cracked black pepper
    • 3 tablespoons sea salt
    • 2 tablespoons lemon pepper
    • 2 teaspoons chili powder
    • 2 tablespoons garlic powder
    • 2 tablespoons onion powder
    • 2 teaspoons celery seeds
    • 1 teaspoon cayenne pepper
    US Customary - Metric

    Instructions

    • Combine all the ingredients for this dry bbq rub recipe in a small bowl and stir to mix using a small whisk to evenly combine.
    • Store leftovers at room temperature in an airtight jar out of light and heat in a dry place. It will keep for at least 3 months.

    Video

    Notes

    BBQ Chicken BBQ

    This BBQ rub is fantastic on grilled chicken. Apply BBQ sauce in the last 5 minutes.

    Beef or Steak 

    It's a perfect for beef BBQ too. It's especially good on tri-tip, ribs, and steaks. But honestly, it makes the BEST grilled hamburgers. Simply mix into the ground beef, with some Worcestershire sauce, and grill! 
    TIP: Buy meat on sale, make portions ready to grill, sprinkle on pieces, and freeze in zip lock bags or with a FoodSaver.

    Ribs and Pork

    Try this on grilled or smoked baby back ribs, pork tenderloin, or even pork chops.
    Pork Loin Pulled Pork: Oven Roasted Low and Slow is so good with this rub, you need a large pork loin to make this pulled pork in the oven.

    Nutrition

    Calories: 20kcal | Carbohydrates: 5g | Protein: 1g | Fat: 1g | Saturated Fat: 1g | Polyunsaturated Fat: 1g | Monounsaturated Fat: 1g | Sodium: 842mg | Potassium: 64mg | Fiber: 1g | Sugar: 2g | Vitamin A: 619IU | Vitamin C: 1mg | Calcium: 16mg | Iron: 1mg

    Chicken Noodle Soup

    [heart_this] · May 24, 2022 · 2 Comments

    A blue bowl filled with homemade chicken noodle soup.

    Last Updated July 24th, 2022 at 07:54 pm by Lisa

    The classic flavors from simple ingredients make this the Best Homemade Chicken Noodle Soup recipe. It is comfort food in a bowl and a great way to use up leftover chicken. Roasting the meat and using scratch chicken stock bone broth with a squeeze of lemon (my secret ingredient) adds amazing flavor to this classic homemade soup!

    When it's a cold day or someone you love isn't feeling so well, a hot bowl of soup is definitely the ticket. And with only 10 ingredients, it's easy to grab anything you might need from the grocery store.

    In no time flat you can whip up a pot of good old fashioned homemade chicken noodle soup from scratch for someone you love, and boy will they love you for making it...

    Easy Chicken Noodle Soup Recipe

    fresh chicken: Many of you like to make your meat in a slow cooker or instant pot, and that works. I think the flavor you get from oven roasted is worth it, it makes really tender chicken, and there is very little prep time. Here are some various cuts that all work just fine:

    • raw whole (cut into pieces)
    • boneless skinless thighs
    • boneless thighs skin on
    • bone-in breasts (also labeled split breasts)
    • boneless skinless breasts (boneless breasts)

    You can also use diced or shredded leftover turkey breast for this soup!

    PRO TIP: For an easy rotisserie chicken noodle soup, simply take the meat off a store-bought one and save those bones for stock in your freezer. You can have soup on the dinner table in no time at all using!

    dried noodles: cook the noodles to al dente, and you can use any type of noodles or pasta brand you love. My favorite brand is the extra wide no yolk noodles.

    chicken stock: make your own homemade stock or buy a good brand at the store. You can use some good bouillon in water to make stock. This flavorful broth tends to not taste anywhere as good as hommemade stock or bone broth made with a chicken carcass and vegetables. Another good alternative is low-sodium broth.

    fresh herbs and vegetables: you can add some fresh parsley, bay leaves, or (a single bay leaf), fresh thyme, storebought wavy-cut carrot chips, garlic powder or crushed cloves of garlic.

    creamy chicken noodle soup: use some heavy cream to make your soup creamy, add ½ cup right toward the end of cooking and give a good quick stir.

    • ½ teaspoon sea salt
    • ¼ teaspoon freshly ground black pepper
    • 4 organic chicken breasts boneless or split bone in
    • 3 tablespoons butter
    • 1 brown or yellow onion finely diced
    • 2 cups sliced medium carrots ½" smaller pieces (or pre-sliced bagged wavy carrot chips)
    • 3 cups diced celery stalks ½" sliced on diagonal
    • 1 8 oz bag No Yolk Noodles or pasta of your choice
    • 8 cups chicken stock homemade preferred (or two 32 oz boxes)
    • ½ lemon

    Making Classic Chicken Noodle Soup

    1. On a cutting board, finely dice the onion, and dice the celery and carrots into ½' pieces. For a shortcut you can buy wavy carrot chips that are presliced.
    2. Line a large sheet pan with parchment paper for easy clean up. Place breasts (they can be boneless or split bone in breasts) season with salt and pepper on both sides.
    3. Heat oven to 400 degrees, and bake small breasts bone in for 45 minutes and larger ones for 50-55 minutes. Boneless usually cooks faster, depending on the thickness of them, check boneless breasts at 20 mintues. Make sure to read the internal temperature with a good meat thermometer, it is cooked at 160 degrees Fahrenheit.
    4. Let chicken rest on the sheet pan until cool enough to handle, remove the bones and skin, and dice into ½" pieces.
    5. On medium-high heat, in a large pot or dutch oven, add 3 tablespoons of butter, ½ teaspoon sea salt, and ¼ teaspoon black pepper into the bottom of the pot. Once butter is melted, add onions and cook until soft. Then add the chopped celery and carrots, and cook for 5 minutes. As the vegetables cook, scrape up the browned bits off the bottom of the pot with a wooden spoon.
    6. Add stock and bring to a simmer on medium-low heat. Add the cooked meat and uncooked pasta noodles. One tip is just use as many noodles as you will eat for that meal. Save the leftover soup without noodles in it, otherwish the noodles get soggy.
    7. Squeeze ½ a lemon into the soup, you will be amazed how this brightens up the flavor!
    8. Cook for about 10 minutes until the noodles are cooked. Ladle into soup bowls and serve with crackers, breadsticks, or homemade bread.
    9. Reheast leftover soup back on the stove in a pan with more dry noodles the next day. You can freeze soup in an airtight container for up to 3 months.

    How To Make Diced Chicken For Recipes

    Keep shredded, sliced, cubed, or finely diced chicken ready to go so you can whip out easy chicken dinner recipes in a rush saving time and money.

    Diced Chicken Recipes
    Keep shredded, sliced, cubed, or finely diced chicken ready so you can whip out easy chicken dinner recipes in a rush saving time and money. No more stressing out about last-minute weeknight dinners while the entire family is hungry. Oven-baked or roasting is so easy to do at home and elevates all your recipes into deliciousness.
    GET THE RECIPE PIN IT
    Cutting boneless chicken breasts into diced cubes of meat to use in recipes.
    Cutting boneless chicken breasts into diced cubes of meat to use in recipes.

    Comforting Chicken Noodle Soup FAQs

    What leftover chicken to use in chicken noodle soup?


    cooked chicken meat: whole chicken, breasts, leftover rotisserie chicken, thighs, or dark meat.

    Roasting adds a depth of flavor and the big diced chicken pieces make this soup meal.  

    Why do chicken soup noodles get soggy?


    Save the soup without the noodles for leftovers, and then reheat on the stove for 10 minutes and add a new batch of uncooked noodles.

    For some reason, noodles soak up the chicken stock if left in the soup.

    Just reheat until simmering for about 10-15 minutes and the noodles will cook through.

    What to serve with chicken noodle soup?


    A great way to enjoy a bowl of chicken noodle soup, is a sprinkle of parmesan cheese, a squeeze of fresh lemon, or slice a baguette open and toast, then slather on some butter. Add crackers, bread sticks, or even cheese toast on the side.

    How to freeze chicken noodle soup?


    Leftover chicken soup can freeze well, but it is best to not leave the noodles in the soup as they do get a bit soggy from soaking up the broth.

    To reheat the soup in a pot, run water over the frozen container to release the frozen block, add some water, and reheat on medium-low heat. Then add some more dried noodles or pasta, they cook as the soup gets hot.

    More Soup Recipes

    Learn how to make your own Homemade Chicken Stock, also known as bone broth. This recipe has all the step-by-step top cooking tips I have learned over the years. I share how to freeze it, plus 15 delicious new recipe ideas. Save money and have some ready to elevate dinner, soups, and stews.

    You can make a big pot of my Cheese Soup, or turn it into Broccoli Cheese Soup by just adding broccoli florets! This is such a delicious recipe, you will make again and again.

    Creamy Chicken Gnocchi Soup is so easy to put together and a hearty dinner recipe. Loaded with juicy shredded chicken, vegetables, and gnocchi which are soft puffy "Italian dumplings".

    Tomato Soup with Basil Dumplings can be rich and chunky or creamy smooth and is loaded with a veggie rainbow for a hearty lunch or dinner.

    • 3 small Mason jars filled with chicken stock and black heart shaped labels.
      Chicken Stock (Bone Broth)
    • White bowl filled with cheese soup and a homemade crouton on top.
      Cheese Soup
    • A white bowl full of Chicken Gnocchi Soup with a silver spoon and bread nearby.
      Chicken Gnocchi Soup
    • A bowl of tomato soup and cup of soup in a white cup garnished with fresh basil.
      Tomato Soup With Basil Dumplings

    Did you love this recipe? We would love to hear from you! If you make this recipe and love it, give it a 5-star rating ⭐⭐⭐⭐⭐ with a comment. THANK YOU!! Follow Delicious Table with my free newsletter and share this recipe with your friends on Facebook, Pinterest, and Instagram.

    A blue bowl filled with homemade chicken noodle soup.
    Print

    Homemade Chicken Noodle Soup Recipe

    The classic flavors from simple ingredients make this the Best Homemade Chicken Noodle Soup recipe. It is comfort food in a bowl with roasted chicken, scratch chicken stock, and a squeeze of lemon (my secret ingredient) that add amazing flavor to this classic homemade soup!
    Course Dinner & Main Dishes
    Cuisine American
    Keyword chicken noodle soup, chicken soup, chicken soup recipe, homemade chicke noodle soup, leftover chicken noodle soup
    Prep Time 10 minutes minutes
    Cook Time 50 minutes minutes
    Total Time 1 hour hour
    Servings 8
    Calories 273kcal
    Author Lisa Hatfield

    Equipment

    • Large Metal Sheet Pan
    • Parchment Paper Sheets
    • Cast Iron Dutch Oven
    • Chef Knife

    Ingredients

    • ½ teaspoon sea salt
    • ¼ teaspoon freshly ground black pepper
    • 4 organic chicken breasts boneless or split bone in
    • 3 tablespoons butter
    • 1 brown or yellow onion finely diced
    • 2 cups diced carrots ½' or pre-sliced bagged wavy carrot chips
    • 3 cups diced celery ½" sliced on diagonal
    • 1 8 oz bag No Yolk Noodles or pasta of your choice
    • 8 cups chicken stock homemade preferred (or 2 32 oz boxes)
    • ½ lemon
    US Customary - Metric

    Instructions

    • On a cutting board, finely dice the onion, and dice the celery and carrots into ½' pieces. For a shortcut you can buy wavy carrot chips that are presliced.
    • Line a large sheet pan with parchment paper for easy clean up. Place 4 breasts (they can be boneless or split bone in breasts) season with salt and pepper on both sides.
    • Heat oven to 400 degrees, and bake small breasts bone in for 45 minutes and larger ones for 50-55 minutes. Boneless usually cooks faster, depending on the thickness of them,so check them at 20 mintues. Make sure to read the internal temperature with a good meat thermometer, it is cooked at 160 degrees Fahrenheit.
    • Let the cooked chicken rest on the sheet pan until cool enough to handle, remove the bones and skin, and dice into ½" pieces.
    • On medium-high heat, in a large pot or dutch oven, add 3 tablespoons of butter, ½ teaspoon sea salt, and ¼ teaspoon black pepper into the bottom of the pot. Once butter is melted, add onions and cook until soft. Then add the chopped celery and carrots, and cook for 5 minutes. As the vegetables cook, scrape up the browned bits off the bottom of the pot with a wooden spoon.
    • Add chicken stock and bring to a simmer on medium-low heat. Add the cooked meat and uncooked pasta noodles. One tip is just use as many noodles as you will eat for that meal. Save the leftover soup without noodles in it, otherwish the noodles get soggy.
    • Squeeze ½ a lemon into the soup, you will be amazed how this brightens up the flavor!
    • Cook for about 10 minutes until the noodles are cooked. Ladle into soup bowls and serve with crackers, breadsticks, or homemade bread.
    • Reheast leftover soup back on the stove in a pan with more dry noodles the next day. You can freeze soup in an airtight container for up to 3 months.

    Video

    Notes

    serving ideas

    A great way to enjoy a bowl of chicken noodle soup, is a sprinkle of parmesan cheese, a squeeze of fresh lemon, or slice a baguette open and toast, then slather on some butter. Add crackers, bread sticks, or even cheese toast on the side.

    noodles

    The noodles will overcook if you reheat, so save soup on the side without noodles for leftovers and then reheat on the stove for 10 minutes and add a new batch of uncooked noodles. You can always add more chicken stock for additional servings.

    chicken

     Many of you like to make your chicken meat in a slow cooker or instant pot, and that works. I think the flavor you get from oven roasted is worth it, it makes really tender chicken, and there is very little prep time. Here are some various cuts that all work just fine:
    • raw whole (cut into pieces)
    • boneless skinless thighs
    • boneless thighs skin on
    • bone-in breasts (also labeled split breasts)
    • boneless skinless breasts (boneless breasts)
    You can also use diced or shredded leftover turkey breast or a rotisserie chicken for this soup!

    dried noodles

    Cook the noodles to al dente, and you can use any type of noodles or pasta brand you love. My favorite brand is the extra wide no yolk noodles.

    chicken stock

     make your own homemade stock or buy a good brand at the store. You can use some good bouillon in water to make stock. This flavorful broth tends to not taste anywhere as good as quality stock or bone broth made with a chicken carcass. Another good alternative is low-sodium broth.

    fresh herbs and vegetables

    You can add some fresh parsley, bay leaves, or (a single bay leaf), fresh thyme, storebought wavy-cut carrot chips, garlic powder or crushed cloves of garlic.

    creamy chicken noodle soup

     use some heavy cream to make your soup creamy, add ½ cup right toward the end of cooking and give a good quick stir.

    Nutrition

    Calories: 273kcal | Carbohydrates: 37g | Protein: 11g | Fat: 9g | Saturated Fat: 4g | Polyunsaturated Fat: 1g | Monounsaturated Fat: 3g | Trans Fat: 1g | Cholesterol: 45mg | Sodium: 582mg | Potassium: 562mg | Fiber: 3g | Sugar: 7g | Vitamin A: 5676IU | Vitamin C: 8mg | Calcium: 51mg | Iron: 1mg

    Diced Chicken For Recipes

    [heart_this] · May 23, 2022 · 1 Comment

    Cutting boneless chicken breasts into diced cubes of meat to use in recipes.

    Last Updated May 26th, 2022 at 11:31 pm by Lisa

    Keep shredded, sliced, cubed, or finely diced chicken ready to go so you can whip out easy chicken dinner recipes in a rush saving time and money.

    No more stressing out about last-minute weeknight dinners while the entire family is hungry!

    Oven-baked roast chicken is so easy to do at home with almost no prep work and elevates all your recipes into deliciousness...

    How To Make Diced Chicken

    1. Line a large sheet pan with parchment paper for easy clean-up. Place breasts (split breasts bone-in) and season with salt and pepper on both sides.
    2. Heat oven to 400 degrees, and bake small breasts for 45 minutes and larger ones for 50-55 minutes. Make sure to check the internal temperature with a good meat thermometer, it is cooked at 160 degrees.
    3. Let the pieces rest until cool enough to handle, remove skin and bones (save those for stock), and cut into a large dice for recipes.

    Types of Chicken At The Grocery Store

    When you go to the store, there are several choices of packaged poultry:

    • raw whole (cut into pieces)
    • boneless skinless thighs
    • boneless thighs skin on
    • bone-in breasts (also labeled split breasts)
    • boneless skinless breasts (boneless breasts)

    I do prefer the bone-in/split breasts for these reasons:

    • They are a great value price-wise per pound.
    • The bones and skin keep the meat moist and full of flavor.
    • I often wait until they are on sale, and buy in bulk. In my area in Southern California, $.99/pound is a great bargain!

    Note: boneless breasts tend to cook faster as they don't have bones, so check them at the 30-minute mark.

    PRO TIP: When you buy and cook chicken at home, a 2 lb package of in weight will net 1.26 pounds of cooked diced meat once you remove the bones, skin, and after roasting.

    PRO TIP: Be careful in handling any raw meat, especially raw chicken. Put your seasoning in small cups, and it is not necessary to rinse it in your sink. You actually increase the chance of cross-contamination!

    Remove The Chicken Bones

    Save the bones, skin, and fat from this baked chicken breast recipe! That is one of my longest-known kitchen secrets. Handed down to me through all the great cooks in my family.

    The best way to make Homemade Stock is from saving all the bones, skin, and fat in zip-top bags in the freezer. Save your rotisserie bones and make this easy recipe for the bone broth at home.

    In my opinion, it is a waste to use a whole chicken for stock. They are very expensive, and after I tested them, found no benefit to using up a whole bird.

    Chicken Stock (Bone Broth) Plus Freezer Tips and 15+ Recipe Uses!
    Make Chicken Stock aka Bone Broth at home to create other tasty recipes with chicken stock, plus cooking tips and 15+ delicious recipe ideas!
    GET THE RECIPE PIN IT
    3 small Mason jars filled with chicken stock and black heart shaped labels.

    Creative Ways To Cook & Flavor Chicken

    With just a few simple ingredients, you can add amazing flavor and create so many recipe ideas. You can place the raw meat in an airtight container with the seasoning and let it marinate for a few hours in the fridge until you are ready to make it. Whether you use an oven and roast it the way I love it or use your pressure cooker, a slow cooker, instant pot, fire grill, or saute in on the stovetop. You can add all kinds of flavor to your recipe.

    Italian: Put it in with Italian seasoning, olive oil, and crushed whole garlic cloves in a sealed container in the fridge, then roast in the oven on a sheet pan. You can even use Italian dressing for a delicious marinade.

    Mexican: For an easy dinner, one of my favorite things is to make chicken tacos. Saute cubed meat in a cast iron pan with a package of taco seasoning, some orange and or lime juice, onion powder, cumin powder, and a tiny pinch of cayenne pepper or red pepper flakes. Stir with a wooden spoon over medium-high heat, and then heat up the tortillas. Serve with warm tortillas, black beans, and taco toppings like cheese, green onions, Mexican pickled red onion, and sour cream.

    Indian: garam masala, cardamom, coriander, a pinch of brown sugar and cayenne pepper, and garlic powder with a drizzle of vegetable oil.

    Buffalo: place pieces in with buffalo hot sauce then bake in a dish..

    French Tarragon: toss in olive oil, dijon mustard, fresh tarragon, and a sprinkle of herbs de Provence.

    Asian Honey Garlic: place uncooked meat in a zip-top bag with honey, ginger, sesame oil, soy sauce, chili powder, and fresh garlic. Bake, dice, and serve over white or brown rice and garnish with green onions and sesame seeds.

    How to use up diced chicken breasts?


    Make a batch of chicken salad, and pile on chicken sandwiches on croissants with crisp lettuce. Season some with taco seasoning, saute, and pile on corn tortillas for chicken tacos. Make an Asian-style garlic stir fry with fried or white rice.

    Bake up chicken bites on a sheet pan tossed in buffalo wing sauce or parmesan sauce and serve with pasta. Toss into alfredo sauce for a hearty dish of chicken alfredo. Or mix with an orange sauce and bake on a sheet pan for orange chicken.

    How do you store cooked chicken?

    Once you make dice or slice chicken, some of the best storage tips for freezing are to put them in a single layer on a sheet pan, freeze, then store in an airtight container so they don't stick together. You can also use a freezer bag.

    How do I use up shredded chicken?


    You can make taquitos, tacos, burritos, casseroles, sandwiches, tortilla wraps, chicken salad and so much more.

    More delicious recipes for leftover shredded chicken are an Enchilada Casserole, Creamy Gnocchi Soup, Homemade Chicken Soup, Cobb Salad, or a Buffalo Chicken Appetizer.

    Diced Chicken Recipes

    You never have too many chicken dinner ideas for busy weeknights! Here are a few of my favorite leftover chicken recipe ideas, hope they become some of your family favorites.

    Once you have some tucked in the freezer, there are so many different ways to use it up in meal planning for delicious dinners the whole family will love.

    Cobb Salad became famous in Hollywood at the Original Brown Derby restaurant, it is served with a Special French Dressing akaCobb Salad Dressing and is loaded with delicious toppings like tomato, diced chicken, crumbled bacon, avocado, and chopped eggs. The classic flavors from simple ingredients make this the Best Homemade Chicken Noodle Soup recipe. It is comfort food in a bowl and a great way to use up leftover chicken. Roasting the meat and a squeeze of lemon (my secret ingredient) add amazing flavor to this classic homemade soup!

    Creamy Chicken Gnocchi Soup is a simple recipe and a hearty dinner. Loaded with juicy tender chicken, vegetables, and gnocchi which are soft puffy "Italian dumplings". Chicken Enchiladas are a comforting casserole layered in a baking dish with corn tortillas, Mexican Oaxaca cheese, black olives, shredded chicken, and fire-roasted salsa verde for added depth of flavor from south of the border.

    • A white square plate filled with colorful Cobb Salad made with chicken, eggs, avocados, tomatoes, and bacon.
      Cobb Salad
    • A blue bowl filled with homemade chicken noodle soup.
      Chicken Noodle Soup
    • A white bowl full of Chicken Gnocchi Soup with a silver spoon and bread nearby.
      Chicken Gnocchi Soup
    • A white casserole dish with chicken enchilada casserole topped with black olives and lots of melted cheese.
      Chicken Enchilada Casserole

    More Chicken Recipes

    Learn how to make your own Homemade Chicken Stock, also known as bone broth. It is the perfect way to use leftover bones from your cubed chicken. Whip up this Buffalo Chicken Appetizer made with tortilla chips, buffalo wing sauce, blue cheese, and crisp celery. It comes together in 20 minutes with just simple 6 ingredients. It takes a nod to hot wings, and is so easy!

    Grill Hawaiian Huli Huli Chicken, and pineapple, and add some coconut lime rice into pineapple bowls. A gorgeous way to entertain for luaus, graduation celebrations, pool parties, or summer cookouts. Easy pretzel-coated Honey Mustard Chicken can be on the table for your family in under an hour, with four simple store-bought ingredients and a 10-minutes to put together this chicken dinner.

    • 3 small Mason jars filled with chicken stock and black heart shaped labels.
      Chicken Stock (Bone Broth)
    • Loaded plate of hot appetizers of Buffalo Chicken on tortilla chips ready for game day food
      Buffalo Chicken Appetizer
    • Two pineapple halves carved out filled with coconut rice, grilled pineapple and huli huli chicken.
      Huli Huli Chicken
    • A piece of chicken coated in a pretzel crust and and salad on the plate for a honey mustard chicken recipe.
      Honey Mustard Pretzel Chicken

    Did you love this recipe? We would love to hear from you! If you make this recipe and love it, give it a 5-star rating ⭐⭐⭐⭐⭐ with a comment. THANK YOU!! Follow Delicious Table with my free newsletter and share this recipe with your friends on Facebook, Pinterest, and Instagram.

    Cutting boneless chicken breasts into diced cubes of meat to use in recipes.
    Print

    Diced Chicken Recipes

    Keep shredded, sliced, cubed, or finely diced chicken ready so you can whip out easy chicken dinner recipes in a rush saving time and money. No more stressing out about last-minute weeknight dinners while the entire family is hungry. Oven-baked or roasting is so easy to do at home and elevates all your recipes into deliciousness.
    Course Dinner & Main Dishes
    Cuisine American
    Keyword chicken for recipes, cubed chicken, diced chicken, diced chicken recipes
    Prep Time 15 minutes minutes
    Cook Time 50 minutes minutes
    Total Time 1 hour hour 5 minutes minutes
    Servings 8
    Calories 324kcal
    Author Lisa Hatfield

    Equipment

    • Epicurean Non-Slip Cutting Board
    • Chef Knife
    • Large Metal Sheet Pan
    • Parchment Paper Sheets

    Ingredients

    • 5 pounds chicken breast skin on split breasts
    • 2 teaspoons sea salt
    • 2 teaspoons black pepper

    Instructions

    • Line a large rimmed baking sheet pan with parchment paper for easy clean-up. Place 4 pieces of chicken (split breasts bone in) and season with salt and pepper on both sides. you can trim any big pieces of visible fat from the chicken. Put your salt and pepper in each in a small bowl so you don't cross-contaminate as you season.
    • Heat oven to 400 degrees, and bake small breasts for 45 minutes and larger ones for 50-55 minutes. Make sure to check the internal temperature with a good meat thermometer, it is cooked at 160 degrees.
    • Let the pieces rest until cool enough to handle, remove skin and bones (save those for stock), and cut into a large dice for recipes.

    Notes

    When you go to the store, there are several choices of packaged poultry:
    • raw whole (cut into pieces)
    • boneless skinless thighs
    • boneless thighs skin on
    • bone-in breasts (also labeled split breasts)
    • boneless skinless breasts (boneless breasts)
    I do prefer the bone-in/split breasts for these reasons:
    • They are a great value price-wise per pound.
    • The bones and skin keep the meat moist and full of flavor.
    • I often wait until they are on sale, and buy in bulk. In my area in Southern California, $.99/pound is a great bargain!
    Note: boneless breasts tend to cook faster as they don't have bones, so check them at the 30-minute mark.

    Nutrition

    Calories: 324kcal | Carbohydrates: 1g | Protein: 60g | Fat: 7g | Saturated Fat: 2g | Polyunsaturated Fat: 1g | Monounsaturated Fat: 2g | Trans Fat: 1g | Cholesterol: 181mg | Sodium: 910mg | Potassium: 1056mg | Fiber: 1g | Sugar: 1g | Vitamin A: 88IU | Vitamin C: 3mg | Calcium: 17mg | Iron: 1mg

    Tomato Soup With Basil Dumplings

    [heart_this] · May 20, 2022 · 1 Comment

    A bowl of tomato soup and cup of soup in a white cup garnished with fresh basil.

    Last Updated August 7th, 2022 at 09:26 pm by Lisa

    Tomato Soup with Basil Dumplings can be rich and chunky or creamy smooth and is loaded with a veggie rainbow for a hearty lunch or dinner.

    What makes this hearty soup recipe so good, are the fluffy basil dumplings! Total comfort food in a bowl, as they soak up the hot creamy homemade tomato soup...

    Best Homemade Tomato Basil Soup Recipe


    2 tablespoon olive oil
    2 brown onions coarsely chopped
    1 shallot coarsely chopped
    2 cloves garlic minced or 1 teaspoon bottled minced garlic
    28 oz vegetable broth or sub chicken stock
    1 carrot coarsely chopped
    2 ribs celery coarsely chopped
    1 red bell pepper coarsely chopped
    1 tablespoon lemon juice
    ½ teaspoon sugar
    tiny dash of cayenne pepper
    ½ teaspoon sea salt
    ½ teaspoon fresh cracked black pepper
    14 ½ oz can diced tomatoes undrained

    1. Roughly chop the rainbow of veggies; bell pepper, carrot, celery, onion, shallot, and garlic. You will be cooking and then using a blender to get them smooth, so rough chunks is fine.
    2. In a large dutch oven or saucepan, heat the olive oil over medium low heat, and add onion, shallot, and garlic. Cook for 5 minutes, and stir until onions are tender.
    3. Add in vegetable broth (or chicken stock), carrot, celery, red bell pepper, lemon juice, sugar, cayenne, sea salt, and black pepper then bring to a boil.
    4. Decrease heat, cover, and simmer for 20 minutes or until vegetables are very tender.
    5. Use an immersion stick blender in the pot to puree until almost smooth. You can also blend it in a regular blender or food processor in small batches, be careful the soup is hot and not to overfill the blender.
    6. Stir in undrained tomatoes, cook uncovered, over low heat for about 10 minutes more or until heated through, stirring often.
    A white cup with tomato soup and basil dumplings.

    How To Make Basil Dumplings

    The first time I made these basil dumplings, I couldn't believe how fast they come together. You can make them from scratch or use a Bisquick mix from the store. They make this a filling meal and are so scrumptious.


    ⅓ cup all-purpose flour
    1 tablespoon fresh basil chopped
    ¼ teaspoon baking powder
    ½ teaspoon salt
    1 egg
    2 teaspoons cooking oil

    PRO TIP Dumpling Shortcut: You can also make this without egg, simply use 1 tablespoon fresh chopped basil plus 1 cup Buttermilk Bisquick and water per package instructions. This saves time and makes great dumplings.

    1. Meanwhile, while the soup is cooking, in a small bowl, combine; ⅓ cup all-purpose flour, 1 tablespoon chopped fresh basil, ¼ teaspoon baking powder, and ½ teaspoon sea salt.
    2. In another small bowl, stir together: 1 beaten egg and 2 teaspoons of cooking oil; pour egg mixture into flour mixture; using a wooden spoon, stir until a soft, sticky dough forms. You can also make this without egg, simply use 1 tablespoon fresh chopped basil plus 1 cup Buttermilk Bisquick and water per package instructions. This saves time and makes great dumplings!
    3. Form Basil Dumplings into 1" size balls, by using 2 spoons.
    4. Carefully drop basil dumplings from the spoon into the hot soup. Cook for 10 minutes with the lid off, then 10 minutes with the lid of the pot on. To test if the dumplings are done, remove one and check the center, making sure they finished cooking all the way through. The basil dumplings will get puffy, and rise up a bit while cooking. You can take one out and cut it to be sure the dough is cooked through.
    5. Ladle the hot tomato soup bowls and basil dumplings into a bowl, and garnish with basil sprigs.
    6. You can make a big batch, reheat the soup in a microwave the next day or freeze leftover soup in an airtight container for up to 3 months.
    What are dumplings?

    Dumplings are prepared around the world using a variety of cooking methods, including baking, boiling, frying, simmering, or steaming.

    The dough is made from bread, flour, or potatoes and has a filling inside. Fillings can consist of meat, fish, fruit, sweets, vegetables, and even cheese.

    There are many types of dumpling dishes made from a variety of starch sources, often wrapped around a filling and crimped, or they can be as simple as a quick dough or noodle steamed in a hearty broth.

    Tomato Soup Swaps & Variations

    Skip that can of tomato soup and get out your soup pot. There is nothing like hot soup on a cold day with a grilled cheese sandwich. You can use really good canned tomatoes or ripe tomatoes with fresh green basil from the garden or from any one of your local grocery stores. This is an easy tomato soup recipe, you can adjust things the way you and your family like it!

    creamy texture: blend this easy tomato basil soup well with an immersion blender or in a regular blender in batches. Then add a splash of either heavy whipping cream or heavy cream like half and half to make it a creamy tomato soup. You could also use a plant-based milk like almond or coconut milk.

    tomatoes: I hight recommend San Marzano chopped tomatoes for the best tomato soup, you can also swap in ripe fresh whole tomatoes. Roma tomatoes, a squeeze of tomato paste, cherry tomatoes, or even some tomato sauce all work in a pinch.

    sugar and salt: when you add a little sugar to this recipe, it takes the edge off the acidity of the tomatoes. Don't add too much additional salt, because it is often in canned tomatoes. You can swap out the sea salt for celery salt.

    slow cooker or crock pot: you can add all the tomato soup ingredients into your slow cooker next time you are short on time, and leave it on low for 4-6 hours. Then blend the soup as you prefer, and drop the basil dumplings in the soup to finish cooking.

    A large white bowl with tomato soup and a silver spoon with basil and tomatoes in the background.

    More Soup Recipes

    These are my favorite soup recipes and my go-to's I make over and over!

    Learn how to make your own Homemade Chicken Stock, also known as bone broth. This recipe has all the step-by-step top cooking tips I have learned over the years. I share how to freeze it, plus 15 delicious new recipe ideas. Save money and have some ready to elevate dinner, soups, and stews.

    A classic famous Cheese Soup with simple ingredients and extraordinary deep rich flavors. An easy recipe and one of my favorite things to serve on chilly nights when it's soup time.

    Creamy Chicken Gnocchi Soup is so easy to put together, a hearty dinner recipe, and this one will become a family favorite. Loaded with juicy shredded chicken, vegetables, and gnocchi which are soft puffy "Italian dumplings".

    • 3 small Mason jars filled with chicken stock and black heart shaped labels.
      Chicken Stock (Bone Broth)
    • White bowl filled with cheese soup and a homemade crouton on top.
      Cheese Soup
    • A white bowl full of Chicken Gnocchi Soup with a silver spoon and bread nearby.
      Chicken Gnocchi Soup

    More Tomato Recipes

    You can make Sun-Dried Tomatoes at home in the oven or by using a food dehydrator. I am sharing all my cooking tips, plus 20+ dinner inspiration recipe ideas, and creative ways to enjoy your homemade dried tomatoes.

    Fried Green Tomatoes can be a snack, lunch, or a side for family dinner. Dip in remoulade sauce or buttermilk ranch dressing, and use up green tomatoes from your Summer garden.

    Sun-Dried Tomato Butter is amazing on hot pasta, roasted vegetables, sizzling grilled steak, or oven warmed baguettes and dinner rolls.

    Bloody Marys with a homemade mix of fire-grilled green chiles (jalapeno, Anaheim, or Hatch Chiles) fresh garden tomatoes, onions, horseradish, and spices.

    • A small clear jar filled with sun dried tomatoes on a table with scattered dried tomatoes all around the table.
      How To Make Sun Dried Tomatoes
    • A white long plate with a stack of fried green tomatoes with remoulade and buttermilk ranch dressing.
      Fried Green Tomatoes
    • A glass bowl filled with compound butter made with herbs and sun dried tomatoes, and them scattered on the cutting board.
      Sun Dried Tomato Butter
    • A pitcher of bloody marys with two drinks garnished with olives, pepperoncinis, and beef sticks.
      Spicy Bloody Marys

    Did you love this recipe? We would love to hear from you! If you make this recipe and love it, give it a 5-star rating ⭐⭐⭐⭐⭐ with a comment. THANK YOU!! Follow Delicious Table with my free newsletter and share this recipe with your friends on Facebook, Pinterest, and Instagram.

    A bowl of tomato soup and cup of soup in a white cup garnished with fresh basil.
    Print

    Tomato Soup With Basil Dumplings

    Tomato Soup with Basil Dumplings can be rich and chunky or creamy smooth and is loaded with a veggie rainbow for a hearty lunch or dinner. What makes this hearty soup recipe so good, are the fluffy basil dumplings! Total comfort food in a bowl, as they soak up the hot creamy homemade tomato soup.
    Course Soup
    Cuisine American
    Keyword soup dinner, soup with dumplings, tomato soup
    Prep Time 20 minutes minutes
    Cook Time 50 minutes minutes
    Total Time 1 hour hour 10 minutes minutes
    Servings 4
    Calories 212kcal
    Author Lisa Hatfield

    Equipment

    • Cast Iron Dutch Oven
    • Chef Knife

    Ingredients

    Tomato Soup

    • 2 tablespoon olive oil
    • 2 brown onions coarsely chopped
    • 1 shallot coarsely chopped
    • 2 cloves garlic minced or 1 teaspoon bottled minced garlic
    • 28 oz vegetable broth or sub chicken stock
    • 1 carrot coarsely chopped
    • 2 ribs celery coarsely chopped
    • 1 red bell pepper coarsely chopped
    • 1 tablespoon lemon juice
    • ½ teaspoon sugar
    • tiny dash cayenne pepper
    • ½ teaspoon sea salt
    • ½ teaspoon fresh cracked pepper
    • 14 ½ oz can diced tomatoes undrained

    Basil Dumplings

    • ⅓ cup all-purpose flour
    • 1 tablespoon fresh basil chopped
    • ¼ teaspoon baking powder
    • ½ teaspoon salt
    • 1 egg
    • 2 teaspoons cooking oil
    US Customary - Metric

    Instructions

    Make The Tomato Soup

    • Roughly chop the rainbow of veggies; bell pepper, carrot, celery, onion, shallot, and garlic. You will be cooking and then using a blender to get them smooth, so rough chunks is fine.
    • In a large dutch oven or saucepan, heat the olive oil over medium low heat, add onion, shallot, and garlic. Cook for 5 minutes, and stir until onions are tender.
    • Add in vegetable broth (or chicken stock), carrot, celery, red bell pepper, lemon juice, sugar, cayenne, sea salt, and black pepper then bring to a boil.
    • Decrease heat, cover and simmer for 20 minutes or until vegetables are very tender.
    • Use an immersion stick blender in the pot to puree until almost smooth. You can also blend it in a regular blender or food processor in small batches, be careful the soup is hot and not to overfill the blender.
    • Stir in undrained tomatoes, cook uncovered, over low heat about 10 minutes more or until heated through, stirring often.

    Basil Dumplings

    • Meanwhile, while the soup is cooking, in a small bowl, combine; ⅓ cup all-purpose flour, 1 tablespoon chopped fresh basil, ¼ teaspoon baking powder, and ½ teaspoon sea salt.
    • In another small bowl, stir together: 1 beaten egg and 2 teaspoons of cooking oil; pour egg mixture into flour mixture; using a wooden spoon, stir until a soft, sticky dough forms. You can also make this without egg, simply use 1 tablespoon fresh chopped basil plus 1 cup Buttermilk Bisquick and water per package instructions. This saves time and makes great dumplings!
    • Form basil dumplings into 1" size balls, by using 2 spoons.
    • Carefully drop basil dumplings from the spoon into the hot soup. Cook for 10 minutes with the lid off, then 10 minutes with the lid of the pot on.
      To test if the dumplings are done, remove one and check the center, making sure they finished cooking all the way through. The basil dumplings will get puffy, and rise up a bit while cooking. You can take one out and cut it to be sure the dough is cooked through.
    • Ladle the hot tomato soup bowls and basil dumplings into a bowl, and garnish with basil sprigs.
    • You can make a big batch, reheat the soup in a microwave the next day or freeze leftover soup in an airtight container for up to 3 months.

    Notes

    Short Cut for Basil Dumplings Without Egg

    Use 1 tablespoon fresh chopped basil plus 1 cup Buttermilk Bisquick and water per package instructions. This saves time and makes great dumplings! 

    Nutrition

    Calories: 212kcal | Carbohydrates: 26g | Protein: 5g | Fat: 11g | Saturated Fat: 2g | Trans Fat: 1g | Cholesterol: 41mg | Sodium: 1569mg | Potassium: 524mg | Fiber: 4g | Sugar: 10g | Vitamin A: 4201IU | Vitamin C: 56mg | Calcium: 86mg | Iron: 2mg

    Cheesy Meatball Subs

    [heart_this] · May 18, 2022 · 5 Comments

    A meatball sub with marinara sauce and melted golden gooey cheese on a toasted baguette.

    Last Updated August 7th, 2022 at 10:55 pm by Lisa

    Cheesy Meatball Subs are loaded with gooey melted cheese and homemade marinara sauce. Use frozen or homemade ground beef, turkey, or pork meatballs.

    Meatball sub sandwiches are classic comfort food, and so worth the effort. Toast them under the broiler to get the bread crispy and the cheese gooey, golden, and melty...

    A hot meatball sub sandwich with marinara sauce and melted golden brown cheese.

    Meatball Sub Recipes

    Take the time to make some scratch meatballs. They are so handy to have on hand to make a quick meal on a busy night like spaghetti or an Italian meatball soup. You can easily make chicken, lamb, or beef meatballs with ground meat found at your local grocery store.

    This is a favorite recipe, I have now made it countless times over the past decade. The first time I made my own meatballs with sauteed vegetables and parmesan cheese inside, it was a game-changer. Besides adding flavor, it keeps the meatballs tender. Classic meatballs have egg and breadcrumbs and don't get the depth of flavor and richness.

    Cheesy Meatball Sub Sandwiches

    1 package of sliced mozzarella cheese
    3 baguettes sliced open, cut into 3 or 4 sections (or sub rolls)
    25-30 homemade meatballs (or frozen bag of meatballs)
    16 oz Marinara Sauce (or your favorite pasta sauce)

    How To Make Meatballs For Subs

    When you have some extra time, make homemade meatballs. It is a great way to have multiple easy dinner ideas ready to go. Sure these take a little effort, but they are so worth it. These are nutritious, healthy, and tasty.

    3 lbs lean ground turkey (ground beef or Italian pork sausage)
    1 small yellow onion
    5 carrots
    5 celery stalks cut into 2-3" pieces
    ½ cup finely chopped basil
    ½ cup finely chopped parsley
    1 small can of tomato paste
    1 tablespoon olive oil
    1 cup breadcrumbs or ground almonds
    ½ cup grated parmesan cheese

    Make the Meatballs

    1. Preheat the oven to 400 degrees.
    2. Rough chop veggies in batches and pulse in a food processor or grate on a box grater. 1 small onion, 5 carrots, and 5 celery stalks. Process veggies in batches and place ground vegetables into a large mixing bowl as you go.
    3. Next dice ½ cup finely chopped basil, and ½ cup finely chopped parsley into the mixing bowl, and toss together.
    4. Heat a large pan or heavy skillet, add 1 tablespoon olive oil and saute the veggies for 3 minutes on medium high heat, keep stirring, then turn off the heat.
    5. Place the sautéed veggie mixture in a large mixing bowl, and cool. Next, add 3 lbs ground turkey (or ground beef, Italian pork sausage etc.), 1 cup of breadcrumbs (or ground almonds), and ½ cup of grated parmesan cheese.
    6. Stir and completely mix with 2 forks to "fluff" the mixture.
    7. Line a large baking sheet with parchment paper. Use a 2" ice cream scoop to portion the meatballs. The ice cream scoop makes the meatballs all the same size, and is faster than hand rolling.
    8. Preheat your oven to 400 degrees. Bake 25-30 minutes until golden brown with crispy edges.

    Italian Marinara Sauce


    2 tablespoons butter
    1 tablespoon olive oil
    1 large yellow onion diced
    1 teaspoon Italian seasoning mix
    ½ teaspoon black pepper
    ¼ teaspoon red pepper flakes
    ½ teaspoon garlic powder
    ½ teaspoon sugar
    1 teaspoon sea salt
    28 oz can diced tomatoes
    6 oz can tomato paste

    1. Heat butter and olive oil in a large heavy pan, add diced onions, saute until soft 5 minutes, then all 6 seasonings, canned tomatoes, and tomato paste.
    2. Stir until the marinara sauce thickens about 10-15 minutes. Keep marinara sauce warm.

    PRO TIP: This marinara sauce is very easy. I recommend you make a double batch and freeze the extra for spaghetti and your favorite meatballs another night, you will look like a kitchen hero on busy weeknights.

    Ingredient Tips & Swaps

    Meatballs: Grab a bag of Italian-style meatballs at the store or make some the whole family will love using ground turkey, chicken, pork, or beef.

    Bread: Try to use good French baguettes or crusty rolls. Split down the middle and cut into 3-4 portions. Hoagie buns, sub rolls, hot dog buns, soft hoagie rolls, sandwich rolls, or slider buns will all work.

    San Marzano Canned Tomatoes make incredible chopped tomatoes for the marinara sauce, I highly recommend this brand!

    Tomato paste adds a deep level of rich concentrated sweet tomato flavor.

    Kinds of Cheese: I used slices of mozzarella, it melts nicely and gets golden which looks great and will make your mouth water. You could use provolone, Havarti, cheddar, Monterey, or pepper jack cheese.

    Crockpot Meatball Subs: For an easy marinara sauce shortcut, you can add a jar of spaghetti sauce to a crock pot or slow cooker with frozen meatballs. Add some Italian seasoning, diced onions, and garlic, and let it cook for 4 hours on low. Then just load the tender meatballs and sauce onto buns with cheese and put them under the broiler until melted and golden brown.

    Meatball Sub Toppings

    • Slices of Provolone Cheese
    • Grated Parmesan Cheese
    • Fresh Basil Ribbons
    • Marinara Sauce (or your favorite pasta sauce)
    • Alfredo Sauce
    • Shredded or Slices of Mozzarella Cheese
    • Saute Onions and Bell Peppers

    Build The Hot Sub Sandwiches

    1. Place 3-4 meatballs on the sliced open baguette or roll, and cover with a few spoonfuls of marinara sauce.
    2. Top with slices of mozzarella and place meatball sandwiches into the oven on a sheet pan under the broiler until the cheese melts and turns golden about 5 minutes. Keep an eye on these under the broiler so they don't burn!
    3. Serve hot and enjoy. You can add some fresh salad, fruit, or a side of chips like tortillas or potato chips.
    4. Store any extra meatballs or marinara sauce in an airtight container or use your food saver and tuck them in the freezer for a fast dinner.
    What is the difference between marinara sauce and regular pasta or spaghetti sauce?


    Marinara sauce: typically does not contain meat while spaghetti sauce usually does. It is traditionally used as a dipping sauce. You can use the marinara sauce as a spaghetti sauce or with any kind of pasta.

    Spaghetti sauce: uses all the same base ingredients as a pasta sauce or marinara sauce, and then takes it to the next level, adding proteins and/or more vegetables and seasonings for flavor.

    Pasta Sauce: It can have more herbs and seasonings, is a thin sauce, and commercial brands often add meat.

    Sliced meatball sub sandwiches on a board covered in melted mozzarella cheese.

    More Dinner Recipes

    Classic Beef Stroganoff made with ground beef is so popular and beloved worldwide. A family dinner idea everyone will be excited about with tender chunks of beef like tri-tip or rib eye.

    These Stuffed Chicken Breasts can be made ahead, and it makes the best pan sauce. Gorgonzola Stuffed Chicken will be a hit at family dinner with everyone, plus it's a low-carb recipe.

    Sheet Pan Chicken with croutons and small potatoes takes 20 minutes to prep and this entire chicken sheet pan dinner bakes in 50 minutes. Beautiful to serve for an easy family weeknight dinner or a fun meal prep idea.

    The best juicy Cheeseburger Meatloaf Recipe is bursting with flavor. The ground beef has a vegetable spice mixture, cheeses, wrapped in bacon slices, and baked. Each slice is light, fluffy, tender, and holds together.

    • White plate filled with Beef Stroganoff on noodles with mushrooms.
      Best Beef Stroganoff Recipe
    • Cooked Gorgonzola Stuffed Chicken in pan sauce garnished with fresh thyme.
      Stuffed Chicken Breasts
    • A white platter filled with sheet pan chicken dinner including lemons, potatoes, and croutons.
      Sheet Pan Chicken
    • A close up view of meatloaf sliced open and cooked bacon strips on top.
      Cheeseburger Meatloaf Recipe

    Did you love this recipe? We would love to hear from you! If you make this recipe and love it, give it a 5-star rating ⭐⭐⭐⭐⭐ with a comment. THANK YOU!! Follow Delicious Table with my free newsletter and share this recipe with your friends on Facebook, Pinterest, and Instagram.

    A meatball sub with marinara sauce and melted golden gooey cheese on a toasted baguette.
    Print

    Cheesy Meatball Subs

    Cheesy Meatball Subs are loaded with gooey melted cheese and homemade marinara sauce. Use frozen or homemade ground beef, turkey, or pork meatballs. These meatball sub sandwiches are classic comfort food, and so worth the effort. Toast them under the broiler to get the bread crispy and the cheese gooey, golden, and melty.
    Course Dinner & Main Dishes
    Cuisine American
    Keyword frozen meatball subs, meatball sub sandwiches, meatball subs
    Prep Time 45 minutes minutes
    Cook Time 40 minutes minutes
    Total Time 1 hour hour 25 minutes minutes
    Servings 10
    Calories 668kcal
    Author Lisa Hatfield

    Equipment

    • Large Metal Sheet Pan
    • Spring Loaded Cookie Scoops (3 Sizes)
    • Food Saver

    Ingredients

    Cheesy Meatball Sub

    • 1 package sliced mozzarella cheese
    • 3 baguettes sliced open and cut into 3 or 4 sections (or sub rolls cut open)
    • 25-30 frozen or homemade meatballs see meatball recipe below
    • 16 oz Marinara Sauce see marinara recipe below

    Meatballs

    • 3 lbs lean ground turkey or ground beef or Italian pork sausage
    • 1 small onion
    • 5 carrots any color
    • 5 celery stalks cut into 2-3" pieces
    • ½ cup finely chopped basil
    • ½ cup finely chopped parsley
    • 1 tablespoon olive oil
    • 1 cup breadcrumbs or ground almonds
    • ½ cup grated parmesan cheese

    Italian Marinara Sauce

    • 2 tablespoons butter
    • 1 tablespoon olive oil
    • 1 large yellow onion diced
    • 1 teaspoon Italian seasoning mix
    • ½ teaspoon black pepper
    • ¼ teaspoon red pepper flakes
    • ½ teaspoon garlic powder
    • ½ teaspoon sugar
    • 1 teaspoon sea salt
    • 28 oz can diced tomatoes
    • 6 oz can tomato paste
    US Customary - Metric

    Instructions

    Make the Meatballs

    • Preheat oven to 400 degrees.
    • Rough chop veggies in batches and pulse in a food processor or grate on a box grater. 1 small onion, 5 carrots, 5 celery stalks. Process veggies in batches, and place ground vegetables into a large mixing bowl as you go.
    • Next dice ½ cup finely chopped basil, and ½ cup finely chopped parsley into the mixing bowl, toss together.
    • Heat a large pan or heavy skillet, add 1 tablespoon olive oil and saute the veggies 3 minutes on medium high heat, keep stirring, then turn off the heat.
    • Place the sautéed veggie mixture in a large mixing bowl, and cool. Next, add 3 lbs ground turkey (or ground beef, Italian pork sausage etc.), 1 cup breadcrumbs (or ground almonds) and ½ cup grated parmesan cheese.
    • Stir and completely mix with 2 forks to "fluff" the mixture.
    • Line a large baking sheet with parchment paper. Use a 2" ice cream scoop to portion the meatballs. The ice cream scoop makes the meatballs all the same size, and is faster than hand rolling.
    • Preheat your oven to 400 degrees. Bake 25-30 minutes until golden brown with crispy edges.

    Homemade Marinara Sauce

    • Heat butter and olive oil in a large heavy pan, add diced onions, saute until soft 5 minutes, then all 6 seasonings, canned tomatoes, and tomato paste.
    • Stir until the marinara sauce thickens about 10-15 minutes. Keep marinara sauce warm.

    Assemble Easy Meatball Subs

    • Place 3-4 meatballs on the sliced open baguette or roll, and cover with a few spoonfuls of marinara sauce.
    • Top with slices of mozzarella and place meatball sandwiches into oven on a sheet pan under broiler until the cheese melts and turns golden about 5 minutes. Keep an eye on these under the broiler so they don't burn!
    • Serve hot and enjoy. You can add some fresh salad, fruit, or a side of chips like tortilla or potato chips.
    • Store any extra meatballs or marinara sauce in an airtight container or use your food saver and tuck them in the freezer for a fast dinner.

    Notes

    meatballs 

    This recipe makes about forty-four 2" meatballs. Freeze extra meatballs on sheet pans either cooked or uncooked, and place them in zip bags or use a Food Saver vacuum sealer for fast easy future meals.
    Grab a bag of Italian-style meatballs at the store or make some the whole family will love using ground turkey, chicken, pork, or beef.

    Bread

    Try to use good French baguettes or crusty rolls. Cut long rolls into portions. Hoagie buns, sub rolls, hot dog buns, soft hoagie rolls, sandwich rolls, or slider buns will all work.

    San Marzano Canned Tomatoes

    Make incredible chopped tomatoes for the marinara sauce, I highly recommend this brand!

    Tomato Paste

    Adds a deep level of rich concentrated sweet tomato flavor.

    Kinds of Cheese

    I used slices of mozzarella, it melts nicely and gets golden which looks great. You could use provolone, Havarti, cheddar, Monterey, or pepper jack cheese.

    Crockpot Meatball Subs

    For an easy marinara sauce shortcut, you can add a jar of spaghetti sauce to a crock pot or slow cooker with frozen meatballs. Add some Italian seasoning, onions, and garlic, and let it cook for 4 hours on low. Then just load the tender meatballs and sauce onto buns with cheese and put them under the broiler until melted and golden brown.

    Meatball Sub Toppings

    • Slices of Provolone Cheese
    • Grated Parmesan
    • Fresh Basil Ribbons
    • Marinara Sauce (or your favorite pasta sauce)
    • Alfredo Sauce
    • Shredded or Slices of Mozzarella Cheese
    • Saute Onions and Bell Peppers

    Nutrition

    Calories: 668kcal | Carbohydrates: 62g | Protein: 54g | Fat: 22g | Saturated Fat: 10g | Cholesterol: 121mg | Sodium: 1580mg | Potassium: 1184mg | Fiber: 6g | Sugar: 10g | Vitamin A: 11380IU | Vitamin C: 23.9mg | Calcium: 444mg | Iron: 6.2mg

    Lamb Gyros With Greek Tzatziki Sauce

    [heart_this] · May 16, 2022 · 3 Comments

    Greek gyros on parchment paper topped with lamb meatballs cucumber and tomatoes.

    Grill Lamb Gyros for a great summer cookout. Wrap a fluffy pita bread around grilled lamb meatballs and top with chopped tomato, cucumber, parsley, and drizzle with a cool Tzatziki Sauce.

    In Greece, gyros are usually made with pork, but other meats like chicken, lamb, or beef are also used there and in many other countries around the world.

    Homemade gyro sandwiches are sublime with the cool veggies and sauce all tucked in a pita ...

    How To Make Gyros

    Homemade Tzatziki Sauce

    • 1 cup Greek yogurt
    • 1 garlic clove minced
    • ½ cucumber (seeded and peeled)
    • 2 teaspoons fresh lemon juice
    • 1 tablespoon olive oil
    • 1 tablespoon fresh mint minced
    • pinch salt and black pepper
    1. In a small bowl, whisk Greek yogurt, minced garlic cloves, chopped cucumber, lemon juice, olive oil, chopped mint, and a pinch of salt and pepper.
    2. Cover and refrigerate for 1-2 hours, this helps the flavor pop.

    You can swap in sour cream or plain yogurt, but it really makes a difference to use real Greek yogurt.

    Homemade Gyro Meat Lamb Kabobs

    All these ingredients for this gyro meat recipe are easily available at your local grocery store. You can swap in some ground beef or ground pork in place of lamb, or do a blended mix. I made this recipe for young adults, and they absolutely loved it the traditional way with ground lamb.

    • ¼ cup red onion (diced)
    • 2 cloves garlic minced
    • ¼ cup breadcrumbs
    • ½ teaspoon ground cinnamon
    • ½ teaspoon dried oregano
    • 1 tablespoon fresh parsley chopped
    • 1 tablespoon fresh rosemary chopped
    • 1 teaspoon ground cumin
    • ½ teaspoon ground allspice
    • 1 teaspoon smoked paprika
    • ½ teaspoon fresh black cracked pepper
    • 1 teaspoon sea salt
    • ½ cup feta cheese crumbled
    • 1 egg
    • 3 lb ground lamb
    • 8 pita wraps

    Grilling Gyros

    1. Soak wood skewers in cold water for 1 hour, or use metal skewers.
    2. In a large bowl, add diced onions, minced garlic, breadcrumbs, cinnamon, oregano, parsley, rosemary, cumin, allspice, paprika, salt, pepper, and crumbled feta.
    3. Crack in one egg and add the ground lamb. Using clean hands or a spatula, combine until and mix the lamb gyro meat well until it comes together.
    4. Use a medium-size ice cream scoop and then roll the meat mixture into almost 3" meatballs in size, as they will shrink on the grill.
    5. Push 4-5 lamb meatballs onto each skewer leaving space in between. Place them on a large rimmed baking sheet until you are ready to grill.
    6. Preheat your grill, for direct cooking on medium-high heat.
    7. Set the lamb kabobs on the wire rack of your gas or charcoal grill for 5-6 minutes per side. Turn every 5-6 minutes until nice grill marks form on the surface of the meatballs. They are done at 160 degrees f internal temperature.

    PRO TIP: To make your own ground lamb at home, slice the lamb meat into 1-inch cubes, and remove all bone and excess fat. Freeze the meat for 30 minutes. This helps "grind" it in a food processor or in a meat grinder.

    Assemble Ground Lamb Gyros

    1. Warm each pita bread briefly on the grill for 20-30 seconds. Don't leave it there too long, you want a nice soft pita bread.
    2. Place 3 grilled meatballs onto the warm pita bread, and sprinkle on fresh toppings of chopped tomato and cucumber.
    3. Dollup on the tzatziki sauce and garnish with parsley. You can serve them with some more Greek food recipes, try a Greek salad, a tabbouleh salad, or Greek fries.

    Gyros FAQ

    What is pita bread?

    The English word pita, comes from the Greeks. Pita bread is a round flatbread or leavened bread made with flour, water, yeast, and salt.

    The dough is rolled flat, and baked in a hot oven. It originates from the Middle East and is found all through the eastern Mediterranean and in wheat-eating areas of Europe, Asia, and Africa. 

    Is lamb meat gamey?


    No, in fact, the flavor of grass-fed lamb is actually closer to what mother nature intended because the animals only eat lush, green, and abundant pastures. Young lamb is mild and almost nutty in flavor and aroma.

    Is lamb dry?


    No, it is only dry if you over-cook it. Seared in a hot pan or grilled, lamb is more tender, flavorful, and juicy between rare and medium.

    Cuts like legs and shoulders require a longer cook time, low and slow is the best way to go.

    What temperature is lamb cooked?


    160°F for ground lamb used for kabobs or lamb kofta.

    For lamb chops and rack of lamb, you don't want to cook much past 145°F, or else it will dry out.

    How are authentic gyros made?


    In Greek, the word gyro or γύρο (pronounced YEE-roh) means "turn or revolution."

    In Greece, gyros are normally made with pork, though other meats are used in other countries. Chicken is common, and lamb or beef may be found more rarely.

    In Greek restaurants, you will often find an upright giant cone of meat turning on an upright vertical rotisserie grill. Thin slices of traditional gyro meat are carved off as it turns to make gyros.

    A gyro loaf is produced by shaping ground meat which can be lamb, chicken, beef, or most commonly pork in a round cylinder. It is frozen and sold commercially to restaurants.


    Miss Sassy sure wants one...

    A person holding a wood tray with gyros, and a small white dog looking up to try to get one.

    More Grill Recipes

    For more lamb recipes, try these easy and impressive Grilled Lamb Chops, with peaches, and a parmesan mint pesto. Serve with cool drinks and a salad, and the party is on!

    An elegant easy entertaining grill recipe ready in 45 minutes, serve your guests with Cabernet Rosemary Grilled Lamb Chops paired with grilled watermelon skewers.

    I have dozens of ideas for outdoor grilling and party food, here are a few more to get you inspired to at your next cookout.

    The Best Cheeseburger with sauce, and homemade relish. Oh and be sure to try the best burger seasoning plus all my tips!

    You must use the category name, not a URL, in the category field.

    Did you love this recipe? We would love to hear from you! If you make this recipe and love it, give it a 5-star rating ⭐⭐⭐⭐⭐ with a comment. THANK YOU!! Follow Delicious Table with my free newsletter and share this recipe with your friends on Facebook, Pinterest, and Instagram.

    Greek gyros on parchment paper topped with lamb meatballs cucumber and tomatoes.
    Print

    Lamb Gyros With Greek Tzatziki Sauce

    Gyros with Tzatziki Sauce are great for summer cookouts. Wrap a pita around grilled lamb meatballs with tomato, cucumber, parsley, and sauce!
    Course Dinner & Main Dishes
    Cuisine Greek
    Keyword grilled lamb kebabs, gyro meat recipe, gyros, lamb gyros
    Prep Time 30 minutes minutes
    Cook Time 15 minutes minutes
    Total Time 45 minutes minutes
    Servings 8 gyros wraps
    Calories 720kcal
    Author Lisa Hatfield

    Equipment

    • Spring Loaded Cookie Scoops (3 Sizes)
    • Grilling/Shish Kabob Stainless Skewers

    Ingredients

    Tzatziki Sauce

    • 1 cup Greek yogurt
    • 1 garlic clove minced
    • ½ cucumber (seeded and peeled)
    • 2 teaspoons fresh lemon juice
    • 1 tablespoon olive oil
    • 1 tablespoon fresh mint minced
    • pinch salt and pepper

    Gyros (Lamb Kabobs)

    • ¼ cup red onion (diced)
    • 2 cloves garlic minced
    • ¼ cup breadcrumbs
    • ½ teaspoon ground cinnamon
    • ½ teaspoon dried oregano
    • 1 tablespoon fresh parsley chopped
    • 1 tablespoon fresh rosemary chopped
    • 1 teaspoon ground cumin
    • ½ teaspoon ground allspice
    • 1 teaspoon smoked paprika
    • ½ teaspoon fresh cracked pepper
    • 1 teaspoon sea salt
    • ½ cup feta cheese crumbled
    • 1 egg
    • 3 lb ground lamb
    • 8 pita wraps

    Garnishes

    • tomatoes chopped
    • cucumber chopped
    • parsley minced
    US Customary - Metric

    Instructions

    Tzatziki Sauce

    • Using a whisk, mix Greek yogurt, minced garlic, chopped cucumber, lemon juice, olive oil, chopped mint, and a pinch of salt and pepper.
    • Cover and refrigerate for 1-2 hours, this helps the flavor.

    Lamb Kabobs

    • Soak wood skewers in cold water for 1 hour, or use metal skewers.
    • In a large bowl, add diced onions, minced garlic, breadcrumbs, cinnamon, oregano, parsley, rosemary, cumin, allspice, paprika, salt, pepper, and crumbled feta.
    • Crack in one egg and add the ground lamb. Using clean hands or a spatula, combine until and mix the lamb gyro meat well until it comes together.
    • Preheat your gas or charcoal grill to medium-high heat, 400 degrees.
    • Use a medium-size ice cream scoop and then roll the meat mixture into almost 3" meatballs in size, as they will shrink on the grill.
    • Push 4-5 meatballs onto each skewer leaving space in between. Place them on a large rimmed baking sheet until you are ready to grill.
    • Preheat your grill, for direct cooking on medium-high heat. Set the lamb kabobs on the wire rack of your gas or charcoal grill for 5-6 minutes per side. Turn every 5-6 minutes until nice grill marks form on the surface of the meatballs. They are done at 160 degrees internal temperature.

    Assemble Gyros

    • Warm each pita bread briefly on the grill for 20-30 seconds. Don't leave it there too long, you want a nice soft pita bread.
    • Place 3 grilled lamb meatballs onto the warm pita bread, and sprinkle on fresh toppings of chopped tomato and cucumber.
    • Dollup on the tzatziki sauce and garnish with parsley. You can serve them with some more Greek food recipes, try a Greek salad, a tabbouleh salad, or Greek fries.

    Video

    Notes

    lamb gyro meatballs

    Use a medium-size ice cream scoop and then roll the lamb meatballs to almost 3" in size, as they will shrink on the grill.
     
    All these ingredients for this gyro meat recipe are easily available at your local grocery store. You can swap in some ground beef or ground pork in place of lamb, or do a blended mix. I made this recipe for young adults, and they absolutely loved the traditional way with lamb.
     

    Greek yogurt

    You can swap in sour cream or plain yogurt, but it really makes a difference to use real Greek yogurt.
     

    ground lamb

    To make your own ground lamb at home, slice the lamb meat into 1-inch cubes, and remove all bone and excess fat. Freeze the meat for 30 minutes. This helps "grind" it in a food processor or in a meat grinder.

    Nutrition

    Calories: 720kcal | Carbohydrates: 37g | Protein: 39g | Fat: 45g | Saturated Fat: 19g | Polyunsaturated Fat: 4g | Monounsaturated Fat: 18g | Trans Fat: 1g | Cholesterol: 154mg | Sodium: 839mg | Potassium: 562mg | Fiber: 2g | Sugar: 2g | Vitamin A: 290IU | Vitamin C: 3mg | Calcium: 175mg | Iron: 4mg

    Cherry Pie Ice Cream Sandwiches

    [heart_this] · May 15, 2022 · 2 Comments

    A white platter with cherry pie ice cream sandwiches.

    5 ingredient Cherry Pie Ice Cream Sandwiches are an easy summer treat to cool you down on hot days, and no ice cream maker is needed!

    Every bite tastes like summertime with sweet cherry filling, and they even look like little pies...

    Ice Cream Sandwich Ingredients

    1 - 20 oz. can cherry pie filling

    1 - 13 oz. jar cherry preserves

    1.5-quart container of vanilla ice cream

    2 boxes of refrigerated pie crusts (4 pie crusts total)

    3 tablespoons fine granulated sugar

    Mix Cherry Ice Cream

    1. Soften a 1.5 quart of vanilla ice cream on the counter for 10-15 minutes.
    2. In a stand mixer or mixing bowl, mix softened ice cream, cherry pie filling, and cherry preserves. Mix until well combined.
    3. Place the mixture back in the freezer to firm up.
    4. Use a large scoop, and scoop it into balls on a parchment-lined baking sheet. Press down into a disc shape, and refreeze.

    Bake Pie Crust Cookies

    1. Roll out the pie crust, and cut out sixteen 3” (2 per sandwich) rounds of refrigerated pie dough, using a coffee cup or cookie cutter. Place on a parchment-lined baking sheet, and sprinkle with fine sugar.
    2. Bake at 400 degrees until golden, about 8 minutes until just turning golden brown. Cool on the counter.
    3. Place cherry mixture in between pie crusts with sugar side out.
    4. Wrap in plastic wrap and store in a freezer-safe container until ready to eat or serve quickly and enjoy!

    PRO TIP: You can swap the sugar pie crust out for any cookie you like! Try chip cookies, sugar cookies, chocolate-dipped wafers, graham crackers, or any kind of baked chocolate rectangle thin cookie.

    How are ice cream sandwiches made around the world?


    You can use any type of cookie, sweet biscuits, donuts, crisp waffles, or wafers to hold the ice cream. You will find all kinds of different combinations around the world.

    -In the US anything goes chocolate chip cookies, sugar cookies, chocolate dipped wafers, graham crackers, or any kind of baked chocolate rectangle thin cookie.
    -In the United Kingdom, a small block of ice cream is placed between two rectangular wafer biscuits. It was a popular alternative to a cone up until the 1980s. A "nougat wafer" has a layer of marshmallow sandwiched between two wafers and coated with chocolate around the edges.
    -In Scotland, a single nougat" is a vanilla layer of softer serve made into a sandwich with one plain wafer and one chocolate-covered nougat one. A double nougat (pronounced nugget) having nougat wafers on both sides. Raspberry sauce is also a common topping. Nougat wafers came in double or triple varieties, depending on the number of nougat wafers in the construction.
    -In Uraguay, they prefer Neapolitan ice cream in a sandwich prepared with wafers.
    -Vietnam serves theirs with a French flair, they put scoops of ice cream stuffed inside a bánh mì, topped with crushed peanuts.

    More Frozen Desserts

    Fruit Popsicles made with coconut water, strawberries, raspberries, and blueberries are refreshing low-sugar treats for hot summer days.

    Frozen Bananas are a healthy treat you dip in dark chocolate and roll in nuts and dried fruit. A healthy vegetarian and vegan treat for hot summer days! You can go crazy adding any toppings you love.

    Make an Oreo Ice Cream Cake for dessert this summer. It has an incredible red velvet cookie crust, pound cake, caramel, chocolate sauce, whip cream, and fun sprinkles.

    Raspberry Lemon Sorbet is a real fruit dessert, that is dairy-free, vegan, and has no refined sugar.

    • A single coconut water popsicle with strawberries, blueberries, and raspberries.
      Homemade Fruit Popsicles
    • A small aluminum sheet pan with brown paper and 5 frozen bananas chocolate dipped and coated in nuts and dried fruit.
      Frozen Chocolate Covered Bananas
    • An ice cream cake with a slice removed and covered in colorful sprinkles.
      Ice Cream Cake
    • Bright yellow lemons carved out and filled with raspberry strawberry lemon sorbet as a summer dessert.
      Raspberry Lemon Sorbet

    Did you love this recipe? We would love to hear from you! If you make this recipe and love it, give it a 5-star rating ⭐⭐⭐⭐⭐ with a comment. THANK YOU!! Follow Delicious Table with my free newsletter and share this recipe with your friends on Facebook, Pinterest, and Instagram.

    A white platter with cherry pie ice cream sandwiches.
    Print

    Cherry Pie Ice Cream Sandwiches

    5 ingredients create your own Homemade Cherry Pie Ice Cream Sandwiches. A fun and easy summer treat to cool you down on hot days!
    Course Desserts & Sweets
    Cuisine American
    Keyword cherry ice cream, homemade ice cream sandwiches, summer dessert
    Prep Time 30 minutes minutes
    Total Time 30 minutes minutes
    Servings 8
    Calories 531kcal
    Author Lisa Hatfield

    Equipment

    • Large Scoop
    • Large Metal Sheet Pan

    Ingredients

    Cherry Ice Cream

    • 20 ounces can cherry pie filling
    • 13 ounces jar cherry preserves
    • 1.5 quart vanilla ice cream

    Pie Crust Cookies

    • 4 whole refrigerated pie crusts 1 box has 2 crusts which yield 8 pie crust cookies or 4 sandwiches. You can reuse pie dough scraps for more sandwiches
    • 3 tablespoons fine sugar
    US Customary - Metric

    Instructions

    Cherry Ice Cream

    • Soften a 1.5 quart of vanilla ice cream on the counter for 10-15 minutes.
    • In a stand mixer or mixing bowl, mix softened ice cream, cherry pie filling, cherry preserves. Mix until well combined.
    • Place the ice cream mixture back in the freezer to firm up for an hour or two.
    • Use a large scoop, and scoop into balls on a parachment-lined baking sheet. Press down into a disc shape, and refreeze.

    Pie Crust Cookies

    • Roll out the pie crust, and cut out sixteen 3” rounds (will make 8 sandwiches) of refrigerated pie dough, using a coffee cup or cookie cutter. Place on a parchment-lined baking sheet, sprinkle with fine sugar.
    • Bake at 400 degrees until golden, about 8 minutes until just turning golden brown. Cool on counter.
    • Place cherry ice cream in between pie crusts with sugar side out.
    • Wrap in plastic wrap and store in a freezer safe container until ready to eat or serve quickly and enjoy!

    Notes

    Sandwich Cookie Swaps

    You can swap the sugar pie crust out for any cookie you like!
    Try chip cookies, sugar cookies, chocolate-dipped wafers, graham crackers, or any kind of baked chocolate rectangle thin cookie.

    Nutrition

    Calories: 531kcal | Carbohydrates: 80g | Protein: 6g | Fat: 20g | Saturated Fat: 10g | Cholesterol: 52mg | Sodium: 230mg | Potassium: 340mg | Fiber: 2g | Sugar: 43g | Vitamin A: 600IU | Vitamin C: 5.4mg | Calcium: 169mg | Iron: 1.1mg

    Raspberry Lemon Sorbet

    [heart_this] · May 15, 2022 · 4 Comments

    Bright yellow lemons carved out and filled with raspberry strawberry lemon sorbet as a summer dessert.

    Last Updated July 20th, 2022 at 07:09 am by Lisa

    Raspberry Lemon Sorbet is a real fruit dessert, that is dairy-free, vegan, and has no refined sugar.

    Some people call this a summer fruit sorbet or nice cream. Put this together with raspberries, strawberries, pineapple, and bananas, and served in real lemon cups.

    Serve this easy lemon sorbet al fresco at a dinner party or cookout. It is healthy for anyone watching their sugar and great for kids. All swirled together, frozen, and scooped into lemon peels. What a beautiful refreshing treat...

    Homemade Lemon Sorbet Recipe

    In France, this dessert is known as Givre', French for "frosted".  It describes sorbet served in frozen coconut shells or whole fruit peels such as lemons, oranges, or pineapples. Often the French will serve this between courses as a palate cleanser or a cool dessert.

    • 6-8 whole lemons (top cut off and scooped out)
    • 6-8 pretty frozen raspberries for garnish

    Raspberry Strawberry Sorbet

    • 2 cups frozen strawberries
    • 1 cup frozen raspberries
    • 6-8 dates
    • 2 cups coconut water

    Lemon Sorbet

    • 2 cups frozen pineapple
    • 1-2 tablespoons fresh lemon juice
    • 1 frozen banana
    • 2 cups coconut water
    1. Freeze all the fruit, raspberries, strawberries, pineapple, and banana.
    2. Clean the lemons well by scrubbing under cool clean water. Lay the lemon on its side and slice the lemon top off. Then use a metal spoon or melon ball scoop and remove the lemon pulp inside the lemon peel shell.
    3. You can also slice a tiny bit of lemon off the bottom of the lemon rind peel to keep it stable on your plate.

    Make The Sorbet

    1. In a high-speed blender, mix frozen strawberries, raspberries, dates, and coconut water.
    2. In a high-speed blender, mix pineapple, lemon juice, banana, and coconut water.
    3. Then spread the raspberry strawberry mixture into half of a 9 x 13 glass baking dish or shallow container, and then spread the tart lemon mixture on top working quickly as it melts fast. Take a spatula and swirl the two together.
    4. Cover well with plastic wrap, and freeze for a couple of hours or until firm.

    Assemble Sorbet

    1. If you freeze overnight, place on the counter to soften up for about 15-20 minutes before scooping into the lemon shell peels. Keep an eye on it, it melts fast.
    2. Using a small 1" ice cream scoop, fill the lemons to the top, and push several more scoops on top, press a raspberry on top. Or simply serve in bowls with raspberries on top.
    3. Freeze nice cream filled lemons with raspberries for a couple more hours or overnight and serve. Store any leftover sorbet in a BPA-free plastic container in the freezer.

    Easy Lemon Sorbet Recipe Tips

    lemons: clean pretty regular standard lemons or Meyer lemons with the top cut off and scooped out the lemon shells with either a spoon or melon baller.

    frozen fresh fruit: use raspberries, strawberries, bananas, and pineapple that are frozen, it helps the nice cream swirl when you put it together. You can also swap in mangos, peaches, blueberries, or cherries. Real fruit has enough sugar so you don't need to add any sugar or simple syrup like some recipes call for.

    dates: add a nice sweetness to the nice cream without adding refined sugar.

    coconut water: adds great flavor and freezes well to make the sorbet, it adds some nice flavor, you could add cups of water or fruit juice in its place.

    lemon juice: fresh lemon juice adds a tartness to all the sweet fruit and dates. It also might be nice to add a little bit of lemon zest.

    This cutie is Kylie, my niece. I am pretty darn proud of her business, creative styling, and photography skills.

    I am totally biased of course, but she has some serious talents that really blow my mind! Perhaps a future creative or food blogger? We put this recipe together, and hey it's officially kid-approved...

    Sorbet FAQ

    What appliance do you need to make sorbet?


    High-speed blender - a Vitamix, Ninja, or NutriBullet.
    Ice cream gelator/frozen yogurt/sorbet maker - Breville, Cuisinart, or Kitchen Aid.

    Follow the high-speed blender, ice cream machine, or frozen yogurt manufacturer's instructions for your favorite recipe.

    So what is the difference between Sorbet and Ice Cream?

    Sorbet - can be scooped but is not creamy as it contains just fruit and sugar, with no dairy. A popular non-fat or low-fat alternative to ice cream is often churned in an ice cream maker.

    Popular to serve in restaurants as a palette cleanser during multi-course meals because its intense fruit flavor is extra refreshing.

    Ice cream must be churned during freezing and is sweetened with sugar. It gets a creamy texture with dairy products and air whipped in. Sorbet has neither air nor dairy. Ice cream is required by the USDA to have at least 10% milkfat, which is the fat from milk.

    What is Nice Cream?


    Nice cream is a clean and healthy vegan treat just as delicious as ice cream, without the need for added sugar, simple syrup, dairy, or a complicated ice cream maker.

    What is in lemon sherbert?


    A lemon sherbert is not real ice cream and not sorbet. Some of the ingredients are fruit and cold water with the richness of milk or buttermilk to add a creamier texture that a light sorbet. The USFDA requires that sherbert contains 1-2% of milk fat.

    Summer treats can be both healthy and delicious when packed with fruit, icy cold, and beautiful.

    There is something so wonderful about sorbet after a heavy meal, and I love to serve these when entertaining, especially when it's a warm evening.

    Lemon fans, take a look at my collection of 15+ Lemon Recipes 🍋🍋🍋, full of all kinds of ideas on how to use them up!

    More Frozen Desserts

    Fruit Popsicles made with coconut water, strawberries, raspberries, and blueberries are refreshing low-sugar treats for hot summer days.

    Frozen Bananas are a healthy treat you dip in dark chocolate and roll in nuts and dried fruit. A healthy vegetarian and vegan treat for hot summer days! You can go crazy adding any toppings you love.

    Make an Oreo Ice Cream Cake for dessert this summer. It has an incredible red velvet cookie crust, layers of ice cream, pound cake, caramel, chocolate sauce, whip cream, and fun sprinkles.

    With just 5 ingredients, you can create your own Cherry Pie Ice Cream Sandwiches. A fun and easy ice cream treat that screams summer.

    • A single coconut water popsicle with strawberries, blueberries, and raspberries.
      Homemade Fruit Popsicles
    • A small aluminum sheet pan with brown paper and 5 frozen bananas chocolate dipped and coated in nuts and dried fruit.
      Frozen Chocolate Covered Bananas
    • An ice cream cake with a slice removed and covered in colorful sprinkles.
      Ice Cream Cake
    • A white platter with cherry pie ice cream sandwiches.
      Cherry Pie Ice Cream Sandwiches

    Did you love this recipe? We would love to hear from you! If you make this recipe and love it, give it a 5-star rating ⭐⭐⭐⭐⭐ with a comment. THANK YOU!! Follow Delicious Table with my free newsletter and share this recipe with your friends on Facebook, Pinterest, and Instagram.

    Bright yellow lemons carved out and filled with raspberry strawberry lemon sorbet as a summer dessert.
    Print

    Raspberry Lemon Sorbet

    Raspberry Lemon Sorbet is a real fruit dessert, that is dairy-free, vegan, and has no refined sugar.
    Some people call this a summer fruit sorbet or nice cream. It is made with raspberries, strawberries, pineapple, and bananas, and served in real lemon cups.
    Course Desserts & Sweets
    Cuisine Vegan
    Keyword lemon sorbet, nice cream recipe, pineapple sorbet, sorbet recipe, vegan sorbet
    Prep Time 30 minutes minutes
    Cook Time 0 minutes minutes
    freezer time 2 hours hours
    Total Time 2 hours hours 30 minutes minutes
    Servings 8
    Calories 119kcal
    Author Lisa Hatfield

    Equipment

    • Epicurean Non-Slip Cutting Board
    • Small Serrated Knife
    • Spring Loaded Cookie Scoops (3 Sizes)
    • Vitamix Blender

    Ingredients

    • 6-8 whole lemons top cut off and scooped out
    • 6-8 pretty raspberries for garnish fresh or frozen looks pretty for garnish

    Raspberry Strawberry Sorbet

    • 2 cups frozen strawberries
    • 1 cup frozen raspberries
    • 6-8 dates
    • 2 cups coconut water

    Lemon Sorbet

    • 2 cups frozen pineapple
    • 1-2 tablespoons fresh lemon juice
    • 1 frozen banana
    • 2 cups coconut water
    US Customary - Metric

    Instructions

    Prep

    • Freeze all the fruit, raspberries, strawberries, pineapple, and banana.
    • Clean the lemons well by scrubbing under cool clean water. Lay the lemon on its side and slice the lemon top off. Then use a metal spoon or melon ball scoop and remove the lemon pulp inside the lemon peel shell.
    • You can also slice a tiny bit of lemon off the bottom of the lemon rind peel to keep it stable on your plate.

    Make The Sorbet

    • In a high-speed blender, mix frozen strawberries, raspberries, dates, and coconut water.
    • In a high-speed blender, mix pineapple, lemon juice, banana, and coconut water.
    • Then spread the raspberry strawberry mixture into half of a 9 x 13 glass baking dish or shallow container, and then spread the tart lemon mixture on top working quickly as it melts fast. Take a spatula and swirl the two together.
    • Cover well with plastic wrap, and freeze for a couple of hours or until firm.

    Assemble Sorbet

    • If you freeze overnight, place on counter to soften up for about 15-20 minutes before scooping into the lemon shell peels. Keep an eye on it, it melts fast.
    • Using a small 1" ice cream scoop, fill the lemons to top, and push several more scoops on top, press a raspberry on top. Or simply serve in bowls with raspberries on top.
    • Freeze nice cream filled lemons with raspberries for a couple more hours or overnight and serve. Store any leftover sorbet in a BPA free plastic container in the freezer.

    Notes

    fruit

    This recipe works best with frozen fruit, to get the swirl effect when mixing the two nice creams together. 

    high-speed blender

    You will need a powerful blender like a Vitamix to get the ingredients smooth. 

    serving

    Keep frozen in the freezer on a tray covered with plastic wrap until ready to serve.
     

    Nutrition

    Calories: 119kcal | Carbohydrates: 30g | Protein: 2g | Fat: 0g | Saturated Fat: 0g | Cholesterol: 0mg | Sodium: 129mg | Potassium: 640mg | Fiber: 7g | Sugar: 17g | Vitamin A: 55IU | Vitamin C: 100.3mg | Calcium: 70mg | Iron: 1.4mg

    Homemade Relish

    [heart_this] · May 13, 2022 · 2 Comments

    A small white bowl with homemade relish in to top hot dogs in paper lined baskets.

    Last Updated April 25th, 2024 at 03:20 pm by Lisa

    Homemade Relish is a mix of clean crunchy fresh produce. Sure you can buy it at the store, but once you have the real thing, you can't go back. You can make it coarse or fine as you prefer. Top hot dogs or load-on burgers as part of your cookout menu.

    There is a whole list of hot dog toppings with this recipe too. Make a bowl of this cool crisp condiment in minutes, it elevates classic grilled foods to a whole new level...

    A hot dog with toppings in a red plastic basket lined with paper.
    • Relish can consist of a single type or a combination of vegetables and fruit, coarsely or finely chopped.
    • Relish texture will vary depending on the slicing style used for these solid ingredients. One of the best things is you can chop the ingredients course or mix them in a Cuisinart for a finer texture.
    • It's a good way to use up extra ingredients like cabbage, pickles, and vinegar.
    Red food baskets filled with hot dogs and toppings at a cookout party.

    Homemade Relish Recipe

    • 1 green bell pepper chopped fine
    • 1-2 dill pickles chopped fine (or use finely chopped cucumbers)
    • 1 cup green cabbage finely shredded
    • ¼ cup onion (chopped fine)
    • 1 tablespoon apple cider vinegar
    • 2 tablespoons yellow mustard
    • ½ teaspoon sea salt
    • ½ teaspoon ground pepper

    Finely chop all the bell pepper, dill pickles, cabbage, and onion on a cutting board or in a food processor. Add to a medium bowl. Stir in vinegar, mustard, salt, and pepper.

    Seal in an airtight container and keep refrigerated for at least a day. Use within a week on hot dogs and hamburgers. This relish is safe at room temperature for cookouts.

    PRO TIP: For a finer texture, pulse all ingredients in a food processor until it becomes a fine mix. If you like relish chunky and course, hand chop it on a cutting board.

    Relish recipe mixed in white bowl with cute bbq towel.

    Homemade Relish Variations & Swaps

    Homemade pickle relish can be made in so many ways with different flavors by adding ingredients you have on hand or prefer.

    Kinds of Peppers: You can swap in different types of peppers; any sweet pepper including mild red bell peppers, green bell peppers, pickled hot peppers, or spicy red peppers like serrano.

    Spices: Any seasoning addition like a sprinkle of mustard seed, celery seed, coriander seed, celery salt, dill seed, or red pepper flakes will turn up the flavor.

    Onions: You can use any large onions,white, yellow, or red onion. Milder sweet onions are also nice and don't have the strong bite that white onions do.

    Pickles: Add some homemade pickles! You can add diced English cucumbers, sweet pickles or your own pickle recipe for extra crunch.

    Vinegars: Any regular white vinegar, white wine vinegar, apple cider vinegar or even lemon juice will work.

    Tomatoes: use up green tomatoes, or even a bit of red tomato for extra color.

    Sweetness: Adding brown sugar, maple sugar, or white sugar to your relish will up the sweet level.

    Why Make Your Own Relish?

    Sure you can just buy relish at the grocery store, but when you read that label who wants all the additives like xanthan gum (a thickening agent), corn syrup, food coloring for the bright color, and many other preservatives?

    • hot relish - add spicy peppers like habaneros, cayenne, red jalapenos, and serranos.
    • dill relish - load more dill pickles, use a good tart pickle variety
    • onion relish - Add a majority of Vidalia onions or other sweet onions
    • chow chow relish - has tomatoes and other spices, popular in the South
    • classic sweet relish - add more sugar and finely diced

    Relish FAQs

    What to use relish on?


    A popular condiment, most recipes are typically a chopped combination of vegetables, herbs, seasonings, and even fruit.

    In America, pickle relish is made with finely chopped pickles, cucumbers, vinegar, and seasonings, then cooked and pickled to make it shelf-stable. You can find sweet dill or dill varieties in the stores.

    Try relish on grilled hot dogs, toss into salads for a crisp crunch, and mix into coleslaw for a nice tang, stir into potato salad, load onto a sub sandwich, top grilled fish, or put on a grilled hamburger.

    What kind of relish goes on hot dogs?


    -Sweet Pickle Relish - classic and sweeter of course.
    -Dill Pickle Relish - for people who prefer a tart tang.
    -Chicago-style Relish is a type of sweet pickle relish typically used on the windy city Chicago dog. The unique green color of the relish often referred to as "neon green", is created by adding blue dye to regular pickle relish.

    More Cookout & Hot Dog Recipes

    These are some of my favorite ways to make hot dogs taste amazing. Try some Spiral Grilled Hot Dogs, and fill those nooks and crannies with toppings. Make some loaded Chili Dogs and get the secret for thick hot dog chili! Get inspired with easy recipes for your next cookout.

    • A red plastic food basket lined with paper holding a loaded grilled hot dog.
      Spiral Grilled Hot Dogs
    • A game day food table with chili dogs loaded with relish, cheese, and onions.
      Hot Dog Chili
    • A square collage of colorful grilled food, side dishes, desserts, and drink recipes to serve at an outdoor bbq cookout.
      75+ Cookout Recipes & BBQ Party Ideas

    Did you love this recipe? We would love to hear from you! If you make this recipe and love it, give it a 5-star rating ⭐⭐⭐⭐⭐ with a comment. THANK YOU!! Follow Delicious Table with my free newsletter and share this recipe with your friends on Facebook, Pinterest, and Instagram.

    A small white bowl with homemade relish in to top hot dogs in paper lined baskets.
    Print

    Homemade Relish Recipe

    Mix up this fresh crunchy homemade relish recipe, to top grilled hot dogs or hamburgers. Serve this condiment at your next cookout or BBQ.
    Course Sauces, Marinades, & Condiments
    Cuisine American
    Keyword hot dog relish, relish, relish recipe
    Prep Time 10 minutes minutes
    Cook Time 0 minutes minutes
    Total Time 10 minutes minutes
    Servings 12
    Calories 9kcal
    Author Lisa Hatfield

    Equipment

    • Chef Knife
    • Epicurean Non-Slip Cutting Board
    • Cuisinart Food Processor

    Ingredients

    • 1 bell pepper chopped fine
    • 1-2 dill pickles chopped fine
    • 1 cup green cabbage finely shredded
    • ¼ cup chopped onion chopped fine
    • 1 tablespoon apple cider vinegar
    • 2 tablespoons yellow mustard
    • ½ teaspoon sea salt
    • ½ teaspoon ground pepper

    Instructions

    • Finely chop all the bell pepper, pickles, cabbage, and onion on a cutting board. Add to a medium size bowl. Stir in vinegar, mustard, salt, and pepper.
    • PRO TIP: For a finer texture, pulse all ingredients in a food processor until finely mixed.
    • Seal in a container and keep refrigerated for at least a day. Use within a week on hot dogs and hamburgers.

    Video

    Notes

    Hot Dog Toppings

    • chili
    • grated cheese
    • coleslaw
    • relish
    • mustard
    • ketchup
    • chopped onions
    • chopped tomatoes
    • green onions
    • pickles
    • sauerkraut
    • pickled jalapenos
    • caramelized onions & mushrooms
    • crumbled bacon

    Nutrition

    Calories: 9kcal | Carbohydrates: 2g | Protein: 1g | Fat: 1g | Saturated Fat: 1g | Polyunsaturated Fat: 1g | Monounsaturated Fat: 1g | Sodium: 174mg | Potassium: 46mg | Fiber: 1g | Sugar: 1g | Vitamin A: 328IU | Vitamin C: 15mg | Calcium: 8mg | Iron: 1mg

    Firecracker Shrimp

    [heart_this] · May 10, 2022 · 2 Comments

    A firecracker shrimp recipe with two dipping sauces on a black platter.

    Last Updated May 20th, 2022 at 08:28 pm by Lisa

    Firecracker Shrimp is a popular appetizer recipe you can oven bake or deep fry, then dip them into a creamy spicy sriracha dipping sauce.

    My oven baked version of the best firecracker shrimp is so darn easy. The egg roll wrappers get crispy, yet are soft, and cook all at once. You can also deep fry these the traditional way, then get to dipping...

    Traditionally, these are deep fried in a wok or a pot of hot oil. I learned to make these from a Chinese chef, and they are great deep fried.

    After I came home from that cooking class, I tested a different approach and "un-fried" this delicious situation, so now you have two options with this recipe. Oven Baked or Deep Fried, your choice.

    Firecracker Shrimp Recipe

    These spicy shrimp are the perfect appetizer or can be a main dish. You could add some hot coconut rice and your favorite salad for a
    complete meal. It is an easy recipe to grab the ingredients at the grocery store and throw together even at the last minute.

    • 24 large frozen shrimp extra jumbo - peeled, deveined, tail-on
    • 1 cup teriyaki sauce
    • 1 tablespoon garlic minced
    • 1 package egg roll wrappers (measuring 7 x 7 inches)
    • 1 whole egg
    • coconut oil or cooking spray
    • ½ cup teriyaki sauce (extra for dipping)

    Spicy Firecracker Sauce

    Try the spicy sriracha dip along with some plain teriyaki sauce in case someone isn't a fan of spicy hot.

    • 3 tablespoons sriracha chili sauce (or a chili garlic sauce)
    • 3 tablespoons prepared horseradish
    • 3 tablespoons mayonnaise

    In a small bowl, use a whisk or small spatula to mix the sriracha chili sauce, horseradish sauce, and mayonnaise. Set aside.

    I tested many ways to make this sauce, and find this spicy sauce has the perfect amount of heat, the right combination of cool and creamy for the fried shrimp.

    You can adjust the heat level to your taste, by reducing the horseradish and chili sauce down to 1-2 tablespoons each. You can also find the perfect balance of savory and sweet flavor with some Thai sweet chili sauce. Store any leftovers in an airtight container to spread on sandwiches, and dip hot fries or chicken strips into it during the week.

    Wrap the Firecracker Shrimp

    1. Remove the frozen shrimp from the bag, place them in a colander, and rinse under water. Your shrimp will be ready to use in about 15 minutes from frozen. Or you can defrost your shrimp overnight in the refrigerator. Place the bag of shrimp in a bowl to catch the moisture or any drips.
    2. Marinade shrimp in a large ziploc bag, add the 24 thawed shrimp, 1 cup teriyaki sauce, and the minced garlic. Rest for 20 minutes in the fridge. Turn the bag a couple of times to evenly coat the shrimp with marinade.
    3. Line a large baking sheet with parchment paper.
    4. Cut a stack of 8 square spring roll/egg roll wrappers (they are 7 x 7 inches out of the package) into thirds, lay strips on top of each other spaced evenly with 1" at the top shows. This helps the wrapping process go faster.
    5. Brush beaten egg over the top of each strip, this acts as the glue to keep the wrapper sealed when baking or deep frying.
    6. Remove the shrimp from the marinade, and pat dry with paper towels.
    7. Lay one shrimp across the bottom of each egg roll wrapper with the tail sticking out.
    8. Tightly wrap the shrimp up, and press the egg wash sealed edge firmly together at the seam.

    Cooked Shrimp Options

    You can use this recipe to deep fry or oven bake. Both ways are delicious, and have advantages.

    Option 1: Pan Deep Fry Method

    Advantages: The deep fry method gives a crunchier golden crisp outside shell. With frying, you need to work in batches and clean up the mess on the stove.

    1. In a dutch oven, deep large skillet over medium-high heat, add about 1-2 inches of vegetable oil (canola oil). You want your oil temperature to be at 350 degrees.
    2. Fry a few at a time for 2-3 minutes in small batches. Remove with a slotted spoon to a rack or paper towel lined platter. You can also use a deep fryer or an air fryer.
    3. Serve on a warm serving platter with small shallow bowls of spicy sriracha dipping sauce and plain teriyaki sauce.

    Option 2: Oven Bake Method

    Advantages: The oven baked method results in a crisp potsticker texture and saves some time and calories. When you bake them on a sheet pan, they all are done at the same time which is nice for parties and entertaining. The clean up is a lot easier too.

    1. Preheat oven to 400 degrees.
    2. Once wrapped, place shrimp on the parchment lined baking sheet in a single layer. Spray all the shrimp well with cooking spray. The oil sprayed on the firecracker shrimp will help them crisp golden brown in the oven.
    3. Bake 12 minutes at 400 degrees, flip over, spray again with coconut oil, bake 12 more minutes until golden brown.
    4. Serve on a warm serving platter with small shallow bowls of spicy sriracha dipping sauce and plain teriyaki sauce.
    What are egg roll wrappers?


    They are square sheets of dough similar to pasta. You can find them in the fresh refrigerated section of the store, usually by the produce department, and are not frozen.

    They are used for frying recipes like egg rolls, and fried spring rolls.


    More Appetizer Recipes

    An easy appetizer and party food, Shrimp Cocktail is made by oven roasting large shrimp, then dip them in fresh homemade cocktail sauce.

    Jalapeno Popper Dip appetizer recipe is always a hit! Make this melty hot dip for parties with just 6 ingredients.

    Learn how to set up a Crostini Bar for Fall with all the toppings, plus get beautiful design inspiration for arranging an easy and relaxed party for Fall gatherings, Friendsgiving, or a way to serve Thanksgiving Appetizers.

    • A clear glass plate with shrimp cocktail, cocktail sauce, and two glasses of champagne.
      Shrimp Cocktail
    • A white oval casserole dish with a hot dip being scooped out with a large corn chip.
      Jalapeno Popper Dip
    • A rustic table with small bowls filled with toppings for a fall appetizer crostini bar.
      Fall Crostini Bar
    • A collection of Thanksgiving appetizers with recipe ideas, and party decorating tips for a Fall party.
      36 Thanksgiving Appetizers

    Did you love this recipe? We would love to hear from you! If you make this recipe and love it, give it a 5-star rating ⭐⭐⭐⭐⭐ with a comment. THANK YOU!! Follow Delicious Table with my free newsletter and share this recipe with your friends on Facebook, Pinterest, and Instagram.

    A firecracker shrimp recipe with two dipping sauces on a black platter.
    Print

    Firecracker Shrimp with Sriracha Dipping Sauce

    Firecracker Shrimp is a popular appetizer recipe you can oven bake or deep fry. Then dip them into a creamy spicy sriracha dipping sauce!
    Course Appetizers, Dips, & Snacks
    Cuisine American
    Keyword firecracker shimp, party food, shrimp appetizer
    Prep Time 20 minutes minutes
    Cook Time 24 minutes minutes
    Total Time 44 minutes minutes
    Servings 24
    Calories 92kcal
    Author Lisa Hatfield

    Equipment

    • Chef Knife
    • Mini Basting Brush
    • Large Metal Sheet Pan
    • Parchment Paper Sheets

    Ingredients

    • 24 large frozen shrimp extra jumbo - peeled, deveined, tail-on
    • 1 cup teriyaki sauce
    • 1 tablespoon garlic minced
    • 1 package egg roll wrappers measuring 7 x 7 inches
    • 1 whole egg
    • coconut oil spray
    • ½ cup teriyaki sauce for dipping

    Spicy Sriracha-Horseradish Dipping Sauce

    • 3 tablespoons sriracha chili sauce
    • 3 tablespoons prepared horseradish
    • 3 tablespoons mayonnaise
    US Customary - Metric

    Instructions

    Make Spicy Sriracha Dipping Sauce

    • In a small bowl, use a whisk or small spatula to mix sriracha chili sauce, horseradish sauce, and mayonnaise. Set Aside.

    Wrap the Firecracker Shrimp

    • Remove the frozen shrimp from the bag, place them in a colander, and rinse underwater. Your shrimp will be ready to use in about 15 minutes from frozen. Or you can defrost your shrimp overnight in the refrigerator. Place the bag of shrimp in a bowl to catch the moisture or any drips.
    • Marinade shrimp in a large ziploc bag, add the 24 thawed shrimp, 1 cup teriyaki sauce and the minced garlic. Rest for 20 minutes in the fridge. Turn bag every 5 minutes or so to evenly coat shrimp with marinade.
    • Line a large baking sheet with parchment paper.
    • Cut a stack of 8 square spring roll/egg roll wrappers (they are 7 x 7 inches out of the package) into thirds, lay strips on top of each other spaced evenly with 1" at the top showing. This helps the wrapping process go faster.
    • Brush beaten egg over the top each strip, this acts as a glue to keep the wrapper sealed when baking.
    • Remove the shrimp from the marinade, and pat dry with paper towels.
    • Lay one shrimp across the bottom of each egg roll wrapper with the tail sticking out.
    • Tightly wrap the shrimp up, and press egg wash sealed edge firmly together at the seam.

    Option 1: Pan Fry Method

    • In a dutch oven, deep large skillet over medium-high heat, add about 1-2 inches of vegetable oil (canola oil). You want your oil temperature to be at 350 degrees.
    • Fry a few at a time for 2-3 minutes in small batches. Remove with a slotted spoon to a rack or paper towel lined platter. You can also use a deep fryer or an air fryer.
    • Serve on a warm serving platter with small shallow bowls of spicy sriracha dipping sauce and plain teriyaki sauce.

    Option 2: Oven Bake Method

    • Preheat oven to 400 degrees.
    • Once wrapped, place shrimp on the parchment lined baking sheet in a single layer. Spray all the shrimp well with cooking spray. The oil sprayed on the firecracker shrimp will help them crisp golden brown in the oven.
    • Bake 12 minutes at 400 degrees, flip over, spray again with coconut oil, bake 12 more minutes until golden brown.
    • Serve on a warm serving platter with small shallow bowls of spicy sriracha dipping sauce and plain teriyaki sauce.

    Notes

    shrimp

    The shrimp package will state 16-24 per pound, those are the extra jumbo/large shrimp you want.

    sauce spiciness 

    You can adjust the heat level to your taste, by reducing the horseradish and chili sauce down to 1-2 tablespoons each. You can also find the perfect balance of savory and sweet flavor with some Thai sweet chili sauce. Store any leftovers in an airtight container to spread on sandwiches, and dip hot fries or chicken strips into it during the week.

    deep fry advantages

    The deep fry method gives a crunchier golden crisp outside shell. With frying, you need to work in batches and clean up the mess on the stove.

    oven bake advantages 

    The oven baked method results in a crisp potsticker texture and saves some time and calories. When you bake them on a sheet pan, they all are done at the same time which is nice for parties and entertaining. The clean-up is a lot easier too.

    Nutrition

    Calories: 92kcal | Carbohydrates: 14g | Protein: 4g | Fat: 1g | Cholesterol: 17mg | Sodium: 889mg | Potassium: 72mg | Sugar: 2g | Vitamin A: 15IU | Vitamin C: 1.2mg | Calcium: 24mg | Iron: 1.1mg

    Cedar Grilled Salmon

    [heart_this] · May 10, 2022 · 2 Comments

    A wooden platter with cedar wrapped salmon, asparagus, and lemon butter.

    Last Updated April 25th, 2024 at 02:55 pm by Lisa

    Grill this gorgeous cedar salmon recipe with everything you need for a healthy dinner including the fresh wild salmon, asparagus, and zucchini ribbons.

    The cedar adds a slightly smoky flavor as the fish cooks and the salmon butter becomes a buttery lemon sauce that melts all over...

    How To Make Grilled Cedar Salmon

    4 cedar wraps or 4 cedar planks (soak wraps and string ties or planks)

    4 pieces of fresh salmon fish (Trader Joes Coho Silver)

    20 asparagus 6-8” spears, trimmed pieces

    1 zucchini, cut into ribbons

    1 tablespoon dry rub (see below)

    1 tablespoon olive oil 

    1 fresh lemon, cut into ¼" half-round slices

    Lemon-Dill Butter slices (see below)

    Cedar wraps and cedar planks are easy to find everywhere now including in hardware, grocery stores, and online.

    1. Soak cedar wraps/butcher string or cedar planks for 20 minutes in cool water. This prevents them from catching on fire while grilling.
    2. Slice lemons in ¼" half rounds. Peel the zucchini using a potato peeler then cut wide ribbons down the full length of the zucchini using a potato peeler.
    3. On a plate, drizzle a little olive oil on cleaned asparagus and microwave for 15-30 seconds. This pre-cooks the asparagus perfectly.
    4. In cedar wraps: on the diagonal, lay a piece of salmon skin side down, sprinkle on spice rub, and layer with asparagus, zucchini ribbons, and lemon slices. Tie with butcher string that was soaked in cold water.
    5. On the cedar plank: place cedar plank down, then lay a piece of salmon skin side down, sprinkle spice rub, and layer with asparagus, zucchini ribbons, and lemon slices.
    6. Heat the grill to medium heat, so the temperature of your gas grill reaches 450 degrees. 
    7. Cook for 7-8 minutes grill time, it will turn to a lighter color and 145 degrees internal temperature on a meat thermometer. Salmon cooks very fast on an outdoor grill, so keep an eye on it. You can also add a few wood chips to add additional smoke flavor.
    8. Serve warm with lemon butter.
    Cedar wrapped bundles of salmon and asparagus on the gas grill tied with kitchen string.

    PRO TIP: You can use skinless salmon fillets or skin-on because the cedar wrap keeps the salmon moist and you don't have to worry about it sticking to the grill.

    Salmon Spice Rub

    • ¼ cup brown sugar
    • ¼ cup paprika
    • 3 tablespoons cracked black pepper
    • 3 tablespoons of sea salt
    • 2 tablespoons lemon pepper
    • 2 teaspoons chili powder
    • 2 tablespoons garlic powder
    • 2 tablespoons onion powder
    • 2 teaspoons celery seeds
    • 1 teaspoon cayenne pepper
    1. Combine all the ingredients in a mixing bowl and stir to mix using a small whisk. 
    2. Store extra in an airtight jar out of light and heat. It will keep for at least 3 months, use it on chicken, hamburgers, or pulled pork.

    Lemon Dill Salmon Butter

    Slice off a coin and watch it become a melty lemon butter salmon sauce right over fish and vegetables.

    You can swap in other fresh herbs like parsley, sage, or thyme in place of dill. I really recommend the dill and salmon combination, it is a classic.

    I find garlic overpowers and adds too much flavor, but that would be an option. Just mix a little soft butter with crushed garlic, salt, and some lemon zest and juice. A drizzle of melted butter or pats of butter on top of the salmon is another option.

    • ½ cup butter softened (salted or unsalted butter)
    • 2 tablespoons fresh dill chopped
    • ½ teaspoon salt (kosher sea salt)
    • 1 lemon - fresh lemon juice and zest
    Lemon-Dill Butter
    Make Lemon Dill Compound Butter and melt on grilled salmon and vegetables like asparagus. Stores great in the freezer for months!
    GET THE RECIPE PIN IT
    Small brown round cutting board with slices of lemon dill butter garnished with fresh lemon and dill.

    You can use up any extra Lemon Butter for the rest of the month. Try it on roasted or mashed potatoes, fish, and grilled vegetables like corn on the cob, and mix it into fresh pasta.

    1. In a small bowl, place the butter, zest of one fresh lemon, one squeeze of lemon juice, and a pinch of salt.
    2. Mix until combined using a small spatula, and place on a piece of plastic wrap or parchment paper.
    3. Push the butter mixture into a long roll shape using plastic wrap or paper to get it about an inch wide in a long roll. Twist the ends closed.
    4. Place in the fridge to firm up and use that day.
    5. Slice into coins, and serve over grilled fish, smashed potatoes or mashed potatoes, or asparagus.
    6. Will keep in the freezer for up to two months. Wrap well and store in a freezer zip-top bag or airtight container.
    Melting herb lemon butter on asparagus with cedar salmon and garnished with lemon slices.

    Cedar Salmon FAQ

    How do you know when salmon is done?


    Grilled Salmon starts out a raw pink translucent color and turns whiter or opaque lighter with a pink color.

    A 1" thick piece of salmon without a cedar wrap takes about 8 minutes of grilling. What you want to do is check for doneness, by taking a sharp knife to peek into the thickest part of the fish. As the fish starts to flake, it will still be a bit raw in the middle, it is done.

    It should not, however, look totally raw. And again look for that 145-degree internal temperature. Pull the salmon off the grill, cover with foil, and rest for at least 5 minutes to finish cooking.

    Why use cedar wood with salmon on the grill?

    Flavor! Grilling with cedar wraps or cedar grilling planks infuses food with cedar smoke aroma and steam without adding extra calories.

    Make-Ahead Entertaining Menu: Make the dinner portions ahead for parties, and enjoy your guests while serving a beautiful dinner outdoors or indoors.

    Easy Serving & Clean-Up: The entire dinner can be served in a cedar wrapped "package" or on a board per person making serving and clean up a breeze.

    Grill Delicate Fish or Small Vegetables on Cedar: Avoid having foods fall through the grill grates or stick like thin vegetables, scallops, or delicate white fish.

    How to use cedar planks or cedar grilling wraps?

    Be sure to soak cedar wraps or cedar grilling planks for at least 10-20 minutes in cool water.

    Preheat the grill to a medium temperature of 400-450º degrees. Place food on a cedar plank or stack the food in the center of the cedar wrap, parallel to the grain of the wood. Wrap edges toward each other and overlaps slightly. Tie with a piece of cotton butcher twine.

    Place salmon wrapped packet on the hot grill; keep away from direct flames. Close grill and cook for 7-10 minutes or until done. Cooking times will vary.

    Serve in the wrap. Cedar-wrapped entrées are beautiful and a great way to serve your guests at parties.

    Keep a spray bottle filled with water close by in case of flare-ups, and enjoy the sweet smell of cedar smoke.

    You can buy cedar wood products for grilling inexpensively at big box hardware stores in the bbq section, and local grocery stores.

    What type of salmon filets should I use?


    For the best salmon steaks, use a wild-caught variety. Some of the best salmon fish are from the Pacific Northwest of the United States.

    Wild salmon is preferred for taste if you're going with Pacific salmon, of which there are five types: King, Sockeye, Coho, Pink, and Chum.

    Chinook Salmon (King) - Rich, high in fat, a large fish.
    Coho Salmon (Silver) - Lighter subtle flavor, medium fat.
    Pink Salmon (Humpback) - Light, mild, lower in fat.
    Sockeye Salmon (Red) - Strong flavor, bright red color, leaner.
    Silverbrite Salmon (Chum/Keta/Dog) - Pale to medium-colored, usually canned or frozen, lower in fat.
    Steelhead - Flavor varies, pink-orange flesh.
    Atlantic Salmon - Mild, well priced, mostly farmed, and controversial as they are overfished in the wild.

    More Seafood Recipes

    This AMAZING Lobster Ravioli in a Lemon Butter Limoncello Cream Sauce can be made ahead with wonton wrappers (no pasta) plus no boiling pots of water or fuss!

    You have gotta make this (1st place blue ribbon) Award-Winning Lobster BLT Sandwich, it has succulent lobster, crispy applewood smoked bacon, and a quick, easy dill-caper aioli!

    An easy appetizer and party food, Shrimp Cocktail is made by oven roasting large shrimp, then dipping them in fresh homemade cocktail sauce.

    Low Country Shrimp Boil is a fast oven-baked weeknight family dinner. Ready in 35 minutes, great for easy dinner parties or a fun meal prep idea!

    • A white plate filled with heart shaped lobster ravioli garnished with parsley.
      Lobster Ravioli
    • A sliced open BLT sandwich loaded with succulent lobster, bacon, lettuce and tomato stacked on a board.
      BLT Lobster Sandwich
    • A clear glass plate with shrimp cocktail, cocktail sauce, and two glasses of champagne.
      Shrimp Cocktail
    • A white platter filled with corn, shrimp, sausage, and potatoes for dinner.
      Sheet Pan Shrimp Boil

    Did you love this recipe? We would love to hear from you! If you make this recipe and love it, give it a 5-star rating ⭐⭐⭐⭐⭐ with a comment. THANK YOU!! Follow Delicious Table with my free newsletter and share this recipe with your friends on Facebook, Pinterest, and Instagram.

    A wooden platter with cedar wrapped salmon, asparagus, and lemon butter.
    Print

    Cedar Grilled Salmon

    Cedar Grilled Salmon with asparagus, zucchini ribbons, and a delicious lemon dill fish butter. This healthy dinner cooks everything at once!
    Course Dinner & Main Dishes
    Cuisine American
    Keyword cedar grilled salmon recipe, grilled salmon butter, salmon butter
    Prep Time 20 minutes minutes
    Cook Time 15 minutes minutes
    Total Time 35 minutes minutes
    Servings 4
    Calories 68kcal
    Author Lisa Hatfield

    Equipment

    • Grilling Cedar Wraps
    • White Cotton Butcher String
    • Cedar Grilling Planks

    Ingredients

    Grilled Salmon and Vegetables

    • 4 pieces salmon fish
    • 20 asparagus 6-8” spears trimmed pieces
    • 1 zucchini cut into ribbons
    • 1 tablespoon BBQ Grill Dry Rub
    • 1 tablespoon olive oil
    • 1 fresh lemon cut into ¼" half-round slices

    Salmon Butter

    • ½ cup butter softened (salted or unsalted butter)
    • 2 tablespoons fresh dill chopped
    • ½ teaspoon salt (kosher sea salt)
    • 1 lemon fresh lemon juice and zest

    Instructions

    Make Lemon-Dill Salmon Butter

    • In a small bowl, place the room temperature soft butter, zest of one fresh lemon, one squeeze of lemon juice, and a pinch of salt. Mix until combined using a small spatula, place on a piece of plastic wrap or parchment paper.
    • Push the lemon dill butter into a long roll shape using the plastic wrap or paper to get it about an inch wide in a long roll. Twist the ends closed. Place in fridge to firm up and use that day. Slice into coins, and serve over grilled fish, potatoes, or asparagus. Will keep in the freezer for up to two months. Wrap well and store in a freezer zip top bag.

    Prep Cedar Salmon and Vegetables

    • Soak cedar wraps/butcher string or cedar planks for 20 minutes in cool water. This prevents them from catching on fire while grilling. Slice lemons in ¼" half rounds. Peel the zucchini using a potato peeler then cut wide ribbons down the full length of the zucchini using a potato peeler.
    • On a plate, drizzle a little olive oil on cleaned asparagus and microwave for 15-30 seconds. This pre-cooks the asparagus perfectly.
    • In cedar wraps: on the diagonal, lay a piece of salmon skin side down, sprinkle on spice rub, and layer with asparagus, zucchini ribbons, and lemon slices. Tie with butcher string that was soaked in cold water.
    • On the cedar plank: place cedar plank down, then lay a piece of salmon skin side down, sprinkle spice rub, and layer with asparagus, zucchini ribbons, and lemon slices.

    Grill Salmon

    •  Heat the grill to medium heat, so the temperature of your gas grill reaches 450 degrees.
    • Cook for 7-8 minutes grill time until salmon is cooked through. It will turn to a lighter color and 145 degrees internal temperature on a meat thermometer. Salmon cooks very fast on an outdoor grill, so keep an eye on it. You can also add a few wood chips to add additional smoke flavor.
    • Serve this easy grilled salmon warm with lemon butter.

    Notes

    Salmon

    Use a wild-caught salmon variety,  some of the best salmon fish are Chinook, King, Coho, Silver, and Pink/Humpback.
    For this recipe, I used skin off Coho/Silver Salmon from Trader Joe's. For the best salmon steaks, use a wild-caught variety. 
    For this recipe, you can use skin-on or skinless because the cedar wrap keeps the fish moist and you don't have to worry about it sticking to the grill!

    Salmon Fish Rub Seasoning

    Try my Rub Recipe or sub in one you have or make at home!

    When is salmon done? 

    Grilled Salmon starts out a raw pink translucent color and turns whiter or opaque lighter with a pink color.
    A 1" thick filet without a cedar wrap takes about 8 minutes of grilling. What you want to do is check for doneness, by taking a sharp knife to peek into the thickest part of the fish. As the fish starts to flake, it will still be a bit raw in the middle, it is done.
    It should not, however, look totally raw. And again look for that 145-degree internal temperature. Pull off the grill, cover with foil, and rest for at least 5 minutes to finish cooking.


    Nutrition

    Calories: 68kcal | Carbohydrates: 8g | Protein: 3g | Fat: 4g | Saturated Fat: 1g | Cholesterol: 1mg | Sodium: 7mg | Potassium: 327mg | Fiber: 3g | Sugar: 3g | Vitamin A: 730IU | Vitamin C: 27.6mg | Calcium: 44mg | Iron: 2.4mg

    Burger Sauce

    [heart_this] · May 7, 2022 · 3 Comments

    A messy grilled burger topped with lettuce, tomato, cheese, pickles and burger sauce in a basket with a bottle of burger sauce.

    Last Updated June 2nd, 2023 at 02:25 pm by Lisa

    Make one of the best burger sauces just like the In-N-Out spread from the west coast drive-through chain that started in Southern California.

    In So Cal, an In-N-Out Double Double "animal style" with fries and a soda is a way of life. There is actually a whole secret language and ways to order off-menu, more on that later in the post.

    When you crave the real thing, here is my favorite way to make a copycat recipe of the In-N-Out burger spread special sauce. It is well, a very messy burger situation, with all that drippiness and melted cheese...

    In-N-Out Sauce Copycat Ingredients

    ½ cup mayonnaise

    2 tablespoons ketchup

    2 tablespoons Dill Pickle Relish (avoid sweet relish to keep it authentic)

    2 teaspoons White Wine Vinegar (or swap regular white vinegar)

    ½ teaspoon sugar

    In-n-Out Copycat Sauce Recipe

    In a medium bowl, whisk these simple ingredients together. Combine mayonnaise, dill pickle relish, ketchup, sugar, and white wine vinegar.

    Store refrigerated in an airtight container for up to a month. I love to use those condiment squeeze bottles for the summer, it makes it so easy for cookouts. Just be sure to not leave at room temperature for more than an hour.

    While I tested a sweet pickle relish (sweet relish) for this recipe, I found the main difference is that it adds too much sweetness and is not the same as the original In-N-Out sauce recipe. The dill pickle juice and the tart dill relish adds a tanginess that gets it very close to the original.

    Also, that tiny splash of vinegar adds the right amount of acid to counterbalance the pinch of sugar in this tangy sauce adding complexity.

    Perfect Copycat In-N-Out Burgers

    For the perfect copycat for real In-N-Out restaurant burgers, start out with quality ingredients. One of the hallmarks of this famous burger chain is they do not cut corners and use the finest quality ingredients available.

    • Grill your all American ground beef hamburger patty on a flat top in a bit of yellow mustard for that authentic taste! Try to form meat for each patty pretty thin like In-N-Out does it. You can sear the beef patties in an iron skillet or on your outdoor grill over medium-high heat.
    • Use quality American cheese, add slices of cheese and let it get melty.
    • Toast the buns on the grill or griddle until golden brown.
    • On the bottom bun and the top bun, spread a couple of tablespoons of sauce.
    • Next, add the dill pickles, try my homemade quick recipe and add 5 or so pickle chips on the bottom bun.
    • Then add a tomato slice or two, a piece of Iceberg lettuce, and an onion slice if you wish.
    • Now add your mustard cooked hamburger patties with melted cheese.
    • And finally top with this In-N-Out burgers sauce recipe and finely diced caramelized onions if you like it "Animal Style".

    In-N-Out Burger FAQ

    Who started In-N-Out Burger?

    In-N-Out Burger is an American restaurant chain of drive-through fast food restaurants with locations primarily in California and the Southwest.

    It is a family business founded in Baldwin Park, California, in 1948 by Harry Snyder and Esther Snyder.

    What is animal-style at In-N-Out Burger?


    According to the website for In-N-Out restaurants, "animal style" is a mustard grilled beef patty made on a flat top, hand-leaved lettuce (Iceberg), tomato slices, dill pickle chips, extra spread (similar to a Thousand Island Dressing), and grilled onions which are a finely chopped mix of caramelized onions.

    What is on a In-N-Out double double burger?


    Order a "double double" and you will get two beef patties, on a toasted bun, with two slices of real American cheese, onions sliced or grilled caramelized onions (your choice), hand-leafed lettuce, spread sauce (secret recipe since 1948), and juicy tomato slices.

    What is the on the secret menu at In-N-Out Burger?


    -If you order "animal-style fries", they pour the caramelized onions and burger sauce all over to make animal style fries. Oh, by the way, don't try to order onion rings, they don't make those!
    -Order "3X3 or Triple Triple" for three 100% American beef patties, hand-leafed lettuce, tomato, spread, and three slices of American Cheese with or without onions, stacked high on a freshly baked bun.
    -Order "protein style" and they will replace the hamburger bun with lettuce for a low-carb burger.
    -Order extra yellow chili peppers, that will come in a small cellophane bag to enjoy with your burger (those aren't on the menu)
    -In 2018, hot cocoa was added back to the menu just like it was offered in the 1950s. This is quality cocoa from Ghirardelli and served with marshmallows. Kids under 12 can enjoy it for free on rainy days!!
    -Lemonade was added to the menu around 2003.
    -You can request extra spread (in small condiment packets to dip fries in or squirt more on your burger.
    -Not all In-N-Outs will recognize what you mean when you order "Roadkill Fries". These fries are animal style fries plus hamburger crumbled on top.
    -If the location is unfamiliar with this item simply order animal fries and a "Scooby Snack" (solo hamburger patty) and self-crumble the meat on top.
    -And last but not least, if you order a "Puppy Patty" (for your doggies) you will get one hamburger grilled patty in a paper sleeve for your pup.

    Hamburger Recipe For The Best Cheeseburgers
    Is there anything more American than a hamburger recipe or a classic cheeseburger? This favorite recipe for burgers also has a copycat In-N-Out Burger Sauce made famous in Southern California! There is nothing better than a big fat juicy cheeseburger. Top with tons of melted cheese and the best toppings for burgers like pickles, tomato slices, and crisp cold lettuce.
    GET THE RECIPE PIN IT
    A person holding a messy grilled burger topped with melted cheese, burger sauce, lettuce, tomato, and pickles.

    Best Topping Ideas For Burgers

    There are endless options, these are just a few inspiring ideas to top a grill cheeseburger at your cookout. Whether you keep it classic or go wild, it is so fun to try out new flavors and ingredients...

    • Crispy Bacon
    • Grilled Onions
    • Sauteed Mushrooms
    • Burger Sauce (In-N-Out Copycat)
    • Pickle Chips
    • Ketchup, Mustard, Mayonnaise, Remoulade
    • Ortega or Hatch Chiles
    • BBQ Sauce
    • Creamy Horseradish Sauce
    • Cheeses: Blue Cheese, Pepper Jack, etc.
    • Guacamole
    • Ranch Dressing
    • Jalapenos
    • Fried Onions

    More Burger Recipes

    Grilled Hamburgers (Cheeseburgers) with burger sauce plus all my tips to make the perfect hamburger patties with easy toppings for summer grilling, BBQs, and cookouts.

    Burger Seasoning makes the flavor-filled juicy hamburgers. Mix up a batch of hamburger seasoning for your next cookout, grill, or BBQ party.

    Cheeseburger Sliders are mini burgers stuffed with cheddar cheese, spread with burger sauce, and oven-baked. The perfect party food for summer cookouts or celebrations like birthdays and graduation.

    • A person holding a messy grilled burger topped with melted cheese, burger sauce, lettuce, tomato, and pickles.
      The Best Cheeseburger
    • The steps to season hamburgers, with them shaped on parchment paper as burgers before grilling.
      Grilled Hamburger Seasoning
    • Mini cheeseburgers with melted cheese, tomato, and lettuce with American flag toothpick decoration on top.
      Cheeseburger Sliders

    Did you love this recipe? We would love to hear from you! If you make this recipe and love it, give it a 5-star rating ⭐⭐⭐⭐⭐ with a comment. THANK YOU!! Follow Delicious Table with my free newsletter and share this recipe with your friends on Facebook, Pinterest, and Instagram.

    A messy grilled burger topped with lettuce, tomato, cheese, pickles and burger sauce in a basket with a bottle of burger sauce.
    Print

    Burger Sauce Recipe -In-N-Out "Animal Style" Spread

    Make one of the best burger sauces just like the In-N-Out spread from the west coast drive-through chain that started in Southern California.
    When you crave the real thing, here is the best way to make a copycat recipe of the real In-N-Out burger spread special sauce.
    Course Sauces, Marinades, & Condiments
    Cuisine Condiment
    Keyword burger sauce, condiment, hamburger spread
    Prep Time 5 minutes minutes
    Cook Time 0 minutes minutes
    Total Time 5 minutes minutes
    Servings 24
    Calories 856kcal
    Author Lisa Hatfield

    Equipment

    • Nostalgia Condiment Squeeze Bottles
    • Rubbermaid Leak-Proof Food Storage Containers

    Ingredients

    • ½ cup mayonnaise
    • 2 tablespoons ketchup
    • 2 tablespoons dill pickle relish
    • 2 teaspoons white wine vinegar
    • ½ teaspoon sugar

    Instructions

    • In a medium bowl, whisk these simple ingredients together. Combine mayonnaise, dill pickle relish, ketchup, sugar, and white wine vinegar.
    • Store refrigerated in an airtight container for up to a month. I love to use those squeeze bottles for the summer, it makes it so easy for cookouts. Just be sure to not leave at room temperature for more than an hour.

    Video

    Notes

    Perfect Copycat In-N-Out Burgers

    For the perfect copycat for real In-N-Out restaurant burgers, start out with quality ingredients. One of the hallmarks of this famous burger chain is they do not cut corners and use the finest quality ingredients available.

    • Grill your all American ground beef hamburger patty on a flat top in a bit of yellow mustard for that authentic taste! Try to form meat for each patty pretty thin like In-N-Out does it. You can sear the beef patties in an iron skillet or on your outdoor grill over medium-high heat.
    • Use quality American cheese, add slices of cheese and let it get melty.
    • Toast the buns on the grill or griddle until golden brown.
    • On the bottom bun and the top bun, spread a couple of tablespoons of sauce.
    • Next, add the dill pickles, try my homemade quick recipe and add 5 or so pickle chips on the bottom bun.
    • Then add a tomato slice or two, a piece of Iceberg lettuce, and an onion slice if you wish.
    • Now add your mustard cooked hamburger patties with melted cheese.
    • And finally top with this In-N-Out burgers sauce recipe and finely diced caramelized onions if you like it "Animal Style".

    More Burger Toppings

    There are endless options, these are just a few inspiring ideas to top burgers at your cookout. Whether you keep it classic or go wild, it is so fun to try out new flavors and ingredients...
    • Crispy Bacon
    • Grilled Onions
    • Sauteed Mushrooms
    • Burger Sauce
    • Pickle Chips
    • Ketchup, Mustard, Mayonnaise, Remoulade
    • Ortega or Hatch Chiles
    • BBQ Sauce
    • Creamy Horseradish Sauce
    • Cheeses: Blue Cheese, Pepper Jack, etc.
    • Guacamole
    • Ranch Dressing
    • Jalapenos
    • Fried Onions

    Nutrition

    Serving: 8g | Calories: 856kcal | Carbohydrates: 23g | Protein: 2g | Fat: 84g | Saturated Fat: 13g | Polyunsaturated Fat: 50g | Monounsaturated Fat: 19g | Trans Fat: 1g | Cholesterol: 47mg | Sodium: 1447mg | Potassium: 191mg | Fiber: 1g | Sugar: 16g | Vitamin A: 354IU | Vitamin C: 2mg | Calcium: 18mg | Iron: 1mg

    Mangos

    [heart_this] · May 6, 2022 · 1 Comment

    A perfectly cut open mango with cubes cut into the fruit.

    Last Updated April 25th, 2024 at 01:59 pm by Lisa

    How can you tell if mangos are ready to eat? Is there an easy way to ripen them faster? How do you get the most fruit possible with that giant seed inside?

    We are going to cover everything you need on how to cut a mango into cubes or slices. Give you lots of creative recipe ideas, and all kinds of fun tips. Today, it is all about this intoxicating juicy tropical fruit...

    A perfectly cut open mango with cubes cut into the fruit.

    How To Cut A Mango

    Sweet juicy mangoes are easy to manage in your kitchen and remove the mango pits once you know a couple of tips.

    You will need a good sharp chef knife or a mango splitter.

    Option 1 - Cutting Board & Knife

    How to Cut Slices or Diced Pieces

    1. Rinse the mango in cool water before cutting it open. Use a clean knife and cutting board with a towel underneath to create a safe cutting surface.
    2. For this knife method, cut a small slice off the stem end and place the cut end down so it sits stable on your board.
    3. Place your knife about ¼" from the widest center line and cut down through the fruit. There will be one long flat seed in the center of the fruit. Next, carefully cut down feeling your way cutting between the large seed and the fruit. The seed is tough and will resist your knife, one side will have a thicker piece of fruit than the other.
    4. Once you have cut both sides of the fruit away from the pit, slice down the in rows of vertical cuts but not through the outer skin. Use a large spoon to scoop out the slices.
    5. Or for a dice, hold one-half and use a small paring knife cut a grid down into the fruit but not through the skin. Cut about a ½" grid for larger dice, or ¼" for smaller dice.

    Option 2 - Use A Mango Splitter

    Advantages are you press down, and that is it...you discard (or compost) the seed in the center with one simple press. The mango splitter, I use is from OXO. It works so well and did a fabulous job on an extra-large Keitt mango.

    Cut a small slice off the stem end so it sits stable.

    Place the splitter matching up the widest part of the fruit with the widest part of the splitter tool. Push down, cutting two pieces, and discard the tough inedible seed from the center.

    Next, hold one-half and use a small paring or butter knife cut a grid down into the fruit but not through the skin. Cut about a ½" grid for larger dice, or ¼" for smaller dice.

    Turn the half inside out and scoop the diced mango pieces into a bowl with your fingers or a large spoon. Or scoop the diced pieces out of the skin using a large spoon into a bowl.

    Now that was easy, wasn't it?

    PRO TIP for Mango Slices: Once you remove the pit, simply slice each side from one end to the other in about ½" long slices without slicing through the skin. Scoop out slices and enjoy them in your favorite recipe!

    A mango splitter tool showing how to cut a mango in half removing the seed.

    Mango Fun Facts

    • Were first grown in India over 5,000 years ago and is now one of the most popular fruits in the world.
    • Their seeds traveled with humans from Asia to the Middle East, East Africa, and South America beginning around 300 or 400 A.D.
    • The paisley pattern of India is based on the shape of a mango.
    • A fruit basket of fresh mangoes is considered a gesture of friendship in India.
    • Legend says that Buddha meditated under the cool shade of a mango tree.
    • Mango trees can grow as tall as 100 feet and are botanically related to cashews and pistachios.
    • The bark, leaves, skin, and pit of the mango have been used in folk remedies for centuries.
    • According to the National Mango Board, there are six types of mangoes or varieties of mangoes. Kent, Tommy Atkins, Keitt, Ataulfo/Honey, Haden, and Francis. And by the way, mangos or mangoes are both correct terms to use.
    • The color of the different varieties have shades from deep orange to a variation of yellow-orange in the fruit flesh. The outside skin can vary in color and does not indicate ripeness. These are Keitt Mangos...
    Two ripe mangos in a ceramic bowl to show how to cut a mango.

    Mango FAQ

    How do you eat fresh mangos?


    -Add slices to fruit salads, you can diced cubes on top.
    -Use in mango pineapple salsas and top tacos or tostadas, they have the perfect soft texture.
    -Blend frozen cut chunks into smoothies for tropical sweetness.
    -Freeze into fruit sorbets for a healthy clean frozen treat.
    -Mix a mango chutney with ginger, garlic, sugar, and other seasonings.
    -Make into a dipping sauce for grilled or coconut shrimp.
    -Add slices into spring rolls for fresh bright color and taste.
    -Blend up mango margaritas or other frozen cocktails.
    -Make mango ceviche with shrimp and lime juice.
    -Blend up some into a tropical salad dressing vinaigrette.
    -Try sprinkling a squeeze of lime, a little salt, or Tajin on ~ a unique spice blend made with lime, world-class chilies, and sea salt.
    -In many Latin American countries, they are served peeled on a stick and sold by street vendors.
    -Mangos have natural tenderizing properties, making them a perfect ingredient in marinades for grilling. Use in a marinade with honey and sriracha for grilled chicken.

    How to tell mangos are ripe and ready to eat?


    The sweet scent of these delicious tropical fruits is a good sign that you have ripe fruit. The color of a ripe mango goes from green to yellowy-orange, red, or even a slight blush of purple depending on the varietal.

    Mature mango fruits won't turn completely orange or red when ripe, but will in some spots.

    One of the easy ways to tell is it will "give slightly" with a gentle squeeze. An underripe mango will not have a sweet smell and will feel firm.


    How do you ripen firm mangos?

    The ripening process for mangos is very simple. When you come home from the grocery store, keep unripe mangoes at room temperature. They will continue to ripen on the counter, becoming sweeter and softer over several days.

    The fastest way to ripen firm green mangos is to place them in a brown paper bag at room temperature for a couple of days.

    Once green mangoes are ripe, you can place the cut fruit in an airtight container or chill the whole fruit in the refrigerator for a couple of days. Or place it in the freezer for up to six months.

    Ripe mangos should be moved to the refrigerator, which will slow down the ripening process similar to an avocado. They may be stored for up to five days in the refrigerator.

    Mango slaw piled on a plate with a glass jar of dressing and limes in the background.

    Delicious Mango Recipe

    This is the best Mango Slaw, it has green crunchy cabbage, crisp jicama, and a sweet tangy lime vinaigrette made with juicy sweet Keitt mangos. A clean side dish, guilt-free as a salad, and so refreshing...

    Mango Slaw Recipe
    Mango Slaw has shredded green cabbage, crisp jicama, and a tangy lime vinaigrette made with juicy sweet mangos. A perfect summer salad.
    GET THE RECIPE PIN IT
    Pouring dressing on a full plate of mango slaw with a gold fork on edge of ceramic plate.

    More Sweet Fruit Recipes

    ​​Fruit Popsicles made with coconut water, strawberries, raspberries, and blueberries are refreshing low-sugar treats for hot summer days. 🍓🫐🧊

    ​15+ Lemon Recipes - Dozens of fresh lemon recipes here from savory dishes to sweet desserts to use up your bags of lemons. 🍋🍃

    Raspberry Lemon Sorbet - clean and refreshing (no dairy) made from fresh summer fruit. 🍋🍨🍓

    Peach Cheesecake Pie is a 30-minute no-bake easy recipe with a crisp graham cracker crust, sweet cream cheese filling, and juicy peaches! 🍑🍰

    • A single coconut water popsicle with strawberries, blueberries, and raspberries.
      Homemade Fruit Popsicles
    • Bright yellow lemons carved out and filled with raspberry strawberry lemon sorbet as a summer dessert.
      Raspberry Lemon Sorbet
    • A collage of lemon recipe for family dinners, desserts, dressings, drinks, and more to make with fresh lemons.
      15 Lemon Recipes
    • A slice of peach pie on a white plate with a silver fork on a red white check tablecloth.
      Peach Cheesecake Pie (No-Bake)

    Did you love this recipe? We would love to hear from you! If you make this recipe and love it, give it a 5-star rating ⭐⭐⭐⭐⭐ with a comment. THANK YOU!! Follow Delicious Table with my free newsletter and share this recipe with your friends on Facebook, Pinterest, and Instagram.

    A perfectly cut open mango with cubes cut into the fruit.
    Print

    Mango Tips: How To Tell If Ripe? And Easy Ways To Cut!

    Learn how to cut a mango into cubes or slices in easy ways. Lots of creative recipe ideas, and all kinds of tips to pick ripe mangos, or ripen them fast at home.
    Course Fruit
    Cuisine Breakfast or Snack
    Keyword Cut a mango, mango recipes, mango tips
    Prep Time 5 minutes minutes
    Cook Time 0 minutes minutes
    Total Time 5 minutes minutes
    Servings 1
    Calories 124kcal
    Author Lisa Hatfield

    Equipment

    • Mango Splitter
    • Epicurean Non-Slip Cutting Board
    • Chef Knife

    Ingredients

    • 1 mango

    Instructions

    Cutting Board and Knife

    • Rinse the mango in cool water before cutting it open. Use a clean knife and cutting board with a towel underneath to create a safe cutting surface.
    • For this knife method, cut a small slice off the stem end and place the cut end down so it sits stable on your board.
    • Place your knife about ¼" from the widest center line and cut down through the fruit. There will be one long flat seed in the center of the fruit. Next, carefully cut down feeling your way cutting between the large seed and the fruit. The seed is tough and will resist your knife, one side will have a thicker piece of fruit than the other.
    • Once you have cut both sides of the fruit away from the pit, slice down the in rows of vertical cuts but not through the outer skin. Use a large spoon to scoop out the slices.
    • Or for a dice, hold one-half and use a small paring knife cut a grid down into the fruit but not through the skin. Cut about a ½" grid for larger dice, or ¼" for smaller dice.

    Use A Mango Splitter Tool

    • Advantages are you press down, and that is it...you discard (or compost) the seed in the center with one simple press.
    • Rinse the mango in cool water before cutting it open.
    • Cut a small slice off the stem end so it sits stable.
    • Place the splitter matching up the widest part of the fruit with the widest part of the splitter tool. Push down, cutting two pieces, and discard the tough inedible seed from the center.
    • Next, hold one-half and use a small paring or butter knife cut a grid down into the fruit but not through the skin. Cut about a ½" grid for larger dice, or ¼" for smaller dice.
    • Turn the half inside out and scoop the diced mango pieces into a bowl with your fingers or a large spoon. Or scoop the diced pieces out of the skin using a large spoon into a bowl.

    Notes

    Mango Recipes

    -Add slices to fruit salads, you can diced cubes on top.
    -Use in mango pineapple salsas and top tacos or tostadas, they have the perfect soft texture.
    -Blend frozen cut chunks into smoothies for tropical sweetness.
    -Freeze into fruit sorbets for a healthy clean frozen treat.
    -Mix a mango chutney with ginger, garlic, sugar, and other seasonings.
    -Make into a dipping sauce for grilled or coconut shrimp.
    -Add slices into spring rolls for fresh bright color and taste.
    -Blend up mango margaritas or other frozen cocktails.
    -Make mango ceviche with shrimp and lime juice.
    -Blend up some into a tropical salad dressing vinaigrette.
    -Try sprinkling a squeeze of lime, a little salt, or Tajin on ~ a unique spice blend made with lime, world-class chilies, and sea salt.
    -In many Latin American countries, they are served peeled on a stick and sold by street vendors.
    -Mangos have natural tenderizing properties, making them a perfect ingredient in marinades for grilling. Use in a marinade with honey and sriracha for grilled chicken.

    Ripe Mango Tips

    The ripening process for mangos is very simple. When you come home from the grocery store, keep unripe mangoes at room temperature. They will continue to ripen on the counter, becoming sweeter and softer over several days.
    The fastest way to ripen firm green mangos is to place them in a brown paper bag at room temperature for a couple of days.
    Once green mangoes are ripe, you can place the cut fruit in an airtight container or chill the whole fruit in the refrigerator for a couple of days. Or place in the freezer for up to six months.
    Ripe mangos should be moved to the refrigerator, which will slow down the ripening process similar to an avocado. They may be stored for up to five days in the refrigerator.

    Nutrition

    Serving: 1g | Calories: 124kcal | Carbohydrates: 31g | Protein: 2g | Fat: 1g | Saturated Fat: 1g | Sodium: 2mg | Potassium: 348mg | Fiber: 3g | Sugar: 28g | Vitamin A: 2240IU | Vitamin C: 75mg | Calcium: 23mg | Iron: 1mg

    Vegetable Spring Rolls

    [heart_this] · May 6, 2022 · 1 Comment

    A vegetable spring roll or rice paper roll cut in half showing the bright veggies inside with a ginger dipping sauce in a small bowl.

    Last Updated April 25th, 2024 at 10:37 am by Lisa

    Make Vegetable Spring Rolls with a peanut ginger dip sauce for a healthy vegetarian/vegan lunch. Eat the rainbow with gorgeous fresh veggies!

    These are also known as Vietnamese rice paper rolls. Each crunchy bite is filled with flavor, as the sauce adds just the right amount of savory sweet heat all wrapped up in tender rice wrappers.

    Fresh spring rolls are an easy recipe to up your veggie game, rolling them is a breeze, and healthy is so stunningly beautiful...

    Loving These Rainbow Rolls

    There are so many reasons to love these veggie spring rolls...

    • They are both vegetarian and vegan. Thanks to the use of rice paper wrappers and not egg roll wrappers, these vegetable rolls are perfect for vegetarians and vegans alike.
    • The use of rice paper rolls makes them so pretty. Egg rolls hide all of the veggie goodness inside... and are typically deep-fried adding so many calories. Rice paper rolls are transparent, putting all of the beautiful contents on full display. And no frying is required.
    • Rice paper wrappers are gluten-free, making the rolls gluten-free too if you use gluten-free ingredients like veggies.
    • The Sesame Ginger sauce is so flavorful. The dipping sauce makes these, and you can make it spicier, tangy, or more creamy if you wish.
    • Enjoy these vegetable rolls with more sides like a vegetable stir fry, hot garlic rice noodles, or veggie fried rice.
    • They're ideal for a snack, lunch, or light dinner. These vegan rolls are perfect for any time you want a healthy, nutritious, vegetable-heavy meal.
    • They are SO GOOD for you! With a rainbow of vegetables, these are guilt free, and fill you up stopping those cravings.
    A sliced open spring roll made with rice paper wrapper stuffed with colorful veggies.

    Vegetable Spring Rolls Recipe

    • 1 package spring roll rice paper wrappers (you'll want about 4 wrappers per person). Rice paper wrappers are clear, and labeled for spring rolls don't get egg roll wrappers - those are for frying.
    • purple cabbage shreds
    • shredded carrots
    • yellow & orange or red bell peppers 4" thin sticks
    • jicama 4" thin sticks
    • cucumber 4" thin sticks
    • fresh basil leaves whole
    • avocados thin slices
    • broccoli sprouts
    • sesame seeds

    PRO TIP: Clean and cut all the veggie filling ingredients (bell pepper, jicama, avocado, cucumber) into 4" sticks or slices. Cut the cabbage and carrots into thin long strips or shreds.

    Peanut Ginger Dipping Sauce

    • 4 tablespoons soy sauce
    • ¼ cup water
    • ½ teaspoon grated ginger or ginger paste
    • 3 tablespoons peanut butter, tahini, or almond butter - each one adds a slightly different flavor and creaminess.
    • 4 teaspoons red chili paste

    PRO TIP: If you want to make a gluten-free dipping sauce, use a gluten-free soy sauce.

    Wrapping Rice Paper Rolls

    PRO TIP: Store any remaining wrappers in an air-tight container or zip-top plastic container bag in the pantry, they will be good to use until the expiration date on the package.

    spring roll filling

    1. Clean and cut all the veggies (bell pepper, jicama, avocado, cucumber) into 4" sticks or slices
    2. Cut the cabbage and carrots into thin long strips or shreds.

    dipping sauce

    1. Whisk in a small bowl the soy sauce, water, grated ginger, peanut butter (or swap almond butter or tahini), and red chili paste.
    2. Serve this dipping sauce in small low bowls.

    wrapping the spring rolls

    1. Have all the cut veggie filling items ready near a cutting board.
    2. Fill a large bowl with warm water, dip the spring roll wrapper in the water and turn it around several times for about 15-20 seconds.
    3. Remove the wrapper, and hang the edge off the end of the flat surface of a cutting board or your work surface. The wet rice paper wrapper will soften more on the board, and become very pliable.
    4. Place the fresh basil leaf down pretty side down first to show through the wrapper. I like to place basil leaves or other pretty things down first, as that will show on top.
    5. Next, add one single thin layer of each veggie in the middle of the wrapper, but try not to overfill.
    6. Fold up the bottom of the wrapper first, then the sides of the wrapper inward, and then be sure to roll the edge of the wrapper tight against the filling all the way to the end.
    7. Serve on a plate with a small bowl of homemade peanut dipping sauce. These hold really well for parties, and everyone loves them.
    8. You will want about four rice paper sheets per person for lunch and 1-2 for appetizers. You can make the dipping sauce sweeter or spicier as you prefer. Garnish with a sprinkle of sesame seeds.
    A close up of a A sliced open spring roll made with rice paper wrapper stuffed with colorful veggies.

    Dipping Sauce Swaps

    The ingredient for my favorite dipping sauce for this homemade spring roll recipe are easy to find at the grocery store. You can adjust the flavor as you prefer, here are a few ideas.

    • brown sugar - makes it sweeter
    • rice vinegar - a teaspoon adds a tangy kick
    • hoisin sauce - adds salty/sweet umami
    • sweet chili sauce or chili garlic sauce - will add a garlicky heat
    • sesame oil - for a toasted nutty flavor
    • red chili powder (cayenne) - just a teeny tiny pinch for added heat

    More Fresh Vegetables To Try

    • fresh mint
    • mung bean sprouts
    • snow peas or snap peas
    • mushrooms
    • favorite microgreens
    • zucchini
    • organic edible flowers (nasturtium or pansies)
    • radicchio
    • shaved broccoli
    • kale
    • watercress
    • fresh spinach
    • radishes
    • baby organic spring mix salad greens
    • green onion or spring onions
    Can You Make Rice Paper Rolls in Advance?

    The key to making the best rice paper rolls is to make them as close to serving time as possible.

    However, if you need to make them up to an hour or two in advance, the key is to keep them at room temperature and not place them in the fridge (which will dry them out). Spring rolls are better fresh, and not as good the next day.

    What are Spring rolls?


    The term "spring roll" is used to describe a variety of different rolls with different types of wrappers and fillings. There are rice paper rolls with vegetables wrapped in a rice paper wrapper. And fried spring rolls which typically have a cooked filling like chicken or pork and wrapped in an egg roll wrapper and then deep-fried.

    Fun fact: Not surprisingly, spring rolls got their name (most likely in China) from being a popular food eaten primarily in the spring.

    Are Spring rolls healthy?


    Rice paper wrappers are a nice alternative to fried egg rolls which require an egg roll wrapper that is filled and then fried.

    Spring roll wrappers typically contain only a few ingredients:

    Rice flour
    Tapioca
    Filtered water
    Salt

    More Healthy Recipes

    • Another bright colorful lunch idea is this Broccoli Grape Salad.
    • Italian Tuna Salad: Made in a bell pepper bowl or a tortilla wrap, make a light and healthy lunch that can be great for the whole family.
    • You can't go wrong with Avocado Toast for a snack, lunch, or light dinner.
    • For a drink on the lighter side, try my Hibiscus Cocktails (Low Sugar/Carb/Keto), it is super refreshing and skips the sugar!
    • A turquoise salad bowl filled with broccoli salad with colorful grapes and pistachios.
      Broccoli Salad
    • Red and green Bell pepper halves filled and green tortilla wraps filled with no mayo Greek Yogurt Tuna Salad.
      Healthy Tuna Salad
    • A close up photo of a slice of avocado toast topped with small heirloom tomatoes and microgreens.
      Avocado Toast
    • A decorative etched cocktail glass with a red hibiscus keto cocktails garnished with an orange slice.
      Hibiscus Cocktails

    Did you love this recipe? We would love to hear from you! If you make this recipe and love it, give it a 5-star rating ⭐⭐⭐⭐⭐ with a comment. THANK YOU!! Follow Delicious Table with my free newsletter and share this recipe with your friends on Facebook, Pinterest, and Instagram.

    A vegetable spring roll or rice paper roll cut in half showing the bright veggies inside with a ginger dipping sauce in a small bowl.
    Print

    Vegetable Spring Rolls with Dipping Sauce

    Vegetable Spring Rolls with a peanut ginger dip sauce for a healthy vegetarian/vegan lunch. Eat the rainbow with gorgeous fresh veggies! These are also known as Vietnamese rice paper rolls. Each crunchy bite is filled with flavor, as the sauce adds just the right amount of savory sweet heat all wrapped up in a tender rice paper wrapper. Fresh spring rolls are an easy recipe to up your veggie game, rolling them is a breeze, and healthy is so stunningly beautiful.
    Course Lunch & Picnic
    Cuisine American
    Keyword rainbow rolls, spring roll recipe, spring rolls, vegan rice paper rolls, vegetable spring rolls
    Prep Time 25 minutes minutes
    Total Time 25 minutes minutes
    Servings 4
    Calories 278kcal
    Author Lisa Hatfield

    Ingredients

    spring roll filling

    • 1 package Spring roll wrappers (rice paper)  You'll want about 4 wrappers per person.  Rice paper wrappers are clear, and not egg roll wrappers.
    • purple cabbage thinly shredded
    • shredded carrots
    • yellow & orange, or red bell peppers 4" thin sticks
    • jicama 4" thin sticks
    • cucumber 4" thin sticks
    • fresh basil leaves whole
    • avocados thin slices
    • broccoli sprouts
    • sesame seeds

    dipping sauce

    • 4 tablespoons soy sauce
    • ¼ cup water
    • ½ teaspoon grated ginger or ginger paste
    • 3 tablespoons peanut butter or almond butter or tahini
    • 4 teaspoons red chili paste
    US Customary - Metric

    Instructions

    spring roll filling

    • Clean and cut all the veggies (bell pepper, jicama, avocado, cucumber) into 4" sticks or slices
    • Cut the cabbage and carrots into thin long strips or shreds.

    dipping sauce

    • Whisk in a small bowl the soy sauce, water, grated ginger, peanut butter (or swap almond butter or tahini) and red chili paste.
    • Serve this dipping sauce in small low bowls.

    wrapping the spring rolls

    • Have all the cut veggie filling items ready near a cutting board.
    • Fill a large bowl with warm water, dip the spring roll wrapper in the water and turn it around several times for about 15-20 seconds.
    • Remove the wrapper, and hang the edge off the end of the flat surface of a cutting board or your work surface. The wet rice paper wrapper will soften more on the board, and become very pliable.
    • Place the fresh basil leaf down pretty side down first to show through the wrapper. I like to place basil leaves or other pretty things down first, as that will show on top.
    • Next, add one single thin layer of each veggie in the middle of the wrapper, but try not to over fill.
    • Fold up the bottom of the wrapper first, then the sides of the wrapper inward, and then be sure to roll the edge of the wrapper tight against the filling all the way to the end.
    • Serve on a plate with a small bowl of homemade peanut dipping sauce. These hold really well for parties, and everyone loves them.
    • You will want about four rice paper sheets per person for lunch and 1-2 for appetizers. You can make the dipping sauce sweeter or spicier as you prefer. Garnish with a sprinkle of sesame seeds.

    Nutrition

    Calories: 278kcal | Carbohydrates: 40g | Protein: 10g | Fat: 8g | Saturated Fat: 1g | Cholesterol: 5mg | Sodium: 1342mg | Potassium: 220mg | Fiber: 2g | Sugar: 1g | Vitamin A: 885IU | Vitamin C: 15.3mg | Calcium: 68mg | Iron: 3.2mg

    Mexican Street Corn (Authentic Elotes)

    [heart_this] · Apr 29, 2022 · 1 Comment

    Several grilled elotes Mexican street corn on the cob sprinkled with Cotija cheese on a platter.

    Last Updated August 25th, 2022 at 12:41 pm by Lisa

    Authentic Mexican street corn aka elotes is fire grilled and brushed with a creamy cilantro sauce sprinkled with Cotija cheese and dusted with chile powder.

    Traditional elotes are served by street vendors and off food trucks all over Mexico and sprinkled with toppings. You hold the corn by the husk handle as you enjoy every delicious, slightly spicy, creamy sweet, and crunchy bite...

    Authentic Mexican Street Corn Recipe "Elotes Mexicanos"

    • 6 ears of sweet fresh corn (silks removed, husks tied)
    • ¼ cup Cotija cheese (to sprinkle on top)
    • 1 pinch of chile powder (or hatch or pinch of cayenne pepper) 
    • creamy mayonnaise cilantro sauce
    • garnishes: lime wedges and chopped cilantro

    creamy cilantro sauce

    • ¼ cup mayonnaise
    • ½ cup chopped fresh cilantro leaves
    • 2 tablespoons fresh lime juice
    • ½ serrano chili fine diced, seeds removed-these are hot!
    • ¼ teaspoon garlic powder
    • ¼ teaspoon onion powder
    • ½ teaspoon sea salt
    1. In a food processor, blend the creamy mayonnaise, cilantro, lime juice, serrano chile, garlic powder, onion powder, and sea salt.
    2. Blend until well combined, place in a small bowl, and chill until ready to use.

    Elote Variations

    All of the ingredients for Mexican corn are easy to find in your local grocery store. To make a more authentic elote recipe, use Mexican crema, cilantro, and a squeeze of lime.

    • serrano chiles are usually very hot, only use ½ of a serrano in this recipe. You could also substitute a jalapeno. 
    • for the non-cilantro fans, you can substitute flat-leaf parsley in place of cilantro
    • you can swap out Mexican crema for mayo although mayo is commonly used
    • you can swap out mayo for American sour cream, but it won't be as creamy
    • sprinkle of chili powder - use chile de árbol (hot), hatch chile (hot), paprika, or a tiny pinch of spicy cayenne if you like it hot!
    • good substitutes for fresh Cotija cheese are either feta cheese, parmesan cheese, or Romano.
    • drizzle hot sauce from Mexico of your choice, like Tapatio or Cholula
    All the ingredients for authentic elotes Mexican street corn on a table all labeled.

    Prep The Elote (Corn)

    1. Remove all the silks of the corn under running water but not the husks. Pull the husks back from each ear of corn.
    2. Tie with cotton kitchen string and or a long piece of husk to hold the husks back from the corn kernels.
    3. Dip or briefly soak the corn with tied husks in water, to help prevent husks and cotton string from burning on the grill.

    Grill The Elote

    1. Preheat your grill, gas, or charcoal, to 500 degrees so the flames are at medium high heat. That means It is hot enough when you can hold your hand above the grill for only one second.
    2. Grill corn 2 minutes per side, about 8 minutes total. Rotate until all sides have char marks. If the husks burn, just move till the flame goes out. Keep the lid open so you can keep an eye on them and rotate.
    3. Remove from the grill onto a platter, and brush the cilantro sauce all over the corn. Sprinkle with cotija cheese, and a pinch of chile powder. Garnish with chopped cilantro and lime wedges. It's nice to squeeze a lime over the corn too!

    Mexican Corn Elotes FAQ

    What are elotes?

    Elote translates to corn in Spanish. Elotes are one of the most popular street foods in Mexico. Corn on the cob is fire-grilled over high heat, then topped and brushed with a mayonnaise and lime sauce and then rolled in crumbled cotija cheese and chile powder.

    Over the years, elote has achieved such popularity that it is no longer just sold on the streets of Mexico. You will find it in restaurants, and sometimes served in cups, this is known as elote en vaso.

    What is an esquites recipe or elote en vaso vs elotes?


    For a taste of real authentic Mexican street food, the charred corn can be cut off the cob and served in a cup. En vaso translates glass cup, whereas Mexican elotes is the same recipe served on the cob.

    You can serve it at room temperature, and adjust the proportions of lime juice, to the mayo/crema, Cotija cheese, and cilantro along with a generous mix of spices. Eat esquites with a fork!

    What is the best way to eat elotes?

    You will find it sold at street fairs and people love to eat it while walking and seeing the sights. This popular Mexican street food dish is usually held by the corn husk handle and consumed with hands.

    It is best fresh right off the grill, and you eat it down the rows just like any corn on the cob.

    What is the best cheese topping for elotes?

    Cotija cheese gets its name from the city of Cotija in the state of Michoacán Mexico. It is the most popular cheese topping for the iconic elote dish in the Mexican culture.

    Cotija is available in small wheels or large blocks and is a dry grating cheese made with raw cow's milk. It is easy to find in United States grocery stores and this salty Mexican cheese is typically aged at least 100 days.

    The aging causes its texture becomes crumbly, dense, and a hard cheese like Parmigiano-Reggiano.

    Grilled Corn Recipe

    Make Grilled Corn On The Cob the easy way, it takes just 15 minutes to prep, requires no boiling water, and grills in 10 minutes. There are endless flavor options using spices you have like bbq rub, seasoning salt, or just as good with a little salt and pepper.

    This easy recipe is delicious for BBQs and cookouts. A great summer side to make ahead or whip up even at the last minute, everyone loves hot buttered corn...

    A larger serving basket with Grilled Corn unwrapped in foil laying in the basket before eating.

    More Authentic Mexican Recipes

    Is there anything better than Mexican food? Here are some of my top favorite recipes. I live just over the border in Southern California, these are ones I have made over and over.

    Mexican Pickled Red Onions are an easy recipe with no canning skills needed and ready in 30 minutes. This tasty condiment for Mexican food is just like what they serve you in restaurants for street tacos.

    There are so many different ways to make guacamole, this is an Authentic Guacamole recipe with fresh lime juice, grated onion (one of my top secrets), chopped tomato, hot sauce, and spices.

    It can be made in a molcajete (a traditional ancient cooking tool) or in any bowl with just a couple of forks. Avocado Salsa (aka Taco Sauce) is a great side dish to drizzle on Mexican foods like tacos, burritos, taquitos, or served with tortilla chips as a dip.

    Micheladas are light, refreshing clamato juice (tomato juice) and are Mexican beer cocktails. The rim of the glass is salted with usually Tajin or seasoned salt. The michelada is a popular drink in Mexico and is often enjoyed on hot days or as an easy recipe the morning after a wild night out.

    • Mexican pickled red onions in a clamp jar and white bowl with chiles and limes on a colorful striped cloth.
      Mexican Pickled Red Onions
    • A blue glass bowl filled with guacamole and a chip stuck inside with a bowl of tortilla chips.
      How To Make Guacamole
    • A wood bowl with green avocado salsa taco sauce and blue corn tortilla chips on the table.
      Avocado Salsa
    • A tall glass filled with michelada garnished with green chili and spice coated lime slice.
      Micheladas Mexican Beer Cocktails

    Did you love this recipe? We would love to hear from you! If you make this recipe and love it, give it a 5-star rating ⭐⭐⭐⭐⭐ with a comment. THANK YOU!! Follow Delicious Table with my free newsletter and share this recipe with your friends on Facebook, Pinterest, and Instagram.

    Several grilled elotes Mexican street corn on the cob sprinkled with Cotija cheese on a platter.
    Print

    Mexican Street Corn Recipe (Authentic Elotes)

    Authentic Mexican street corn recipe aka elotes is fire grilled and brushed with a creamy cilantro sauce sprinkled with Cotija cheese.
    Course Side Dishes & Vegetables
    Cuisine Mexican
    Keyword authentic elotes, Elotes, Mexican corn, Mexican street corn
    Prep Time 20 minutes minutes
    Cook Time 8 minutes minutes
    Total Time 28 minutes minutes
    Servings 6
    Calories 139kcal
    Author Lisa Hatfield

    Equipment

    • Cuisinart Food Processor
    • Professional Cotton Cooking Twine

    Ingredients

    elotes

    • 6 ears fresh corn silks removed, husks tied
    • 1 cup creamy cilantro mayonnaise sauce
    • ¼ cup Cotija cheese to spinkle on top
    • 1 pinch chile powder or cayenne pepper 
    • ¼ cup chopped cilantro garnish
    • 2 limes sliced for garnish

    creamy cilantro sauce

    • ¼ cup mayonnaise
    • ½ cup chopped cilantro leaves
    • 2 tablespoons fresh lime juice
    • ½ serrano chili fine diced, seeds removed-THESE ARE HOT!
    • ¼ teaspoon garlic powder
    • ¼ teaspoon onion powder
    • ½ teaspoon sea salt
    US Customary - Metric

    Instructions

    creamy cilantro sauce

    • In a food processor, blend the mayonnaise, cilantro, lime juice, serrano chile, garlic powder, onion powder, and sea salt.
    • Blend until well combined, place in a bowl and chill until ready to use.

    prep the elote

    • Remove all the silks off the corn under running water. Pull the husks back from each ear of corn.
    • Tie with cotton kitchen string and or a long piece of husk to hold the husks back from the corn kernels.
    • Dip or briefly soak the corn with tied husks in water, to help prevent husks and cotton string from burning on the grill.

    grill the elote

    • Preheat your grill, gas or charcoal, to 500 degrees so the flames are at a medium high heat. That means It is hot enough when you can hold your hand above grill for only one second.
    • Grill corn 2 minutes per side, about 8 minutes total. Rotate until all sides have char marks. If the husks burn, just move till the flame goes out. Keep the lid open so you can keep an eye on them and rotate.
    • Remove from the grill onto a platter, and brush the cilantro sauce all over the corn. Sprinkle with cotija cheese, and a pinch of chile powder. Garnish with chopped cilantro and lime wedges. It's nice to squeeze a lime over the corn too!

    Notes

    corn

    Be sure to buy nice fresh sweet corn, I prefer a light yellow summer sweet corn. Be sure to clean the corn well, remove all the silks, and keep the husks on.
    You will want to dip the husks in the water right before grilling to reduce the chance of them burning on the grill over the fire.  

    Elote Variations

    All of the ingredients for Mexican corn are easy to find in your local grocery store. To make a more authentic elote recipe, use Mexican crema, cilantro, and a squeeze of lime.
    • swap out mayo for Mexican crema, although mayo is commonly used
    • you can swap out mayo for American sour cream
    • serrano chiles are usually very hot, only use ½ of a serrano in this recipe. You could also substitute a jalapeno. 
    • for the non-cilantro fans, you can substitute flat-leaf parsley in place of cilantro
    • sprinkle of chili powder - use chile de árbol (hot), hatch chile (hot), paprika, or a tiny pinch of spicy cayenne if you like it hot!
    • good substitutes for fresh Cotija cheese are either feta cheese, parmesan cheese, or Romano.
    • drizzle hot sauce from Mexico of your choice, like Tapatio or Cholula


    Nutrition

    Calories: 139kcal | Carbohydrates: 18g | Protein: 3g | Fat: 7g | Sodium: 263mg | Potassium: 249mg | Fiber: 1g | Sugar: 5g | Vitamin A: 260IU | Vitamin C: 8mg | Calcium: 2mg | Iron: 0.5mg
    • « Go to Previous Page
    • Page 1
    • Interim pages omitted …
    • Page 3
    • Page 4
    • Page 5
    • Page 6
    • Page 7
    • Page 8
    • Go to Next Page »

    Primary Sidebar

    MEET LISA

    Hey Everyone! I've been cooking passionately for over 30 years with professional culinary training and thousands of recipes in my collection. Let's get cooking! ♥

    Find out more →

    FOLLOW US ON SOCIAL

    • Facebook
    • Instagram
    • LinkedIn
    • Pinterest
    • YouTube

    MOST POPULAR RECIPES

    • Three golden crispy edged hash browns baked in a muffin tin on cutting board.
      Oven Baked Hash Browns
    • A white ceramic dog dish that says woof filled with homemade dog food.
      Homemade Dog Food Recipes (30+ Ideas!)
    • A large spoon holding a scoop of hot potato casserole serving it for dinner.
      Cheesy Potato Casserole
    • Marinated mozzarella balls in a beige ceramic dish with appetizer toothpicks.
      Marinated Mozzarella Balls
    • A white casserole dish with oven roasted pulled pork shredded and ready to eat in tacos or a recipe for dinner.
      Oven Roasted Pulled Pork
    • A baked loaf of pumpkin bread sliced thick with a silver knife.s
      Pumpkin Bread

    ALL READER FAVES ►

    FALL RECIPES

    • A ceramic dish full of golden brown roast pumpkin seeds.
      Roasted Pumpkin Seeds
    • Dozens of pictures of 200 Halloween recipes including adult drinks, appetizers, treats, snacks, desserts for kids and families all with a Halloween theme.
      200+ Best Halloween Recipes
    • Apple Crisp in a red bowl with a silver spoon, ice cream, and drizzled with caramel sauce.
      Apple Crisp
    • Slices of green Granny Smith apples around a white dish with a sweet dessert dip inside a low small white dish with a ruffled edge, and a piece of apple sticking into the dip.
      Caramel Apple Dip
    • A large jar filled with apple pie filling with a lid and bow.
      Apple Pie Recipe Filling
    • A white pie dish with a slice of apple crumble pie, also known as a dutch apple pie with a crumbled topping and green apples in the background in a wood bowl.
      Dutch Apple Pie

    Footer

    Most Popular "Reader Favorite" Recipes

    Three golden crispy edged hash browns baked in a muffin tin on cutting board.

    Oven Baked Hash Browns

    A white ceramic dog dish that says woof filled with homemade dog food.

    Homemade Dog Food Recipes (30+ Ideas!)

    A large spoon holding a scoop of hot potato casserole serving it for dinner.

    Cheesy Potato Casserole

    Marinated mozzarella balls in a beige ceramic dish with appetizer toothpicks.

    Marinated Mozzarella Balls

    A white casserole dish with oven roasted pulled pork shredded and ready to eat in tacos or a recipe for dinner.

    Oven Roasted Pulled Pork

    A baked loaf of pumpkin bread sliced thick with a silver knife.s

    Pumpkin Bread

    A large glass clamp jar filled with pickled eggs, fresh jalapeno slices, and spices.

    Jalapeno Pickled Eggs Recipe

    A large pork loin roast with a lot of dry rub seasoning pouring over the top.

    The Best BBQ Dry Rub

    Mexican pickled red onions in a clamp jar and white bowl with chiles and limes on a colorful striped cloth.

    Mexican Pickled Red Onions

    A white plate filled with heart shaped lobster ravioli garnished with parsley.

    Lobster Ravioli

    A sliver carving fork and knife next to a pork loin roast and topped with cherries.

    Cherry Balsamic Pork Loin

    A Cinco de Mayo party with frozen margaritas called Coronaritas, guacamole, and chips on a green table.

    CoronaRita Margaritas

    A large white spoon scooping a serving of cowboy baked beans out of a casserole dish.

    Cowboy Beans

    More Delicious Recipes

    PLEASE FOLLOW US!

    • Amazon
    • Facebook
    • Instagram
    • LinkedIn
    • Pinterest
    • TikTok
    • Twitter
    • YouTube

    Footer

    DELICIOUS TABLE

    • MEET LISA
    • SEE MY WORK! PRESS & DIGITAL MEDIA PUBLICATIONS
    • PRIVACY POLICY
    • ACCESSIBILITY STATEMENT

    POPULAR LINKS

    • EMAIL SIGN-UP newsletters and updates
    • RECIPE INDEX
    • AMAZON STORE As an Amazon Associate, I earn from qualifying purchases.

    LET'S CONNECT

    • PINTEREST
    • FACEBOOK
    • INSTAGRAM
    • YOUTUBE
    • TIKTOK
    • LINKEDIN
    • X / TWITTER

    2026 COPYRIGHT © ♥︎ DELICIOUS TABLE ®️