
• Skip to main content
  • Skip to primary sidebar
  • Skip to footer

Delicious Table ® logo

menu icon
go to homepage
  • ALL RECIPES
  • HALLOWEEN PARTY FOOD
  • FALL RECIPES
  • WELCOME TO DT!
    • Facebook
    • Instagram
    • Pinterest
    • YouTube
  • subscribe
    search icon
    Homepage link
    • ALL RECIPES
    • HALLOWEEN PARTY FOOD
    • FALL RECIPES
    • WELCOME TO DT!
    • Facebook
    • Instagram
    • Pinterest
    • YouTube
  • ×
    Home » Recipes

    Latest Recipes

    Chocolate Chip Christmas Cookies

    [heart_this] · Nov 4, 2021 · 3 Comments

    A white rectangle plate filled with chocolate chip peppermint cookies with a small Santa nearby.

    Last Updated April 25th, 2024 at 02:09 pm by Lisa

    Bake a batch of loaded Chocolate Chip Peppermint Cookies. These Christmas cookies taste amazing and won 1rst place at a cookie exchange that my neighbor took them to.

    Loaded with flavors of the holidays, these have candy cane peppermint crunch, milk chocolate chips, and Andes creme de menthe chips. Be sure to leave some out on a plate for Santa with milk, and share with friends and family.

    This cookie dough recipe is easy, and be sure to make a double batch. I am sharing tips to freeze the cookie dough to enjoy warm chocolate chip cookies freshly baked out of the oven all during the holidays...

    Why You Will LOVE These Holiday Cookies

    • These Peppermint Cookies are LOADED with sweet milk chocolate chips, candy cane crunch pieces, and minty creme de menthe chips are a perfect cookie for the Christmas Holidays.
    • Take these to your cookie exchange, this recipe WON 1RST PLACE at a very competitive cookie exchange party, people went crazy for the recipe and you will too.
    • The red and green colors say Christmas, and who doesn't love lots of peppermint in everything around all the holidays?
    • Make an extra batch of this cookie dough and keep it in the freezer just in case you need a last-minute treat for a party or friends pop by. Read on for tips to freeze cookie dough.

    You Will Need

    • ½ cup butter soft, room temperature
    • ½ cup vegetable oil
    • 1 teaspoon vanilla extract
    • 1 cup white sugar
    • 1 cup light brown sugar
    • ½ teaspoon almond extract optional
    • 2 eggs
    • 3 cups flour
    • 1 teaspoon of sea salt
    • 1 teaspoon baking powder
    • 1 teaspoon baking soda
    • 1 cup Andes Peppermint Crunch pieces
    • 11.5 oz bag milk chocolate chips (Ghiradelli milk chocolate chips)
    • 10 oz bag Andes Creme de Menthe baking chips (or Toll House Dark Chocolate & Mint Morsels - Limited Edition)

    Let's Bake These Christmas Cookies

    1. Cream butter, oil, vanilla extract, almond extract, white sugar, and brown sugar in a stand mixer or by hand mixer.
    2. Add eggs, and beat until creamy.
    3. In a separate bowl, sift flour, salt, baking powder, baking soda, and mix well.
    4. Add dry ingredients into wet ingredients in the mixer a cup at a time. Mix until well combined.
    5. Add all 3 chips; peppermint, milk chocolate, and creme de menthe.
    6. Mix chips into the dough until well combined by hand using a rubber spatula, or carefully using the mixer. The dough will be slightly crumbly, don't worry that is the right texture.
    7. Scoop out dough with 1 or (2" scoop for bigger cookies) on a Sil pat or parchment-lined baking sheet 1" apart.
    8. Bake at 375 for 12 minutes, until edges just browning. These are a soft cookie and will look a little underbaked when you first look at them. Trust me, they are fine!
    9. Cool completely before moving, these are soft cookies and need to set up.

    Top Cookie Baking Tips

    1. Scoop out the cookie dough with a 1" scoop. Why? To save time and get evenly baked cookies.
    2. Bake them on a parchment-lined baking sheet or a Sil Pat baking mat. Why? These are reusable, non-stick, and easy to clean. This helps the cookies bake evenly, and again makes clean up a breeze.

    Frozen Cookie Dough Tips

    Make extra cookie dough, scoop into balls and freeze to bake cookies anytime.

    1. Use a 1" scoop or roll into 1" balls.
    2. Place the dough balls onto a paper plate, slide inside a freezer zip-lock bag or pop into a freezer-safe container.
    3. Bake straight from the freezer, for hot fresh cookies anytime!

    More Christmas Cookies

    Santa Claus will Ho Ho Ho when he sees these piled up on a Peppermint Plate, or take to your Christmas Party or cookie exchange!

    Kids write their wish list on decorated Christmas cookies with edible ink. This recipe for Santa's Cookies and Milk includes step-by-step instructions. Ho Ho Ho! *plan ahead, these take 3-4 days for the icing to dry before writing on the cookies.

    Shortbread Christmas Cookies are baked with peppermint white chocolate and macadamia nuts, these say Mele Kalikimaka and Aloha!

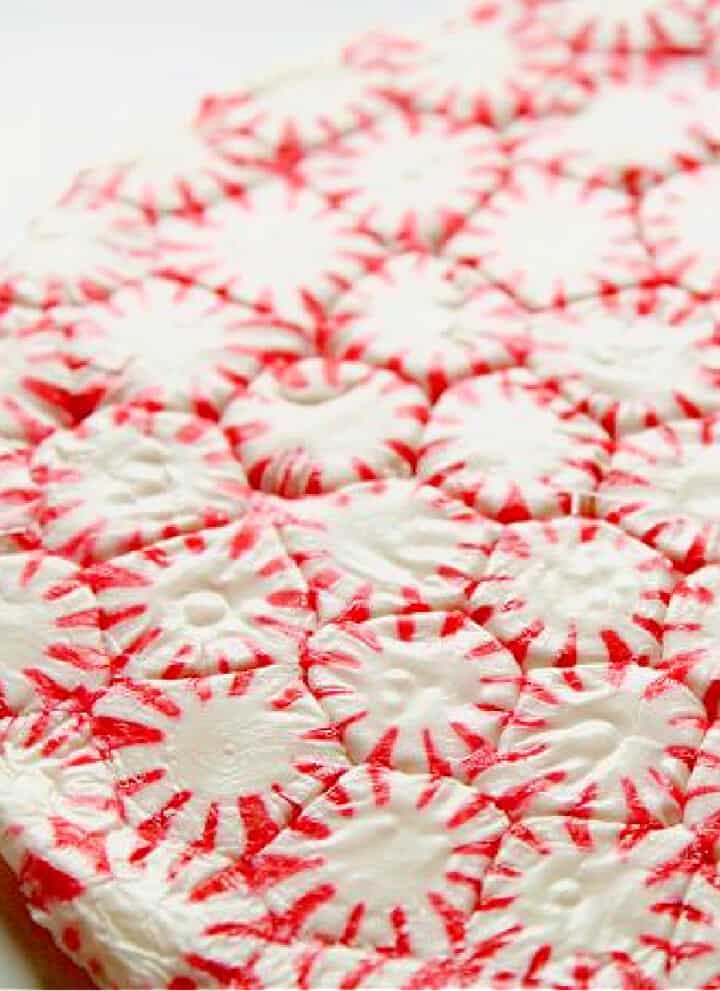
    Make a Peppermint Candy Plate for Christmas in only 20 minutes. Serve cookies, candy, hot cocoa, coffee, tea, festive drinks, or holiday cocktails. You only need 1 bag of mints, a pan, and parchment paper.

    I took this plate on Christmas Eve to a holiday party, it was quite the conversation! And, it's edible.

    • A collage of Christmas cookies decorated for Santa including one with a kids wish list on a mug of milk.
      Santas Cookies
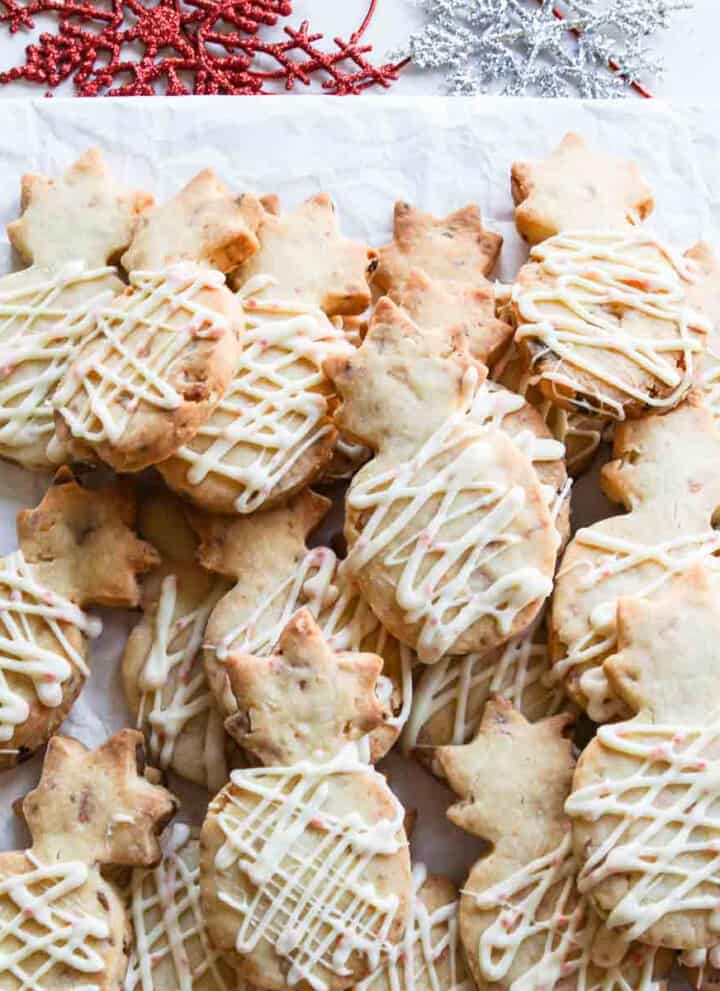
    • A pile of pineapple shaped peppermint macadamia nut shortbread cookies.
      Christmas Shortbread Cookies
    • A red and white peppermint candy plate made from melted candy in a round shape.
      Peppermint Candy Plate

    Did you love this recipe? We would love to hear from you! If you make this recipe and love it, give it a 5-star rating ⭐⭐⭐⭐⭐ with a comment. THANK YOU!! Follow Delicious Table with my free newsletter and share this recipe with your friends on Facebook, Pinterest, and Instagram.

    A white rectangle plate filled with chocolate chip peppermint cookies with a small Santa nearby.
    Print

    Chocolate Chip Peppermint Christmas Cookies

    Bake Chocolate Chip Peppermint Cookies with candy cane peppermint crunch, chocolate chips, and minty creme de menthe chips. Leave these out for Santa or make them for a holiday party, cookie exchange, gift them to friends and neighbors.
    Course Desserts & Sweets
    Cuisine American
    Keyword chocolate chip cookies, Christmas cookies, hoilday baking, holiday cookies, peppermint cookies
    Prep Time 15 minutes minutes
    Cook Time 12 minutes minutes
    Total Time 27 minutes minutes
    Servings 36 cookies
    Calories 254kcal
    Author Lisa Hatfield

    Equipment

    • Spring Loaded Cookie Scoops (3 Sizes)
    • Classic Cookie Sheet
    • Parchment Paper Sheets
    • Silicon Baking Mat
    • Large Stainless Spatula
    • ande

    Ingredients

    • ½ cup butter soft, room temperature
    • ½ cup vegetable oil
    • 1 teaspoon vanilla extract
    • 1 cup white sugar
    • 1 cup light brown sugar
    • ½ teaspoon almond extract optional
    • 2 eggs
    • 3 cups flour
    • 1 teaspoon sea salt
    • 1 teaspoon baking powder
    • 1 teaspoon baking soda
    • 1 cup Andes Peppermint Crunch pieces
    • 11.5 oz bag milk chocolate chips (Ghiradelli is a good brand)
    • 10 oz bag Andes Creme de Menthe baking chips (or Toll House Dark Chocolate & Mint Morsels - Limited Edition)
    US Customary - Metric

    Instructions

    • Cream butter, oil, vanilla extract, almond extract, white sugar, and brown sugar in a stand mixer or by hand mixer.
    • Add eggs, and beat until creamy.
    • In a separate bowl, sift flour, salt, baking powder, baking soda, and mix well.
    • Add dry ingredients into wet ingredients in the mixer a cup at a time. Mix until well combined.
    • Add all 3 chips; peppermint, milk chocolate, and creme de menthe.
    • Mix chips into the dough until well combined by hand using a rubber spatula, or carefully using the mixer. The dough will be slightly crumbly, don't worry that is the right texture.
    • Scoop out the dough with 1 or (2" scoop for bigger cookies) on a Sil pat or parchment lined baking sheet 1" apart.
    • Bake at 375 for 12 minutes, until edges just browning. These are a soft cookie and will look a little underbaked when you first look at them. Trust me, they are fine!
    • Cool completely before moving, these are soft cookies and need to set up.

    Notes

    Baking Tips

    1. Scoop out the dough with a 1" scoop. Why? To save time and get evenly baked cookies. Win-win!
    2. Bake them on a parchment-lined baking sheet or a Sil Pat baking mat. Why? These are reusable, non-stick, and easy to clean. This helps the cookies bake evenly, and again makes clean up a breeze.

    Cookie Dough Freezer Tips

    1. Use a 1" scoop or roll into 1" balls.
    2. Place the cookie dough balls onto a paper plate, inside a freezer zip-lock bag (or freezer-safe container).
    3. Bake straight from the freezer, hot fresh cookies anytime!

    Nutrition

    Calories: 254kcal | Carbohydrates: 34g | Protein: 2g | Fat: 12g | Saturated Fat: 8g | Cholesterol: 18mg | Sodium: 137mg | Potassium: 33mg | Sugar: 25g | Vitamin A: 130IU | Vitamin C: 0.1mg | Calcium: 34mg | Iron: 1.1mg

    4 Cheese Ball Recipes

    [heart_this] · Nov 3, 2021 · 1 Comment

    4 cheese balls shaped round and topped with curly bows and ornament hooks to serve as Christmas appetizers.

    Last Updated December 7th, 2023 at 10:23 am by Lisa

    Make Cheese Balls for holiday appetizers this year. There are four flavors of these Christmas appetizers to serve as party food all season.

    One, two, or all of these will be the talk of your party. The flavors are White Cheddar Rosemary Pomegranate, Pimento Cheese, Garlic Chive Goat-Cheese, and Cranberry Pecan.

    These will be the star holiday party appetizer on a cheese board and don't they say Happy Holidays and Merry Christmas...

    A square white platter with 4 colorful holiday cheese balls shaped like ornaments with crackers and a serving knife on the plate.

    Why You Will Love Cheese Balls

    • These are made in 15 minutes, you can put one together even at the last minute.
    • They can be made a day or two ahead.
    • Pack these up with a bottle for a wine-great hostess gift!
    • They're loved by kids and adults.
    • Flexible simple inexpensive ingredients.
    • Use up ingredients from the holidays like extra candied pecans or cheeses from a charcuterie board.
    • Super cute and festive, everyone loves the ornament shape! 🎄
    • Ahhh the flavors are ridiculously good!

    Four Festive Flavors

    I'm going to show you how to make four flavors...you can make all four or mix and match. All four are amazing, but my personal fave is the White Cheddar Rosemary Pomegranate.

    • White Cheddar Rosemary Pomegranate
    • Cheddar Pimento Cheese
    • Garlic Chive Goat Cheese
    • Blue Cheese Cranberry Pecan

    Can you blame me? I love how bright and festive it looks thanks to the pomegranate seeds.

    Speaking of which, if you're always wrestling with pomegranates and ending up with a whole lot of mess and not a whole lot of seeds, check out my kitchen tip: Juice and Seed Pomegranates Easily! It is a lifesaver...

    Pomegranates: Seed, Juice, and Recipe Ideas
    Get Pomegranate Seeds out the easy way. Learn the simple trick to open, seed, and juice pomegranate arils in step-by-step instructions.
    GET THE RECIPE PIN IT
    A white ceramic dish with pomegranate seeds ready to use in a recipe.

    Let's Make Cheese Balls

    These are easy to make, which is why I love serving them as a Christmas appetizer. Plus, you can dress them up or down with a variety of fun and festive toppings!

    Step 1: Reserve the topping as noted in each recipe.

    Step 2: In a medium-size bowl, mix the ingredients with a fork until well combined.

    Step 3: Remove using a small rubber spatula, and roll into a round ball shape.

    Step 4: Wrap in plastic wrap and chill for at least an hour, but overnight makes the flavors really come through!

    Step 5: Roll in the topping right before your party.

    TIP: Have your topping ready in zip-lock bag/s and assemble while plating with crackers and small spreader knives.

    White Cheddar Rosemary Pomegranate

    • 8 oz cream cheese, room temperature
    • 1 cup grated white cheddar cheese
    • 1 teaspoon Worcestershire sauce
    • ½ teaspoon garlic powder
    • 2 tablespoons fresh rosemary finely minced
    • ½ cup pomegranate seeds (topping)

    pro tip: be sure the pomegranate seeds are dry before rolling on the cheese ball, otherwise, they won't stick!

    Pimento Cheddar

    • 8 oz cream cheese, room temperature
    • 1 ½ cups grated sharp cheddar cheese
    • 1 teaspoon diced jalapenos canned
    • 4 oz diced pimentos drained (one small jar)
    • ½ teaspoon sea salt
    • ½ teaspoon pepper
    • 1 teaspoon garlic powder
    • 1 cup grated sharp white cheddar (topping)

    Garlic Chive Goat

    • 8 oz cream cheese, room temperature
    • 5 oz goat cheese
    • 1 teaspoon minced garlic any jar brand
    • 1 teaspoon garlic powder
    • ½ teaspoon fresh ground pepper
    • 1 teaspoon lemon juice
    • ¼ cup fresh chives finely minced (topping)

    Blue Cheese Cranberry-Pecan

    • 8 oz cream cheese, room temperature
    • 1 cup (8 oz) blue cheese crumbles
    • ½ cup dried cranberries chopped
    • ½ cup pecans chopped small pieces (topping)
    What To Dip In A Cheese Ball?

    Crackers, Pita Chips, Pretzel Sticks, Bagel Chips, Sliced Baguette, and Crostini.

    What Things To Roll A Cheese Ball In?


    Chopped Dried Fruits, Crumbled Bacon, Fresh Chopped Herbs, Crushed Chips/Crackers, Mixed Nuts & Chopped Herbs, Nuts (sunflower seeds, sesame seeds, pumpkin seeds, etc), Grated Cheeses (cheddar, pepper jack, blue cheese), Crushed Pretzels Or Potato Chips.

    How Can You Decorate Them?

    However, you want! For a festive holiday appetizer or Christmas appetizer, I suggest adding a cute ornament hanger and fun bright bow, so they look like Christmas ornaments on a platter! 

    Serve with assorted crackers and small spreader knives on a tray...

    Four bright color round cheese balls encrusted in toppings and decorated like Christmas tree ornaments to serve at a holiday with crackers.

    More Christmas Appetizers

    Appetizer parties for Christmas eve are relaxed with recipes like beautiful Holiday Deviled Eggs. Warm-up a cold Winter night with this Jalapeno Popper Dip people go crazy for this melty hot dip served with large corn chips.

    Brie and Bacon Palmiers baked in 15 minutes with 3 ingredients; store-bought puff pastry crumbled bacon and brie. An easy last-minute appetizer. Shrimp Cocktail is a classic party food idea, be sure to make fresh Cocktail Sauce to go with it, so much better than one from a jar.

    • White platter with Christmas Deviled Eggs garnished with rosemary and pomegranate seeds.
      Christmas Deviled Eggs
    • A white oval casserole dish with a hot dip being scooped out with a large corn chip.
      Jalapeno Popper Dip
    • A white platter filled with brie and bacon palmier appetizers golden brown and ready to eat.
      Brie and Bacon Palmiers
    • A clear glass plate with shrimp cocktail, cocktail sauce, and two glasses of champagne.
      Shrimp Cocktail

    Did you love this recipe? We would love to hear from you! If you make this recipe and love it, give it a 5-star rating ⭐⭐⭐⭐⭐ with a comment. THANK YOU!! Follow Delicious Table with my free newsletter and share this recipe with your friends on Facebook, Pinterest, and Instagram.

    4 cheese balls shaped round and topped with curly bows and ornament hooks to serve as Christmas appetizers.
    Print

    4 Cheese Balls

    Make Cheese Balls for holiday appetizers this year. There are four flavors of these Christmas appetizers to serve for party food all season.
    Course Appetizers, Dips, & Snacks
    Cuisine American
    Keyword cheese ball recipes, cheese balls, christmas appetizer
    Prep Time 15 minutes minutes
    Cook Time 0 minutes minutes
    Total Time 15 minutes minutes
    Servings 40
    Calories 155kcal
    Author Lisa Hatfield

    Equipment

    • Ornament Hooks
    • Small Spatula

    Ingredients

    White Cheddar, Rosemary, and Pomegranate

    • 8 oz cream cheese, room temperature
    • 1 cup grated white cheddar cheese
    • 1 teaspoon Worcestershire sauce
    • ½ teaspoon garlic powder
    • 2 tablespoons fresh rosemary finely minced
    • ½ cup pomegranate seeds (topping)

    Pimento Cheese

    • 8 oz cream cheese, room temperature
    • 1 ½ cups grated sharp cheddar cheese
    • 1 teaspoon diced jalapenos canned
    • 4 oz diced pimientos drained
    • ½ teaspoon sea salt
    • ½ teaspoon pepper
    • 1 teaspoon garlic powder
    • 1 cup grated sharp white cheddar (topping)

    Garlic Chive Goat Cheese

    • 8 oz cream cheese, room temperature
    • 5 oz goat cheese
    • 1 teaspoon minced garlic any jar brand
    • 1 teaspoon garlic powder
    • ½ teaspoon fresh ground pepper
    • 1 teaspoon lemon juice
    • ¼ cup fresh chives (finely minced topping)

    Blue Cheese Cranberry Pecan

    • 8 oz cream cheese, room temperature
    • 1 cup (8 oz) blue cheese crumbles
    • ½ cup dried cranberries chopped
    • ½ cup pecans (chopped small pieces topping)
    US Customary - Metric

    Instructions

    • Reserve the cheese ball topping as noted in each recipe.
    • In a medium-size bowl, mix all the ingredients with a fork until well combined.
    • Remove using a small rubber spatula, and roll into a round ball shape.
    • Wrap in plastic wrap and chill at least an hour, but overnight makes the flavors really come through!
    • Roll in the topping right before your party. Tip: have your topping ready in zip-lock bag/s and assemble while plating with crackers.
    • Optional: add a cute ornament hanger and fun bright bow.
    • Serve with assorted crackers or baguette slices.

    Notes

    pomegranate seeds

    Be sure the pomegranate seeds are dry before rolling on the cheese ball, otherwise, they won't stick! (I learned this the hard way) 


    servings

    The number of servings is approximately 10 people per cheese ball.


    more topping ideas

    • Chopped Dried Fruits
    • Crumbled Bacon
    • Fresh Chopped Herbs
    • Crushed Chips/Crackers
    • Mixed Nuts & Chopped Herbs
    • Nuts (sunflower seeds, sesame seeds, pumpkin seeds, etc.)
    • Grated Cheeses (cheddar, pepper jack, blue cheese)
    • Crushed Pretzels Or Potato Chips

    more dipper ideas

    • Crackers
    • Pita Chips
    • Celery Sticks
    • Carrots
    • Pretzel Sticks
    • Bagel Chips
    • Sliced Baguette
    • Crostini
     

    Nutrition

    Serving: 40g | Calories: 155kcal | Carbohydrates: 3g | Protein: 5g | Fat: 14g | Saturated Fat: 8g | Cholesterol: 39mg | Sodium: 226mg | Potassium: 68mg | Fiber: 1g | Sugar: 2g | Vitamin A: 556IU | Vitamin C: 3mg | Calcium: 117mg | Iron: 1mg

    How To Clean And Cut Leeks

    [heart_this] · Nov 2, 2021 · 5 Comments

    Bright green leeks held by rubber bands at a Farmers market.

    Last Updated February 14th, 2022 at 01:42 pm by Lisa

    Fresh leeks will become one of your favorite vegetables when you know all the easy ways to cut, clean, and cook with their mild onion-like flavor.

    Raw leeks can be used in place of a standard onion in your cooking. Think of them simply as oversized scallions. They are not as popular in the United States as they are in other countries around the world like France.

    Follow this step-by-step guide for the best way to trim leeks, and freeze the thin strips so they are ready to go in recipes. They bring a wonderful delicate flavor to dishes and are easy to find near the spring onions in any grocery store...

    How To Clean Leeks

    Grown partly underground, whole leeks grow in sandy soil. A lot of dirt gets trapped on the outer leaves and inside the light green parts. And you sure don't want that in your recipe!

    Step 1: On a stable cutting board, use a good sharp knife and slice off the root end of the leek and discard.

    STEP 2: From the root end, slice up through the leek half way. Leave the tough green top end connected. Fill up a large bowl of cold water. This is so you can soak and begin to wash the dirt off but not have leaves go everywhere. You will begin to see the sand in the bottom of the bowl of water. Use a circular motion and swish them around.

    STEP 3: Use your hands to remove a lot of dirt. The bottom of the bowl of water will get quite gritty. Put the dark green tops into the water and continue to clean. Change the dirty water several times as you go.

    STEP 4: Fan the leaves open underwater to be sure they are clean. And keep changing the water until clear.

    How To Cut Leeks

    STEP 5: Once clean, move to a cutting board. Now slice all the way through the length of the leeks. Place the flat cut side down on the cutting board.

    STEP 6: Slice the entire leek into thin half moons for your recipe.

    Julienne Cut: Take 3-4 layers from leek halves, then fold in half lengthwise, and slice into thin long strips with a large chef's knife. Go slowly and use your best knife skills to slice leeks, they can slip so be careful.

    Finer Slices: Take clean leek halves pieces with the flat side down, and start at one end and slice across into ⅛ inch thick half moon slices. You can then cut those strips into finer dice.

    PRO TIP: After your leeks are clean, the easiest way to get them dry is in a salad spinner. They will saute nicely once dry.

    How To Store Leeks

    PRO TIP: My favorite method to use leeks in different ways in my cooking is to buy 2-3 fresh leeks at a time. I prefer to cut leeks all at one time and keep them frozen and ready to use.

    • Fridge Storage: After you buy them, store leeks unwashed in open plastic wrap or zip top plastic bags for up to 1-2 weeks in the crisper drawer.
    • Freezer Storage: Store clean sliced leeks in freezer zip lock bags or airtight container for 3-4 months. Use a kitchen or paper towel to blot them dry before you freeze or cook with them.
    • Freeze the clean sliced tought top dark green leek pieces in a ziplock plastic bag, and use them to make homemade stock or broth.
    Chicken Stock (Bone Broth) Plus Freezer Tips and 15+ Recipe Uses!
    Make Chicken Stock aka Bone Broth at home to create other tasty recipes with chicken stock, plus cooking tips and 15+ delicious recipe ideas!
    GET THE RECIPE PIN IT
    3 small Mason jars filled with chicken stock and black heart shaped labels.

    Cooking With Leeks

    Leeks are a mild wonderful vegetable, a "distant relative" to onions and garlic. Use these cooking tips and try them in place of regular onions in recipes.

    They have a sweet delicate mild flavor. Their vibrant light green color is so pretty in dishes.    

    Sauté Leeks

    1. In an extra-large heavy skillet, melt a tablespoon of butter or splash of olive oil, season with sea salt, and cracked pepper.
    2. Add the chopped leeks, and saute' over medium heat about 5-8 minutes until soft and light brown.
    3. Add a bit more butter to cooked leeks, for a delicious side dish called buttered leeks.

    Roast Leeks

    1. Clean and chop leeks into ½ inch pieces. Rinse the cut pieces in colander and rinse very well to get all the sand and debrie removed. Pat dry with a clean paper or kitchen towel. You want them dry to roast well.
    2. On a large sheet pan, drizzle with olive oil, salt, and pepper and roast at 425° for 15 to 20 minutes, or until they're tender. Turn half way through at about the 10 minute mark.
    Chopped leeks stirred in a pan with an olive wood spoon.

    Top Leeks Tips

    • 2 large leeks or 3 medium yields about 2 cups (179g) sliced.
    • Buy several at once, clean, slice, and keep ready in the freezer for quick recipe preparation.
    • Leeks freeze well in zip-top bags and freezer containers, just like onions. It makes cooking go so much faster to have onions or leeks ready to cook with.
    • Most recipes call for the white part of the leeks or the light leafy green part. The darker green parts and dark green tops of the leek can be tougher, but are a great addition in homemade chicken stock and vegetable broths.
    • Think of leeks as giant green onions, and try them in different recipes in place of green onions aka scallions.
    What Are Leeks?


    Leeks are a vegetable that tastes like mild onions. They are part of the allium family also known as the onion family. They are closely related to garlic, chives, scallions, shallots, and all other onions.

    What are popular leek recipes?


    Use as a side dish, you can roast them with parmesan cheese, salt, and pepper. Leeks are famous in soups, stews, and vegetable or Chicken Stock.

    Clean, chop and saute to add into pasta dishes, Parmesan Risotto, toss into an omelet, or sprinkle as a pizza topping. Bake into a cheesy French gratin, mix into roasted or Smashed Potatoes or in Hash Browns for breakfast.

    Bake up a leek tart, a leek potato casserole, or use in scalloped potatoes.

    What do leeks taste like?

    Leeks have a delicate sweet, mild onion flavor.
    They are classic in recipes like potato leek soup and gratins. They can be used in place of onions in creamy soups, stews, pasta, flatbreads, and so many other dishes.


    Popular leek recipes are potato soup, cold vichyssoise, leek tarts and gratins.

    More Leek Recipes

    These are a couple of my favorite leek recipes, stuffed chicken breasts can be made ahead, and it makes the best pan sauce. Gorgonzola Stuffed Chicken will be a hit at family dinner with everyone, plus it's a low-carb recipe.

    Stuffed Chicken Breasts Recipe
    Stuffed Chicken Breasts makes a great weeknight family dinner, and is perfect for special occasions, holidays, or romantic date nights. Make ahead for entertaining, and has the best sauce with only one pan and a tiny bowl to clean! Try lots of different stuffings and ingredients.
    GET THE RECIPE PIN IT
    Cooked Gorgonzola Stuffed Chicken in pan sauce garnished with fresh thyme.

    Chilled Cucumber Soup (aka White Gazpacho) is a refreshing Summer recipe with yogurt, grapes, green apples, topped with almonds and crab.

    Cucumber Gazpacho Recipe
    A chilled cucumber gazpacho recipe is so refreshing in the summer months with yogurt, grapes, and green apples, topped with almonds and lump crab meat. This cold cucumber soup recipe includes lots of other garnish topping ideas for you too!
    GET THE RECIPE PIN IT
    Chilled cucumber soup topped with crab meat and grape garnish served in bowls over ice.

    Did you love this kitchen tip? We would love to hear from you! If you make this recipe and love it, stop back, give it a 5-star rating ⭐⭐⭐⭐⭐ and leave a comment.

    THANK YOU!! Readers LOVE to hear how it helped you out in the kitchen! Follow Delicious Table with my free newsletter and share this recipe with your friends on Facebook, Pinterest, and Instagram for more Delicious Table recipes!

    Did you love this recipe? We would love to hear from you! If you make this recipe and love it, give it a 5-star rating ⭐⭐⭐⭐⭐ with a comment. THANK YOU!! Follow Delicious Table with my free newsletter and share this recipe with your friends on Facebook, Pinterest, and Instagram.

    Bright green leeks held by rubber bands at a Farmers market.
    Print

    How To Clean, Cut, and Cook Leeks

    Learn how to clean and cut leeks, plus freezer storage tips. Creative recipe ideas to saute and roast them for soups, dinner, and sides.
    Course Side Dishes & Vegetables
    Cuisine Condiment
    Keyword fresh sliced leeks, how to clean and cut leeks, leek recipes
    Cook Time 20 minutes minutes
    Total Time 20 minutes minutes
    Servings 8 cups
    Calories 54kcal
    Author Lisa Hatfield

    Equipment

    • Epicurean Non-Slip Cutting Board
    • Chef Knife

    Ingredients

    • 2 large leeks
    • olive oil
    • sea salt
    • black pepper

    Instructions

    • STEP 1: On a stable cutting board, use a good sharp knife and slice off the root end of the leek and discard.
    • STEP 2: From the root end, slice up through the leek half way. Leave the tough green top end connected. Fill up a large bowl of cold water. This is so you can soak and begin to wash the dirt off but not have leaves go everywhere. You will begin to see the sand in the bottom of the bowl of water. Use a circular motion and swish them around.
    • STEP 3: Use your hands to remove a lot of dirt. The bottom of the bowl of water will get quite gritty. Put the dark green tops into the water and continue to clean. Change the dirty water several times as you go.
    • STEP 4: Fan the leaves open underwater to be sure they are clean. And keep changing the water until clear.
    • STEP 5: Once clean, move to a cutting board. Now slice all the way through the length of the leeks. Place the flat cut side down on the cutting board.
    • STEP 6: Slice the entire leek into thin half moons for your recipe.

    Notes

    Pro Cooking Tips

    2 large leeks or 3 medium yields about 2 cups (179g) sliced.
    Buy several leeks at once,  clean, slice, and keep ready in the freezer for quick recipe preparation.
    Most recipes call for the white and light green parts, the dark green parts can be tougher, but can be used in your chicken stocks and broths.
    If the recipe calls for cooked leeks, you can saute them in a skillet with a splash of olive oil, just cook them like onions until soft and their edges are turning golden brown but not dark. 

    Storing

    After you buy leeks, refrigerate them unwashed in open plastic bags up to 1-2 weeks. 

    Freezing

    Press on a clean towel on leeks to dry, or use a salad spinner. Store clean and pre-sliced, in freezer zip lock bags for 3-4 months. 
    Freeze the clean, dark green leek pieces in a ziplock bag, and use to make homemade stocks or broth.
    Julienne Cut: Take 3-4 layers from leek halves, then fold in half lengthwise, and slice into thin long strips with a large chef's knife. Go slowly and use your best knife skills to slice leeks, they can slip so be careful.
    Finer Slices: Take clean leek halves pieces with the flat side down, and start at one end and slice across into ⅛ inch thick half moon slices. You can then cut those strips into finer dice. How To Cut Leeks

    Nutrition

    Calories: 54kcal | Carbohydrates: 13g | Protein: 1g | Fat: 1g | Saturated Fat: 1g | Polyunsaturated Fat: 1g | Monounsaturated Fat: 1g | Sodium: 18mg | Potassium: 160mg | Fiber: 2g | Sugar: 3g | Vitamin A: 1484IU | Vitamin C: 11mg | Calcium: 53mg | Iron: 2mg

    Thanksgiving Appetizer Deviled Eggs

    [heart_this] · Oct 19, 2021 · 2 Comments

    A slice of rustic tree wood with Thanksgiving deviled eggs garnished with fresh herbs.

    Last Updated January 4th, 2026 at 09:32 am by Lisa

    Thanksgiving Deviled Eggs are an easy appetizer party food idea. Gorgeous Fall color, garnished with sage and thyme to celebrate the season.

    Serve them on a rustic board or tray, and watch them vanish...

    How To Make Thanksgiving Deviled Eggs

    The full printable recipe card is below to make these easy-deviled eggs!

    • boiled eggs (use large eggs)
    • mayonnaise
    • Dijon mustard
    • fresh lemon juice
    • creme fraiche (or sub soft cream cheese, sour cream)
    • paprika (not the hot one!)
    • sea salt (kosher salt)
    • ground black pepper

    Garnish Decoration

    • sprigs of fresh sage leaves for garnish
    • sprigs of fresh thyme leaves for garnish
    • or finely diced chives

    Make Hard Boiled Eggs

    1. Make hardboiled eggs: Boil on the stove in a large saucepan, make in an Instant Pot, or try my Steam method!
    2. Peel and slice eggs in half.
    Steamed Hard Boiled Eggs Recipe
    Steamed hard boiled eggs cook perfectly every time with no green ring. So easy to peel, the eggshells miraculously slip right off in minutes!
    GET THE RECIPE PIN IT
    6 perfectly hard boiled eggs with a cracked half of an egg shelf on top.

    Assemble The Deviled Eggs

    1. In a medium bowl, add the egg yolks, mayo, Dijon mustard, lemon juice, salt, pepper, smoked paprika, and cream Fraiche' (or soft cream cheese).
    2. Mix the yolk mixture until well combined with a hand mixer, and load into a large zip log bag or piping bag fitted with a large star tip.
    3. Pipe the filling back into the boiled egg whites, and garnish with a few fresh tiny sprigs of sage, thyme, or fine minced chives.
    4. Keep cold and in the fridge until serving time.
    Looking down on a white ceramic egg dish with hard boiled eggs and one sliced open to reveal the yolk

    Deviled Eggs Top Tips

    • Instead of scooping out the yolk with a spoon (which can tear the egg) gently push from the back of the egg and pop the yolk out.
    • You can certainly mix the deviled egg filling with a spoon or whisk, but a hand mixer gives you a creamy fluffy texture that pipes beautifully.
    • Use a large gallon zip-top bag and large star tip to pipe the filling into the egg white shells, it looks gorgeous and professional.
    • Make-Ahead Tips: Boil the eggs, and slice them in half. Keep covered on a tray. Fill your ziptop bag with a piping tip, and have your tiny sage and thyme pieces ready to go, then assemble in minutes right before your party.
    A graphic showing boiled eggs and how to remove yolk from cooked eggs.

    Appetizer Party Tips

    1. Use serving pieces you have, look high and low for the thing you have-trust me you have great pieces to use.
    2. Plan an area for all your appetizers. A nice long table, the dinner table, or a kitchen counter space all work great. Just plan for your number of guests, and space to walk around the table.

    Use what you have to create different heights and to keep people moving around trying different appetizers. Try to set up a scene with levels, and place things up high, low, and spilling out of baskets.

    • Cheese Boards
    • Trays
    • Small Bowls
    • Small Serving Spoons
    • Cheese Knives
    • Napkins
    • Utensils
    • Small Plates
    • Spreader Knives

    I took these to a potluck happy hour appetizer party with girlfriends! And I also took a tray of my Christmas Deviled Eggs...

    A rustic piece of tree cut into a platter with Thanksgiving deviled eggs filled with rust colored filling and garnished with herbs.

    More Deviled Eggs

    Serve Christmas Deviled Eggs with bubbly Champagne or drinks at your holiday party. These Christmas appetizers are gorgeous for the holidays. Sprinkle a few sparkling ruby red pomegranate seeds with sprigs of rosemary and celebrate the season...

    These Easter Deviled Eggs look like little Spring baskets and have fresh herbs and edible flower garnish. Serve these as an easy appetizer for Easter dinner or brunch, or a Spring baby, bridal shower, or celebration.

    Halloween Deviled Eggs are spooky party appetizers with dark black crackled egg shells filled with bright orange filling. This classic simple appetizer is great to make ahead and have with Halloween cocktails

    • White platter with Christmas Deviled Eggs garnished with rosemary and pomegranate seeds.
      Christmas Deviled Eggs
    • Pretty Easter deviled eggs with green filling and decorated with fresh herbs and edible flowers.
      Easter Deviled Eggs
    • A black platter filled with Halloween deviled eggs sprinkled with black sesame seeds.
      Halloween Deviled Eggs

    More Thanksgiving Appetizer Recipes

    People can help themselves to any of these impressive appetizer spreads that look so stunning for the cozy Fall and Winter holidays like Christmas and Thanksgiving.

    Keep a few of these easy recipes for 40 of the best Puff Pastry Recipes for special occasions during the holidays, such as Thanksgiving appetizers, or your Christmas dinner celebration...

    Create a stunning Thanksgiving charcuterie board filled with your favorite little bites of sliced meats, different types of cheeses, crackers, fruit, nuts, and a few festive and sugary holiday treats for hungry guests on turkey day or anytime during the holiday season.

    These are the best Thanksgiving Appetizers for savory snacks, easy appetizers, and a bounty of party ideas for your celebration.  Nothing is easier than a Crostini Bar for appetizers with an easy setup and assembly. There are recipes for a whipped goat cheese crostini topping and tons of ideas for toppings! 🥖🍷🧀

    • A number of puff pastry appetizers, dinner ideas, and desserts in a collection.
      40 Puff Pastry Appetizer Recipes
    • A bountiful Thanksgiving charcuterie cheeseboard fill with colorful meats, cheeses nuts and more for Thanksgiving.
      Thanksgiving Charcuterie Board
    • A collection of Thanksgiving appetizers with recipe ideas, and party decorating tips for a Fall party.
      36 Thanksgiving Appetizers
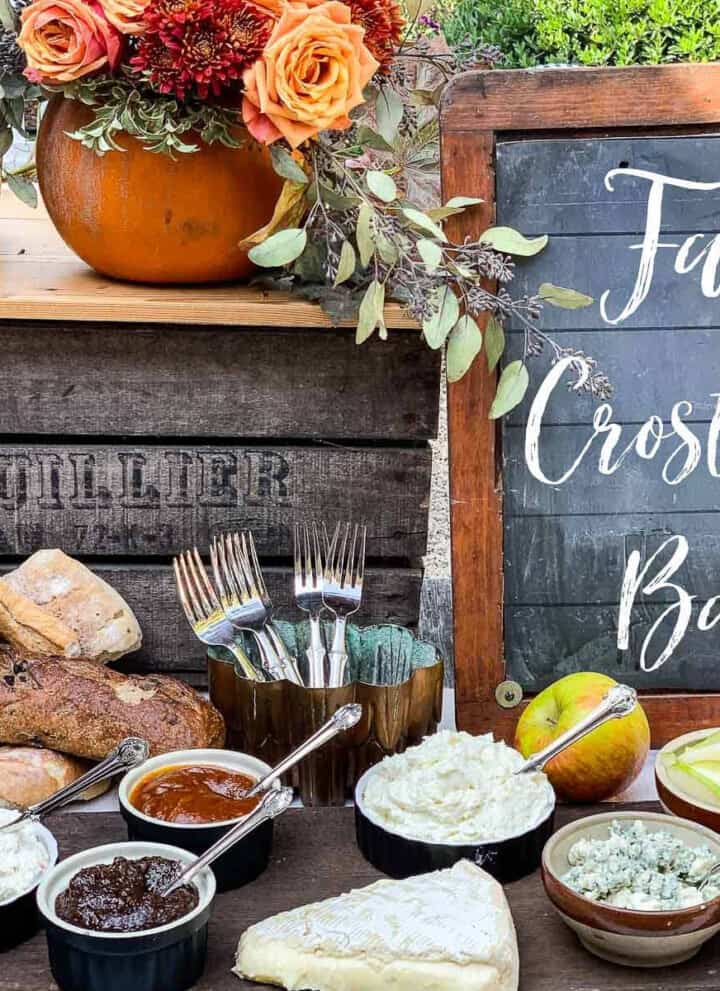
    • A rustic table with small bowls filled with toppings for a fall appetizer crostini bar.
      Fall Crostini Bar

    Did you love this recipe? We would love to hear from you! If you make this recipe and love it, give it a 5-star rating ⭐⭐⭐⭐⭐ with a comment. THANK YOU!! Follow Delicious Table with my free newsletter and share this recipe with your friends on Facebook, Pinterest, and Instagram.

    A slice of rustic tree wood with Thanksgiving deviled eggs garnished with fresh herbs.
    Print

    Thanksgiving Deviled Eggs Recipe

    Thanksgiving Deviled Eggs are an easy appetizer party food idea. Gorgeous Fall color, garnished with sage and thyme to celebrate the season.
    Course Appetizer
    Cuisine American
    Keyword deviled eggs, thanksgiving appetizers, Thanksgiving deviled eggs
    Prep Time 20 minutes minutes
    Cook Time 0 minutes minutes
    0 minutes minutes
    Total Time 20 minutes minutes
    Servings 12
    Calories 61kcal
    Author Lisa Hatfield

    Equipment

    • Epicurean Non-Slip Cutting Board
    • Chef Knife

    Ingredients

    deviled eggs

    • 6 boiled eggs
    • 2 tablespoons mayonnaise
    • 1 tablespoon Dijon mustard
    • 1 tablespoon fresh lemon juice
    • 1 tablespoon creme fraiche or sub soft cream cheese or sour cream
    • 2 tablespoons paprika not the hot or smoked one!
    • ½ teaspoon sea salt kosher salt
    • ½ teaspoon ground black pepper

    garnish decoration

    • sprigs fresh sage leaves garnish
    • sprigs fresh thyme leaves garnish

    Instructions

    Hard Boiled Eggs

    • Make hardboild eggs: Boil, Instant Pot, or Steam method.
    • Peel and slice the boiled eggs, slice in half.

    Make Deviled Eggs

    • PRO TIP: Instead of scooping out the yolk with a spoon (which can tear the egg) gently push from the back of the egg and pop the yolk out!
    • In a medium bowl, add the egg yolks, mayonnaise, Dijon mustard, lemon juice, salt, pepper, smoked paprika, and cream Fraiche' (or soft cream cheese).
    • Mix the yolk mixture until well combined with a hand mixer, and load into a large zip log bag or piping bag fitted with a large star tip.
    • Pipe the filling back into the boiled eggshells, and garnish with a few fresh tiny sprigs of sage, thyme, or fine minced chives.

    Video

    Notes

    Deviled Eggs Top Tips

    • Instead of scooping out the yolk with a spoon (which can tear the egg) gently push from the back of the egg and pop the yolk out.
    • You can certainly mix the deviled egg filling with a spoon or whisk, but a hand mixer gives you a creamy fluffy texture that pipes beautifully.
    • Use a large gallon zip-top bag and large star tip to pipe the filling into the egg white shells, it looks gorgeous and professional.
    • Make-Ahead Tip: Boil the eggs, slice in half, and keep covered on a tray. Fill your ziptop bag with a piping tip, and have your tiny sage and thyme pieces and ready to go, then assemble in minutes right before your party.

    Thanksgiving Appetizer Party Tips

    1. Use serving pieces you have, look high and low for the thing you have-trust me you have great pieces to use.
    2. Plan an area for all your appetizers. A nice long table, the dinner table, or a kitchen counter space all work great. Just plan for your number of guests, and space to walk around the table.
    Use what you have to create different heights and to keep people moving around trying different appetizers. 
    Try to set up a scene with levels, and place things up high, low, and spilling out of baskets.
    • Cheese Boards
    • Trays
    • Small Bowls
    • Small Serving Spoons
    • Cheese Knives
    • Napkins
    • Utensils
    • Small Plates
    • Spreader Knives

    Nutrition

    Serving: 12g | Calories: 61kcal | Carbohydrates: 1g | Protein: 3g | Fat: 5g | Saturated Fat: 1g | Cholesterol: 95mg | Sodium: 159mg | Potassium: 58mg | Fiber: 1g | Sugar: 1g | Vitamin A: 711IU | Vitamin C: 1mg | Calcium: 16mg | Iron: 1mg

    Succulent Pumpkins

    [heart_this] · Oct 18, 2021 · 1 Comment

    A collage of 9 different succulent pumpkins in different colors and top with succulents.

    Succulent Pumpkins are an easy Fall or Thanksgiving centerpiece idea. These will last up to 2 months and are gorgeous for Autumn decorating.

    You can share succulent cuttings with friends to make this craft, and then replant them in your garden at the end of the season. I have made them with girlfriends several times, what a fun craft to do together...

    An orange and green pumpkin topped with succulent cuttings for a Fall centerpiece.

    Craft Supplies You Will Need

    • pumpkin(s) large or small, any size works!
    • assorted succulents cuttings (dirt/roots and dead bits removed)
    • green sheet moss
    • brown paper bag
    • scissors or garden clippers
    • disposable gloves
    • Aleen's Spray Adhesive
    • Aleen's Tacky Glue
    A paper box filled with succulent cuttings and craft supplies to make a succulent pumpkin.

    For several years, I have admired and been fascinated by these pumpkin centerpieces at Rogers Gardens in Corona del Mar, California.

    I took a workshop and that is how I learned exactly how to make them at home. They are so easy once you know the secret tips.  

    A bright orange pumpkin topped with different colored succulents for a Thanksgiving centerpiece.

    Looks so pretty to have different textures and colors of succulents...

    A white pumpkin topped with succulent cuttings for a Fall centerpiece.

    You could host a craft party, and do this project with friends and family. Have each person bring cuttings from their gardens and the supplies to share...

    Any Shape Or Size Pumpkin Works!

    Top Project Tips

    • Add larger succulents in the center, have some smaller ones tucked in at the edges, and something trailing looks really nice.
    • You really can't go wrong, all the succulents blend so beautifully together.
    • The glue dries in 6-8 hours, dries completely clear, and will not hurt the succulents.
    • Pick your succulents with these tips in mind.

    a thriller - dramatic larger focal point

    a filler - smaller items to fill in the gaps

    a spiller - something trailing or hanging down

    A white pumpkin showing the succulents glued on top with a note to replant them in your garden.

    Let's Make Succulent Pumpkins

    Step 1: Pick a pumpkin to decorate, any size will work. You can take the stem off the pumpkin or leave it, but don't carve the pumpkin.

    Step 2: Snip your succulents pieces. If you buy them, remove the dirt and roots. The succulents will live on the pumpkin, as you will mist with water weekly.

    Step 3: Cut a brown paper bag open for a work surface.

    Step 4: Spray adhesive spray or tacky glue on top of the pumpkin, cut a circle of moss that fits the top of the pumpkin. Press the circle of moss on the pumpkin.

    Step 5: On a brown paper bag, pour fast grab tacky glue. Dip the largest succulent cuttings into the glue and push them into the center of the moss circle. Use a lot of glue so the pieces stick.

    Step 6: Continue to add succulents and fill in until the moss is covered.

    Step 7: Add some trailing pieces of succulents, some thrillers, and vary the colors and textures of the succulents.

    Step 8: Care for your succulent topped pumpkin, mist once a week, and clean out any dry leaves or twigs.

    The glue does not hurt the succulents, as long as you mist them weekly with water, they should last almost 2 months.

    Succulent Pumpkin Care and Watering

    Keep out of direct sunlight and rain. Indirect sunlight is best, and you can keep the pumpkin indoors or outdoors as long as under a covered patio. Mist with a spray bottle every week, if it's is wet, don't water, if super dry give it a spritz of water all over.

    PRO TIP: Your pumpkin succulent should last as long as the pumpkin which can be 2 months or longer.

    More Pumpkin Ideas

    For more fall table ideas, try my: Thanksgiving Table Pumpkin Flower Centerpieces, and be sure to take a peek at my Fall Recipe Collection for delicious recipe inspiration.

    Fall & Thanksgiving Centerpieces
    Pumpkin-filled Thanksgiving Centerpieces are gorgeous on your table using bright fall-colored squash, pumpkins, flowers, and greenery.
    Check out this recipe
    A collage showing Thanksgiving centerpieces made with pumpkins and fresh flowers for Thanksgiving centerpieces.
    Roasted Pumpkin Seeds Recipe ~ Low Carb Keto Snack Idea
    Save the seeds from Jack-o-lantern pumpkin carving! Roasted Pumpkin Seeds are great to top soups and sprinkle on salads. And they are a perfect low-carb keto snack idea. Roasting pumpkin seeds with buttery crunchy goodness is a simple recipe to make every Fall, and quite a fun tradition.
    GET THE RECIPE PIN IT
    A ceramic dish full of golden brown roast pumpkin seeds.

    Did you love this recipe? We would love to hear from you! If you make this recipe and love it, give it a 5-star rating ⭐⭐⭐⭐⭐ with a comment. THANK YOU!! Follow Delicious Table with my free newsletter and share this recipe with your friends on Facebook, Pinterest, and Instagram.

    A collage of 9 different succulent pumpkins in different colors and top with succulents.
    Print

    Succulent Pumpkins ~ Fall or Thanksgiving Centerpieces

    Succulent Pumpkins are easy Fall or Thanksgiving centerpieces to DIY. These will last up to 2 months, and are gorgeous for Autumn decorating.
    Prep Time 5 minutes minutes
    Cook Time 25 minutes minutes
    Total Time 30 minutes minutes
    Servings 1
    Calories
    Author Lisa Hatfield
    Cost $20

    Equipment

    • Felco Garden Pruner

    Ingredients

    • 1 pumpkin(s) large or small
    • 12-20 small assorted succulent cuttings (dirt/roots and dead bits removed)
    • 1 piece green sheet moss
    • 1 brown paper bags
    • 1 pair scissors or garden clippers
    • 1 pair disposable gloves
    • spray adhesive Aleen's brand
    • tacky glue Aleen's brand

    Instructions

    • Pick a pumpkin to decorate, any size will work. You can take the stem off the pumpkin or leave it, but don't carve the pumpkin.
    • Snip your succulents pieces. If you buy them, remove the dirt and roots. The succulents will live on the pumpkin, as you will spray with water weekly.
    • Cut a brown paper bag open for a work surface.
    • Spray adhesive spray or tacky glue on top of the pumpkin, cut a circle of moss that fits the top of the pumpkin. Press the circle of moss on the pumpkin.
    • On a brown paper bag, pour fast grab tacky glue. dip largest succulent cuttings into glue and push into the center of the moss circle.
    • Continue to add succulents and fill in until the moss is covered.
    • Add some trailing pieces of succulents, some thrillers, and vary the colors and textures of the succulents.
    • Care for your succulent topped pumpkin, mist once a week, and clean-out any dry leaves.

    Notes

    Succulent Pumpkin Care and Watering

    Keep out of direct sunlight and rain. Indirect sunlight is best, and you can keep the pumpkin indoors or outdoors (as long as under a covered patio). Mist with a spray bottle every week, if it's is wet, don't water, if super dry give it a spritz of water all over.
    PRO TIP: Your pumpkin succulent should last as long as the pumpkin which can be 2 months or longer. These succulents can be replanted right back into pots or back out in your garden.

    Top Project Tips

    • Add larger succulents in the center, have some smaller ones tucked in at the edges, and something trailing looks really nice.
    • You really can't go wrong, all the succulents blend so beautifully together!
    • The glue dries in 6-8 hours, dries completely clear, and will not hurt the succulents.
    • Pick your succulents with these tips in mind.
    a thriller - dramatic larger focal point
    a filler - smaller items to fill in the gaps
    a spiller - something trailing or hanging down
     

    Leftover Turkey Shepherd's Pie

    [heart_this] · Oct 12, 2021 · 3 Comments

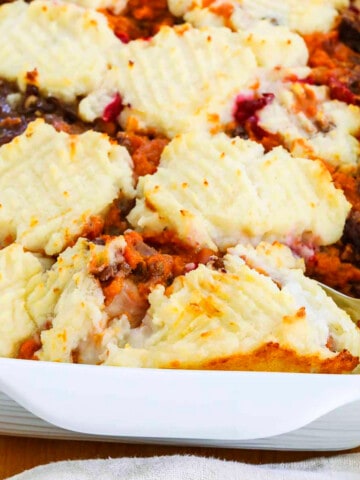
    A white dish filled with golden bubbly turkey shepherd's pie baked and ready to eat.

    Last Updated September 15th, 2023 at 10:12 am by Lisa

    After the holidays, try this leftover turkey recipe for shepherd's pie. Use turkey leftovers, stuffing, mashed potatoes, gravy, and more from Thanksgiving dinner or Christmas.

    Years and years ago, I had so many leftovers. I asked my Dad, "What am I going to do with all this food?" And he wisely said, "Well why don't you make a turkey shepherd's pie?"

    At first, it sounded weird, but then I thought hey that is a good idea. So I made one. Dad, this recipe is all yours, I give you full credit.

    As a matter of fact, it is a yearly tradition and a great freezer meal. Bake it up all golden and bubbly on a cold evening. This is fast comfort food to love...

    These are the turkey leftovers and fixings I had from Thanksgiving that went into this recipe...

    Why Everyone Will Love It

    • Well, what is a better reason than, it uses your leftovers?
    • Everyone loves comfort food.
    • No prep with this recipe, just layer leftovers and bake.
    • The sweet and savory layers just work. Trust me. And yes, even the cranberry sauce.
    • You will have a casserole in the freezer ready to go, with ZERO dinner prep!
    • Each bite is different. I put mashed potatoes on the top but you could even do Mac and Cheese or scalloped potatoes top. I mean why not?
    • No wasted leftovers, and they taste even better after a day or two.

    Thanksgiving Leftovers To Use Up...

    • Dressing or Stuffing
    • Turkey Try my easy Turkey Breast, Spatchcock Turkey, or Roast Turkey with a Dry Brine recipe!
    • Gravy
    • Cranberry Sauce
    • Cranberry Relish
    • Sweet Potato Casserole with marshmallow topping
    • Ruth's Chris Steak House Sweet Potato Casserole
    • Mashed Potatoes

    More Thanksgiving Leftover Recipes

    Mix it up and try different things for your Thanksgiving leftover casserole. Use what you have and what you made for the holidays. There really are no rules, you can layer so many different things in this shepherd's pie.

    Mashed potatoes are classic, but why not top with Mac and Cheese with a sprinkle of buttered breadcrumbs or panko? Or, try potato au gratin or scalloped potatoes, and sprinkle with cheese.

    You can layer roasted veggies, sprinkle fried corn or add some green bean casserole. Even if you don't have enough mashed potatoes to cover the top, just dollop them on and criss-cross with a fork for a beautiful pattern.

    • Roasted Butternut Squash or Acorn Squash
    • Scalloped Potatoes
    • Roasted Sweet Potatoes or Carrots
    • Green Bean Casserole
    • Potato Au Gratin
    • Roasted Potatoes
    • Cut Corn
    • Sauteed Mushrooms
    • Crumbled Cornbread
    • Mac and Cheese

    Turkey Shepherds Pie Instructions

    Preheat the oven to 400 degrees.

    Spray a 9x13 casserole dish with non-stick spray.

    For LAYER 1 Put stuffing in the bottom of the dish, which is about 2 cups.

    Next LAYER 2 Lay down 2 cups of leftover turkey pieces.

    On LAYER 3 Drizzle ½ cup gravy over the turkey.

    And then LAYER 4 Spoon ¼ cup of cranberry sauce all over.

    LAYER 5 Now dollop spoonfuls of sweet potato casserole all over the casserole.

    Finally LAYER 6 Place large spoonfuls of mashed potatoes on top, and press down with a fork. Dip the for in water to make a criss-cross pattern.

    Bake 45 minutes until mashed potatoes are turning golden brown and the casserole is heated all the way through. Serve hot.

    More Turkey Dinner Holiday & Christmas Recipes

    And for leftover turkey, try either my Empanadas, hand pies filled with holiday leftovers, or my Turkey Shepherds Casserole!

    Here are some other great recipes for the holidays, Thanksgiving, or Christmas. Make these Make-Ahead Mashed Potatoes with 5 Ways to Reheat them for your holiday party. And one of them is in your slow cooker with cream and melted butter!

    Sausage Dressing is the BEST holiday side also known as sausage stuffing, it has the best rich flavors! You can use hot and/or mild Italian sausage, cornbread, crunchy celery, soft French bread, sweet dried cherries, and tart dried cranberries. This dish takes traditional stuffing to a whole new level!

    A festive, easy, Christmas Tree Salad with a Cranberry Vinaigrette (made in a Mason jar) will be the talk of your holiday party. Shape this salad like a Christmas tree and decorate it with "garland, ornaments, and snow".

    This Sweet Potato Casserole recipe is Ruth Chris's Thanksgiving side dish made with pecan crumble topping, vanilla extract, and a bit of maple syrup.

    • A white casserole dish filled with mashed potatoes and squares of melted butter on top.
      Make-Ahead Mashed Potatoes
    • A white casserole dish filled with Sausage Stuffing baked to a golden brown.
      Sausage Stuffing Dressing
    • A salad shaped like a Christmas tree with red bell pepper garland, white apple stars and ornaments of nuts and fruit.
      Christmas Tree Salad
    • Lifting a scoop of sweet potato casserole out of a white casserole dish with large serving spoon.
      Sweet Potato Casserole (Ruth's Chris Recipe)

    More Thanksgiving Recipes

    Easier to roast than a whole Thanksgiving turkey, a Roast Turkey Breast easily goes well with any side dishes you choose and gives you leftovers!

    Make a Cranberry Orange Relish, and delight your friends and family. It has a light fresh taste, a little bit of a crunch, and less sugar than a traditional cranberry sauce. 

    Dinner Rolls is a pull-apart bread, people go crazy for these decorated with cheese and herbs are a party hit every time.

    For sweet potatoes, try either Coconut-Pecan Sweet Potatoes with little marshmallows or Sweet Potato Casserole with a crumble topping and 2 secret ingredients... SO good!

    This tropical Pineapple Orange Cranberry Sauce will be a great addition to take or serve at your holiday feast. It is made in a food processor in minutes, and so clean and refreshing with rich holiday dishes!

    • A gorgeous red and orange cranberry relish in a clear crystal bowl with a spoon.
      Cranberry Relish
    • A close up of baked Frozen Dinner Rolls topped with cheeses, herbs, and seasonings.
      Dinner Rolls
    • A silver server scooping up sweet potato casserole with golden toasted marshmallows on top out of a white casserole dish.
      Sweet Potato Casserole With Marshmallows
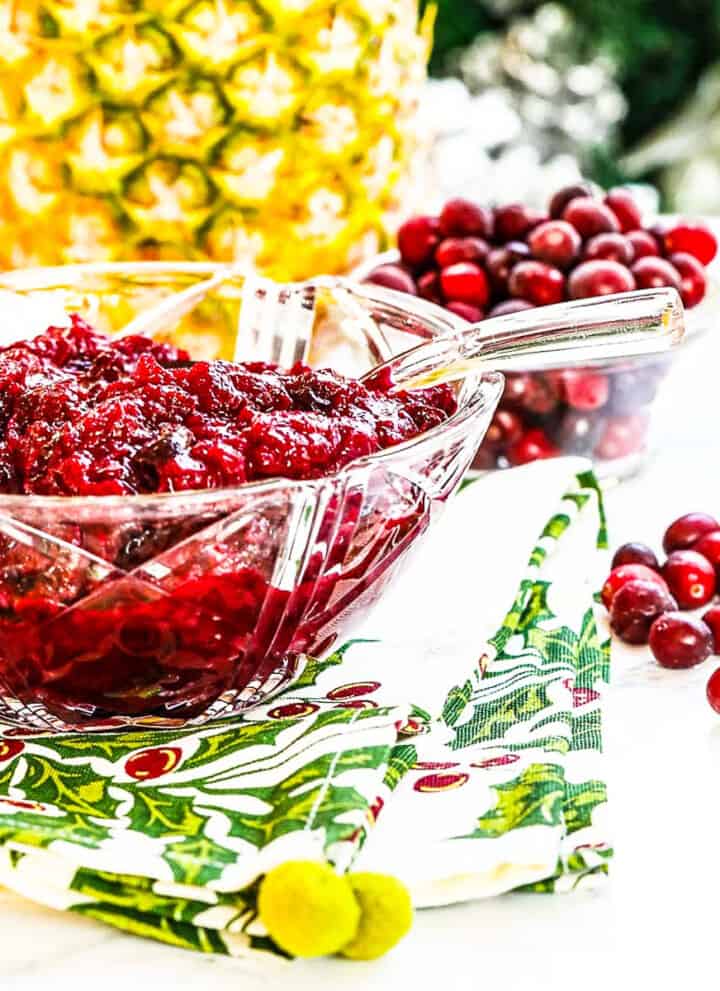
    • A crystal bowl filled with cranberry sauce with pineapple and cranberries in the background.
      Pineapple-Orange Cranberry Sauce

    Turkey Leftover Recipe: Empanadas

    Wondering what to do with your Thanksgiving leftovers? Make Turkey Empanadas also know as hand pies.

    Use Thanksgiving leftovers like turkey, ham, mashed potatoes, or stuffing baked into homemade or store-bought pie crust...

    Empanadas - Thanksgiving Leftover Recipe
    Empanadas made with Thanksgiving leftovers: Use Thanksgiving leftover turkey, ham, mashed potatoes or stuffing, gravy etc baked into homemade or store-bought pie crust. Freeze empanadas for easy weeknight meals!
    GET THE RECIPE PIN IT
    Golden brown baked empanadas decorated with pie crust leaves on a Fall tray.

    Did you love this recipe? We would love to hear from you! If you make this recipe and love it, give it a 5-star rating ⭐⭐⭐⭐⭐ with a comment. THANK YOU!! Follow Delicious Table with my free newsletter and share this recipe with your friends on Facebook, Pinterest, and Instagram.

    A white dish filled with golden bubbly turkey shepherd's pie baked and ready to eat.
    Print

    Turkey Leftover Recipe: Shepherd's Pie

    A leftover turkey recipe for shepherd's pie to use turkey leftovers, stuffing, mashed potatoes, gravy, and more from Thanksgiving dinner.
    Course Main Course
    Cuisine American
    Keyword leftover turkey recipe, Thanksgiving leftovers, turkey casserole
    Prep Time 10 minutes minutes
    Cook Time 45 minutes minutes
    Total Time 55 minutes minutes
    Servings 10
    Calories 207kcal
    Author Lisa Hatfield

    Equipment

    • Large Casserole Dish

    Ingredients

    • 2 cups stuffing
    • 2 cups turkey
    • ½ cup gravy
    • ¼ cup cranberry sauce
    • 2 cups sweet potato casserole
    • 2 cups mashed potatoes

    Instructions

    • Preheat the oven to 400 degrees.
    • Spray a 9x13 casserole dish with non-stick spray.
    • Layer 1: Place stuffing in the bottom of the dish, which is about 2 cups.
    • Layer 2: Next, lay 2 cups of leftover turkey pieces.
    • Layer 3: Now drizzle ½ cup gravy over the turkey.
    • Layer 4: Then spoon ¼ cup of cranberry sauce all over.
    • Layer 5: Now dollup spoonfuls of sweet potato casserole all over the casserole.
    • Layer 6: Place large spoonfuls of mashed potatoes on top, and press down with a fork. Dip the for in water to make a criss cross pattern.
    • Bake 45 minutes until mashed potatoes are turning golden brown and the casserole is heated all the way through. Serve hot.

    Video

    Notes

    freezer tips

    Wrap well with plastic wrap and then heavy aluminum foil. You will have a casserole in the freezer ready to go, with ZERO dinner prep!

    More Thanksgiving Leftovers & Ideas

    Mix it up and try different things for your Thanksgiving leftover casserole. Use what you have and what you made for the holidays. There really are no rules, you can layer so many different things in this shepherd's pie.
    Mashed potatoes are classic, but why not top with Mac and Cheese with a sprinkle of buttered breadcrumbs or panko? Or, try potato au gratin or scalloped potatoes, and sprinkle with cheese.
    You can layer roasted veggies, sprinkle fried corn or add some green bean casserole. Even if you don't have enough mashed potatoes to cover the top, just dollop them on and criss-cross with a fork for a beautiful pattern.
    • Roasted Butternut Squash or Acorn Squash
    • Scalloped Potatoes
    • Roasted Sweet Potatoes or Carrots
    • Green Bean Casserole
    • Potato Au Gratin
    • Cut Corn
    • Sauteed Mushrooms
    • Crumbled Cornbread
    • Mac and Cheese

    Nutrition

    Serving: 10g | Calories: 207kcal | Carbohydrates: 33g | Protein: 8g | Fat: 5g | Saturated Fat: 1g | Cholesterol: 15mg | Sodium: 303mg | Potassium: 472mg | Fiber: 4g | Sugar: 8g | Vitamin A: 10898IU | Vitamin C: 21mg | Calcium: 40mg | Iron: 1mg

    Thanksgiving Centerpieces

    [heart_this] · Oct 11, 2021 · 1 Comment

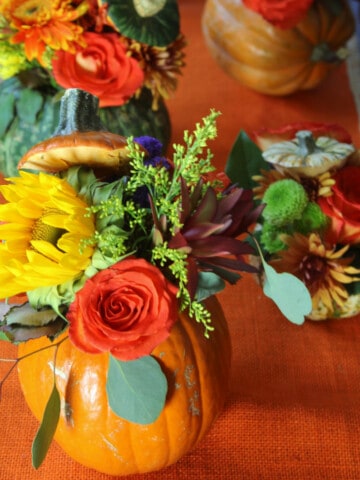
    An orange table runner with handmade orange pumpkins filled with fresh Fall flowers and greenery for Thanksgiving centerpieces.

    Pumpkin-filled Thanksgiving Centerpieces are gorgeous on your table using bright fall-colored squash, pumpkins, flowers, and greenery.

    The thing I love about this project is you can use pumpkins from Halloween in two ways.

    One is to use your pumpkins as vases for flowers. And second, the seeds are perfectly edible and easy to make Roasted Pumpkin Seeds for snacks or to sprinkle on a salad. Now that is a lot of bang for the buck for your decorations.

    When packing up leftovers for your guests to take home, give each family a centerpiece to enjoy...

    How to Make Thanksgiving Centerpieces

    For many years, our family Thanksgiving Table has been set with these fun Pumpkin Flower Centerpieces.  My Dad always loved this tradition, and each year would ask if I was going to do the flowers like last year, to which I always said yes.

    My Top Project Tips

    • Use pumpkins left from Halloween to use as your Thanksgiving table decorations.
    • Decide which way to use the pumpkin or squash as the "vase" so it sits flat on the table and doesn't roll or rock around.
    • Make the flower arrangements the day before your party and keep them either chilled in the fridge or a cool part of your home.
    • Refill the water in the oasis to keep the flowers hydrated.
    • Use flowers you can find locally, and look in your garden. You will have tons of things to clip and snip to use.
    • Buy just a few roses and use more inexpensive flowers and greenery.
    • Over the years, I have used some dried materials like wheat, fall leaves, and other dry floral pieces.
    • Buy different color and shaped pumpkins and squash, they all look so interesting together on the table.
    • What I love about these arrangements is they are fun, playful, and not too tall.
    • You can easily move these arrangements as the table fills, or place some over at the buffet or by the drinks.
    • You can add bows by tying pretty ribbon on skewer pieces, and stick into the arrangement.
    • My favorite tip is to give them to family, friends, and guests before they head home! They will not last more than a few days, so have them keep them on a plate and not on a delicate surface as they are natural and break down fast.

    Materials You Will Need

    Fall color flowers - 2 bunches or flowers/greenery from your garden.

    1 block floral oasis - for real flowers (to soak in water) from the craft store

    serrated knife

    garden clippers or scissors

    2-3 wooden skewers

    bucket with water to hold flowers while arranging and to soak the wet oasis

    5-6 pumpkins and squash: I used Sugar Pie Pumpkins, Kabocha Squash, Acorn Squash, and Mark's Stripe.

    More Flower Ideas: Have fun using different materials, you can even use your own garden clippings, flowers, and greenery.

    I like to use bright Fall colors, yellow-orange roses, daisies, sunflowers, eucalyptus, and greenery like lemon leaves.

    EB Farm's chart for more ideas

    Step 1: With Pumpkins you can cut the top off just like a jack-o-lantern, with the squash try laying them on their side and cutting a  hole in the top so the squash will sit firmly on the table and not tip over. Save the tops for later.

    Step 2: Scoop out all the pumpkin and squash seeds, and save them in a bowl. These make fantastic Roasted Pumpkin Seeds which are perfect as a snack or on a salad. You can freeze them for roasting later.

    A zip-top bag filled with clean pumpkin seeds to use later in a roast pumpkin seed recipe.

    Step 3: Cut the wet flower oasis (soaked in water) and place the pieces into the pumpkins and squash. Floral oasis cuts easily with any knife.

    Step 4: Cut flowers with shorter stems and push them down into the oasis. Try to use leaves to cover fill in the area so the green oasis is hidden. Have fun using different materials, you can even use your own garden clippings, flowers, and greenery. I like to use bright Fall colors, yellow-orange roses, daisies, sunflowers, eucalyptus, and greenery like lemon leaves.

    Step 5: With the tops of the pumpkins, push a small piece of the skewer into the underside of the top, and push down into the centerpiece to secure into the arrangement.

    Roasted Pumpkin Seeds Recipe ~ Low Carb Keto Snack Idea
    Save the seeds from Jack-o-lantern pumpkin carving! Roasted Pumpkin Seeds are great to top soups and sprinkle on salads. And they are a perfect low-carb keto snack idea. Roasting pumpkin seeds with buttery crunchy goodness is a simple recipe to make every Fall, and quite a fun tradition.
    GET THE RECIPE PIN IT
    A ceramic dish full of golden brown roast pumpkin seeds.
    A ceramic bowl filled with seasoned roast pumpkin seeds.

    Thanksgiving Dinner Recipes

    • Apple cider Fall sangria in glasses next to a real pumpkin with fruit and garnished with cinnamon sticks.
      Apple Cider Sangria
    • A round white dish of fresh baked caramel apple crisp with a large serving spoon for a Fall dessert.
      Caramel Apple Crisp
    • Thanksgiving dinner recipes on a table like a carved roast turkey on a platter, mashed potatoes, cranberry sauce, gravy, stuffing, and sweet potato casserole.
      50 Thanksgiving Dinner Recipes
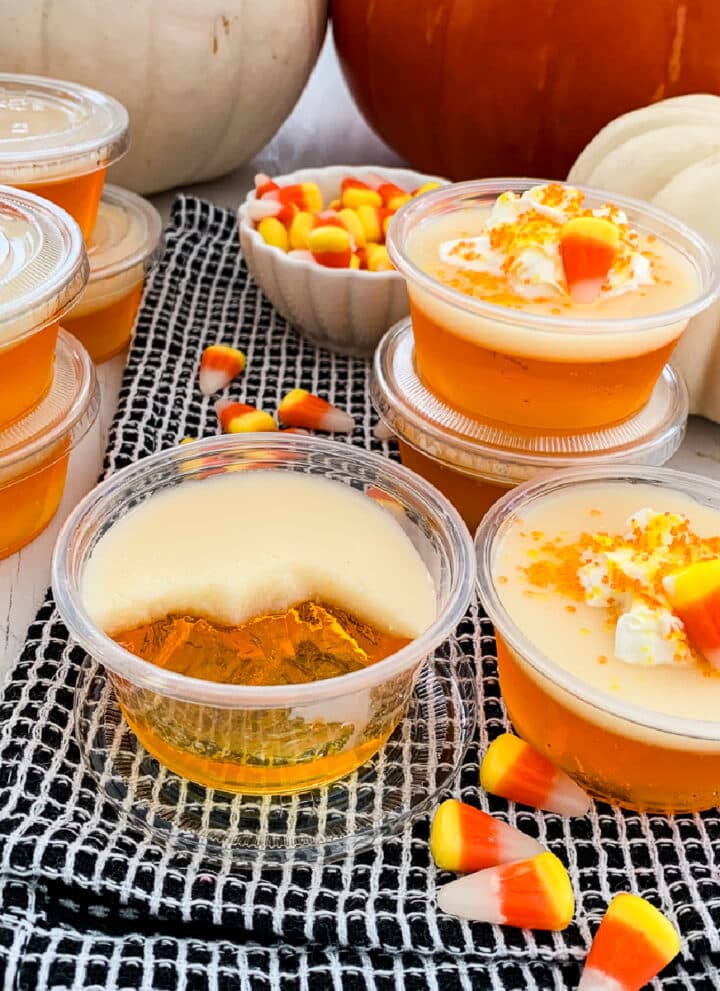
    • Close up of a candy corn Jello shot that is half sipped and others in plastic cups at a party with candy corn in the background.
      Candy Corn Jello Shots
    • A dark golden roast turkey with a white gravy boat pouring turkey gravy on top.
      Turkey Gravy
    • A large spoon holding a scoop of hot potato casserole serving it for dinner.
      Cheesy Potato Casserole
    • A small glass spice jar filled with pumpkin pie spice made at home.
      Pumpkin Pie Spice
    • A ceramic dish full of golden brown roast pumpkin seeds.
      Roasted Pumpkin Seeds

    Did you love this recipe? We would love to hear from you! If you make this recipe and love it, give it a 5-star rating ⭐⭐⭐⭐⭐ with a comment. THANK YOU!! Follow Delicious Table with my free newsletter and share this recipe with your friends on Facebook, Pinterest, and Instagram.

    A collage showing Thanksgiving centerpieces made with pumpkins and fresh flowers for Thanksgiving centerpieces.
    Print

    Fall & Thanksgiving Centerpieces

    Pumpkin-filled Thanksgiving Centerpieces are gorgeous on your table using bright fall-colored squash, pumpkins, flowers, and greenery.
    Keyword Fall centerpieces, pumpkins, Thanksgiving centerpieces
    Prep Time 0 minutes minutes
    Cook Time 1 hour hour
    Total Time 1 hour hour
    Servings 6
    Calories
    Author Lisa Hatfield
    Cost $30

    Equipment

    • Floral Oasis ~ Fresh Flowers
    • Felco Garden Pruner

    Ingredients

    • 1 bunches assorted Fall flowers
    • 1 block wet floral oasis soak in water
    • 1 knife serrated blade
    • 1 pair garden clippers or good scissors
    • 2-3 wooden skewers
    • 3-5 pumpkins Sugar Pie pumpkins
    • 3-5 squash Kabocha, Acorn, or Mark's Stripe

    Instructions

    floral oasis

    • Soak one brick of the flower oasis in a bucket of water. Push it down under water, and it will begin to soak it up.

    carve the pumpkins and squash vases

    • For the pumpkins, you can cut the top off just like a jack-o-lantern, save the tops. With the squash try laying them on their side to be sure they will sit firmly and not tip over, then cut a hole in the top so the squash, keep the lid.
    • Scoop out all the pumpkin and squash seeds, and save in a bowl.  These make fantastic Roasted Pumpkin Seeds which are a perfect snack or on a salad. You can wash and freeze extra seeds in zip-top bags for roasting later.
    • Save the tops of the pumpkins, and you can add these to the arrangements.
    • Push a small piece of the skewer into the pumpkin and squash tops and push down into the centerpiece to secure, this looks so cute!
    • Once the oasis is soaked, use a knife to slice it into pieces to fit into the pumpkin as you go. Place down into the pumpkins and squash.
    • Cut the flower stems shorter and push them down into the oasis one by one.  Keep trimming until they look nice and not too tall. Try to use leaves to cover fill in the area so the green oasis is hidden.
    • Have fun using different materials, you can even use your own garden clippings, flowers, and greenery. I like to use bright Fall colors, yellow-orange roses, daisies, sunflowers, eucalyptus, and greenery like lemon leaves.

    Notes

    My Top Project Tips
    • Use pumpkins left from Halloween to use as your Thanksgiving table decorations.
    • Decide which way to use the pumpkin or squash as the "vase" so it sits flat on the table and doesn't roll or rock around.
    • Make the flower arrangements the day before your party and keep them either chilled in the fridge or a cool part of your home.
    • Refill the water in the oasis to keep the flowers hydrated.
    • Use flowers you can find locally, and look in your garden. You will have tons of things to clip and snip to use.
    • Buy just a few roses and use more inexpensive flowers and greenery.
    • Over the years, I have used some dried materials like wheat, fall leaves, and other dry floral pieces.
    • Buy different color and shaped pumpkins and squash, they all look so interesting together on the table.
    • What I love about these arrangements is they are fun, playful, and not too tall.
    • You can easily move these arrangements as the table fills, or place some over at the buffet or by the drinks.
    • You can add bows by tying pretty ribbon on skewer pieces, and stick into the arrangement.
    • My favorite tip is to give them to family, friends, and guests before they head home! They will not last more than a few days, so have them keep them on a plate and not on a delicate surface.
    Turkey Breast Recipe

    [heart_this] · Oct 10, 2021 · 2 Comments

    Top down view of a roasted turkey breast sliced thick and garnished with fresh herbs.

    Last Updated April 25th, 2024 at 10:42 am by Lisa

    Turkey is easy using a boneless turkey breast and you will love this gravy recipe made from the pan drippings. Easier to roast than a whole Thanksgiving turkey, and easily goes well with any side dishes you choose.

    Dotted with herb butter, this keeps the roast tender and moist. Plus adds amazing flavor to the meat and gravy...

    Turkey Breast Recipe

    When choosing what Thanksgiving turkey to make, there are lots of things to consider. Most years, I make one classic bird we all know and love, but my insider secret is I prepare at least one boneless breast roast.

    I NEVER want to wake up the day after Thanksgiving without leftovers. That actually happened, and it was not good...

    • Super simple to roast and you can buy both white and dark meat roasts.
    • Cleanup and carving are a breeze, no mess or bones to deal with.
    • The herb butter flavors the boneless turkey roast.
    • Chicken Stock in the pan drippings make amazing herb-flavored gravy.
    • Make an extra boneless turkey breast for L-E-F-T-O-V-E-R-S!
    Herb Butter Recipe
    Herb Butter is fantastic melted on roasted vegetables, hot pasta, sizzling grilled steaks, warm baguettes, spread on tea sandwiches, or dinner rolls. Flavored butter is an easy condiment to create in your kitchen and will keep for weeks. And when dinner is ready, have it ready to slather on hot food and bread.
    GET THE RECIPE PIN IT
    Homemade herb butter wrapped in parchment paper on a cutting board with fresh herbs.

    How To Bake A Turkey Roast

    1. Plan ahead, and thaw your roast 1 ½ to 2 days ahead in the fridge. Place it in a small pan to catch any drips.
    2. Preheat the oven to 375 degrees.
    3. Unwrap from its package. IMPORTANT: Leave the netting on the turkey so it holds together. Dry off the surface well with paper towels, this helps the butter stick.
    4. In a small bowl, mix soft butter, chopped herbs, salt and pepper.
    5. Pull up the netting all around the boneless turkey roast. This makes it easier to remove after roasting and allows you to place the herb butter mixture on the turkey. Place 8 teaspoons of herb butter all over the surface of the roast under the netting.
    6. Set the roast in a small roasting pan with extra sprigs of herbs (sage, rosemary, and thyme), and pour about 2 cups of chicken stock in the bottom of the pan.
    7. Roast 375 for 1 hour and 45 minutes. The internal temperature will need to reach 165 degrees. Use a good instant-read meat thermometer.
    8. NOTE: Disregard the cooking instruction on the package, and I recommend tossing the gravy packet and making your own!

    Turkey Gravy

    1. Heat on medium-low. Add 1 cup pan drippings into a saute pan, remove large pieces of herbs.
    2. Mix ¼ cup soft butter with ¼ cup flour until smooth using a small spatula. This is your gravy thickener.
    3. Whisk pan drippings, add in chicken stock, white wine, salt, pepper, and add your butter/flour thickener. Bring to a boil; reduce heat and simmer, whisking constantly, until thickened, about 20 minutes.
    4. Serve warm in a gravy boat or cup with a spout.

    Recipes For Thanksgiving Sides

    • Make these Make-Ahead Mashed Potatoes with 5 Ways to Reheat them for your holiday party.
    • For more sides, you can't beat classics like Sweet Potato Casserole,  Coconut-Pecan Sweet Potatoes, Party Dinner Rolls, or Easy Cornbread Muffins.
    • Sausage Dressing is a meal by itself, with crumbled sausage, cornbread, and more.
    • A square white dish filled with colorful roasted vegetables and topped with squares of butter garnished with herbs.
      Vegetable Roasting
    • A white casserole dish filled with mashed potatoes and squares of melted butter on top.
      Make-Ahead Mashed Potatoes
    • Lifting a scoop of sweet potato casserole out of a white casserole dish with large serving spoon.
      Sweet Potato Casserole (Ruth's Chris Recipe)
    • A cornbread muffin in an orange muffin tin paper with a piece out of it and crumbs on the table.
      Cheddar Cheese Jalapeño Cornbread
    • A white casserole dish filled with Sausage Stuffing baked to a golden brown.
      Sausage Stuffing Dressing
    • A close up of baked Frozen Dinner Rolls topped with cheeses, herbs, and seasonings.
      Dinner Rolls
    • A silver server scooping up sweet potato casserole with golden toasted marshmallows on top out of a white casserole dish.
      Sweet Potato Casserole With Marshmallows
    • A crystal bowl filled with cranberry sauce with pineapple and cranberries in the background.
      Pineapple-Orange Cranberry Sauce
    What Is A Frozen Boneless Turkey Breast Roast?

    A boneless Turkey Roast has white and or dark meat (depending on the brand) and is easy to find in grocery stores. It is easily roasted in the oven and sliced once cooked, and is held together with a net during cooking.

    How To Thaw Boneless Turkey Roast

    Always, thaw in the refrigerator for food safety for 1 ½-2 days, set it in a small dish to catch any liquid.

    When Is Temperature Is Turkey Breast Roast Done?

    The internal temperature should reach 165 degrees in the very center of the boneless roast. Use a good meat thermometer.

    Try These Thanksgiving Recipes

    Here are some other recipes for Thanksgiving that you might enjoy...

    • Delicious Thanksgiving Appetizers and party snacks to make; Festive Holiday "Ornament" Cheese Balls, Spicy Pumpkin Pie Candied Pecans, Brie and Bacon Palmiers, Fall Snack Mix, or Roasted Pumpkin Seeds
    • Try this amazing Kahlua Pineapple Glazed Ham for your main course.
    • Here is a great fall drink idea! Fireball Cinnamon Apple Cider Fall Cocktails.
    • How about some amazing apple desserts? Apple Crumble Pie will have your guests raving.
    • A collection of Thanksgiving appetizers with recipe ideas, and party decorating tips for a Fall party.
      36 Thanksgiving Appetizers
    • A spiral baked ham on white platter with wedges of pineapple and sliced oranges.
      Kahlua Pineapple Glazed Ham
    • Fireball Whisky Cocktails with cinnamon sticks wrapped in orange peel for garnish.
      Fireball Whisky Cocktails
    • A white pie dish with a slice of apple crumble pie, also known as a dutch apple pie with a crumbled topping and green apples in the background in a wood bowl.
      Dutch Apple Pie

    Thanksgiving Turkey Leftover Recipes

    Wondering what to do with Thanksgiving leftovers? Make Thanksgiving Empanadas (Hand Pies)or bake a Leftover Casserole that is just like a Shephard's Pie...

    Turkey Leftover Recipe: Shepherd's Pie
    A leftover turkey recipe for shepherd's pie to use turkey leftovers, stuffing, mashed potatoes, gravy, and more from Thanksgiving dinner.
    GET THE RECIPE PIN IT
    A white dish filled with golden bubbly turkey shepherd's pie baked and ready to eat.
    Empanadas - Thanksgiving Leftover Recipe
    Empanadas made with Thanksgiving leftovers: Use Thanksgiving leftover turkey, ham, mashed potatoes or stuffing, gravy etc baked into homemade or store-bought pie crust. Freeze empanadas for easy weeknight meals!
    GET THE RECIPE PIN IT
    Golden brown baked empanadas decorated with pie crust leaves on a Fall tray.

    Did you love this recipe? We would love to hear from you! If you make this recipe and love it, give it a 5-star rating ⭐⭐⭐⭐⭐ with a comment. THANK YOU!! Follow Delicious Table with my free newsletter and share this recipe with your friends on Facebook, Pinterest, and Instagram.

    Top down view of a roasted turkey breast sliced thick and garnished with fresh herbs.
    Print

    Turkey Breast Recipe

    Turkey breast recipe using boneless turkey breast plus a gravy recipe from pan drippings. Easier to roast and carve for Thanksgiving turkey.
    Course Main Course
    Cuisine American
    Keyword thanksgiving dinner, thanksgiving turkey breast, turkey breast
    Prep Time 15 minutes minutes
    Cook Time 1 hour hour 45 minutes minutes
    Total Time 2 hours hours
    Servings 12
    Calories 497kcal
    Author Lisa Hatfield

    Equipment

    • Stainless Pan
    • Digital Meat Thermometer

    Ingredients

    • 3 pound boneless turkey roast

    herb butter

    • 1 tablespoons chopped herbs parsley, thyme, rosemary
    • ½ cup salted butter softened

    turkey gravy

    • 1 cup turkey pan drippings
    • 2 cups chicken stock
    • 2 tablespoons good white wine optional
    • ¼ teaspoon fresh cracker pepper
    • 1 teaspoon sea salt
    • 4 tablespoons salted butter
    • 4 tablespoons all-purpose flour

    Instructions

    • Plan ahead, and thaw your turkey roast 1 ½ to 2 days ahead in the fridge. Place it in a small pan to catch any drips.
    • Preheat the oven to 375 degrees.
    • Unwrap from its package. IMPORTANT: Leave the netting on the turkey so it holds together. Dry off the surface well with paper towels, this helps the butter stick.
    • In a small bowl, mix soft butter, chopped herbs, salt and pepper.
    • Pull up the netting all around the boneless roast. This makes it easier to remove after roasting and allows you to place the herb butter mixture on easier. Place 8 teaspoons of herb butter all over the surface of the turkey roast under the netting.
    • Set roast in a small roasting pan with extra sprigs of herbs (sage, rosemary, and thyme), and pour about 2 cups of chicken stock in the bottom of the pan.
    • Roast 375 for 1 hour and 45 minutes. The internal temperature will need to reach 165 degrees.
    • NOTE: Disregard the cooking instruction on the package, and I recommend tossing the gravy packet and making your own!

    make the gravy

    • Heat on medium-low. Add 1 cup turkey pan drippings into a saute pan, remove large pieces of herbs.
    • Mix ¼ cup soft butter with ¼ cup flour until smooth using a small spatula. This is your gravy thickener.
    • Whisk pan drippings, add in chicken stock, white wine, salt, pepper, and add your butter/flour thickener. Bring to a boil; reduce heat and simmer, whisking constantly, until thickened, about 20 minutes.
    • Slice into ½" thick slices, and serve with or pour gravy over turkey. Serve gravy warm in a gravy boat or cup with a spout on the side of the turkey.

    Video

    Notes

    thawing

    Always, thaw in the refrigerator for food safety for 1  ½-2 days, set it in a small dish to catch any liquid.

    frozen turkey roast

    If you don't have time to thaw the roast, this recipe will work, but you will be cooking it for 2 ½- 3 hours depending on your oven, so check it at every 30 minutes in the last hour of cooking, you are looking for an internal temperature of 165 degrees.

    boneless turkey breast

    A boneless Turkey Roast has white and or dark meat (depending on the brand) and is easy to find in grocery stores. It is easily roasted in the oven and sliced once cooked, and is held together with a net during cooking.

    turkey cooked temperature

    The internal temperature should reach 165 degrees in the very center of the boneless roast.

    Nutrition

    Serving: 6g | Calories: 497kcal | Carbohydrates: 8g | Protein: 53g | Fat: 28g | Saturated Fat: 16g | Cholesterol: 187mg | Sodium: 1228mg | Potassium: 674mg | Fiber: 1g | Sugar: 2g | Vitamin A: 769IU | Vitamin C: 1mg | Calcium: 41mg | Iron: 2mg

    Vegetable Roasting

    [heart_this] · Oct 8, 2021 · 3 Comments

    A square white dish filled with colorful roasted vegetables and topped with squares of butter garnished with herbs.

    Make perfectly roasted vegetables with these cooking tips and techniques. Plus get roasting times and ideas to use seasonal veggies.

    Vegetable side dishes work for dinner any day of the week or make a classic side dish for the holidays like Thanksgiving. Sheet pan roasted vegetables can be prepped ahead, and then roasted the day of your party.

    The possibilities are endless, but today we are doing a fall mix of veggies including sweet potato, butternut squash, rainbow carrots, and Brussel sprouts. These are the ones I serve on Thanksgiving, butter is of course optional...

    ⬆ Vegetable Roasting Video ⬆

    Why This Recipe Works

    • You can prepare these veggies a couple of days ahead, and it actually saves room in your fridge to pack them in ziptop bags.
    • Cut them all the same size so they all roast at the same time.
    • This recipe will serve a large number of people and ideal for a Thanksgiving feast or Christmas dinner.
    • Serve these veggies for a big family dinner, and the leftovers make a wonderful creamy vegetable soup!
    • Endless options of vegetables you can use, these are a colorful Fall mix.

    Here Is All You Need...

    Roasted Vegetables Recipe

    PRO TIP: You want to cut all the veggies into small similar-sized pieces about ½". This ensures they roast at the same time, and you don't get any mushy veggies.

    1) Wash and slice the baby carrots and Brussel sprouts. Cut the carrots into ½" pieces.

    2) Cut the Brussel sprout into quarters, peel any wilted leaves. PRO TIP: this makes them easier to roast and eat!

    3) Peel the sweet potatoes, and cut into small cubes about ½".

    4) Cut the top and bottom off the butternut squash. Using a peeler, remove the skin.

    1) Carefully cut the butternut squash in half, start on one end.

    2) Cut through the other end.

    3) Scoop out seeds and pulp with a large spoon, discard.

    4) Next slice into thick slabs.

    5) Cut slabs into ½" cubes.

    1. Spray a large sheet pan with nonstick spray, and spread the vegetables.
    2. Toss the cut vegetables in olive oil (or avocado, coconut or vegetable oil) sea salt, pepper, fresh thyme and rosemary. You can do this on the sheet pan, large bowl, or in a large zip-top bag, and keep refridgerated for a day or two until ready to roast.
    3. Preheat the oven to 400 degrees. Roast the vegetables for 30 minutes and then check them, give them a good stir.
    4. The veggies will be done after about 45 minutes if they are cut small into ½" pieces. If you cut them larger they could need a few more minutes till done. Take a bite of them to check if tender.
    5. Garnish with fresh herbs like thyme and parsley and you can add a couple of slices of butter.

    PRO TIP: darker sheet pans tend to roast and bake food quicker! I use an old dark-colored sheet pan when roasting veggies.

    PRO TIP: Spread out the veggies in a single layer on the sheet pan, so they roast and do not steam. You can even use two sheet pans.

    Make Ahead Tip

    One thing I love to do is get all my vegetables cut into the same size pieces and load them into zip-top bags. Then I add the olive oil, salt, pepper, balsamic vinegar, fresh thyme, and rosemary into the bags.

    Seal and toss, to mix. Then stash in the fridge overnight, you can even prep these a couple of days ahead.

    When ready to roast, pull out of the fridge about 30 minutes before roasting, place on a large sheet pan. And then roast away...

    What Size To Cut The Vegetables?

    One of the most important things is to cut the vegetables into small similar size pieces around ½" so they cook and roast evenly.

    What Oil To Use?

    Oil helps to roast and crisp up the veggies versus steaming them. Use an oil like:

    • olive oil
    • coconut oil
    • avocado oil
    • vegetable oil

    Vegetable Roasting Times At 425°

    The first tip is to cut the vegetables into small ½" pieces.

    Spread out on the sheet pan so they roast and don't steam.

    Coat them with the oil of your choice with seasoning.

    • potatoes 30-45 minutes
    • sweet potatoes 30-45 minutes
    • carrots 30-45 minutes
    • parsnips 30-45 minutes
    • tomatoes 15-20 minutes
    • Brussel sprouts (cut in half or quarters) 30-45 minutes
    • broccoli or cauliflower 20 minutes
    • zucchini and other summer squash 15-20 minutes
    • winter squash (acorn, butternut) 30-45 minutes if cut small
    • bell peppers and onions 25-45 minutes
    • asparagus and green beans 20 minutes
    Which Herbs For Roasted Vegetables?

    Fresh herbs add so much flavor to roasted vegetables. Classic herbs that work best are rosemary, basil, thyme, and parsley. Other options are chervil, tarragon, coriander, cumin, and dill.

    Can Roasted Vegetables Be Made The Day Before?


    Actually, they can! You can roast them till they are almost all soft, then reheat and they will be cooked perfectly and not go too soft.

    Can Roasted Vegetables Be Reheated?


    Yes, reheat them at 350 degrees on a sheet pan for 10 minutes.

    More Vegetable Side Dishes

    • Mashed Potatoes plus 5 ways to reheat them!
    • Smashed Potatoes are elegant and a perfect side for dinner.
    • Easiest Grilled Corn is my go-to for an easy grilling sided.
    • Fried Green Tomatoes are a Southern comfort food classic.
    • A white casserole dish filled with mashed potatoes and squares of melted butter on top.
      Make-Ahead Mashed Potatoes
    • A sheet pan of smashed potatoes with fresh herbs baked with crispy golden brown edges.
      Crispy Smashed Potatoes
    • Ears of grilled corn on a white platter seasoned with melted butter on top.
      Grilled Corn On The Cob

    More Thanksgiving Sides

    Here are some other recipes for Thanksgiving that you might enjoy:

    • Make these Make-Ahead Mashed Potatoes with 5 Ways to Reheat them for your holiday party.
    • Sausage Dressing is the BEST holiday side (also known as sausage stuffing), you can use hot and/or mild Italian sausage, cornbread, crunchy celery, soft French bread, sweet dried cherries, and tart dried cranberries!
    • Dinner Rolls is a pull-apart bread, people go crazy for these decorated with cheese and herbs are a party hit every time.
    • For your sweet potato side, try either Coconut-Pecan Sweet Potatoes with little marshmallows or Sweet Potato Casserole with a crumble topping and 2 secret ingredients... SO good!
    • This tropical Pineapple Orange Cranberry Sauce will be great additions to take or serve at your holiday feast.
    • A white casserole dish filled with Sausage Stuffing baked to a golden brown.
      Sausage Stuffing Dressing
    • A close up of baked Frozen Dinner Rolls topped with cheeses, herbs, and seasonings.
      Dinner Rolls
    • A silver server scooping up sweet potato casserole with golden toasted marshmallows on top out of a white casserole dish.
      Sweet Potato Casserole With Marshmallows
    • A crystal bowl filled with cranberry sauce with pineapple and cranberries in the background.
      Pineapple-Orange Cranberry Sauce

    Did you love this recipe? We would love to hear from you! If you make this recipe and love it, give it a 5-star rating ⭐⭐⭐⭐⭐ with a comment. THANK YOU!! Follow Delicious Table with my free newsletter and share this recipe with your friends on Facebook, Pinterest, and Instagram.

    A square white dish filled with colorful roasted vegetables and topped with squares of butter garnished with herbs.
    Print

    Roasting Vegetables: Roast Times, Tips & Ideas

    Make perfectly Roasted Vegetables with these cooking tips and techniques. Plus get vegetable roasting times and ideas to use seasonal veggies.
    Course Side Dishes & Vegetables
    Cuisine American
    Keyword roasted vegetables, vegetable side
    Prep Time 30 minutes minutes
    Cook Time 45 minutes minutes
    Total Time 1 hour hour 15 minutes minutes
    Servings 16
    Calories 71kcal
    Author Lisa Hatfield

    Equipment

    • Large Metal Sheet Pan
    • Chef Knife
    • Epicurean Non-Slip Cutting Board

    Ingredients

    • 12 ounces baby rainbow carrots
    • 1 medium sweet potato
    • 1 butternut squash
    • 2 cups Brussel sprouts
    • 1 tablespoon balsamic vinegar
    • 3 tablespoons extra virgin olive oil
    • 1 teaspoon sea salt
    • 1 teaspoon fresh cracked pepper
    • 1 tablespoon fresh thyme leaves off the stem
    • 1 tablespoon rosemary finely chopped

    Instructions

    prep the veggies

    • PRO TIP: You want to cut all the veggies into small similar sized pieces about ½".
    • Wash and slice the baby carrots and Brussel sprouts. Cut the carrots into ½" pieces and Remove any wilted leaves on the Brussel sprouts, and cut into quarters. PRO TIP: this makes them easier to eat!
    • Peel the sweet potatoes, and cut into small cubes about ½"
    • Cut the top and bottom off the butternut squash. Using a peeler, remove the skin. Next, carefully cut in half. Lay flat on the board face down, cut each half in half. Next slice into slabs and cut into ½" cubes.

    roasting the vegetables

    • Spray a large sheet pan with nonstick spray, and spread the vegetables. PRO TIP: darker sheet pans tend to roast and bake food quicker! I use an old dark colored sheet pan when roasting veggies.
    • Toss the cut vegetables in olive oil (or avocado, coconut or vegetable) sea salt, pepper, fresh thyme and rosemary. You can do this on the sheet pan, or in a large zip top bag, and keep refridgerated until ready to roast.
    • Preheat the oven to 400 degrees. Roast the vegetables for 30 minutes and then check them, give them a good stir.
    • The veggies will be done after 45 minutes if they are cut small into ½" pieces. If you cut them larger they could need a few more minutes till done. Take a bite of them to check if tender.
    • Garnish with more fresh herbs like thyme and parlsely and you can add a couple slices of butter.

    Video

    Notes

    leftovers:

    You can freeze extra leftover roasted vegetables, and make vegetable soup with them. Simply defrost, add chicken stock, and reheat in a pot on the stove. Blend with a stick blender, and add a splash of cream for a delicious soup!

    Brussel sprouts: 

    Cut the Brussel sprout into quarters, PRO TIP: this makes them easier to eat!

    herb options: 

    Fresh herbs add so much flavor to roasted vegetables. Classic herbs that work best are rosemary, basil, thyme, and parsley. Other options are chervil, tarragon, coriander, cumin, and dill.

    make and prep ahead tips:

    One thing I love to do is get all my vegetables cut into the same size pieces and load them into zip-top bags. Then I add the olive oil, salt, pepper, balsamic vinegar, fresh thyme, and rosemary into the bags.
    Seal and toss, to mix. Then stash in the fridge overnight, you can even prep these a couple of days ahead.
    When ready to roast, pull out of the fridge about 30 minutes before roasting, place on a large sheet pan. r
    You can also roast them till they are almost all soft, then reheat and they will be cooked perfectly and not go too soft. Simply reheat for 10 minutes at 350 degrees. 

    Nutrition

    Serving: 16g | Calories: 71kcal | Carbohydrates: 12g | Protein: 1g | Fat: 3g | Saturated Fat: 1g | Sodium: 175mg | Potassium: 311mg | Fiber: 3g | Sugar: 3g | Vitamin A: 10050IU | Vitamin C: 22mg | Calcium: 44mg | Iron: 1mg

    Pineapple-Orange Cranberry Sauce

    [heart_this] · Sep 30, 2021 · 3 Comments

    A crystal bowl filled with cranberry sauce with pineapple and cranberries in the background.

    Last Updated January 2nd, 2023 at 06:19 pm by Lisa

    For a tropical twist on Cranberry Sauce, this recipe has fresh pineapple and oranges adding a balanced sweetness and much less sugar than traditional recipes.

    Plus, there are 10 creative ways to use your leftover sauce, because we always seem to have some tucked in the fridge after the holidays, right?

    With only 4 simple ingredients, this easy holiday recipe always gets glowing comments at the holiday table for Christmas or as a Thanksgiving side dish. And the fresh orange and pineapple fruit add a wonderful island vibe to this gorgeous cranberry sauce recipe...

    Why This Recipe Works

    • THE RIGHT SWEETNESS: Traditional cranberry sauce can be a bit tart, almost bitter, and or very sweet. Many recipe call for a cup of sugar, some honey, maple syrup, crystalized ginger, and brown sugar. My theory is that those ingredients taste too sweet. And just maybe that's why some people don't like homemade cranberry sauce.
    • TROPICAL TWIST: Most recipes call for around 1 cup of sugar! That is a lot of calories, and this recipe has just ¼ cup because the fresh pineapple adds just the right taste balance to the tart cranberries. Plus the orange juice and zest balance out the tart cranberries and add great citrus flavor.
    • SIMPLE INGREDIENTS: Only 4 ingredients, simple yet so different!!
    • MAKE AHEAD: Make it ahead of time, it holds well in the fridge for up to two days before serving in an airtight container.
    • FROZEN OR FRESH BERRIES: Either frozen or fresh cranberries will work for this recipe. Pull the cranberries from the freezer about an hour before making this recipe to allow them to thaw before cooking.

    Cranberry Sauce Recipe

    Much like a traditional cranberry sauce recipe, this recipe is simple, easy, and requires minimal ingredients.

    • fresh (or frozen) cranberries
    • fresh pineapple (canned is fine too!) and juice
    • orange juice and orange peel zest
    • granulated white sugar

    Optional variations: add chopped pecans, apple, pear, dried mixed fruit, more orange zest, blood oranges, raisins, currants, ground cinnamon, a cinnamon stick, ground nutmeg, or ground allspice.

    Step 1: Combine the cranberries, pineapple plus any juice, sugar, and 3 oranges zested and juiced in a medium saucepan or pot.

    Step 2: Bring up to a simmer over medium to medium-high heat and cook for 15 minutes. Stir every 3-5 minutes. Turn the heat down if it is cooking too fast. Once it thickens, and half the cranberries have popped, stop cooking.

    To serve: Let cool completely before serving, it will set up a bit as it cools down.

    A clear glass bowl filled with pineapple cranberry orange sauce surrounded by fresh cranberries.

    10+ Ways to Use Leftovers

    There is a 100% chance you will have extra sauce this year in your home, so let's get creative and try some new ways to use it.

    Its tart-sweet flavor is so versatile and complements a wide variety of dishes. Besides slathering it on Here are a few ideas.

    1. Mix with plain Greek yogurt for breakfast
    2. Mix into a cranberry vinaigrette salad dressing
    3. Make cranberry compound butter for toast or bagels
    4. Use it as a glaze for chicken or meatloaf
    5. Mix into soft cream cheese and spread on bagels
    6. Pour over waffles and pancakes
    7. Make cranberry-baked brie
    8. Make a grilled brie cheese and cranberry sandwich
    9. Make cranberry parfaits
    10. Mix into soft vanilla ice cream
    11. Toast dinner rolls spread some brie cheese on, and add turkey, dressing, and cranberry sauce for the best leftover turkey sandwiches!

    You can also use some in my Christmas Tree Salad + Cranberry Vinaigrette recipe. Or add it to Thanksgiving Leftover Empanadas!

    Cranberry FAQ

    How long does cranberry sauce last?


    Cranberry sauce lasts up to two weeks refrigerated in an airtight container.

    Where did cranberries come from?


    Cranberries are one of the few fruits both native to the US and as early as the 17th century. Cranberry sauce was first sold in the U.S. in 1912.

    Ocean Spray created the "wet harvesting" process where the farmers are waist-deep of water and cranberries in the bog which is flooded with up to 18 inches of water the night before the berries are to be harvested.

    The growers then use water reels, nicknamed “eggbeaters,” to churn the water and loosen the cranberries from the vine. Each berry has tiny pockets of air that allow the berries to float to the surface of the water.

    When is cranberry sauce most popular?

    Cranberry sauce is the most popular in the U.S. and Canada for Thanksgiving. In the United Kingdom, it's most popular for Christmas.

    There are differences, U.K. recipes are typically sour and not as sweet as U.S. recipes which are typically heavily sweetened with sugar.

    More Cranberry Recipes

    The holiday season is filled with big meals and rich heavy food. Let your palate take a welcomed break with a few bites of a Fresh Cranberry Relish along with your Thanksgiving turkey, stuffing, mashed potatoes, and gravy.

    All these recipes use cranberries in creative ways. If you have leftover sauce, use it up in a Thanksgiving Leftover Casserole. It is delicious next to all the savory items left over from the holidays. Toss some into a Cranberry Vinaigrette Dressing, on a Christmas Tree Salad, that's right, and it's made in minutes!

    Sausage Stuffing is a classic holiday side dish loaded with so much flavor! Choose to make it with a spicier or a mild sweet Italian sausage. It also has boxed cornbread, crunchy celery, soft French bread, sweet dried cherries, and tart dried cranberries all mixed into one heavenly dressing recipe.

    Make adorable Cranberry, Blue Cheese, & Pecan Cheese Balls that look like ornaments for your next holiday party! During the Christmas season, it is great to have a non-alcoholic Christmas Punch along with holiday cocktails. Serve a few appetizers, and the party is on. But you need one delicious holiday party drink without booze!

    • A gorgeous red and orange cranberry relish in a clear crystal bowl with a spoon.
      Cranberry Relish
    • A white dish filled with golden bubbly turkey shepherd's pie baked and ready to eat.
      Leftover Turkey Shepherd's Pie
    • A salad shaped like a Christmas tree with red bell pepper garland, white apple stars and ornaments of nuts and fruit.
      Christmas Tree Salad
    • A white casserole dish filled with Sausage Stuffing baked to a golden brown.
      Sausage Stuffing Dressing
    • 4 cheese balls shaped round and topped with curly bows and ornament hooks to serve as Christmas appetizers.
      4 Cheese Ball Recipes
    • A big glass beverage container filled with holiday Christmas Punch.
      Christmas Punch

    Did you love this recipe? We would love to hear from you! If you make this recipe and love it, give it a 5-star rating ⭐⭐⭐⭐⭐ with a comment. THANK YOU!! Follow Delicious Table with my free newsletter and share this recipe with your friends on Facebook, Pinterest, and Instagram.

    A crystal bowl filled with cranberry sauce with pineapple and cranberries in the background.
    Print

    Pineapple-Orange Cranberry Sauce ~ Plus 10+ Clever Uses Of Leftovers!

    Pineapple-Orange Cranberry Sauce has 4 ingredients, and has a wonderfully balanced sweetness with oranges and pineapple, plus 10 ways to use leftover sauce during the holidays! This easy holiday recipe always gets glowing comments at the holiday table for Christmas or as a Thanksgiving side dish. And the fresh orange and pineapple fruit add a wonderful island vibe to this gorgeous cranberry sauce recipe.
    Course Sauces, Marinades, & Condiments
    Cuisine American
    Keyword cranberry recipe, cranberry sauce, cranberry sauce recipes, thanksgiving recipe, Thanksgiving side dish
    Prep Time 10 minutes minutes
    Cook Time 15 minutes minutes
    Total Time 25 minutes minutes
    Servings 12
    Calories 51kcal
    Author Lisa Hatfield

    Equipment

    • Classic Citrus Zester
    • Lemon/Lime Juicer

    Ingredients

    • 12 oz fresh cranberries
    • 1 cup fresh pineapple and juice (fresh or canned)
    • 3 oranges - zest and juice
    • ¼ cup granulated sugar
    US Customary - Metric

    Instructions

    prep pineapple and oranges

    • Use canned or fresh pineapple, chop 1 cup of pineapple and juice liquid. Set aside.
    • Wash the oranges in cool water, zest the 3 oranges into a small bowl, then juice the 3 oranges. Set aside.

    cook the cranberry sauce

    • Combine the cranberries, pineapple plus any juice, sugar, and zest of 3 oranges and juice in a medium saucepan or pot. Bring up to a simmer over medium-high heat and cook for 15 minutes. Stir every 3-5 minutes. Turn your heat down, if is cooking too fast. You will see the cranberries pop in the pan as it cooks, but you don't want it to boil.
    • Stir every 3-5 minutes. Turn the heat down if it is cooking too fast. Once it thickens, and half the cranberries have popped, stop cooking.
    • MAKE AHEAD: You can prepare ahead and store in an airtight container in the refrigerator for up to a week ahead.
    • SERVING: Let cool completely before serving, it will set up more when chilled. Place into a pretty serving bowl, and it is safe at room temperature for two hours.

    Video

    Notes

    10+ Ways to Use Leftovers

    There is a 100% chance you will have extra sauce this year in your home, so let's get creative and try some new ways to use it.
    Its tart-sweet flavor is so versatile and complements a wide variety of dishes. Besides slathering it on Here are a few ideas.
    1. Mix with plain Greek yogurt for breakfast
    2. Mix into a cranberry vinaigrette salad dressing
    3. Make cranberry compound butter for toast or bagels
    4. Use it as a glaze for chicken or meatloaf
    5. Mix into soft cream cheese and spread on bagels
    6. Pour over waffles and pancakes
    7. Make cranberry-baked brie
    8. Make a grilled brie cheese and cranberry sandwich
    9. Make yogurt cranberry parfaits
    10. Mix into soft vanilla ice cream
    11. Toast dinner rolls spread some brie cheese on, and add turkey, dressing, and cranberry sauce for the best leftover turkey sandwiches!
    You can also use some in my Christmas Tree Salad + Cranberry Vinaigrette recipe. Or add it to Thanksgiving Leftover Empanadas or my Leftover Turkey Thanksgiving Shepherd's Casserole!

    Storage

    Cranberry sauce lasts two weeks refrigerated.

    Variations

    • Add chopped pecans, apple, pear, dried mixed fruit, blood oranges, raisins, currants, cinnamon, and a cinnamon stick for flavoring (and remove before serving) ground nutmeg, or ground allspice.

    Nutrition

    Serving: 18g | Calories: 51kcal | Carbohydrates: 13g | Protein: 1g | Fat: 1g | Saturated Fat: 1g | Sodium: 1mg | Potassium: 98mg | Fiber: 2g | Sugar: 10g | Vitamin A: 99IU | Vitamin C: 28mg | Calcium: 17mg | Iron: 1mg

    Buttercream Chocolate Frosting

    [heart_this] · Sep 27, 2021 · 1 Comment

    A chocolate cupcake with swirled chocolate buttercream frosting and sprinkles on a small stand.

    Chocolate Frosting (also called buttercream chocolate frosting) is ideal for cupcakes and cake decorating. This chocolate buttercream spreads so beautifully, holds its shape, and tastes amazing on desserts.

    Once you make your own, it is hard to justify buying it at a store. The cost is high, and it's never "fluffy" out of the can. Take the time to up your baking game, you will be licking the spoon...

    ⬆ Chocolate Buttercream Video Tutorial ⬆

    What You Will Need

    Mix Chocolate Frosting

    1. Beat soft butter and shortening in a mixer on high until creamy for 5 minutes.
    2. At low speed, add powder sugar 1 cup at a time until smooth.
    3. On high speed, mix in vanilla extract, almond extract, and hot water for 5 minutes until fluffy and smooth.
    4. Add 1 cup cocoa powder and mix untill fluffy. You can add more hot water to smooth out the consistency, just add it slowly a tablespoon at a time.

    Top Cake Frosting Tips

    • butter - use a hight quality salted butter, and use it at room temperature. This helps makes it fluffy and smooth.
    • shortening - yes, I know. The stuff our Moms and Grandmothers baked with. Trust me, the is what makes the frosting smooth, fluffy, and holds its shape.
    • powder sugar - Also called confectioners sugar, this recipe calls for 10 cups which sounds ridiculous! But it melts down into as you whip it in the mixer.
    • vanilla extract - this adds flavor, I used 2 tablespoons, and it works so well with the cocoa.
    • almond extract - I know..it sounds strange to add another extract. I heard about this in buttercream recipes, and once I tested it, was hooked. My white cake frosting also uses almond extract and it is so tasty.
    • unsweetened cocoa - it wouldn't be chocolate cake frosting without cocoa. Buy a good quality unsweetened cocoa.

    PRO TIP: This frosting holds great at room temperature and covers cakes beautifully. If you freeze it, it is spreadable within an hour or so of defrosting. Simple place in a bowl and re-whip.

    More Cake Recipes

    Bake a spooky Halloween Cake (9 x 13 sheet cake) marbled inside, has chocolate frosting, and step-by-step decorating tips and ideas.

    Make this Flag Cake July 4th dessert for your cookout or picnic, you can bake the cake the night before and decorate it a day before your party or have guests do the honors. It has a super fluffy white Cake Frosting that is my go-to for cake decorating. ⬇

    Fluffy Buttercream "Bakery-Style" Frosting
    Frosting that is not-too-sweet, fluffy, and so spreadable. A "bakery-style" vanilla buttercream frosting that mixes together in minutes and holds its shape on any dessert like cakes or cupcakes.
    GET THE RECIPE PIN IT
    A red bowl with fluffy vanilla frosting ready to frost a cake.

    This Strawberry Cake recipe has strawberries baked in the cake and strawberry preserves in the buttercream and is a deliciously natural dessert...

    What an adorable Easter Bunny Cake, it is made from two round cakes, vanilla frosting, and decorated with candy...

    • A chocolate Halloween Cake with gate, fence, tree and tombstones.
      Halloween Cake
    • An American flag cake decorated with blueberries, raspberries, and white frosting with a patriotic star towel.
      American Flag July 4th Cake
    • A freshly baked and decorated strawberry cake with real strawberries as decorations.
      Fresh Strawberry Cake
    • An adorable bunny cake on a hot pink background surrounded with jelly beans.
      Easter Bunny Cake

    Did you love this recipe? We would love to hear from you! If you make this recipe and love it, give it a 5-star rating ⭐⭐⭐⭐⭐ with a comment. THANK YOU!! Follow Delicious Table with my free newsletter and share this recipe with your friends on Facebook, Pinterest, and Instagram.

    A chocolate cupcake with swirled chocolate buttercream frosting and sprinkles on a small stand.
    Print

    Buttercream Chocolate Frosting

    Chocolate Frosting (aka buttercream chocolate frosting) spreads beautifully for cake decorating, holds its shape, and tastes amazing.
    Course Dessert
    Cuisine American
    Keyword chocolate buttercream, chocolate cake frosting, chocolate frosting
    Prep Time 5 minutes minutes
    Cook Time 0 minutes minutes
    Total Time 15 minutes minutes
    Servings 36
    Calories 141kcal
    Author Lisa Hatfield

    Equipment

    • KitchenAid Mixer
    • Offset Icing Spatula
    • Large Reusable Piping Bag
    • Large Star Piping Tip (1M)

    Ingredients

    cake frosting

    • 1 cup salted butter (2 sticks, room temperature)
    • ½ cup vegetable shortening
    • 5 cups powder sugar (confectioners sugar)
    • ½ cup hot water
    • 2 teaspoons vanilla extract
    • ¼ teaspoon almond extract
    • 1 cup unsweetened cocoa

    Instructions

    make frosting

    • Beat soft butter and shortening in a mixer on high until creamy for 5 minutes.
    • At low speed, add powder sugar 1 cup at a time until smooth.
    • On high speed, mix in vanilla, almond extract, and ½ cup hot water for 5 minutes until fluffy and smooth. You can add more hot water 1 tablespoon at a time, till the frosting mixes fluffy and smooth. Dry hot days, will make it not as smooth.

    cake decorating tips

    • Place a dollup of frosting on a small piece of cardboard or a tray, and set the cake on top. This keeps the cake from sliding around while decorating.
    • Frost cakes using a small offset spatula. Smooth out the buttercream as best you can all over the top and sides of the cake. This recipe is so easy to spread, you won't have to clean your spatula while decorating.
    • To fill a large piping bag with frosting, set the bag in a tall sturdy mason jar glass. Push the chocolate buttercream down inside, then when ¾ full push the it inside the bag toward the tip. Fold the top down and decorate your cake.

    Video

    Notes

    frosting

    This frosting recipe is SOOO fluffy and easy to spread at room temperature. But it firms up nicely when chilled in the fridge, so decorate your cake with room temperature frosting. You can freeze any leftover frosting, and use it for another dessert.
    For larger cakes or ones with layers, you will want to double this recipe.

    decorating

    A small offset spatula makes it really easy, but you can use a butter knife too. 
     

    Nutrition

    Calories: 141kcal | Carbohydrates: 18g | Protein: 1g | Fat: 8g | Saturated Fat: 4g | Polyunsaturated Fat: 1g | Monounsaturated Fat: 3g | Trans Fat: 1g | Cholesterol: 14mg | Sodium: 46mg | Potassium: 39mg | Fiber: 1g | Sugar: 16g | Vitamin A: 158IU | Calcium: 5mg | Iron: 1mg

    Sun Dried Tomato Butter

    [heart_this] · Jul 10, 2021 · 3 Comments

    A glass bowl filled with compound butter made with herbs and sun dried tomatoes, and them scattered on the cutting board.

    Last Updated April 21st, 2023 at 04:45 pm by Lisa

    Sun-Dried Tomato Butter is amazing on hot pasta, roasted vegetables, sandwiches, sizzling grilled steak, or oven warmed baguettes and dinner rolls.

    Homemade condiments like compound butter really elevate your cooking. I combined my Herb Butter and Sun Dried Tomato recipes, and have so many ways to slather this yummy tomato butter into your dishes...

    ⬆ Sun Dried Tomato Butter Video ⬆

    Compound Herb Butter Top Tips

    It’s very easy to make fresh herb butter or compound butter at home.

    • Pro Tip: Use a clean sharp pair of kitchen scissors to cut the herbs in a jar or cup instead of with a knife and a cutting board. (see below for more).
    • Pick a high-quality brand of fresh butter, I recommend salted butter but unsalted works fine.
    • Let the butter soften to room temperature for a couple of hours.  PRO TIP: The butter should be very soft and easy to mix, cut into small cubes to soften faster.
    • Fresh herbs work best, you can clean them underwater and allow them to air dry for several hours prior to chopping.
    • Both dried and fresh herbs may be used to season the butter, but I think fresh herbs make it extra flavorful and beautiful!

    How To Make Sun Dried Tomatoes

    • You can buy or make Sun-Dried Tomatoes at home in the oven or by using a food dehydrator.
    • Most people will prefer to make these at home in the oven, it goes faster, but if you have a food dehydrator that is a great option as well.
    A small clear jar holding sun dried tomatoes with a label and them sprinkled on a table.

    You Need...

    • 2 pounds small mixed tomatoes or Roma tomatoes
    • 1 teaspoon sea salt
    • 1 tablespoon Italian Seasoning (optional)

    Oven Dehydrator Method

    1. Line metal baking sheets with parchment paper. Don't place directly on the metal or use foil which can react with the tomatoes.
    2. Preheat the oven to 225 degrees.
    3. Wash and slice the small tomatoes ¼" thick slices, the thinner the faster they will dry out. You can cut them round or the long ways into different shapes you like!
    4. Arrange cut side up on a baking sheet. Optional: sprinkle very lightly with sea salt and or Italian seasoning. I highly recommend sprinkling sea salt and Italian seasoning on them, it makes them spectacular.
    5. At 2 hours rotate your pans in the oven, this helps distribute the heat evenly on your sun-dried tomatoes.
    6. Return to the oven and bake for at least 2 more hours, until tomatoes are "dry and leathery". My top sheet pan was done in 2:45 minutes but the bottom pan was 3 hours 15 minutes.
    How To Make Sun Dried Tomatoes
    Preserve your tomato bounty this Summer! And master how to make Sun Dried Tomatoes with any kind of tomato variety. You can do this in either your home oven or in an inexpensive food dehydrator! Sundried tomatoes are a tasty snack. And add a punch of flavor into cozy beef stews, Italian tuna salad wraps, cold pasta salads, creamy pasta dinners, and so many other recipes. There are 20+ ideas for you to try! The pop of color is so gorgeous, and nothing from a package or jar will taste as sweet and "tomatoey" as this garden candy!
    GET THE RECIPE PIN IT
    A small clear jar filled with sun dried tomatoes on a table with scattered dried tomatoes all around the table.

    Ways To Use Sun Dried Tomato Butter

    • Spread on any warm loaf of bread or hot dinner rolls
    • Add to sizzling grilled steaks
    • Melt into hot pasta
    • Melt slices on grilled, roasted, or baked potatoes
    • Try on shrimp or grilled salmon
    • Incredible on Mashed Potatoes
    • Great on Grilled Corn
    How To Store Compound Butter


    Once the compound butter is made, it can be stored in a small covered container, wrapped in plastic wrap, or in parchment paper, and chilled until it is firm enough to be sliced.

    More Flavored Butter

    Herb Butter Recipe
    Herb Butter is fantastic melted on roasted vegetables, hot pasta, sizzling grilled steaks, warm baguettes, spread on tea sandwiches, or dinner rolls. Flavored butter is an easy condiment to create in your kitchen and will keep for weeks. And when dinner is ready, have it ready to slather on hot food and bread.
    GET THE RECIPE PIN IT
    Homemade herb butter wrapped in parchment paper on a cutting board with fresh herbs.
    Lemon-Dill Butter
    Make Lemon Dill Compound Butter and melt on grilled salmon and vegetables like asparagus. Stores great in the freezer for months!
    GET THE RECIPE PIN IT
    Small brown round cutting board with slices of lemon dill butter garnished with fresh lemon and dill.

    Did you love this recipe? We would love to hear from you! If you make this recipe and love it, give it a 5-star rating ⭐⭐⭐⭐⭐ with a comment. THANK YOU!! Follow Delicious Table with my free newsletter and share this recipe with your friends on Facebook, Pinterest, and Instagram.

    A glass bowl filled with compound butter made with herbs and sun dried tomatoes, and them scattered on the cutting board.
    Print

    Sun Dried Tomato Butter (Compound Butter)

    Sun Dried Tomato Butter is amazing on hot pasta, roasted vegetables, sizzling grilled steak, or oven warmed baguettes and dinner rolls.
    Course Sauces, Marinades, & Condiments
    Cuisine American
    Keyword compound butter, compound herb butter, herb butter
    Prep Time 20 minutes minutes
    Total Time 20 minutes minutes
    Servings 12
    Calories 73kcal
    Author Lisa Hatfield

    Equipment

    • Global Kitchen Scissors
    • Parchment Paper Sheets
    • Glass Prep Bowls

    Ingredients

    • 4 tablespoons sun dried tomatoes finely chopped
    • ½ cup butter soften at room temperature
    • ¼ cup fresh herbs minced rosemary, parsley, thyme, basil
    • ½ teaspoon sea salt optional if using salted butter
    • 1 teaspoon fresh cracked pepper
    • other herbs to try! sage, dill, chives, tarragon, oregano, or green onions
    US Customary - Metric

    Instructions

    • Leave the butter out at room temperature for a few hours to soften. PRO TIP: cut the cube into little cubes and it will soften faster.
    • Snip fresh herbs and sun dried tomatoes in a small mug or glass jar with clean kitchen scissors until the herbs and tomatoes are finely minced.
    • Mix soft butter, ¼ cup finely chopped herbs and sun dried tomatoes, ½ teaspoon sea salt and 1 teaspoon fresh cracked pepper, in a small bowl with a spatula.
    • Place your sun dried tomato butter in a small sealed container with a lid, it will keep in the fridge for a week. Or place on parchment paper in a log shape, roll and twist ends closed-keep in fridge or freeze for longer storage.

    Video

    Notes

    storage options

    Place on plastic wrap or parchment paper in a log shape, roll, and twist ends closed. Place in a ziptop bag, and freeze for up to 2 months. 
    OR Place your compound butter in a small sealed container with a lid, it will keep in the fridge for about 2 weeks. 

    sun dried tomato butter uses

    • Melt on hot pasta
    • Try it on toasted bread, steak, fish, or vegetables.
    • Great to slice off on a sizzling hot steak
    • Rub under the skin of your turkey or chicken before roasting. The butter flavors the poultry and keeps it moist while helping to crisp the skin of the chicken or roasted turkey. 

    leftover herbs

    Once you snip your herbs in the jar if you have extra, simply screw on the lid and use the herbs up in other dishes or salads. They stay fresh for a few days!

    butter

    I have always used salted butter for my compound butters, but unsalted works just fine. You can leave out the salt if you wish. 

    Nutrition

    Serving: 12g | Calories: 73kcal | Carbohydrates: 1g | Protein: 1g | Fat: 8g | Saturated Fat: 5g | Polyunsaturated Fat: 1g | Monounsaturated Fat: 2g | Trans Fat: 1g | Cholesterol: 20mg | Sodium: 169mg | Potassium: 63mg | Fiber: 1g | Sugar: 1g | Vitamin A: 278IU | Vitamin C: 1mg | Calcium: 6mg | Iron: 1mg

    Slow Cooker Pulled Pork

    [heart_this] · Jul 2, 2021 · 1 Comment

    Red white check paper lined basked holding a pulled pork sandwich topped with coleslaw.

    Last Updated April 9th, 2024 at 10:23 am by Lisa

    Slow Cooker Pulled Pork made with pork loin is so juicy, top with coleslaw, pickle chips, and tangy BBQ sauce all on a golden bun.

    You can serve it with Cowboy Baked Beans, Potato Salad, or Macaroni Salad for dinner, BBQ cookouts, or summer gatherings.

    Years ago I wanted to make pulled pork sandwiches without the fatty bits and gristle of a traditional pork butt, so I tried loin and it worked beautifully. I really prefer this cut over some of the other heavier cuts, it has all the deep flavor and works great in a slow cooker...

    Let's Make It!

    • 5 pounds pork loin roast
    • ¼ cup BBQ rub
    • 2 tablespoons canola oil
    • 2 cloves crushed garlic
    • 1 large sweet yellow onion diced
    • 1 - 12 ounce Coca Cola soda (can or bottle)
    • 18 oz BBQ Sauce spicy, sweet, or smoky your choice

    For Sandwiches, You Need

    • 12 buns
    • 4 cups coleslaw
    • pickle chips
    • extra bbq sauce
    A large pork loin roast with a lot of dry rub seasoning pouring over the top.

    Boneless Pork Loin Roast Tips

    • Pork loin roasts are inexpensive and easily feed a crowd. I find great quality ones at Costco, sometimes I cut them depending on the recipe.
    • They are sold in a vacuum-sealed package which is ready to pop in the freezer if you won't cook it right away.
    • It can be cooked in slow cooker/crockpot recipes as well as in the oven.
    • You avoid the higher fat, gristle, and inedible parts.
    • Season well with my amazing grill rub, and slow cook or roast in the oven for approximately 20 minutes per pound at 375 degrees.
    • Freeze your leftovers, I use either zip-top bags or a food saver machine to get an airtight seal, there are endless ways to use pork in recipes.
    1. Season the pork loin all over with grill BBQ rub.
    2. Optional step but makes it taste great. In a large heavy frying pan on medium-high heat, add the canola oil. Next, add the pork and cook, turning frequently till all sides are brown.
    3. Move the browned pork, chopped onions, and garlic to your slow cooker or crockpot.
    4. Add a 12 oz can of Coca-Cola and the barbecue sauce over the pork loin.
    5. Cook on HIGH for 4 hours or on LOW for 7-8 hours.
    6. Remove pork into a large pan (roasting pans work well) and shred with 2 forks.
    7. Serve pulled pork piled on buns with extra bbq sauce, sliced pickle chips, and coleslaw.
    The Best BBQ Dry Rub
    Use this grilling and BBQ dry rub on chicken, steaks, pork, hamburgers, and as a rib rub. This seasoning blend adds amazing flavor and color!
    GET THE RECIPE PIN IT
    A large pork loin roast with a lot of dry rub seasoning pouring over the top.

    PRO TIP: There will be liquid leftover in the slow cooker, if you want you can place it on the stove in a small pan, reduce it down, and pour over pulled pork to keep it even juicier.

    What temperature for pork loin in a slow cooker?


    Cook the pork loin in a slow-cooker or crockpot until the pork has an internal temperature reads 145 degrees and it should easily shred with two forks to use for pulled pork sandwiches and other dishes.

    Pulled Pork Sides

    • Coleslaw
    • Cowboy Baked Beans
    • Potato Salad
    • 7 Layer Salad
    • Mac n' Cheese
    • Mexican Grilled Corn
    • Grilled Corn
    • A clear glass bowl filled with tri color cole slaw and wooden tongs stuck in the slaw.
      Coleslaw Recipe (No Mayo)
    • A large white spoon scooping a serving of cowboy baked beans out of a casserole dish.
      Cowboy Beans
    • A glass trifle dish filled with 7 Layer Salad full of colorful ingredients.
      7 Layer Salad
    • Ears of grilled corn on a white platter seasoned with melted butter on top.
      Grilled Corn On The Cob

    More Pork Loin Recipes

    Easy 10-minute prep, Cherry Balsamic Pork Loin serves a large crowd, perfect for family dinner, entertaining, special occasions, or the holidays!

    Perfectly moist yet slightly caramelized edges, a super savory Oven Pulled Pork made from pork loin.

    Wondering what to with Leftovers? Well make "Totchos", nachos made with tater tots and pulled pork! My Grill and BBQ rub is fantastic on chicken and steak.

    • A sliver carving fork and knife next to a pork loin roast and topped with cherries.
      Cherry Balsamic Pork Loin
    • A white casserole dish with oven roasted pulled pork shredded and ready to eat in tacos or a recipe for dinner.
      Oven Roasted Pulled Pork
    • A close up of a oval cast iron pan with tater tots, pulled pork, cut avocado, and drizzled with white sauce.
      Tachos Tater Tot Nachos
    • A large pork loin roast with a lot of dry rub seasoning pouring over the top.
      The Best BBQ Dry Rub

    More Pulled Pork Recipes

    Serve Classic Game Day Food like this super popular Pulled Pork (made low and slow in the oven, and use the leftovers for these Cuban Pulled Pork Sliders which are perfect for lunch or dinner.

    If you want to make Slow Cooker Pulled Pork, this is an easy recipe that uses Coca-Cola. It is super moist and makes it easy for parties and large groups.

    • Red white check paper lined basked holding a pulled pork sandwich topped with coleslaw.
      Slow Cooker Pulled Pork
    • A white casserole dish with oven roasted pulled pork shredded and ready to eat in tacos or a recipe for dinner.
      Oven Roasted Pulled Pork
    • Three pulled pork sandwiches on Hawaiian buns with pickles, cheese and ham on a cutting board.
      Pulled Pork Sliders

    Did you love this recipe? We would love to hear from you! If you make this recipe and love it, give it a 5-star rating ⭐⭐⭐⭐⭐ with a comment. THANK YOU!! Follow Delicious Table with my free newsletter and share this recipe with your friends on Facebook, Pinterest, and Instagram.

    Red white check paper lined basked holding a pulled pork sandwich topped with coleslaw.
    Print

    Slow Cooker Pulled Pork Sandwiches

    Slow Cooker Pulled Pork (a pork loin recipe) is so juicy top these pulled pork sandwiches with coleslaw, pickle chips, and tangy BBQ sauce.
    Course Dinner & Main Dishes
    Cuisine American
    Keyword crock pot, pork loin, pork loin recipe, pork loin temperature, pulled pork recipes, pulled pork sandwiches, slow cooker pulled pork
    Prep Time 15 minutes minutes
    Cook Time 4 hours hours
    4 hours hours
    Total Time 4 hours hours 2 minutes minutes
    Servings 12 people
    Calories 543kcal
    Author Lisa Hatfield

    Equipment

    • OXO Digital Timer
    • Wolf Gourmet Multi Cooker
    • Epicurean Non-Slip Cutting Board
    • Cast Iron Fry Pan

    Ingredients

    slow cooker pulled pork

    • 5 pounds pork loin roast
    • ¼ cup BBQ rub
    • 2 tablespoons canola oil
    • 2 cloves crushed garlic
    • 1 large sweet yellow onion diced
    • 12 ounce Coca Cola soda can or bottle
    • 18 oz BBQ Sauce spicy, sweet, or smoky your choice!

    Coca Cola Pulled Pork Sandwiches

    • 12 buns
    • 4 cups coleslaw
    • pickle chips
    • extra bbq sauce

    Instructions

    • Season the pork loin all over with ¼ cup grill BBQ rub.
    • Optional step but makes it taste great! In a large heavy frying pan on medium high heat, add the canola oil. Next, add the pork and cook, turning frequently till all sides are brown.
    • Move the browned pork, chopped onions, and garlic to your slow cooker or crockpot.
    • Add a 12 oz can of cola and the barbecue sauce over the pork loin.
    • Cook on HIGH for 4 hours or on LOW for 7-8 hours.
    • Remove the cooked pork into a large pan (roasting pans work well) and shred with 2 forks.
    • Serve pulled pork piled on buns with extra bbq sauce, sliced pickle chips, and coleslaw. A great side dish to go with these pulled pork sandwiches is Cowboy Baked Beans.
    • There will be liquid leftover in the slow cooker, if you want you can place it on the stove in a small pan, reduce it down, and pour over pulled pork to keep it even juicier.

    Notes

    Browning

    This is an optional step but makes your pulled pork taste great. By the way, there are slow cookers on the market that saute, and I highly recommend those and love mine. You can use a large heavy frying pan on medium-high heat, add the canola oil.
    Next, add the pork and cook, turning frequently till all sides are brown. Whenever you brown meat you are creating the Maillard reaction aka "caramelization". The golden-brown crust created at higher heat in a pan condenses the proteins and sugar adding a depth of flavor and adds beautiful color. 

    Pan Sauce

    There will be liquid leftover in the slow cooker, if you want you can place it on the stove in a small pan, reduce it down, and pour over pulled pork to keep it even juicier.

    Nutrition

    Serving: 8ounces | Calories: 543kcal | Carbohydrates: 56g | Protein: 49g | Fat: 13g | Saturated Fat: 3g | Cholesterol: 119mg | Sodium: 828mg | Potassium: 873mg | Fiber: 2g | Sugar: 22g | Vitamin A: 155IU | Vitamin C: 10.1mg | Calcium: 58mg | Iron: 12.6mg

    Fluffy Buttercream Frosting

    [heart_this] · Jun 18, 2021 · 17 Comments

    A red bowl with fluffy vanilla frosting ready to frost a cake.

    Last Updated April 4th, 2024 at 08:26 pm by Lisa

    A frosting recipe that is not-too-sweet, fluffy, and so spreadable. This "bakery-style" vanilla buttercream frosting mixes together in minutes and holds its shape on any dessert like cakes or cupcakes.


    Most buttercream recipes are really sweet, this recipe is light with simple ingredients. This recipe is a traditional buttercream, also known as simple or American buttercream but without that's not super sweet. One more good reason this is the best buttercream, is it really holds up even in the high heat of summer.


    Baking is so rewarding, take time, it is worth every minute of mixing. This is the perfect frosting and a true guilty pleasure. It's like having a bakery in your home, you will definitely lick the spoon...

    Why This Recipe Works

    • One word ~ FLUFFY! Seriously, this recipe has soft peaks you won't get out of a can.
    • Holds its shape at room temperature, very stable, and has the right consistency, which can have issues and melt in the heat.
    • This Fluffy White Frosting is cost-effective vs grocery store frosting in a can that are quite expensive.
    • The RIGHT amount of sweetness Not-too-sweet!
    • Mixes in minutes with simple pantry ingredients.
    • A good choice for first time bakers, a fluffy frosting with a smooth texture.
    • Easier to work with a spreadable fluffy consistency.
    • Try this simple recipe on one of your favorite desserts. It will work on angel food cake, sugar cookies, vanilla cake and cupcakes, layer cakes, or chocolate cake and cupcakes.
    • This great recipe works well with any vibrant colors of food coloring you choose.
    • Freezes really well and keeps its consistency.
    Close up of the corner on a Flag Cake decorated with white frosting, raspberries, and blueberries.

    How To Make Fluffy Buttercream

    What is buttercream frosting?

    One of the most common types of frosting you will find in a bakery and has butter in the ingredients.


    Plain buttercream is the same as American buttercream or simple buttercream. Simple buttercream is a beaten butter frosting that whips the butter first as opposed to a cubed butter meringue frosting which has butter chunks added slowly.

    You Will Need

    • 1 cup salted butter (2 sticks, room temperature butter)
    • ½ cup vegetable shortening
    • 5 cups powdered sugar (confectioners sugar)
    • 2 tablespoons hot water
    • 2 teaspoons vanilla extract
    • ¼ teaspoon almond extract
    The ingredients to make cake frosting on a countertop labeled including powder sugar, butter, and shortening.

    Let's Mix It

    1. Beat soft butter and shortening in an electric mixer on high speed with the whisk attachment until creamy for 5 minutes. Scrape down the sides of the bowl.
    2. At low speed, add powder sugar 1 cup at a time until smooth into the mixing bowl.
    3. On high speed, mix in vanilla, almond extract, and hot water for 5 minutes until fluffy and smooth.

    PRO TIP: This fluffy vanilla frosting holds great at room temperature and covers cakes and cupcakes beautifully. If you freeze it, it is spreadable within an hour or so of bringing it to room temperature. Simply place in a bowl and re-whip. Buttercream will not spread right out of the fridge when cold, also bring to room temperature first.

    Decorating Tips

    How To Decorate A Cake

    Place a dollop on a small piece of cardboard or on a tray, and set your cake on top. This keeps it from sliding around while decorating. Cake boards made with cardboard help you move the cake once decorated. A cake decorating turntable, allows you to turn the cake for a professional result. These tools help you smooth and decorate cakes at home.

    Easy Way To Fill A Piping Bag

    Set the bag in a tall sturdy glass measuring cup. Push frosting down inside with a spatula, then when it is ¾ full, push inside the bag toward the tip. Fold the top down and decorate. Don't overfill the bag, or it will squeeze out the top as you decorate.

    Invest in a good large reusable piping bag. They clean easily with hot water to use over and over in your baking.

    For Smooth Frosting

    Frost using a small offset spatula, smooth out as best you can all over the top and sides of the cake. This frosting is so easy to spread, and you won't have to clean your spatula while decorating. You can also use a metal scraper as you move the cake on a turntable to smooth the sides of a round cake.

    If you do get crumbs in your frosting, you can keep crumbs out of your frosting by using one small bowl to put on a crumb coat, then a new batch to decorate with, and wipe your spatula a wet towel each time.

    Piping Designs

    Create beautiful designs using a piping bag fitted with tips. There are so many different tips to try, star tips are so easy to use and make a simple cake look so fancy.

    A sheet can, frosting, and berries to decorate a cake.

    How To Make Flavored Buttercream

    Food Extracts

    Extracts pack a lot of flavor without adding liquid, are the easiest way to flavor buttercream.

    Flavor extracts like peppermint, rum, vanilla, lemon, raspberry, almond, and mint will create delicious buttercream.

    The color in dark extracts may tint your frosting slightly, so keep that in mind to use clear flavor extracts if you want to maintain bright and vibrant frosting color.

    Flavorings and extracts will require the least amount of adjustment since the flavors you’re adding are already concentrated. Start by adding a tiny small amount, adding more to taste as you go.

    A dark bottle of vanilla extract made at home with a small jar of spiced rum extract on a kitchen counter.

    Add More Flavorings

    Flavor additions like jam, peanut butter, melted chocolate, or ganache will change the consistency of your buttercream depending on what you add and the quantity.

    If you add a flavor and your frosting becomes too thick, add more milk, water, or cream. If too thin, add more powdered sugar.

    Spices

    Spices like pumpkin pie spice, cinnamon, cardamom, cloves, nutmeg, and ginger will add cozy warm depth to buttercream, try these on pumpkin desserts like my Pumpkin Bread.

    Coffee, Espresso & Cocoa Powder

    Fresh brewed black coffee can be concentrated down on the stove in a pan to get a more syrupy consistency. Or simply brew espresso for that punch of coffee flavor.

    To use instant coffee granules, you will need a fine powder. Place in a clean coffee grinder, and process to a powder before mixing.

    Instant coffee or espresso powder makes my Chocolate Buttercream taste even more chocolatey!

    PRO TIP: Dry powder additions like espresso or spices will create a thicker frosting, so you might need to adjust with more liquid like water or milk to get it a spreadable consistency.

    Citrus Zest & Juice

    There is nothing better in desserts than the bright punch from fresh citrus fruit flavors. You can use lemons, limes, oranges, tangerines, grapefruit, and even blood oranges. These are great ideas for summer desserts like lemon cakes, lime cookies, and fruit-flavored orange cupcakes.

    The best way to get the citrus zest is to use a microplane zester or super-fine grater. This handy kitchen tool will avoid the white pith that is the bitter part of the citrus skin.

    PRO TIP: Try a combination of zest and juice to enhance your frosting with a citrusy punch. For even more flavor, citrus juice can be used in place of milk or water in your frosting.

    Wine & Liquours

    A good guide is for one buttercream recipe, add just 3-4 tablespoons of alcohol. You can concentrate any liquor in a pan on the stove that will pack in flavor and not add too much liquid into your buttercream frosting.

    This is a strong flavor profile, so add slowly, and taste as you go. Some of the best booze flavors to add are Irish cream, gin, rum, whiskey, bourbon, full-body red wines, and fireball whisky are all delicious.

    A large glass bowl full of chocolate frosting with a small offset spatula ready to frost a cupcake or cake.

    Frosting FAQ

    Can frosting be frozen?


    Yes, leftover frosting can be frozen in zip-top bags or an airtight container.
    Simply remove from the freezer at least an hour before using, and remix in a bowl or stand mixer to get it soft again from that thicker consistency.

    How to frost a cake?

    The best tip is to work with a chilled cake. Let the steam escape, and the cold cake is easier to frost.

    Use a spreadable frosting that is not too thick. Applying a crumb coat and chilling it, is helpful to keep a smooth layer without the bumps crumbs can create. Try using an offset spatula and cake turntable, that helps get a nice smooth finish.

    A 9 x 13 chocolate sheet cake frosted on a table.

    What frosting is best?


    Different baked recipes require different types of frosting. An example is carrot cakes which almost always have cream cheese frosting in the recipe. Pastry cream is a rich creamy flavored custard. And used to fill pastry desserts such as eclairs, cream puffs, and Boston cream pie cake.

    Classic American buttercream is the easiest of the different frosting types and most common buttercream frosting. Also, it is the quickest to make. It's often used for piping and decorating cakes and cupcakes. The icing is known for its super sweet flavor and slightly gritty consistency. It's made with three basic ingredients; butter, confectioners' sugar, and milk.

    The type of buttercream that is best for your recipe will depend on many things. You will want to consider if the dessert will be in warm temperatures or humid weather. Some have a smooth consistency, while others are a bit grittier. Light desserts can handle a rich one, and others will call for the addition of fresh fruit to balance the sweetness like a white chocolate cheesecake.

    Buttercream Frosting - very sweet, ivory color, used on sheet cakes and cupcakes, made by combining butter and sugar.
    Swiss Meringue Buttercream (swiss buttercream) - buttery sweet, used on wedding cakes, is pure white in color due to egg white meringue.
    Italian Meringue Buttercream - mild buttery sweet, used on birthday cakes and pies, stable for outdoor events.
    French Buttercream - rich and buttery, yellow color, used on cupcakes and fruit tart, is made with hot sugar syrup and rich egg yolks
    German Buttercream - rich and custard-like, used as pastry filing and in cupcakes, has a custard base made from whole eggs.
    Ermine Buttercream - mild sweetness, used on red velvet cakes and twinkies, does not contain eggs and cooked before mixing.
    Cream Cheese Frosting - tangy and sweet, used on carrot cake and hummingbird cake, made with the addition of cream cheese instead of butter.
    Whipped Cream Frosting - light and mild, used on strawberry shortcakes and berry cakes, combines whip cream and mascarpone.
    Seven Minute Frosting - sweet and marshmallow-like, used on cupcakes and coconut cakes, meringue-like is mixed for 7 minutes.
    Ganache - rich and chocolatey, used on cheesecakes and eclairs, made with melted chocolate and any hot liquid.
    Fudge Frosting - sweet and chocolatey, light brown or brown, used on yellow cakes and cupcakes, made with chocolate, butter, milk, and sugar.
    Fondant - sugary sweet, used for decorations on birthday cakes, dough-like consistency can be rolled or shaped.

    What is the difference between frosting and icing?

    Frosting is thick and forms stiff peaks from being whipped, it is spreadable, and is the perfect topping to decorate cakes and cupcakes. The types of buttercream that are best for a rich cake will typically not be sweet buttercream or ganache which would overwhelm the desert. There is typically a balance between the cake or dessert sweetness and the buttercream icing that is best for that recipe.

    Icing is typically thin, piped, or drizzled on like a royal icing recipe, and will harden or firm when it cools on cookies and donuts. It is a little bit tricky to get the consistency correct, but you can add additional heavy cream, whipping cream, or milk to thin it for decorating. A meringue powder, confectioners' sugar, and water are used to make construction icing used in gingerbread houses. The egg whites in the meringue powder form a strong bond when the icing dries. Icing sugar is the same thing as powdered sugar or confectioner sugar and is labeled differently on packages all over the world.

    Looking at the corner of a sheet cake sliced out, with red white and blue marbled cake.

    More Buttercream Frosting & Cake Recipes

    Make this Flag Cake July 4th dessert for your cookout or picnic, you can bake the cake the night before and decorate it a day before your party or have guests do the honors...

    Bake a spooky Halloween Cake (9 x 13 sheet cake) marbled inside, has chocolate buttercream, and step-by-step decorating tips and ideas.

    This Strawberry Cake recipe has strawberries baked in the cake and strawberry preserves in the buttercream and is a deliciously natural dessert...

    An adorable Easter Bunny Cake, it is a cut cake from two 9" round cakes, vanilla buttercream, and decorated with coconut and candy...

    • A chocolate cupcake with swirled chocolate buttercream frosting and sprinkles on a small stand.
      Buttercream Chocolate Frosting
    • A chocolate Halloween Cake with gate, fence, tree and tombstones.
      Halloween Cake
    • A freshly baked and decorated strawberry cake with real strawberries as decorations.
      Fresh Strawberry Cake
    • An American flag cake decorated with blueberries, raspberries, and white frosting with a patriotic star towel.
      American Flag July 4th Cake
    • An adorable bunny cake on a hot pink background surrounded with jelly beans.
      Easter Bunny Cake

    Did you love this recipe? We would love to hear from you! If you make this recipe and love it, give it a 5-star rating ⭐⭐⭐⭐⭐ with a comment. THANK YOU!! Follow Delicious Table with my free newsletter and share this recipe with your friends on Facebook, Pinterest, and Instagram.

    A red bowl with fluffy vanilla frosting ready to frost a cake.
    Print

    Fluffy Buttercream "Bakery-Style" Frosting

    Frosting that is not-too-sweet, fluffy, and so spreadable. A "bakery-style" vanilla buttercream frosting that mixes together in minutes and holds its shape on any dessert like cakes or cupcakes.
    Course Dessert
    Cuisine American
    Keyword cake frosting, easy frosting, fluffy frosting, frosting, frosting recipe, vanilla buttercream
    Prep Time 5 minutes minutes
    Cook Time 0 minutes minutes
    Total Time 15 minutes minutes
    Servings 36
    Calories 585kcal
    Author Lisa Hatfield

    Equipment

    • KitchenAid Mixer
    • Offset Icing Spatula
    • Large Reusable Piping Bag
    • Cake Piping Tips and Pastry Bags
    • Spoon Spatula

    Ingredients

    • 1 cup salted butter (2 sticks, room temperature)
    • ½ cup vegetable shortening
    • 5 cups powder sugar (confectioners sugar)
    • 2 tablespoons hot water
    • 2 teaspoons vanilla extract
    • ¼ teaspoon almond extract

    Instructions

    make frosting

    • Beat soft butter and shortening in an electric mixer on high speed with the whisk attachment until creamy for 5 minutes. Scrape down the sides of the bowl.
    • At low speed, add powder sugar 1 cup at a time until smooth into the mixing bowl.
    • On high speed, mix in vanilla, almond extract, and hot water for 5 minutes until fluffy and smooth.

    cake decorating

    • Place a dollop of frosting on a small piece of cardboard or on a tray, and set the cake on top. This keeps the cake from sliding around while decorating.
    • Fill a large piping bag with frosting, set the bag in a tall sturdy glass measuring cup. Load it down inside the pastry bag with a spatula, when ¾ full, push inside the bag toward the tip. Fold the top down and decorate your cake. Don't overfill or it will squeeze out of the top of the bag.
    • Frost the cake using a small offset spatula, smooth out as best you can all over the top and sides of the cake. This frosting is so easy to spread, and you don't have to clean your spatula while decorating. Then create beautiful designs using a piping bag fitted with tips.

    Video

    Notes

    PRO TIP:  Great frosting at room temperature and covers cakes and cupcakes beautifully. If you freeze it, it is spreadable within an hour or so of bringing it to room temperature. Simply place in a bowl and re-whip. Simply remove from the freezer at least an hour before using, and remix in a bowl or stand mixer to get it soft again from that thicker consistency.

    Decorating Tips

    How To Decorate A Cake

    Place a dollop of frosting on a small piece of cardboard or on a tray, and set your cake on top. This keeps it from sliding around while decorating. Cake boards made with cardboard help you move the cake once decorated. A cake decorating turntable, allows you to turn the cake for a professional result. These tools help you smooth and decorate cakes at home.

    Easy Way To Fill A Piping Bag

    Set the bag in a tall sturdy glass measuring cup. Push frosting down inside with a spatula, then when it is ¾ full, push the frosting inside the bag toward the tip. Fold the top down and decorate. Don't overfill the bag, or it will squeeze out the top as you decorate.
    Invest in a good large reusable piping bag. They clean easily with hot water to use over and over in your baking.

    For Smooth Frosting

    Frost using a small offset spatula, smooth out the frosting as best you can all over the top and sides of the cake. This frosting is so easy to spread, and you won't have to clean your spatula while decorating.

    Piping Designs

    Create beautiful designs using a piping bag fitted with tips. There are so many different tips to try, star tips are so easy to use and make a simple cake look so fancy.


    Nutrition

    Calories: 585kcal | Carbohydrates: 81g | Protein: 1g | Fat: 30g | Saturated Fat: 15g | Polyunsaturated Fat: 4g | Monounsaturated Fat: 9g | Trans Fat: 2g | Cholesterol: 49mg | Sodium: 343mg | Potassium: 24mg | Fiber: 1g | Sugar: 70g | Vitamin A: 567IU | Calcium: 63mg | Iron: 1mg

    Cocktail Sauce

    [heart_this] · May 31, 2021 · 1 Comment

    Last Updated April 19th, 2022 at 02:14 pm by Lisa

    Fresh Cocktail Sauce made in minutes for easy appetizers like Shrimp Cocktail. Dollop this seafood sauce on oysters, clams, crab, and more!

    There are over 15 ways to use your leftover classic seafood sauce, also called shrimp cocktail sauce, in creative new ways...

    ⬆ Cocktail Sauce Video ⬆

    Shrimp Cocktail History

    Sauces and condiments for seafood originated in the 19th century and there are several types of cold or room temperature recipes.

    No one knows where the name came from, but in the 1920s shrimp were often served and garnished with cocktail sauce. Some sources link the serving of the dish in cocktail glasses during the ban on alcoholic drinks during the 1920s prohibition era in the United States.

    Who knows, but maybe that is how it got its name. Shrimp Cocktail became a wildly popular appetizer in the 1960s and 70s in the United States.

    My Mom served it for parties, and it was a Christmas Eve tradition in our home. She would serve large shrimp on iced bowls with crushed ice, topped with cocktail sauce.

    Why This Recipe Works

    • It's so fresh, the celery adds a clean crunch.
    • The zip of prepared horseradish is so good.
    • Add Tabasco for additional heat if love hot sauce.
    • Using real lemon juice and zest gives it brightness.
    • The stuff in the jar is no match for homemade!
    • Use your leftover sauce in creative ways.

    Let's Make It!

    • ¼ cup Chili Garlic Sauce Heinz or Vietnamese brand
    • ½ cup ketchup
    • 1 lemon zest and juice
    • 1 tablespoon prepared horseradish
    • 1 tablespoon Worcestershire
    • 1 cup celery 3 stalks finely chopped
    • optional: ¼ teaspoon hot sauce Tabasco
    1. Mix the ingredients; chili garlic sauce, ketchup, lemon zest and juice, Worcestershire sauce, prepared horseradish, celery, Tabasco hot sauce in a small bowl, chill in the fridge in an airtight container.
    2. It will keep up to 2 weeks refrigerated.
    Cocktail Sauce Uses


    Classic use is on seafood; shrimp cocktail, crabs, oysters, and crab.

    Use the leftovers on
    -Mix Bloody Marys, add tomato juice, and season
    -Top ham and cheese omelets
    -Dip deep-fried mushrooms
    -Drizzle on crab cakes
    -Sauce for burgers or hot dogs
    -A dip for mozzarella sticks
    -Top deviled Eggs
    -Mix into meatloaf
    -Eggroll dip
    -Use as Onion Ring dip
    -Drizzle on avocado toast

    How Long Will Cocktail Sauce Last?


    -Cocktail Sauce jar unopened keep 4-6 months on the pantry shelf
    -Cocktail Sauce jar opened use within 1 month, keep refrigerated
    -Homemade Cocktail Sauce use in 1 – 2 weeks, keep refrigerated in an airtight container

    A clear glass platter full of cooked shrimp for shrimp cocktail with cocktail sauce nearby.
    Shrimp Cocktail Recipe
    The best Shrimp Cocktail (prawn cocktail) is made by oven-roasting, then dipping them in homemade shrimp cocktail sauce! The shrimp cooks in just 15 minutes and is such an easy appetizer for the holiday season, New Year's Eve, or party food for special occasions and celebrations. Roasting is a great way to go versus dealing with a large pot of boiling water, a sheet pan is so much easier with less cleanup, and the roasting adds deep rich, delicious shrimpy flavor.
    GET THE RECIPE PIN IT
    A clear glass plate with shrimp cocktail, cocktail sauce, and two glasses of champagne.

    More Sauce Recipes

    Lobster Ravioli With Lemon Butter Sauce
    Lobster Ravioli with a Lemon Butter Sauce uses a baked ravioli technique you can prep ahead for dinner parties, holidays, and romantic nights. This recipe can be made ahead with wonton wrappers and baked instead of boiling the ravioli. It is a perfect recipe for the holidays or special dinners like Valentine's Day.
    GET THE RECIPE PIN IT
    A white plate filled with heart shaped lobster ravioli garnished with parsley.
    Creamy Balsamic Horseradish Sauce
    If you enjoy spicy foods, this Creamy Balsamic Horseradish Sauce is a great compliment to savory dishes like thick slices of Beef Roast, prime rib, Corned Beef. Or to slather on beef tenderloin Roast Beef Sandwiches. Add deep flavor and a spicy fiery kick to your home cooking. Dollop this creamy sauce on a good french dip sandwich or grilled filet mignon. And it lasts in the fridge for over two weeks. You will feel like you are dining at the finest restaurant or steak house every day.
    GET THE RECIPE PIN IT
    Looking down into a wooden bowl with creamy balsamic horseradish sauce swirled in the center, and a wooden spreader resting on the edge of the bowl with a rustic beige tablecloth underneath and on a woven rattan placemat.
    Remoulade
    Remoulade sauce is a popular condiment or dipping sauce, usually paired with seafood, cold meats, and fried foods. Drizzle on baked fish, fried green tomatoes, or as a sandwich spread. Use it as a dip for chicken wings, hot french fries or bites of scrumptious crab cakes.
    GET THE RECIPE PIN IT
    A vintage spoon scooping up remoulade sauce to use on a recipe.

    Did you love this recipe? We would love to hear from you! If you make this recipe and love it, give it a 5-star rating ⭐⭐⭐⭐⭐ with a comment. THANK YOU!! Follow Delicious Table with my free newsletter and share this recipe with your friends on Facebook, Pinterest, and Instagram.

    Print

    Cocktail Sauce Plus 15 Uses!

    Delicious Cocktail Sauce made in minutes and goes with easy appetizers like Shrimp Cocktail, oysters, clams and crab.
    Course Appetizer
    Cuisine American
    Keyword cocktail sauce, cocktail sauce recipe, shrimp cocktail
    Prep Time 15 minutes minutes
    Cook Time 10 minutes minutes
    Total Time 25 minutes minutes
    Servings 8
    Calories 34kcal
    Author Lisa Hatfield

    Equipment

    • Epicurean Non-Slip Cutting Board
    • Chef Knife
    • Classic Citrus Zester

    Ingredients

    • ¼ cup Chili Garlic Sauce Heinz or Vietnamese brand
    • ½ cup ketchup
    • 1 lemon zest and juice
    • 1 tablespoon prepared horseradish
    • 1 tablespoon Worcestershire
    • 1 cup celery 3 stalks finely chopped
    • optional: ¼ teaspoon hot sauce Tabasco

    Instructions

    • Mix all the cocktail sauce ingredients; chili garlic sauce, ketchup, lemon zest and juice, Worcestershire sauce, prepared horseradish, celery, Tabasco hot sauce in a small bowl.
    • Keep chilled in the fridge, use within a week.

    Video

    Notes

    chili garlic sauce

    Heinz or any Vietnamese brand works well in this recipe and are easy to find in any grocery store.

    use leftover cocktail sauce

    Classic use is on seafood; shrimp cocktail, crabs, oysters, and crab
    • Mix Bloody Marys, add tomato juice, and season.
    • Top ham and cheese omelets
    • Dip deep-fried mushrooms
    • Drizzle on crab cakes
    • Sauce for burgers or hot dogs
    • A dip for mozzarella sticks
    • Top deviled Eggs
    • Mix into meatloaf
    • Eggroll dip
    • Use as Onion Ring dip
    • Drizzle on avocado toast

    how long to store

    -Cocktail sauce jar unopened keep 4-6 months on the pantry shelf
    -Cocktail sauce jar opened use within 1 month, keep refrigerated
    -Homemade cocktail sauce use in 1 – 2 weeks, keep refrigerated in an airtight container
     

    Nutrition

    Serving: 12g | Calories: 34kcal | Carbohydrates: 8g | Protein: 1g | Fat: 1g | Saturated Fat: 1g | Sodium: 538mg | Potassium: 120mg | Fiber: 1g | Sugar: 5g | Vitamin A: 134IU | Vitamin C: 9mg | Calcium: 13mg | Iron: 1mg

    Homemade Fruit Popsicles

    [heart_this] · May 25, 2021 · 2 Comments

    A single coconut water popsicle with strawberries, blueberries, and raspberries.

    Last Updated August 14th, 2023 at 11:01 pm by Lisa

    Homemade real Fruit Popsicles are made with coconut water, strawberries, raspberries, and blueberries. These are refreshing low-sugar treats for hot summer days. But you can certainly mix it up and make these creamy, sweeter, or to your tastes.

    With an inexpensive popsicle mold and 10 minutes of time,  you can have popsicles waiting in your freezer for about 3 hours...

    A single coconut water popsicle with strawberries, blueberries, and raspberries.

    Let's Make Homemade Popsicles

    Making popsicles out of fruit is so fast and easy, just slice up larger berries and place them down in the popsicle mold, then add the coconut water freeze and wait 3 hours, or overnight.

    • slices of strawberries
    • raspberries
    • blueberries
    • coconut water

    Place the sliced strawberries, raspberries, and blueberries in the popsicle mold.

    Pour the coconut water onto the top.

    Place the metal cover on top of the mold, and push the popsicle sticks into the mold.

    Freeze for 3 hours.

    Run water over the mold to release the popsicles.

    Popsicles Flavor Additions

    Skip all the added sugar, high fructose corn syrup, and artificial flavors of store-bought ones. These frozen beauties are so "guilt-free". They are a healthier treat you can let the kids have more than one. Here are inspiring ideas to mix up the flavors with all kinds of fresh fruit and other sweet additions.

    • Creamy Popsicles: make creamy popsicles, just add ¼ cup of one of these; coconut milk, coconut cream, Greek yogurt, or heavy cream. Simply add the creamy addition to pureed fruit in a blender, and blend the mixture until smooth.
    • Sweetness: to make them sweeter, add honey, agave, maple syrup, or even a dash of vanilla extract. Try different substitutions that go with the fruits you choose.
    • Fruit Juices: In place of coconut water, try a different kind of juice like apple juice, orange juice, grape juice, and cranberry juice. You can also add a splash of lemon juice or lime juice! Clear juices or liquid let you see the fruit inside the ice pop.
    • Popsicle Recipes to Try: lemonade popsicles, root beer popsicles, watermelon popsicles, creamy cherry popsicles, chocolate fudge popsicles, banana popsicles, cookies and cream, pineapple popsicles, and strawberry popsicles.
    What are the best flavors for fresh fruit popsicles?


    strawberries
    blueberries
    raspberries
    blackberries
    watermelon
    peaches
    cut mango or pineapple
    cherries (pitted)
    kiwi
    banana slices
    orange or tangerine slices
    grapefruit

    What is coconut water?

    Coconut water is also called coconut juice and is the clear liquid inside coconuts which are fruits of the coconut palm. It is a drink and can be used in frozen desserts and other recipes.

    More Frozen Desserts

    Raspberry Lemon Sorbet is a real fruit dessert, that is dairy-free, vegan, and has no refined sugar.

    Frozen Chocolate Covered Bananas are dipped in melted chocolate and rolled in your favorite toppings of dried fruit, chopped nuts, colorful sprinkles, crushed cookies, or candies for a wholesome frozen dessert.

    Make this easy Oreo Ice Cream Cake recipe in a 9 x 11 glass dish or in a pan that is a springform mold for the classic round cake shape.

    5 ingredient Cherry Pie Ice Cream Sandwiches are an easy summer treat to cool you down on hot days, and no ice cream maker is needed.

    • Bright yellow lemons carved out and filled with raspberry strawberry lemon sorbet as a summer dessert.
      Raspberry Lemon Sorbet
    • A small aluminum sheet pan with brown paper and 5 frozen bananas chocolate dipped and coated in nuts and dried fruit.
      Frozen Chocolate Covered Bananas
    • An ice cream cake with a slice removed and covered in colorful sprinkles.
      Ice Cream Cake
    • A white platter with cherry pie ice cream sandwiches.
      Cherry Pie Ice Cream Sandwiches

    Did you love this recipe? We would love to hear from you! If you make this recipe and love it, give it a 5-star rating ⭐⭐⭐⭐⭐ with a comment. THANK YOU!! Follow Delicious Table with my free newsletter and share this recipe with your friends on Facebook, Pinterest, and Instagram.

    A single coconut water popsicle with strawberries, blueberries, and raspberries.
    Print

    Homemade Fruit Popsicles Recipe

    Homemade real Fruit Popsicles are made with coconut water, strawberries, raspberries, and blueberries. These are refreshing low-sugar treats for hot summer days. But you can certainly mix it up and make these creamy, sweeter, or to your tastes. With an inexpensive popsicle mold and 10 minutes of time,  you can have popsicles waiting in your freezer in about 3 hours.
    Course Desserts & Sweets
    Cuisine American
    Keyword frozen treats, fruit popsicles, homemade fruit popsicles, popsicle recipes, popsicles
    Prep Time 10 minutes minutes
    Freezing 3 hours hours
    Total Time 3 hours hours 10 minutes minutes
    Servings 10
    Calories 68kcal
    Author Lisa Hatfield

    Equipment

    • Wood Popsicle Sticks
    • Popsicle Mold

    Ingredients

    • 10-20 slices strawberries
    • 1 cup raspberries
    • 1 cup blueberries
    • 1 box coconut water
    US Customary - Metric

    Instructions

    • Place the sliced strawberries, raspberries, and blueberries in the popsicle mold.
    • Pour in the coconut water to the top.
    • Place the metal cover on top of the mold, and push the popsicle sticks into the mold.
    • Freeze for 3 hours.
    • Run water over the mold to release the popsicles.

    Video

    Notes

    Popsicles Flavor Additions

    Skip all the added sugar, high fructose corn syrup, and artificial flavors of store-bought ones. These frozen beauties are so "guilt-free". They are a healthier treat you can let the kids have more than one. Here are inspiring ideas to mix up the flavors with all kinds of fresh fruit and other sweet additions.
    • Creamy Popsicles: make creamy popsicles, just add ¼ cup of one of these; coconut milk, coconut cream, Greek yogurt, or heavy cream. Simply add the creamy addition to pureed fruit in a blender, and blend the mixture until smooth.
    • Sweetness: to make them sweeter, add honey, agave, maple syrup, or even a dash of vanilla extract. Try different substitutions that go with the fruits you choose.
    • Fruit Juices: In place of coconut water, try a different kind of juice like apple juice, orange juice, grape juice, and cranberry juice. You can also add a splash of lemon juice or lime juice! Clear juices or liquid let you see the fruit inside the ice pop.
    • Popsicle Recipes to Try: lemonade popsicles, root beer popsicles, watermelon popsicles, creamy cherry popsicles, chocolate fudge popsicles, banana popsicles, cookies and cream, pineapple popsicles, and strawberry popsicles.

    more fruit to try! 

    strawberries
    blueberries
    raspberries
    blackberries
    watermelon
    peaches
    cut mango or pineapple
    cherries (pitted)
    kiwi
    banana slices
    orange or tangerine slices
    grapefruit

    Nutrition

    Calories: 68kcal | Carbohydrates: 16g | Protein: 1g | Fat: 1g | Saturated Fat: 1g | Sodium: 2mg | Potassium: 284mg | Fiber: 4g | Sugar: 10g | Vitamin A: 32IU | Vitamin C: 102mg | Calcium: 30mg | Iron: 1mg

    Crudités With Dip

    [heart_this] · May 25, 2021 · 2 Comments

    A cutting board with crudites and dip with bright colored vegetables cut into strips and sticks.

    Last Updated May 22nd, 2023 at 12:00 am by Lisa

    Crudités with Green Goddess Dip is an easy appetizer. Serve veggie cups and a purple cabbage "bowl" for a unique relish tray at your party.

    The little dipping cups are great for guests to enjoy munching on veggies at summer picnics, cookouts, or pool parties.

    In French, Crudité literally means raw food, or raw vegetables served with a dip. And Crudite is really just a fancy word we use to describe a veggie tray or what my Mom always called a relish tray.

    Entertaining on the patio by the pool is my favorite way to relax with friends and family.  Cool crisp crudité is refreshing and hydrates on hot Summer days...

    ⬆ Crudites Video ⬆

    You Will Need

    What is Crudité?


    A Crudités is a traditional easy appetizer that consists of several different types of sliced, raw vegetables. Served with a vinaigrette or dipping sauce, they are even more delicious, and a cool healthy snack. A carved-out purple cabbage makes the perfect bowl for your favorite veggie dip, serve with vegetables cut into sticks, strips, and bite-size pieces.

    What Vegetables Are Served With Crudites?

    Assorted raw vegetables are served with this easy appetizer, typically with a dip like a ranch dip or green goddess.

    Easter egg radishes
    celery sticks
    colorful mini carrots
    cucumber sticks
    jicama sticks
    bell pepper strips or mini bell peppers
    green beans
    broccoli
    snap peas
    cauliflower
    cherry tomatoes

    How To Cut Crudites?

    It is best to cut veggies for crudites in thin and long strips or small bite-size pieces. That makes them great for dipping and easier to eat.

    Washing Vegetables

    1. Crudités are raw veggies, wash them carefully to remove any yucky germs.
    2. Vegetable cleaning is easy; simply place whole uncut veggies in a large bowl, splash white vinegar and fill the bowl with cool water.
    3. Rinse with clean water, then refrigerate all cut vegetables in zip-top bags or containers until ready to serve. I keep a large $2 bottle of plain white vinegar under my sink just for veggie washing.
    Small orange, yellow and purple carrots cleaned and ready to eat.
    A bunch of bright red colorful radishes tied in a bundle on a board.
    A graphic showing how to put dip in small clear cups to dip veggies in a a party.

    Cabbage Dip Bowl Tips

    Slice a 2-inch portion off the top of the cabbage, purple ones are so pretty. Next, using a small paring knife carefully cut about 2-3 inches straight down in a circle a good inch from the outside of the cabbage to form a cup for the dip.

    This takes time, just cut a little, pull out the pieces, and keep going around until it is deep enough. A spoon helps to scoop out the bits.  Slice a small portion off the bottom to keep the cabbage bowl sitting flat.

    Fill with dip, chill, and serve...

    Let's Make The Dip

    • 1 large purple cabbage, carved out for the dip bowl
    • 1 cup greek yogurt
    • ½ cup mayonnaise
    • ½ cup chopped parsley
    • 3 tablespoons chopped green onions or chives
    • 3 tablespoons anchovy paste optional
    • 3 tablespoons tarragon wine vinegar
    • 1 tablespoon fresh lemon juice
    • 1 clove crushed garlic or ½ teaspoon minced garlic from jar
    • pinch of sea salt and pepper to taste

    Combine ingredients in a blender until smooth for about 30 seconds and chill in a container. It Will last in the fridge for about a week, toss the extra into a salad during the week.

    More Easy Appetizers

    • A white platter with crostini recipe topped with edible flowers and herbs.
      Spring Crostini Appetizers
    • A collection of Thanksgiving appetizers with recipe ideas, and party decorating tips for a Fall party.
      36 Thanksgiving Appetizers
    • A pumpkin shaped cheese ball on a platter with pita chips and crackers.
      Everything Bagel Pumpkin Cheese Ball

    Did you love this recipe? We would love to hear from you! If you make this recipe and love it, give it a 5-star rating ⭐⭐⭐⭐⭐ with a comment. THANK YOU!! Follow Delicious Table with my free newsletter and share this recipe with your friends on Facebook, Pinterest, and Instagram.

    A cutting board with crudites and dip with bright colored vegetables cut into strips and sticks.
    Print

    Crudités and Green Goddess Dip

    Crudités with Green Goddess Dip is an easy appetizer. Serve veggie cups and a purple cabbage "bowl" for a unique relish tray at your party!
    Course Salads & Dressing
    Cuisine American
    Keyword crudite platter, crudites, relish tray
    Prep Time 20 minutes minutes
    Total Time 20 minutes minutes
    Servings 24
    Calories 53kcal
    Author Lisa Hatfield

    Equipment

    • Epicurean Non-Slip Cutting Board
    • Small Serrated Knife

    Ingredients

    crudité veggies

    • Easter egg radishes
    • celery sticks
    • mini carrots or sliced carrot sticks
    • cucumber sticks
    • jicama sticks
    • bell pepper strips or mini bell peppers
    • green beans
    • broccoli
    • snap peas
    • cauliflower
    • cherry tomatoes

    green goddess dip

    • 1 large purple cabbage ("dip bowl")
    • 1 cup Greek yogurt
    • ½ cup mayonnaise
    • ½ cup parsley (chopped)
    • 3 tablespoons green onions or chives (chopped)
    • 3 tablespoons anchovy paste optional
    • 3 tablespoons tarragon wine vinegar
    • 1 tablespoon fresh lemon juice
    • 1 clove crushed garlic or ½ teaspoon minced garlic from jar
    • pinch of sea salt and pepper to taste
    US Customary - Metric

    Instructions

    red cabbage dip bowl:

    • Slice a 2 inch portion off the top of the cabbage. Next, using a small paring knife carefully cut about 2-3 inches straight down in a circle a good inch from the outside of the cabbage to form a cup for the dip. This takes time, just cut a little, pull out the pieces, and keep going around until it is deep enough. A spoon helps to scoop out the bits.  Slice a small portion off the bottom to keep the cabbage bowl sitting flat.
    • Serve on a large board or platter. Place the cut vegetables in long rows, pour the light green goddess dip into the cabbage bowl, or into small clear cups. Place a few sticks of each veggie into small clear cups for guests and kids to "grab and go"! Or people can dip right into the dip bowl, (no double dipping of course...LOL)

    light green goddess dip:

    • Combine ingredients in a blender until smooth about 30 seconds and chill in a container. Will last in the fridge for about a week.
    • Serve as a dip, or toss with salad greens for a dressing.

    clean your veggies:

    • Crudités must be washed carefully to remove any yucky germs.
    • Vegetable cleaning is easy, simply place whole uncut veggies in a large bowl, splash white vinegar and fill the bowl with cool water. Rinse with clean water, then refrigerate all cut vegetables in zip top bags or containers until ready to serve. I keep a large $2 bottle of plain white vinegar under my sink just for veggie washing.

    Video

    Notes

    make ahead

    You can make the dip ahead and keep it chilled a couple of days, and slice the veggies a day ahead. Keep them in zip-top bags or airtight containers. If they dry out, simply spritz them with clean water from a spray bottle. 

    serving

    You can use any tray or clean cutting board for your crudites. I love using long grazing boards for parties, and sometimes add crackers, bread, cheeses, nuts, and cut fruit.  
     

    Nutrition

    Serving: 24g | Calories: 53kcal | Carbohydrates: 3g | Protein: 2g | Fat: 4g | Saturated Fat: 1g | Trans Fat: 1g | Cholesterol: 4mg | Sodium: 116mg | Potassium: 118mg | Fiber: 1g | Sugar: 2g | Vitamin A: 516IU | Vitamin C: 22mg | Calcium: 32mg | Iron: 1mg

    100+ July 4th Recipes

    [heart_this] · May 23, 2021 · 4 Comments

    A graphic showing lots of food for July 4th including cheeseburgers, corn, and baked beans.

    Last Updated April 25th, 2024 at 01:53 pm by Lisa

    100+ July 4th recipes of cookout food including grilling recipes, side dishes, and picnic food ideas with drinks, desserts, and more!

    Some of the classic “must-haves” on the 4th of July are more than tradition, they make our Independence Day celebrations into memories with friends and family. Many of these recipe ideas have patriotic red, white, and blue colors, and all are easy.

    I also have more than one-hundred red, white, and blue desserts. Your summer party or picnic will be one to remember with a patriotic July 4th dessert.

    These recipes are from inspiring Food Blogger friends, and I am also sharing my July 4th menu I made over many years...

    A collage of recipes to make for July 4th including baked beans, grilled corn, flag pie and more.

    When it comes to July 4th, Americans definitely have 4th of July Food Traditions for their backyard barbecues!

    How the Fourth of July party traditions started is not exactly known, but there are some great items that most people love to have on our national holiday.

    Table of Contents

    • July 4th Tips For Cookouts, Barbeques, Picni cs
    • July 4th Food Ideas Party Checklist
    • Blueberry Pie ~ Grill Baked
    • An All American July 4th Menu
    • Party Drinks & Fourth of July Appetizers
    • Side Dishes & Salads
    • Cookout Menu, Barbeque, and Grilling
    • Hamburgers and The Best Cheeseburgers
    • Fourth of July Desserts
    • July 4th Food FAQ
    • More Party Food

    July 4th Tips For Cookouts, Barbeques, Picnics

    A freshly baked blueberry pie with a flag shaped crust with a food tent over it cooling.
    • Use serving pieces you have, red, white, and blue are great but not necessary. Look high and low for the thing you have-trust me you have great pieces to use. Find trays, baskets, and bowls, or buy inexpensive ones. 
    • Plan an area for all the food. A nice long table in the shade, a dinner table, or a kitchen counter space all work great. Serve out of the heat, cover food, and try to keep any salads or meat items covered.
    • For summer pool parties, I make sure to get food back in the fridge after about an hour or so to keep it safe, then take it out later in the day when people get hungry again.
    • Plan for your number of guests, space to walk around the table, and chairs, and places to sit in the shade.
    • Have containers to send leftovers home with guests, people love it! I use inexpensive Chinese paper takeout containers or grocery store brands.
    • If serving outside, plan to keep food protected from flying insects with food tents, chill salads, and keep dishes out of the direct sun if possible. 
    • Use what you have to create different heights if possible and to keep people moving around trying different dishes. I sometimes use boxes under pretty linens and tablecloths to create high and low places.
    • Use American flags, linens, flowers, and patriotic decorations.
    • Serve salads in large chilled bowls on ice packs with a pretty towel covering the ice packs.  There are also platters that stay chilled for up to two hours, I have a couple and love them. 

    July 4th Food Ideas Party Checklist

    • Trays - regular or ones that stay chilled 
    • Small Bowls
    • Small Serving Spoons
    • Salad Tongs
    • Napkins
    • Utensils
    • Plates
    • Red Solo Cups
    • Ice
    • Insect Tents/Covers
    • Bottled Water
    • Iced Tea or Lemonade
    • Chips, Pretzels, Snacks
    • Cookout, BBQ, and Grill Items
    • Cocktails and Drinks
    • Desserts

    Blueberry Pie ~ Grill Baked

    A blueberry pie with a flag crust baked on a grill.

    If you would like to learn how to bake a pie on your grill, take a look at my recipe for Blueberry Pie. There are lots of tips and helpful resources to bake on your grill and get the patriotic flag pie crust. It keeps the house cooler and works so well. Not to mention it is the most fun party trick ever!

    An All American July 4th Menu

    Each year, I love to celebrate with a traditional July 4th menu. The backyard and pool are all decorated, baby back ribs are put in the smoker early in the morning while the coffee is just brewing, and the ribs are rubbed with my Grill and BBQ rub the night before.

    It starts early and goes late until the last fireworks crackle. It is one of my favorite holidays, and I serve more food than people can believe, but somehow it all disappears, here is what is usually on the menu...

    • A person holding a messy grilled burger topped with melted cheese, burger sauce, lettuce, tomato, and pickles.
      The Best Cheeseburger
    • The steps to season hamburgers, with them shaped on parchment paper as burgers before grilling.
      Grilled Hamburger Seasoning
    • Blue rimmed margarita glasses with margaritas in them on ice cubes with sliced lime garnish.
      Easy Limeade Margaritas
    • A messy grilled burger topped with lettuce, tomato, cheese, pickles and burger sauce in a basket with a bottle of burger sauce.
      Burger Sauce
    • A clear glass bowl filled with tri color cole slaw and wooden tongs stuck in the slaw.
      Coleslaw Recipe (No Mayo)
    • A large pork loin roast with a lot of dry rub seasoning pouring over the top.
      The Best BBQ Dry Rub
    • A white casserole dish with oven roasted pulled pork shredded and ready to eat in tacos or a recipe for dinner.
      Oven Roasted Pulled Pork
    • Looking down on a white plate filled with macaroni salad and a silver fork.
      Classic Macaroni Salad Recipe
    • Looking down into a scooped out watermelon filled with rounded watermelon balls garnished with mint and feta cheese.
      Watermelon Salad
    • A white plate filled with July 4th red white and blue cookies with icing and star sprinkles.
      Patriotic July 4th M&M Cookies
    • Red white check paper lined basked holding a pulled pork sandwich topped with coleslaw.
      Slow Cooker Pulled Pork
    • A sheet pan filled with a flag pie made with strawberries, blueberries, and pie crust.
      American Flag Pie
    • An ice cream cake with a slice removed and covered in colorful sprinkles.
      Ice Cream Cake
    • Mini cheeseburgers with melted cheese, tomato, and lettuce with American flag toothpick decoration on top.
      Cheeseburger Sliders
    • Ears of grilled corn on a white platter seasoned with melted butter on top.
      Grilled Corn On The Cob
    • A blueberry pie that is baked outdoors on a grill with a flag shaped pie crust.
      Blueberry Pie Baked Outdoors
    • Mason jar handled glasses with blueberry lemonade garnished with blueberries, mint, and lemons halves.
      Blueberry Lemonade
    • Two tall glasses of white sangria loaded with blueberries, raspberries, strawberries, and apple star garnish.
      White Wine Sangria
    • A large white spoon scooping a serving of cowboy baked beans out of a casserole dish.
      Cowboy Beans
    • A small white bowl filled with bacon potato salad garnished with crispy bacon.
      Bacon Potato Salad

    Party Drinks & Fourth of July Appetizers

    Serve light and refreshing drinks like white wine sangria, for July 4th and all summer. Use summer fruits in new ways like crostini with strawberries.

    How patriotic are the layered drinks and watermelon stars?

    There are so many fun July food ideas...

    Two glasses of red white and blue drinks on ice in wine goblets.
    Red White and Blue
    Rum Slush
    A white platter with strawberry topped crostini appetizer at a party.
    Balsamic Strawberry Crostini
    Four glasses of red white and blue drinks with straws at a July 4th party.
    Frosted Patriotic Punch
    A large glass dispenser filled with infused water garnished with blueberries, watermelon stars, and strawberries.
    Star Spangled Infused Water
    Raspberry Spritzer
    • Summer Sangria - July 4th Sparklers by Delicious Table
    • Red, White, and Blue Daiquiri by Kleinworth & Co
    • Raspberry Vodka Spritzer by A Communal Table
    • Red, White, and Blue Sangria Sparklers by A Fork's Tale
    • Frozen Bomb Pop Cooler by Bitz & Giggles
    • Easy Homemade Sweet Peach Tea by A Farmgirl's Kitchen
    • Frosty Patriotic Punch by Spend with Pennies
    • Star-Spangled Fruit Infused Water by The View from Great Island
    • Red, White, and Blue Rum Slush for Two by Zona Cooks
    • Blueberry Oatmeal Smoothie by Veggie Inspired
    • CoronaRita Frozen Margarita Beer Cocktail by Delicious Table
    • Raspberry Mint Vodka Spritzer by A Communal Table
    • Hibiscus Cocktails by Delicious Table
    • Real Cuban Mint Mojitos by Delicious Table
    • Hibiscus Margarita by A Communal Table
    • Roasted Hatch Chile Spicy Bloody Mary Mix by Delicious Table
    • Spicy Mexican Beer Micheladas by Delicious Table
    • Marinated Mozzarella Balls by Delicious Table
    • Red, White, and Blue Sangria by Certified Pastry Aficionado
    • Easy Guacamole by Delicious Table
    • Firecracker Shrimp by Delicious Table
    • Watermelon Skewers by Debra Klein
    • Almond Berry Fruit Dip by Dip Recipe Creations
    • Sour Cream Onion Dip by Delicious Table
    • Red White and Blue Golden Oreo Cheeseball by Dip Recipe Creations
    • Balsamic Strawberry Toasted Crostini by Home & Plate
    • Ice Cold Sweet Summertime Blueberry Lemonade by Delicious Table

    Side Dishes & Salads

    Serving lots of sides and salads Fourth of July recipes make your July celebration a feast. Some are light like Vinegar Coleslaw which has a clean taste. Some are traditional, like Cowboy Baked Beans. Try a variety in your Fourth of July menu so everyone is happy...

    A small white bowl filled with baked beans with a bean pot in the background.
    Country Style Baked Beans
    A white bowl filled with salad made with strawberries, blueberries and jicama stars.
    Strawberry Blueberry Jicama Salad
    A white bowl with fruit salsa and a cinnamon cookie on top.
    Summer Fruit Salsa
    A large dish of cowboy beans with white spoon scooping out a serving.
    Cowboy Baked Beans
    A strawberry, tomato summer salad garnished with little daisies.
    Strawberry and Blueberry Salad
    • Cowboy Baked Beans by Delicious Table
    • Easy Picnic Pasta Salad by Delicious Table
    • Fire Grilled Hatch Chile Tomatillo Salsa by Delicious Table
    • Country Style Baked Beans by A Farmgirl's Kitchen
    • Grilled Corn - Mexican Chile Lime Elotes by Delicious Table
    • Macaroni Pasta Salad - Dot's Original Family Recipe by Delicious Table
    • Coleslaw by Delicious Table
    • Red Onions by Delicious Table
    • Red, White, and Bleu Potato Salad by Healthy Seasonal Recipes
    • Summer Fruit Salsa by Home. Made. Interest.
    • Red, White, and Blue American Potato Salad by Delicious Table
    • Garlic Dill Potato Salad by Loaves and Dishes
    • 7 Layer Salad by Delicious Table
    • Fruity Quinoa Salad by Nutrition to Fit
    • Watermelon-Blueberry Salad by Savoring Today
    • Strawberry and Blueberry Caprese Farro Salad by The Forked Spoon
    • The Summer Berry Salad by The Organic Kitchen
    • Watermelon Feta Salad with Blueberries by The Spicy Apron
    • Strawberry, Blueberry, and Jicama Salad by The Whole Serving
    • Beet and Blueberry Salad by Upstate Ramblings
    Two bowls of potato salad for July 4th on a red white and blue star towel and silver forks.

    Cookout Menu, Barbeque, and Grilling

    Okay, what else is more All-American than BBQ or Grilled anything? Ribs, barbecue sauce, grilled chicken, or kabobs these recipes will make your party legendary. And if you are grilling burgers take a look at my collection of 42+ Amazing Burger Sides! Make sure to have plenty of condiments like mustard and pickles for the Beef Burgers.

    Smoked Pork Butt (Pulled Pork Sandwiches)
    A platter filled with well seasoned BBQ ribs with BBQ sauce.
    Fall Off The Bone Ribs
    A pulled chicken sandwich on a hamburger bun.
    Sweet and Spicy BBQ Chicken Sliders
    A silver container filled with bbq sauce, and a brush dripping with the sauce.
    BBQ Sauce
    A pile of BBQ ribs with corn and sweet tea at a BBQ cookout.
    Honey Balsamic Chipotle Ribs
    A cutting board with bright colored kebabs with vegetables and sausages at a July 4th party.
    Firecracker Sausage Kebabs
    A white casserole dish with roasted pulled pork just out of the oven and seasoned with bbq rub.
    • Smoked Pork Butt (Pulled Pork Sandwiches) by Foodology Geek
    • Fall Off The Bone BBQ Ribs Recipe by West Via Midwest
    • Honey Balsamic Chipotle Ribs by A Farmgirl's Kitchen
    • Grilled Pork Kabobs with Bacon Rub by Foodology Geek
    • Chicken Green Chile Sliders by A Communal Table
    • Easy BBQ Pulled Pork Sandwiches by Seannas Kitchen
    • Cheeseburgers by Delicious Table
    • BBQ Sauce Recipe by A Farmgirls Kitchen
    • Sweet and Spicy Barbecue Chicken Sliders by From A Chef's Kitchen
    • Grilled Lamb Chops, Peaches, and Parmesan Mint Pesto by Delicious Table
    • Grill and BBQ Rub by Delicious Table
    • Balsamic Grilled Caprese Chicken by Home & Plate
    • Grilled Ribeye Steaks by Seannas Kitchen
    • Cuban Pulled Pork Sliders by Delicious Table
    • Baked American Cheeseburger Sliders by Delicious Table
    • Quick and Flavorful Firecracker Sausage Kebabs by Easy Cooking with Melanie
    • Firework Hot Dogs by Hustle. Mom. Repeat.
    • Easy Cowboy Butter Sauce by Seannas Kitchen
    • Shish Kabobs by Delicious Table
    • Chili Dogs by Delicious Table
    • Picnic Basket Pressed Sandwiches by Delicious Table
    • Pork Loin Pulled Pork by Delicious Table

    Hamburgers and The Best Cheeseburgers

    Grilled Hamburgers (Cheeseburgers) with burger sauce plus all my tips to make the perfect hamburger patties with easy toppings for summer grilling, BBQs, and cookouts.

    Burger Seasoning makes the flavor-filled juicy hamburgers. Mix up a batch of hamburger seasoning for your next cookout, grill, or BBQ party.

    A lady holding a messy grilled cheeseburger wrapped in paper with baskets of burgers in the background.
    Hamburger Recipe For The Best Cheeseburgers
    Is there anything more American than a hamburger recipe or a classic cheeseburger? This favorite recipe for burgers also has a copycat In-N-Out Burger Sauce made famous in Southern California! There is nothing better than a big fat juicy cheeseburger. Top with tons of melted cheese and the best toppings for burgers like pickles, tomato slices, and crisp cold lettuce.
    GET THE RECIPE PIN IT
    A person holding a messy grilled burger topped with melted cheese, burger sauce, lettuce, tomato, and pickles.
    Hamburger Seasoning Recipe
    Mix up a hamburger seasoning recipe for the most delicious, juiciest burgers. Everyone will rave over at your next backyard BBQ cookout! Add amazing flavor with just a few insider secrets like what beef to buy, how to make the burger patties, and pro grilling tips. Grill restaurant-quality hamburgers in your own backyard this summer.
    GET THE RECIPE PIN IT
    The steps to season hamburgers, with them shaped on parchment paper as burgers before grilling.

    Fourth of July Desserts

    Celebrating the Fourth of July with our national flag colors is an American tradition. And what could be better than pies, tarts, cookies, no-bake desserts, cakes, cupcakes, trifles, cheesecakes, ice cream sandwiches, popsicles, and more for your party?

    I put together a full collection of 100 Patriotic July 4th Dessert Recipes from my food blogger friends, here are a few to inspire you...

    Patriotic Red Velvet Cake Balls
    A small plate with strawberry shortcake and a fork with two wood strawberry baskets.
    Old Fashioned Strawberry Shortcake
    Firecracker Cake
    American Flag July 4th Cake Recipe
    Bake a patriotic American Flag July 4th Cake with red, white, and blue marbled vanilla cake inside. And, an amazing, scrumptious, bakery-style buttercream frosting that is not too sweet, and spreads like a dream.
    GET THE RECIPE PIN IT
    An American flag cake decorated with blueberries, raspberries, and white frosting with a patriotic star towel.
    • American Flag Cake by Delicious Table
    • A Red, White, and Blue Tart by The Simple Sweet Life
    • Red, White, and Blue Cookie Tarts by Foodtastic Mom
    • Best Ever Homemade Apple Pie by A Farmgirl’s Kitchen
    • Dutch Apple Pie by Delicious Table
    • Red, White, and Blue Bites by Chic and Savvy
    • Homemade Cherry Pie Filling by A Farmgirls Kitchen
    • American Flag Strawberry Blueberry Pie by Delicious Table
    • Southern Fried Apple Hand Pies by A Farmgirls Kitchen
    • Deconstructed Patriotic Pie by An Affair from the Heart
    • Red, White, and Blue Berry Fruit Tart by What a Girl Eats
    • Grill-Baked Blueberry Pie by Delicious Table
    • Star-Spangled Berry Sheet Pan Pie by Strawberry Blondie Kitchen
    • American Flag Fruit Tart by That Skinny Chick Can Bake
    • Star-Spangled Cookies by Sugar Spun Run
    • Cherry Cobbler by A Farmgirls Kitchen
    • Red, White, and Blue Swirl Cookies by The Decorated Cookie
    • Patriotic Chocolate Chip Skillet Cookie by Kleinworth & Co
    • Patriotic M&M Pudding Cookies by An Affair from the Heart
    • Patriotic Cookies – Stars n’ Stripes USA Cookies by Delicious Table
    • Easy Patriotic Bark by What the Fork
    • Patriotic White Chocolate Pretzels by Beyond the Chicken Coop
    • 4th of July Donuts by The Simple Sweet Life
    • Firecracker Cake by Love Bakes Good Cakes
    • Yogurt Parfaits by Delicious Table
    • Old Fashioned Strawberry Shortcake by A Farmgirl’s Kitchen
    • Patriotic Mini Trifles by Strawberry Blondie Kitchen
    • Wave Your Flag Cheesecakes by Grumpy’s Honeybunch
    • Angel Cake Berry Trifle Sundae by A Farmgirl’s Kitchen
    • Red, White, and Blueberry Smoothie Popsicles by The Suburban Soapbox
    • Berrylicious Ice Pops by Joy Filled Eats
    • Berries and Cream Ice Cream Pie by Joy Filled Eats
    • Red, White, and Blue Patriotic Fruit Popsicles by Delicious Table
    • Firecracker Popsicles by Fried Dandelions
    • Berry Cheesecake Bomb Pops by Lively Table
    • Patriotic Ice Cream Sandwiches by Cooking on the Front Burner
    • Cherry Pie Ice Cream Sandwiches by Delicious Table
    An ice cream cake for July 4th with a slice cut out of it on a patriotic red, white, and blue star tablecloth.
    Patriotic Ice Cream Cake

    July 4th Food FAQ

    What Are Traditional July 4th Menu Ideas?


    Here are some traditional 4th of July foods for cookouts, picnics, and potluck sides.

    Grilled Cheeseburgers/Hamburgers
    BBQ Ribs
    Grilled Hot Dogs,
    Sausages & Hamburgers
    Beer and Soda
    Corn on the Cob
    S'mores
    Lemonade
    Strawberry Shortcake

    7 Layer Salad
    Red Solo Cups
    Red, White, and Blue Drinks and Cocktails
    Apple, Cherry, or Strawberry Pie
    Ice Cream Sandwiches
    Popsicles
    Potato Salad
    Macaroni Salad
    Watermelon Salad
    Pasta Salad
    Coleslaw
    Red, White, and Blue Desserts

    Is It July 4th, Fourth of July, or Independence Day?

    Independence Day, also referred to as the Fourth of July or July Fourth, is a federal holiday in the United States commemorating the adoption of the Declaration of Independence on July 4, 1776. The Continental Congress declared that the thirteen American colonies regarded themselves as a new nation, the United States of America, and were no longer part of the British Empire. The Congress actually voted to declare independence two days earlier, on July 2.

    Independence Day is commonly associated with fireworks, parades, cookouts, barbecues, carnivals, fairs, picnics, concerts, baseball games, family reunions, and political speeches and ceremonies, in addition to various other public and private events celebrating the history, government, and traditions of the United States. Independence Day is the National Day of the United States. (source: Wikipedia)

    Small glass trifles filled with candy, whip cream, and July 4th sprinkles.

    More Party Food

    Celebrate with July 4th Recipes on Independence Day at your Grill and BBQ party, Cookout, or Picnic. Make it one to remember with these Summer recipes...🇺🇸

    100+ July 4th Recipes for your cookout menu including grilling recipes, side dishes, and picnic food ideas with drinks, desserts, and more! Some of the classic “must-haves” on the 4th of July are more than tradition, they make our celebrations into memories with friends and family! Many of these recipe ideas have patriotic red, white, and blue colors, and all are easy.

    This complete guide has over fifty Bridal Shower Food Ideas to host an elegant party for the bride-to-be. Choose from creative, delicious recipes with planning tips for a beautiful wedding shower for the bride.

    Celebrate with over 50+ high school and college Graduation Party Food Ideas. Throw an awesome 2023 grad party full of delicious food and drinks!

    These are the best side dishes to make during cookout season! This ultimate list has 30+ Cookout Side Dish Recipes that will inspire you to create the yummiest food for family gatherings, summer picnics, outdoor cookouts, backyard barbecues, or church potlucks.

    Look through 42 of the Best Burger Sides! These recipes will help you throw a legendary backyard cookout or July 4th BBQ with clever Summer party food ideas.

    A complete Cookout Menu with over 60 recipes for grilling, sides, drinks, desserts, potluck sides, and more for your outdoor BBQ party. Plus inspiring ideas, tips, and hacks to make your cookout spectacular.

    Gather your party guests and throw a legendary football party with spectacular, delicious Super Bowl foods for the biggest game of the year. And tailgate in style with all your fan favorites with some of these amazing Football Food Ideas.

    Boo! Take a peek through 200+ of the Best Halloween Recipes from inspiring Food Blogger friends!

    • A graphic showing lots of food for July 4th including cheeseburgers, corn, and baked beans.
      100+ July 4th Recipes
    • A pink and white cake with buttercream flowers on a cake plate with glasses of pink champagne at a bridal shower.
      50+ Bridal Shower Food Ideas
    • A grad party with red, white, and black food themed items on a table like a cake and snacks.
      50+ Graduation Party Food Ideas
    • A collage of many colorful side dishes to make during cookout season including potluck salads, baked beans, fruit salad, summer desserts and more.
      30+ Cookout Side Dish Ideas
    • A grilled burger loaded with toppings and served at a cookout in paper lined plastic baskets.
      42 Amazing Burger Sides For Cookouts
    • A square collage of colorful grilled food, side dishes, desserts, and drink recipes to serve at an outdoor bbq cookout.
      75+ Cookout Recipes & BBQ Party Ideas
    • A football shaped cheese ball coated with crumbled bacon, green onions, and cheddar cheese and white cheese to look like laces on the football surrounded by crackers on a platter.
      75+ Football Food Recipes
    • Dozens of pictures of 200 Halloween recipes including adult drinks, appetizers, treats, snacks, desserts for kids and families all with a Halloween theme.
      200+ Best Halloween Recipes

    Did you love this recipe? We would love to hear from you! If you make this recipe and love it, give it a 5-star rating ⭐⭐⭐⭐⭐ with a comment. THANK YOU!! Follow Delicious Table with my free newsletter and share this recipe with your friends on Facebook, Pinterest, and Instagram.

    A graphic loaded with July 4th desserts with red white and blue cakes, pies, and treats.
    Print

    100+ July 4th Dessert Recipes + American Flag Cake

    Celebrate Independence Day with 4th of July desserts and red, white, and blue recipes for your block party, potluck picnic, or backyard cookout! Browse over 100 Fourth of July party ideas including cakes, cookies, cheesecakes, easy dessert recipes, frozen treats, and so much more.
    Course Dessert
    Cuisine American
    Keyword flag cake, July 4th cake, July 4th Dessert, July 4th recipes
    Prep Time 45 minutes minutes
    Cook Time 30 minutes minutes
    Total Time 1 hour hour 15 minutes minutes
    Servings 20
    Calories 585kcal
    Author Lisa Hatfield

    Equipment

    • Rectangle 9 x 13 Cake Pan (3" deep)
    • Offset Icing Spatula
    • Large Reusable Piping Bag
    • Large Star Piping Tip (1M)

    Ingredients

    9 X 13 rectangle cake

    • 1 boxed white vanilla cake mix 16 cups cake batter for pans than 3”
    • water vegetable oil eggs called for on cake mix box
    • red food color or gel
    • blue food color or gel
    • fresh raspberries
    • fresh blueberries

    cake frosting

    • 2 cups salted butter - room temperature (2 sticks)
    • 1 cup vegetable shortening
    • 10 cups powder sugar (confectioners sugar)
    • 4 tablespoons hot water
    • 1 tablespoon vanilla extract
    • ½ teaspoon almond extract (optional but great!)

    Instructions

    cake pan

    • Put a few drops of vegetable oil in bottom of your cake pan. Next, line with parchment paper cut to fit the bottom of the pan.
    • This will help release the cake from the pan and makes clean up much easier. If you are serving the cake right from the pan and not removing the cake to decorate, don’t line the pan of course!

    make frosting

    • Beat soft butter and shortening in a mixer on high until creamy for 5 minutes.
    • At low speed, add powder sugar 1 cup at a time until smooth.
    • On high speed, mix in vanilla, almond extract, and hot water for 5 minutes until fluffy and smooth.

    bake cake

    • Mix your cake batter in a large mixing bowl or stand mixer according to the box directions. (Deeper pans might need more cake batter - I used a deeper pan (3 inches deep, most pan are 2 inches deep) so I mixed up 2 boxes of cake batter).
    • In a small bowl place 1-2 cups of batter, stir in red food color until it’s the red you like. In another small bowl, place 1-2 cups of the batter; stir in blue food color until it’s the blue you like.
    • Now, pour dollops of the batter into the pan alternating from red, white and blue. Try to place the batter on top of each area, it will begin to spread out.
    • When all the batter is in the cake pan, use a skewer to pull lines from the center outward, and then do some slight swirls around the pan. This helps create the marble design. Rap the pan down on the counter to help level the batter and pop any bubbles in the batter that would make the cake bake uneven.
    • Bake according to your cake box directions, most classic cake mixes require a 350-degree oven for 28 minutes for a regular 9x13 cake pan. (If you use a cake pan deeper than 2 inches, reduce baking temperature to 325 degrees and bake longer for 55 minutes). Check with a toothpick, if it comes out clean the cake is done.

    decorate cake

    • Cool cake for 10 minutes in the cake pan, then remove it to a wire rack to finish cooling. Cool the cake in the refrigerator for at least two hours or preferably overnight before decorating. I like to bake cakes one day, then decorate them the next. This helps release the steam in the cake and the frosting holds on the cake when chilled, otherwise, it melts.
    • Place a dollup of frosting on a small piece of cardboard or a tray, and set the cake on top. This keeps the cake from sliding around while decorating.
    • Frost the cake with frosting using a small offset spatula. Smooth out the frosting as best you can all over the top and sides of the cake.
    • Using a knife, draw a line about 5 inches long and 4 inches tall for the blue part of the flag in the upper left corner. Place blueberries in that box, pick the best larger ones and place them with the smooth side up.
    • Starting at the top of the cake, use large raspberries pointed up and make long rows of red, leaving 1" white stripe in between each row of raspberries.
    • Fill a large piping bag with a large 1M star tip and frosting. PRO TIP: rest the piping bag in a tall sturdy jar or glass and pull the piping bag down, it really helps to fill it up. Pipe stars on blueberries for the stars of the flag working in slightly offset rows like the flag.
    • Pipe stars in between rows of raspberries, and decorate the sides of the cake if you wish. You will have some frosting leftover, it freezes great in a zip-top bag, and can be used for another dessert.
    • The cake will hold well overnight in the refrigerator for 1 day, and possibly 2 days if your berries are really fresh. I would decorate the cake either the day of your party or the night before. I have also had guests decorate it during the party which was SO much fun!

    Video

    Notes

    cake storage

    The flag cake will last up to 2 days chilled in the fridge. The frosting will firm up, so remove the cake at least one hour before serving to let the frosting soften up before serving. 

    frosting

    This frosting recipe is SOOO fluffy and easy to spread at room temperature. But it firms up nicely when chilled in the fridge, so decorate your cake with room temperature frosting. You can freeze any leftover frosting, and use it for another dessert.

    baking pans

    You can bake this in a sheet pan, glass 9 x 13 dish, or metal cake pan. If you use a pan deeper than 3 inches, you will want to lower the temperature from 350 down to 325 degrees and bake it longer, about 50 minutes. Also, be sure to line the pan with parchment, it makes taking the cake out so much easier, and in one piece. 🍰

    batter

    Coloring the batter is really easy, be sure to use bowls that won't stain with the dye, and just work to put big dollops on top of each other, with lots of white batter all over. Then use a chopstick to pull outward from the center and then in a circle, this makes the swirls you want! 🥣

    baking

    You can bake the cake a day ahead, and keep it chilled in the fridge until it's time to decorate it. You will want the cake very cool before you frost it!

    decorating

    A small offset spatula makes it really easy, but you can use a butter knife too. I had fun piping stars on the cake, totally optional but looks so patriotic. 🇺🇸 Use a large piping bag and 1M tip to create the stars. I used regular food coloring, just mix until it's a dark enough shade. Red took the whole little bottle.

    berries

    I used blueberries and raspberries, but you could use strawberries for the red stripes. You could also use colored sugar or sprinkles for the stripes. 🫐❤️

    July 4th Recipes

    I have a collection of over 100+ July 4th Desserts with treats from my food blogger friends plus a few of mine, with something for everyone. Happy July 4th 🇺🇸, you can also get over 100+ July 4th Recipes and food ideas for your party.

    July 4th Cookouts, BBQs, and Picnic Tips!

    • Use serving pieces you have, red, white, and blue are great but not necessary. Look high and low for the thing you have-trust me you have great pieces to use. Find trays, baskets, bowls, or buy inexpensive ones. 
    • Plan an area for all the food. A nice long table in the shade, the dinner table, or a kitchen counter space all work great. Serve out of the heat, cover food, and try to keep any salads or meat items covered.
    • For summer pool parties, I make sure to get food back in the fridge after about an hour or so to keep it safe, then take it out later in the day when people get hungry again.
    • Plan for your number of guests, and space to walk around the table, and chairs, and places to sit in the shade.
    • Have containers to send leftovers home with guests, people love it! I use inexpensive Chinese paper takeout containers or grocery store brands.
    • If serving outside, plan out to keep food protected from flying insects with food tents, chill salads, and keep dishes out of the direct sun if possible. 
    • Use what you have to create different heights if possible and to keep people moving around trying different dishes. I sometimes use boxes under pretty linens and tablecloths to create high and low places.
    • Use American flags, linens, flowers, and patriotic decorations.
    • Serve salads in large chilled bowls on ice packs with a pretty towel covering the ice packs.  There are also platters that stay chilled for up to two hours, I have a couple and love them. 


      Nutrition

      Calories: 585kcal | Carbohydrates: 81g | Protein: 1g | Fat: 30g | Saturated Fat: 15g | Polyunsaturated Fat: 4g | Monounsaturated Fat: 9g | Trans Fat: 2g | Cholesterol: 49mg | Sodium: 343mg | Potassium: 24mg | Fiber: 1g | Sugar: 70g | Vitamin A: 567IU | Calcium: 63mg | Iron: 1mg

      Did you love this recipe? We would love to hear from you! If you make this recipe and love it, give it a 5-star rating ⭐⭐⭐⭐⭐ with a comment. THANK YOU!! Follow Delicious Table with my free newsletter and share this recipe with your friends on Facebook, Pinterest, and Instagram.

      A graphic showing lots of food for July 4th including cheeseburgers, corn, and baked beans.
      Print

      100+ July 4th Recipes ~ Cheeseburger Sliders with Burger Sauce

      100+ July 4th recipes for your cookout menu including grilling recipes, side dishes, and picnic food ideas with drinks, desserts, and more. These cheeseburger sliders are stuffed with cheese and have an easy burger sauce, baked or grilled, these sliders are scrumptious.
      Course Dinner & Main Dishes
      Cuisine American
      Keyword baked hamburgers, burger sauce, cheeseburger sliders
      Prep Time 15 minutes minutes
      Cook Time 20 minutes minutes
      Total Time 25 minutes minutes
      Servings 24
      Calories 335kcal
      Author Lisa Hatfield

      Equipment

      • Large Metal Sheet Pan
      • Patriotic Cupcake Picks and Wrappers
      • Large Scoop
      • Pop Up Food Tents (picnics, BBQ)

      Ingredients

      Cheese Stuffed Hamburgers

      • 3 lb ground hamburger
      • 24 ½" cubes cheddar cheese use a block of cheese
      • 3 tablespoons BBQ Grill Rub your favorite or try mine!
      • 1 cup Worcestershire

      Burger Sauce

      • 4 tablespoons ketchup
      • 4 tablespoons mayonnaise
      • 4 tablespoons dill or sweet relish

      Baked Hamburgers

      • 24 mini hamburger buns
      • 1 cup burger sauce
      • 24 cheese stuffed cooked hamburger patties
      • 24 tomato slices
      • ruffled bib lettuce
      • 6 slices Colby cheese slices cut into quarters
      US Customary - Metric

      Instructions

      Make the Burger Sauce

      • Measure equal portions of ketchup, mayo, and relish (either dill or sweet).
      • Mix in a small container, and chill until ready to use. This sauce is SO easy and really makes burgers amazing!

      Oven Bake the Hamburgers

      • Preheat oven to 400 degrees.
      • Line a large sheet pan with parchment paper.
      • Cut 24 cheddar cheese 1" cubes from a large block of cheese.
      • In a large bowl, mix hamburger meat, grill rub, and Worcestershire sauce until well combined. Use a 2” ice cream scoop to get cheeseburgers even sized, place a ½" cube of cheddar cheese inside, and form into a ball. Place on the parchment-lined sheet pan.
      • BAKE 400 degrees 20 minutes until well done, an internal temperature of 160 degrees.

      Assemble Hamburgers

      • Slice buns open, spread burger sauce on each side of the bun.
      • Stack lettuce, tomato, burger, ¼ of a Colby cheese slice, and serve on a patriotic tray (or in cupcake wrappers) and stick a flag toothpick on top. Serve with burger sauce.

      Video

      Notes

      July 4th Cookout, Barbeque, Picnic Tips

      • Use serving pieces you have, red, white, and blue are great but not necessary. Look high and low for the thing you have-trust me you have great pieces to use. Find trays, baskets, bowls, or buy inexpensive ones. 
      • Plan an area for all the food. A nice long table in the shade, the dinner table, or a kitchen counter space all work great. Serve out of the heat, cover food, and try to keep any salads or meat items covered.
      • For summer pool parties, I make sure to get food back in the fridge after about an hour or so to keep it safe, then take it out later in the day when people get hungry again.
      • Plan for your number of guests, and space to walk around the table, and chairs, and places to sit in the shade.
      • Have containers to send leftovers home with guests, people love it! I use inexpensive Chinese paper takeout containers or grocery store brands.
      • If serving outside, plan out to keep food protected from flying insects with food tents, chill salads, and keep dishes out of the direct sun if possible. 
      • Use what you have to create different heights if possible and to keep people moving around trying different dishes. I sometimes use boxes under pretty linens and tablecloths to create high and low places.
      • Use American flags, linens, flowers, and patriotic decorations.
      • Serve salads in large chilled bowls on ice packs with a pretty towel covering the ice packs.  There are also platters that stay chilled for up to two hours, I have a couple and love them. 

      Party Checklist

      • Trays - regular or ones that stay chilled 
      • Small Bowls
      • Small Serving Spoons
      • Salad Tongs
      • Napkins
      • Utensils
      • Plates
      • Red Solo Cups
      • Ice
      • Insect Tents/Covers
      • Bottled Water
      • Iced Tea or Lemonade
      • Chips, Pretzels, Snacks
      • Cookout, BBQ, and Grill Items
      • Cocktails and Drinks
      • Desserts

      Burger Serving Ideas

      Try serving the cheeseburger sliders on patriotic cupcake wrappers on a tray, easier to eat and hold at a party.

      Party Planning Portions

      These are small hamburgers, plan on at least two per person.

      Burger Sauce

      Is SO GOOD! Serve extra so people can add more if they like. 
      What Kind of Bread Buns Work for Small Burgers?
      • Small Dinner Rolls
      • Parker House Rolls
      • King's Hawaiian Bread Rolls
      • Martin's Potato Rolls
      • Petite Brioche Buns
       

      Nutrition

      Calories: 335kcal | Carbohydrates: 27g | Protein: 16g | Fat: 17g | Saturated Fat: 6g | Cholesterol: 48mg | Sodium: 480mg | Potassium: 394mg | Fiber: 1g | Sugar: 5g | Vitamin A: 380IU | Vitamin C: 6.1mg | Calcium: 173mg | Iron: 4mg

      Brie and Bacon Mini Quiche

      [heart_this] · May 18, 2021 · 8 Comments

      A vintage wire rack with four baked brie and bacon mini quiche.

      Last Updated April 19th, 2022 at 02:15 pm by Lisa

      Make scrumptious Brie and Bacon Mini Quiche in muffin tins or small pie dishes, and serve these easy-to-make bacon quiches for brunch or breakfast.

      Every time I serve these for brunch people love the small individual quiche size, and really want this recipe. Maybe it's all that bacon on top...

      You Will Need

      • 4 pie crusts store-bought or homemade
      • 8 ounces brie cheese (remove rind optional)
      • 4 cups grated swiss cheese shredded (or Monterey Jack Cheese)
      • 12 slices Bacon (Cooked Crisp, Drained, Crumbled)
      • 6 large eggs (or egg beaters)
      • ½ cup whipping cream
      • ½ cup sour cream
      • 1 teaspoon Worcestershire sauce
      • 1 pinch each nutmeg, sea salt, pepper

      Top Mini Quiche Tips

      • Use homemade or store-bought pie crust both work well in this recipe.
      • Spray the muffin tin, even non-stick ones, that way if thing bubble over it's easier to clean.
      • A water glass or cookie cutter works well to cut the pie crust for the muffin tin.
      • One more thing, I made a few of these without bacon, and they were delish. So consider making a few that way!
      • The quiche will puff up while baking, and that is ok. This happens because of the egg mixture. They will fall quite a bit once out of the oven.
      • This recipe will make 24 regular or 6 small 5-inch individual pie dishes.
      • Try making a few without bacon, they are incredible. Or add some chopped veggies like onion, bell pepper, or mushroom. 
      1. Preheat the oven to 375 degrees. Spray two muffin tins with non-stick coconut spray. Use a water glass or cookie cutter that cuts the pie dough to fill the bottom of each muffin tin cup.
      2. Cut out the pie crusts, reroll the pie dough, and cut them all out.
      3. Place pie dough pieces in the bottom of each muffin tin space, pressing them in place.
      4. Crumble 3 pieces of brie (you can remove the coating or leave on - your preference) and the grated swiss cheese (or Monterey jack) in the bottom of the pie crust.

      5. Using a whisk or fork, mix eggs, heavy whipping cream, sour cream, Worcestershire sauce, nutmeg, salt, and pepper.

      6. Use a ¼ measuring cup, and pour into each of the muffin tin cups or fill the small pie dishes until ½" from the top edge.

      7. Spread crumbled bacon on top.

      8. Bake at 375 degrees for about 50-55 minutes, until a toothpick, comes out clean and the pie crust is slightly golden and baked. Cool slightly before serving.

      Quiche FAQs


      What Is Quiche?

      Quiche is a savory French tart with a pastry crust that is filled with eggs and other delicious flavorings, like cheese, meat, seafood, or vegetables.

      Will Quiche Freeze?

      YES. It freezes very well. I recommend letting it sit in the fridge for a good 24 hours to thaw before you reheat and eat it.

      Can Quiche Be Made Ahead?

      You don’t want the crust to get soggy, which can happen sometimes. So, to avoid this, I would make the crust and fill it separately, and just combine them when you are ready to eat and bake it!

      Brunch Menu Ideas

      Grapefruit Green Smoothies

      Irish Coffee & Mimosa's

      Pastry From The Bakery

      Baked Parmesan Hash Browns

      Mini Brie & Bacon Quiche

      Yogurt Parfaits

      Pancake Muffin Bites

      Two glasses of grapefruit juice with mini quiches and flowers in the background at brunch.

      More Breakfast Ideas

      You must use the category name, not a URL, in the category field.

      Did you love this recipe? We would love to hear from you! If you make this recipe and love it, give it a 5-star rating ⭐⭐⭐⭐⭐ with a comment. THANK YOU!! Follow Delicious Table with my free newsletter and share this recipe with your friends on Facebook, Pinterest, and Instagram.

      A vintage wire rack with four baked brie and bacon mini quiche.
      Print

      Brie and Bacon Mini Quiche

      Make Brie and Bacon Mini Quiche in muffin tins or small pie dishes. Serve for brunch or breakfast, the bacon and brie combination is scrumptious!
      Course Breakfast & Brunch
      Cuisine American
      Keyword bacon quiche, mini quiche, quiche recipe
      Prep Time 30 minutes minutes
      Cook Time 55 minutes minutes
      Total Time 1 hour hour 25 minutes minutes
      Servings 24
      Calories 317kcal
      Author Lisa Hatfield

      Ingredients

      • 4 pie crusts store-bought or homemade
      • 8 ounces brie cheese (rind removed)
      • 4 cups grated swiss cheese shredded (or Monterey Jack Cheese)
      • 12 slices Bacon Cooked Crisp, Drained, Crumbled
      • 6 large eggs or egg beaters
      • ½ cup whipping cream
      • ½ cup sour cream
      • 1 teaspoon Worcestershire sauce
      • 1 pinch each nutmeg, sea salt, pepper
      US Customary - Metric

      Instructions

      • Preheat the oven to 375 degrees. Spray two muffin tins with non-stick coconut spray. Use a water glass or cookie cutter that cuts the pie dough to fill the bottom of each muffin tin cup.
      • Cut out the pie crusts, reroll the pie dough and cut them all out.
      • Place pie dough pieces in the bottom of each muffin tin space, pressing them in place.
      • Crumble 3 pieces of brie (you can remove the coating or leave on - your preference) and the grated swiss cheese (or Monterey jack) in the bottom of the pie crust.
      • Using a whisk or fork, mix eggs, heavy whipping cream, sour cream, Worcestershire sauce, nutmeg, salt, and pepper.
      • Use a ¼ measuring cup, and pour into each of the muffin tin cups or fill the small pie dishes until ½" from the top edge.
      • Spread crumbled bacon on top.
      • Bake at 375 degrees for about 50-55 minutes, until a toothpick comes out clean and the pie crust is slightly golden and baked. Cool slightly before serving.

      Notes

      Oven Puff

      The quiches will puff up while baking, and that is ok. They will fall quite a bit once out of the oven.

      Portions

      This recipe will make 6 small 5-inch individual pie dishes or 24 regular muffin tin quiches.

      Variations

      Try making a few without bacon, they are incredible. Or add some chopped veggies like onion, bell pepper, or mushroom.

      Top Tips

      • Use homemade or store-bought pie crust both work well in this recipe.
      • Spray the muffin tin, even non-stick ones, that way if thing bubble over it's easier to clean.
      • A water glass or cookie cutter works well to cut the pie crust for the muffin tin.
       

      Nutrition

      Calories: 317kcal | Carbohydrates: 15g | Protein: 11g | Fat: 23g | Saturated Fat: 10g | Cholesterol: 83mg | Sodium: 306mg | Potassium: 105mg | Vitamin A: 370IU | Vitamin C: 0.1mg | Calcium: 180mg | Iron: 1.1mg

      Yogurt Parfaits

      [heart_this] · May 11, 2021 · 2 Comments

      Four small yogurt parfaits made with yogurt, granola and berries.

      Last Updated June 10th, 2022 at 07:51 pm by Lisa

      Yogurt Parfaits are a great make-ahead breakfast or snack on the go. This recipe includes homemade granola and can be made the night before.

      Put any flavor yogurt in the bottom of the glass, layer with granola, top with fruit you love-even frozen fruit works and drizzle with honey. You can pop lids on these breakfast parfaits, and tuck them into the fridge. In just minutes you have something healthy to eat anytime...

      Four yogurt parfaits layered with yogurt, granola, and fresh raspberries and blackberries.

      ⬆ Yogurt Parfaits Video ⬆

      You Will Need

      Granola, preferably homemade...

      Yogurt of your choice

      Fruit of your choice

      A drizzle of honey

      Ingredients labeled to make yogurt parfaits with a granola recipe on a table.

      Let's Make Granola (Or Buy It!)

      Step 1: Roughly chop the nuts you chose. Sliced almonds work really well, pistachios are the right size too, just rough chop larger nuts like walnuts and pecans.

      Step 2: In a large mixing bowl, add the coconut oil, vanilla extract, and honey, mix but it won't totally incorporate.

      Step 3: Next add all dry ingredients: chia seeds, cinnamon, brown sugar, pistachios, almonds, pecans, coconut, wheat germ, bran flake cereal, and rolled oats.

      Step 4: Mix all ingredients, place in a single layer on a large baking sheet pan.

      Step 5: Bake 225 degrees for 1 hour. Stir every 15 to 20 minutes while baking.

      Step 6: Remove from oven, stir every 20 minutes until cool. This prevents the granola from forming clumps.

      TIP: Granola keeps well refrigerated in a ziplock bag or sealed in containers for several weeks!

      3 zip top bags filled with granola made at home on a beige towel.
      Homemade Granola Recipe
      Granola made with quality ingredients is the best breakfast cereal, use this recipe in yogurt bowls, granola bars, cookies, and more!
      GET THE RECIPE PIN IT
      A wooden bowl filled with granola and a wooden spoon.

      Assemble Parfaits

      In a small glass or mason jar, layer yogurt, homemade granola, fruit, and drizzle with honey.

      Mason jars are a GREAT container for a portable breakfast. Plus, yogurt in a jar is just fun to eat. I LOVE these new plastic lids for Mason jars, no more rusty lids!

      Assemble the night before and grab on your way out the door. Now you're off to a healthy start to your day. Who wouldn't want a breakfast that looks like this?

      A layered yogurt parfait with granola and fresh raspberries and blackberries.
      What Does "Parfait" Mean?


      "Parfait" is from the French word that means "perfect." It is typically a cold dessert consisting of layers of ice cream, fruit, syrup, and or whip cream served in a glass that shows the layers.

      More Healthy Breakfast Recipes

      Steamed hard-boiled eggs cook perfectly every time with no green ring. So easy to peel, that the eggshells miraculously slip right off. These are the ultimate in perfectly hard cooked eggs that are made fast to slice and chop beautifully for your recipes. Or simply enjoy for breakfast or snacks.

      For a fresh clean start for breakfast, try these amazing Pink Grapefruit Green Detox Smoothies. For a healthier breakfast, the whole family will love, try my Parmesan Baked Hash Browns. They are not cooked in oil, simply baked to a golden brown. It doesn't get much healthier than this gorgeous green Avocado Toast.

      • 6 perfectly hard boiled eggs with a cracked half of an egg shelf on top.
      • Two glasses of a green smoothie recipe garnished with grapefruit slices and straws.
      • Three golden crispy edged hash browns baked in a muffin tin on cutting board.
      • A close up photo of a slice of avocado toast topped with small heirloom tomatoes and microgreens.

      Did you love this recipe? We would love to hear from you! If you make this recipe and love it, give it a 5-star rating ⭐⭐⭐⭐⭐ with a comment. THANK YOU!! Follow Delicious Table with my free newsletter and share this recipe with your friends on Facebook, Pinterest, and Instagram.

      Four small yogurt parfaits made with yogurt, granola and berries.
      Print

      Yogurt Parfaits

      Yogurt Parfaits are a great make-ahead breakfast or snack on the go. This recipe includes homemade granola and can be made the night before!
      Course Breakfast & Brunch
      Cuisine American
      Keyword breakfast parfaits, granola breakfast, yogurt parfaits
      Prep Time 15 minutes minutes
      Cook Time 1 hour hour
      Total Time 1 hour hour 15 minutes minutes
      Servings 24
      Calories 249kcal
      Author Lisa Hatfield

      Equipment

      • Mason Ball Pint Jar
      • Regular and Wide Mouth Mason Jar Plastic Lids

      Ingredients

      Wet Ingredients

      • ¾ cup melted coconut oil
      • 3 tablespoons vanilla extract
      • 1 cup honey

      Dry Ingredients

      • ¼ cup chia seeds
      • 1 teaspoon cinnamon
      • 3 tablespoons brown sugar
      • 1 cup unsweetened flaked coconut
      • 1 cup wheat germ
      • 1 ½ cup pistachios, almonds, pecans
      • 2 cups bran flake cereal
      • 6 cups rolled oats (not quick oats)

      Parfait Toppings

      • yogurt of your choice
      • fruit of your choice
      • a drizzle of honey
      US Customary - Metric

      Instructions

      Homemade Granola

      • Roughly chop the nuts you chose. Sliced almonds work really well, pistachios are the right size too, just rough chop larger nuts like walnuts and pecans.
      • In a large mixing bowl, add the coconut oil, vanilla extract, and honey, mix but it won't totally incorporate.
      • Next add all dry ingredients: chia seeds, cinnamon, brown sugar, pistachios, almonds, pecans, coconut, wheat germ, bran flake cereal, and rolled oats.
      • Mix all ingredients, place in single layer on a large unlined 10 x 15 sheet baking pan.
      • Bake 225 degrees for 1 hour, and stir every 20 minutes while baking.
      • Remove from oven, stir every 20 minutes until cool. This prevents the granola from forming clumps.

      Parfaits

      • In a small glass or mason jar, layer yogurt, homemade granola, fruit, and drizzle with honey.
      • Put the lid on the mason jar and keep refrigerated.

      Video

      Notes

      rolled oats

      Use old-fashioned rolled oats as opposed to quick-cook oats, they have a better texture in your granola. 

      storage

      Homemade granola keeps well in a ziplock bag or sealed container for several weeks!

      nuts

      I love slice almonds, pecans, and pistachios! But other options are sunflower seeds, walnuts, cashews, pumpkin seeds, or sesame seeds would all be great.


      Nutrition

      Serving: 0g | Calories: 249kcal | Carbohydrates: 34g | Protein: 5g | Fat: 12g | Saturated Fat: 8g | Trans Fat: 1g | Sodium: 25mg | Potassium: 173mg | Fiber: 5g | Sugar: 14g | Vitamin A: 85IU | Vitamin C: 1mg | Calcium: 29mg | Iron: 2mg

      Lemon-Dill Butter

      [heart_this] · May 8, 2021 · 6 Comments

      Small brown round cutting board with slices of lemon dill butter garnished with fresh lemon and dill.

      Last Updated May 12th, 2023 at 06:16 pm by Lisa

      Lemon Dill Compound Butter pairs with grilled salmon and vegetables with incredible flavor. Store in the freezer for months!

      Lemon and dill are a great flavor combination, this butter works fabulously slathered on any fish, grilled chicken, bread, or vegetables like grilled corn, asparagus, roasted potatoes, and lobster. Flavored butter is one of the best cooking tips my Mom ever taught me, and there are endless ways to make it at home.

      Slice off a coin of this lemon butter, and watch it melt into a "sauce" at dinnertime, you will make it again and again...

      How To Make Compound Butter

      1 cube butter, softened

      2 tablespoons fresh dill, chopped

      pinch of salt

      2 tablespoons fresh lemon zest

      1 tablespoon fresh lemon juice

      1. In a small bowl, place the butter, zest of one fresh lemon, one squeeze of lemon juice, and a pinch of salt.
      2. Mix until combined using a small spatula, place on a piece of plastic wrap or parchment paper, and fold the paper or wrap over the lemon-dill butter.
      3. Push the lemon dill butter into a long roll shape using the plastic wrap to get it about an inch wide. Twist the ends closed.
      4. Place in the fridge to firm up and use that day.
      5. Slice into coins, and serve over grilled fish, potatoes, or asparagus.
      6. Keep in a ziplock bag in the freezer for up to 4 months.
      A small round cutting board with slices of lemon dill butter and sliced lemon garnish.

      Compound Butter FAQ

      What is compound butter?


      Compound butter can be made at home by adding delicious ingredients such as fresh fruit or herbs, spices, sweet maple syrup, spicy jalapenos, and garlic, to soft butter for different flavored butter combinations.
      The flavor options are truly endless, and it is a great way to use up small amounts of ingredients. Use your creativity to come up with your own flavors of compound butter.

      Think both sweet and savory! Hey, they will keep for a couple of months in the freezer, so have fun and create your own to take a dish you love to the next level of deliciousness.

      How to store compound butter?


      The flavored soft compound butter is rolled into a long roll in parchment paper or plastic wrap or formed in molded shapes using small butter mold trays. Place in a ziptop freezer bag and keep in the freezer until ready to use.

      How Long Will Compound Butter Last?


      Compound butter will keep in the refrigerator for about 2 weeks. The firm compound butter placed in the freezer will keep for several months frozen and well wrapped.

      Slather Compound Butter On

      1. slather on corn on the cob
      2. melt over fish, shrimp or lobster
      3. toss into fresh pasta
      4. butter over hot bread
      5. try it on any fish dish
      6. afternoon tea sandwiches
      7. use on hot grilled steaks
      8. stir into hot mashed potatoes
      9. goes very well with grilled chicken
      10. add to sauces for a glossy finish
      11. place on grilled vegetables
      12. spread on cooked asparagus

      More Compound Butter Flavors

      One of my favorite things to always keep on hand is my Homemade Herb Butter, take a look at all the ideas for that recipe, it is especially good on toasted French bread.

      • Sage Butter
      • Mint Butter
      • Garlic Herb Butter
      • Sun Dried Tomato Butter
      • Basil Butter
      • Tarragon Butter
      • Herb Butter
      • Orange Butter
      • Strawberry Butter (think pancakes and waffles!)
      • A glass bowl filled with compound butter made with herbs and sun dried tomatoes, and them scattered on the cutting board.
        Sun Dried Tomato Butter
      • Homemade herb butter wrapped in parchment paper on a cutting board with fresh herbs.
        How To Make Herb Butter

      Did you love this recipe? We would love to hear from you! If you make this recipe and love it, give it a 5-star rating ⭐⭐⭐⭐⭐ with a comment. THANK YOU!! Follow Delicious Table with my free newsletter and share this recipe with your friends on Facebook, Pinterest, and Instagram.

      Small brown round cutting board with slices of lemon dill butter garnished with fresh lemon and dill.
      Print

      Lemon-Dill Butter

      Make Lemon Dill Compound Butter and melt on grilled salmon and vegetables like asparagus. Stores great in the freezer for months!
      Course Sauces, Marinades, & Condiments
      Cuisine American
      Keyword compound butter, grilled salmon butter, lemon dill butter
      Prep Time 10 minutes minutes
      Cook Time 0 minutes minutes
      Total Time 10 minutes minutes
      Servings 12
      Calories 70kcal
      Author Lisa Hatfield

      Ingredients

      Lemon Dill Butter

      • ½ cup butter softened
      • 2 tablespoons fresh dill chopped
      • 1 pinch kosher sea salt
      • 1 fresh lemon juice and zest

      Instructions

      Mix Lemon Dill Butter

      • In a small bowl, place the butter, fresh dill, zest of one fresh lemon, one squeeze of lemon juice, and a pinch of salt.
      • Mix until combined using a small spatula, place on a piece of plastic wrap or parchment paper.
      • Push the lemon dill butter into a long roll shape using the plastic wrap or paper to get it about an inch wide in a long roll. Twist the ends closed.

      Storage Tips For Lemon Dill Butter

      • Place in fridge to firm up and use that day.
      • Slice into coins, and serve over grilled fish, potatoes, or asparagus.
      • Will keep in the freezer for up to two months. Wrap well and store in a freezer zip top bag.

      Notes

      How To Use Lemon Dill Butter In Other Recipes?

      • slather on corn on the cob
      • melt over shrimp or lobster
      • toss into fresh pasta
      • butter over hot bread
      • try it on any fish dish
      • use on hot grilled steaks 
      • stir into hot mashed potatoes
      • goes very well with grilled chicken
      • add to sauces for a glossy finish
      • place it on grilled vegetables

      How To Store Lemon Dill Compound Butter?

      • Wrap in parchment paper and keep in a ziplock bag in the freezer for up to 4 months. 

      Nutrition

      Serving: 12g | Calories: 70kcal | Carbohydrates: 1g | Protein: 1g | Fat: 8g | Saturated Fat: 5g | Cholesterol: 20mg | Sodium: 71mg | Potassium: 12mg | Fiber: 1g | Sugar: 1g | Vitamin A: 240IU | Vitamin C: 4.8mg | Calcium: 5mg | Iron: 0.1mg

      Pickling Spice

      [heart_this] · Apr 5, 2021 · 5 Comments

      A recipe to make homemade pickling spice in a white bowl.

      Last Updated April 25th, 2024 at 01:16 pm by Lisa

      Pickling Spice is an easy seasoning mix to create amazing Dill Pickles, Corned Beef Brisket, braised stews, soups, and rice. As a matter of fact, did you know it is great in marinades and as a brine to flavor meat? Grind it finely, mix it with a marinade, and inject in beef briskets as a tenderizer!

      A homemade pickle spice is easy to make at home and a great way to use things up in the pantry or spice cabinet...

      Pickling Spice Recipe

      This is a classic pickling spice mix recipe. So what is pickling spice? Well, it has black peppercorns, mustard seeds, coriander seeds, dill seeds, allspice berries, bay leaves, and crushed red pepper flakes. Be sure to try this pickled egg spice recipe in my wildly popular Spicy Pickled Eggs recipe. And read on for lots more ways to use it in your cooking. So here is what is in pickling spice...

      • coriander seed
      • dill seed
      • cinnamon stick
      • whole allspice berries
      • red pepper flakes
      • bay leaves
      • peppercorns black, pink, white, or mixed is fine
      • yellow mustard seeds
      1. In a small bowl, combine all your spices.
      2. Crush the bay leaves and cinnamon sticks with your fingers into the bowl.
      3. Add some of the optional ones I listed below for additional flavor.
      4. Keep your spice mix in a glass jar with a tight-fitting lid, and use it within 6 months.

      Storage Tips

      Store your pickle spice mix in an airtight container in a cool place out of direct sunlight. I really like either these glass clamp jars or small spice jars.

      Use within a few months. The fresher your spices, the stronger your seasoning blend will be in dishes.

      Blend in a spice grinder, clean coffee grinder, or food processor, and add to a marinade.

      More Pickling Spice Additions

      You can add additional other whole spices to this recipe, try some or all of these:

      • few whole cloves
      • couple of star anise
      • some juniper berries
      • fennel seeds
      • ground ginger
      • mace
      • couple of cardamom pods
      • teaspoon of anise seeds

      How To Use Pickling Spice

      Try this blend in quick and canned pickled vegetables like Red Onions, carrots, jalapenos, butter pickles, Green Beans, and beets. You can boil a vinegar water solution, add this pickle spices, and let it cool. Then pour over the vegetables and refrigerate for simple, quick, vegetable pickles. Eat within a week. For a sweet taste, add a pinch of sugar.

      Use a mini food processor, spice grinder, or mortar and pestle to grind the pickling spices. Mix the ground spices with your marinade and fill a meat injector. And inject the marinade into the beef brisket or meat you are cooking.

      A white ceramic bowl filled with mixed pickling spice blend.

      More Recipes To Use Pickling Spice

      Baked Corned Beef Brisket has a delicious spice crust and juicy fork-tender slices. Make old-fashioned homemade deli-style Pickled Eggs with jalapenos, garlic, and pickling spice.

      Tavern Bar Style Pickled Eggs are a popular bar food served for hundreds of years to hungry patrons. These spicy eggs get their bright cheery yellow color from chili peppers, turmeric, and pickling spice. This fun easy pickled egg recipe can be a healthy snack, appetizer, or cold hor d'oeuvre.

      • A white platter with sliced corned beef brisket with silver carving set and sauce.
        Corned Beef
      • A large glass clamp jar filled with pickled eggs, fresh jalapeno slices, and spices.
        Jalapeno Pickled Eggs Recipe
      • Crinkled parchment paper with a mug of beer, yellow pickled eggs, and pretzel sticks.
        Tavern Bar Style Pickled Eggs

      PRO TIP: One of the most popular ways to use homemade pickling spice is on Corned Beef, try my recipe! Toss the seasoning packet that comes with the meat from the grocery store. They are mostly just peppercorns, bay leaves, dill, and mustard seeds. You can make it super fresh and flavor-packed at home!

      Baked Corned Beef Brisket Recipe
      Make the best Corned Beef with a delicious spice crust, and juicy fork-tender slices. An Irish tradition especially for St. Patrick's Day! This is an easy recipe and it is braised to cook it perfectly. Pair it with classic sides like roasted cabbage wedges, glazed carrots, rosemary baby gold potatoes, and horseradish cream sauce.
      GET THE RECIPE PIN IT
      A white platter with sliced corned beef brisket with silver carving set and sauce.
      A process shot collage to make an oven baked corned beef brisket.

      Pickling Spice FAQ

      How To Use Pickling Spices?


      Homemade Pickling Spice is an excellent general seasoning. Besides corned beef, additionally, pop it into Pickled Eggs or delicious Quick Dill Pickles. These spices add characteristic flavor to pickles, and will certainly add complex flavor to braised stews, beans, and rice dishes as well.

      For meat stews, tie the spice mix into a piece of cheesecloth tied with a long piece of butcher string and braise it in the pot or slow cooker until the meat is deliciously tender.


      How Do I Make A Corned Beef Pickling Spice Packet?


      To make a traditional corned beef for St. Paddy's day, a top chef's tip is to make your own corned beef spice packet!

      PRO TIP: Toss the one that comes with the meat from the grocery store. The seasoning packets vary by brand and are mostly just peppercorns, bay leaves, dill, and mustard seeds. You can make it fresh and flavor-packed at home.

      1 tablespoon coriander seed
      ½ cinnamon stick
      1 tablespoon dill seed
      1 tablespoon whole allspice berries
      1 teaspoon crushed red pepper flakes
      5 dry bay leaves
      1 teaspoon black peppercorns (pink, white, or mixed whole peppercorns all work!)
      2 teaspoons yellow mustard seeds

      Mix in a small bowl. It will store at room temperature in small glass jar or airtight container for 3-4 months.

      More Spice Mixes & Flavored Salts

      Mix your own Pumpkin Pie Spice. Although, you can certainly buy it. But what a great way to use pantry spices, and its tastes so much better homemade!

      Flavored Finishing Sea Salt Recipes; Sriracha, Pinto Noir, Mustard, Celery, and House Seasoning. This Savvy Kitchen Tip includes step-by-step instructions, recipes, and ideas on how to use your finishing salts.

      Fire up the grill and use a Burger Seasoning that makes the juiciest flavor-filled Grilled Hamburgers. Mix up a batch of hamburger seasoning for your next cookout, grill, or BBQ party.

      • A small glass spice jar filled with pumpkin pie spice made at home.
        Pumpkin Pie Spice
      • A wood platter with 5 seasoning jars open filled with flavored finishing salts.
        Flavored Finishing Salts
      • The steps to season hamburgers, with them shaped on parchment paper as burgers before grilling.
        Grilled Hamburger Seasoning

      More BBQ Rub & Seasoning Recipes

      My most popular seasoning mixes are this easy Homemade Grill & BBQ Rub to use as a rib rub, steak rub, chicken seasoning, or dry rub for pork. The best part, it is a great all-around steak seasoning, especially on a pork loin for Pulled Pork and ribs.

      Make your own Cajun Seasoning Mix with a simple spice mix and take your Cajun cooking to the next level. Use on shrimp, oven fries, or in recipes for jambalaya, and classic gumbo. This spice blend would even work in a good hamburger for a Cajun twist, and you could add some more red pepper flakes if you like heat!

      Learn how to dehydrate cherry tomatoes at home in the oven or by using a food dehydrator. Homemade dried cherry tomatoes are a tasty snack. Above all, add Sun Dried Tomatoes into sandwich wraps and pasta salads!

      • A large pork loin roast with a lot of dry rub seasoning pouring over the top.
        The Best BBQ Dry Rub
      • A small glass mason jar filled with Cajun seasoning with a label and it in a wooden bowl.
        Cajun Seasoning Recipe
      • A small clear jar filled with sun dried tomatoes on a table with scattered dried tomatoes all around the table.
        How To Make Sun Dried Tomatoes

      Did you love this recipe? We would love to hear from you! If you make this recipe and love it, give it a 5-star rating ⭐⭐⭐⭐⭐ with a comment. THANK YOU!! Follow Delicious Table with my free newsletter and share this recipe with your friends on Facebook, Pinterest, and Instagram.

      A recipe to make homemade pickling spice in a white bowl.
      Print

      Pickling Spice Recipe

      Pickling Spice is an easy seasoning mix to create amazing Dill Pickles, Corned Beef Brisket, braised stews, soups, and rice. Did you know it is also great in marinades, or as a brine to flavor meat? Ground and mixed into marinades, it can be injected into beef briskets! Pickling Spice is easy to make at home and a great way to use things up in the pantry or spice cabinet.
      Course Seasoning
      Cuisine American
      Keyword corned beef spices, pickle spice, pickling, pickling spice, pickling spice mix, spices
      Prep Time 10 minutes minutes
      Cook Time 0 minutes minutes
      Total Time 10 minutes minutes
      Servings 12
      Calories 102kcal
      Author Lisa Hatfield

      Equipment

      • Spice Storage Jar
      • Mini Ball Spice Jars

      Ingredients

      • 1 tablespoon coriander seed
      • ½ cinnamon stick
      • 1 tablespoon dill seed
      • 1 tablespoon whole allspice berries
      • 1 teaspoon crushed red pepper flakes
      • 5 dry bay leaves
      • 1 teaspoon peppercorns black, pink, white, or mixed is fine
      • 2 teaspoons yellow mustard seeds

      Optional Variations

      • 2 star anise
      • 8 whole cloves
      • 4 juniper berries
      • 1 teaspoon ground ginger
      • 2 cardamon pods

      Instructions

      • In a small bowl, combine all your spices. Add some of the optional ones I listed for addition flavor.
      • Keep in a glass jar with a tight fitting lid, and use within 6 months.

      Video

      Notes

      How To Use Pickling Spice

      Try this blend in quick and canned pickled vegetables like Red Onions, carrots, jalapenos, butter pickles, Green Beans, and beets. You can boil a vinegar water solution, add this pickle spices, and let it cool. Then pour over the vegetables and refrigerate for a simple, quick, vegetable pickles. Eat within a week. For a sweet taste, add a pinch of sugar.
      Use a mini food processor, spice grinder, or mortar and pestle to grind the pickling spices. Mix the ground spices with your marinade and fill a meat injector. And inject the marinade into the beef brisket or meat you are cooking.
      More Recipe Ideas: Use not only adds characteristic flavor to pickles, but it also adds complex flavor to braised stews, bean, and rice dishes.
      PRO TIP: One of the most popular ways to use this spice mix is on Corned Beef Brisket, try my recipe!
      For meat stews, you can tie the spices into a piece of cheesecloth tied with a long piece of butcher string and braise in the pot or slow cooker until the meat is deliciously tender. It works well in crockpot or slow-cooker recipes, pot roast, soups, and braised meat dishes.

      Flavor Variations

      You can add additional spices to add your basic mix, try some or all of these:

      • a few whole cloves
      • ½ cinnamon stick
      • a couple of star anise
      • some juniper berries
      • ground ginger
      • a couple of cardamon pods

      Storage Tips

      Store your mix in an airtight container out of direct sunlight, small mason jars work really well. Use within a few months. The fresher your spices, the stronger your spice blend will be in dishes.

      Nutrition

      Serving: 12g | Calories: 102kcal | Carbohydrates: 17g | Protein: 4g | Fat: 5g | Saturated Fat: 1g | Sodium: 43mg | Potassium: 356mg | Fiber: 8g | Sugar: 1g | Vitamin A: 593IU | Vitamin C: 5mg | Calcium: 217mg | Iron: 4mg

      Best Beef Stroganoff Recipe

      [heart_this] · Apr 4, 2021 · 6 Comments

      White plate filled with Beef Stroganoff on noodles with mushrooms.

      Last Updated May 28th, 2025 at 09:44 am by Lisa

      Classic beef stroganoff made with ground beef is so popular and beloved worldwide. But what if I shared my secrets to pack in flavor and use various beef cuts?

      This recipe has ideas for different steak cuts, mushrooms, of course, rich stroganoff flavor, and a creamy sauce. A family dinner idea everyone will be excited about with tender chunks of beef like tri-tip or rib eye. Plus it is one of those classic recipes easy enough for a weeknight dinner and yummy enough for company...

      Beef Stroganoff on a white plate with beef and mushrooms.

      How To Make Beef Stroganoff Recipe

      The first time I tried it with a leftover steak tri-tip cut of beef I had on hand, it was an OH MY GOODNESS moment with those tender strips of beef that had been browned in the pan. It is the most amazing beef stroganoff...

      Ingredients You Will Need

      • 2 cups beef broth
      • 1 tablespoons Worcestershire sauce
      • 1 tablespoon Dijon mustard
      • 2 tablespoons all purpose flour
      • 2 lb. beef* loin tri-tip roast, trimmed & sliced or ground beef
      • ½ teaspoon fresh cracked pepper
      • 1 teaspoon sea salt
      • 2-3 tablespoons vegetable or olive oil
      • 1 medium onion, thinly sliced
      • 1 tablespoon butter
      • 16 oz white button mushrooms, sliced
      • ¼ cup brandy (or sub white wine) optional but adds incredible flavor!
      • 12 oz bag extra-wide egg noodles
      • 1 cup sour cream (or sub Greek yogurt)
      • garnish: parsley, thyme, chives

      PRO TIP: Use leftover grilled beef or steak! You won't have to cook it which saves time, and just add it to the pan and sear for a minute or two, then continue to make the stroganoff sauce in the recipe.

      Top Ingredient Tips

      Beef Broth: Gives the creamy stroganoff sauce depth of flavor. Buy a good brand or better yet use homemade.

      *Beef Cuts: 85/15 ground beef is a common ingredient for this recipe, and I have made it that way countless times. For something new, swap in Tri-tip, a tender lean beef cut that gets its name from its triangular shape. It is a small roast from the bottom sirloin or cut into tri-tip steaks. Simply cut on the bias, and use in this recipe. Also, this recipe works with leftover steak like ribeye steaks or leftover Roast Beef.

      Mushrooms: Of course, mushrooms make it a classic stroganoff, but the sauce and noodles with any beef you choose will be delicious so the mushrooms can be left out.

      Egg Noodles: I use extra-wide egg noodles for stroganoff. If you want to pre-cook the pasta, and then reheat later, you can do this by cooking it as usual, but leave it slightly undercooked. Drain and toss with a little oil. Store in a sealed container in the refrigerator.

      Reheat by dropping the noodles into boiling water for a minute or two, until heated through. Drain and plate with Beef Stroganoff.

      Brandy: This is a game-changer in this recipe. You can also use white wine, but trust me I gave this recipe to a work colleague years ago and she still raves about it and it's the addition of brandy.

      Sour Cream: Adds the creaminess in the sauce, but you can use Greek yogurt in a pinch. Add the sour cream at the very end on low heat, to which creates an incredible sour cream mushroom gravy.

      Beef Stroganoff Cooking Instructions

      Prepare The Ingredients

      Set a large pot on the stove and begin boiling the water for the noodles.

      One: Make Beef Stock slurry. In a bowl, whisk together beef broth, Worcestershire, Dijon, and all purpose flour. This slurry will help thicken the stroganoff sauce.

      PRO TIP: To thicken sauces and gravy, whisk either cornstarch or flour into water or a broth liquid that is a hot or cold liquid. It avoids the lumps and thickens sauces and gravy.

      Two: Slice mushrooms into ¼″ slices.

      Three: Slice one medium onion thinly into 2" pieces.

      Four: Next, pat the tri-tip roast dry with paper towels. Trim excess fat from the tri-tip using a small serrated knife.

      Five: Slice against the grain into ½” thick, 1” long, pieces. Toss in a bowl with 1 teaspoon salt and ½ teaspoon pepper.

      Saute The Beef

      Six: Over medium-high heat, place a large dutch oven (or Sauté pan). Add 2 tablespoons vegetable or olive oil, be sure to test one piece of meat to see if it sizzles in the pan. Then, carefully saute’ which means to “fry quickly in a little hot fat” the tri-tip in batches for 3-5 minutes, using long-handled tongs, move around the pan to brown all sides. 

      Seven: Add one more tablespoon of vegetable oil if the pan is dry before all the tri-tip is brown, and you won’t be cooking the tri-tip all the way it will finish in the last 10 minutes. Oh, and don’t clean the pan, it will be dark with brown bits, this will add flavor! Remove browned tri-tip pieces to a plate. Set aside. Turn heat down to medium heat.

      PRO TIP: If you overcrowd the pan, it won’t brown, it will steam.

      Add Onions and Mushrooms

      Eight: Next, on medium heat, add the chopped onion and stir for 3 minutes. Add one tablespoon butter and add the sliced mushrooms, stir for 3-4 minutes using a wooden spoon. Cook mushrooms till golden brown and scrape the brown caramelized bits off the bottom of the pan. Turn heat down to a low simmer.

      Make The Noodles And Sauce

      Nine: At this point, add the noodles to the boiling water (add a little salt to the water) according to package directions for approximately 10-12 minutes. Drain when cooked.

      Ten: Now add the browned tri-tip and all the drippings into the large sauté pan, skillet or dutch oven pot. Stir in the mushrooms and onions. Then add the beef stock slurry into the pan. Stir and cook slowly for 10 more minutes.

      Finally, add sour cream on low heat, and stir just before serving.

      Serve over a big bowl of noodles, and garnish with parsley or thyme.

      What Are The Best Cuts Of Beef For Beef Stroganoff?

      Typically, Beef Stroganoff is made with ground beef or more tender beef cuts, which decrease the cooking time.
      For the best results, you will want to find the best meat cut possible. Avoid tougher cuts of meat like chuck, round, brisket, shank and stew meat.
      Go for the best cut of meat in your budget, although each of these listed are a bit more expensive cut than ground beef.

      -tri-tip steak (a tender cut, really good option)
      Originally a California, United States cut, this steak (and roast) has become increasingly popular because of the superior flavor and because it is a steak built for grilling. The tri-tip is an excellent steak for several reasons. First, it is far less expensive than other equally flavorful steaks like rib-eye.
      -beef tenderloin (filet mignon)
      -top sirloin steak (New York strip)
      -boneless ribeye
      -flank steak (slice on bias)

      Easy Beef Stroganoff Serving Ideas

      For comfort food like classic beef stroganoff, put it over wide cooked egg noodles. But it also is great on cooked rice or even over hot Mashed Potatoes.

      Green vegetables of any kind will go great from steamed broccoli to green beans.

      For sides, add a cold crisp salad like a Wedge Salad would go great. And round out your meal with Dinner Rolls, a sliced baguette with Herb Butter, Smashed Potatoes, or Cheesy Potato Casserole.

      Beef Stroganoff FAQ

      What Is Stroganoff Sauce Made Of?


      Stroganoff sauce is a sour cream gravy made with beef broth that's thickened with flour in beef broth. It's flavored with mustard and mushrooms.
      Larousse Gastronomique lists Stroganov as a cream, paprika, veal stock, and white wine recipe. The Brazilian variant includes diced beef or strips of beef (usually beef tenderloin or filet mignon) with tomato sauce or tomato paste, onions, mushrooms, and heavy cream.

      What Is Beef Stroganoff?


      Classic Beef Stroganoff or Beef Stroganov is one of the most popular Russian recipes. This Russian dish consists of sautéed pieces of beef served in a sauce with smetana (sour cream). From its origins in mid-19th-century Russia, it has become popular around the world, with considerable variation from the original recipe.
      The dish is named either after one of the members of the influential Stroganov family or possibly from the Russian verb strogat', to chip/shave off (see stroganina). You will find a classic beef stroganoff recipe in almost every Russian cookbook you find.

      More Ground Beef Dinner Recipes

      Cowboy Baked Beans have crispy applewood smoked bacon and browned ground beef cooked in a slow cooker or in the oven. An awesome party food recipe to make ahead for a large hungry crowd...

      Slather Cheeseburgers with burger sauce, the meat patties are amazing mixed with a burger seasoning, tons of melted cheese, pickle chips, tomato slices, and crisp cold lettuce. 

      This simple Taco Salad hits the spot on so many levels, the fresh toppings like tomato, olives, onions, and bell pepper mixed with salty Frito chips and seasoned taco meat are scrumptious. For a twist, make a Dorito taco salad with crushed chips.

      The best juicy Cheeseburger Meatloaf Recipe is bursting with flavor. The ground beef has a vegetable spice mixture, cheeses, wrapped in bacon slices, and baked. Each slice is light, fluffy, tender, and holds together.

      • A large white spoon scooping a serving of cowboy baked beans out of a casserole dish.
        Cowboy Beans
      • A person holding a messy grilled burger topped with melted cheese, burger sauce, lettuce, tomato, and pickles.
        The Best Cheeseburger
      • A white plate full of taco salad topped with taco meat, grated cheese, Fritos, sour cream, black olives and tomatoes.
        Easy Taco Salad
      • A close up view of meatloaf sliced open and cooked bacon strips on top.
        Cheeseburger Meatloaf Recipe

      Did you love this recipe? We would love to hear from you! If you make this recipe and love it, give it a 5-star rating ⭐⭐⭐⭐⭐ with a comment. THANK YOU!! Follow Delicious Table with my free newsletter and share this recipe with your friends on Facebook, Pinterest, and Instagram.

      White plate filled with Beef Stroganoff on noodles with mushrooms.
      Print

      Beef Stroganoff Recipe

      Classic beef stroganoff made with ground beef is so popular and beloved worldwide. But what if I shared my secrets to pack in flavor and use various beef cuts? This recipe has ideas for different steak cuts, mushrooms of course, rich stroganoff flavor, and a creamy sauce.
      Course Dinner & Main Dishes
      Cuisine American
      Keyword beef stroganoff, beef stroganoff recipe, stroganoff sauce, tri-tip steak
      Prep Time 20 minutes minutes
      Cook Time 25 minutes minutes
      Total Time 45 minutes minutes
      Servings 8
      Calories 492kcal
      Author Lisa Hatfield

      Equipment

      • Dutch Oven
      • Epicurean Non-Slip Cutting Board
      • Chef Knife

      Ingredients

      • 2 cups beef broth
      • 1 tablespoons Worcestershire sauce
      • 1 tablespoon Dijon mustard
      • 2 tablespoons flour
      • 2 lb. beef loin tri-tip roast, trimmed & sliced
      • ½ teaspoon fresh cracked pepper
      • 1 teaspoon sea salt
      • 2-3 tablespoons vegetable or olive oil
      • 1 medium onion, thinly sliced
      • 1 tablespoon butter
      • 16 oz mushrooms
      • ¼ cup brandy (or swap white wine) optional but adds incredible flavor!
      • 12 oz bag extra-wide egg noodles
      • 1 cup sour cream
      • garnish: parsley, thyme, chives

      Instructions

      • Set a large pot on the stove and begin boiling the water for the noodles. In a bowl, whisk together beef broth, Worcestershire, Dijon, and flour. This slurry will help thicken the stroganoff sauce.
      • Slice mushrooms into ¼″ slices.
      • Slice one medium onion thinly into 2″ pieces.
      • Next, pat the tri-tip roast dry with paper towels, this helps the tri-tip brown and gives more flavor. Trim excess fat from tri-tip using a small serrated knife.
      • Slice against the grain into ½” thick, 1” long, pieces. Toss in a bowl with 1 teaspoon salt and ½ teaspoon pepper.
      • Heat a large dutch oven (or very deep cast iron skillet) on high heat, add 2 tablespoons vegetable oil, be sure to test one piece of meat to see if it sizzles in the pan. Then, carefully saute’ (“fry quickly in a little hot fat”) the tri-tip in batches for 3-5 minutes, using long-handled tongs, move around the pan to brown all sides. PRO TIP: If you overcrowd the pan, it won’t brown, it will steam.
      • Add one more tablespoon of vegetable oil if the pan is dry before all the tri-tip is brown, and you won’t be cooking the tri-tip all the way it will finish in the last 10 minutes. Oh, and don’t clean the pan, it will be dark brown, this will add flavor! Remove browned tri-tip pieces to a plate. Set aside. Turn heat down to medium heat.
      • Next, on medium heat, add the chopped onion and stir for 3 minutes. Add one tablespoon butter and add the sliced mushrooms, stir for 3-4 minutes using a wooden spoon. Cook mushrooms till golden brown and scrape the brown caramelized bits off the bottom of the pan. Turn heat down to a low simmer.
      • At this point, add the noodles to the boiling water (add a little salt to the water) according to package directions for approximately 10-12 minutes. Drain when cooked.
      • Now add the browned tri-tip and all the drippings into the large pot stir with the mushrooms and onions. Then add the beef stock slurry into the pan. (Optional: add the brandy or white wine). Stir and cook slowly for 10 more minutes. Add additional salt and or pepper to taste. Finally, add sour cream on low heat, and stir just before serving. Serve over hot noodles, garnish with parsley or thyme.

      Notes

      Serving

      Serve over hot cooked wide egg noodles, mashed potatoes, or rice. Garnish with parsley, lemon thyme, or chives.
      beef broth: Gives the creamy stroganoff sauce depth of flavor. Buy a good brand or better yet use homemade.
      *beef: 85/15 ground beef is a common ingredient for this recipe, and I have made it that way countless times. For something new, swap in Tri-tip, a tender lean beef cut that gets its name from its triangular shape. It is a small roast from the bottom sirloin or cut into tri-tip steaks. Simply cut on the bias, and use in this recipe.
      mushrooms: Of course, mushrooms make it a classic stroganoff, but the sauce and noodles with any beef you choose will be delicious so the mushrooms can be left out.
      egg noodles:
      I use extra-wide egg noodles for stroganoff.
      If you want to pre-cook the pasta, and then reheat later, you can do this by cooking it as usual, but leave it slightly undercooked. Drain and toss with a little oil. Store in a sealed container in the refrigerator.
      Reheat by dropping the noodles into boiling water for a minute or two, until heated through. Drain and plate with Beef Stroganoff.
      brandy: Is a game-changer in this recipe. You can also use white wine, but trust me I gave this recipe to a work colleague years ago and she still raves about it and it's the addition of brandy.
      sour cream: Adds the creaminess in the sauce, but you can use Greek yogurt in a pinch. Add the sour cream at the very end on low heat, to which creates an incredible sour cream mushroom gravy.

      Beef Cuts (In Place Of Ground Beef)

      Typically, Beef Stroganoff is made with ground beef or more tender beef cuts, which decrease the cooking time.
      For the best results, you will want to find the best meat cut possible. Avoid tougher cuts of meat like chuck, round, brisket, shank and stew meat.
      Go for the best cut of meat in your budget, although each of these listed are a bit more expensive cut than ground beef.
      -tri-tip steak (a tender cut, really good option)
      Originally a California, United States cut, this steak (and roast) has become increasingly popular because of the superior flavor and because it is a steak built for grilling. The tri-tip is an excellent steak for several reasons. First, it is far less expensive than other equally flavorful steaks like rib-eye.
      • beef tenderloin (filet mignon)
      • top sirloin steak (New York strip)
      • boneless rib eye
      • flank steak (slice on the bias)
      PRO TIP: Use leftover grilled beef or steak! You won't have to cook it which saves time, and just add it to the pan and sear for a minute or two, then continue to make the stroganoff sauce in the recipe.

      Nutrition

      Calories: 492kcal | Carbohydrates: 37g | Protein: 32g | Fat: 21g | Saturated Fat: 10g | Cholesterol: 128mg | Sodium: 705mg | Potassium: 792mg | Fiber: 2g | Sugar: 3g | Vitamin A: 250IU | Vitamin C: 3.3mg | Calcium: 89mg | Iron: 3.4mg

      Easter Coconut Macaroons

      [heart_this] · Mar 14, 2021 · 3 Comments

      An overhead view of fresh baked and decorated Easter dessert coconut macaroon cookies.

      Last Updated April 3rd, 2022 at 03:30 pm by Lisa

      Easter Coconut Macaroons aka Birds Nest Cookies are an easy Easter dessert, top these macaroon cookies with melted chocolate and candy eggs.

      How adorable will this Easter recipe be at your celebration...

      You Will Need

      • ⅔ cup sweetened condensed milk
      • 1 large egg white
      • 1 ½ teaspoons vanilla
      • ⅛ teaspoon salt
      • 3 ½ cups sweetened coconut
      • 1  cup semi-sweet chocolate chips
      • 1 teaspoon vegetable oil
      • chocolate Easter egg candy (I used mini malted milk eggs)

      Let's Make These

      1. Preheat the oven to 325°F. Line a large baking sheet with parchment paper or a Silpat mat.
      2. In a large bowl, stir together the sweetened condensed milk, egg white, vanilla extract, and salt. Stir until combined. Add in the coconut and mix well.
      3. With a spoon or 1" ice cream scoop, drop 2 tablespoons of the macaroon mix and place it onto the prepared baking sheet. Form the cookies into the shape of a bird's nest and leave the edges a little jagged. Press down the center with a measuring teaspoon sprayed with non-stick coconut spray to make a little dip.
      4. Bake cookies for 20 to 25 minutes, or until edges are slightly golden brown.  Cool the cookies on the baking sheets for about 5 minutes or until they are firm and set. Remove with a spatula onto a cooling rack. Cool completely.
      5. On the stove, place a pan with a couple of inches of water, and then a heatproof bowl over the pan with ½ cup of semi-sweet chocolate chips. Stir and melt the chips, add ½ teaspoon vegetable oil and stir until mixed. Place about a tablespoon of melted chocolate in the center of each cookie and decorate. Place 3 egg candies in the center of each cookie. Set in fridge to fully set the chocolate.
      6. Make these 2-3 days in advance. Store in an airtight container on the counter or in the fridge.
      A white plate filled with Easter coconut macaroons decorate with chocolate eggs.

      Macaroon Cookies FAQs

      What are macaroons vs macarons?

      Macarons and macaroons use different ingredients and are completely different desserts.
      Macarons are small sandwich-style confections with a filling using almond meal as an ingredient.

      Macaroons are drop-style cookies using shredded coconut. Coconut macaroons are made from shredded coconut held together by egg whites and granulated sugar. They have rough edges that turn brown are chewy inside and are often dipped in chocolate.

      What Is Sweet Condensed Milk?


      It is canned milk that has been condensed and sweetened.

      What Can You Substitute For Sweet Condensed Milk?


      One option for homemade sweetened condensed milk is to add ½ or ⅔ cup unrefined sugar to a can of evaporated milk. You may need to heat to fully dissolve the sugar.

      More Easter Desserts

      Bake an Easter bunny cake made from two round cakes, vanilla frosting, and decorated with candy...

      Cake Mix Cookies are an easy recipe that bake in 11-minutes and 4-ingredients. 

      Chocolate Easter Bunny Cupcakes are so easy, you can buy cupcakes at the grocery store, and made with store-bought ingredients. And cute Cottontail Cupcakes with their bums in the air are adorable!

      • An adorable bunny cake on a hot pink background surrounded with jelly beans.
        Easter Bunny Cake
      • A white plate filled with freshly baked cake mix cookies with pastel m&m candies.
        Cake Mix Cookies
      • A display of Easter cupcakes decorated with chocolate bunnies and green sprinkles.
        Chocolate Easter Bunny Cupcakes
      • Easter dessert idea, bunny butt cupcakes digging in the garden.
        Bunny Butt Easter Cupcakes

      More Easter Dinner Recipes

      Make a Twice Smoked Ham, with an easy orange honey glaze. Smoking the ham outside frees up oven space, and takes an ordinary spiral ham from basic to incredible. Take a look at dozens of Easter Dinner Ideas good for the whole weekend including dinner, drinks, appetizers, desserts, and more.

      For Easter Dinner, serve this delicious Kahlua Pineapple Glazed Ham. Elevate traditional classic ham dinner to serve a crowd of friends and family. You will love the amazing Kahlua brown sugar glaze. How cute are these Easter Deviled Eggs looking like little baskets! They are decorated with herbs and edible flowers...so easy and festive!

      • A double smoked ham on a outdoor smoker ready to eat.
        Double Smoked Ham With Orange Honey Glaze
      • An Easter Dinner Ideas collage of recipes for dinner, desserts, and appetizers.
        80+ Easter Dinner Ideas
      • A spiral baked ham on white platter with wedges of pineapple and sliced oranges.
        Kahlua Pineapple Glazed Ham
      • Pretty Easter deviled eggs with green filling and decorated with fresh herbs and edible flowers.
        Easter Deviled Eggs

      Did you love this recipe? We would love to hear from you! If you make this recipe and love it, give it a 5-star rating ⭐⭐⭐⭐⭐ with a comment. THANK YOU!! Follow Delicious Table with my free newsletter and share this recipe with your friends on Facebook, Pinterest, and Instagram.

      An overhead view of fresh baked and decorated Easter dessert coconut macaroon cookies.
      Print

      Easter Coconut Macaroons

      Easter Coconut Macaroons aka Birds Nest Cookies are an easy Easter dessert, top these macaroon cookies with melted chocolate and candy eggs.
      Course Desserts & Sweets
      Cuisine American
      Keyword Bird Nest Cookies, coconut macaroons, macaroon cookies
      Prep Time 20 minutes minutes
      Cook Time 25 minutes minutes
      Total Time 45 minutes minutes
      Servings 12
      Calories 297kcal
      Author Lisa Hatfield

      Equipment

      • Large Metal Sheet Pan
      • Parchment Paper Sheets
      • Mini Easter Egg Candy
      • Spring Loaded Cookie Scoops (3 Sizes)

      Ingredients

      • ⅔ cup sweetened condensed milk
      • 1 large egg white
      • 1 ½ teaspoons vanilla
      • ⅛ teaspoon salt
      • 3 ½ cups sweetened coconut
      • 1 cup semi-sweet chocolate chips
      • 1 teaspoon vegetable oil
      • Chocolate Easter egg candy your favorite (I used mini malted milk eggs)
      US Customary - Metric

      Instructions

      • Preheat the oven to 325°F. Line a large baking sheet with parchment paper or a Silpat mat.
      • In a large bowl, stir together the sweetened condensed milk, egg white, vanilla extract, and salt. Stir until combined. Add in the coconut and mix well.
      • With a spoon, or 1" ice cream scoop, drop 2 tablespoons of the macaroon mix and place onto the prepared baking sheet. Form the cookies into the shape of a bird's nest and leave the edges a little jagged. Press down the center with a measuring teaspoon sprayed with non-stick coconut spray to make a little dip.
      • Bake cookies for 20 to 25 minutes, or until edges are slightly golden brown.  Cool the cookies on the baking sheets for about 5 minutes or until they are firm and set. Remove with a spatula onto a cooling rack. Cool completely.
      • On the stove, place a pan with a couple inches of water, and then a heatproof bowl over the pan with ½ cup of semi-sweet chocolate chips. Stir and melt the chips, add ½ teaspoon vegetable oil and stir until mixed. Place about a tablespoon of melted chocolate in the center of each cookie. Place 3 egg candies in the center of each cookie. Set in fridge to fully set the chocolate.
      • Make these 2-3 days in advance. Store in an airtight container on the counter or in the fridge.

      Notes

      baking tips:

      Use a 1" ice cream scoop to get the cookies the same size.
      Press down the center with a measuring teaspoon sprayed with non-stick coconut spray to make a little dip.

      sweet condensed milk:

      What can you substitute for sweet condensed milk? Add ½ or ⅔ cup unrefined sugar to a can of evaporated milk. You may need to heat to fully dissolve.

      decorate:

      Add jelly beans, Easter candies, mini malted milk balls, or chocolate eggs. 

      make ahead and storage:

      Make these 2-3 days in advance. Store in an airtight container on the counter or in the fridge.
       

      Nutrition

      Calories: 297kcal | Carbohydrates: 34g | Protein: 3g | Fat: 16g | Saturated Fat: 12g | Cholesterol: 8mg | Sodium: 128mg | Potassium: 241mg | Fiber: 3g | Sugar: 28g | Vitamin A: 55IU | Vitamin C: 0.4mg | Calcium: 75mg | Iron: 1.4mg

      Lucky Green Oreos

      [heart_this] · Feb 24, 2021 · 1 Comment

      A square white plate with green oreos decorated with shamrock sprinkles.

      Last Updated April 24th, 2024 at 09:31 pm by Lisa

      Lucky Green Oreos are easy no-bake "green food" cookies. These are dipped in green chocolate with Shamrock sprinkles for St. Patrick's Day!

      All kinds of crazy things turn green in celebration of St. Patrick's Day, so why not Oreos...

      • This is an EASY no-bake recipe perfect for kids!
      • Who doesn't love Oreos, but coated in chocolate? Oh my, these are amazing.
      • You can order shamrock sprinkles off the internet, or just use any green sanding sugar, white or even gold star sprinkles look great!
      • The white chocolate drizzle is optional. Add your touches, maybe some gold chocolate coins would be fun?

      How To Make Green Oreo Cookies

      These are so easy, no oven, no cookie dough, no mixer, just decorate!

      • 24 oz White Chocolate Chips
      • Green Food Color Drops
      • 1 package Oreo Cookies - Mint Oreos or Thins
      • Green Shamrock Sprinkles (order online)
      An ingredient list of ingredients to make green oreos for St Patricks Day.
      4 step by step images showing how to make green oreos for St Patricks Day.
      1. In a small bowl, melt white Chocolate Chips over simmering water in a pan.
      2. Take melted chocolate chips off heat, and reserve some white chocolate in a small ziplock bag to drizzle as decoration. Add green food coloring drops. Stir until mixed.
      3. Dip Oreos in chocolate, and lay them on parchment paper or silicone Silpat mats to dry.
      4. Decorate with Shamrock Sprinkles. Snip the corner of a ziplock bag, and drizzle white chocolate over the cookies.
      Three green oreos dipped in green chocolate topped with shamrocks sprinkles.

      More St. Patrick's Day Recipes

      Wishing you a Happy St. Patrick's Day and don't forget to wear your green...and of course, eat green food and drink Green Drinks and of course Shamrock Jello Shots! Celebrate the luck of the Irish with this wide assortment of festive and green food recipes to serve on St. Patrick's Day.

      Make the best Corned Beef with a delicious spice crust, and juicy fork-tender slices. An Irish tradition especially for St. Patrick's Day!

      End the day with a delicious Irish Coffee complete with lucky shamrock sprinkles and real edible gold flakes, just like a pot of gold! You can add in a splash of some Bailey's or Irish Whiskey.

      • A white platter with sliced corned beef brisket with silver carving set and sauce.
        Corned Beef
      • A white rectangle platter with green jello shots and jigglers shaped like shamrocks.
        Green Jello Shots & Jigglers
      • Four glasses of green cocktails for St. Patrick's day on a green tray with gold coins.
        Tipsy Leprechaun Green Cocktails
      • A glass mug with Irish Coffee on a vintage green table topped with green sprinkles and edible gold.
        Irish Coffee With Baileys or Whiskey
      A square white plate with green oreos decorated with shamrock sprinkles.
      Print

      Lucky Green Mint Oreos

      Lucky Green Oreos are easy no-bake "green food" cookies. These are dipped in green chocolate with Shamrock sprinkles for St. Patrick's Day!
      Course Desserts & Sweets
      Cuisine American, Irish
      Keyword Green Cookies, Green Oreos, St. Patrick's Day cookies
      Prep Time 15 minutes minutes
      Cook Time 5 minutes minutes
      Total Time 20 minutes minutes
      Servings 24
      Calories 239kcal
      Author Lisa Hatfield

      Equipment

      • Green Shamrock Sprinkles
      • Parchment Paper Sheets
      • Silicon Baking Mat
      • Americolor Soft Gel Food Color - 6 Colors

      Ingredients

      • 24 oz White Chocolate Chips
      • Green Food Color Drops
      • 1 package Oreo Cookies - Mint Oreos or Thins
      • Green Shamrock Sprinkles order online
      US Customary - Metric

      Instructions

      • Line a cookie sheet or baking sheet pan with parchment paper, or a silicone mat.
      • In a small bowl, melt white Chocolate Chips over simmering water in a pan or in the microwave. Chocolate chips sometimes do not melt well in the microwave.
      • Take melted white chocolate off heat, reserve some white chocolate in a small ziplock bag to drizzle as decoration.
      • Add green food coloring drops or green gel food coloring called for on your package of chocolate wafers. Stir until mixed.
      • Dip Oreos in chocolate, lay on a piece of parchment paper.
      • Snip the corner of the ziplock bag with white chocolate, and drizzle white chocolate over cookies.
      • Decorate with Shamrock Sprinkles and let set about 30 minutes.

      Video

      Notes

      Serve on a nice platter with fun decorations like gold chocolate coins and small shamrocks.
      Enjoy these cookies with a traditional Irish Coffee, an adult beverage.

      melting chocolate 

      • I used white chocolate chips, melting candy wafers will work fine too. When melting chocolate over simmering water, be careful not to get any water in your chocolate or it will seize and not be useable.
      • You can add a couple of drops of vegetable oil to add some gloss and shine to your chocolate. 
      • If you color white melting wafers, be sure to use the right gel coloring product your chocolate wafers need. Sometimes regular food coloring can seize the chocolate. 

      Nutrition

      Calories: 239kcal | Carbohydrates: 30g | Protein: 2g | Fat: 12g | Saturated Fat: 6g | Cholesterol: 5mg | Sodium: 103mg | Potassium: 117mg | Sugar: 25g | Vitamin A: 10IU | Vitamin C: 0.2mg | Calcium: 60mg | Iron: 1.5mg

      CoronaRita Margaritas

      [heart_this] · Feb 24, 2021 · 6 Comments

      A Cinco de Mayo party with frozen margaritas called Coronaritas, guacamole, and chips on a green table.

      Last Updated November 16th, 2025 at 09:10 am by Lisa

      A CoronaRita is simply defined as, "an overturned bottle of Corona draining into a margarita." Works for me, how about you?

      Make yours at home, these CoronaRita Margarita Beer Cocktails have a mini “Coronita” turned upside down into a slushy margarita. Perfect when you can’t decide between a margarita and an icy cold Corona...

      Looking down into a slushy margarita with a Coronita beer inside the glass.

      How To Make CoronaRitas

      A Coronarita recipe is perfect for parties and Taco Tuesday! When you can't make the difficult decision of beer or margarita, have both!

      • 7 limes - juice 5 (slice 2 into lime wedges for garnish)
      • 1 orange - juice (or 3 clementine oranges)
      • 8 cups ice
      • 1 cup tequila (use a good brand!)
      • ¼ cup triple sec
      • 2 cups margarita mix
      • sea salt for the rim of the glass
      • 6 pack of Coronitas (small 7 oz Corona beers)
      • Optional: Large margarita glasses, CoronaRita beer clips, or colorful straws
      A list of ingredients to make CoronaRita margaritas on a picture of the drink recipe.

      Let's Make CoronaRitas!

      Is anyone getting thirsty?

      1. Slice the 2 limes in wedges for garnish.
      2. Run a lime slice around the rim of glasses, and dip the glass rim into sea salt poured on a plate.
      3. Juice the 5 limes and 1 orange, and add the juice to the blender.
      4. Now, add 8 cups of ice cubes, good tequila, triple sec, and margarita mix.
      5. Blend until thick, add more ice if necessary.
      6. Pour the slushy margarita mixture from the blender into salt-rimmed glasses, open an ice-cold small 7 oz Corona beer (Coronitas), and carefully tip the mouth of the bottle into the glass, with the beer upside down.
      7. Garnish with a lime slice and a fun straw, sip, and enjoy!

      PRO TIP: Test your mini Coronita bottles in your glasses, you can see the glasses I have are made to fit the neck of the beer bottle.

      Looking down into a slushy margarita with a Coronita beer inside the glass.

      Why Are CoronaRitas So Popular?

      • For some reason, this is one of my most popular recipes, perhaps it's because it is so... well shall we say it's so over the top?
      • This Corona margarita cocktail is THE answer on a hot day, special celebration, or game day.
      • You can serve these in large glasses or any tall stable glass that holds the Coronitas.
      • The fresh citrus from limes and oranges adds amazing brightness!
      • Perfect to serve at a cookout or backyard party, poolside this summer, or with any Mexican dish.
      Two glasses of frozen margaritas made into CoronaRitas with Coronita beers poured inside.

      CoronaRita FAQ

      What glasses do you serve CoronaRitas in?


      You can serve CoronaRitas in any tall drinking glass, but the traditional Mexican handmade glasses are so beautiful. The big margarita-style handmade glasses have a dip in the bottom to hold the little 7 oz Coronita beers just right, but you can always use any large tall heavier glass like a pint glass, and tip the beer in.

      What goes with CoronaRitas?


      How about serving these CoronaRitas with tacos, chicken enchiladas, ceviche, salsa, or guacamole and chips? Another great idea would be to have them with a crunchy easy taco salad.

      A large blue rimmed margarita glass with straw, lime, and Coronita beer poured inside the glass.

      CoronaRita and Coronita Beer Tips

      • If you want the 7 oz Coronita "little beers" icy cold, pop them in the freezer for 20 minutes right before serving.
      • Some margarita glasses have a dip in them that holds the little Coronitas. I found my glasses and pitcher at Home Goods, they were quite inexpensive. 
      • Large Corona extra® beers would tip over most glasses, try to use the little 7 oz Coronitas for this cocktail, and use the Coronita clips made for this drink!
      • Corona Clips are available online to hold beers in glasses just for this purpose, my glasses worked fine but test before your party. The beer can make the glass tippy so use some care as you sip!
      An icy cold slushy margarita with a small Coronita beer inside the glass at a party.

      More Cocktail Recipes

      Tasty Easy Margaritas is made with 3 simple ingredients available at grocery stores. You won't believe how good these taste. The twist on this recipe is they are mixed in a pitcher, with no premade mix, blender, cocktail shakers, or simple syrup. So serve this fruity margarita full of flavors at your next party!

      Fireball Whisky Cocktails are made with orange, cinnamon, cloves, apple cider, and cinnamon-flavored whiskey. Serve these fireball whisky drinks for game days, the holiday season, brunch, Fall parties, and Thanksgiving Day.

      Micheladas are light, refreshing clamato juice (tomato juice) and Mexican beer cocktails. The rim of the glass is salted with usually Tajin or seasoned salt. Sip at brunch, lazy relaxed weekend game days, and Cinco de Mayo!

      Straight from my trip to Cuba, this Mojito is 100% an authentic Cuban Mojito! Learn the secret ingredient in these famous Cuban cocktails and what secrets make them totally authentic.

      • Blue rimmed margarita glasses with margaritas in them on ice cubes with sliced lime garnish.
        Easy Limeade Margaritas
      • Fireball Whisky Cocktails with cinnamon sticks wrapped in orange peel for garnish.
        Fireball Whisky Cocktails
      • A tall glass filled with michelada garnished with green chili and spice coated lime slice.
        Micheladas Mexican Beer Cocktails
      • Four Havana club glasses filled with mojitos garnished with mint.
        Authentic Mojito Recipe

      Did you love this recipe? We would love to hear from you! If you make this recipe and love it, give it a 5-star rating ⭐⭐⭐⭐⭐ with a comment. THANK YOU!! Follow Delicious Table with my free newsletter and share this recipe with your friends on Facebook, Pinterest, and Instagram.

      A Cinco de Mayo party with frozen margaritas called Coronaritas, guacamole, and chips on a green table.
      Print

      CoronaRita Frozen Margarita Beer Cocktail

      CoronaRita Margarita/Beer Cocktails are made with a margarita and a mini “Coronita” turned upside down into the drink. Perfect when you can’t decide between a margarita and an icy cold Corona!
      Course Drinks & Cocktails
      Cuisine American, Mexican
      Keyword CoronaRita, frozen cocktail, frozen margarita
      Prep Time 20 minutes minutes
      Total Time 20 minutes minutes
      Servings 6
      Calories 240kcal
      Author Lisa Hatfield

      Equipment

      • Coronarita/Margarita Glasses
      • Colorful Striped Straws
      • Coronarita Drink Clips

      Ingredients

      • 7 limes - juice 5 and slice 2 for garnish
      • 1 orange or 3 clementine oranges
      • 8 cups ice
      • 1 cup good tequila
      • ¼ cup triple sec
      • 2 cups margarita mix
      • sea salt for rim of glass
      • 6 pack of Coronitas small 7 ounce Corona beers
      • Optional: Large margarita glasses and CoronaRita beer clips, colorful straws
      US Customary - Metric

      Instructions

      • Slice the 2 limes in wedges for garnish.
      • Run a lime slice around the rim of glasses, and dip the glass rim into sea salt poured on a plate.
      • Juice the 5 limes and 1 orange, and add the juice to the blender.
      • Now, add 8 cups ice, good tequila, triple sec, and margarita mix. Blend until thick, add more ice if necessary.
      • Pour the slushy margaritas from the blender into salt-rimmed glasses, open an ice-cold small 7 oz Corona beer (Coronitas) and carefully tip the mouth of the bottle into the glass.
      • Garnish with a lime slice and a fun straw, sip, and enjoy!

      Video

      Notes

      serving top tips

      Serve each small 7 oz Coronita beer with a clip in beautiful blue-rimmed margarita glasses made in Mexico and or a pitcher.

      "Coronita" tips

      • If you want the 7 oz Coronita "little beers" icy cold, pop them in the freezer for 20 minutes right before serving.

      glassware tips

      • Some margarita glasses have a dip in them that holds the little Coronitas. I found my glasses and pitcher at Home Goods, they were quite inexpensive. Large Corona beers would tip over the glass, try to use the little 7 oz Coronitas for this cocktail, or use the Coronita clips made for this drink!
      • Corona sells clips online to hold beers in glasses just for this purpose, my glasses worked fine but test before your party. The beer can make the glass tippy so use some care!

      Nutrition

      Calories: 240kcal | Carbohydrates: 32g | Protein: 1g | Fat: 0.2g | Saturated Fat: 0.03g | Polyunsaturated Fat: 0.1g | Monounsaturated Fat: 0.02g | Sodium: 76mg | Potassium: 132mg | Fiber: 3g | Sugar: 23g | Vitamin A: 88IU | Vitamin C: 34mg | Calcium: 45mg | Iron: 1mg

      Palmiers

      [heart_this] · Feb 10, 2021 · 1 Comment

      A pile of freshly baked palmier cookies on a decorative white heart plate.

      Last Updated May 22nd, 2023 at 12:00 am by Lisa

      Palmiers are airy flaky crisp French cookies with only 2 ingredients. This sweet treat easy dessert bake is divine any time of day.

      These might become your go-to cookie recipe once you learn how easy they are to bake...

      A white heart shaped dish filled with fresh baked palmiers.

      Why This Palmier Recipe Works

      • Two simple ingredients for cookies!
      • Palmiers will get crunchier as they cool, and are best to eat the same day.
      • An easy recipe, kids can help make these.
      • No cookie dough to mix.
      • Store them in an airtight container, they will go soft in a couple of days.
      • So good with tea or coffee.

      Here Is All You Need...

      Working With Your Puff Pastry

      1. Thaw puff pastry sheet at room temperature 40 minutes until it unfolds easily, it should still be cold to the touch as it's defrosting.
      2. Unfold the puff pastry and lay flat.
      3. Sprinkle sugar on your board below puff pastry and on top.
      4. Sprinkle granulated sugar and roll it in gently.

      How To Slice Palmier Cookies

      1. Fold the puff pastry sheet in towards the center 2 inches on each side.
      2. Fold the puff pastry sheet again in toward the center.
      3. And again a third time, fold to the center and lay on the side.
      4. Next, slice into ½" slices.

      Palmier Baking Tips

      1. For a classic folded "Palmier shape", chill the puff pastry.
      2. Next roll it up and slice. This helps it keep its shape during baking. PRO TIP: I use a small baking sheet and pop it in the refrigerator for about 20 minutes just before baking.
      3. Press a lot of sugar into the puff pastry dough. The more sugar, the more crunchy and caramelized your palmiers will bake.
      4. The sliced puff pastry will make a "U shape", set each piece on a baking sheet lined with either parchment paper or Silpat mats a few inches apart.

      Puff Pastry Recipe Tips

      1. You can thaw the puff pastry overnight in the refrigerator, or take it out of the box and paper wrapper and rest for 40 minutes.
      2. The truth is, you can make your own puff pastry at home. I made it in professional cooking school once (with a French Chef's help) but it is a difficult and lengthy process. So why would you make it when it's so easy to buy and tastes just as good?
      3. Puff pastry is great to keep in the freezer for last-minute dessert baking or party appetizers. My Brie and Bacon Palmier recipe, is so easy to bake with 3 ingredients and will be a huge hit at parties.

      Palmier Recipe FAQs

      What are palmiers?


      Palmiers are made from puff pastry, a dough with no yeast, no baking soda, and no baking powder.

      A palmier (French for "palm tree"), or elephant ear, is a French pastry in a palm leaf shape or a butterfly shape, sometimes called palm leaves, cœur de France, French hearts, shoe soles, jalebi, or glasses. In the Puerto Rican version, it is topped with honey. In Mexico, they are known as Orejas (ears).

      What is puff pastry?

      Puff pastry is made by layering dough and butter, rolled and folded over and over to create hundreds of flaky layers that "puff" in the hot oven.

      When you look at puff pastry dough, it looks similar to pie dough, but it’s actually many thin layers of butter and dough.

      More Of My Cookie Recipes

      • Valentine's Day Palmier Cookies have easy step-by-step instructions. Bake a batch of these flaky little crisp French cookies in heart shapes!
      How To Make Heart Shaped Cookies
      Palmiers are flaky crisp French cookies with only 3 ingredients, are easy to bake, and these heart cookies are perfect for Valentine's Day!
      GET THE RECIPE PIN IT
      A white plate with heart shaped colorful Valentine cookies.
      • Lucky Green (mint) Oreos are easy no-bake cookies, dipped in chocolate and sprinkled in green Shamrocks. Fun "green food" recipe for kids. 
      • Santa's Chocolate Chip Peppermint Cookies with candy cane peppermint crunch, chocolate chips, and Andes creme de menthe chips are the cookies to leave out for Santa or make for a holiday party!
      • Kids write their wish list on decorated Christmas cookies with edible ink pens, including step-by-step instructions. Ho Ho Ho!
      • Peppermint white chocolate and macadamia nut have these Shortbread Cookies say Aloha!
      • A square white plate with green oreos decorated with shamrock sprinkles.
        Lucky Green Oreos
      • A white rectangle plate filled with chocolate chip peppermint cookies with a small Santa nearby.
        Chocolate Chip Christmas Cookies
      • A collage of Christmas cookies decorated for Santa including one with a kids wish list on a mug of milk.
        Santas Cookies
      • A pile of pineapple shaped peppermint macadamia nut shortbread cookies.
        Christmas Shortbread Cookies

      Did you love this recipe? We would love to hear from you! If you make this recipe and love it, give it a 5-star rating ⭐⭐⭐⭐⭐ with a comment. THANK YOU!! Follow Delicious Table with my free newsletter and share this recipe with your friends on Facebook, Pinterest, and Instagram.

      A pile of freshly baked palmier cookies on a decorative white heart plate.
      Print

      Palmiers

      Palmiers are airy flaky crisp French cookies with only 2 ingredients. This sweet treat easy dessert bake is divine any time of day!
      Course Desserts & Sweets
      Cuisine French
      Keyword French cookies, palmier cookies, palmiers
      Prep Time 30 minutes minutes
      Cook Time 20 minutes minutes
      Total Time 50 minutes minutes
      Servings 20
      Calories 212kcal
      Author Lisa Hatfield

      Equipment

      • Large Metal Sheet Pan
      • Parchment Paper Sheets
      • Wood Rolling Pin
      • Chef Knife

      Ingredients

      • 1 box puff pastry Pepperidge Farm
      • 2 cups sugar
      US Customary - Metric

      Instructions

      Palmier Prep

      • Thaw puff pastry sheet at room temperature 40 minutes until it unfolds easily, it should still be cold to the touch as it's defrosting.
      • Preheat oven to 400 degrees.

      Roll Out Puff Pastry

      • Sprinkle ½ cup of white granulated sugar evenly on the counter or your worksurface.
      • Open sheet and lay flat on work surface. Evenly sprinkle ½ cup of sugar on top puff pastry sheet.
      • Use rolling-pin, roll the puff pastry sheet until it's about 13 x 13 inches square. The sugar will press into the puff pastry on top and bottom.

      Slice Palmiers

      • Fold the puff pastry sheet in towards the center 2 inches on each side. Fold the puff pastry sheet again in toward the center. And again a third time, fold to the center and lay on the side. Next, slice into ½" slices.

      Bake Palmiers

      • Place the slices, cut side up, on baking sheets lined with a Silpat mat or parchment paper.
      • Bake the cookies 400 for 20 minutes until golden brown. Transfer to a baking rack to cool.

      Notes

      puff pastry tips

      1. You can thaw the puff pastry overnight in the refrigerator.
      2. Or take it out of the box and paper wrapper and rest for 40 minutes on the kitchen counter.

      palmier baking tips

      1. Palmiers will get crunchier as they cool, and are the best to eat the same day.
      2. To get the classic folded Palmier shape, chill the puff pastry after rolling up, and slicing. This helps it keep its shape during baking. I use a small baking sheet and pop it in the refrigerator for about 20 minutes just before baking.
      3. Press a lot of sugar into the puff pastry dough. The more sugar, the more crunchy and caramelized your palmier will bake.

      storage

      Store them in an airtight container, but they will go soft in a couple of days.

      Nutrition

      Serving: 20g | Calories: 212kcal | Carbohydrates: 31g | Protein: 2g | Fat: 9g | Saturated Fat: 2g | Sodium: 61mg | Potassium: 15mg | Fiber: 1g | Sugar: 20g | Vitamin A: 1IU | Calcium: 3mg | Iron: 1mg

      Chocolate-Cherry Hand Pies

      [heart_this] · Feb 10, 2021 · 1 Comment

      A red cookie plate filled with heart shaped chocolate hand pies.

      Last Updated April 24th, 2024 at 08:46 pm by Lisa

      Cherry Chocolate Hand Pies have an amazing sugar crust, this with store bought or homemade pie crust, chocolate chips, and frozen cherries.

      In just about 45 minutes, you can bake these sweet dessert pies at home for those you love...

      A stack of heart shaped hand pies on red plates with red and white decorations.

      Chocolate Cherry Hand Pie Recipe

      Simple store-bought ingredients come together into a bakery style pastry, ready in 45 minutes. The rich chocolate and cherry filling is absolutely incredible. Each pie is topped with a sugary crust, with a crackled texture.

      • 2 pie crusts homemade or store bought
      • 16 ounce bag frozen dark pitted sweet cherries
      • 1 cup semi sweet chocolate chunks (or semi sweet chocolate chips)
      • 3 tablespoons corn starch
      • ½ cup sugar
      • 1 teaspoon fresh lemon juice
      • ¼ teaspoon kosher sea salt
      • 1 teaspoon vanilla extract

      For these hand pies, I found this heart-shaped press at Williams Sonoma. You can always simply cut out a heart shape in parchment paper, and trace it around with a small paring knife or pastry wheel or use a large cookie cutter.

      1. On a lightly floured surface, roll out the pie dough. Cut the pie dough into heart shapes using a large cookie cutter, paring knife, or heart hand pie press. Reroll the excess dough, and rollout using a rolling pin.
      2. In a small bowl, mix the cherries, chocolate, cornstarch, sugar, lemon juice sea salt and vanilla extract. Give the cherry filling mix a good stir.
      3. Preheat oven to 400 degrees.
      4. Fill each hand pie with a small amount of filling about 5-6 cherries per pie, try to not overfill. Be careful to not overfill the press or pie hearts so they seal well.
      5. Place your filling on the bottom crust, place top crust, and press in hand pie press or crimp the edges closed with a fork.
      6. Sprinkle each pie with granulated sugar. This gives a nice crust, or brush with an egg wash glaze, or melted butter.
      7. Bake 400 degrees for 20 minutes, on a parchment lined baking sheet until edges are golden brown. Cool on a wire rack at room temperature.
      8. Optional, serve slightly warm and sprinkle with powdered sugar.

      Hand Pie FAQs

      What are hand pies?


      A  folded or pressed pastry with either a sweet or savory filling that is either baked or fried.

      How do you make hand pies?

      Hand pies are made by placing a small amount of sweet or savory filling onto a round piece of dough. Then it is folded over and sealing the edges with either a fork or a small pie mold before baking or frying.

      More Pie Recipes

      Some of the best old-fashioned Fried Apple Hand Pies by A Farmgirls Kitchen or try Jessica's recipe for Blackberry Hand Pies by A Farmgirls Kitchen.

      Bake an American Flag Pie for your patriotic dessert this July 4th, which is baked on a rimmed baking sheet, and will serve 20 people for summer cookouts and picnics.

      Bake this Blueberry Pie Recipe outdoors on your gas or charcoal grill. It works just like an indoor oven and keeps your house cool on scorching hot days.

      Dutch Apple Pie is also known as Apple Crumble Pie baked with a homemade filling, a foolproof flaky crust, and a crumble topping.

      Make Empanadas after Thanksgiving. Use this as a turkey leftover recipe, and add ham, mashed potatoes, gravy, dressing/stuffing, and more.

      • A white pie dish with a slice of apple crumble pie, also known as a dutch apple pie with a crumbled topping and green apples in the background in a wood bowl.
        Dutch Apple Pie
      • A sheet pan filled with a flag pie made with strawberries, blueberries, and pie crust.
        American Flag Pie
      • A blueberry pie that is baked outdoors on a grill with a flag shaped pie crust.
        Blueberry Pie Baked Outdoors
      • Golden brown baked empanadas decorated with pie crust leaves on a Fall tray.
        Empanadas ~ Turkey Leftover Recipe

      Did you love this recipe? We would love to hear from you! If you make this recipe and love it, give it a 5-star rating ⭐⭐⭐⭐⭐ with a comment. THANK YOU!! Follow Delicious Table with my free newsletter and share this recipe with your friends on Facebook, Pinterest, and Instagram.

      A red cookie plate filled with heart shaped chocolate hand pies.
      Print

      Chocolate-Cherry Hand Pies

      Cherry Chocolate Hand Pies have an amazing sugar crust, this with store bought or homemade pie crust, chocolate chips, and frozen cherries. In just about 45 minutes, you can bake these sweet dessert pies at home for those you love.
      Course Desserts & Sweets
      Cuisine American
      Keyword cherry hand pies, chococolate cherry hand pies, dessert hand pies, hand pie, hand pie recipe
      Prep Time 15 minutes minutes
      Cook Time 20 minutes minutes
      Total Time 35 minutes minutes
      Servings 6
      Calories 562kcal
      Author Lisa Hatfield

      Equipment

      • Hand Pie Press
      • Assorted Heart Cookie Cutters

      Ingredients

      • 2 pie crusts homemade or store bought
      • 16 ounce bag frozen dark pitted sweet cherries
      • 1 cup semi sweet chocolate chunks or semi sweet chocolate chips
      • 3 tablespoons corn starch
      • ½ cup sugar
      • 1 teaspoon fresh lemon juice
      • ¼ teaspoon kosher sea salt
      • 1 teaspoon vanilla extract
      US Customary - Metric

      Instructions

      • On a lightly floured surface, roll out the pie dough. Cut the pie dough into heart shapes using a large cookie cutter, paring knife, or heart hand pie press. Reroll the excess dough, and rollout using a rolling pin.
      • In a small bowl, mix the cherries, chocolate, cornstarch, sugar, lemon juice sea salt and vanilla extract. Give the cherry filling mix a good stir.
      • Preheat oven to 400 degrees.
      • Fill each hand pie with a small amount of filling about 5-6 cherries per pie, try to not overfill. Be careful to not overfill the press or pie hearts so they seal well.
      • Place your filling on the bottom crust, place top crust, and press in hand pie press or crimp the edges closed with a fork.
      • Sprinkle each pie with granulated sugar. This gives a nice crust, or brush with an egg wash glaze, or melted butter.
      • Bake 400 degrees for 20 minutes, on a parchment lined baking sheet until edges are golden brown. Cool on a wire rack at room temperature.
      • Optional, serve slightly warm and sprinkle with powdered sugar.

      Notes

      What are hand pies?
      A  folded or pressed pastry with either a sweet or savory filling that is either baked or fried.
      Hand pies are made by placing a small amount of sweet or savory filling onto a round piece of dough. Then it is folded over and sealing the edges with either a fork or a small pie mold before baking or frying.
       

      Nutrition

      Serving: 6g | Calories: 562kcal | Carbohydrates: 76g | Protein: 6g | Fat: 26g | Saturated Fat: 11g | Trans Fat: 1g | Cholesterol: 2mg | Sodium: 332mg | Potassium: 395mg | Fiber: 5g | Sugar: 37g | Vitamin A: 64IU | Vitamin C: 6mg | Calcium: 40mg | Iron: 4mg

      Pomegranate Seeds

      [heart_this] · Dec 22, 2020 · 1 Comment

      A white ceramic dish with pomegranate seeds ready to use in a recipe.

      Last Updated December 15th, 2021 at 06:49 pm by Lisa

      Learn the simple way to juice and seed pomegranates. Step-by-step instructions on how to open, seed, and juice pomegranate arils plus ways to use pomegranates in recipes.

      Once you try this cooking tip, you will love using pomegranates...

      A large red pomegranate with the top cut off and cut down the side.
      A ripe pomegranate cut open showing the pomegranate arils to use in recipes.

      How To Open Pomegranates

      1. Cut the ½" off the top crown of the pomegranate where the stem is, and set aside.
      2. Using a small knife, run the knife down the pomegranate skin along the white pith to the bottom, but not through the bottom center of the pomegranate (this keeps it held together for the next step).
      3. Cut straight down the side of the pomegranate all the way around about 2-3 apart.
      4. Crack open the pomegranate and remove the center white core pith.
      5. Now break each piece over a bowl and pop out the seeds by running your fingers gently over the aril seeds. This does take some time, and remove be sure to remove the white pith bits that fall into your bowl.

      Pomegranate Juice

      1. Place the aril seeds into a strainer that fits into a similar size bowl.
      2. Press down on the pomegranate seeds with a large spoon, letting the juice drain into a bowl.
      3. Store in the refrigerator for up to a couple of days in a Mason jar.

      How To Enjoy The Juice

      1. Freeze in cute shape ice cube trays for drinks or for healthy sparkling water.
      2. Sip as a healthy drink.
      3. Make homemade pomegranate juice Mason jar dressing.
      4. Mix into Greek yogurt for a healthy breakfast or snack.
      5. Blend a smoothie using your pomegranate juice.
      6. Splash into a vodka soda cocktail with a twist of lime or orange.

      Pomegranate FAQs

      When Is Pomegranate Season?

      In the United States, the season for pomegranates is from September through January. Pomegranates are grown in the Central Valley of California and in Arizona. The pomegranate is native to what is now a region from modern-day Iran to northern India. Pomegranates have been grown throughout the Middle East, South Asia, and the Mediterranean region for several thousand years.

      How To Open Pomegranates?

      Pomegranates can be a mess to open and eat but are made neater when you actually eat the entire seed.
      1. Start by cutting ½" off the top crown of the pomegranate where the stem is, and set aside.
      2. Using a small knife, run the knife down the pomegranate skin along the white pith to the bottom, but not through the bottom center of the pomegranate, this keeps it held together for the next step.
      3. Continue all the way around the pomegranate until cuts are made down the sides.
      4. Crack open the pomegranate and remove the center white core pith.
      5. Now break each piece over a bowl and pop out the seeds by running your fingers gently over the aril seeds. This does take some time, and remove be sure to remove the white pith bits that fall into your bowl.

      Pomegranate Recipes

      1. Sprinkle on Christmas and holiday salads
      2. Enjoy as a snack!
      3. Drop a few in a glass of champagne, sparkling water, or prosecco
      4. Pop a few on top of a Breakfast Parfaits
      5. Cover Cheese Balls for a festive sparkle!
      6. Place a few on Holiday Deviled Eggs
      7. Use pomegranate arils as "ornament" decorations a Christmas Tree Salad.
      • Two plates of Christmas salad with forks topped with fruit and nuts.
        Christmas Holiday Salad
      • 4 cheese balls shaped round and topped with curly bows and ornament hooks to serve as Christmas appetizers.
        4 Cheese Ball Recipes
      • White platter with Christmas Deviled Eggs garnished with rosemary and pomegranate seeds.
        Christmas Deviled Eggs
      • A salad shaped like a Christmas tree with red bell pepper garland, white apple stars and ornaments of nuts and fruit.
        Christmas Tree Salad

      Did you love this recipe? We would love to hear from you! If you make this recipe and love it, give it a 5-star rating ⭐⭐⭐⭐⭐ with a comment. THANK YOU!! Follow Delicious Table with my free newsletter and share this recipe with your friends on Facebook, Pinterest, and Instagram.

      A white ceramic dish with pomegranate seeds ready to use in a recipe.
      Print

      Pomegranates: Seed, Juice, and Recipe Ideas

      Get Pomegranate Seeds out the easy way. Learn the simple trick to open, seed, and juice pomegranate arils in step-by-step instructions.
      Course Appetizers, Dips, & Snacks
      Cuisine American
      Keyword pomegranate arils, pomegranate juice, pomegranate seeds
      Prep Time 5 minutes minutes
      Cook Time 0 minutes minutes
      Total Time 5 minutes minutes
      Servings 1
      Calories 234kcal
      Author Lisa Hatfield

      Equipment

      • Epicurean Non-Slip Cutting Board
      • Chef Knife
      • Fine-Mesh Strainer

      Ingredients

      • 1 whole pomegranate

      Instructions

      Seed A Pomegranate

      • Cut the ½" off the top crown of the pomegranate where the stem is, and set aside.
      • Using a small knife, run the knife down the pomegranate skin along white pith to the bottom, but not through the bottom center of the pomegranate (this keeps it held together for next step).
      • Continue all the way around the pomegranate until cuts are made down the sides.
      • Crack open the pomegranate and remove the center white core pith.
      • Now break each piece over a bowl and pop our the seeds by running your fingers gently over the aril seeds. This does take some time, and remove be sure to remove the white pith bits that fall into your bowl.

      Juice A Pomegranate

      • Place the pomegranate seeds into a strainer that fits into a similar size bowl.
      • Press down on the pomegranate seeds with a large spoon, letting the juice drain into a bowl.
      • Store in the refrigerator for up to a couple days in a Mason jar.

      Notes

      Ways To Use Pomegranate Juice

      • Make homemade Pomegranate Mason Jar Dressing.
      • Mix into Greek yogurt for a healthy treat.
      • Blend a smoothie using your pomegranate juice.
      • Splash into a vodka soda cocktail with a twist of lime or orange.

      Nutrition

      Calories: 234kcal | Carbohydrates: 52g | Protein: 4g | Fat: 3g | Saturated Fat: 0g | Cholesterol: 0mg | Sodium: 8mg | Potassium: 665mg | Fiber: 11g | Sugar: 38g | Vitamin C: 28.8mg | Calcium: 28mg | Iron: 0.8mg

      Peppermint Candy Plate

      [heart_this] · Dec 13, 2020 · 4 Comments

      A red and white peppermint candy plate made from melted candy in a round shape.

      Last Updated April 24th, 2024 at 09:16 pm by Lisa

      Make a Peppermint Candy Plate in only 20 minutes. Serve desserts like cookies, candy, hot cocoa, coffee, tea, festive drinks, or holiday cocktails!

      Take this Christmas plate to a dinner or holiday party filled with treats, people go crazy when they realize it's made of candy and you can eat it...

      A peppermint candy plate made from peppermints with a pile of fresh baked colorful Christmas cookies.

      You Will Love This Plate...

      I took this Peppermint Plate to a family Christmas Eve party. My family kept asking how I made the plate...and never mind the cookies! Just kidding, they ate the cookies. Every last one.

      • It is the perfect Christmas DIY project for kids and adults. Have kids help unwrap the mints and place them on the pan. You handle the oven step and then the kids can admire their hard work when it's cool!
      • Create any design you want. If you use a combination of red and green mints, you can get really creative with the design!
      • You can make different shapes, like hearts or stars. I used a tart pan to make mine but a cookie sheet works just fine.
      • I've even seen people mold the peppermint plates around a bowl straight out of the oven to create peppermint bowls. Simply use a heat resistant bowl, turn it upside down, and carefully place the hot peppermint plate on top.

      What You Need

      • 1 bag of Brach’s Star Brites peppermint candy (red, green, or both!)
      • cookie sheet, spring-form pan, or tart pan
      • parchment paper
      A collage of how to make a peppermint candy plate in a small low tart pan for Christmas.

      How Do You Make It?

      Are you ready for some fun? These take about 20 minutes to make...

      Step 1: Heat oven to 350 degrees.

      Step 2: Line your pan with parchment paper or line a cookie sheet.

      Step 3: Arrange unwrapped mints in any design you wish on top of the parchment paper, allow extra room on the sides as the mints will melt and spread.

      Step 4: Bake for approximately 5-8 minutes. Watch carefully.

      Step 5: Take out and allow to cool on cookie sheet for a few minutes.

      Step 6: Remove from the bottom. Be careful; the tray is fragile and breaks easily, so keep it on a small tray when moving it around.

      Tips for Making Candy Plates

      • If you want to shape or mold the tray in any way after you melt it, you should do so in the first minute it is out of the oven because it hardens quickly. Be careful... it's hot!
      • Try using a spring-form pan if you have one. I used a tart pan, it was not easy to remove the candy plate.
      • Let the parchment paper be a bit bigger than the bottom of the spring-form pan to help you remove the candy plate.

      Christmas Cookie Ideas

      Santa's Chocolate Chip Peppermint Cookies (right) and Christmas Cookies (left).

      I have made Christmas Cookies every year since 1991 and it wouldn't be Christmas without those cookies...

      A candy plate for Christmas made from round peppermint candies melted together.

      More Recipes For Christmas Baking

      • A pile of pineapple shaped peppermint macadamia nut shortbread cookies.
        Christmas Shortbread Cookies
      • A collage of Christmas cookies decorated for Santa including one with a kids wish list on a mug of milk.
        Santas Cookies
      • A lady holding a s'more cookie dough truffle cut open with mini marshmallows inside.
        S'more Cookie Dough Truffles
      • Nut Goodie Bar Candy in mini white paper cups.
        Nut Goodie Bar Candy

      More Christmas Recipes

      • Learn how to make Roast Beef with Port-Wine Sauce, a delicious elegant dinner for parties and holidays. 
      • Christmas Tree Salad + Cranberry Vinaigrette: A healthy and festive Christmas salad.
      • EASY Holiday Deviled Eggs are a festive (MAKE-AHEAD Oh Yesssssss) appetizer made with simple ingredients. Serve with bubbly or drinks at your holiday party!
      • Sausage Stuffing with Cranberries and Cherries: A wonderful Italian sausage stuffing (dressing) recipe that is bursting with flavor.

      Did you love this recipe? We would love to hear from you! If you make this recipe and love it, give it a 5-star rating ⭐⭐⭐⭐⭐ with a comment. THANK YOU!! Follow Delicious Table with my free newsletter and share this recipe with your friends on Facebook, Pinterest, and Instagram.

      A peppermint candy plate made from peppermints with a pile of fresh baked colorful Christmas cookies.
      Print

      Candy Plate

      Make a Peppermint Candy Plate for Christmas in only 20 minutes. Serve cookies, candy, hot cocoa, coffee, tea, festive drinks or holiday cocktails! You need 1 bag of mints, a pan, and parchment paper.
      Course Desserts & Sweets
      Cuisine American
      Keyword candy plate, peppermint candy plate, peppermint plate
      Prep Time 20 minutes minutes
      Cook Time 8 minutes minutes
      Total Time 28 minutes minutes
      Servings 1
      Calories 1838kcal
      Author Lisa Hatfield
      Cost $5

      Equipment

      • Classic Cookie Sheet
      • Parchment Paper Sheets
      • Tart Pan

      Ingredients

      Ingredient

      • 1 bag of Brach’s Star Brites peppermint candy
      US Customary - Metric

      Instructions

      Prep

      • Line your cookie sheet, sping form pan, or tart pan with parchment paper.
      • Preheat oven to 350 degrees.
      • Arrange unwrapped mints in any design you wish on top of the parchment paper.
      • Allow extra room on the sides around the edge of the pan as the mints will melt and spread.

      Bake Plate

      • Bake for approximately 5-8 minutes. Watch carefully.
      • Take out and allow to cool for a few minutes.
      • The tray is fragile and breaks easily, so keep it on a small tray when moving it around.

      Notes

      Tips for Making Candy Plates

      • If you want to shape or mold the tray in any way after you melt it, you should do so in the first minute it is out of the oven because it hardens quickly. Be careful... it's hot!
      • Try using a spring-form pan if you have one. (I used a tart pan, it was not as easy to remove the candy plate, but it did come out!)
      • Let the parchment paper be a bit bigger than the bottom of the spring-form pan to help you remove the candy plate.
      • You can also bake your candy plate on any cookie sheet, it works great.

      Nutrition

      Calories: 1838kcal | Carbohydrates: 429g | Sugar: 306g

      Empanadas ~ Turkey Leftover Recipe

      [heart_this] · Nov 22, 2020 · 3 Comments

      Golden brown baked empanadas decorated with pie crust leaves on a Fall tray.

      Last Updated October 19th, 2023 at 08:04 pm by Lisa

      Grab a box of pie crust from the store, and make some empanadas with your holiday leftovers. You can use up roast turkey, ham, roast beef, mashed potatoes, gravy, sweet potatoes, dressing, stuffing, and more!

      Empanadas are also known as hand pies in America and are super easy, delicious, and freeze beautifully. Cute pie crust cutouts on top are optional but super fun. Empanadas are worldwide comfort food for a good reason...

      Golden brown baked empanadas decorated with pie crust leaves on a Fall tray.

      You Will Love This Turkey Leftover Recipe!

      • Empanadas (hand pies) are easy to make. After the big day, simply fill the empanadas, fold them, and bake.
      • This Thanksgiving leftovers recipe is versatile. Want a savory empanada? A sweet empanada? A savory-and-sweet empanada? You can do all three... there are no empanada rules.
      • Mix n' match your leftovers as you like, and try combinations.
      • These will take care of your Thanksgiving leftovers.
      • You can dress them up with cute pastry leaf cut-outs.
      • They're freezable, making them perfect for meal prep.
      • You can also freeze these in airtight containers, and then bake for fast weeknight dinner meals or lunches.
      • Imagine digging into the flavors of Thanksgiving in January!

      What Leftovers Can I Use?

      PRO TIP: You can fit about 2-3 tablespoons of filling per 6 " round pie crust circle. Be careful to not overfill or the edges are hard to seal closed. Have fun mixing savory and sweet.

      • 1 tablespoon turkey or ham - cut into 1 " pieces
      • 1 tablespoon dressing
      • 1 tablespoon mashed potatoes
      • 1 tablespoon sweet potato casserole
      • 1 tablespoon cranberry sauce
      • 1 tablespoon roasted veggies
      • 1 tablespoon gravy

      Do I Need An Empanada Press?

      You really don't need an empanada press, but it does the job really fast and they are inexpensive.

      PRO TIP: If making your empanadas by hand, simply cut the pie dough into a 6-inch circle, place your filling, fold over the pie crust over your filling, and use a fork to seal the edges closed. 

      • 2 whole pie crusts
      • 3 tablespoons melted butter

      How to Make Leftover Empanadas...

      Ready to use up your Thanksgiving leftovers? Let's get started!

      Step 1: On a floured board, roll out pie dough a little thinner than the average crust.

      Step 2: Cut dough into 6" circles: use the other side of the empanada cutter or a small upside-down bowl to cut the dough into circles.

      PRO TIP: The pie crusts will make 6 empanadas.

      Step 3: Place 2-3 tablespoons of filling (use my suggested filling or create your own based on your Thanksgiving leftovers) on one side of the pie dough.

      PRO TIP: Do not overfill your hand pies. If they are overfilled, the press won't close and seal.

      Step 4: Close the empanada maker, and seal the edges. Or, fold the dough in half with filling, and press the edges closed with the tips of a fork.

      Pie Crust Leaf Decorations...

      Using small scraps of pie crust you can cut out small leaves and place them on top of each empanada. It just takes seconds but makes them so stunning...

      Step 5: Place empanadas on a parchment-lined baking sheet. Optional: Cut out leaf pie crust decorations, place them on top of empanadas.

      Step 6: Brush with melted butter.

      Step 7: Bake at 375 for 20-25 minutes pie crust until edges are golden brown and baked.

      What are Empanadas?


      Empanadas are small folded pastries with a filling and are either baked or fried. They look like a turnover or a small hand pie and are common in Southern European, Latin American, and the Philippines cultures. Their name comes from the Spanish verb empanar, and translates as "enbreaded", meaning wrapped or coated in bread.


      Almost all cultures and countries around the world have some version of a pastry or dough with sweet or savory fillings. Some of these you will know as dumplings, pierogis, samosas, turnovers, British or Cornish pasties, Brazilian pastel, Cuban pastelitos, bolanis, pastechis, and empanadillas.

      What Are Empanadas Filled With?


      They are made by folding dough over a filling and can be savory made from meat, cheese, tomato, cheese, corn, chiles, or other ingredients. They can also be a sweet dessert, and made from fruit, chocolate, sweet preserves, sugar, cinnamon, etc.

      What are Hand Pies?

      A hand pie is simply the Southern U.S. term for an empanada. A hand pie is a piece of dough that is filled with a savory (savory hand pie) or sweet (sweet hand pie) filling and folded over and sealed shut... in other words, an empanada!

      What Else Can You Make With Turkey Leftovers?

      • Casseroles
      • Sandwiches
      • Chilis or Soups
      • Frittatas
      • Shepherd's Pies
      • Pot Pies

      Another Turkey Leftover Recipe

      And if you have a lot of leftovers, this Shepherd's Pie Casserole is so easy and delicious...

      Turkey Leftover Recipe: Shepherd's Pie
      A leftover turkey recipe for shepherd's pie to use turkey leftovers, stuffing, mashed potatoes, gravy, and more from Thanksgiving dinner.
      GET THE RECIPE PIN IT
      A white dish filled with golden bubbly turkey shepherd's pie baked and ready to eat.
      Golden brown baked empanadas decorated with pie crust leaves on a Fall tray.
      Print

      Empanadas - Thanksgiving Leftover Recipe

      Empanadas made with Thanksgiving leftovers: Use Thanksgiving leftover turkey, ham, mashed potatoes or stuffing, gravy etc baked into homemade or store-bought pie crust. Freeze empanadas for easy weeknight meals!
      Course Dinner & Main Dishes
      Cuisine American
      Keyword empanadas, turkey leftover recipes, turkey leftovers
      Prep Time 20 minutes minutes
      Cook Time 20 minutes minutes
      Servings 6
      Calories 82kcal
      Author Lisa Hatfield

      Equipment

      • Empanada Press
      • Leaf Cookie Cutters For Thanksgiving

      Ingredients

      • 2 pie crusts
      • 3 tablespoons melted butter

      Thanksgiving Leftover Filling Ideas:

      • 1 tablespoon turkey or ham - cut into 1 " pieces
      • 1 tablespoon dressing
      • 1 tablespoon mashed potatoes
      • 1 tablespoon sweet potatoes
      • 1 tablespoon cranberry sauce
      • 1 tablespoon roast veggies
      • 1 tablespoon gravy

      Instructions

      • On a floured board, roll out pie dough thinner than the average crust.
      • Cut dough into 6" circles: use the other side of empanada cutter or a small upside down bowl to cut the dough into circles.
      • One pie crusts will make 6 empanadas.
      • Place 2-3 tablespoons of filling on one side of the pie dough. If they are overfilled, the press won't close and seal.
      • Close the empanada maker, and seal the edges. Or, fold dough in half with filling, and press the edges closed with the tips of a fork.
      • Place empanadas on a parchment lined baking sheet.
      • Brush with melted butter.
      • Bake at 375 for 20-25 minutes pie crust until edges are golden brown and baked.

      Video

      Notes

      empanada press:

      You don't NEED an empanada press, but it does the job really fast and they are inexpensive. If making your empanadas by hand, simply fold over the pie crust over your filling, and use a fork to seal the edges. 
      TIP: Do not overfill your savory hand pies, if they are overfilled, the press won't close and seal.

      pie crusts:

      One pie crust will make 6 empanadas.

      leaf decorations:

      Use your extra pie crust to make pretty leaf decorations.

      freezable:

      Empanadas are freezable, making them perfect for meal prep. You can also freeze these in airtight containers, and then bake for fast weeknight dinner meals or lunches. 
       

      Nutrition

      Calories: 82kcal | Carbohydrates: 4g | Protein: 1g | Fat: 6g | Saturated Fat: 3g | Cholesterol: 17mg | Sodium: 90mg | Potassium: 35mg | Fiber: 0g | Sugar: 1g | Vitamin A: 650IU | Vitamin C: 2.2mg | Calcium: 2mg

      Sweet Potato Casserole With Marshmallows

      [heart_this] · Nov 21, 2020 · 1 Comment

      A silver server scooping up sweet potato casserole with golden toasted marshmallows on top out of a white casserole dish.

      Last Updated December 22nd, 2022 at 01:29 pm by Lisa

      The best Sweet Potato Casserole with crunchy pecans, coconut, and toasted marshmallows. A winning Thanksgiving side or Holiday dish to serve!

      Of course, you don't really have to wait until next Thanksgiving to serve it again. It can also make an appearance at any other fall or holiday gathering. Even better, it comes together in just about 30 minutes, making it the ideal last-minute side dish.

      Made in minutes, and everything melts together, this is one of those guilty pleasure dishes people love...

      Sweet Potato Casserole Recipe

      1 stick soft butter

      1 cup brown sugar

      1 cup chopped pecans

      1 cup sweetened coconut

      1 large can sweet potatoes

      1 cup mini marshmallows

      1. Preheat oven to 375. Place sweet potatoes in a single layer in the bottom of a non-stick sprayed casserole dish.
      2. Make the crumble topping: In a medium bowl, mix pecans, coconut, brown sugar, and butter. Set aside
      3. Sprinkle crumbly mixture evenly on top.
      4. Scatter mini marshmallows.
      5. Bake for 20 minutes until warm, and marshmallows are golden brown.

      Can You Make Sweet Potato Casserole Ahead?

      Yes, sweet potato casserole is an ideal make-ahead dish. Put this dish together up to a full day ahead, and then pull it out and bake it when it's almost time for your holiday meal.

      Sweet Potatoes vs. Yams: What is the Difference?

      If you've wondered about sweet potatoes vs. yams, you're not alone! In fact, sweet potatoes are often mislabeled as yams in the grocery store because there is so much confusion. Here are a few key differences:

      Yams have rougher skin than sweet potatoes.
      Yams are starchier than sweet potatoes.
      Yams require more butter, oil, or cream when cooking.
      Sweet potatoes are much higher in Vitamin C than yams.
      Yams are much higher in potassium than sweet potatoes.
      Sweet potatoes are lower in calories than yams because they're less starchy.
      Sweet potatoes are in the morning glory family and yams are in the grass and palms family.

      A silver server scooping up sweet potato casserole with golden toasted marshmallows on top out of a white casserole dish.

      More Thanksgiving Sides

      Take a look at all the sides for your Thanksgiving feast, these are a few of my top must-have all-time favorites.

      • Make these Make-Ahead Mashed Potatoes with 5 Ways to Reheat them for your holiday party. hey are creamy smooth and melt in your mouth with 5 easy ways to reheat and keep warm for dinner or your holiday party.
      • Sausage Dressing is the BEST holiday side (also known as sausage stuffing), you can use hot and/or mild Italian sausage, cornbread, crunchy celery, soft French bread, sweet dried cherries, and tart dried cranberries.
      • Dinner Rolls is a pull-apart bread, people go crazy for these decorated with cheese and herbs are a party hit every time.
      • This tropical Pineapple Orange Cranberry Sauce will be great additions to take or serve at your holiday feast.
      • A white casserole dish filled with mashed potatoes and squares of melted butter on top.
        Make-Ahead Mashed Potatoes
      • A white casserole dish filled with Sausage Stuffing baked to a golden brown.
        Sausage Stuffing Dressing
      • A close up of baked Frozen Dinner Rolls topped with cheeses, herbs, and seasonings.
        Dinner Rolls
      • A crystal bowl filled with cranberry sauce with pineapple and cranberries in the background.
        Pineapple-Orange Cranberry Sauce

      Another Sweet Potato Casserole

      Sweet Potato Casserole with a crumble topping and 2 secret ingredients...

      Sweet Potato Casserole Recipe (Ruth's Chris Copycat)
      For all you avid fans of the Sweet Potato Casserole at the famous Ruth's Chris Steak House, this is their original recipe and signature side dish. The combination of the fluffiness of the sweet potato mixture topped with a pecan crumble takes this classic holiday side way over the top. It is so scrumptious, the whole family will want seconds and a copy of this delicious copycat recipe.
      GET THE RECIPE PIN IT
      Lifting a scoop of sweet potato casserole out of a white casserole dish with large serving spoon.
      A silver server scooping up sweet potato casserole with golden toasted marshmallows on top out of a white casserole dish.
      Print

      Sweet Potato Casserole With Marshmallows

      The BEST Sweet Potato Casserole with marshmallows, with crunchy pecans, toasted coconut. A winning Thanksgiving side or Holiday dish to serve.
      Course Side Dishes & Vegetables
      Cuisine American
      Keyword easy holiday side dish, Sweet Potato Casserole, Thanksgiving Sides
      Prep Time 10 minutes minutes
      Cook Time 20 minutes minutes
      Total Time 30 minutes minutes
      Servings 10
      Calories 234kcal
      Author Lisa Hatfield

      Equipment

      • Large Casserole Dish

      Ingredients

      • 1 stick soft butter
      • 1 cup brown sugar
      • 1 cup chopped pecans
      • 1 cup sweetened coconut
      • 1 large can sweet potatoes
      • 1 cup mini marshmallows
      US Customary - Metric

      Instructions

      • Preheat oven to 375
      • Make the crumble topping: In a medium bowl, mix pecans, coconut, brown sugar, butter. Set aside
      • Place sweet potatoes in a single layer in the bottom of a non-stick sprayed casserole dish.
      • Sprinkle crumbly mixture evenly on top and scatter mini marshmallows.
      • Bake for 20 minutes until warm, and marshmallows browned.

      Notes

      sweet potatoes

      For this recipe use canned sweet potatoes, fresh would work fine, but aren't the same texture. 

      make ahead tips

      Put this dish together up to a full day ahead, and then pull it out and bake it when it's almost time for your holiday meal.

      Nutrition

      Serving: 12g | Calories: 234kcal | Carbohydrates: 36g | Protein: 2g | Fat: 10g | Saturated Fat: 3g | Cholesterol: 1mg | Sodium: 48mg | Potassium: 181mg | Fiber: 3g | Sugar: 29g | Vitamin A: 3212IU | Vitamin C: 1mg | Calcium: 33mg | Iron: 1mg

      Fireball Punch

      [heart_this] · Oct 20, 2020 · 9 Comments

      A large glass punch bowl filled with Fall and Thanksgiving punch with apples and oranges floating on top.

      Last Updated November 12th, 2022 at 10:49 am by Lisa

      Fireball Punch "big batch cocktails" are made with orange juice, apple cider, and Fireball whisky that tastes like cinnamon red hot candies. Besides, could it just be the prettiest bowl of Thanksgiving punch? Hey, and why not serve it for a Halloween party with spooky appetizers.

      All you need is a punch bowl or large pitchers and a few simple ingredients.

      It's just the right sweetness and tastes like Fall with crisp apples, fresh oranges, and spicy cinnamon...

      Punch or Batch Cocktails Tips

      • Use a large punch bowl with a ladle.
      • Serve in large drink pitchers.
      • Use a beverage dispenser container.
      • Add frozen ice molds to keep your drinks cold.
      • Add a few small frozen apples to keep the punch chilled~they really work!

      What You Will Need...

      All the ingredients to make Fireball Thanksgiving punch labeled on a table including prosecco and apple cider.

      Punch Garnish Ideas

      • Regular Orange or Blood Orange Slices
      • Thick Orange Peel Slices
      • Cinnamon Sticks
      • Star Anise
      • Apple Slices
      Ingredients to make Fireball punch; orange juice concentrate, Prosecco, Fireball Whisky, and apple cider.
      Garnish with sliced oranges and apples, cinnamon sticks, or orange peels.

      What To Serve With Fireball Punch?

      Host an appetizer party! Or make this punch for a Halloween Party, you might want to look over those spooky recipes I have for you...lot's of creative fun ways to serve your guests.

      Setup a Fall Crostini Bar, and let your guests mix and mingle as they try different combinations. Have a couple of other fun finger foods like Salted Caramel Apple Dip, and an Everything Bagel Cheeseball shaped just like a little pumpkin-cute!

      People love a mix of hot appetizers fresh from the oven to enjoy while sipping their drinks. Baked Brie and Bacon Palmiers are made with only 3 ingredients and are scrumptious. But the recipe that everyone will want is Jalapeno Popper Dip. Really, no seriously.

      Each time I take that dip out of the oven at a party, people just love it. I serve it with those large curled corn chips and ALWAYS double the recipe because people love it that much.

      Now your party plan is ready!

      This punch is sooooo yummy...and you won't be stuck making drinks all night!

      Punch Bowl Ice Molds and Tips

      Small frozen red apples with heart and round shaped molds filled with frozen water, cinnamon sticks, and orange slices.
      • Use small containers that fit in your punch bowl - small plastic containers, cake molds, bundt pans, and small bowls all work!
      • Clear a flat place in your freezer, use a small tray to catch any spills and to set your filled molds on the tray.
      • Place your fruit, herbs, and spices inside the mold-use edible items.
      • Fill each container with distilled water<(it will freeze clear!) about half way, and add more water and decorations and refreeze till you reach the top of the mold.
      • Freeze at least one day before your party.
      • Run water over the mold to pop out the ice block and place it in your punch bowl right as your guests arrive!
      • PRO TIP: Frozen small apples work great and look pretty too..they won't water down your punch and add such a festive element!

      Fall Cocktails and Fireball Drinks

      • Fireball Whisky Cocktails with cinnamon sticks wrapped in orange peel for garnish.
        Fireball Whisky Cocktails
      • A black cauldron with wooden ladle and pouring red punch into the bowl with dry ice smoke for Halloween Punch.
        Halloween Party Punch
      • A pitcher of bloody marys with two drinks garnished with olives, pepperoncinis, and beef sticks.
        Spicy Bloody Marys
      • Three glasses of Aperol Spritz on a table with appetizers at a Fall party.
        Autumn Aperol Spritz

      Did you love this recipe? We would love to hear from you! If you make this recipe and love it, give it a 5-star rating ⭐⭐⭐⭐⭐ with a comment. THANK YOU!! Follow Delicious Table with my free newsletter and share this recipe with your friends on Facebook, Pinterest, and Instagram.

      A large glass punch bowl filled with Fall and Thanksgiving punch with apples and oranges floating on top.
      Print

      Fireball Thanksgiving Punch "Batch Cocktails"

      Fireball Thanksgiving Punch with orange, apple cider, and Fireball whisky. Serve Fall "big batch cocktails" for Friendsgiving & Thanksgiving.
      Course Drinks & Cocktails
      Cuisine American
      Keyword Fireball, punch recipe, Thanksgiving punch
      Prep Time 10 minutes minutes
      Cook Time 0 minutes minutes
      Total Time 10 minutes minutes
      Servings 30
      Calories 116kcal
      Author Lisa Hatfield

      Equipment

      • Glass Serving Bowl / Centerpiece
      • Plastic Punch Ladle

      Ingredients

      • 11 cups apple cider (2.5 liters jug)
      • 12 ounces frozen orange juice (1 can)
      • 1 bottle Prosecco, chilled
      • 2 cups Fireball Whisky
      • 5 small granny smith apples freeze ahead!
      • ice or ice rings
      • garnishes sliced apple halves, sliced orange halves, cinnamon sticks, and star anise.

      Instructions

      • Freeze ice ring the night before your party decorated as you wish. Ideas; orange slices, cinnamon sticks, or star anise. And or freeze a few small apples to keep the punch chilled.
      • Use a large punch bowl. This recipe makes 2 gallons of punch, you could also use a couple of large pitchers or a large beverege dispenser.
      • Pour the chilled apple cider, Fireball whisky, orange juice concentrate, and chilled Prosecco into the bowl, pitcher or beverage dispenser.
      • Add garshes; sliced apples, oranges, cinnamon sticks, and star anise.
      • Serve with a ladle and glasses.
      • Add cubes of ice, frozen apples, and or ice rings.

      Video

      Notes

      ice molds

      You can freeze water in any small container that will fit in your punch bowl or pitcher.
      • Use small containers that fit in your punch bowl - small plastic containers, cake molds, bundt pans, and small bowls all work!
      • Clear a flat place in your freezer, use a small tray to catch any spills, and to set your filled molds on the tray.
      • Place your fruit, herbs, and spices inside the mold-use edible items.
      • Fill each container with distilled water<(it will freeze clear!) about halfway, and add more water and decorations and refreeze till you reach the top of the mold.
      • Freeze at least one day before your party.
      • Run water over the mold to pop out the ice block and place it in your punch bowl right as your guests arrive!
      • PRO TIP: Frozen small apples work great and look pretty too..they won't water down your punch and add such a festive element!
      For Fall & Thanksgiving: orange, lemon, or apple slices, cinnamon sticks, star anise, fresh or frozen cranberries. 

      Punch or Batch Cocktails Tips

      • Use a large punch bowl with a ladle.
      • Serve in large drink pitchers.
      • Use a beverage dispenser container.
      • Add frozen ice rings to keep your drinks cold.
      • Add a few small frozen apples to keep the punch chilled~they really work!


      Nutrition

      Serving: 30g | Calories: 116kcal | Carbohydrates: 16g | Protein: 1g | Fat: 1g | Saturated Fat: 1g | Sodium: 6mg | Potassium: 184mg | Fiber: 1g | Sugar: 14g | Vitamin A: 40IU | Vitamin C: 12mg | Calcium: 13mg | Iron: 1mg

      Remoulade Sauce

      [heart_this] · Sep 3, 2020 · 1 Comment

      A vintage spoon scooping up remoulade sauce to use on a recipe.

      Last Updated January 18th, 2023 at 04:18 pm by Lisa

      Remoulade sauce is a popular condiment or dipping sauce, usually paired with shrimp and crab seafood, cold meats, and fried foods.

      A cold smooth sauce made with a mayonnaise base, garlic, onions, mustard, parsley, other fresh herbs, and seasonings. Variations of remoulade are found all over the world, from France to Louisiana, USA. 

      Drizzle on baked salmon or fried fish, on vegetables, or use it as a sandwich spread. Dip hot french fries in it or dollup on scrumptious crab cakes...

      Remoulade Sauce Recipe

      • fresh lemon juice
      • vegetable oil
      • yellow onions
      • green onions green and white parts
      • celery
      • garlic
      • prepared horseradish
      • whole-grain mustard or Creole mustard
      • prepared yellow mustard
      • ketchup
      • fresh flat-leaf parsley
      • sea salt
      • cayenne
      • ground black pepper
      • celery salt
      • Louisiana-style hot sauce or Crystal Hot Sauce
      1. Combine all the ingredients in a blender or a food processor fitted with a steel blade and process until fairly smooth, about 30 seconds.
      2. Transfer to an airtight container and refrigerate for at least 1 hour before using. Will keep for up to 1 week in the refrigerator. Serve in a bowl with a small spoon. You can also put the remoulade sauce in a plastic squeeze bottle for easy use.

      Common Ingredient Variations

      Mix it up, and try some of these commonly used ingredients in your homemade remoulade sauce. Add some additional flavor, and use up things in your kitchen!

      Paprika, anchovies, capers, and horseradish are some of the many ingredient variations added to flavor this popular condiment.

      • chopped pickles like cornichons
      • capers
      • anchovies
      • curry
      • shallots
      • fresh tarragon, chervil, or dill
      • Dijon mustard
      • Worcestershire sauce
      • add more seasonings: Cajun seasoning features an array of hot spices and ground peppers—black, cayenne, and white pepper. Creole seasonings use more herbal fragrant spices often have oregano, thyme, rosemary, and paprika.
      What is Remoulade?

      Remoulade is a cold French sauce with a mayonnaise base. Its original purpose was possibly for serving with meats, but today is served as a condiment or dipping sauce, primarily with fried foods, fish, shrimp, and crab, as a sandwich spread, and on vegetables.

      Although similar to tartar sauce, it is often an orange color (Louisiana-style remoulades), and variations are made with different ingredients around the world.

      How long does remoulade keep?


      Remoulade will keep refrigerated for two weeks. Store in an inexpensive plastic squeeze bottle or an airtight container.

      Close up view of fried green tomatoes on a white plate drizzled with sauce.

      What to use Remoulade Sauce on?

      Use remoulade dressing to dip or drizzle on these dishes...

      • fried fish
      • crab cakes
      • French fries
      • BLT sandwich spread
      • hot dogs or sausages
      • potato salads
      • hamburgers
      • fried pickles
      • Po'boy sandwiches
      • chicken wings
      • fried green tomatoes
      • softshell crab sandwiches
      • steamed or roasted artichokes
      • asparagus
      • shrimp cocktail
      • grilled salmon
      • roast beef topping

      More Cajun Recipes

      Cajun Seasoning
      Make homemade Cajun seasoning with common spices. Use Cajun spice on chicken, shrimp steaks, fries, or classics like jambalaya, fried green tomatoes, and gumbo!
      GET THE RECIPE PIN IT
      A small glass mason jar filled with Cajun seasoning with a label and it in a wooden bowl.

      More Sauce Recipes

      Take a look at all the sauce recipes I have to add great flavor and these all taste so much better than things in a jar from the store. Slather Creamy Balsamic Horseradish Sauce on Roast Beef Sandwiches, Burger Sauce on Cheeseburgers, Cocktail Sauce on seafood like Shrimp Cocktail, or Lemon Butter Cream Sauce that is perfect on Lobster Ravioli.

      • Looking down into a wooden bowl with creamy balsamic horseradish sauce swirled in the center, and a wooden spreader resting on the edge of the bowl with a rustic beige tablecloth underneath and on a woven rattan placemat.
        Creamy Balsamic Horseradish Sauce
      • A messy grilled burger topped with lettuce, tomato, cheese, pickles and burger sauce in a basket with a bottle of burger sauce.
        Burger Sauce
      • Cocktail Sauce
      • A white plate filled with heart shaped lobster ravioli garnished with parsley.
        Lobster Ravioli

      Did you love this recipe? We would love to hear from you! If you make this recipe and love it, give it a 5-star rating ⭐⭐⭐⭐⭐ with a comment. THANK YOU!! Follow Delicious Table with my free newsletter and share this recipe with your friends on Facebook, Pinterest, and Instagram.

      A vintage spoon scooping up remoulade sauce to use on a recipe.
      Print

      Remoulade

      Remoulade sauce is a popular condiment or dipping sauce, usually paired with seafood, cold meats, and fried foods. Drizzle on baked fish, fried green tomatoes, or as a sandwich spread. Use it as a dip for chicken wings, hot french fries or bites of scrumptious crab cakes.
      Course Sauces, Marinades, & Condiments
      Cuisine Condiment
      Keyword condiment sauce, remoulade, remoulade sauce
      Prep Time 10 minutes minutes
      Cook Time 0 minutes minutes
      Total Time 10 minutes minutes
      Servings 24
      Calories 67kcal
      Author Lisa Hatfield

      Equipment

      • Vitamix Blender
      • Epicurean Non-Slip Cutting Board
      • Chef Knife
      • Lemon/Lime Juicer
      • Condiment Squeeze Bottles

      Ingredients

      • ¼ cup fresh lemon juice
      • ¾ cup vegetable oil
      • ½ cup chopped yellow onions
      • ½ cup chopped green onions green and white parts
      • ¼ cup chopped celery
      • 2 cloves chopped garlic
      • 2 tablespoons prepared horseradish
      • 3 tablespoons whole-grain mustard or Creole mustard
      • 3 tablespoons prepared yellow mustard
      • 3 tablespoons ketchup
      • 3 tablespoons chopped fresh flat-leaf parsley
      • 1 teaspoon of sea salt
      • ¼ teaspoon cayenne
      • ⅛ teaspoon freshly ground black pepper
      • 1 teaspoon celery salt
      • 1 tablespoon Louisiana-style hot sauce

      Instructions

      • Combine all the ingredients in a blender or a food processor fitted with a steel blade and process until fairly smooth, about 30 seconds.
      • Transfer to an airtight container and refrigerate for at least 1 hour before using. Serve in a bowl with a small spoon. The sauce will keep for up to 1 week in the refrigerator. You can also put the remoulade sauce in a plastic squeeze bottle for easy use.

      Notes

      Remoulade will keep refrigerated for two weeks. Store in an inexpensive plastic squeeze bottle.

      Common Ingredient Variations

      Mix it up, and try some of these commonly used ingredients in your homemade remoulade sauce. Add some additional flavor, and use up things in your kitchen!
      Paprika, anchovies, capers, and horseradish are some of the many ingredient variations added to flavor this popular condiment.
      • chopped pickles like cornichons
      • capers
      • anchovies
      • curry
      • shallots
      • fresh tarragon, chervil, or dill
      • Dijon mustard
      • Worcestershire sauce
      • add more seasonings: Cajun seasoning features an array of hot spices and ground peppers—black, cayenne, and white pepper. Creole seasonings use more herbal fragrant spices often have oregano, thyme, rosemary, and paprika.

      What to use Remoulade Sauce on?

      Use remoulade dressing to dip or drizzle on these dishes...
      • fried fish
      • crab cakes
      • French fries
      • BLT sandwich spread
      • hot dogs or sausages
      • potato salads
      • hamburgers
      • fried pickles
      • Po'boy sandwiches
      • chicken wings
      • fried green tomatoes
      • softshell crab sandwiches
      • steamed or roasted artichokes
      • asparagus
      • shrimp cocktail
      • grilled salmon
      • BLT sandwich spread
      • roast beef topping

        Nutrition

        Serving: 24g | Calories: 67kcal | Carbohydrates: 2g | Protein: 1g | Fat: 7g | Saturated Fat: 6g | Sodium: 275mg | Potassium: 33mg | Fiber: 1g | Sugar: 1g | Vitamin A: 86IU | Vitamin C: 3mg | Calcium: 7mg | Iron: 1mg

        Cajun Seasoning Recipe

        [heart_this] · Sep 1, 2020 · 1 Comment

        A small glass mason jar filled with Cajun seasoning with a label and it in a wooden bowl.

        Last Updated April 23rd, 2024 at 11:13 am by Lisa

        Make homemade Cajun seasoning with common easy-to-find spices. Use on chicken, shrimp, steaks, fries, or classics like jambalaya and gumbo.

        Why make your own seasonings? They just take a few minutes to put together, you can adjust the salt and heat levels, and know exactly what the ingredients are inside.

        Another good reason to use fresh spice mixes is they pack flavor into your cooking and inspire you to make new exciting dishes...

        How To Make Cajun Seasoning

        • 3 tablespoons smoked paprika
        • 2 tablespoons sea salt
        • 2 tablespoons garlic powder
        • 1 tablespoon onion powder
        • 1 tablespoon cayenne pepper
        • 1 tablespoon dried oregano
        • 1 tablespoon dried parsley
        • 1 tablespoon ground black pepper
        • 1 tablespoon dried thyme
        • 1 tablespoon white pepper optional
        • ½ teaspoon red pepper flakes optional
        1. Mix all the spices together in a bowl.
        2. Store in an airtight container for up to 6 months, small glass jars work well or airtight containers.

        How To Store Spices and Seasonings

        An inexpensive way to store any homemade spice mix (like this cajun spice mix) is to use a small glass canning jar.

        I have collected vintage canning jars for years, and I love and cherish each one. You can find them online on Etsy, eBay, thrift stores, antique shops, and vintage flea markets in your town.

        Add a paper tag and some string to give as a gift, and you could include some of your favorite Cajun recipes!

        Fried Green Tomatoes are a classic that uses Cajun seasoning. These can be a snack, lunch, or a side for family dinner. Dip in remoulade sauce or buttermilk ranch dressing, and use up green tomatoes from your Summer garden.

        You can buy green tomatoes in the store, I found beautiful firm unripe heirloom tomatoes in my local grocery produce section. There are a few secrets to this recipe, and you will get a golden crisp crust and the Remoulade and Ranch dipping sauces take these over the top...

        Fried Green Tomatoes With 3 Dipping Sauce Recipes
        These are the best Fried Green Tomatoes, and one of the most famous Southern recipes of all time. Each slice has a crunchy crust to dip into a creamy remoulade, buttermilk ranch dressing, or comeback sauce. There are a few secrets to frying them perfectly golden crisp, and the three dipping sauces take these right over the top.
        GET THE RECIPE PIN IT
        A white long plate with a stack of fried green tomatoes with remoulade and buttermilk ranch dressing.
        What Is Cajun Seasoning Used For?

        Well just about everything! Try Cajun seasoning as an all-around seasoning blend on grilled chicken, and oven fries, it is great on shrimp, steaks, pork, corn on the cob, roasted veggies, and classics like gumbo, maque choux, fried green tomatoes, shrimp po- boys, shrimp etouffee, and jambalaya. You can even sprinkle it on popcorn, make cajun deviled eggs, or create Cajun dips and sauces.


        What are Cajun seasoning ingredients?

        garlic powder, onion powder, salt, smoked paprika, black pepper, oregano, thyme, and cayenne.

        optional spices: dry mustard, parsley, crushed red pepper, white pepper, celery seed, chipotle pepper, cumin, dried red or green bell pepper.

        More Homemade Seasoning Recipes

        Take a look at all of my spice and seasoning recipe ideas to up your cooking game! Making your own spice blends and homemade seasonings is so easy and will add tremendous flavor to your dishes. All of these recipes include simple ingredients available at any grocery store, and most use dry herbs you might have on hand right now. This is a great way to use up those extra seasonings in your pantry.

        If you're looking for grill seasonings or BBQ seasonings, try this easy Homemade Grill & BBQ Rub recipe. It is a great steak seasoning, works on pork both pork loin and ribs.

        Mix up the Best Burger Seasoning recipe for delicious, juicy hamburgers everyone will rave over at your next backyard barbecue cookout.

        Mix your own Pumpkin Pie Spice. You can certainly buy it, but it is a great way to use pantry spices and tastes so much better homemade.

        Make homemade Pickling Spice and add this spice mix to create amazing pickles, corned beef, braised stews, rice, or use in marinades to flavor meat.

        • A large pork loin roast with a lot of dry rub seasoning pouring over the top.
          The Best BBQ Dry Rub
        • The steps to season hamburgers, with them shaped on parchment paper as burgers before grilling.
          Grilled Hamburger Seasoning
        • A small glass spice jar filled with pumpkin pie spice made at home.
          Pumpkin Pie Spice
        • A recipe to make homemade pickling spice in a white bowl.
          Pickling Spice

        Did you love this recipe? We would love to hear from you! If you make this recipe and love it, give it a 5-star rating ⭐⭐⭐⭐⭐ with a comment. THANK YOU!! Follow Delicious Table with my free newsletter and share this recipe with your friends on Facebook, Pinterest, and Instagram.

        A small glass mason jar filled with Cajun seasoning with a label and it in a wooden bowl.
        Print

        Cajun Seasoning

        Make homemade Cajun seasoning with common spices. Use Cajun spice on chicken, shrimp steaks, fries, or classics like jambalaya, fried green tomatoes, and gumbo!
        Course Seasoning
        Cuisine Seasoning
        Keyword Cajun recipe, cajun seasoning, Cajun spice mix
        Prep Time 5 minutes minutes
        Total Time 5 minutes minutes
        Servings 14
        Calories 16kcal
        Author Lisa Hatfield

        Equipment

        • Mason Ball Pint Jar

        Ingredients

        • 3 tablespoons smoked paprika
        • 2 tablespoons sea salt
        • 2 tablespoons garlic powder
        • 1 tablespoon onion powder
        • 1 tablespoon cayenne pepper
        • 1 tablespoon dried oregano
        • 1 tablespoon dried parsley
        • 1 tablespoon ground black pepper
        • 1 tablespoon dried thyme
        • 1 tablespoon white pepper optional
        • ½ teaspoon red pepper flakes optional

        Instructions

        • Mix all the spices together in a bowl.
        • Store in an airtight container for up to 6 months, small glass jars work well or airtight containers.

        Notes

        optional spices

        You can add in other spices and seasonings like dry mustard, celery seed, chipotle pepper, dried jalapeno, cumin, and dried red or green bell pepper.

        Cajun seasoning uses

        Well just about everything! Try Cajun seasoning as an all-around seasoning blend on grilled chicken, and oven fries, it is great on shrimp, steaks, pork, corn on the cob, roasted veggies, and classics like gumbo, maque choux, shrimp po-boys, fried green tomatoes, shrimp etouffee, and jambalaya. You can even sprinkle it on popcorn, make cajun deviled eggs, or Cajun dipping sauces.

        Nutrition

        Calories: 16kcal | Carbohydrates: 3g | Protein: 1g | Fat: 1g | Saturated Fat: 1g | Sodium: 1001mg | Potassium: 74mg | Fiber: 1g | Sugar: 1g | Vitamin A: 926IU | Vitamin C: 1mg | Calcium: 22mg | Iron: 1mg

        Parmesan Risotto

        [heart_this] · Jun 28, 2020 · 4 Comments

        A black cast iron pan with risotto made from arborio rice topped with artichokes and pine nuts.

        Last Updated October 8th, 2021 at 06:01 pm by Lisa

        Made with arborio rice, this Parmesan Risotto has an amazingly deep flavor. But the best part is hands-free cooking requiring no constant stirring like most risotto recipes.

        That's right...this recipe won't have you standing at the stove, it's easy and delicious with artichokes and toasted pine nuts. I also have lots of other ingredient ideas of things to add to this recipe. Mix it up and make it the way you want it.

        Risotto is a special side dish, and now you know there is a "hands-free" secret. Make it on a weeknight, just pop it in the oven and bake.

        Creamy, warm, and comforting, and transports you to Italy...

        Why Does This Risotto Recipe Work?

        Years ago, I learned to cook risotto in a professional cooking class and loved it. However, it required a lot of hands-on cooking time.

        Most risotto recipes require stove time stirring hot chicken stock in "cup by cup" to get that creamy texture.  And I got to thinking, there must be an easier way. And there is.

        Let's simplify risotto, and make it a parmesan risotto. Baked in the oven, almost completely hands-free with just a few minutes of stirring.

        For this recipe, you will bake your risotto in the oven. Then take it out of the oven, you add 1 cup of chicken stock, grated parmesan cheese, wine, and butter.

        At that point, stir vigorously for 2 to 3 minutes, until the rice is thick and creamy. THIS IS WHY THIS RECIPE WORKS!

        A pan of risotto on a wood hot pad on a table.

        First, what is Arborio Rice?

        Authentic Italian arborio rice is harvested in Northern Italy, where the climate is cool and the soil is marshy.

        Arborio rice is Italian short-grain rice named after the town of Arborio. It is from the Po Valley, in the main growing region of Italy.

        Arborio rice is a short, plump, pearl-like grain that absorbs lots of liquid while cooking slowly and evenly releasing starch. This is what makes risotto creamy and smooth when cooked.

        The rounded grains are firm, creamy, and chewy, due to their higher amylopectin starch content.

        What is Risotto?

        Risotto is a classic and common way of cooking rice from northern Italy, using broth to create a creamy consistency.

        The broth can be derived from meat, fish, or vegetables. Many types of risotto contain butter, wine, and onion to add greater flavor.

        How to Make Oven-Baked Parmesan Risotto

        Step #1: Preheat the oven to 350 degrees.

        Step #2: Toast the pine nuts till golden brown in a small pan on the stove over low heat. This brings out their flavor. Set aside.

        Step #3: Heat the chicken stock in a large covered pot or dutch oven on the stove until simmering. Reserve 1 cup of hot chicken stock, set aside.

        Step #4: In a large heavy cast iron pan (or Dutch oven) place the arborio rice. Add 4 cups of hot chicken stock, salt, and pepper. Stir to combine. Cover with a lid or 2 layers of foil-wrapped tightly around the cast iron pan. Bake in the oven for 45 minutes.

        Step #5: Remove from the oven. Add the remaining 1 cup of chicken stock, the grated parmesan cheese, wine, and butter. Stir vigorously for 2 to 3 minutes, until the rice is thick and creamy. THIS IS WHY THIS RECIPE WORKS!

        Step #6: Add the artichokes and toasted pine nuts and toss until heated through.

        Serve warm and garnish with finely diced chives and more parmesan cheese.

        What Else Can I Add To Risotto?


        Try these additions...

        Fresh garlic
        Fresh Herbs
        Butter
        Cooked Veggies: Tomatoes, Butternut Squash, Zucchini
        Cooked Meats: Sausage, Chicken, or Pork
        Seafood: Roasted Shrimp or Seared Scallops
        Fried or Poached Eggs

        More Side Dishes

        • A close up of baked Frozen Dinner Rolls topped with cheeses, herbs, and seasonings.
          Dinner Rolls
        • A sheet pan of smashed potatoes with fresh herbs baked with crispy golden brown edges.
          Crispy Smashed Potatoes
        • A large white spoon scooping a serving of cowboy baked beans out of a casserole dish.
          Cowboy Beans
        • A white casserole dish filled with mashed potatoes and squares of melted butter on top.
          Make-Ahead Mashed Potatoes

        Did you love this recipe? We would love to hear from you! If you make this recipe and love it, give it a 5-star rating ⭐⭐⭐⭐⭐ with a comment. THANK YOU!! Follow Delicious Table with my free newsletter and share this recipe with your friends on Facebook, Pinterest, and Instagram.

        A black cast iron pan with risotto made from arborio rice topped with artichokes and pine nuts.
        Print

        Parmesan Risotto ~ Easy No Stir Recipe!

        Parmesan Risotto has a rich deep flavor, made with arborio rice, and is hands-free with no constant stirring, unlike most risotto recipes.
        Course Side Dishes & Vegetables
        Cuisine American
        Keyword parmesan risotto, risotto, risotto recipe
        Prep Time 20 minutes minutes
        Cook Time 45 minutes minutes
        Total Time 1 hour hour 5 minutes minutes
        Servings 12
        Calories 322kcal
        Author Lisa Hatfield

        Equipment

        • Large Cast Iron Skillet
        • Microplane Grater

        Ingredients

        • 2 cups Arborio rice
        • 5 cups simmering chicken stock preferably homemade
        • 1 cup freshly grated Parmesan cheese
        • ½ cup toasted pine nuts
        • ½ cup dry white wine or sub ½ of chicken stock for no alcohol
        • 4 tablespoons unsalted butter diced
        • 1 teaspoon kosher sea salt
        • 1 teaspoon freshly ground black pepper
        • 3 cups artichoke hearts canned, jar, or frozen/defrosted to room temp
        • garnish: more grated parmesan cheese and finely diced chives
        US Customary - Metric

        Instructions

        Prep For Easy Risotto Rice

        • Preheat the oven to 350 degrees.
        • Toast the pine nuts till golden brown in a small pan on the stove over low heat, this brings out the flavor. Set aside.

        Make Easy Parmesan Artichoke Risotto

        • Heat the Chicken stock in a large covered pot or dutch oven on the stove until simmering. Reserve 1 cup of hot chicken stock, set aside.
        • In a large heavy cast iron pan or Dutch oven, place the arborio rice and 4 cups of the hot chicken stock, salt, pepper. Stir to combine. Cover with lid or 2 layers of foil wrapped tightly around the cast iron pan, and bake in the oven for 45 minutes.
        • Remove from the oven, add the remaining 1 cup of chicken stock, the grated parmesan cheese, wine, butter, and stir vigorously for 2 to 3 minutes, until the rice is thick and creamy. This is what makes the risotto creamy!
        • Add the artichokes and toasted pine nuts and toss until heated through. Serve warm and garnish with finely diced chives and more parmesan cheese.
        • Serve warm and garnish with finely diced chives and more parmesan cheese.

        Notes

        Arborio Rice: A short, plump, pearl-like grain that absorbs lots of liquid while slowly and evenly releasing starch, making risotto creamy and smooth when cooked.
        Hand-Free No Constant Stirring: At the end of the cooking process in the oven, the risotto rice has released its creamy consistency during cooking and then at the end when you stir vigorously for 2 to 3 minutes, the arborio rice is thick and creamy.
        What Else Can I Add To Risotto? Try these additions...
        Fresh garlic, Fresh Herbs, Butter, Cooked Veggies: Tomatoes, Butternut Squash, Zucchini, Cooked Meats: Sausage, Chicken, or Pork, Seafood: Roasted Shrimp or Seared Scallops, or Fried or Poached Eggs

        Nutrition

        Calories: 322kcal | Carbohydrates: 33g | Protein: 8g | Fat: 15g | Saturated Fat: 4g | Cholesterol: 18mg | Sodium: 661mg | Potassium: 178mg | Fiber: 2g | Sugar: 2g | Vitamin A: 680IU | Vitamin C: 10.7mg | Calcium: 116mg | Iron: 2.4mg

        Cheeseburger Sliders

        [heart_this] · Jun 28, 2020 · 11 Comments

        Mini cheeseburgers with melted cheese, tomato, and lettuce with American flag toothpick decoration on top.

        Last Updated August 14th, 2023 at 10:38 pm by Lisa

        Cheeseburger Sliders are mini burgers stuffed with cheddar cheese, spread with burger sauce, and oven-baked. The perfect party food for summer cookouts or celebrations like birthdays and graduation.

        Juicy burgers are about as All-American as it gets. Easy hamburger sliders are great to serve a hungry crowd for a party or game-day food but will work for the whole family as an easy meal.

        So much to love about these fun little cheeseburgers. They can work for a family dinner or patriotic holidays like July 4th and the burger sauce is delicious...

        How To Make Cheeseburger Sliders

        There are endless ways to make homemade sliders, but a fun way to make these is to line a baking sheet (or a 13-inch baking dish) which helps prep and clean up go so fast to make the hamburgers.

        Kids can help make these individual burgers. Have them help with clean hands to form the individual patties with a little piece of cheese stuffed inside each one.

        The best thing is, you can bake these classic cheeseburger sliders in the oven, and you won't have to fire up the grill!

        Cheese Stuffed Mini Hamburger Patties

        • 3 lb ground hamburger (85/15 works great)
        • 24 ½" cubes cheddar cheese use a block of cheese
        • 3 tablespoons BBQ Grill Rub your favorite or try mine!
        • 1 cup Worcestershire

        Stuffing your mini cheeseburgers with cheese is optional, but SO good!!

        1. Cut 24 cheddar cheese 1" cubes from a large block of cheese.
        2. Line a large sheet pan with parchment paper or aluminum foil.
        3. In a large bowl, mix hamburger meat, grill rub, and Worcestershire sauce until well combined. Use a 2” ice cream scoop to get the burgers even-sized, place a ½" cube of cheddar cheese inside, and form into a ball. Place on the parchment-lined sheet pan.
        4. Preheat oven to 400 degrees.
        5. Bake 400 degrees 20 minutes until well done, the internal temperature of 160 degrees.
        6. Assemble burgers: slice buns, spread the burger sauce on the inside tops of the rolls, stack lettuce, tomato, cooked burger, and ¼ of a Colby cheese slice.
        7. The perfect way to serve them is on a patriotic tray or in cupcake wrappers with a flag toothpick on top. These are easy for little hands to grab and enjoy at the party.

        Assemble The Sliders

        • 24 mini hamburger buns (or Hawaiian rolls)
        • 1 cup burger sauce
        • 24 cheese stuffed cooked hamburger patties
        • 24 tomato slices
        • ruffled bib lettuce
        • 6 slices Colby cheese slices cut into quarters

        How To Make Burger Sauce

        In a medium bowl, mix ketchup, mayo, and relish (either dill or sweet) a splash of vinegar, and a pinch of sugar. This sauce is amazing and so easy!

        • ½ cup mayonnaise
        • 2 tablespoons ketchup
        • 2 tablespoons dill pickle relish
        • 2 teaspoons white wine vinegar
        • ½ teaspoon sugar
        Mixing ingredients in a glass bowl to make Burger Sauce for grilled burgers.

        Hamburger Slider Recipe FAQ

        What Kind of Slider Buns Work for Small Burgers?


        Small Dinner Rolls
        Parker House Rolls
        King's Sweet Hawaiian Buns
        Martin's Potato Rolls
        Petite Brioche Buns
        Mini Sesame Seed Buns

        What Toppings Go On In


        There are endless options for juicy sliders, these are just a few inspiring toppings for your cookout. Whether you keep it classic or go wild, it is so fun to try out new flavors and ingredients and mix it up on individual sliders...

        Crispy Bacon
        Grilled Onions or Diced Onions
        Sauteed Mushrooms
        Burger Sauce
        Pickle Chips
        Dill Pickles or Butter Pickles
        Ketchup, Mustard, Mayonnaise, Remoulade
        Ortega or Hatch Chiles
        BBQ Sauce
        Creamy Horseradish Sauce
        Small Slices Of Cheese: Pepper Jack, American cheese slices, Blue Cheese
        Guacamole
        Ranch Dressing
        Jalapenos
        Fried Onions

        More Burger Recipes

        Fire up the grill for cookouts and make winning game day food with these burger recipes. Nothing beats a good slider or burger with melted slices of American cheese.

        Grilled Hamburgers (Cheeseburgers) with burger sauce plus all my tips to make the perfect hamburger patties with easy toppings for summer grilling, BBQs, and cookouts.

        Burger Seasoning makes the juiciest flavor-filled burgers. Mix up a batch of hamburger seasoning for your next cookout, grill, or BBQ party.

        Make Burger Sauce at home, this recipe is very similar to the In-N-Out Spread from Southern California. 

        • A person holding a messy grilled burger topped with melted cheese, burger sauce, lettuce, tomato, and pickles.
          The Best Cheeseburger
        • The steps to season hamburgers, with them shaped on parchment paper as burgers before grilling.
          Grilled Hamburger Seasoning
        • A messy grilled burger topped with lettuce, tomato, cheese, pickles and burger sauce in a basket with a bottle of burger sauce.
          Burger Sauce

        Did you love this recipe? We would love to hear from you! If you make this recipe and love it, give it a 5-star rating ⭐⭐⭐⭐⭐ with a comment. THANK YOU!! Follow Delicious Table with my free newsletter and share this recipe with your friends on Facebook, Pinterest, and Instagram.

        Mini cheeseburgers with melted cheese, tomato, and lettuce with American flag toothpick decoration on top.
        Print

        Cheeseburger Sliders (Baked Hamburgers)

        Cheeseburger Sliders are mini burgers stuffed with cheese, spread with burger sauce, and oven-baked. The perfect party food for summer.
        Course Dinner & Main Dishes
        Cuisine American
        Keyword baked hamburgers, burger sauce, cheeseburger sliders
        Prep Time 15 minutes minutes
        Cook Time 20 minutes minutes
        Total Time 25 minutes minutes
        Servings 24
        Calories 335kcal
        Author Lisa Hatfield

        Equipment

        • Large Metal Sheet Pan
        • Patriotic Cupcake Picks and Wrappers
        • Large Scoop

        Ingredients

        Cheese Stuffed Hamburger Patties

        • 3 lb ground hamburger
        • 24 ½" cubes cheddar cheese use a block of cheese
        • 3 tablespoons BBQ Grill Rub your favorite or try mine!
        • 1 cup Worcestershire

        Burger Sauce

        • 2 tablespoons ketchup
        • ½ cup mayonnaise
        • 2 tablespoons dill or sweet relish
        • 2 teaspoons  white wine vinegar
        • ½ teaspoon sugar

        Baked Hamburgers

        • 24 mini hamburger buns
        • 1 cup burger sauce
        • 24 cheese stuffed cooked hamburger patties
        • 24 tomato slices
        • ruffled bib lettuce
        • 6 slices Colby cheese slices cut into quarters
        US Customary - Metric

        Instructions

        Make the Burger Sauce

        • Mix ketchup, mayo, and relish (either dill or sweet) vinegar and sugar. This sauce is SO easy and really makes the burgers amazing!

        Oven Bake the Hamburgers

        • Preheat oven to 400 degrees.
        • Line a large sheet pan with parchment paper.
        • Cut 24 cheddar cheese 1" cubes from a large block of cheese.
        • In a large bowl, mix hamburger meat, grill rub, and Worcestershire sauce until well combined. Use a 2” ice cream scoop to get cheeseburgers even sized, place a ½" cube of cheddar cheese inside, and form into a ball. Place on the parchment-lined sheet pan.
        • Bake 400 degrees 20 minutes until well done, an internal temperature of 160 degrees. Use a good meat thermometor to check.

        Assemble Hamburgers

        • Slice buns open, spread burger sauce on each side of the bun.
        • Stack lettuce, tomato, burger, ¼ of a Colby cheese slice, and serve on a patriotic tray (or in cupcake wrappers) and stick a flag toothpick on top.

        Video

        Notes

        Cute serving idea

         Try serving the cheeseburger sliders on patriotic cupcake wrappers on a tray, easier to eat and hold at a party! 

        Dinner or Party Planning Portions

        These are small hamburgers, plan on at least two per person!

        Burger Sauce

        Is SO GOOD! Serve extra so people can add more if they like. 

        What Kind of Bread Buns Work for Small Burgers?

        • Small Dinner Rolls
        • Parker House Rolls
        • King's Hawaiian Bread Rolls
        • Martin's Potato Rolls
        • Petite Brioche Buns
        • Small Sesame Seed Buns
        Any small roll or bun will work just fine, you can even find "slider" buns and rolls easily in the grocery store.

        Nutrition

        Calories: 335kcal | Carbohydrates: 27g | Protein: 16g | Fat: 17g | Saturated Fat: 6g | Cholesterol: 48mg | Sodium: 480mg | Potassium: 394mg | Fiber: 1g | Sugar: 5g | Vitamin A: 380IU | Vitamin C: 6.1mg | Calcium: 173mg | Iron: 4mg

        Homemade Dog Treats

        [heart_this] · Jun 25, 2020 · 7 Comments

        A wooden bowl with homemade dog treats and the name of the dog Sassy stamped in each of them in a pile.

        Last Updated February 6th, 2023 at 11:58 am by Lisa

        Your dog will love these homemade dog treats. Each biscuit is packed with nutritious pumpkin, peanut butter, spinach, zucchini, and carrots.

        Make these fun personalized doggie cookies using a cutter with your pet's name, or any shape you love. Sassy fully approves of these, and your dog will too...

        Meet Sassy, my 10-year-old Shih Tzu. Don't let these ice blue eyes fool you, She lives up to her name. She is S-A-S-S-Y!! She has a reputation in the neighborhood for chasing kids on skateboards and anyone she feels like she can boss around.

        What a cheeky handful, and a heavy personality weighing in at 10 just over pounds...she has a lot of energy and fiercely protects her garden from black raven birds! They drive her nuts.

        I might just be giving her a few too many these days, well with those baby blue eyes ya can't blame me...

        Sassy has learned so many words over the years, but one that perks her ears every single time is C-O-O-K-I-E!

        She will walk around the house with one of her "dog cookies" in her mouth and won't eat it right away, savoring the moment, and then finally, crunch!!!

        It's gone very fast. This is right before the crunch.

        Honestly, you guys, when I made these I was thinking how cute... but knew my girl would probably turn up her nose.

        She is kinda finicky with treats. Actually 100% picky. To my surprise, she ate them while I took some snaps in my studio!

        SHOCKER...

        Yup, she likes them. A lot.

        Cut them into any shapes, but how cute to put your beloved doggies' name on them? I have some links in the recipe card if you want to personalize them for your pup.

        How To Make Homemade Dog Treats

        • 1 cup organic canned pumpkin
        • ¼ cup peanut butter
        • 2 large eggs
        • ½ cup old-fashioned oats
        • 3 cups whole wheat flour
        • ½ cup carrot (2 carrots peeled and shredded)
        • ½ cup zucchini (1 small zucchini shredded0
        • 1 cup baby spinach chopped

        This recipe will make about 48 small dog treats or 24 large, depending on your cookie cutter size.

        1. Preheat the oven to 350 degrees. Line a baking sheet with parchment paper.
        2. Shred the zucchini, carrot, and spinach in a food processor or with a hand grater, or use a knife to cut the veggies into a fine mix. Make sure the veggies are in a fine mix, I cut them on a cutting board to get that fine mix so you get them well mixed into the dough.
        3. In a bowl using a hand or stand mixer using a wire attachment, beat the canned pumpkin, peanut butter, and eggs on medium-high until mixed well, about 1-2 minutes.
        4. Next, add old-fashioned oats a little at a time and 2 ½ cups flour at low speed, mixing in well. Add an additional ½ cup flour at a time just until the dough no longer sticks to the bowl. Add the shredded carrot, zucchini, and spinach, until well distributed in the dough mixture.
        5. Flour your work surface VERY WELL add way more flour than you think... and knead the dough 3-4 times until it comes together. The dough is tough and sticky! That is ok... use a rolling pin to roll out the dough to ¼-inch thickness. Keep adding flour so the cutter won't stick, and the dough won't stick to the surface. Using a personalized bone shape cookie cutter, or any shaped cookie cutter you like, cut out and place onto the prepared baking sheet.
        6. Bake until the edges are golden brown about 30 minutes.
        7. Then turn off the oven heat, and let the biscuits cool and dry in the oven overnight with the light on in the oven.
        8. Then dry the dog treats dry well for a few days on the kitchen counter. Store the dog biscuits in an airtight container in the freezer for several months. Simply pull them from the freezer, and set them on the counter for 20 minutes before serving. Your dog will LOVE them!

        Personalized Cookie Cutter

        Keep adding flour so the cutter won't stick, and the dough won't stick to the surface. Put your cutter back in flour each time to help cut them out. Using a personalized bone shape cookie cutter, or any shaped cookie cutter you like, cut out and place onto the prepared baking sheet.

        Dog Treat Cutter: I found my dog biscuit cutter on Etsy, super cute! There are also quite a few personalized dog bone cookie cutters in Amazon. And it would be a sweet gift. 

        These dog biscuits will be dry after you bake and leave them in the oven, I often leave the oven light and keep them in the oven to dry overnight with the oven off and the residual heat of the oven to dry them. These won't be as dry and hard as a commercial biscuit so you will need to store them in the freezer. 

        Some dogs like cold treats, and they thaw really fast. If you store them in your pantry, they will most likely mold as the veggies are not actually dehydrated. 

        A small white Shih Tzu dog sitting near a wooden bowl of homemade personalized dog biscuits.
        Why make your own dog treats?


        Let's face it - dog treats are expensive. homemade saves money.
        Uses up leftover veggies that you might normally toss out.
        You know exactly what is in them, and NOT in them.

        Many dogs are allergic to chicken, and you can manage any allergies easily. It seems almost every commercial treat has some form of chicken by-product in the ingredients. Plus no nasty fillers and chemicals.

        Pack them full of vegetables that are nutritious and healthy.

        What other vegetables are safe for dogs?

        broccoli
        asparagus
        green beans
        peas
        kale
        parsley
        sweet potato

        Dry and Store Your Dog Treats

        Let the dog treats dry well for a few days on the kitchen counter.

        Then store the dry biscuits in an airtight container in the freezer for several months.

        Simply set them on the counter for 20 minutes before serving. Your dog will love them.

        The word "Cookie" now means get up, wiggle the tail, pull paw up for maximum cuteness, and a brief wait for a homemade treat...

        Make Homemade Dog Food

        Homemade Dog Food can be custom-made for your dog, is healthy, fresh dog food, and a freezer meal all in one. Chock full of fresh veggies and a great way to ensure your dog's diet has a good variety.

        Homemade Dog Food Recipes (30+ Ideas!)
        Easy homemade dog food recipes are fresh, nutritious, and can be custom-made! Skip expensive store-bought commercial pet food. And watch your furry friend lick the bowl clean. Now let's create one of the best home cooked dog food recipes with these 30+ ingredient ideas.
        GET THE RECIPE PIN IT
        A white ceramic dog dish that says woof filled with homemade dog food.

        Did you love this recipe? We would love to hear from you! If you make this recipe and love it, give it a 5-star rating ⭐⭐⭐⭐⭐ with a comment. THANK YOU!! Follow Delicious Table with my free newsletter and share this recipe with your friends on Facebook, Pinterest, and Instagram.

        A wooden bowl with homemade dog treats and the name of the dog Sassy stamped in each of them in a pile.
        Print

        Homemade Dog Treats

        Your doggy will love these homemade dog treats (dog biscuit recipe) packed with nutritious pumpkin, peanut butter, spinach, zucchini, carrots, and oats.
        Course Dog Treats
        Cuisine American
        Keyword dog biscuit, dog biscuit recipe, dog food, dog treat, dog treat recipe
        Prep Time 25 minutes minutes
        Cook Time 30 minutes minutes
        Total Time 55 minutes minutes
        Servings 48
        Calories 84kcal
        Author Lisa Hatfield
        Cost $5

        Equipment

        • Personalized Dog Treat Cookie Cutter
        • Dog Bone Cookie Cutters

        Ingredients

        • 1 cup organic canned pumpkin
        • ¼ cup peanut butter
        • 2 large eggs
        • ½ cup old-fashioned oats
        • 3 cups whole wheat flour or more as needed
        • ½ cup carrot 2 carrots peeled and shredded
        • ½ cup zucchini 1 small zucchini shredded
        • 1 cup baby spinach chopped
        US Customary - Metric

        Instructions

        • Preheat oven to 350 degrees. Line a baking sheet with parchment paper.
        • Shred the zucchini, carrot, and spinach in a food processor or with a hand grater, or use a knife to cut the veggies into a fine mix. Make sure the veggies are in a fine mix, I cut them on cutting board to get that fine mix so you get them well mixed into the dough.
        • In a bowl using a hand or stand mixer using wire attachment, beat the canned pumpkin, peanut butter, and eggs on medium-high until mixed well, about 1-2 minutes.
        • Next, add old-fashioned oats a little at a time and 2 ½ cups flour at low speed, mixing in well. Add an additional ½ cup flour at a time just until the dough no longer sticks to the bowl. Add the shredded carrot, zucchini, and spinach, until well distributed in the dough mixture.
        • Flour your work surface VERY WELL add way more flour than you think... and knead the dough 3-4 times until it comes together. The dough is tough and sticky! That is ok... use a rolling pin to roll out the dough to ¼-inch thickness. Keep adding flour so the cutter won't stick, and the dough won't stick to the surface. Using a personalized bone shape cookie cutter, or any shaped cookie cutter you like, cut out and place onto the prepared baking sheet.
        • Bake until the edges are golden brown about 30 minutes.
        • Then turn off the oven heat, and let the biscuits cool and dry in the oven overnight with the light on in the oven.
        • Then dry the dog treats dry well for a few days on the kitchen counter. Store the dog biscuits in an airtight container in the freezer for several months. Simply pull them from the freezer, and set them on the counter for 20 minutes before serving. Your dog will LOVE them!

        Video

        Notes

        Dog Treat Cutter

        I found my dog biscuit cutter on Etsy, super cute! There are also quite a few personalized dog bone cookie cutters in Amazon. And it would be a sweet gift. 

        Treat Cutting Tip

        Flour your work surface VERY WELL add way more flour than you think... the dough is really sticky! That is ok... add flour so the cutter won't stick, and the dough won't stick to your work surface.

        Yield

        This recipe will make about 48 small dog treats or 24 large.

        Other Vegetable Options Good For Dogs

        For this recipe, substitute 2 cups of vegetables of your choice, try to use at least two for texture, color, and nutrition! Be sure to chop or grate them finely for your dog treats. 
        • broccoli
        • asparagus
        • green beans
        • peas
        • kale
        • parsley
        • sweet potato
        If your dog is allergic to peanut butter, simply substitute additional pumpkin puree or sweet potato puree.

        Storage Tip

        These dog biscuits will be dry after you bake and leave them in the oven, I often leave the oven light and keep them in the oven to dry overnight with the oven off and the residual heat of the oven to dry them. These won't be as dry and hard as a commercial biscuit so you will need to store them in the freezer. 
        Some dogs like cold treats, and they thaw really fast. If you store them in your pantry, they will most likely mold as the veggies are not actually dehydrated. 

        Nutrition

        Calories: 84kcal | Carbohydrates: 13g | Protein: 3g | Fat: 2g | Cholesterol: 13mg | Sodium: 21mg | Potassium: 140mg | Fiber: 2g | Sugar: 1g | Vitamin A: 2165IU | Vitamin C: 2.4mg | Calcium: 15mg | Iron: 0.9mg

        Fireball Whisky Cocktails

        [heart_this] · May 30, 2020 · 7 Comments

        Fireball Whisky Cocktails with cinnamon sticks wrapped in orange peel for garnish.

        Last Updated November 3rd, 2023 at 01:14 pm by Lisa

        Fireball Whisky Cocktails are made with orange, cinnamon, cloves, apple cider, and cinnamon flavored whiskey. Serve these fireball whisky drinks for game days, the holiday season, brunch, Fall parties, and Thanksgiving Day.

        This popular liquor is so much more than to use for whiskey shots. It makes great cocktails, or how about adding a cinnamon Fireball shot into a cup of hot chocolate with whipped cream on those chilly nights.

        And try these drinks with my Apple Pie or this Candy Corn Harvest Munch Mix at gatherings, they are so good together.
        And if you want to serve batch cocktails, take a look at one of my new Fireball recipes for Fireball Punch.

        Surprisingly refreshing and they taste like cinnamon red hots.... yummy. I love fall! Who is with me?

        While staying in Texas with my dear friend, she served this cocktails one night in her home and they were the hit of the party! It was the first time I had tried it, and since I do love a lot of cinnamon, my taste buds were delighted.

        Just to be sure they were super tasty, I served them for a couple of dinner gatherings at our friends' lake cabin in Minnesota. And confirmed, that yes...these really are delicious, and a good idea to serve, even for a crowd.

        Wouldn't these apple cider drinks be great to serve with Thanksgiving dessert?

        I love the colors in these Fall cocktails...these are festive and easy to make for your party guests, no cocktail shaker is needed. There are several more recipes in the works for this Fall, and I can't wait to share them with you. I think a hot fireball apple cider or a hot toddy would be really good!

        How To Make Fireball Whisky Cocktails

        Ingredients

        1 shot Fireball Cinnamon Whisky

        1 cup Apple Cider (Apple Juice will work in a pinch)

        3 ounces 7 UP (Club Soda or Ginger Ale)

        garnish: oranges blood oranges, whole cloves, cinnamon sticks

        1. Use a vegetable peeler, and cut strips of orange peels for garnish, set aside.
        2. Optional: wrap around cinnamon sticks and secure with a small piece of toothpick.
        3. Slice oranges into small wedges, squeeze a slice of orange in the glass.
        4. Fill glass ½ full of ice, pour 1 shot of Fireball Cinnamon Whisky.
        5. Fill the glass within an inch of the top with Apple Cider.
        6. Place 5 cloves, 1 cinnamon stick with orange peel garnish wrapped around.
        7. Pour a splash of either 7up or Club Soda.
        8. Serve and enjoy.

        * use care when sipping these cocktails with the cloves and cinnamon sticks!

        What Is Fireball Whisky?

        According to the official Fireball website, the product was developed in Canada in the mid-1980s, and for a long time was little known outside of Canada. 


        Fireball Cinnamon Whisky is a mixture of whisky and REAL cinnamon flavoring and sweeteners that is produced by the Sazerac Company. As of 2018, it is among the top-selling whisky brands in the United States. Most people just think of a shot or on ice as the only way to drink it, but the best way is to mix drinks and cocktail recipes.

        Is It Whiskey or Whisky?

        The spelling difference comes from the translations of the word from the Scottish and Irish Gaelic forms. The Scottish spell it whisky and the Irish spell it whiskey with the 'e'.

        In America, it is spelled Whiskey with the 'e' typically. Fireball Whisky is made in Canada and drops the 'e'.

        Is Fireball Cinnamon Whiskey Made With Real Cinnamon?

        YES! Real cinnamon is used in the production of this Whisky.

        What Does Fireball Whisky Taste Like?

        It tastes just like those little cinnamon red hot candies. Some say that it "Tastes Like Heaven, Burns Like Hell". That could explain why there is a fire-breathing dragon on the label of the bottle. It has a high alcohol content and has a lot of cinnamon flavor.

        Fireball Whisky Recipes


        With so many ways to enjoy this wildly popular whiskey, here are just a few creative recipes to try besides shots or on the rocks...

        Add into Fireball Whisky Cocktails
        Make Fireball Punch or Sangria
        Make a Fireball Fudge or Cake
        Fireball Coffee Hot Shots
        Mix up Fireball Jello Shots
        Fireball Barbeque Sauce
        Grilled Fireball Chicken or Wings
        Fireball Pumpkin Pie or Apple Pie

        How To Make The Orange Peel Garnish

        We used blood oranges, but regular oranges would work just as well! You can use a vegetable peeler, and cut long strips, secure with pieces of toothpicks to the cinnamon sticks, or simply float in the glass.

        Use a vegetable peeler, and cut strips of orange peels for garnish going around in a circle, set aside.

        I love fall!  and really enjoy the slower pace this time of year. It is time for couch time, good books, hot coffee, soup, and blankets cuddled watching a good game or a show. Wishing you, your family, and friends time to relax and enjoy the fall season.

        One More Fireball Whiskey Recipe

        All you need is a beverage container, a punch bowl or large pitchers, and a few simple ingredients to make Fireball Punch. It takes a lot of time to make single serving mixed drinks like whiskey cocktails at a party.

        This is a great way to serve a mixed drink to large groups, and even the guys will love this punch with an extra kick. It has just the right sweetness and tastes like Fall with crisp apples, fresh oranges, and spicy cinnamon.

        Try some of these Fall drinks to have with game day food, during Halloween, or a festive New Year party.

        Fireball Thanksgiving Punch "Batch Cocktails"
        Fireball Thanksgiving Punch with orange, apple cider, and Fireball whisky. Serve Fall "big batch cocktails" for Friendsgiving & Thanksgiving.
        GET THE RECIPE PIN IT
        A large glass punch bowl filled with Fall and Thanksgiving punch with apples and oranges floating on top.

        More Fall Cocktail Ideas

        Try some of these Fall drink ideas. For game days, Bloody Marys or Micheladas are so refreshing. The perfect cocktail for Summer nights or Fall gatherings is an Aperol Spritz. And no Halloween party would be complete with out some spooky Halloween Punch.

        • Three glasses of Aperol Spritz on a table with appetizers at a Fall party.
          Autumn Aperol Spritz
        • A pitcher of bloody marys with two drinks garnished with olives, pepperoncinis, and beef sticks.
          Spicy Bloody Marys
        • A tall glass filled with michelada garnished with green chili and spice coated lime slice.
          Micheladas Mexican Beer Cocktails
        • A black cauldron with wooden ladle and pouring red punch into the bowl with dry ice smoke for Halloween Punch.
          Halloween Party Punch

        Did you love this recipe? We would love to hear from you! If you make this recipe and love it, give it a 5-star rating ⭐⭐⭐⭐⭐ with a comment. THANK YOU!! Follow Delicious Table with my free newsletter and share this recipe with your friends on Facebook, Pinterest, and Instagram.

        Fireball Whisky Cocktails with cinnamon sticks wrapped in orange peel for garnish.
        Print

        “Fireball” Whisky Cocktails

        "Red Hot" Fireball Whisky Cocktails made with orange, cinnamon, cloves, and apple cider. Serve fireball drinks for Fall parties, brunch, and Thanksgiving Day!
        Course Drinks & Cocktails
        Cuisine American
        Keyword Fireball, Thanksgiving cocktail, whiskey cocktail
        Prep Time 2 minutes minutes
        Total Time 2 minutes minutes
        Servings 1
        Calories 260kcal
        Author Lisa Hatfield

        Equipment

        • Vegetable Peeler
        • Wood Toothpicks

        Ingredients

        • 1 shot Fireball Cinnamon Whisky
        • 1 cup Apple Cider
        • 3 ounces 7 UP or Club Soda
        • 1 slice garnish: oranges blood oranges, whole cloves, cinnamon sticks

        Instructions

        Prep Garnish

        • Use a vegetable peeler, and cut strips of orange peels for garnish, set aside.
        • Optional: wrap around cinnamon sticks and secure with a small piece of toothpick.

        Make Fireball Whisky Cocktails

        • Slice oranges into small wedges, squeeze a slice of orange in the glass.
        • Fill glass ½ full of ice, pour 1 shot of Fireball Cinnamon Whisky.
        • Fill the glass within an inch of top with Apple Cider.
        • Place 5 cloves, 1 cinnamon stick with orange peel garnish wrapped around.
        • Pour a splash of either 7up or Club Soda.
        • Serve and enjoy.

        * use care when sipping these cocktails with the cloves and cinnamon sticks!

          Notes

          oranges

          I used blood oranges in these drinks but regular navel oranges or tangerines would be just great.

          garnish

          1. Use a vegetable peeler, and cut strips of orange peels for garnish, set aside.
          2. Optional: wrap around cinnamon sticks and secure with a small piece of toothpick.
          Use care when sipping these cocktails with the cloves and cinnamon sticks!

          fireball punch

          If you love this cocktail, you will love my recipe for Fireball Punch. It serves up to 30 and is so festive for Thanksgiving or Friendsgiving.
           

          Nutrition

          Calories: 260kcal | Carbohydrates: 37g | Protein: 0g | Fat: 0g | Saturated Fat: 0g | Cholesterol: 0mg | Sodium: 17mg | Potassium: 238mg | Fiber: 0g | Sugar: 32g | Vitamin C: 9.6mg | Calcium: 19mg | Iron: 0.3mg

          Cowboy Beans

          [heart_this] · Apr 10, 2020 · 45 Comments

          A large white spoon scooping a serving of cowboy baked beans out of a casserole dish.

          Last Updated May 24th, 2023 at 12:52 pm by Lisa

          Cowboy Baked Beans are loaded with browned hamburger meat and crispy applewood smoked bacon. The addition of ground beef makes these absolutely amazing and almost a meal itself.

          One of the most delicious side dishes ever. A family favorite for dinner, holidays like Christmas and Easter, or for summer cookouts and picnics. People also call these calico beans or hamburger baked beans.

          These crock pot baked beans can also be baked in the oven. Enjoy this hearty recipe that feeds a large hungry crowd. They will rave, get seconds, and want this great recipe...

          Traditional baked beans are really good, but this is one of the best baked beans with ground beef recipes ever.

          The first time I tried these I couldn't stop eating them at a friend's birthday party.

          This cowboy bean recipe is my own version and is one of my personal favorite new recipes and is quick, easy, and inexpensive to put together.

          How To Make Cowboy Beans

          • 1 lb bacon applewood smoked
          • 1 large yellow onion chopped
          • 2 cloves fresh garlic minced
          • 1 lb ground beef
          • 48 ounces baked beans (don't drain)
          • 32 ounces kidney beans (drain)
          • 16 ounces cannellini beans (drain)
          • 32 ounces black beans (drain)
          • ¼ cup brown sugar
          • ¼ cup apple cider vinegar
          • 1 cup ketchup
          • 2 tablespoons yellow mustard

          Ground beef 85/15 works well in this recipe. You can also swap in lean ground beef if you prefer.

          Bacon any brand works fine, but applewood smoked bacon is so extra special and adds a bit of smoky flavor. Feel free to add even more bacon than I used! And if you really like a smoky flavor, you could add some liquid smoke.

          Apple cider vinegar is in the recipe to help balance the sweetness of the brown sugar, ketchup, and sugar in the canned baked beans. If you want to dial back the sweetness, you can use less sugar by reducing the brown sugar.

          Beans usually called for in this recipe are limas, and those work really well. I have listed additional types of beans that will work just fine. I used canned instead of dry beans. Soaked beans take time, plus they don't always get to the right soft texture.

          • butter (mature lima beans)
          • pork and beans
          • navy
          • kidney
          • black
          • pinto
          • cannellini white
          Side by side photos of cowboy beans in a white cast iron pot inside and them in a slow cooker.

          Let's Make Them!

          1. Decide if you are going to make them in a slow cooker or bake in the oven. You can use a deep casserole dish or large pot like a dutch oven. I like a large heavy cast iron pot so I can cook in it and finish baking all in one. Slow cookers are great for parties to keep them warm for several hours.
          2. Chop the sliced uncooked bacon into small pieces, over medium heat, brown the bacon in a heavy cast-iron skillet or a large cast iron dutch oven on the stove top using a wooden spoon. Tip, you can cut the bacon into small pieces with clean kitchen scissors right into the pot-I find this faster!
          3. Remove the crispy cooked bacon to a small bowl with a slotted spoon. Don't remove the bacon drippings from the pan. Next add the chopped onion and brown for 5-6 minutes until translucent, add the minced garlic, stir for one minute.
          4. Next, brown the ground beef, cook for 6-8 minutes. Next, add the bacon, back in with the cooked ground beef, onion, and garlic.
          5. Next, add 3 cans of baked beans (don't drain), 2 cans of kidney beans (drain), 1 can of cannellini beans (drain), and 2 cans of black beans (drain).
          6. Add the remaining ingredients; brown sugar, cider vinegar, ketchup, and yellow mustard. Stir all the ingredients well to combine.
          7. Place into the slow cooker or large dutch oven or large deep casserole dish. The baked beans usually doesn't all fit in one standard 9 x 13, you need a deeper dish.
          8. Cook in slow cooker crockpot on low for 2 hours OR bake 350 degrees for 1 ½ hours in a large covered dish. Serve hot.

          Reader Comments

          "Very good! I made this today for the slow cooker to take to a family reunion." Christy

          "I lost my old recipe for Cowboy Beans and found this duplicate. hooray! It is a perfect match and love, love, love them." Durreta

          "Wow I made these last week and my family went crazy for these cowboy baked beans. Will be doing this again over memorial day weekend." William

          "These “Cowboy Baked Beans” are fabulous. All you need is cornbread and sweet tea to make a great meal." Betty

          What are Cowboy Beans?

          A popular dish in the western United States Cowboy Beans are made with ground beef and a variety of beans in a slightly sweet and tangy sauce. Other types of meat can be used like bacon. They are like baked beans but not as sweet, and are a meal in themselves. They are made and served from slow cookers or crock-pots, or baked in the oven, depending on the recipe.

          Although cowboy appears in the name, the use of canned beans, ketchup, and mustard, means the dish is unlike anything ranch hands would have eaten in the 19th century.

          Out on the trail, the chuckwagon cook soaked beans in a pot all day and perhaps combined them with small bits of leftover meat, and maybe that is how Cowboy beans got their name? We will never know, but these are amazing and the perfect side dish for family dinner, holidays, and cookouts.

          Serving Idea

          You can serve individual hot portions in small paper bowls or cups with spoons to make them easier to eat at picnics and cookouts.

          Leftovers

          Place leftovers in an airtight container and refrigerate. When ready to reheat, place them in a casserole dish covered with aluminum foil and bake in the oven at 375 for 20 minutes.

          Cookout Food Safety

          • If serving outside, plan to keep food protected from flying insects with food tents, and try different ways to chill salads. You can use ice packs or buy special bowls that chill before parties.
          • Keep dishes out of the direct sun if possible. When they sit out for a long time, they can spoil and not be food-safe. 
          • For outdoor parties, make sure to get food back in the fridge after about an hour to keep it safe during the hottest time of day.
          • It's a good idea to reheat leftover dishes later in the day when people get hungry.
          • The best way to be on the safe side, is to choose dishes that won't spoil in the heat. Avoid mayonnaise-based recipes.
          • Pack up leftovers for guests to take with them, and keep chilled until people head home.

          What To Serve With Baked Beans

          For your next holiday or cookout party Crockpot baked beans go well with the best side dishes like coleslaw, grilled corn, macaroni salad, or potato salad. A Seven Layer fresh salad is perfect with perhaps fresh fruit at family gatherings and picnics. You can serve a creamy dressing like Ranch Dressing. Serve a hot side dish of mashed potato on the buffet table. For a healthier option, serve a platter of fresh veggies with a light dip. And toss a colorful bowl of fresh fruit together for your party.

          Try this easy recipe for smoky baked beans with main dish ideas like Cheeseburgers, Hot Dogs, or Cheeseburger Sliders. BBQ sandwiches like Pulled Pork Sandwiches can be topped with BBQ sauce. More delicious ways to enjoy perfect baked beans are to serve them with a grilled chicken breast or pork chops.

          • Mini cheeseburgers with melted cheese, tomato, and lettuce with American flag toothpick decoration on top.
            Cheeseburger Sliders
          • Looking down on a white plate filled with macaroni salad and a silver fork.
            Classic Macaroni Salad Recipe
          • A small white bowl filled with bacon potato salad garnished with crispy bacon.
            Bacon Potato Salad
          • A square collage of colorful grilled food, side dishes, desserts, and drink recipes to serve at an outdoor bbq cookout.
            75+ Cookout Recipes & BBQ Party Ideas
          • Ears of grilled corn on a white platter seasoned with melted butter on top.
            Grilled Corn On The Cob
          • A person holding a messy grilled burger topped with melted cheese, burger sauce, lettuce, tomato, and pickles.
            The Best Cheeseburger
          • A clear glass bowl filled with tri color cole slaw and wooden tongs stuck in the slaw.
            Coleslaw Recipe (No Mayo)
          • Red white check paper lined basked holding a pulled pork sandwich topped with coleslaw.
            Slow Cooker Pulled Pork

          Did you love this recipe? We would love to hear from you! If you make this recipe and love it, give it a 5-star rating ⭐⭐⭐⭐⭐ with a comment. THANK YOU!! Follow Delicious Table with my free newsletter and share this recipe with your friends on Facebook, Pinterest, and Instagram.

          A large white spoon scooping a serving of cowboy baked beans out of a casserole dish.
          Print

          Cowboy Baked Beans Recipe (Oven or Slow Cooker)

          Cowboy Baked Beans (aka Calico Beans) are loaded with ground beef and applewood smoked bacon. A great party food recipe for large groups.
          Course Side Dish
          Cuisine American
          Keyword baked beans, baked beans recipe, cowboy baked beans, Cowboy beans
          Prep Time 20 minutes minutes
          Cook Time 1 hour hour
          Total Time 1 hour hour 20 minutes minutes
          Servings 18
          Calories 430kcal
          Author Lisa Hatfield

          Equipment

          • Cast Iron Dutch Oven
          • Slow Cooker / Crock Pot
          • Epicurean Non-Slip Cutting Board
          • Chef Knife

          Ingredients

          • 1 lb bacon applewood smoked
          • 1 large yellow onion chopped
          • 2 cloves garlic minced
          • 1 lb ground beef
          • 48 ounces baked beans (don't drain)
          • 32 ounces kidney beans (drain)
          • 16 ounces cannellini beans (drain)
          • 32 ounces black beans (drain)
          • ¼ cup brown sugar
          • ¼ cup apple cider vinegar
          • 1 cup ketchup
          • 2 tablespoons yellow mustard

          Instructions

          • Decide if you are going to make them in a slow cooker or bake in the oven. You can use a deep casserole dish or large pot like a dutch oven. I like a large heavy cast iron pot so I can cook in it and finish baking all in one. Slow cookers are great for parties to keep them warm for several hours.
          • Chop the sliced uncooked bacon into small pieces, over medium heat, brown the bacon in a heavy cast-iron skillet or a large cast iron dutch oven on the stove top using a wooden spoon. Tip, you can cut the bacon into small pieces with clean kitchen scissors right into the pot-I find this faster!
          • Remove the crispy cooked bacon to a small bowl with a slotted spoon. Don't remove the bacon drippings from the pan. Next add the chopped onion and brown for 5-6 minutes until translucent, add the minced garlic, stir for one minute.
          • Next, brown the ground beef, cook for 6-8 minutes. Next, add the bacon, back in with the cooked ground beef, onion, and garlic.
          • Next, add 3 cans of baked beans (don't drain), 2 cans of kidney beans (drain), 1 can of cannellini beans (drain), and 2 cans of black beans (drain).
          • Add the remaining ingredients; brown sugar, cider vinegar, ketchup, and yellow mustard. Stir all the ingredients well to combine.
          • Place into the slow cooker or large dutch oven or large deep casserole dish. The baked beans usually doesn't all fit in one standard 9 x 13, you need a deeper dish.
          • Cook in slow cooker crockpot on low for 2 hours OR bake 350 degrees for 1 ½ hours in a large covered dish. Serve hot.

          Notes

          Ground beef 85/15 works well in this recipe. You can also swap in lean ground beef if you prefer.
          Bacon any brand works fine, but applewood smoked bacon is so extra special and adds a bit of smoky flavor. Feel free to add even more bacon than I used! And if you really like the smoky flavor you could add some liquid smoke, I don't but it might add some great additional flavor.
          Apple cider vinegar is in the recipe to help balance the sweetness of the brown sugar, ketchup, and sugar in the canned baked beans. If you want to dial back the sweetness, you can reduce the brown sugar
          Beans usually called for in this recipe are limas, and those work really well. I have listed additional types of beans that will work just fine. I used canned instead of dry beans. Soaked beans take time, plus they don't always get to the right soft texture.
          • butter (mature lima beans)
          • pork and beans
          • navy
          • kidney
          • black
          • pinto
          • cannellini white

          Serving Idea

          You can serve individual hot portions in small paper bowls or cups with spoons to make them easier to eat at picnics and cookouts.

          Leftovers

          Place leftovers in an airtight container and refrigerate. When ready to reheat, place them in a casserole dish covered with aluminum foil and bake in the oven at 375 for 20 minutes.

          Nutrition

          Calories: 430kcal | Carbohydrates: 50g | Protein: 22g | Fat: 17g | Saturated Fat: 6g | Polyunsaturated Fat: 2g | Monounsaturated Fat: 7g | Trans Fat: 1g | Cholesterol: 40mg | Sodium: 694mg | Potassium: 798mg | Fiber: 14g | Sugar: 6g | Vitamin A: 82IU | Vitamin C: 3mg | Calcium: 97mg | Iron: 5mg
          • « Go to Previous Page
          • Page 1
          • Interim pages omitted …
          • Page 5
          • Page 6
          • Page 7
          • Page 8
          • Go to Next Page »

          Primary Sidebar

          MEET LISA

          Hey Everyone! I've been cooking passionately for over 30 years with professional culinary training and thousands of recipes in my collection. Let's get cooking! ♥

          Find out more →

          FOLLOW US ON SOCIAL

          • Facebook
          • Instagram
          • LinkedIn
          • Pinterest
          • YouTube

          MOST POPULAR RECIPES

          • Three golden crispy edged hash browns baked in a muffin tin on cutting board.
            Oven Baked Hash Browns
          • A white ceramic dog dish that says woof filled with homemade dog food.
            Homemade Dog Food Recipes (30+ Ideas!)
          • A large spoon holding a scoop of hot potato casserole serving it for dinner.
            Cheesy Potato Casserole
          • Marinated mozzarella balls in a beige ceramic dish with appetizer toothpicks.
            Marinated Mozzarella Balls
          • A white casserole dish with oven roasted pulled pork shredded and ready to eat in tacos or a recipe for dinner.
            Oven Roasted Pulled Pork
          • A baked loaf of pumpkin bread sliced thick with a silver knife.s
            Pumpkin Bread

          ALL READER FAVES ►

          FALL RECIPES

          • A ceramic dish full of golden brown roast pumpkin seeds.
            Roasted Pumpkin Seeds
          • Dozens of pictures of 200 Halloween recipes including adult drinks, appetizers, treats, snacks, desserts for kids and families all with a Halloween theme.
            200+ Best Halloween Recipes
          • Apple Crisp in a red bowl with a silver spoon, ice cream, and drizzled with caramel sauce.
            Apple Crisp
          • Slices of green Granny Smith apples around a white dish with a sweet dessert dip inside a low small white dish with a ruffled edge, and a piece of apple sticking into the dip.
            Caramel Apple Dip
          • A large jar filled with apple pie filling with a lid and bow.
            Apple Pie Recipe Filling
          • A white pie dish with a slice of apple crumble pie, also known as a dutch apple pie with a crumbled topping and green apples in the background in a wood bowl.
            Dutch Apple Pie

          Footer

          Most Popular "Reader Favorite" Recipes

          Three golden crispy edged hash browns baked in a muffin tin on cutting board.

          Oven Baked Hash Browns

          A white ceramic dog dish that says woof filled with homemade dog food.

          Homemade Dog Food Recipes (30+ Ideas!)

          A large spoon holding a scoop of hot potato casserole serving it for dinner.

          Cheesy Potato Casserole

          Marinated mozzarella balls in a beige ceramic dish with appetizer toothpicks.

          Marinated Mozzarella Balls

          A white casserole dish with oven roasted pulled pork shredded and ready to eat in tacos or a recipe for dinner.

          Oven Roasted Pulled Pork

          A baked loaf of pumpkin bread sliced thick with a silver knife.s

          Pumpkin Bread

          A large glass clamp jar filled with pickled eggs, fresh jalapeno slices, and spices.

          Jalapeno Pickled Eggs Recipe

          A large pork loin roast with a lot of dry rub seasoning pouring over the top.

          The Best BBQ Dry Rub

          Mexican pickled red onions in a clamp jar and white bowl with chiles and limes on a colorful striped cloth.

          Mexican Pickled Red Onions

          A white plate filled with heart shaped lobster ravioli garnished with parsley.

          Lobster Ravioli

          A sliver carving fork and knife next to a pork loin roast and topped with cherries.

          Cherry Balsamic Pork Loin

          A Cinco de Mayo party with frozen margaritas called Coronaritas, guacamole, and chips on a green table.

          CoronaRita Margaritas

          A large white spoon scooping a serving of cowboy baked beans out of a casserole dish.

          Cowboy Beans

          More Delicious Recipes

          PLEASE FOLLOW US!

          • Amazon
          • Facebook
          • Instagram
          • LinkedIn
          • Pinterest
          • TikTok
          • Twitter
          • YouTube

          Footer

          DELICIOUS TABLE

          • MEET LISA
          • SEE MY WORK! PRESS & DIGITAL MEDIA PUBLICATIONS
          • PRIVACY POLICY
          • ACCESSIBILITY STATEMENT

          POPULAR LINKS

          • EMAIL SIGN-UP newsletters and updates
          • RECIPE INDEX
          • AMAZON STORE As an Amazon Associate, I earn from qualifying purchases.

          LET'S CONNECT

          • PINTEREST
          • FACEBOOK
          • INSTAGRAM
          • YOUTUBE
          • TIKTOK
          • LINKEDIN
          • X / TWITTER

          2026 COPYRIGHT © ♥︎ DELICIOUS TABLE ®️