

Last Updated March 20th, 2022 at 02:05 pm by Lisa
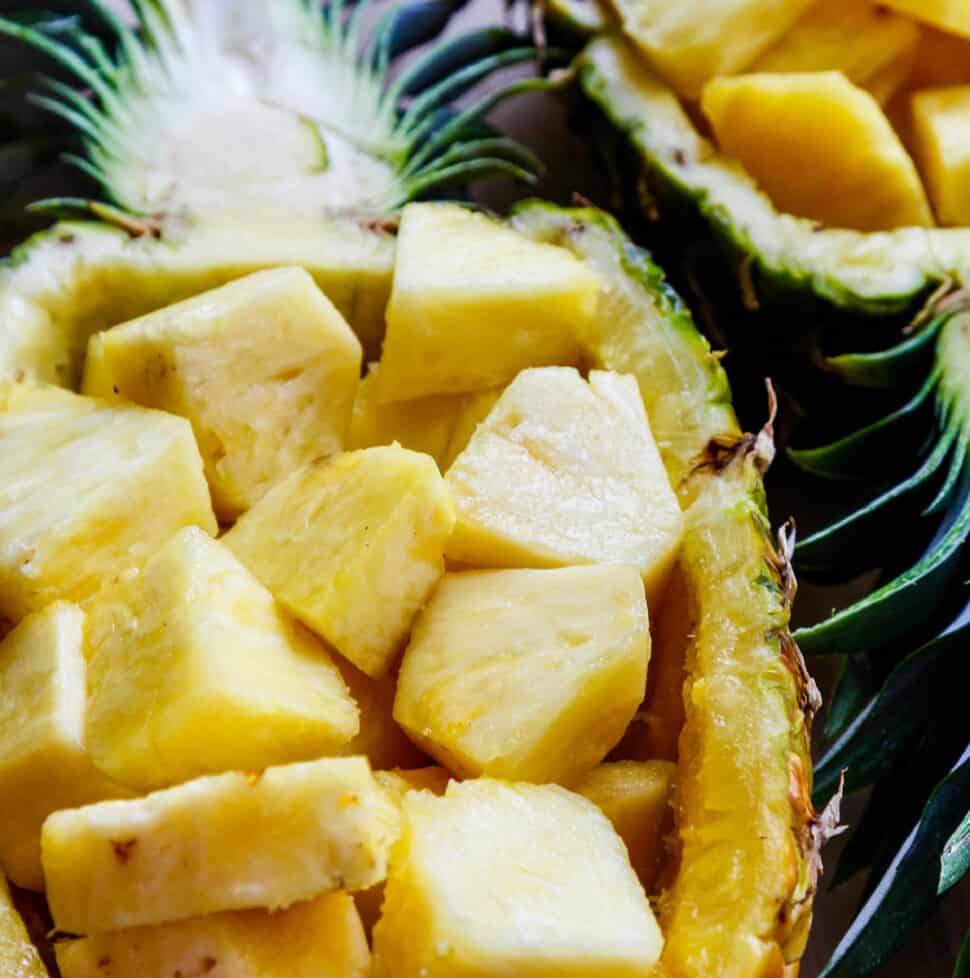
Learn how to cut pineapples and create Bowls or Boats as they are also known. This kitchen tip is a game-changer, just follow the steps and you might not ever buy it cut at the store ever again.
There are so many recipes to try using this sweet tropical fruit. Make some pineapple fried rice, Shish Kabobs, or Huli Huli Chicken this summer. What a gorgeous way to serve fresh fruit for picnics, cookouts, or anytime...
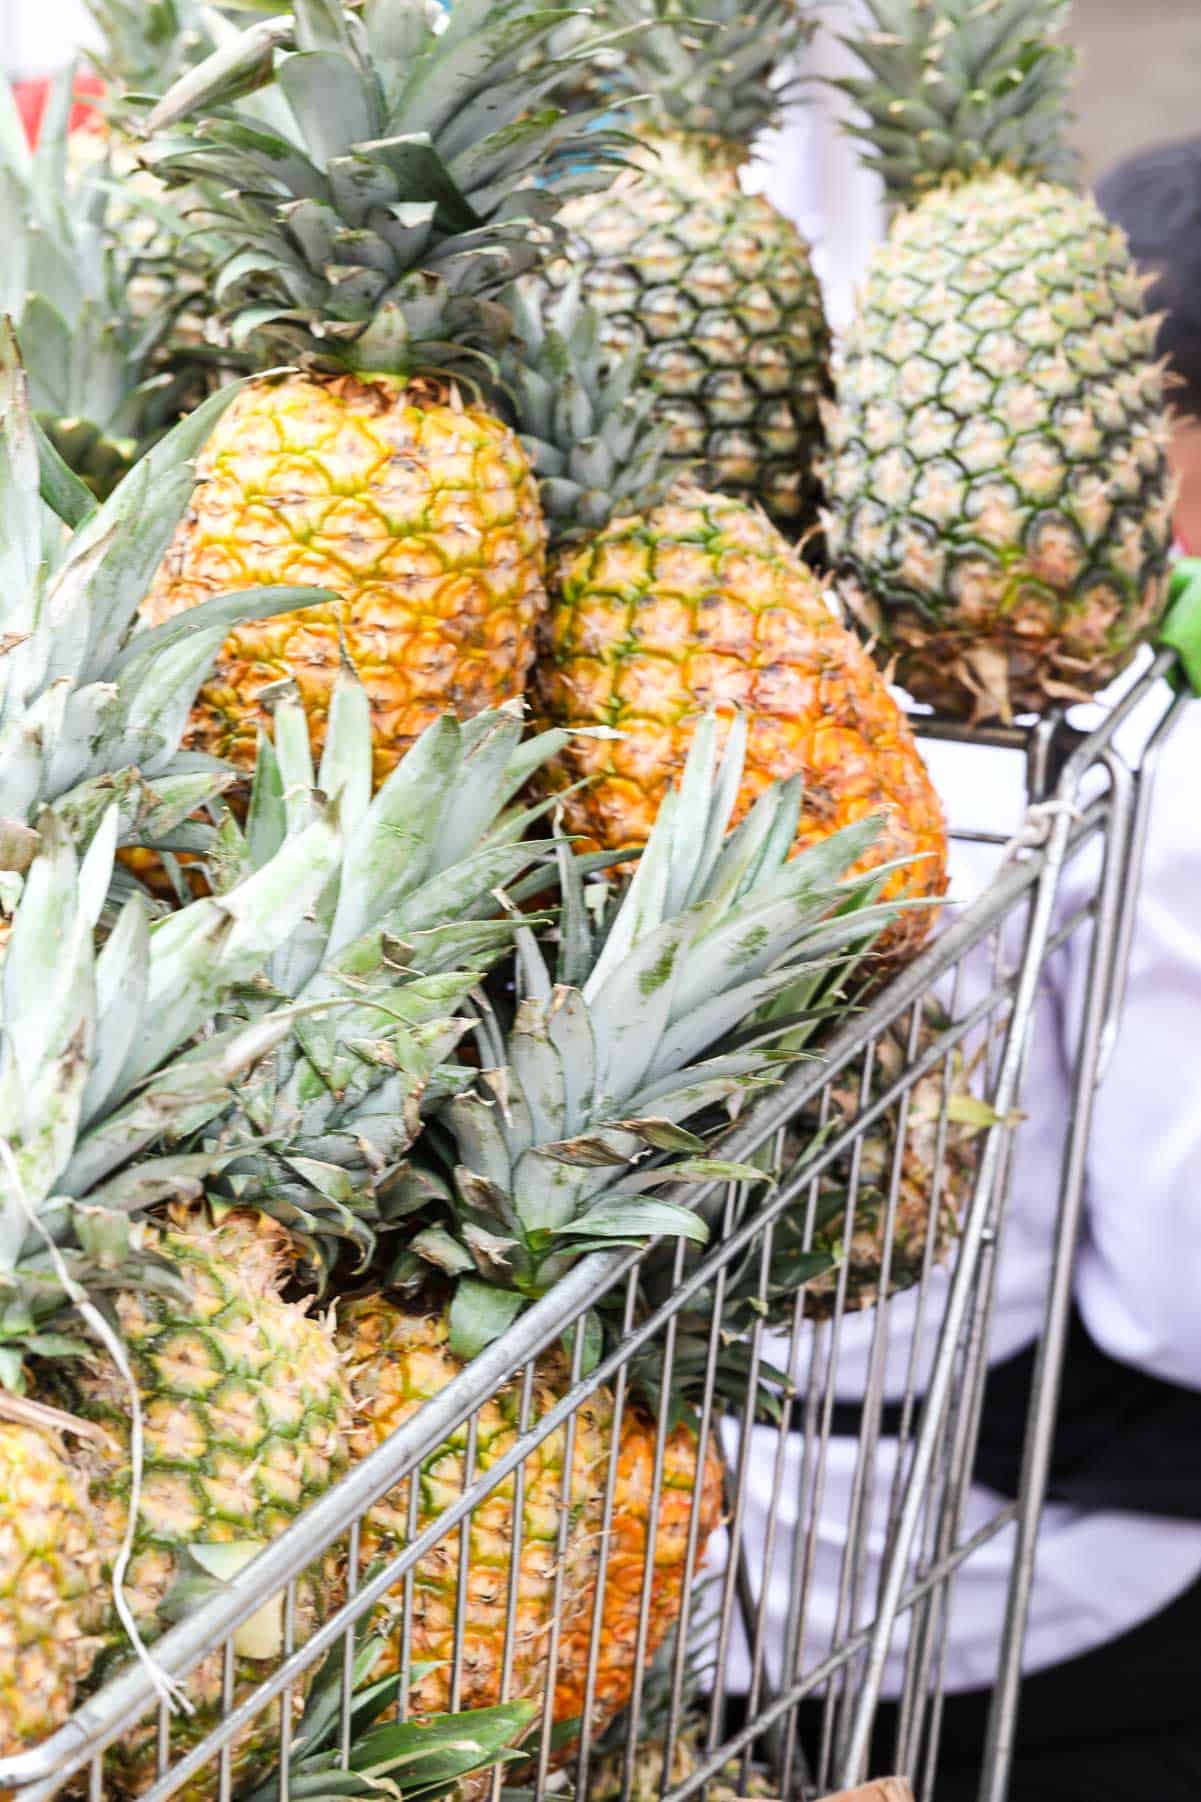
Top Pineapple Tips
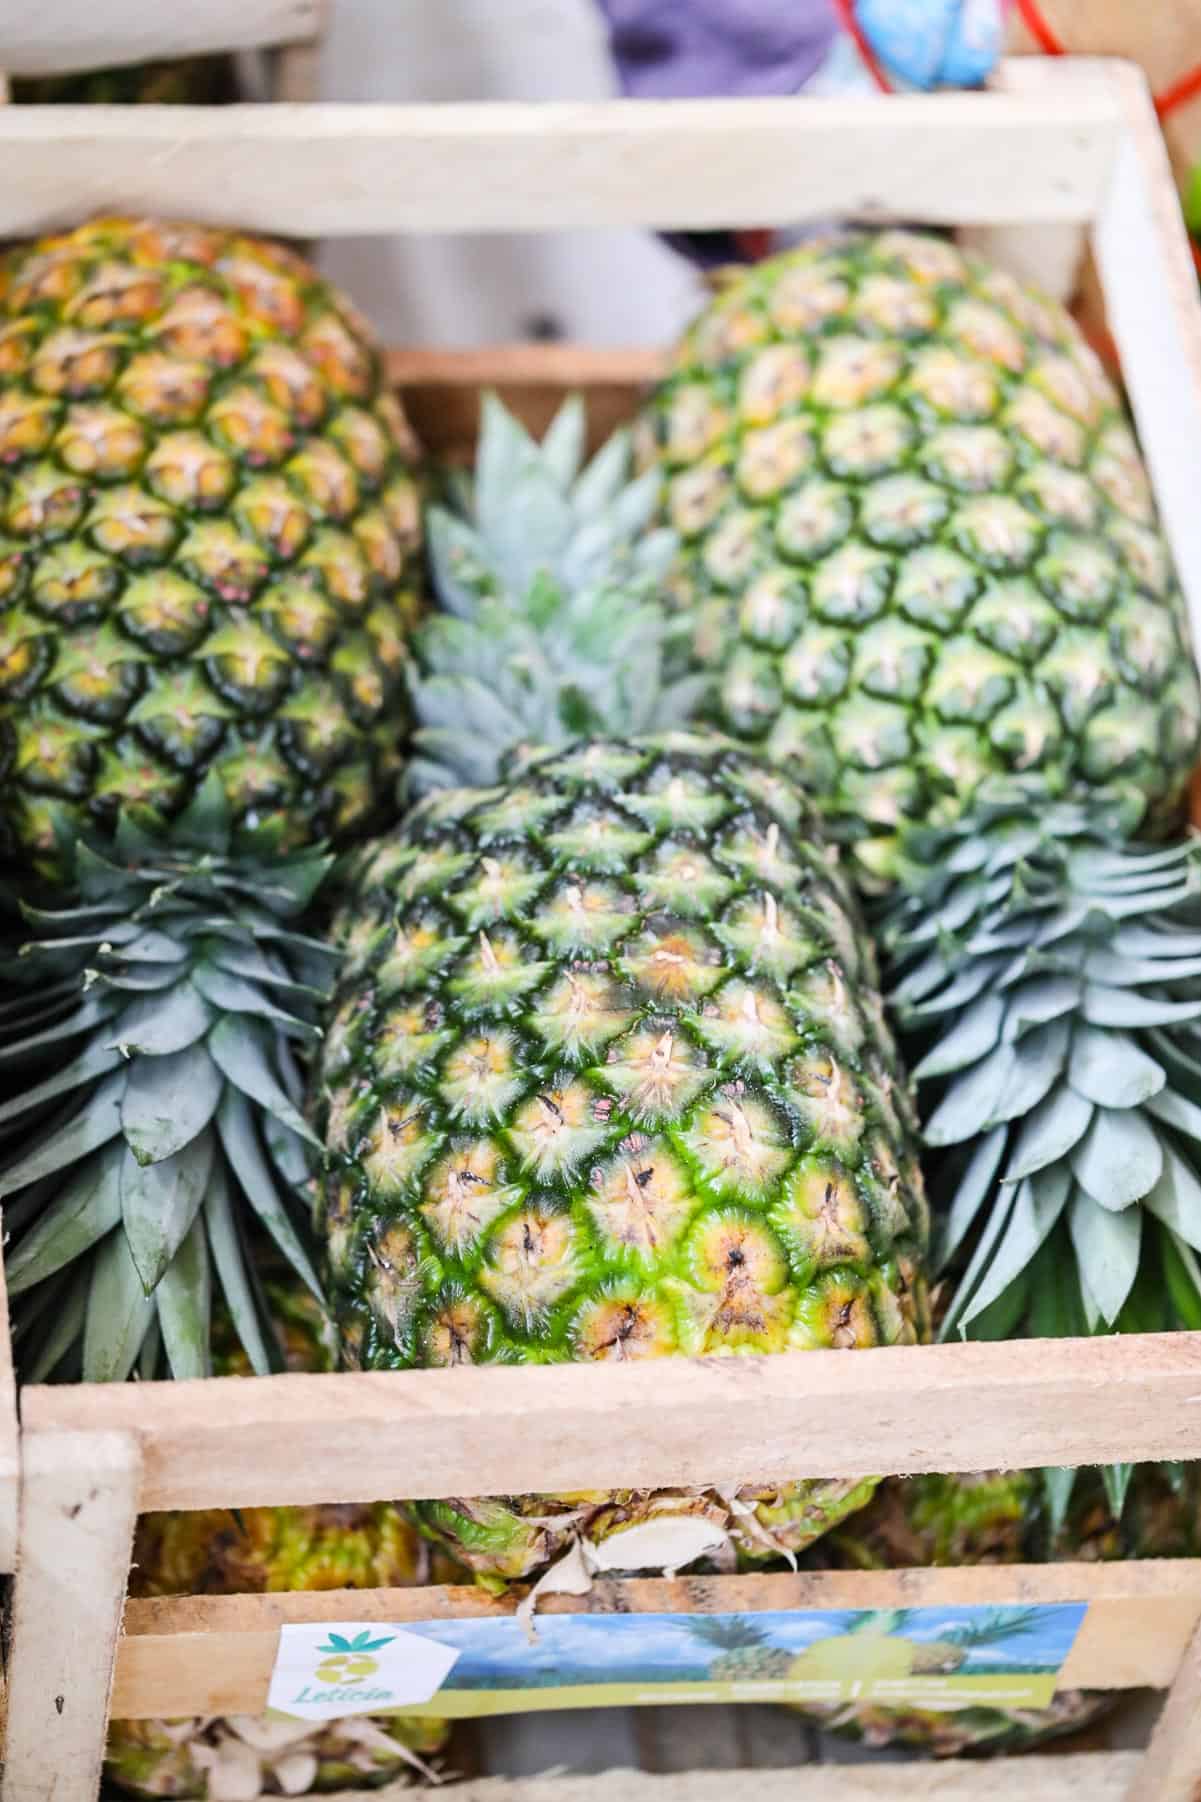
- Be sure the pineapple has a sweet smell towards the base.
- Green color indicates that it might not be ripe and was picked too early.
- Use the "Press Test." A sweet (and ripe) pineapple will yield slightly to pressure.
- Make sure to avoid overripe pineapples. They usually have reddish-brownish skins and dark dried leaves that crumble when you touch them and have a fermented smell. Pass on that one, it will taste-off, and be mushy and overripe inside.
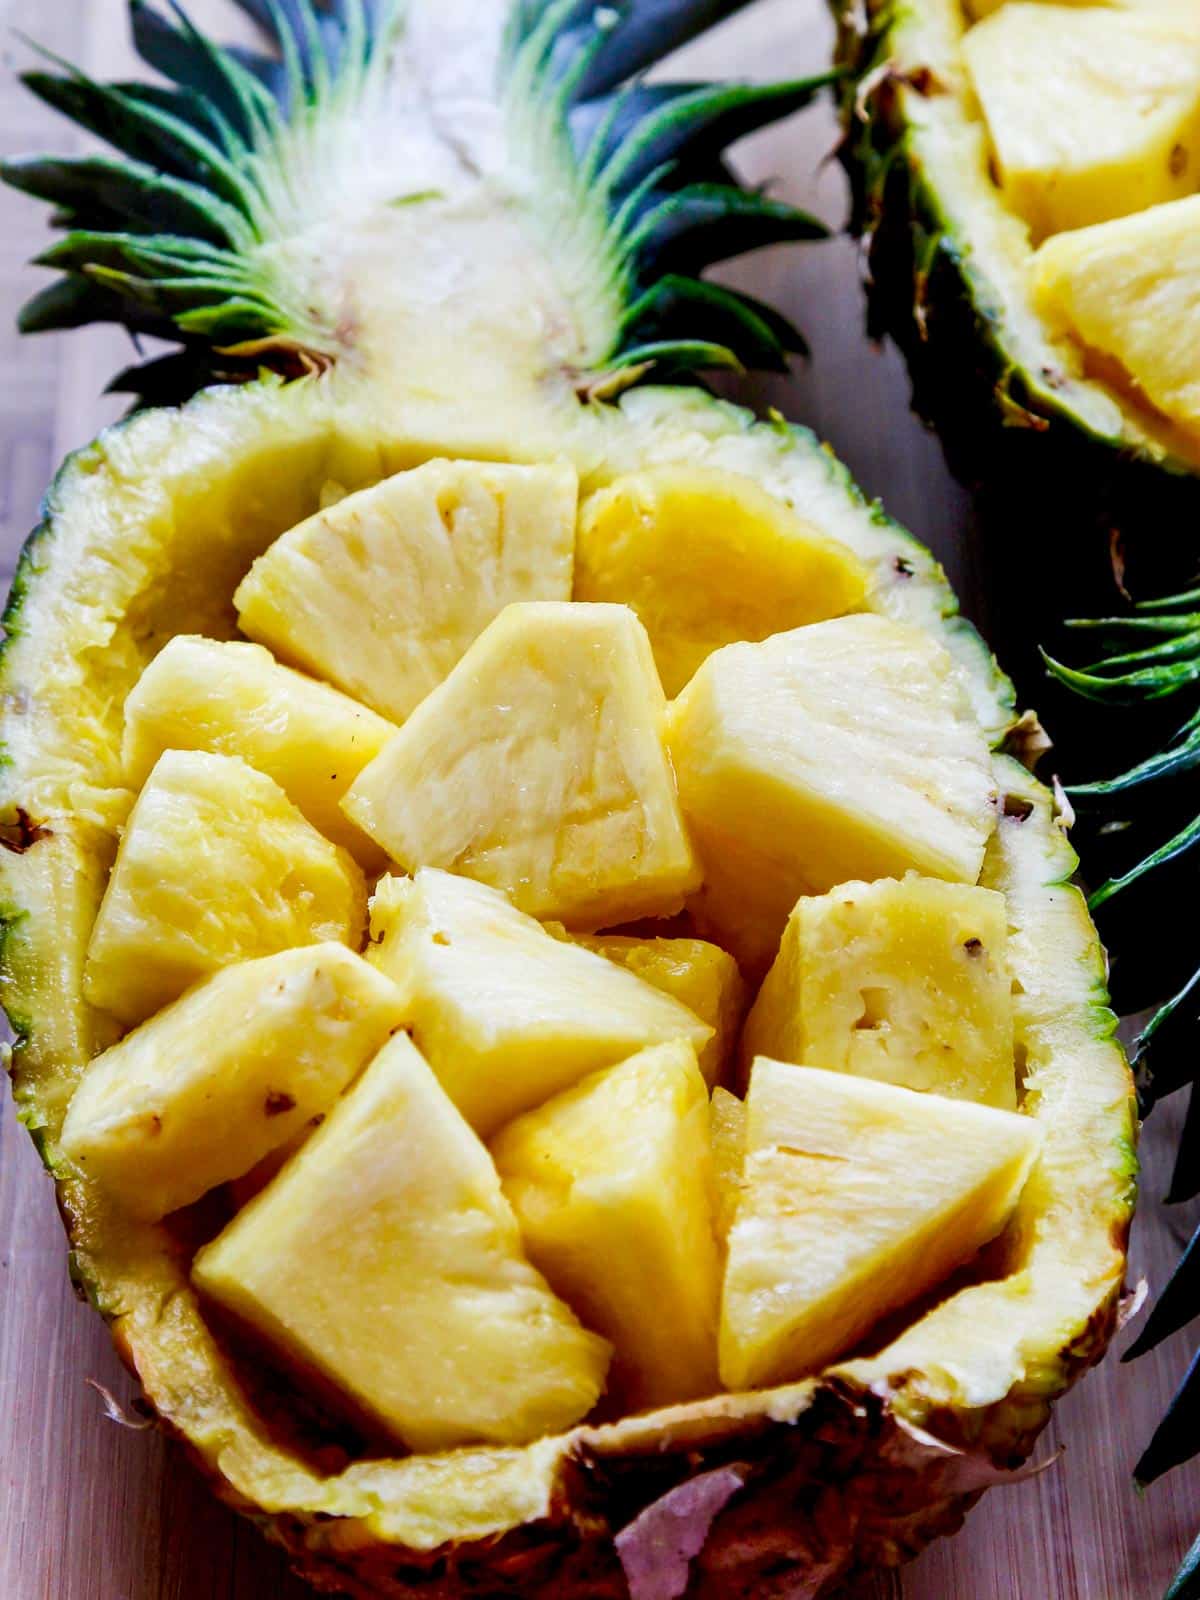
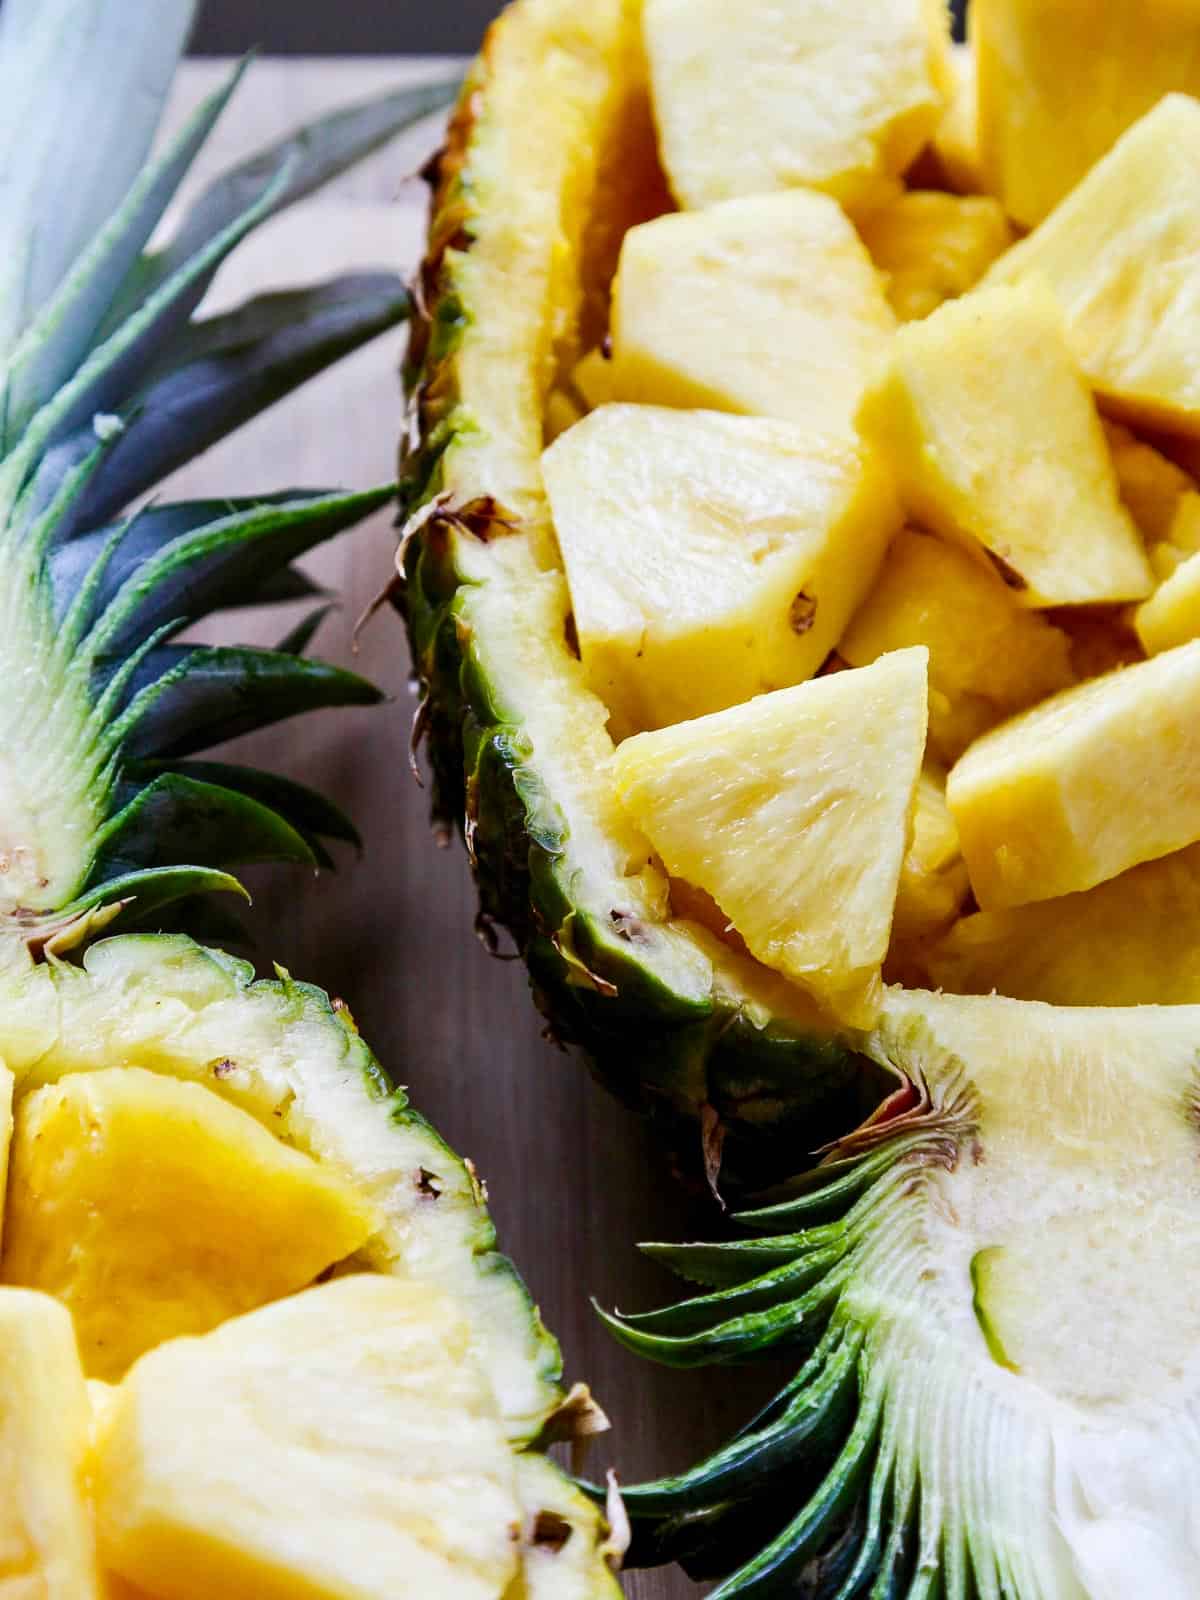
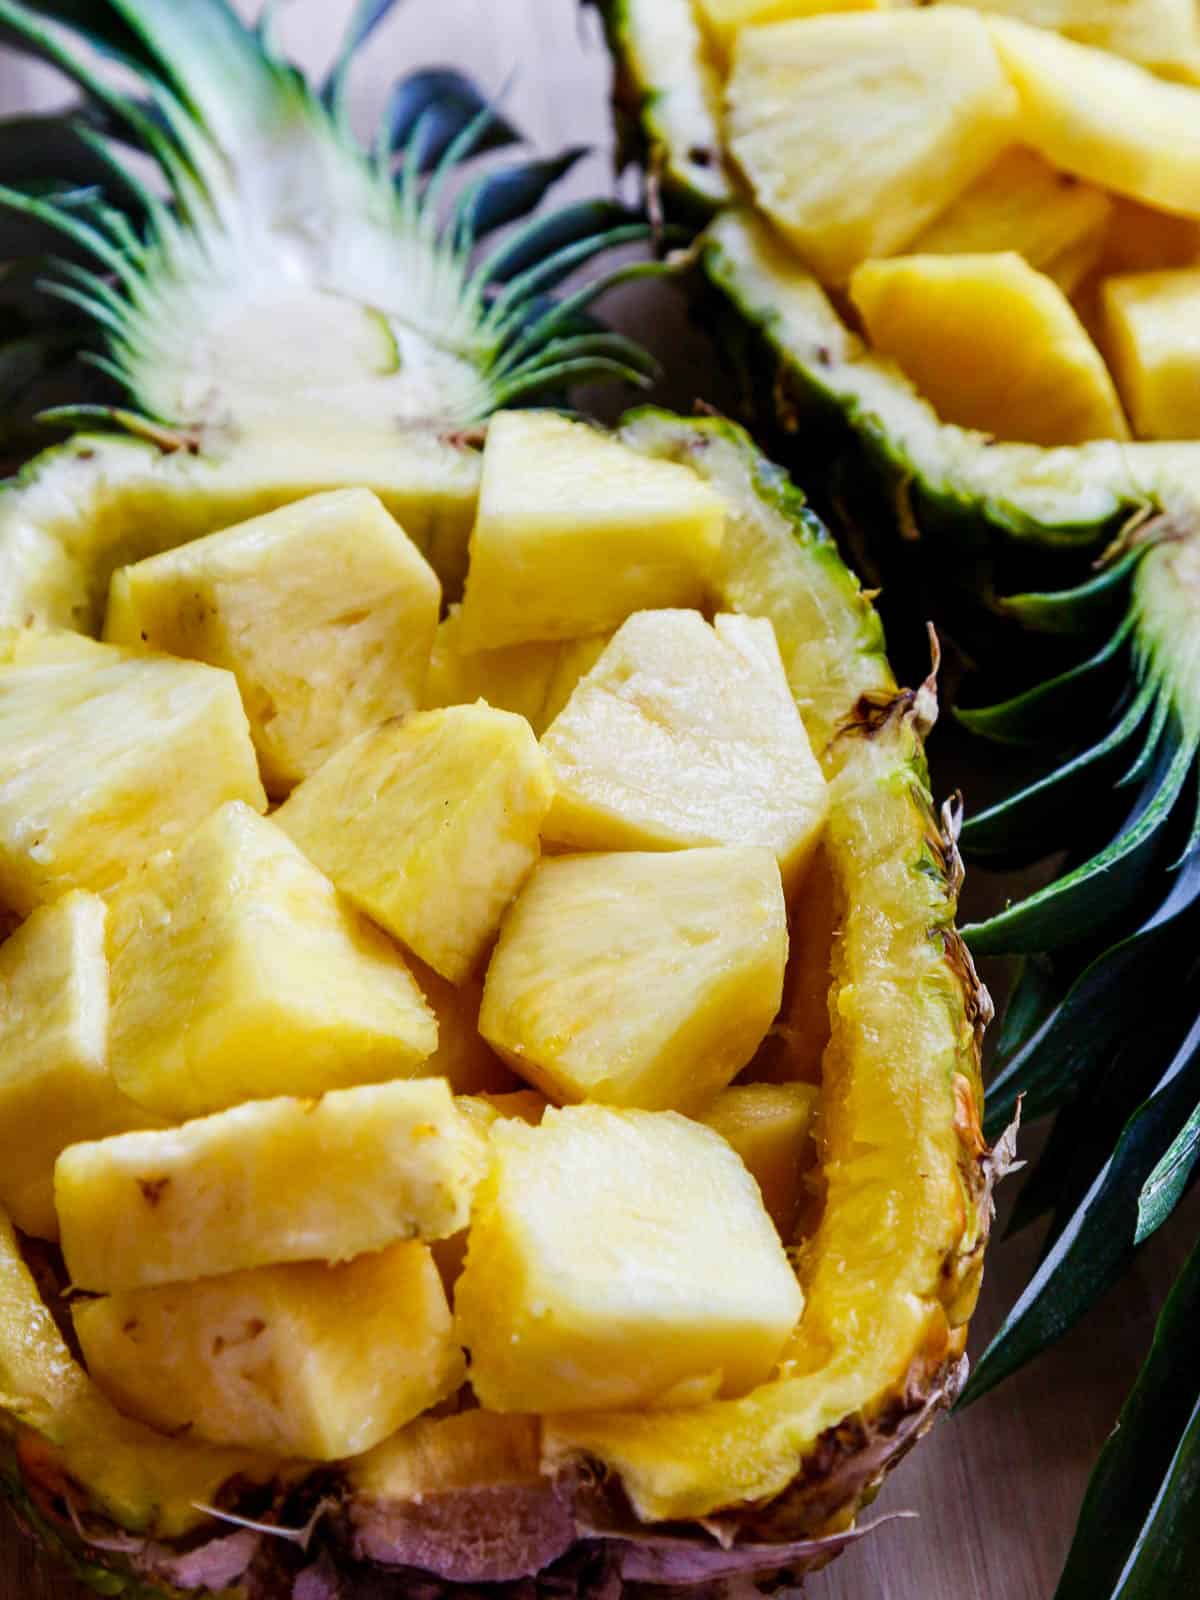
How To Make Pineapple Bowls
Step-by-Step
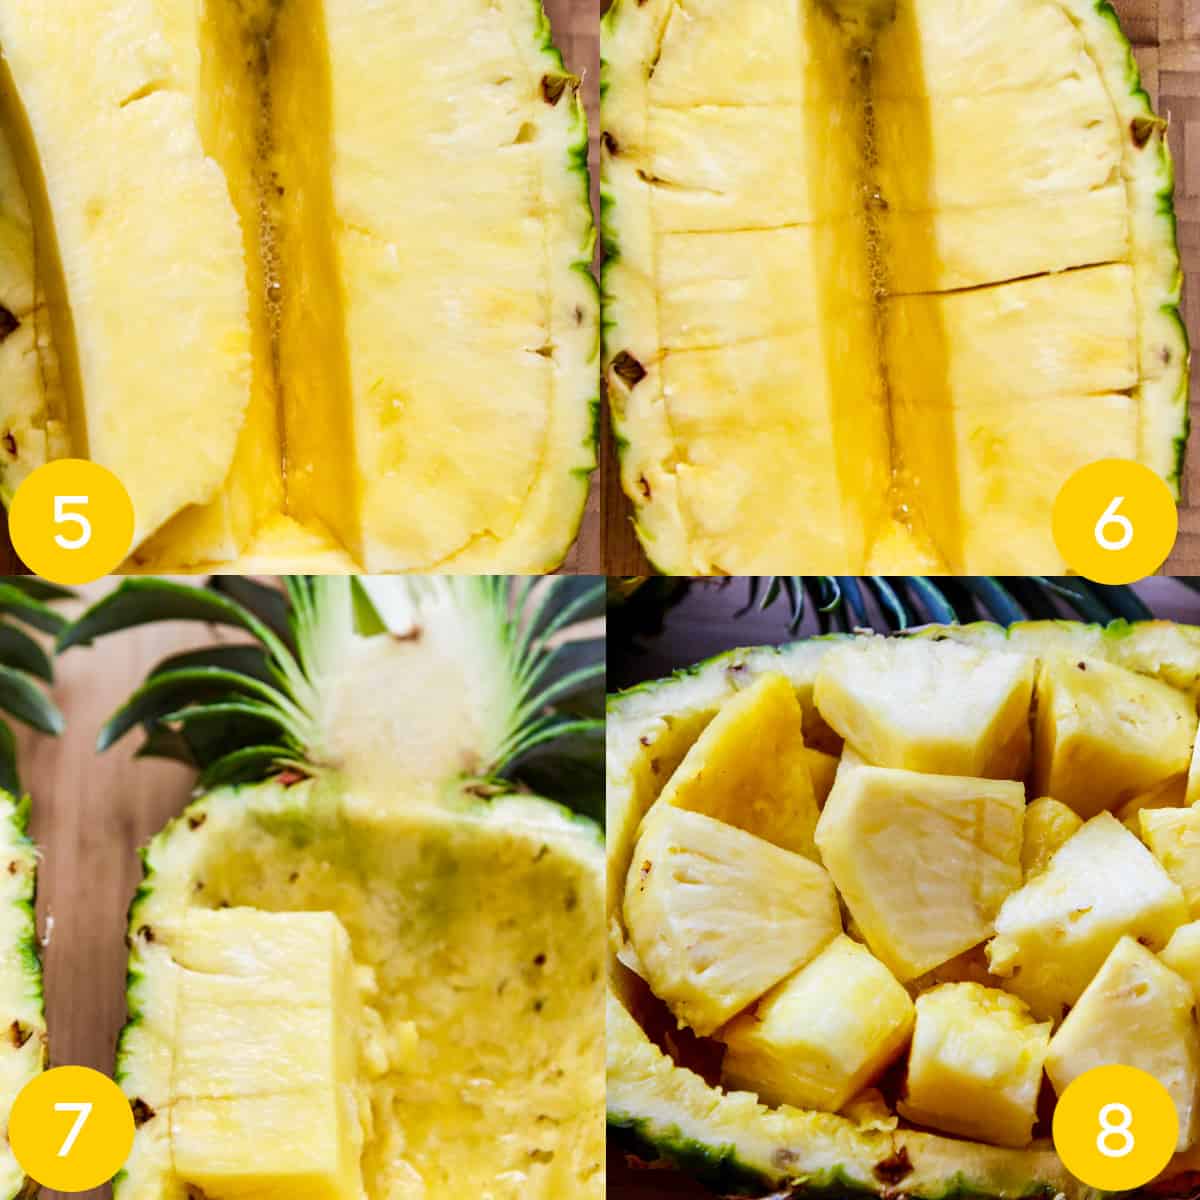
- Using a large knife cut the pineapple lengthwise and through the leaves into 2 halves.
- Next, use a small serrated paring knife, cut all the way around the edge leaving about ¾” of the outside edge.
- Cut the core out by cutting down both sides of the core at a slight angle inward in a "V" shape.
- Remove the core.
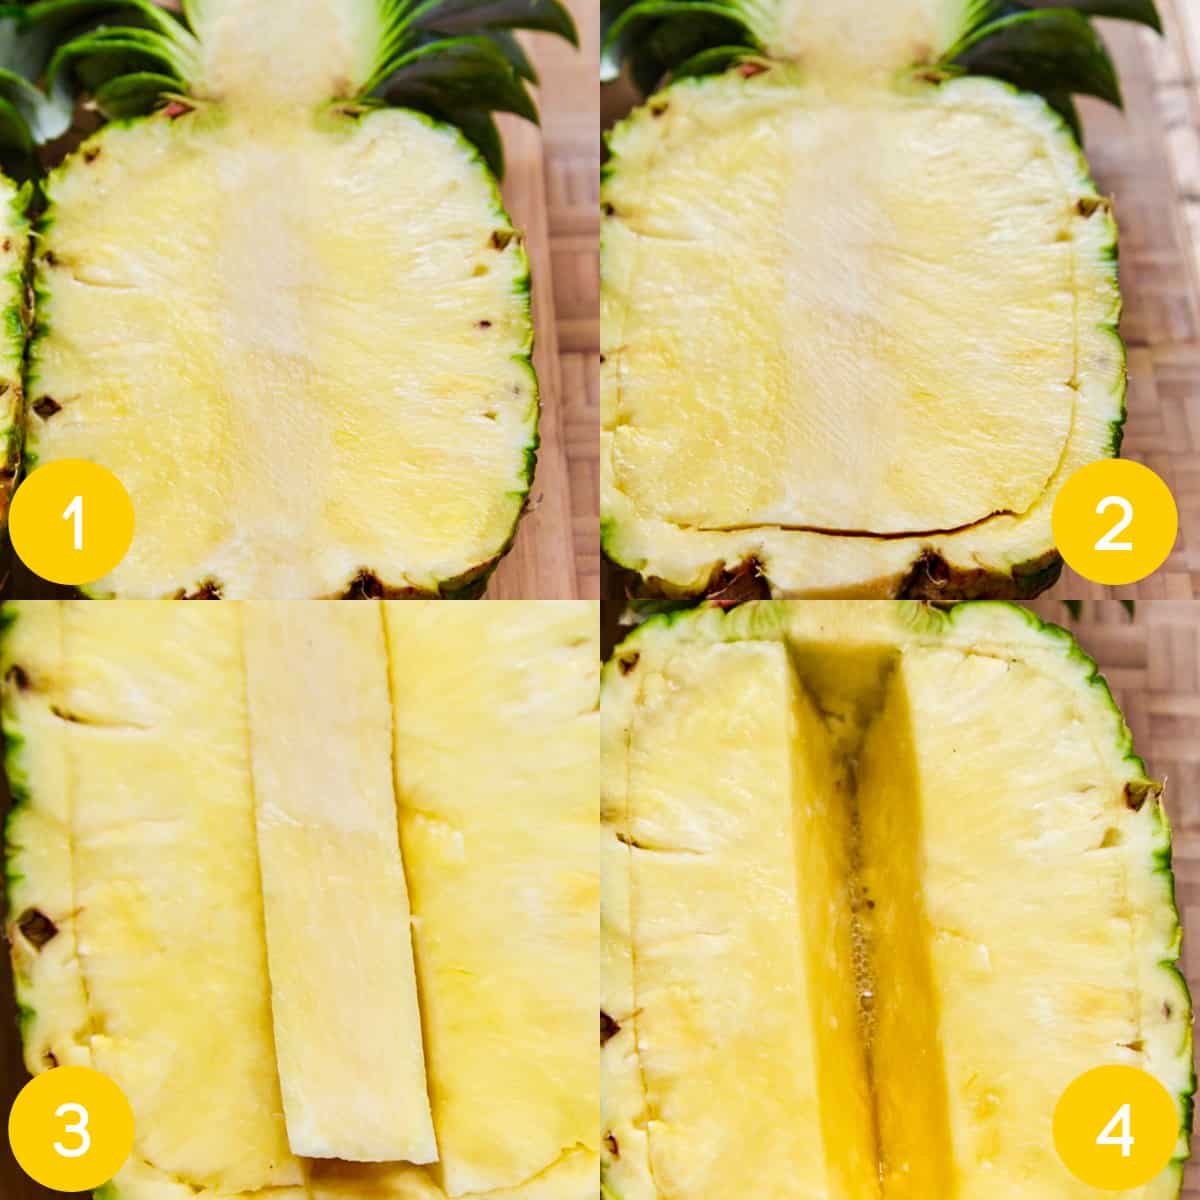
5. Discard as it is tough and inedible.
6. Slice into chunks by making a grid pattern of about 1" pieces. Be careful not to cut through the outer skin.
7. Use a large serving spoon, scoop out the pieces, save the juice ~ drink it or make a smoothie.
8. Place the cut pieces back into the bowl.
Pineapple FAQ
You'll want to be sure you refrigerate it after you cut it up, and then it may last up to 7 days in a sealed container.
First, smell the bottom for sweetness. This is the first tell-tale sign to determine how sweet and ripe your pineapple will be. Sugar comes from the bottom of the fruit, where it migrates to the top as it ripens. The bottom is where it should be most fragrant, so put your nose there not on the crown with all the leaves.
If it smells sweet, like pineapple juice, it is ripe. If you smell nothing, that means there is insufficient sugar and the fruit will not be sweet, and it has been harvested too early.
Pineapples ripen very little after they have been harvested. So you don't want to pick one that is underripe, hoping it will get ripened later. Unfortunately, it won't.
What you want to look for is a yellow-golden color.
As the fruit starts to ripen in the field, it starts from the bottom, the higher the yellow rises toward the crown, the more sugar (and sweetness) it will have!
Yellow on the bottom and green on the top will yield inconsistency in sweetness (i.e. some parts are sweet, other parts are not). Ideally, you want the yellow color to rise all the way to the crown, which means the sugar is distributed evenly through the fruit.
More Pineapple Recipes
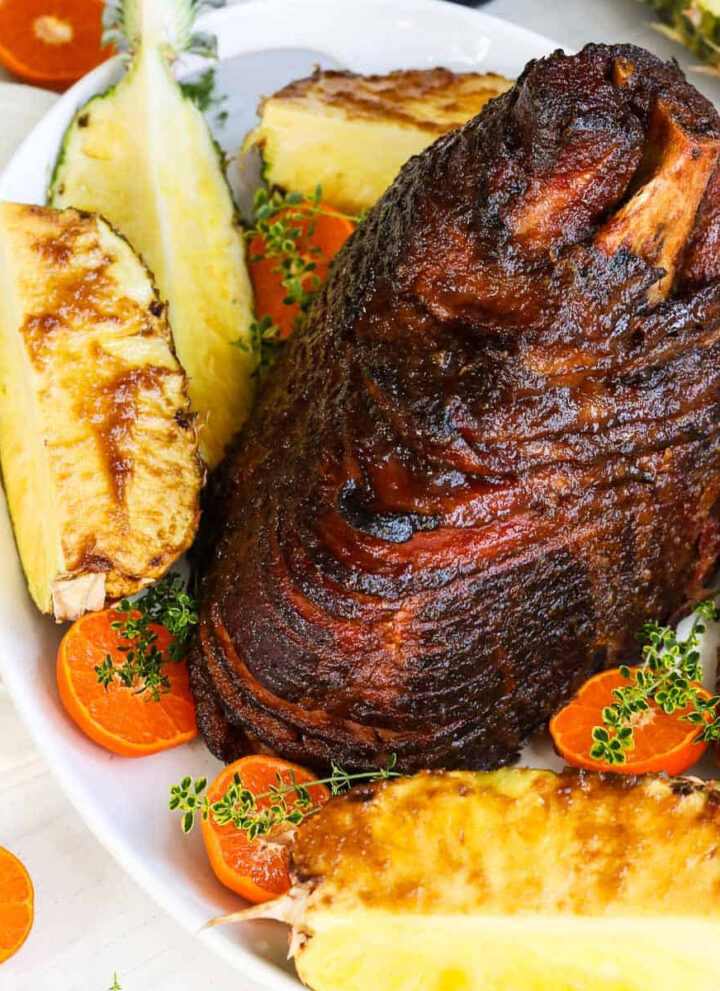
This Kahlua Ham Recipe has pineapple juice, grated ginger, honey, vanilla, Kahlua, a sprinkle of cinnamon, and orange zest/juice.
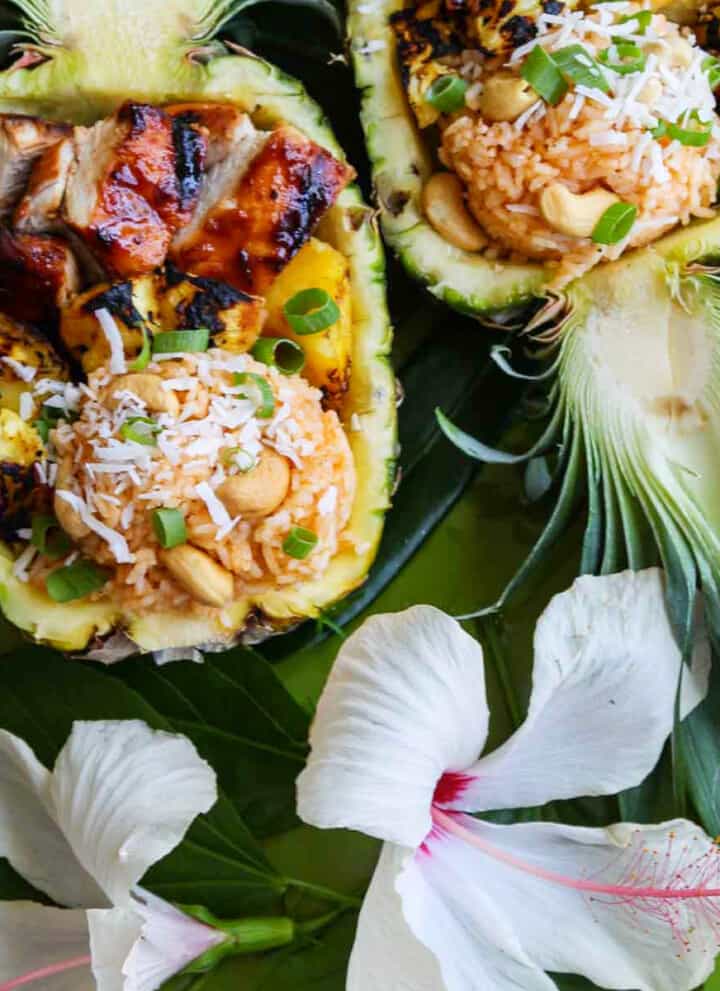
For summer grilling, make Huli Huli Chicken and serve in Pineapple Bowls.
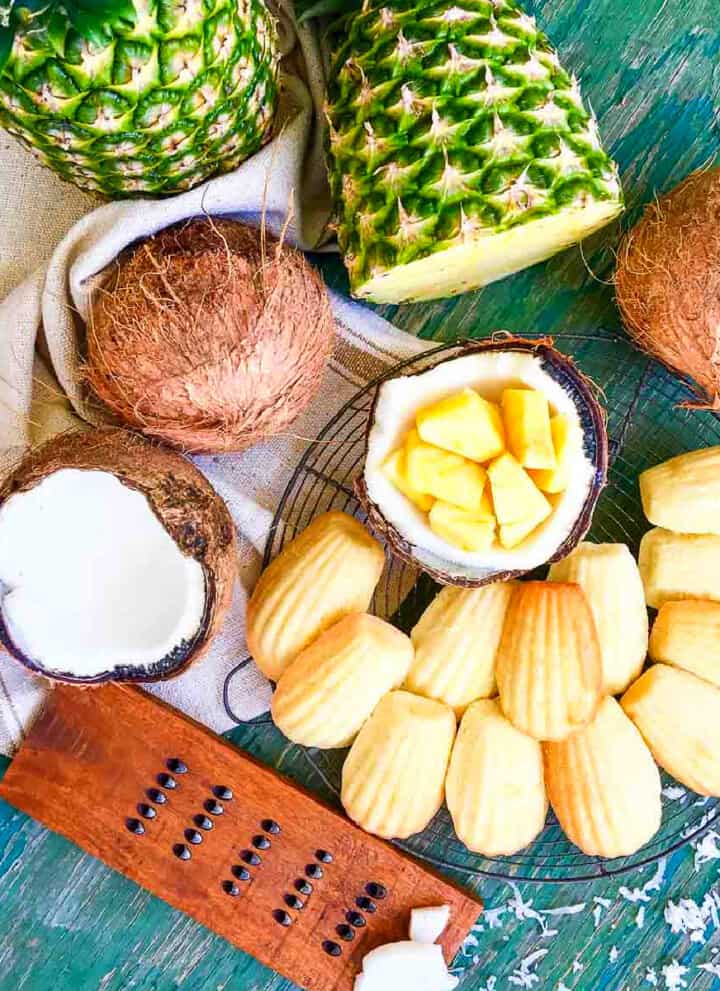
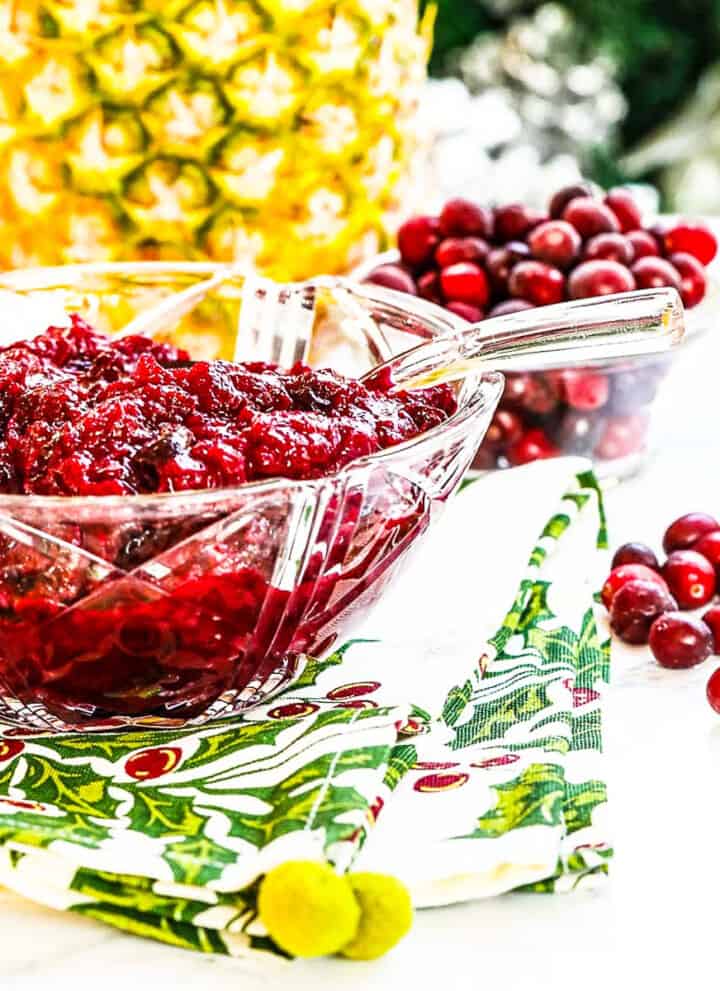
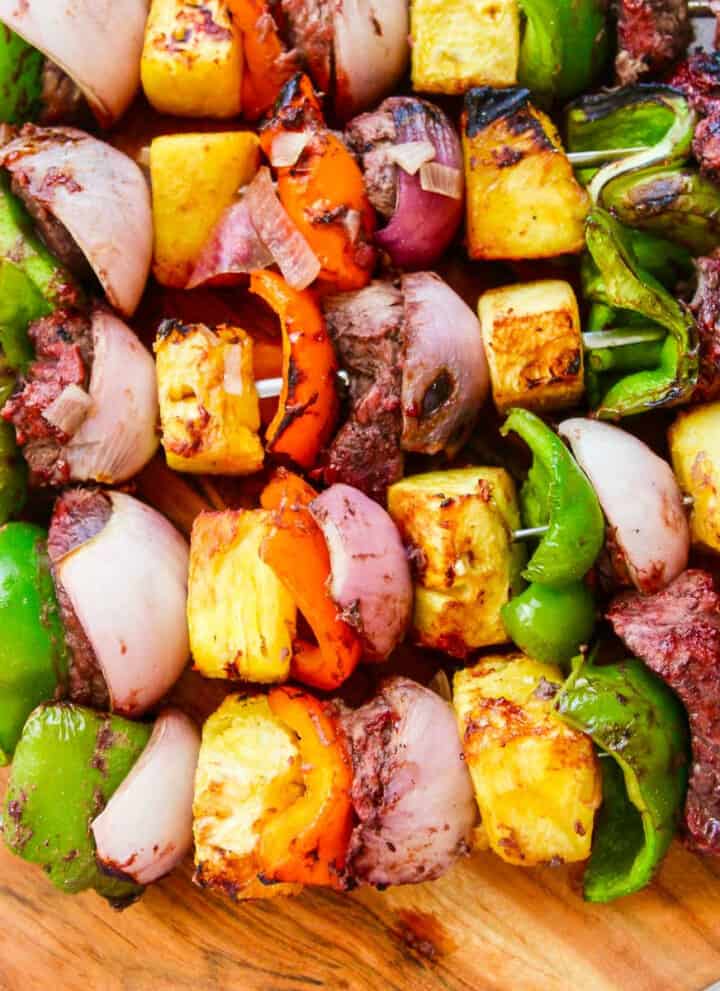
Grill Shish Kabobs have a beef marinade made with pineapple and dark rum brushed on these bright colorful grilled skewers. Or whip up a summer dessert like Fruit Sorbet with no guilt or Pineapple-Coconut Madeleines are so great anytime as a treat. For Thanksgiving and Christmas holidays, shake things up and make a new Cranberry Sauce with orange and pineapple as the co-star ingredients.

Did you love this recipe? We would love to hear from you! If you make this recipe and love it, give it a 5-star rating ⭐⭐⭐⭐⭐ with a comment. THANK YOU!! Follow Delicious Table with my free newsletter and share this recipe with your friends on Facebook, Pinterest, and Instagram.
How To Make Pineapple Bowls
Ingredients
Pineapple Bowls
- 1 large fresh pineapple
Instructions
- Using a large knife cut the pineapple lengthwise and through the leaves into 2 halves.
- Next, use a small serrated paring knife, cut all the way around the edge leaving about ¾” of the outside edge.
- Cut the core out by cutting down both sides of the core at a slight angle inward in a "V" shape.
- Now remove the core.
- Discard as it is tough and inedible.
- Slice into chunks by making a grid pattern of about 1" pieces. Be careful not to cut through the skin.
- Use a large serving spoon, scoop out the pieces, save the juice ~ drink it or make a smoothie.
- Place the cut pineapple back into the bowl.
Notes
Top Ripe Pineapple Tips
- Be sure the pineapple has a sweet smell towards the base.
- A green color indicates that it might not be ripe and was picked too early.
- Use the "Press Test." A sweet (and ripe) pineapple will yield slightly to pressure.
- Make sure to avoid overripe pineapples. They usually have reddish-brownish skins and dark dried leaves that crumble when you touch them and have a fermented smell. Pass on that pineapple, it will taste-off, and be mushy and overripe inside.


thank you delicioustable for giving me wonderful information
I did a dry run of this in hopes of having a pineapple boat at Easter brunch and it was so much easier than I thought and turned out beautifully! Thank you for this great how-to Lisa!